AEAT-8800-Q24
10-Bit to16-Bit Programmable
Angular Magnetic Encoder
Application Note
Description
Normal Operation Mode
AEAT-8800-Q24 is a CMOS magnetic sensor structure suitable
for contactless 360° encoding based on the Hall Effect. It
provides an angle output up to 16 bits of resolution and
simultaneous incremental output of up to 4096 CPR. An
integrated Hall structure at the core of the device uses a single
2-pole disc magnet to convert the magnetic field vector in the
chip plane into an AC signal whose amplitude and phase
correspond to the magnitude and direction of the field.
The Normal mode is the normal operating mode of the chip.
The absolute output (10-bit, 12-bit, 14-bit, or 16-bit absolute
position data) is available through SSI pins (DO, CLK, and NCS).
The following are the output signal conditions during
AEAT-8800-Q24 initialization:
An internal digital signal processing unit then processes and
conditions the raw AC signal from the sensor. The output
signals are available in three different forms:
PWM signals all 0s.
ABI signals all 1s.
UVW signals all 0s.
The incremental positions are indicated on ABI and UVW
signals with user-configurable CPR 32, 64, 128, 256, 512, 1024,
2048, 4096 of ABI signals and pole pairs from 1 to 8 (2 to 16
poles) for UVW commutation signals.
Pulse Width Modulation (PWM)
16-bit absolute position through the Serial Synchronous
Interface (SSI)
Incremental output (ABI and UVW signals)
Figure 2 shows the recommended circuit diagram for
AEAT-8800-Q24.
These features can be programmed by configuring the internal
registers in program mode.
OTP Programming Mode
More information about the product specifications of
AEAT-8800-Q24 are available in the product data sheet.
AEAT-8800-Q24 is an OTP ASIC. OTP registers are 0 by default.
During OTP programming, the VDD voltage is recommended
to be at the minimum of 5.5V, typical 5.6V, and maximum
of 5.7V.
Operation Mode
The AEAT-8800-Q24 features two types of operational modes
that are normal operation mode, one-time programming (OTP)
mode.
Programming of AEAT-8800-Q24 can be performed with the
HEDS-8988 programming kit or any tester/programmer device
using the guidelines provided.
Figure 2 shows the recommended circuit diagram for
AEAT-8800-Q24.
Absolute and Incremental Programming
The absolute resolution can be set to 10, 12, 14 or 16 bits. For
incremental selection, ABI or UVW can be selected by following
the instructions in the following sections. The PWM output is
available as well.
Broadcom
-1-
�AEAT-8800-Q24
Application Note
The OTP shadow registers are programmable using the SPI
protocol. Writing specific commands to specific addresses of
the internal registers will program values of OTP shadow
registers to OTP permanently.
4.
In UNLOCK mode, you may write to any OTP shadow
registers or registers. Values written will remain until
power off.
5.
The UNLOCK state is maintained until the power supply is
turned off or any value (except 0xAB) is written to
address 0x10.
6.
All OTP memory is programmable by writing only the
appropriate commands to addresses 0x11–0x13 and 0x1B
(see Programming Customer Reserved OTP and
Programming User Configuration OTP).
Memory Map
The Broadcom AEAT-8800-Q24 uses nonvolatile OTP as shown
in the tables that follow.
The memory is separated into 8 bits per address. During OTP
programming, the VDD voltage is recommended for a
minimum of 5.5V, typical 5.6V, and maximum of 5.7V.
OTP Shadow Registers
Nonvolatile Register (OTP)
1.
OTP shadow registers are volatile (upon power up, reload
values from OTP) and are not written to OTP automatically.
2.
To write OTP shadow registers values to OTP (nonvolatile)
memory, see Programming Customer Reserved OTP and
Programming User Configuration OTP.
3.
The OTP shadow registers will be from address 0x00
to 0x0D.
1.
2.
3.
OTP is one-time programmable only. Any OTP bit with
value 0 can be written to 1, but not vice versa. Do not
program 1 to the same address bit twice.
OTP shadow registers are volatile registers that are loaded
with corresponding OTP values after power on.
All bits (except addresses 0x00–0x03, and 0x10–0x12) are
in LOCK mode by default after power on. To enter UNLOCK
mode (to be able to write to the OTP shadow registers or
registers), write 0xAB to address 0x10.
The tables that follow show the registers.
Customer Reserve and Zero Reset Registers
Address
Bit(s)
Name
Description
Default
0x00
[7:0]
Customer Reserve 0
User programmable
8'h0
0x01
[7:0]
Customer Reserve 1
User programmable
8'h0
0x02
[7:0]
Zero Reset0
Zero Reset Position [7:0]
8'h0
0x03
[7:0]
Zero Reset1
Zero Reset Position [15:8]
8'h0
Customer Configuration Registers
These registers are required to be unlocked, which is done by writing 8'hAB to address 0x10, then writing to the OTP shadow
register.
Broadcom
-2-
�AEAT-8800-Q24
Application Note
Table 1 Customer Configuration 0 Registers
Address
0x04
Bit(s)
Name
Description
Default
[7]
UVW Select
1: Select UVW mode
0: Select PWM mode
0
[6:5]
PWM Setting
11: PWM period = 8193 μs
10: PWM period = 4097 μs
01: PWM period = 2049 μs
00: PWM period = 1025 μs
00
[4:3]
I-width Setting
11: (ABI) I-width = 360 electrical deg (edeg)
10: (ABI) I-width = 270 electrical deg (edeg)
01: (ABI) I-width = 180 electrical deg (edeg)
00: (ABI) I-width = 90 electrical deg (edeg)
00
[2:0]
UVW Setting
111: UVW = 8 pole-pairs
110: UVW = 7 pole-pairs
101: UVW = 6 pole-pairs
100: UVW = 5 pole-pairs
011: UVW = 4 pole-pairs
010: UVW = 3 pole-pairs
001: UVW = 2 pole-pairs
000: UVW = 1 pole-pairs
000
Table 2 Customer Configuration 1 Registers
Address
0x05
a.
Bit(s)
Name
Description
Default
[7:4]
CPR Setting 1a
0111: (ABI) 4096 CPR
0110: (ABI) 2048 CPR
0101: (ABI) 1024 CPR
0100: (ABI) 512 CPR
0011: (ABI) 256 CPR
0010: (ABI) 128 CPR
0001: (ABI) 64 CPR
0000: (ABI) 32 CPR
0000
[3:0]
Hysteresis Setting
1001: 1.4 mechanical degree (mdeg)
1000: 0.7 mechanical degree (mdeg)
0111: 0.35 mechanical degree (mdeg)
0110: 0.17 mechanical degree (mdeg)
0101: 0.08 mechanical degree (mdeg)
0100: 0.04 mechanical degree (mdeg)0
011: 0.02 mechanical degree (mdeg)
0010: 0.01 mechanical degree (mdeg)
0001: 0.005 mechanical degree (mdeg)
0000: No Hysteresis
0000
Incremental: The CPR setting 1 in address 0x05 must match to CPR setting 2 in 0x06.
Absolute: For absolute only application, set CPR setting 2 in 0x06 to 0100.
Broadcom
-3-
�AEAT-8800-Q24
Application Note
Table 3 Customer Configuration 2 Registers (Read the Important Notes HIghlighted in the Table)
Address
0x06
0x0a
Bit(s)
Name (Note)
Description
Default
[7]
Dira
1: Count up at counterclockwise rotation
0: Count up at clockwise rotation
0
[6]
Zero Latency Modeb
1: Zero latency is on
0: Zero latency is off
0
[5:4]
Absolute Resolution
00: 16-b absolute resolution (SSI)
01: 14-b absolute resolution (SSI)
10: 12-b absolute resolution (SSI)
11: 10-b absolute resolution (SSI)
00
[3:0]
CPR Setting 2c
0110: 4096 CPR
0110: 2048 CPR
0100: 1024 CPR
0100: 512 CPR
0011: 256 CPR
0010: 128 CPR
0010: 64 CPR
0010: 32C PR
0100: Absolute resolution
0000
[1]
Operating Voltaged
0: 3.3V
1: 5.0V
0
a.
See Figure 1 for the direction definition.
b.
Zero latency is only applicable from 32 CPR ~1024 CPR. When Zero Latency mode is on, you must set CPR setting 2 in 0x06 to 0101 for all the applicable CPRs
(32~1024).
c.
Incremental: The CPR setting 1 in address 0x05 must match to CPR setting 2 in 0x06.
Absolute: For absolute only application, set CPR setting 2 in 0x06 to 0100.
d.
IMPORTANT: If the user wants to change the operating voltage to 5.0V, the following steps must be performed before proceding to customer configuration
from address 0x00 to 0x06.
1. Write 0xAB to address 0x10 to unlock the register.
2. Write 0x00 to Reg 0x07, 0x08, and 0x09.
2. Write 0x02 to address 0x0a.
3. Change the voltage at VDDA pin to 5.6V ± 0.1V for OTP programming.
4. Write 0xA4 to address 0x14 to OTP the operating voltage.
5. Power cycle (power off and power on) the IC.
Programming Customer Reserved OTP
Perform the following steps to program Customer Reserved OTP shadow registers to OTP.
1.
Write the desired values to the Customer Reserved OTP shadow registers (0x00–0x01).
2.
Read back the Customer Reserved OTP shadow registers (0x00–0x01) to confirm that the correct values are stored.
3.
Write 8'hA1 to address 0x11 to program the Customer Reserved OTP shadow registers (0x00–0x01) to OTP.
4.
Perform a power supply cycle and read back the Customer Reserved OTP shadow registers (0x00–0x01) to confirm correct
values are stored into OTP.
Broadcom
-4-
�AEAT-8800-Q24
Application Note
Programming User Configuration OTP
Figure 1 Direction Definition when Magnet Rotates
Perform the following steps to program User Configuration
OTP shadow registers to OTP.
1.
Write the desired values to the User Configuration OTP
shadow registers (0x04–0x06).
2.
Read back the User Configuration OTP shadow registers
(0x04–0x06) to confirm correct values are stored.
3.
Write 8'hA3 to address 0x13 to program the User
Configuration OTP shadow registers (0x04–0x06) to OTP.
4.
Perform a power supply cycle (power off and power on)
and read back the User Configuration OTP shadow
registers (0x04–0x06) to confirm that the correct values are
stored into OTP.
Zero Reset and Static Offset Calibration
Zero Reset Programming
Offset Calibration (for Optimum Performance)
AEAT-8800-Q24 allows users to configure a zero reset position.
This value is stored at OTP 0x02 (lower 8-b) and 0x03 (upper
8-b). To set to the zero reset position, for example, position X,
use a procedure similar to the following.
NOTE
You should decide the desired direction or
orientation (as outlined in Direction) before
setting the zero reset position.
The AEAT-8800-Q24 features offset calibration to enhance the
angular accuracy measurement detected by the Hall sensors.
This feature allows you to align the Hall sensors to the best
accuracy within the recommended alignment area as defined
in Magnet and IC Package Placement.
This alignment addresses the variations of the spatial
displacement during integration.
1.
Stop the motor at position X.
Perform the following steps to use this feature.
2.
Read the 16-b value of position X using the SSI protocol
(for example, read 16'hABCD).
1.
3.
Write the lower 8-b (from the preceding example, 8'hCD)
to the OTP shadow registers 0x02 using SPI.
4.
5.
Write the upper 8-b (from the preceding example, 8'hAB)
to the OTP shadow registers 0x03 using SPI.
2.
Rotate the magnet any direction at 100 rpm.
3.
Monitor the ABI and UVW output of AEAT-8800-Q24 with
an oscilloscope.
4.
The following signals (monitor from an oscilloscope)
describe the status of the signal during calibration:
Confirm that the correct zero reset value is written to the
OTP shadow registers by rereading the motor position
value using SSI. Make sure that the current position read is
16'h0000 (excluding step jumps incurred by noise).
6.
To permanently save this zero reset value, write 8'hA2 to
internal registers 0x12.
7.
Power-cycle (power off and power on) the chip.
8.
Confirm that the correct zero reset value is written to OTP
by rereading the motor position value using SSI. Make sure
that the current position read is 16'h0000 (excluding the
step jumps incurred by noise).
ABI = 3'b111: Indication of AEAT-8800-Q24
successfully calibrated.
— A=0: Indication that the distance between
AEAT-8800-Q24 and the magnet is too close or too far.
— B or/and I=0: Indication of AEAT-8800-Q24 is not able
to calibrate correctly due to poor magnet alignment; it
is beyond of its spatial tolerance.
—
5.
Repeat step 2 to step 3 until indication at step 4 meets the
expected criterion.
6.
To end the calibration, write 8'h00 to 0x17.
7.
The calibration is completed when the ABI signal is all high
(observed from the oscilloscope).
8.
To OTP offset calibration, write 8’hA5 to address 0x1B.
Direction
The direction must be defined whether to count-up at
clockwise or counterclockwise per rotation. Per the default
setting, if the magnet is spinning at a clockwise position, based
on the user's line of sight as shown in Figure 1, AEAT 8800
counts up.
Write 8'h02 to 0x17, bit 1, to start a calibration.
NOTE
Broadcom
-5-
A typical successful calibration should be
completed in less than 30 revolutions.
�AEAT-8800-Q24
Application Note
Safety Alarm
AEAT-8800-Q24 provides following safety alarms:
Magnet High (MHI) error: This error indicates the magnet strength detected by chip is too strong. When this is flagged high
consistently, change to a weaker magnet, or increase the distance between the chip and the magnet.
Magnet Low (MLO) error: This error indicates the magnet strength detected by chip is too weak. When this is flagged high
consistently, change to a stronger magnet, or decrease the distance between the chip and the magnet.
These alarms are read out from SSI interface as described in the "Absolute Output Format" section in the data sheet.
AEAT-8800-Q24 Circuit Diagram
Figure 2 Recommended Circuit Diagram for AEAT-8800-Q24 during Normal Operation and OTP Programming
5V/3.3V
Regulator
VDD
A
B
I
VDDA (14)
VSS (13)
10uF
ADC
Hall
Sensors
Analog Front
End
SinP/SinN/
CosP/CosN
Digital
Processing
U
V
W/PWM
VDD
VDDA (19)
VSS (20)
100nF
SSI_NSL/SPI_DIN
SSI_SCL/SPI_CLK
SSI_OUT/SPI_DOUT
SSI_SPI_Sel
AEAT-8800
OTP
Interface
SPI
NOTE
Refer to the "Programming the AEAT-8800-Q24" section in the data sheet for OTP programming.
Connect the 10 μF and 100 nF capacitors as close to the individually assigned power and ground pins as possible.
Broadcom
-6-
�AEAT-8800-Q24
Application Note
Recommended Magnetic Input Specifications
Parameter
Symbol
Min.
Typ.
Max.
Units
Units
Recommended magnet: Cylindrical magnet,
diametrically magnetized and 1 pole pair.
1.
Diameter
d
—
6
—
mm
2.
Thickness
t
—
2.5
—
mm
3.
Magnetic input filed magnitude
Bpk
45
—
75
mT
Required vertical component of the
magnetic field strength on the die's surface,
measured along a concentric circle.
4.
Magnet displacement radius
R_m
—
—
0.5
mm
Displacement between the magnet axis to
the device center.
5.
Recommended magnet material
and temperature drift
—
–0.12
—
%/K
NdFeB (Neodymium Iron Boron), grade
N35SH. For better performance, consider an
SmCo (Samarium Cobalt) magnet.
Diametrically Magnetized Magnet
Thickness =2.5mm (Typ)
Diameter=6mm (Typ)
Broadcom
-7-
�AEAT-8800-Q24
Application Note
Magnet and IC Package Placement
Figure 3 Defined Chip Sensor Center and Magnet Displacement Radius
The magnet's center axis should be aligned within a
displacement radius of 0.5 mm from defined hall sensor center.
The magnet should be put facing the sensor. The Z gap varies
depending on the magnetic strength on the die surface, with
recommended magnet material and dimension.
The typical distance Z is 0.5 mm to 1.5 mm. However, larger
distances are possible as long as the magnetic strength is
within the defined limit. It is important not to put magnetic
material close to the magnet as it will affect the magnetic field
and increase the INL. The magnetic material must keep from
the IC package a minimum of 30 mm. The magnet must be
mount on nonmagnetic part.
Figure 4 Vertical Placement of the Magnet
Broadcom
-8-
�AEAT-8800-Q24
AEAT-8800-Q24 Pins Assignment and
Description
Application Note
Table 4 Pin Assignment
Pin
Figure 5 AEAT-8800-Q24: Pins Assignment and Description
Symbol
Description
1-6
NC
No Connection
7
I
Index output (ABI mode)
8
B
Incremental B output (ABI mode)
9
A
Incremental A output (ABI mode)
10
SSI_SCL_SPI_CLK SSI/SPI clock input
11
SSI_NSL_SPI_DI
SSI/SPI data input
12
SSI_DO_SPI_DO
SSI/SPI data out
13
VSS
Supply Ground
14
VDDA
3.3V/5V Supply input
15
NC
No Connection
16
NC
No Connection
17
NC
No Connection
18
NC
No Connection
19
VDDA
3.3V/5V Supply input
20
VSS
Supply Ground
21
SSI_SPI_SEL
SSI/SPI select pin
22
U
U Commutation output (UVW mode)
23
V
V Commutation output (UVW mode)
24
W or PWM
W Commutation (UVW mode)/ PWM
output
25
VSS
Supply Ground
Broadcom
-9-
�AEAT-8800-Q24
Application Note
Absolute Output Format
The AEAT-8800-Q24 provides SSI 3 wires and PWM outputs to indicate absolute position of the motor.
SSI 3 Wires (SSI)
SSI protocol uses three pins and is shared between SSI and SPI protocols. Use SSI_SPI_sel (the input pin) to select either protocol at
a time. Assert 1 on SSI_SPI_sel to select SSI protocol, which supports up to 10-MHz clock rates.
SSI_NSL_SPI_DIN → NSL (enable) signal for SSI protocol, input to AEAT-8800-Q24
SSI_SCL_SPI_CLK → SCL (clock) signal for SSI protocol, input to AEAT-8800-Q24
SSI_DO_SPI_DO → DO (data out) signal for SSI protocol, output from AEAT-8800-Q24
NOTE
Notes for timing diagram in the following figure:
NSL must held high for at least 3 ms after power up.
NSL = 1 means it is in load mode and is used to obtain the position of the magnet.
NSL = 0 is shift mode of the registers and with the SCL (clock) pin, the register will be clocked.
tREQ ≥ 300 ns.
tNSLH ≥ 200 ns.
The user is advised to read from the SSI falling edge.
Figure 6 SSI Protocol Timing Diagram
SSI3 READ (absolute data = 16b)
tsw(SEL)
tNSLH
tREQ
tREQ2
tsw(SEL)
20 clks
NSL
SCL
16
1
D[15]
DO
……
17
D[0]
18
Ready
19
MHI
20
MLO
21
Parity
D[15]
……
SSI_SPI
_SEL
Table 5 Symbols and Description
Symbol
Description
Min.
Typ.
Max.
Unit
1
—
—
μs
tsw(SEL)
SSI_SPI_SEL switch time
tREQ
SCL hight time between NLS falling edge and first SCL falling edge
300
—
—
ns
tREQ2
NSL low time after rising edge of last clock period for an SSI read
200
—
—
ns
tNSLH
NSL high time between 2 successive SSI reads
200
—
—
ns
NOTE
CLK=1 when inactive; DIN=1 when inactive.
ATTENTION Make sure that CLK is high when switching between SSI and SPI modes.
Broadcom
- 10 -
�AEAT-8800-Q24
Application Note
SSI data format may vary depending on the different settings on absolute resolution (16 bits, 14 bits, 12 bits, or 10 bits).
The total data length is shown in the following figure.
Three bits status is for Ready, MHI, and MLO.
Figure 7 SSI Output Format for Different Absolute Resolution Settings
SSI3 READ Data Format
19
4
16-b
3
16-b data
4
14-b
3
4
3
0
1
12-b data
10-b
1-b
parity
3-b status
15
13
0
1
14-b data
12-b
1-b
parity
3-b status
17
1-b
parity
3-b status
4
3
10-b data
0
1
3-b status
0
1
1-b
parity
NOTE
Total data length: 16-b pos —> 20-b, 14-b pos—> 18-b, 12-b pos —> 16-b, 10-b pos —> 14-b
3-b status: {Ready, MHI, MLO}
Magnet High (MHI) Error: This indicates that the magnet strength detected by the chip is too strong. When this is flagged
high consistently, change the weaker magnet or increase the distance between the chip and the magnet.
The value for this alarm is represented as 1.
Magnet Low (MLO) Error: This indicates that the magnet strength detected by the chip is too weak. When this is flagged high
consistently, change the stronger magnet or decrease the distance between the chip and the magnet.
The value for this alarm is represented as 1.
Ready: The chip is ready, and the ready value is 1.
1-b parity is even parity.
Broadcom
- 11 -
�AEAT-8800-Q24
Application Note
PWM
PWM protocol uses one output pin (W_PWM) from AEAT-8800-Q24. Note that W_PWM pin is shared between UVW and PWM
protocols. The PWM signals are configurable to have period of 1025, 2049, 4097, or 8193 μs. During power-up, the PWM signal is 0
before chip ready.
Figure 8 PWM Signals (Period = 1025/2049/4097/8193 μs)
t=1us
t=0us
PWM period: 1025
t=1024us
PWM period: 1025, 2049, 4097, 8193 μs
t=1025us
PWM
Absolute posiƟon = 16’h0
PWM
Absolute posiƟon = 16’hFFFF
t=2049us
t=2048us
t=1us
t=0us
PWM period: 2049
PWM
Absolute posiƟon = 16’h0
PWM
Absolute posiƟon = 16’hFFFF
t=1us
t=0us
PWM period: 4097
t=4096us
PWM period: 1025, 2049, 4097, 8193 μs
t=4097us
PWM
Absolute posiƟon = 16’h0
PWM
Absolute posiƟon = 16’hFFFF
t=8193us
t=8192us
t=1us
t=0us
PWM period: 8193
PWM
Absolute posiƟon = 16’h0
PWM
Absolute posiƟon = 16’hFFFF
Broadcom
- 12 -
�AEAT-8800-Q24
Application Note
Incremental Output Format
The AEAT-8800-Q24 provides ABI and UVW signals to indicate incremental position of the motor.
ABI
The ABI incremental interface is available to provide position data and direction data from the three output pins (A, B, and I).
The index signal marks the absolute angular position and typically occurs once per revolution The ABI signal is configurable using
the memory map registers. It supports the following configuration:
Programmable CPR: 32, 64, 128, 256, 512, 1024, 2048, or 4096
Programmable I-width: 90, 180, 270, or 360 electrical degrees (edeg)
Figure 9 ABI Signal (4096 CPR, with Different I-Width Settings), Assuming User Sets Hysteresis at 0.02 Mechanical Degree
14’h3FFF
14’h3FFE
14’h3FFD
14b Absolute
PosiƟon (hex)Æ
14’h3FFC
I=360ȗ
14’h3FFD
I=360ȗ
14’h3FFF
I=270ȗ
14’h0000
I=270ȗ
I(270ȗ)
I(360ȗ)
14’h0001
I=180ȗ
14’h0002
I=180ȗ
14’h0003
I(180ȗ)
14’h0002
I=90ȗ
14’h0001
I=90ȗ
14’h0000
B
I(90ȗ)
14’h3FFE
A
UVW
Three-channel integrated commutation output (U, V, W) emulates Hall sensor feedback and is available using three output pins.
Note that W_PWM pin is shared between the UVW and PWM protocols.
AEAT-8800-Q24 can configure pole pairs from 1 to 8 equivalents to 2 to 16 poles.
Broadcom
- 13 -
�AEAT-8800-Q24
Application Note
U
V
W
U
V
W
60ȗ
90ȗ
2 pole pair
U
V
W
1 pole pair
U
V
W
0ȗ
16’h0
3 pole pair
U
V
W
30ȗ
60ȗ
90ȗ
120ȗ
150ȗ
180ȗ
120ȗ
150ȗ
180ȗ
240ȗ
270ȗ
300ȗ
330ȗ
360ȗ
210ȗ
240ȗ
270ȗ
300ȗ
330ȗ
360ȗ
210ȗ
240ȗ
270ȗ
300ȗ
330ȗ
360ȗ
16’h7FFF
16’hFFFF
30ȗ
16’h0
0ȗ
210ȗ
16’hFFFF
4 pole pair
U
V
W
180ȗ
16’h7FFF
5 pole pair
U
V
W
150ȗ
16’h3FFF
6 pole pair
U
V
W
120ȗ
16’hFFFF
90ȗ
16’h7FFF
60ȗ
16’h3FFF
30ȗ
16’h0
0ȗ
16’h3FFF
7 pole pair
8 pole pair
Figure 10 UVW Signals (1~8 Pole-Pairs)
Broadcom
- 14 -
�AEAT-8800-Q24
Application Note
Note that signal U from UVW protocol is tagged to signal I from the ABI protocol as shown in the following figure.
Figure 11 U-to-I Tagging
A
B
I(90ȗ)
I=90ȗ
I(180ȗ)
I=180ȗ
I(270ȗ)
I(360ȗ)
I=270ȗ
I=360ȗ
14’h0007
14’h0006
14’h0005
14’h0004
14’h0003
14’h0002
14’h0001
14’h0000
14’h3FFF
14’h3FFE
14’h3FFD
14’h3FFC
14’h3FFB
14b Absolute
PosiƟon (hex)Æ
14’h3FFA
U
Programming the AEAT-8800-Q24
The OTP shadow registers and internal registers are programmable using the SPI protocol. Writing specific commands to specific
addresses of internal registers will program values of OTP shadow registers to OTP permanently.
SPI Protocol
SPI protocol uses three pins from AEAT-8800-Q24. These three pins are shared between SSI and SPI protocols. SSI_SPI_sel (input
pin) selects either protocol at a time. Assert 0 on SSI_SPI_sel to select the SPI protocol. The AEAT-8800-Q24 supports the SPI
protocol from 10 kHz to 1 MHz.
SSI_NSL_SPI_DIN → DIN (data in) signal for SPI protocol, input to AEAT-8800-Q24
SSI_SCL_SPI_CLK → CLK (clock) signal for SPI protocol, input to AEAT-8800-Q24
SSI_DO_SPI_DO → DO (data out) signal for SPI protocol, output from AEAT-8800-Q24
To read an address using SPI:
DIN: ReadAddress; from 8 bits DIN
SPI_DIN: WriteAddressData
— Write is specified as 2 bits (01) in the MSB of the address bus, followed by the 6-bit address, and lastly 8-bit data.
NOTE
The user should read back data to confirm data written successfully.
Broadcom
- 16 -
�AEAT-8800-Q24
Application Note
Figure 13 SPI Write Timing Diagram
SPI WRITE
SPI_DIN: WriteAddressData
8 clks
7 clks
6 clks
tsw(SEL)
CLK
1
6
A[5]
DIN
01: write
……
1
A[0]
2
D[7]
6 bit address
7
D[6]
tsw(SEL)
thi(CLK)
……
8
D[0]
……
8 bit data
DO
SSI_SPI
_SEL
Table 7 Symbols and Description
Symbol
Description
tsw(SEL)
SSI_SPI_SEL switch time
td(DO)
DO data valid after falling edge of CLK
thi(CLK)
CLK high time after end of last clock period for an SPI read/write command
Typ.
Max.
1
CLK=1 when inactive; DIN=1 when inactive.
Important: Make sure CLK is high when switching between SSI and SPI modes.
Broadcom
- 17 -
300
Unit
μs
200
NOTE
Min.
ns
ns
�AEAT-8800-Q24
Application Note
Programming OTP via SPI
Here are steps for permanently program the OTP nonvolatile memory.
Change the voltage at VDDA pin to 5.6V ± 0.1 V for OTP programming.
See the memory map address as described in Memory Map.
The following are details on the register 0x10 to 0x1B.
Table 8 Register 0x10 to 0x1B Details
Address
Bits
Name
Description
Default
0x10
7:0
Unlock Registers
Write 0xAB to this address to unlock all OTP shadow registers 8'h0
and internal registers (except 0x00~0x03, 0x10, 0x11, 0x12,
and 0x1B, which are not locked).
0x11
7:0
Program Customer Reserved OTP
(0x00, 0x01)
Write 0xA1 to this address to program customer reserved OTP 8'h0
(0x00, 0x01) to OTP.
0x12
7:0
Program ST Zero Reset OTP (0x02,
0x03)
Write 0xA2 to this address to program ST Zero Reset OTP
(0x02, 0x03) to OTP.
8'h0
0x13
7:0
Program Customer Configuration
OTP (0x04, 0x05, 0x06)
Write 0xA3 to this address to program Customer
Configuration OTP (0x04, 0x05, 0x06) to OTP.
8'h0
0x14
7:0
Program Operating Voltage
Write 0xA4 to address 0x14.
8’h0
0x1B
7:0
Program Configuration of Full
Calibration OTP
Write 0xA5 to this address to program full calibration results
to OTP.
8'h0
Broadcom
- 18 -
�AEAT-8800-Q24
Application Note
Package Drawings (in mm)
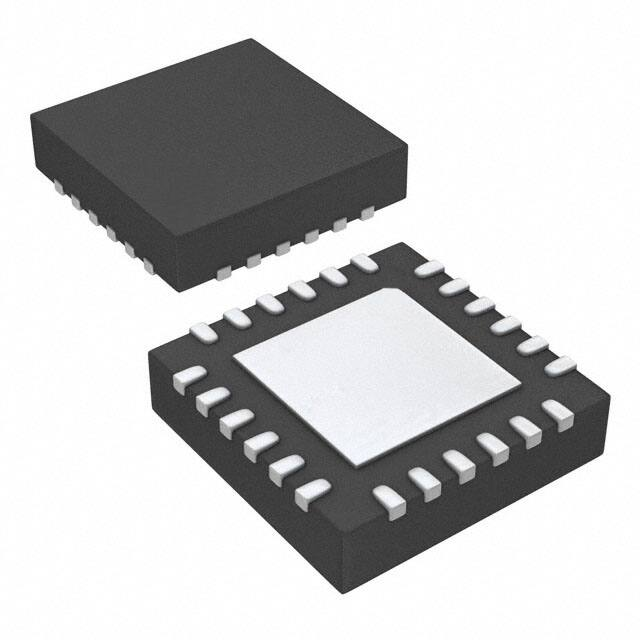
Figure 14 AEAT-8800, 24 QFN Dimensions
Table 9 Dimensions and Tolerances
Dimension Reference
Dimension Tolerance
REF
Min.
Nom.
Max.
REF
Tolerance
A
0.800
0.850
0.900
aaa
0.100
A1
0.000
—
0.050
bbb
0.100
A2
0.203 REF
ccc
0.050
D
5.000 BSC
ddd
0.050
E
5.000 BSC
eee
0.080
fff
0.050
D2
3.200
3.250
3.300
E2
3.200
3.250
3.300
b
0.250
0.300
0.350
e
L
0.650 BSC
0.350
0.400
0.450
Broadcom
- 19 -
�AEAT-8800-Q24
Application Note
Recommended PCB Land Pattern (in mm)
Figure 15 Land Pattern Dimensions
Broadcom
- 20 -
�For product information and a complete list of distributors, please go to our web site:
www.broadcom.com.
Broadcom, the pulse logo, Connecting everything, Avago Technologies, Avago, and
the A logo are among the trademarks of Broadcom and/or its affiliates in the United
States, certain other countries and/or the EU.
Copyright © 2016–2017 by Broadcom. All Rights Reserved.
The term "Broadcom" refers to Broadcom Limited and/or its subsidiaries. For more
information, please visit www.broadcom.com.
Broadcom reserves the right to make changes without further notice to any
products or data herein to improve reliability, function, or design.
Information furnished by Broadcom is believed to be accurate and reliable. However,
Broadcom does not assume any liability arising out of the application or use of this
information, nor the application or use of any product or circuit described herein,
neither does it convey any license under its patent rights nor the rights of others.
pub-005906 – May 17, 2017
�


 工商网监
湘ICP备2023018690号
工商网监
湘ICP备2023018690号
