Product
Folder
Order
Now
Support &
Community
Tools &
Software
Technical
Documents
TPS65070, TPS65072
TPS65073, TPS650731, TPS650732
SLVS950I – JULY 2009 – REVISED MAY 2018
TPS65070x Power Management IC (PMIC) With Battery Charger, 3 Step-Down Converters,
and 2 LDOs
1 Features
3 Description
•
The TPS6507x family of devices are single-chip
power management ICs (PMICs) for portable
applications consisting of a battery charger with
power path management for a single Li-Ion or LiPolymer cell. The charger can either be supplied by a
USB port on pin USB or by a DC voltage from a wall
adapter connected to pin AC. Three highly efficient
2.25-MHz step-down converters are targeted at
providing the core voltage, memory, and I/O voltage
in a processor-based system. The step-down
converters enter a low power mode at light load for
maximum efficiency across the widest possible range
of load currents.
1
•
•
•
•
•
•
•
Charger/Power Path Management:
– 2-A Output Current on the Power Path
– Linear Charger; 1.5-A Maximum Charge
Current
– 100-mA/500-mA/800-mA/1300-mA Current
Limit From USB Input
– Thermal Regulation, Safety Timers
– Temperature Sense Input
3 Step-Down Converters:
– 2.25-MHz Fixed-Frequency Operation
– Up to 1.5 A of Output Current
– Adjustable or Fixed Output Voltage
– VIN Range From 2.8 V to 6.3 V
– Power Save Mode at Light Load Current
– Output Voltage Accuracy in PWM Mode ±1.5%
– Typical 19-µA Quiescent Current per
Converter
– 100% Duty Cycle for Lowest Dropout
LDOs:
– Fixed Output Voltage
– Dynamic Voltage Scaling on LDO2
– 20-µA Quiescent Current
– 200-mA Maximum Output Current
– VIN Range From 1.8 V to 6.3 V
wLED Boost Converter:
– Internal Dimming Using I2C
– Up to 2 × 10 LEDs
– Up to 25 mA per String With Internal Current
Sink
I2C Interface
10 Bit A/D Converter
Touch Screen Interface
Undervoltage Lockout and Battery Fault
Comparator
Device Information(1)
PART NUMBER
TPS65070x
PACKAGE
VQFN (48)
BODY SIZE (NOM)
6.00 mm × 6.00 mm
(1) For all available packages, see the orderable addendum at
the end of the data sheet.
Block Diagram
TPS6507x
AC
USB
BAT
Memory
Charger and
Power Path
DCDC1
Memory
DCDC2
CORE
DCDC3
Processor or FPGA
LDO1
Peripheral
and Interface
LDO2
Peripheral
and Interface
wLED
Boost and
DRV
2 Applications
•
•
•
Portable Navigation Systems
PDAs, Pocket PCs
OMAP™ and Low Power DSP Supplies
1
An IMPORTANT NOTICE at the end of this data sheet addresses availability, warranty, changes, use in safety-critical applications,
intellectual property matters and other important disclaimers. UNLESS OTHERWISE NOTED, this document contains PRODUCTION
DATA.
�TPS65070, TPS65072
TPS65073, TPS650731, TPS650732
SLVS950I – JULY 2009 – REVISED MAY 2018
www.ti.com
Table of Contents
1
2
3
4
5
6
7
8
Features ..................................................................
Applications ...........................................................
Description .............................................................
Revision History.....................................................
Description (continued).........................................
Device Options.......................................................
Pin Configuration and Functions .........................
Specifications.........................................................
1
1
1
2
4
4
5
7
8.1
8.2
8.3
8.4
8.5
8.6
8.7
8.8
8.9
Absolute Maximum Ratings ..................................... 7
ESD Ratings.............................................................. 7
Recommended Operating Conditions....................... 7
Thermal Information .................................................. 9
Electrical Characteristics........................................... 9
Electrical Characteristics - DCDC1 Converter ........ 10
Electrical Characteristics - DCDC2 Converter ........ 11
Electrical Characteristics - DCDC3 Converter ........ 12
Electrical Characteristics - VLDO1 and VLDO2 Low
Dropout Regulators.................................................. 13
8.10 Electrical Characteristics - wLED Boost
Converter ................................................................. 14
8.11 Electrical Characteristics - Reset, PB_IN, PB_OUT,
PGood, Power_on, INT, EN_EXTLDO, EN_wLED.. 14
8.12 Electrical Characteristics - ADC Converter ........... 15
8.13 Electrical Characteristics - Touch Screen
Interface ................................................................... 15
8.14 Electrical Characteristics - Power Path................. 15
8.15 Electrical Characteristics - Battery Charger .......... 17
8.16 Timing Requirements ............................................ 18
8.17 Dissipation Ratings .............................................. 18
8.18 Typical Characteristics .......................................... 19
9 Parameter Measurement Information ................ 23
10 Detailed Description ........................................... 24
10.1
10.2
10.3
10.4
10.5
10.6
Overview ...............................................................
Functional Block Diagram .....................................
Feature Description...............................................
Device Functional Modes......................................
Programming.........................................................
Register Maps .......................................................
24
24
25
40
41
43
11 Application and Implementation........................ 64
11.1 Application Information.......................................... 64
11.2 Typical Applications .............................................. 66
12 Power Supply Recommendations ..................... 87
13 Layout................................................................... 88
13.1 Layout Guidelines ................................................. 88
13.2 Layout Example .................................................... 88
14 Device and Documentation Support ................. 89
14.1
14.2
14.3
14.4
14.5
14.6
14.7
14.8
Device Support......................................................
Documentation Support ........................................
Related Links ........................................................
Receiving Notification of Documentation Updates
Community Resources..........................................
Trademarks ...........................................................
Electrostatic Discharge Caution ............................
Glossary ................................................................
89
89
89
89
89
90
90
90
15 Mechanical, Packaging, and Orderable
Information ........................................................... 90
4 Revision History
NOTE: Page numbers for previous revisions may differ from page numbers in the current version.
Changes from Revision H (September 2015) to Revision I
Page
•
Changed the title of the data sheet ........................................................................................................................................ 1
•
Changed the pin number column headers from TPS65072 and TPS6507x to TPS6507x and TPS65072 in the Pin
Functions table ....................................................................................................................................................................... 5
•
Changed the Electrostatic Discharge Caution statement..................................................................................................... 89
Changes from Revision G (May 2013) to Revision H
•
Page
Added ESD Ratings table, Feature Description section, Device Functional Modes, Application and Implementation
section, Power Supply Recommendations section, Layout section, Device and Documentation Support section, and
Mechanical, Packaging, and Orderable Information section .................................................................................................. 1
Changes from Revision F (July 2012) to Revision G
•
2
Page
Changed the PPATH1. Register Address: 01h section table. Default row From: xx00011 To: xx00110 ............................ 44
Submit Documentation Feedback
Copyright © 2009–2018, Texas Instruments Incorporated
Product Folder Links: TPS65070 TPS65072 TPS65073 TPS650731 TPS650732
�TPS65070, TPS65072
TPS65073, TPS650731, TPS650732
www.ti.com
SLVS950I – JULY 2009 – REVISED MAY 2018
Changes from Revision E (February) to Revision F
•
Page
Added TPS650701 and TPS650721 device specs to the data sheet .................................................................................... 4
Changes from Revision C (August 2011) to Revision D
•
Page
Changed text in the Low Dropout Voltage Regulators section, second paragraph – the sentence "The output voltage
for LDO1 is defined by the settings in Register DEFLDO1" to "The output voltage for LDO1 is defined by the
settings in Register LDO_CTRL1" ........................................................................................................................................ 36
Changes from Revision B (December 2009) to Revision C
Page
•
Changed Input Current Limit MIN value from 2000 to 1900 for IAC2500 specification............................................................ 16
•
Changed KISET spec MIN/TYP/MAX values from 840/900/1000 to 820/950/1080 respectively for a charge current of
1500 mA ............................................................................................................................................................................... 17
•
Changed KISET spec MIN/TYP/MAX values from 930/1100/1200 to 890/1050/1200 respectively for a charge current
of 100 mA ............................................................................................................................................................................. 17
Changes from Revision A (August 2009) to Revision B
Page
•
Changed title from ".....Navigation Systems" to ".......Battery Powered Systems".................................................................. 1
•
Changed status of TPS65072RSL device to Production Data ............................................................................................... 4
•
Deleted "Product Preview" from TPS65072 pinout graphic ................................................................................................... 5
•
Changed VOUT Parameter from: "Fixed output voltage; PFM mode" to: "DC output voltage accuracy; PFM mode" .......... 11
•
Changed VOUT Parameter from: "Fixed output voltage; PWM mode" to: "DC output voltage accuracy; PWM mode" ....... 11
•
Changed part number from TPS65072 to TPS650732 at the DCDC3 Converter VOUT Default output voltage spec. to
correct typo error ................................................................................................................................................................. 12
•
Changed VOUT Parameter from: "Fixed output voltage; PFM mode" to: "DC output voltage accuracy; PFM mode" .......... 12
•
Changed VOUT Parameter from: "Fixed output voltage; PWM mode" to: "DC output voltage accuracy; PWM mode" ....... 12
•
Added test conditions for IDISCH specification........................................................................................................................ 15
•
Deleted "Product Preview" cross reference and Tablenote with reference to device TPS65072 ....................................... 31
•
Changed TSC equations in Table 3 to correct typographical errors ................................................................................... 38
•
Added Xpos= ADRESULT /1024 to X position Equation list of Table 3................................................................................. 39
•
Added Ypos= ADRESULT /1024 to Y position Equation list of Table 3................................................................................. 39
•
Added Sub-section Performing Measurements Using the Touch Screen Controller for Programmers benefit ................... 39
•
Changed Bit 7 explanation from '...when input voltage at pin AC detected' to '...when no input voltage at pin AC is
detected' . ............................................................................................................................................................................. 49
•
Changed Bit 0 explanation from '...when input voltage at pin AC detected' to '....when no input voltage at pin AC is
detected'. .............................................................................................................................................................................. 49
•
Deleted "Product Preview" status & footnote for the TPS65072 device listing. .................................................................. 64
•
Deleted "Product Preview" footnote in reference to the TPS65072 device status. .............................................................. 77
•
Changed Schematic entity part number from OMAP3505 to AM3505................................................................................. 86
Copyright © 2009–2018, Texas Instruments Incorporated
Submit Documentation Feedback
Product Folder Links: TPS65070 TPS65072 TPS65073 TPS650731 TPS650732
3
�TPS65070, TPS65072
TPS65073, TPS650731, TPS650732
SLVS950I – JULY 2009 – REVISED MAY 2018
www.ti.com
5 Description (continued)
For low noise applications the devices can be forced into fixed-frequency PWM using the I2C interface. The stepdown converters allow the use of small inductors and capacitors to achieve a small solution size. The TPS6507x
devices also integrate two general purpose LDOs for an output current of 200 mA. These LDOs can be used to
power an SD-card interface and an always-on rail, but can be used for other purposes as well. Each LDO
operates with an input voltage range from 1.8 V to 6.3 V allowing them to be supplied from one of the step-down
converters or directly from the main battery. An inductive boost converter with two programmable current sinks
power two strings of white LEDs.
The TPS6507x devices come in a 48-pin leadless package (6-mm × 6-mm VQFN) with a 0.4-mm pitch.
6 Device Options
(1)
4
OUTPUT
VOLTAGE AT
DCDC3
OUTPUT VOLTAGE AT
DCDC1
DCDC2
OUTPUT VOLTAGE
AT LDO1 / LDO2
OUTPUT CURRENT AT
DCDC1 / DCDC2 / DCDC3
PGOOD,
RESET DELAY
TOUCH SCREEN
CONTROLLER
PART NUMBER (1)
1 V / 1.2 V
(OMAP-L1x8)
3.3 V
1.8 V / 3.3 V
1.8 V / 1.2 V
0.6 A / 1.5 A / 1.5 A
400 ms
Yes
TPS65070RSL
1.2 V / 1.4 V
(Atlas IV)
3.3 V
1.8 V / 2.5 V
1.2 V / 1.2 V
3 x 600 mA
20 ms
No
TPS65072RSL
1.2 V / 1.35 V
(OMAP35xx)
1.8 V
1.2 V / 1.8 V
1.8 V / 1.8 V
0.6 A / 0.6 A / 1.5 A
External sequencing
400 ms
Yes
TPS65073RSL
1.2 V / 1.35 V
(OMAP35xx)
1.8 V
1.2 V / 1.8 V
1.8 V / 1.8 V
0.6 A / 0.6 A / 1.5 A
Internal sequencing
400 ms
Yes
TPS650731RSL
1.2 V / 1.35 V
(AM3505)
1.8 V
1.8 V / 3.3 V
1.8 V / 1.8 V
0.6 A / 0.6 A / 1.5 A
Internal sequencing
400 ms
Yes
TPS650732RSL
The RSL package is available in tape and reel. Add R suffix (TPS65070RSLR) to order quantities of 2500 parts per reel. Add T suffix
(TPS65070RSLT) to order quantities of 250 parts per reel.
Submit Documentation Feedback
Copyright © 2009–2018, Texas Instruments Incorporated
Product Folder Links: TPS65070 TPS65072 TPS65073 TPS650731 TPS650732
�TPS65070, TPS65072
TPS65073, TPS650731, TPS650732
www.ti.com
SLVS950I – JULY 2009 – REVISED MAY 2018
7 Pin Configuration and Functions
33
ISINK2
5
32
VIN_DCDC3
7
30
PGND3
SYS
8
29
VDCDC3
EN_EXTLDO
FB_WLED
L4
37
40
38
INT
41
39
AGND
BYPASS
42
AD_IN2
AD_IN1
44
43
AD_IN4
AD_IN3
46
45
INT_LDO
EN_wLED
48
47
6
31
L3
SYS
7
30
PGND3
SYS
8
29
VDCDC3
ISET
9
28
SCLK
AC
10
27
SDAT
TS
11
26
PGOOD
USB
12
25
PB_IN
Thermal Pad
21
22
23
24
L2
VDCDC2
PB_OUT
L1
VINDCDC1/2
19
20
VDCDC1
17
18
24
PB_OUT
VIN_DCDC3
BAT
DEFDCDC2
23
VDCDC2
32
DEFDCDC3
22
L2
5
15
21
VINDCDC1/2
19
20
DEFDCDC2
L1
17
18
DEFDCDC3
VDCDC1
15
PB_IN
16
PGOOD
25
EN_DCDC2
26
12
EN_DCDC3
11
13
SDAT
14
TS
USB
ISINK2
BAT
SCLK
27
EN_DCDC1
10
POWER_ON
AC
28
33
16
9
4
L3
SYS
ISET
ISINK1
VLDO1
EN_DCDC2
31
34
ISINK1
4
Thermal Pad
3
ISET1
BAT
6
ISET1
VINLDO1/2
ISET2
VLDO1
BAT
ISET2
35
EN_DCDC3
34
3
36
2
13
35
2
1
14
36
1
AVDD6
VLDO2
EN_DCDC1
FB_WLED
RESET
L4
37
38
INT
40
39
AGND
BYPASS
41
42
AD_IN1 (TSX1)
AD_IN2 (TSX2)
44
43
AD_IN3 (TSY1)
AD_IN4 (TSY2)
46
TPS65072 RSL Package
48-Pin VQFN With Thermal Pad
Top View
POWER_ON
VINLDO1/2
45
INT_LDO
VLDO2
47
48
AVDD6
THRESHOLD (EN_wLED)
TPS6507x RSL Package
48-Pin VQFN With Thermal Pad
Top View
Pin Functions
PIN
NAME
NO.
I/O
DESCRIPTION
TPS6507x TPS65072
CHARGER BLOCK
AC
10
10
I
Input power for power path manager, connect to external DC supply. Connect external 1 µF (minimum) to
GND
AD_IN1 (TSX1)
43
43
I
Analog input1 for A/D converter;
TPS65070, TPS65073, TPS650731, TPS650732 only:
Input 1 to the x-plate for the touch screen.
AD_IN2 (TSX2)
44
44
I
Analog input2 for A/D converter;
TPS65070, TPS65073, TPS650731, TPS650732 only:
Input 2 to the x-plate for the touch screen
AD_IN3 (TSY1)
45
45
I
Analog input3 for A/D converter;
TPS65070, TPS65073, TPS650731, TPS650732 only:
Input 1 to the y-plate for the touch screen
AD_IN4 (TSY2)
46
46
I
Analog input4 for A/D converter;
TPS65070, TPS65073, TPS650731, TPS650732 only:
Input 2 to the y-plate for the touch screen
AVDD6
1
1
O
Internal “always-on”-voltage. Connect a 4.7-µF capacitor from AVDD6 to GND
BAT
5, 6
5, 6
O
Charger power stage output, connect to battery. Place a ceramic capacitor of 10 µF from these pins to GND
BYPASS
41
41
O
Connect a 10-µF bypass capacitor from this pin to GND. This pin can optionally be used as a reference output
(2.26 V). The maximum load on this pin is 0.1 mA.
INT
40
40
O
Open-drain interrupt output. An interrupt can be generated upon:
• A touch of the touch screen
• Voltage applied or removed at pins AC or USB
• PB_IN actively pulled low (optionally actively pulled high)
INT_LDO
48
48
O
Connect a 2.2-µF bypass capacitor from this pin to GND. The pin is connected to an internal LDO providing
the power for the touch screen controller (TSREF).
ISET
9
9
I
Connect a resistor from ISET to GND to set the charge current.
Copyright © 2009–2018, Texas Instruments Incorporated
Submit Documentation Feedback
Product Folder Links: TPS65070 TPS65072 TPS65073 TPS650731 TPS650732
5
�TPS65070, TPS65072
TPS65073, TPS650731, TPS650732
SLVS950I – JULY 2009 – REVISED MAY 2018
www.ti.com
Pin Functions (continued)
PIN
NO.
NAME
I/O
DESCRIPTION
TPS6507x TPS65072
SCLK
28
28
I
SDAT
27
27
I/O
Clock input for the I2C interface.
Data line for the I2C interface.
SYS
7, 8
7, 8
O
System voltage; output of the power path manager. All voltage regulators are typically powered from this
output.
TS
11
11
I
Temperature sense input. Connect to NTC thermistor to sense battery pack temperature. TPS6507x can be
internally programmed to operate with a 10-kΩ curve 2 or 100-kΩ curve 1 thermistor. To linearize the
thermistor response, use a 75-kΩ (for the 10-kΩ NTC) or a 360-kΩ (for the 100-kΩ NTC) in parallel with the
thermistor. Default setting is 10-kΩ NTC.
USB
12
12
I
Input power for power path manager, connect to external voltage from a USB port. Connect external 1 µF
(minimum) to GND. Default input current limit is 500 mA maximum.
AGND
42
42
—
DEFDCDC2
18
18
I
Select Pin of DCDC2 output voltage.
DEFDCDC3
17
17
I
Select Pin of DCDC3 output voltage.
EN_DCDC1
14
14
I
Enable Input for DCDC1, active high
EN_DCDC2
15
15
I
Enable Input for DCDC2, active high
EN_DCDC3
16
16
I
Enable Input for DCDC3, active high
CONVERTERS
Analog GND, connect to PGND (thermal pad)
EN_EXTLDO
—
39
O
TPS65072:
This pin is the active high, push-pull output to enable an external LDO. This pin will be set and reset during
startup and shutdown by the sequencing option programmed. The output is pulled internally to the SYS
voltage if HIGH.
The output is only used for sequencing options for Sirf Prima or Atlas 4 processors with DCDC_SQ[2..0] =
100 or DCDC_SQ[2..0] = 111.
EN_wLED
—
47
I
TPS65072, : This pin is the actively high enable input for the wLED driver. The wLED converter is enabled by
the ENABLE ISINK Bit OR enable EN_wLED pin.
FB_WLED
38
38
I
Feedback input for the boost converter's output voltage.
ISET1
(AD_IN6)
35
35
I
Connect a resistor from this pin to GND to set the full scale current for Isink1 and Isink2 with Bit Current Level
in register WLED_CTRL0 set to 1.
Analog input6 for the A/D converter.
ISET2
(AD_IN7)
36
36
I
Connect a resistor from this pin to GND to set the full scale current for Isink1 and Isink2 with Bit Current Level
in register WLED_CTRL0 set to 0.
Analog input7 for the A/D converter.
ISINK1
34
34
I
Input to the current sink 1. Connect the cathode of the LEDs to this pin.
ISINK2
33
33
I
Input to the current sink 2. Connect the cathode of the LEDs to this pin.
L1
20
20
O
Switch Pin for DCDC1. Connect to Inductor
L2
22
22
O
Switch Pin of DCDC2. Connect to Inductor.
L3
31
31
O
Switch Pin of DCDC3. Connect to Inductor.
L4
37
37
I
Switch Pin of the white LED (wLED) boost converter. Connect to Inductor and rectifier diode.
PB_IN
25
25
I
Enable input for TPS6507x. When pulled LOW, the DCDC converters and LDOs start with the sequencing as
programmed internally. Internal 50kO pullup resistor to AVDD6
PB_OUT
24
24
O
Open-drain output. This pin is driven by the status of the /PB_IN input (after debounce). PB_OUT=LOW if
PB_IN=LOW
PGND3
30
30
—
Power GND for DCDC3. Connect to PGND (thermal pad)
PGOOD
26
26
O
Open-drain power good output. The delay time equals the setting for Reset. The pin will go low depending on
the setting in register PGOODMASK. Optionally it is also driven LOW for 0.5 ms when PB_IN is pulled LOW
for >15s.
POWER_ON
13
13
I
Power_ON input for the internal state machine. After PB_IN was pulled LOW to turn on the TPS6507x, the
POWER_ON pin needs to be pulled HIGH by the application processor to keep the system in ON-state when
PB_IN is released HIGH. If POWER_ON is released LOW, the DCDC converters and LDOs will turn off when
PB_IN is HIGH.
RESET
39
—
O
TPS65070, TPS65073, TPS650731, TPS650732:
Open-drain active low reset output, reset delay time equals settings in register PGOOD. The status depends
on the voltage applied at THRESHOLD.
THRESHOLD
47
—
I
TPS65070, TPS65073, TPS650731, TPS650732:Input for the reset comparator. RESET will be LOW if this
voltage drops below 1 V.
VDCDC1
19
19
I
Feedback voltage sense input. For the fixed voltage option, this pin must directly be connected to Vout1, for
the adjustable version, this pin is connected to an external resistor divider.
VDCDC2
23
23
I
Feedback voltage sense input, connect directly to Vout2
6
Submit Documentation Feedback
Copyright © 2009–2018, Texas Instruments Incorporated
Product Folder Links: TPS65070 TPS65072 TPS65073 TPS650731 TPS650732
�TPS65070, TPS65072
TPS65073, TPS650731, TPS650732
www.ti.com
SLVS950I – JULY 2009 – REVISED MAY 2018
Pin Functions (continued)
PIN
NO.
NAME
I/O
DESCRIPTION
TPS6507x TPS65072
VDCDC3
29
29
I
Feedback voltage sense input, connect directly to Vout3
VINDCDC1/2
21
21
I
Input voltage for DCDC1 and DCDC2 step-down converter. This pin must be connected to the SYS pin.
VINLDO1/2
3
3
I
Input voltage for LDO1 and LDO2
VIN_DCDC3
32
32
I
Input voltage for DCDC3 step-down converter. This pin must be connected to the SYS pin.
VLDO1
4
4
O
Output voltage of LDO1
VLDO2
2
2
O
Output voltage of LDO2
—
Power ground connection for the PMU. Connect to GND
Thermal Pad
8 Specifications
8.1 Absolute Maximum Ratings
over operating free-air temperature range (unless otherwise noted) (1)
Voltage
Current
Power
MIN
MAX
On all pins except the pins listed below with respect to AGND
–0.3
7
On pins INT, RESET, PGOOD, PB_OUT with respect to AGND
–0.3
V(AVDD6)
On pins VINDCDC1/2, VINDCDC3, VINLDO respect to AGND
–0.3
V(SYS)
On pins AD_IN1, AD_IN2, AD_IN3, AD_IN4 with respect to AGND
–0.3
3.3
On pins ISINK1, ISINK2, AC, USB
–0.3
20
On pin L4 (output voltage of boost converter), FB_wLED
–0.3
3000
In/Out at all other pins
1000
40
Maximum junction temperature, TJ
Storage temperature, Tstg
(1)
(2)
mA
mA
See Dissipation Ratings
Operating free-air temperature, TA
Temperature
V
40
In/Out at SYS, AC, USB, BAT, L3
Continuous total power dissipation
UNIT
–65
(2)
85
°C
125
°C
150
°C
Stresses beyond those listed under Absolute Maximum Ratings may cause permanent damage to the device. These are stress ratings
only and functional operation of the device at these or any other conditions beyond those indicated under Recommended Operating
Conditions is not implied. Exposure to absolute-maximum-rated conditions for extended periods may affect device reliability.
The thermal resistance RθJP junction to thermal pad of the RSL package is 1.1 K/W. The value for RθJA was measured on a high K
board.
8.2 ESD Ratings
VALUE
V(ESD)
(1)
(2)
Electrostatic discharge
Human body model (HBM), per ANSI/ESDA/JEDEC JS-001, all pins (1)
±2000
Charged device model (CDM), per JEDEC specification JESD22-C101,
all pins (2)
±500
UNIT
V
JEDEC document JEP155 states that 500-V HBM allows safe manufacturing with a standard ESD control process.
JEDEC document JEP157 states that 250-V CDM allows safe manufacturing with a standard ESD control process.
8.3 Recommended Operating Conditions
MIN
NOM
MAX
UNIT
BATTERY CHARGER AND POWER PATH
VIN
IIN
Input voltage for power path manager at pins AC or USB
4.3
17
Input voltage for power path manager at pins AC or USB, charger and power path
active (no overvoltage lockout)
4.3
5.8
Input voltage for power path manager at pins AC or USB in case there is no battery
connected at pin BAT
3.6
17
Input current at AC pin
2.5
Input current at USB pin
1.3
Copyright © 2009–2018, Texas Instruments Incorporated
Submit Documentation Feedback
Product Folder Links: TPS65070 TPS65072 TPS65073 TPS650731 TPS650732
V
A
7
�TPS65070, TPS65072
TPS65073, TPS650731, TPS650732
SLVS950I – JULY 2009 – REVISED MAY 2018
www.ti.com
Recommended Operating Conditions (continued)
MIN
IBAT
NOM
MAX
Current at BAT pin
UNIT
2
A
DCDC CONVERTERS AND LDOs
VINDCDC
Input voltage range for step-down converter DCDC1, DCDC2, DCDC3
2.8
6.3 (1)
V
VDCDC1
Output voltage range for VDCDC1 step-down converter
0.6
VINDCDC1
V
VDCDC2
Output voltage range for VDCDC2, DCDC3 step-down converter
0.6
VINDCDC2
V
VINLDOx
Input voltage range for LDO1 and LDO2
1.8
6.3 (1)
V
VLDO1
Output voltage range for LDO1
0.9
3.3
V
VLDO2
Output voltage range for LDO2
0.8
3.3
IOUTDCDC1
Output current at L1; except TPS650701
IOUTDCDC1
Output current at L1 for TPS650701
L1
Inductor at L1
CINDCDC12
Input Capacitor at VINDCDC1 and VINDCDC2 (2)
(2)
mA
1200
mA
2.2
µH
1.5
(2)
COUTDCDC1
Output Capacitor at VDCDC1
IOUTDCDC2
Output current at L2;
L2
Inductor at L2 (2)
COUTDCDC2
Output Capacitor at VDCDC2
IOUTDCDC3
Output current at L3;except TPS65072
IOUTDCDC3
Output current at L3 for TPS65072
L3
Inductor at L3 (2)
(2)
V
600
22
µF
10
22
µF
1500
mA
1.5
2.2
µH
10
22
µF
1500
mA
600
mA
2.2
µH
1.5
CINDCDC3
Input Capacitor at VINDCDC3
(2)
10
COUTDCDC3
Output Capacitor at VDCDC3 (2)
10
L4
Inductor at L4
COUTWLED
Output Capacitor at wLED boost converter
4.7
µF
CINLDO1/2
Input Capacitor at VINLDO1/2
2.2
µF
COUTLDO1
Output Capacitor at VLDO1
2.2
IOUTLDO1
Output Current at VLDO1
COUTLDO2
Output Capacitor at VLDO2
IOUTLDO2
Output Current at VLDO2
CAC
Input Capacitor at AC
CUSB
Input Capacitor at USB
CBAT
Capacitor at BAT pin
10
CSYS
Capacitor at SYS pin
22
CBYPASS
Capacitor at BYPASS pin
10
µF
CINT_LDO
Capacitor at INT_LDO pin
2.2
µF
CAVDD6
Capacitor at AVDD6 pin
4.7
TA
Operating ambient temperature
–40
85
°C
TJ
Operating junction temperature
–40
125
°C
(1)
(2)
(3)
8
(2)
µF
22
µF
22
µH
µF
100
mA
100
mA
2.2
µF
1
µF
1
µF
µF
100
(3)
µF
µF
6.3 V or VSYS whichever is less.
See Application Information for more details.
For proper soft-start.
Submit Documentation Feedback
Copyright © 2009–2018, Texas Instruments Incorporated
Product Folder Links: TPS65070 TPS65072 TPS65073 TPS650731 TPS650732
�TPS65070, TPS65072
TPS65073, TPS650731, TPS650732
www.ti.com
SLVS950I – JULY 2009 – REVISED MAY 2018
8.4 Thermal Information
TPS65070x
THERMAL METRIC (1)
RSL (VQFN)
UNIT
48 PINS
RθJA
Junction-to-ambient thermal resistance
30
°C/W
RθJC(top)
RθJB
Junction-to-case (top) thermal resistance
16
°C/W
Junction-to-board thermal resistance
5.3
°C/W
ψJT
Junction-to-top characterization parameter
0.2
°C/W
ψJB
Junction-to-board characterization parameter
5.3
°C/W
RθJC(bot)
Junction-to-case (bottom) thermal resistance
1
°C/W
(1)
For more information about traditional and new thermal metrics, see the Semiconductor and IC Package Thermal Metrics application
report.
8.5 Electrical Characteristics
VSYS = 3.6 V, EN_DCDCx = VSYS, L = 2.2 µH, COUT = 10 µF, TA = –40°C to 85°C typical values are at TA = 25°C (unless
otherwise noted)
PARAMETER
TEST CONDITIONS
MIN
TYP
MAX
UNIT
SUPPLY CURRENT
VINDCDC Input voltage range for DC-DC converters
2.8
Only DCDC2, DCDC3 and LDO1 enabled, device in ONmode; DCDC converters in PFM
IQ
Operating quiescent current
Total current into VSYS, VINDCDCx, VINLDO1/2
V
µA
140
Per DC/DC converter, PFM mode
19
30
For LDO1 or LDO2 (either one enabled)
20
35
For LDO1 and LDO2 (both enabled)
34
For wLED converter
1.5
Per DC/DC converter, PWM mode
2.5
ISD
Shutdown current
All converters, LDOs, wLED driver and ADC disabled, no
input voltage at AC and USB;
SYS voltage turned off
VUVLO
Undervoltage lockout threshold
Voltage at the output of the power manager detected at pin
SYS; falling voltage, voltage defined with ,
DEFAULT: 3 V
Undervoltage lockout hysteresis
Rising voltage defined with ; DEFAULT:
500 mV
Undervoltage lockout deglitch time
Due to internal delay
Thermal shutdown for DCDC converters, wLED
driver and LDOs
Thermal shutdown hysteresis
TSD
6.3
–2%
mA
8
12
2.8
3
3.1
3.25
2%
µA
V
360
450
mV
4
ms
Increasing junction temperature
150
°C
Decreasing junction temperature
20
°C
EN_DCDC1, EN_DCDC2, EN_DCDC3, DEFDCDC2, DEFDCDC3, SDAT, SCLK, EN_wLED (optional)
VIH
High Level Input Voltage, EN_DCDC1,
EN_DCDC2, EN_DCDC3, DEFDCDC2,
DEFDCDC3, SDAT, SCLK, EN_wLED
1.2
VSYS
V
VIL
Low Level Input Voltage, EN_DCDC1,
EN_DCDC2, EN_DCDC3, DEFDCDC2,
DEFDCDC3, SDAT, SCLK, EN_wLED
0
0.4
V
IIN
Input bias current, EN_DCDC1, EN_DCDC2,
EN_DCDC3, DEFDCDC2, DEFDCDC3, SDAT,
SCLK
1
µA
Copyright © 2009–2018, Texas Instruments Incorporated
0.01
Submit Documentation Feedback
Product Folder Links: TPS65070 TPS65072 TPS65073 TPS650731 TPS650732
9
�TPS65070, TPS65072
TPS65073, TPS650731, TPS650732
SLVS950I – JULY 2009 – REVISED MAY 2018
www.ti.com
8.6 Electrical Characteristics - DCDC1 Converter
PARAMETER
VVINDCDC1
Input voltage range
IO
Maximum output
RDS(ON)
High side MOSFET ON-resistance
ILH
High side MOSFET leakage current
TEST CONDITIONS
Connected to SYS pin
MIN
TYP
2.8
MAX
600
150
300
VINDCDC1 = 3.5 V
120
200
VINDCDC1 = 2.8 V
200
300
VINDCDC1 = 3.5 V
160
180
VINDCDC1 = 6.3 V
2
Low side MOSFET ON-resistance
ILL
Low side MOSFET leakage current
VDS = 6.3 V
ILIMF
Forward current limit
for TPS65072, TPS65073, TPS650731,
TPS650732
ILIMF
Forward current limit
for TPS65070
fS
Oscillator frequency
Vout
Fixed output voltage range
Internal resistor divider, I2C selectable
0.8
1.1
mΩ
1.5
A
1.1
1.6
2.2
A
1.95
2.25
2.55
MHz
3.3
V
0.725
For TPS65070, TPS65072
3.3
For TPS65073, TPS650731, TPS650732
1.8
Vout
DC output voltage accuracy; PFM mode (1)
VINDCDC1 = VDCDC1 +0.3 V to 6.3 V;
0 mA = IO = 0.6 A
–2%
3%
Vout
DC output voltage accuracy; PWM mode (1)
VINDCDC1 = VDCDC1 +0.3 V to 6.3 V;
0 mA = IO = 0.6 A
–1.5%
1.5%
ΔVOUT
Power save mode ripple voltage (2)
IOUT = 1 mA, PFM mode
tStart
Start-up time
Time from active EN to Start switching
tRamp
VOUT ramp up time
10
µA
µA
Default output voltage
(2)
mΩ
1
Vout
(1)
V
mA
VINDCDC1 = 2.8 V
RDS(ON)
RDIS
UNIT
6.3
V
40
mVpp
170
µs
Time to ramp from 5% to 95% of VOUT
250
µs
Power good threshold
rising voltage
Vo 5%
Power good threshold
falling voltage
Vo 10%
Internal discharge resistor at L1
–35%
250
35%
Ω
Output voltage specification does not include tolerance of external voltage programming resistors. Output voltage in PFM mode is
scaled to +1% of nominal value.
Configuration L= 2.2 µH, COUT = 10 µF
Submit Documentation Feedback
Copyright © 2009–2018, Texas Instruments Incorporated
Product Folder Links: TPS65070 TPS65072 TPS65073 TPS650731 TPS650732
�TPS65070, TPS65072
TPS65073, TPS650731, TPS650732
www.ti.com
SLVS950I – JULY 2009 – REVISED MAY 2018
8.7 Electrical Characteristics - DCDC2 Converter
PARAMETER
VVINDCDC
TEST CONDITIONS
Input voltage range
Connected to SYS pin
MIN TYP
2.8
MAX
6.3
UNIT
V
2
IO
Maximum output current
RDS(ON)
High side MOSFET ON-resistance
ILH
High side MOSFET leakage current
RDS(ON)
Low side MOSFET ON-resistance
ILL
Low side MOSFET leakage current
TPS65072/73/731/732
TPS65070
Forward current limit
fS
Oscillator frequency
Vout
Adjustable output voltage range
Vref
Reference voltage
Vout
Fixed output voltage range
TPS65070
150
300
VINDCDC2 = 3.5 V
120
200
VINDCDC2 = 2.8 V
200
300
VINDCDC2 = 3.5 V
160
180
0.8
1.1
1.5
2.1
2.4
3.5
1.95 2.25
2.55
2
1
2.8 V < VINDCDC2 < 6.3 V
External resistor divider
Internal resistor divider, I2C
selectable (Default setting)
Default output voltage for TPS65072
Default output voltage for TPS65073, TPS650731
DC output voltage accuracy; PFM mode
DC output voltage accuracy; PWM mode
(1)
3.3
For DEFDCDC2 = LOW
1.8
For DEFDCDC2 = HIGH
2.5
For DEFDCDC2 = LOW
1.2
For DEFDCDC2 = HIGH
1.8
VINDCDC2 = 2.8 V to 6.3 V;
0 mA = IO = 1.5 A
Power save mode ripple voltage
IOUT = 1 mA, PFM mode (2)
tStart
tRamp
(2)
µA
mΩ
µA
A
MHz
V
V
V
V
–2%
3%
–1.5
%
1.5%
–2%
3%
–1%
mΩ
mV
3.3
1.8
VINDCDC2 = VDCDC2 +0.3 V (min
2.8 V) to 6.3 V; 0 mA = IO = 1.5A
(1)
0.725
For DEFDCDC2 = HIGH
DC output voltage accuracy with resistor divider at DEFDCDC2; PWM
RDIS
Vin
For DEFDCDC2 = LOW
(1)
DC output voltage accuracy with resistor divider at DEFDCDC2; PFM
ΔVOUT
0.6
600
Vout
Vout
VINDCDC2 = 2.8 V
VDS = 6.3 V
Default output voltage for TPS65070, TPS650732,
Vout
mA
1500
VINDCDC2 = 6.3 V
TPS65072/73/731/732
ILIMF
600
Vin > 2.8 V
1%
40
mVpp
Start-up time
Time from active EN to Start
switching
170
µs
VOUT ramp up time
Time to ramp from 5% to 95% of
VOUT
250
µs
Power good threshold
rising voltage
Vo 5%
Power good threshold
falling voltage
Vo 10%
Internal discharge resistor at L2
–35%
250
35%
Ω
Output voltage specification does not include tolerance of external voltage programming resistors. Output voltage in PFM mode is
scaled to +1% of nominal value.
Configuration L= 2.2 µH, COUT = 10 µF
Copyright © 2009–2018, Texas Instruments Incorporated
Submit Documentation Feedback
Product Folder Links: TPS65070 TPS65072 TPS65073 TPS650731 TPS650732
11
�TPS65070, TPS65072
TPS65073, TPS650731, TPS650732
SLVS950I – JULY 2009 – REVISED MAY 2018
www.ti.com
8.8 Electrical Characteristics - DCDC3 Converter
PARAMETER
VVINDCDC
TEST CONDITIONS
Input voltage range
MIN
Connected to SYS pin
2.8
TYP
MAX
6.3
UNIT
V
3
IO
Maximum output current
TPS65072,
Vin > 2.8 V
600
mA
IO
Maximum output current
TPS65070, TPS65073, TPS650731,
TPS650732
Vin > 2.8 V
1500
mA
RDS(ON)
High side MOSFET ON-resistance
ILH
High side MOSFET leakage current
VINDCDC3 = 2.8 V
150
300
VINDCDC3 = 3.5 V
120
200
VINDCDC3 = 2.8 V
200
300
VINDCDC3 = 3.5 V
160
180
VINDCDC3 = 6.3 V
2
mΩ
µA
RDS(ON)
Low side MOSFET ON-resistance
ILL
Low side MOSFET leakage current
1
µA
ILIMF
Forward current limit
TPS65072
2.8 V < VINDCDC3 < 6.3 V
0.8
1.1
1.5
A
ILIMF
Forward current limit
TPS65070/73/731/732
2.8 V < VINDCDC3 < 6.3 V
2.1
2.4
3.5
A
fS
Oscillator frequency
1.95
2.25
2.55
MHz
Vout
Adjustable output voltage range
Vref
Reference voltage
Vout
Fixed output voltage range
Vout
Default output voltage for TPS65070
Vout
Default output voltage for TPS65072
Vout
Default output voltage for TPS65073, TPS650731, TPS650732
VDS = 6.3 V
DC output voltage accuracy; PWM mode
Internal resistor divider, I2C
selectable (Default setting)
(1)
(1)
1
For DEFDCDC3 = LOW
1.2
For DEFDCDC3 = HIGH
1.4
For DEFDCDC3 = LOW
1.2
For DEFDCDC3 = HIGH
1.35
VINDCDC3 = 2.8 V to 6.3 V;
0 mA = IO = 1.5 A
DC output voltage accuracy with resistor divider at DEFDCDC3; PWM
VINDCDC3 = VDCDC3 +0.3 V (min
2.8 V) to 6.3 V; 0 mA = IO = 1.5A
ΔVOUT
Power save mode ripple voltage
IOUT = 1 mA, PFM mode (2)
tStart
tRamp
12
V
V
V
V
–2%
3%
–1.5%
1.5%
–2%
3%
–1%
V
mV
3.3
1.2
DC output voltage accuracy with resistor divider at DEFDCDC3; PFM
(2)
0.725
For DEFDCDC3 = HIGH
Vout
(1)
Vin
For DEFDCDC3 = LOW
Vout
RDIS
0.6
600
DC output voltage accuracy; PFM mode
Vout
External resistor divider
mΩ
1%
40
mVpp
Start-up time
Time from active EN to Start
switching
170
µs
VOUT ramp up time
Time to ramp from 5% to 95% of
VOUT
250
µs
Power good threshold
rising voltage
Vo 5%
Power good threshold
falling voltage
Vo 10%
Internal discharge resistor at L3
–35%
250
35%
Ω
Output voltage specification does not include tolerance of external voltage programming resistors. Output voltage in PFM mode is
scaled to +1% of nominal value.
Configuration L= 2.2 µH, COUT = 10 µF
Submit Documentation Feedback
Copyright © 2009–2018, Texas Instruments Incorporated
Product Folder Links: TPS65070 TPS65072 TPS65073 TPS650731 TPS650732
�TPS65070, TPS65072
TPS65073, TPS650731, TPS650732
www.ti.com
SLVS950I – JULY 2009 – REVISED MAY 2018
8.9 Electrical Characteristics - VLDO1 and VLDO2 Low Dropout Regulators
MAX
UNIT
VINLDO
Input voltage range for LDO1, LDO2
PARAMETER
1.8
6.3 (1)
V
VLDO1
LDO1 output voltage range
1.0
3.3
V
VLDO2
LDO2 output voltage range
0.725
3.3
V
IO
Output current for LDO1
200
mA
VLDO1
LDO1 default output voltage
For TPS65072
1.2
VLDO1
LDO1 default output voltage
For TPS65070, TPS65073, TPS650731, TPS650732
1.8
VLDO2
LDO2 default output voltage
For TPS65070
1.2
V
VLDO2
LDO2 default output voltage
For TPS65072
1.2
V
VLDO2
LDO2 default output voltage
For TPS65073, TPS650731, TPS650732
1.8
IO
Output current for LDO2
ISC
LDO1 short circuit current limit
ISC
LDO2 short circuit current limit
MIN
Voltage options available see register description
TYP
V
V
200
mA
VLDO1 = GND
400
mA
VLDO2 = GND
400
mA
Minimum voltage drop at LDO1
IO = 100 mA, VINLDO = 3.3 V
150
mV
Minimum voltage drop at LDO2
IO = 100 mA, VINLDO = 3.3 V
150
mV
Output voltage accuracy for LDO1, LDO2
ILDO1 = 100 mA; ILDO2 = 100 mA;
Vin = Vout + 200 mV
–1%
1.5%
Line regulation for LDO1, LDO2
VINLDO1,2 = VLDO1,2 + 0.5 V (min. 2.8 V) to 6.5 V,
ILDO1 = 100 mA; ILDO2 = 100 mA
–1%
1%
Load regulation for LDO1, LDO2
IO = 1 mA to 200 mA
Load regulation for LDO1, LDO2
IO < 1 mA ; Vo < 1V
RDIS
Internal discharge resistor at VLDO1, VLDO2
tRamp
VOUT ramp up time
(1)
TEST CONDITIONS
–1%
1%
–2.5%
2.5%
Time to ramp from 5% to 95% of VOUT
400
Ω
250
µs
6.3 V or VSYS whichever is less
Copyright © 2009–2018, Texas Instruments Incorporated
Submit Documentation Feedback
Product Folder Links: TPS65070 TPS65072 TPS65073 TPS650731 TPS650732
13
�TPS65070, TPS65072
TPS65073, TPS650731, TPS650732
SLVS950I – JULY 2009 – REVISED MAY 2018
www.ti.com
8.10 Electrical Characteristics - wLED Boost Converter
PARAMETER
VL4
voltage at L4 pin
Vsink1,2
Input voltage at ISINK1, ISINK2 pins
VOUT
Internal overvoltage protection
TEST CONDITIONS
MIN
Maximum boost factor (Vout/Vin)
Tmin_off
Minimum off pulse width
RDS(ON)
N-channel MOSFET ON-resistance
N-channel leakage current
35
37
9
10
Isink1 = Isink2 = 20 mA, Vin = 2.8 V
0.8
Minimum voltage drop at Isink pin to GND for
proper regulation
VISET
ISET pin voltage
KISET
Current multiple Iout/Iset
Isink1, Isink2
fPWM
1.6
VDS = 25 V, TA = 25°C
V
16
V
39
V
ns
Ω
2
A
1
µA
1.125
MHz
400
mV
1.24
V
Iset current = 15 µA
1000
Iset current = 25 µA
1000
Minimum current into ISINK1, ISINK2 pins
For proper dimming (string can be disabled also)
Maximum current into ISINK1, ISINK2 pins
Vin = 3.3 V
DC current set accuracy
Isinkx = 5 mA to 25 mA; no PWM dimming
±5%
Current difference between Isink1 and isink2
Rset1 = 50k; Isink1 = 25 mA, Vin = 3.6 V; no PWM
dimming
±5%
Current difference between Isink1 and Isink2
Rset2 = 250k; Isink1 = 5 mA, Vin = 3.6 V; no PWM
dimming
±5%
PWM dimming frequency
Rise / fall time of PWM signal
4
25
–15%
100
15%
PWM dimming Bit = 01 (default)
–15%
200
15%
PWM dimming Bit = 10
–15%
500
15%
PWM dimming Bit = 11
–15%
1000
15%
2
Dimming PWM DAC resolution
mA
mA
PWM dimming Bit = 00
For all PWM frequencies
UNIT
39
0.6
Switching frequency
Vsink1,
Vsink2
MAX
70
VL4 = 3.6 V
N-channel MOSFET current limit
ILN_NFET
TYP
2.8
Hz
µs
1%
8.11 Electrical Characteristics - Reset, PB_IN, PB_OUT, PGood, Power_on, INT, EN_EXTLDO,
EN_wLED
PARAMETER
Reset delay time and PGOOD delay time
TEST CONDITIONS
Input voltage at threshold pin rising; time
defined with ,
PB-IN debounce time
PB_IN “Reset-detect- time”
Internal timer
PGOOD low time when PB_IN = Low for >15s
MIN
TYP
MAX
–15%
20
100
200
400
15%
UNIT
–15%
50
15%
–15%
15
15%
s
–15%
0.5
15%
ms
ms
ms
VIH
High level input voltage on pin POWER_ON
1.2
VIN
V
VIH
High level input voltage on pin PB_IN
1.8
AVDD6
V
VIL
Low Level Input Voltage, PB_IN, Power_on
0
0.4
Internal pullup resistor from PB_IN to AVDD6
50
Output current at AVDD6
IIN
Input bias current at Power_on
0.01
VOL
Reset, PB_OUT, PGood, INT output low voltage,
EN_EXTLDO
IOL = 1 mA, Vthreshold < 1 V
VOH
EN_EXTLDO HIGH level output voltage
IOH = 0.1 mA; optional push pull output
IOL
Reset, PB_OUT, PGood, INT sink current
Reset, PB_OUT, PGood, INT open-drain
output in high impedance state
Vth
Threshold voltage at THRESHOLD pin
Input voltage falling
Vth_hyst
Hysteresis on THRESHOLD pin
Input voltage rising
Iin
Input bias current at EN_wLED, THRESHOLD
14
Submit Documentation Feedback
1
mA
1
µA
0.3
V
VSYS
1
Reset, PB_OUT, PGood,INT output leakage current
1
V
mA
0.25
–4%
V
kΩ
4%
7
µA
V
mV
1
µA
Copyright © 2009–2018, Texas Instruments Incorporated
Product Folder Links: TPS65070 TPS65072 TPS65073 TPS650731 TPS650732
�TPS65070, TPS65072
TPS65073, TPS650731, TPS650732
www.ti.com
SLVS950I – JULY 2009 – REVISED MAY 2018
8.12 Electrical Characteristics - ADC Converter
PARAMETER
TEST CONDITIONS
MIN
TYP
MAX
For full scale measurement
0
2.25
Input voltage range internal channel 6 to channel 9
For full scale measurement
0
6
Input voltage range on channel4 (TS pin) and channel5
(ISET pin)
Unipolar measurement of charge current at pin
ISET (voltage at ISET)
0
2.25
VIN
Input voltage range at AD_IN1 to AD_IN4 pin
(channel 0 to channel 3)
4
UNIT
V
Iin
AD_IN1 to AD_IN4 input current
0.1
Cin
Input capacitance at AD_IN1 to AD_IN4
15
µA
pF
ADC resolution
10
Bits
Differential linearity error
±1
LSB
Offset error
1
Gain error
±8
LSB
220
µs
Sampling time
Conversion time
5
19
Wait time after enable
Time needed to stabilize the internal voltages
Quiescent current, ADC enabled by I2C
includes current needed for I2C block
µs
1.5
ms
500
µA
Quiescent current, conversion ongoing
1
Reference voltage output on pin BYPASS
–1%
LSB
2.260
Output current on reference output pin BYPASS
mA
1%
V
0.1
mA
8.13 Electrical Characteristics - Touch Screen Interface
PARAMETER
VTSREF
TEST CONDITIONS
MIN
Voltage at internal voltage regulator for TSC
TYP
MAX
2.30
UNIT
V
TOUCHSCREEN PANEL SPECIFICATIONS
Plate resistance X
Specified by design
200
400
1200
Ω
Plate resistance Y
Specified by design
200
400
1200
Ω
Resistance between plates contact
180
400
1000
Ω
Resistance between plates pressure
180
400
1000
Settling time
Position measurement; 400 Ω, 100 pF
5.5
Capacitance between plates
2
Total capacitance at pins TSX1,TSX2,TSY1,TSY2 to GND
internal TSC reference resistance
Ω
µs
10
nF
100
pF
20.9
22
23.1
kΩ
111
160
SWITCH MATRIX SPECIFICATIONS
Tgate resistance
Specified by design
230
Ω
PMOS resistance
Specified by design
20
Ω
NMOS resistance
Specified by design
20
Ω
Quiescent supply current
in TSC standby mode with TSC_M[2..0] =
101
10
µA
8.14 Electrical Characteristics - Power Path
PARAMETER
TEST CONDITIONS
MIN
TYP
MAX
UNIT
QUIESCENT CURRENT
IQSPP1
Quiescent current, AC or USB mode
Current into AC or USB, AC or USB selected,
no load at SYS
20
µA
INPUT SUPPLY
VBATMIN
Minimum battery voltage for BAT SWITCH
operation
No input power, BAT_SWITCH on
2.75
V
VIN(DT)
Input voltage detection threshold
AC detected when V(AC)–V(BAT) > VIN(DT) ;
USB detected when
V(USB)–V(BAT) > VIN(DT)
150
mV
VIN(NDT)
Input Voltage removal threshold
AC not detected when V(AC)–V(BAT) <
VIN(NDT) ; USB not detected when
V(USB)–V(BAT) < VIN(NDT)
IDISCH
Internal discharge current at AC and USB input
Activated based on settings in CHGCONFIG3
Bit 0 and Bit 7
Copyright © 2009–2018, Texas Instruments Incorporated
75
95
Submit Documentation Feedback
Product Folder Links: TPS65070 TPS65072 TPS65073 TPS650731 TPS650732
mV
µA
15
�TPS65070, TPS65072
TPS65073, TPS650731, TPS650732
SLVS950I – JULY 2009 – REVISED MAY 2018
www.ti.com
Electrical Characteristics - Power Path (continued)
PARAMETER
TDGL(DT)
Power detected deglitch
VIN(OVP)
Input over voltage detection threshold
TEST CONDITIONS
MIN
AC or USB voltage increasing
TYP
MAX
22.5
5.8
6
UNIT
ms
6.3
V
POWER PATH TIMING
TSW(ACBAT)
Switching from AC to BAT
No USB, AC power removed
200
µs
SW(USBBAT)
T Switching from USB to BAT
No AC, USB power removed
200
µs
TSW(PSEL)
Switching from USB to AC
I2C
150
µs
TSW(ACUSB)
Switching from AC/ USB, USB / AC
AC power removed or USB power removed
200
µs
SYS power up delay
Measured from power applied to start of
power-up sequence
TSYSOK
11
ms
POWER PATH INTEGRATED MOSFETS CHARACTERISTICS
AC Input switch dropout voltage
(ILIMITAC set = 2.5 A I(SYS) = 1 A)
150
mV
USB input switch dropout voltage
ILIMITUSB = 1300 mA I(SYS) = 500 mA
ILIMITUSB = 1300 mA I(SYS) = 800 mA
100
160
mV
Battery switch dropout voltage
V(BAT) = 3.0 V, I(BAT) = 1 A
85
100
mV
INPUT CURRENT LIMIT
IUSB100
Input current limit; USB pin
USB input current [0,0]
90
100
mA
IUSB500
Input current limit; USB pin
USB input current [0,1] (default)
450
500
mA
IUSB800
Input current limit; USB pin
USB input current [1,0]
700
800
mA
IUSB1300
Input current limit; USB pin
USB input current [1,1]
1000
1300
mA
IAC100
Input current limit; AC pin
AC input current [0,0]
90
100
mA
IAC500
Input current limit; AC pin
AC input current [0,1]
450
500
mA
IA1300
Input current limit; AC pin
AC input current [1,0]
1000
1300
mA
IAC2500
Input current limit; AC pin
AC input current [1,1] (default)
1900
2500
mA
POWER PATH SUPPLEMENT DETECTION PROTECTION AND RECOVERY FUNCTIONS
VBSUP1
Enter battery supplement mode
VBSUP2
Exit battery supplement mode
VSYS(SC1)
Sys short-circuit detection threshold, power-on
VOUT = VBAT –
45 mV
AC input current set to 10: 1.3A
VOUT = VBAT –
35 mV
All power path switches set to OFF if V VSYS <
VSYS(SC1)
1.4
Short circuit detection threshold hysteresis
RFLT(AC)
Sys Short circuit recovery pullup resistors
Internal resistor connected from AC to SYS;
Specified by design
RFLT(USB)
Sys Short circuit recovery pullup resistors
Internal resistor connected from USB to SYS;
Specified by design
VSYS(SC2)
Output short-circuit detection threshold, supplement
mode VBAT – VSYS > VO(SC2) indicates short-circuit
tDGL(SC2)
Deglitch time, supplement mode short circuit
tREC(SC2)
Recovery time, supplement mode short circuit
VBAT(SC)
BAT pin short-circuit detection threshold
IBAT(SC)
Source current for BAT pin short-circuit detection
200
1.8
2
V
50
mV
500
Ω
500
Ω
250
300
mV
120
µs
60
ms
1.4
1.8
2
V
4
7.5
11
mA
DPPM LOOP (1)
VDPM
(1)
16
Threshold at which DPPM loop is enabled. This is
the approximate voltage at SYS pin, when the USB
or AC switch reaches current limit and the charging
current is reduced; Selectable by I2C
3.5
3.75
4.25
4.50
Set with Bits
;
V
If the DPPM threshold is lower than the battery voltage, supplement mode will be engaged first and the SYS voltage will chatter around
the battery voltage; during that condition no DPPM mode is available.
Submit Documentation Feedback
Copyright © 2009–2018, Texas Instruments Incorporated
Product Folder Links: TPS65070 TPS65072 TPS65073 TPS650731 TPS650732
�TPS65070, TPS65072
TPS65073, TPS650731, TPS650732
www.ti.com
SLVS950I – JULY 2009 – REVISED MAY 2018
8.15 Electrical Characteristics - Battery Charger
PARAMETER
TEST CONDITIONS
MIN
TYP
MAX
–1%
4.10
1%
–1%
4.15
1%
–1%
4.20
1%
–1%
4.25
1%
UNIT
CHARGER SECTION
Battery discharge current
2
Battery charger voltage
Depending on setting in CHGCONFIG2
And internal EEPROM
Default = 4.20 V (except TPS650721)
Default = 4.10 V (for TPS650721)
VLOWV
Precharge to fast-charge transition threshold
default = 2.9 V set with
Bit
tDGL1(LOWV)
Vo(BATREG)
A
V
2.9
2.5
V
Deglitch time on precharge to fast-charge
transition
25
ms
tDGL2(LOWV)
Deglitch time on fast-charge to precharge
transition
25
ms
ICHG
Battery fast charge current range
VBAT(REG) > VBAT > VLOWV, VIN = VAC or VUSB =
5V
ICHG
Battery fast charge current
VBAT > VLOWV, VIN = 5 V, IIN-MAX > ICHG, no load
on SYS pin, thermal loop not active, DPPM
loop not active
KISET
Fast charge current factor
for a charge current of 1500 mA
820
950
1080
AΩ
KISET
Fast charge current factor
for a charge current of 100 mA
890
1050
1200
AΩ
0.1×
ICHG
0.14×
ICHG
A
0.13×
ICHG
A
100
1500
KISET/RISET
IPRECHG
Precharge current
0.06×
ICHG
ITERM
Charge current value for termination detection
threshold (internally set)
0.08×
ICHG
0.1×
ICHG
tDGL(TERM)
Deglitch time, termination detected
VRCH
Recharge detection threshold
150
100
tDGL(RCH)
Deglitch time, recharge threshold detected
tDGL(NO-IN)
Delay time, input power loss to charger turn-off
IBAT(DET)
Sink current for battery detection
tDET
Battery detection timer
A
25
Voltage below nominal charger voltage
VBAT = 3.6V. Time measured from
VIN: 5V → 3.3V 1µs fall-time
ms
65
ms
20
ms
10
250
TCHG
Charge safety timer
TPRECHG
Precharge timer
Pre charge timer range, thermal and
DPM/DPPM loops not active scalable with
TPCHGADD
Precharge safety timer “add-on” time range
Maximum value for precharge safety timer,
thermal, DPM or DPPM loops always active
mV
125
3
Safety timer range, thermal and DPM not
active selectable by I2C with Bits
mA
ms
–15%
4
5
6
8
15%
25
50
30
60
35
70
0
mA
2×TCHG
h
min
h
BATTERY-PACK NTC MONITOR
RT1
Pullup resistor from thermistor to Internal LDO .
I2C selectable
10 k curve 2 NTC
–2%
7.35
2%
100 k curve 1 NTC
–2%
62.5
2%
VHOT
High temperature trip point (set to 45°C)
Battery charging
VHYS(HOT)
Hysteresis on high trip point (set to 3°C)
VCOLD
Low temperature trip point (set to 0°C)
VHYS(COLD)
kΩ
kΩ
860
mV
Battery charging
50
mV
Battery charging
1660
mV
Hysteresis on low trip point (set to 3°C)
Battery charging
50
mV
VnoNTC
No NTC detected
NTC error
2000
mV
THRMDLY
Deglitch time for thermistor detection after
thermistor power on
tDGL(TS)
Deglitch time, pack temperature fault detection
3
Battery charging
ms
50
ms
THERMAL REGULATION
TJ(REG)
Temperature regulation limit
TJ(OFF)
Charger thermal shutdown
TJ(OFF-HYS)
Charger thermal shutdown hysteresis
Copyright © 2009–2018, Texas Instruments Incorporated
If temperature is exceeded, charge current is
reduced
115
125
135
155
°C
20
°C
Submit Documentation Feedback
Product Folder Links: TPS65070 TPS65072 TPS65073 TPS650731 TPS650732
°C
17
�TPS65070, TPS65072
TPS65073, TPS650731, TPS650732
SLVS950I – JULY 2009 – REVISED MAY 2018
www.ti.com
8.16 Timing Requirements (1)
MIN MAX
Clock frequency
twH(HIGH)
Clock high time
600
ns
twL(LOW)
Clock low time
1300
ns
tR
SDAT and CLK rise time
300
ns
tF
SDAT and CLK fall time
300
ns
th(STA)
Hold time (repeated) START condition (after this period the first clock pulse is generated)
600
ns
tsu(STA)
Setup time for repeated START condition
600
ns
th(SDAT)
Data input hold time
0
ns
tsu(SDAT)
Data input setup time
100
ns
tsu(STO)
STOP condition setup time
600
ns
t(BUF)
Bus free time
1300
ns
(1)
400
UNIT
fMAX
kHz
Note: Rise and fall time tR and tF for the SDAT and CLK signals are defined for 10% to 90% of V(INT-LDO) which is 2.2 V
8.17 Dissipation Ratings (1)
(1)
PACKAGE
RθJA
TA = 25°C
POWER RATING
DERATING FACTOR
ABOVE TA = 25°C
TA = 70°C
POWER RATING
TA = 85°C
POWER RATING
RSL
37 K/W
2.6 W
26 mW/K
1.48 W
1W
The thermal resistance RθJP junction to thermal pad of the RSL package is 1.1 K/W. The value for RθJA was measured on a high K
board.
DATA
t( BUF)
th(STA)
t(LOW)
tr
tf
CLK
t h(STA)
t(HIGH)
th(DATA)
STO
STA
tsu(STA)
tsu(STO)
tsu(DATA)
STA
STO
Figure 1. Serial Interface Timing Diagram
18
Submit Documentation Feedback
Copyright © 2009–2018, Texas Instruments Incorporated
Product Folder Links: TPS65070 TPS65072 TPS65073 TPS650731 TPS650732
�TPS65070, TPS65072
TPS65073, TPS650731, TPS650732
www.ti.com
SLVS950I – JULY 2009 – REVISED MAY 2018
8.18 Typical Characteristics
Table 1. Table of Graphs
FIGURE
Efficiency DCDC1 vs Load current / PWM mode
VO = 3.3 V; VI = 3 V, 3.6 V, 4.2 V, 5 V
Figure 2
Efficiency DCDC1 vs Load current / PFM mode
VO = 3.3 V; VI = 3 V, 3.6 V, 4.2 V, 5 V
Figure 3
Efficiency DCDC2 vs Load current / PWM mode up to 1.5A
VO = 2.5 V; VI = 3 V, 3.6 V, 4.2 V, 5 V
Figure 4
Efficiency DCDC2 vs Load current / PFM mode up to 1.5A
VO = 2.5 V; VI = 3 V, 3.6 V, 4.2 V, 5 V
Figure 5
Efficiency DCDC2 vs Load current / PWM mode up to 1.5A
VO = 1.8 V; VI = 3 V, 3.6 V, 4.2 V, 5 V
Figure 6
Efficiency DCDC2 vs Load current / PFM mode up to 1.5A
VO = 1.8 V; VI = 3 V, 3.6 V, 4.2 V, 5 V
Figure 7
Efficiency DCDC3 vs Load current / PWM mode up to 1.5A
VO = 1.2 V; VI = 3 V, 3.6 V, 4.2 V, 5 V
Figure 8
Efficiency DCDC3 vs Load current / PFM mode up to 1.5A
VO = 1.2 V; VI = 3 V, 3.6 V, 4.2 V, 5 V
Figure 9
Efficiency DCDC3 vs Load current / PWM mode up to 1.5A
VO = 1 V; VI = 3 V, 3.6 V, 4.2 V, 5 V
Figure 10
Efficiency DCDC3 vs Load current / PFM mode up to 1.5A
VO = 1 V; VI = 3 V, 3.6 V, 4.2 V, 5 V
Figure 11
Load transient response converter 1
Scope plot; IO= 60 mA to 540 mA; VO = 3.3 V; VI = 3.6 V
Figure 12
Load transient response converter 2
Scope plot; IO= 150 mA to 1350 mA; VO = 1.8 V; VI = 3.6 V
Figure 13
Load transient response converter 3
Scope plot; IO= 150 mA to 1350 mA; VO = 1.2 V; VI = 3.6 V
Figure 14
Line transient response converter 1
Scope plot; VO= 3.3; VI = 3.6 V to 5 V to 3.6 V; IO= 600 mA
Figure 15
Line transient response converter 2
Scope plot; VO= 1.8; VI = 3.6 V to 5 V to 3.6 V; IO = 600 mA
Figure 16
Line transient response converter 3
Scope plot; VO = 1.2 V; VI=3.6 V to 5 V to 3.6 V; IO = 600 mA
Figure 17
Output voltage ripple and inductor current converter 2;
PWM Mode
Scope plot; VI = 3.6 V; VO=1.8 V; IO = 10 mA
Figure 18
Output voltage ripple and inductor current converter 2;
PFM Mode
Scope plot; VI = 3.6 V; VO=1.8 V; IO = 10 mA
Figure 19
Startup DCDC1, DCDC2 and DCDC3, LDO1, LDO2
Scope plot
Figure 20
Load transient response LDO1
Scope plot; VO= 1.2 V; VI=3.6 V
Figure 21
Line transient response LDO1
Scope plot
Figure 22
KSET vs RISET
Figure 23
wLED efficiency vs duty cycle
2 x 6LEDs (VLED=19.2 V); IO= 2x20 mA
Figure 24
wLED efficiency vs input voltage
2 x 6LEDs (VLED=19.2V); IO= 2x20 mA
Figure 25
100
3.4V
80
Efficiency - %
70
60
3.4V
90
3.6V
4.2V
50
40
60
50
40
30
30
20
20
10
10
0.001
4.2V
70
5V
0
0.0001
5V 3.6V
80
Efficiency - %
90
100
VO = 3.3 V,
PWM Mode
25°C
0.01
0.1
IO - Output Current - A
1
10
Figure 2. Efficiency DCDC1 vs Load Current/PWM Mode
Copyright © 2009–2018, Texas Instruments Incorporated
0
0.0001
VO = 3.3 V,
PWM Mode
25°C
0.001
0.01
0.1
IO - Output Current - A
1
10
Figure 3. Efficiency DCDC1 vs Load Current/PFM Mode
Submit Documentation Feedback
Product Folder Links: TPS65070 TPS65072 TPS65073 TPS650731 TPS650732
19
�TPS65070, TPS65072
TPS65073, TPS650731, TPS650732
SLVS950I – JULY 2009 – REVISED MAY 2018
100
90
www.ti.com
100
VO = 2.5 V,
PWM Mode
25°C
3V
80
3V
90
80 3.6V
3.6V
4.2V
70
70
5V
60
Efficiency - %
Efficiency - %
4.2V
5V
50
40
20
20
10
10
0.001
0.01
0.1
IO - Output Current - A
1
70
80
3V
1
10
Efficiency - %
50
5V
40
40
20
20
10
10
0.01
0.1
IO - Output Current - A
1
0
0.0001
10
Figure 6. Efficiency DCDC2 vs Load Current/PWM Mode
VO = 1.8 V,
PWM Mode
25°C
0.001
0.01
0.1
IO - Output Current - A
1
10
Figure 7. Efficiency DCDC2 vs Load Current/PFM Mode
100
100
VO = 1.2 V,
90 PWM Mode
25°C
80
VO = 1.2 V,
90 PWM Mode
25°C
80
3V
3V
70 3.6V
Efficiency - %
3.6V
60
4.2V
5V
40
40
20
20
10
10
1
10
Figure 8. Efficiency DCDC3 vs Load Current/PWM Mode
Submit Documentation Feedback
5V
50
30
0.01
0.1
IO - Output Current - A
4.2V
60
30
0.001
5V
50
30
70
4.2V
60
30
0.001
3V
3.6V
70
3.6V
4.2V
0
0.0001
0.01
0.1
IO - Output Current - A
Figure 5. Efficiency DCDC2 vs Load Current/PFM Mode
90
60
50
0.001
100
VO = 1.8 V,
90 PWM Mode
25°C
80
0
0.0001
VO = 2.5 V,
PWM Mode
25°C
0
0.0001
10
100
Efficiency - %
40
30
Figure 4. Efficiency DCDC2 vs Load Current/PWM Mode
Efficiency - %
50
30
0
0.0001
20
60
0
0.0001
0.001
0.01
0.1
IO - Output Current - A
1
10
Figure 9. Efficiency DCDC3 vs Load Current/PFM Mode
Copyright © 2009–2018, Texas Instruments Incorporated
Product Folder Links: TPS65070 TPS65072 TPS65073 TPS650731 TPS650732
�TPS65070, TPS65072
TPS65073, TPS650731, TPS650732
www.ti.com
SLVS950I – JULY 2009 – REVISED MAY 2018
100
90
100
VO = 1 V,
PWM Mode
25°C
90
80
3V
80
3V
3.6V
70
70
3.6V
60
50
4.2V
Efficiency - %
Efficiency - %
VO = 1 V,
PWM Mode
25°C
5V
40
60
40
30
20
20
10
10
0.001
0.01
0.1
IO - Output Current - A
1
10
Figure 10. Efficiency DCDC3 vs Load Current/PWM Mode
VOUT DCDC1 (Offset: 3.3 V)
5V
50
30
0
0.0001
4.2V
0
0.0001
0.001
0.01
0.1
IO - Output Current - A
1
10
Figure 11. Efficiency DCDC3 vs Load Current/PFM Mode
VOUT DCDC2 (Offset: 1.8 V)
ILoad DCDC2
ILoad DCDC1
VIN DCDC3 = 3.6V,
Load = 60 mA - 560 mA - 60 mA
Figure 12. Load Transient Response Converter 1
VOUT DCDC3 (Offset: 1.2 V)
VIN DCDC3 = 3.6 V,
Load mA - 1350 mA - 150 mA
Figure 13. Load Transient Response Converter 2
VOUT DCDC1 (Offset: 3.25 V)
ILoad DCDC3
VIN DCDC1 (Offset: 3 V)
VIN DCDC3 = 3.6 V,
Load = 150 mA - 1350 mA - 150 mA
Figure 14. Load Transient Response Converter 3
Copyright © 2009–2018, Texas Instruments Incorporated
VIN = 3.6 V - 5 V - 3.6V,
Load = 0.6 A
Figure 15. Line Transient Response Converter 1
Submit Documentation Feedback
Product Folder Links: TPS65070 TPS65072 TPS65073 TPS650731 TPS650732
21
�TPS65070, TPS65072
TPS65073, TPS650731, TPS650732
SLVS950I – JULY 2009 – REVISED MAY 2018
www.ti.com
VOUT DCDC2 (Offset: 1.75 V)
VOUT DCDC3 (Offset: 1.16 V)
VIN DCDC2 (Offset: 3 V)
VIN DCDC3 (Offset: 3 V)
VIN = 3.6 V - 5 V - 3.6V,
Load = 1.5 A
VIN = 3.6 V - 5 V - 3.6V,
Load = 1.5 A
Figure 16. Line Transient Response Converter 2
Figure 17. Line Transient Response Converter 3
VOUT DCDC2 (Offset: 1.8 V)
VOUT DCDC2 (Offset: 1.78 V)
IL DCDC2
IL DCDC2
VIN = 3.6 V,
Load = 200 mA PWM
Figure 18. Output Voltage Ripple and Inductor Current
Converter 2 – PWM Mode
VIN = 3.6 V,
Load = 15 mA PFM
Figure 19. Output Voltage Ripple and Inductor Current
Converter 2 – PFM Mode
VOUT DCDC1,
(LOAD: 100 mA)
VOUT LDO1 (Offset: 1.8 V)
VOUT DCDC2,
(LOAD: 100 mA)
Vbat = VIN LDO1 = 3.6 V,
LOAD = 20 mA - 180 mA
VOUT DCDC3 (LOAD: 100 mA)
LDO1 (LOAD: 50 mA)
VOUT LDO2 (LOAD: 50 mA)
VIN = 3.6 V
ILOAD LDO1
Figure 21. Load Transient Response LDO1
Figure 20. Startup DCDC1, DCDC2, AND DCDC3, LDO1,
LDO2
22
Submit Documentation Feedback
Copyright © 2009–2018, Texas Instruments Incorporated
Product Folder Links: TPS65070 TPS65072 TPS65073 TPS650731 TPS650732
�TPS65070, TPS65072
TPS65073, TPS650731, TPS650732
www.ti.com
SLVS950I – JULY 2009 – REVISED MAY 2018
1200
1150
VOUT LDO1 (Offset: 1.8 V)
1100
Kset
Vbat = 5 V,
VIN LDO1: 3.6 V - 5 V - 3.6 V,
LOAD = 40 mA
VIN LDO1 (Offset: 3 V)
1050
1000
950
900
0.1
1
10
100
RIset - kW
Figure 22. Line Transient Response LDO1
Figure 23. KSET vs RISET
100
100
2x6 LEDs
20 mA each
90
90
2x6 LEDs
20 mA each
100% duty cycle
5V
3V
70
60
50
40
50
40
20
20
10
10
10
20
30
40 50 60 70
Duty Cycle - %
80
90 100
Figure 24. wLED Efficiency vs Duty Cycle
25% duty cycle
60
30
0
50% duty cycle
70
30
0
75% duty cycle
80
3.6V
wLED - Efficiency - %
wLED - Efficiency - %
80
0
2.8
3.2
3.6
4
4.4
4.8
5.2
VI - Input Voltage - V
5.6
6
Figure 25. wLED Efficiency vs Vin
9 Parameter Measurement Information
The data sheet graphs were taken on the TPS6507x evaluation module (EVM). Refer to the TPS6507xEVM
user´s guide for the setup information.
Copyright © 2009–2018, Texas Instruments Incorporated
Submit Documentation Feedback
Product Folder Links: TPS65070 TPS65072 TPS65073 TPS650731 TPS650732
23
�TPS65070, TPS65072
TPS65073, TPS650731, TPS650732
SLVS950I – JULY 2009 – REVISED MAY 2018
www.ti.com
10 Detailed Description
10.1 Overview
This section provides a description of each of the individual block that are featured in the TPS6507x device. The
device is great for a variety of applications for it has a configurable battery charger, 3 DC-DC step-down
converters, 2 LDOs, and 2 string wLED boost and sink control. In addition to the digital logic power goods and
interrupts of the device, the device has a 4-channel ADC or touch screen interface. The device has I²C and
hardware enable pin controls for a flexible PMU interface.
10.2 Functional Block Diagram
AC
SYS
AC
switch
22 mF
SYS
USB
USB
switch
AVDD6
Iset
4.7 mF
Batt
BAT
switch
Charger/power path mgmt
Batt
10 mF
TS
TSX1 TSX2
INT_LDO
AD_IN1
INTERNAL BIASING
Thermistor
biasing
Touch
screen
biasing
AD_IN2
BYPASS
AD_IN3
TSY1 TSY2
AD_IN4
AD_IN1
AD_IN2
AD_IN3
AD_IN4
V_TS
ANALOG MUX
I_Ch
V_AC
V_USB
AD_IN5
V_SYS
V_BAT_SNS
10 BIT SAR
ADC
SCLK
State
machine
I²C
SDAT
INT
Power_ON
PB_IN
PB_OUT
ON/OFF circuitry / power good logic
undervoltage lockout
PGOOD
2.2 mH
L1
VIN_DCDC1/2
DCDC1
STEP-DOWN CONVERTER
600mA
EN_DCDC1
VI/O
VDCDC1
10 mF
PGND1
L2
DCDC2
STEP-DOWN CONVERTER
600mA / 1500mA
DEFDCDC2
EN_DCDC2
2.2 mH
Vmem
VDCDC2
10 mF
PGND2/PAD
2.2 mH
L3
VIN_DCDC3
DCDC3
STEP-DOWN CONVERTER
DEFDCDC3
EN_DCDC3
Sequencing
600mA / 1500mA
10 mF
PGND3/PAD
VINLDO1/2
EN_LDO1(I2C)
Vcore
VDCDC3
VLDO1
LDO1
200mA LDO
VLDO1
2.2 mF
VLDO2
EN_LDO2(I2C)
VLDO2
LDO2
200mA LDO
2.2 mF
L4
SYS
FB_wLED
iset1
1 mF
wLED boost
I2C controlled
up to 25mA per string
iset2
Isink1
Isink2
THRESHOLD
PGND4/PAD
(EN_wLED)
Reset
-
(EN_EXTLDO )
delay
+
Vref =1V
AGND
PGND(PAD)
Copyright © 2016, Texas Instruments Incorporated
24
Submit Documentation Feedback
Copyright © 2009–2018, Texas Instruments Incorporated
Product Folder Links: TPS65070 TPS65072 TPS65073 TPS650731 TPS650732
�TPS65070, TPS65072
TPS65073, TPS650731, TPS650732
www.ti.com
SLVS950I – JULY 2009 – REVISED MAY 2018
10.3 Feature Description
10.3.1 Battery Charger and Power Path
The TPS6507x integrates a Li-ion linear charger and system power path management targeted at space-limited
portable applications. The TPS6507x power the system while simultaneously and independently charging the
battery. This feature reduces the number of charge and discharge cycles on the battery, allows for proper charge
termination and enables the system to run with a defective or absent battery pack. It also allows instant system
turn-on even with a totally discharged battery. The input power source for charging the battery and running the
system can be an AC adapter or an USB port. The power-path management feature automatically reduces the
charging current if the system load increases. The power-path architecture also permits the battery to
supplement the system current requirements when the adapter cannot deliver the peak system currents.
250 mV
AVDD6V
Vsys (sc1)
V BAT
SYS-SC1
SYS - SC2
t DGL(SC2)
500 W
AC
VSYS
I(AC)
VAC
ADC2
SYS
ADC0
AC SWITCH
V ISET
V IPRECHG
I(AC) / KILIMIT
ADC5
ISET
500
VI CHG
I(USB)
VUSB
ADC1
AC Input
Current
Limit Error
Opamp
USB
I(USB)
IAC
T J(REG)
V DPPM
V OUT
I²C
IAC100
IAC500
DAC
I²C
Sys
V BAT(REG)
DUSBSWON
IAC1300
IAC2500
ISAMPLE
Short
Detect
USB SWITCH
DACSWON
IINLIM
I²C
IPRECHG
ITERM
TJ
40 mV
VSYS
Supplement
IUSB100
IUSB500
IUSB800
IUSB1300
USB Input
Current
Limit Error
Opamp
IBAT(SC)
I²C
BAT
V LOWV
V
VRCH
V BAT(SC)
ADC3
BAT_sense
IUSB
I BAT (DET)
tDGL(TERM)
V BAT + V IN- DT
t DGL2( LOWV)
t DGL1( LOWV)
/VUSB
t DGL(RCH)
BAT - SC
VAC
DAC
I²C
t DGL(NO-IN)
t DGL(PGOOD)
V UVLO
I²C
V OVP
t BLK(OVP)
VTHRON
DTHCHG
Charge control
Half timers
I²C
I²C
V HOT(45)
Dynamically
controlled
Oscillator
Fast-charge timer
V COLD (0)
Timer fault
Pre-charge timer
V ISET
I²C
TS
t DGL(TS)
V IPRECHG
VI CHG
ADC4
Reset timers
I²C
CC1 3
Timers disabled
RST
CC1 0
V DIS(TS)
EN
I²C EN
Copyright © 2016, Texas Instruments Incorporated
Figure 26. Charger Block Diagram
Copyright © 2009–2018, Texas Instruments Incorporated
Submit Documentation Feedback
Product Folder Links: TPS65070 TPS65072 TPS65073 TPS650731 TPS650732
25
�TPS65070, TPS65072
TPS65073, TPS650731, TPS650732
SLVS950I – JULY 2009 – REVISED MAY 2018
www.ti.com
Feature Description (continued)
10.3.2 Power Down
The charger remains in a power down mode when the input voltage at the AC or USB pin is below the undervoltage lockout threshold VUVLO. During the power down mode the host commands at the control pins are not
interpreted.
10.3.3 Power-On Reset
The charger resets when the input voltage at the AC or USB pin enters the valid range between VUVLO and
VOVLO. All internal timers and other circuit blocks are reset. The device then waits for a time period TDGL(PGOOD),
after which CHARGER ACTIVE Bit indicates the input power status, and the Iset pin is interpreted.
10.3.4 Power-Path Management
There are two inputs to the power path called AC and USB. Both inputs support the same voltage rating but are
typically set to a different current limit with AC beeing at the higher limit and USB at the lower. If voltage is
applied at both inputs and both are enabled in register PPATH1 (default setting), AC will be preferred over USB.
In this case, the deivce is only powered from AC and there is no current from USB. If voltage at AC is removed,
the USB input will become and TPS6507x is powered from USB. The current at the input pin AC or USB of the
power path manager is shared between charging the battery and powering the system load on the SYS pin.
Priority is given to the system load. The input current is monitored continuously. If the sum of the charging and
system load currents exceeds the preset maximum input current (programmed internally by I2C), the charging
current is reduced automatically. See the electrical characteristics or the register desciption for the default current
limit on AC and USB for the different family members.
Figure 27 illustrates what happens in an example case where the battery fast-charge current is set to 500 mA,
the input current limit is set at 900 mA and the system load varies from 0 to 750 mA.
IOUT
400 mA
IBAT
750 mA
500 mA
150 mA
IIN
IIN -MAX
900 mA
500 mA
Figure 27. Power Path Functionality
10.3.4.1 SYS Output
The SYS pin is the output of the power path. When TPS6507x is turned off and there is no voltage at AC or
USB, the SYS output is disconnected internally from the battery. When TPS6507x is turned on by pulling PB_IN
=LOW, the voltage at SYS will ramp with a soft-start. During soft start, the voltage at SYS is ramped with a 30mA current source until the voltage reached 1.8 V. During the soft start, the SYS pin must not be loaded by an
external load.
10.3.5 Battery Charging
When Bit CHARGER ENABLE in register CHGCONFIG1 is set to 1, battery charging can begin. First, the device
checks for a short-circuit on the BAT pin: IBAT(SC) is turned on till the voltage on the BAT pin rises above VBAT(SC).
If conditions are safe, it proceeds to charge the battery.
The battery is charged in three phases: conditioning precharge, constant current fast charge (current regulation)
and a constant voltage tapering-off (voltage regulation). In all charge phases, an internal control loop monitors
the IC junction temperature and reduces the charge current if the internal temperature threshold is exceeded.
Figure 28 shows what happens in each of the three phases.
26
Submit Documentation Feedback
Copyright © 2009–2018, Texas Instruments Incorporated
Product Folder Links: TPS65070 TPS65072 TPS65073 TPS650731 TPS650732
�TPS65070, TPS65072
TPS65073, TPS650731, TPS650732
www.ti.com
SLVS950I – JULY 2009 – REVISED MAY 2018
Feature Description (continued)
CC FAST CHARGE
PRECHARGE
CV TAPER
DONE
VBAT(REG)
IO(CHG)
Battery Current
Battery
Voltage
VLOWV
TERM CURRENT = 1
I(PRECHG)
I(TERM)
Figure 28. Battery Charge
In the precharge phase, the battery is charged at a current of IPRECHG. The battery voltage starts rising. Once the
battery voltage crosses the VLOWV threshold, the battery is charged at a current of ICHG. The battery voltage
continues to rise. When the battery voltage reaches VBAT(REG), the battery is held at a constant value of VBAT(REG).
The battery current now decreases as the battery approaches full charge. When the battery current reaches
ITERM, the TERM CURRENT flag in register CHGCONFIG0 indicates charging done by going high.
Note that termination detection is disabled whenever the charge rate is reduced from the set point because of the
actions of the thermal loop, the DPM loop or the VIN-LOW loop.
The value of the fast-charge current is set by the resistor connected from the ISET pin to GND, and is given by
the equation
ICHG = KISET / RISET
RISET = KISET / ICHG
(1)
(2)
Note that if ICHG is programmed as greater than the input current limit, the battery will not charge at the rate of
ICHG, but at the slower rate of IIN-MAX (minus the load current on the OUT pin, if any). In this case, the charger
timers will be slowed down by 2x whenever the thermal loop or DPPM is active.
10.3.5.1 I-PRECHARGE
The value for the precharge current is fixed to a factor of 0.1 of the fast charge current (full scale current)
programmed by the external resistor Rset.
10.3.5.2 ITERM
The value for the termination current threshold can be set in register CHGCONFIG3 using Bits TERMINATION
CURRENT FACTOR 0 and TERMINATION CURRENT FACTOR 1. The termination current is pre-set to a factor
of 0.1 of the fast charge current programmed by the external resistor Rset.
10.3.5.3 Battery Detection and Recharge
Whenever the battery voltage falls below VRCH (Vset-100 mV), a check is performed to see whether the battery
has been removed: current IBAT(DET) is pulled from the battery for a duration tDET. If the voltage on the BAT pin
remains above VLOWV, it indicates that the battery is still connected. If the charger is enabled by Bit CHARGER
ENABLE in register CHGCONFIG1 set to 1, the charger is turned on again to top up the battery.
Copyright © 2009–2018, Texas Instruments Incorporated
Submit Documentation Feedback
Product Folder Links: TPS65070 TPS65072 TPS65073 TPS650731 TPS650732
27
�TPS65070, TPS65072
TPS65073, TPS650731, TPS650732
SLVS950I – JULY 2009 – REVISED MAY 2018
www.ti.com
Feature Description (continued)
If the BAT pin voltage falls below VLOWV in the battery detection test, it indicates that the battery has been
removed. The device then checks for battery insertion: it turns on FET Q2 and sources IPRECHG out of the BAT
pin for duration tDET. If the voltage does not rise above VRCH, it indicates that a battery has been inserted, and a
new charge cycle can begin. If, however, the voltage does rise above VRCH, it is possible that a fully charged
battery has been inserted. To check for this, IBAT(DET) is pulled from the battery for tDET: if the voltage falls below
VLOWV, a battery is not present. The device keeps looking for the presence of a battery.
10.3.5.4 Charge Termination On/Off
Charge termination can be disabled by setting the Bit CHARGE TERMINATION ON/OFF in register
CHGCONFIG1 to logic high. When termination is disabled, the device goes through the precharge, fast-charge
and CV phases, then remains in the CV phase – the charger behaves like an LDO with an output voltage equal
to VBAT(REG), able to source current up to ICHG or IIN-MAX, whichever is lesser. Battery detection is not performed.
10.3.5.5 Timers
The charger in TPS6507x has internal safety timers for the precharge and fast-charge phases to prevent
potential damage to either the battery or the system. The default values for the timers can be changed in
registers CHGCONFIG1 and CHGCONFIG3. The timers can be disabled by clearing Bit SAFETY TIMERS
ENABLE in register CHGCONFIG1. (The timers are disabled when termination is disabled: Bit CHARGE
TERMINATION ON/OFF in register CHGCONFIG1 =1).
10.3.5.6 Dynamic Timer Function
The following events can reduce the charging current and increase the timer durations in the fast charge phase:
• The system load current increases, and the DPPM loop reduces the available charging current
• The input current is reduced because the input voltage has fallen to VIN-LOW
• The device has entered thermal regulation because the IC junction temperature has exceeded TJ(REG)
In each of these events, the internal timers are slowed down proportionately to the reduction in charging current.
Note also that whenever any of these events occurs, termination detection is disabled.
A modified charge cycle with the thermal loop active is shown in Figure 29.
28
Submit Documentation Feedback
Copyright © 2009–2018, Texas Instruments Incorporated
Product Folder Links: TPS65070 TPS65072 TPS65073 TPS650731 TPS650732
�TPS65070, TPS65072
TPS65073, TPS650731, TPS650732
www.ti.com
SLVS950I – JULY 2009 – REVISED MAY 2018
Feature Description (continued)
PRECHARGE
THERMAL
REGULATION
CC FAST
CHARGE
CV TAPER
DONE
VO(REG)
IO(CHG)
Battery
Voltage
Battery
Current
V(LOWV)
TERM CURRENT = 1
I(PRECHG)
I(TERM)
IC junction
temperature, TJ
TJ(REG)
Figure 29. Thermal Loop
10.3.5.7 Timer Fault
The following events generate a fault status:
• If the battery voltage does not exceed VLOWV in time tPRECHG during precharging
• If the battery current does not reach ITERM in time tMAXCH in fast charge (measured from beginning of fast
charge).
The fault status is indicated by Bits CHG TIMEOUT or PRECHG TIMEOUT in register CHGCONFIG0 set to 1.
10.3.6 Battery Pack Temperature Monitoring
The device has a TS pin that connects to the NTC resistor in the battery pack. During charging, if the resistance
of the NTC indicates that the battery is operating outside the limits of safe operation, charging is turned off. All
timers maintain their values. When the battery pack temperature returns to a safe value, charging is resumed,
and the timers are also turned back on.
Battery pack temperature sensing is disabled when termination is disabled and the voltage on the TS pin is
higher than VDIS(TS) (caused by absence of pack and thus absence of NTC).
The default for the NTC is defined in register CHGCONFIG1 with Bit SENSOR TYPE as a 10k curve 2 NTC. The
sensor can be changed to a 100-kΩ curve 1 NTC by setting the Bit to 0.
There needs to be a resistor in parallel to the NTC for linearization of the temperature curve. The value for the
resistor is given in Table 15.
Copyright © 2009–2018, Texas Instruments Incorporated
Submit Documentation Feedback
Product Folder Links: TPS65070 TPS65072 TPS65073 TPS650731 TPS650732
29
�TPS65070, TPS65072
TPS65073, TPS650731, TPS650732
SLVS950I – JULY 2009 – REVISED MAY 2018
www.ti.com
Feature Description (continued)
10.3.7 Battery Charger State Diagram
Wait 1 ms after
EN_REF_CHG=1
At any state, exit and force
EN_CHG=0 && EN_SHRT=0 &&
DBATSINK=0.
TEMP_ERROR=0. Also register should be enabled.
Check Bat lowV
EN_CHG=0
EN_ISHRT = 1
BAT_SHRT_D = 1
When
TEMP_ERROR=1 || BAT_OVERI_D=1
|| (BAT_SHRT_D = 1 && EN_CHG=1)
Or when AC and USB are not
detected. Out of normal mode.
YES
Reset timers when Supplement mode
is detected. SUPLM_D=1. Per
customer request.
NO
Check Iset shrt
EN_CHG=0
Slower timers 2x when DPPM_ON=1
or TREG_ON = 1
EN_ISHRT=0
EN_ISETDET_D = 1
And wait 1ms
YES
ISET_SHRT_D = 1
TEMP_HOT = 0 && TEMP_COLD = 0 && TSHUT = 0
NO
suspend = 0
cont precharge timer
EN_ISETDET_D=0
PRCHF = 1
Reset precharge timer
HALT_PRECHARGE
EN_CHG=0
suspend = 1
Halt precharge timer
PRECHARGE
EN_CHG=1
DPRCHF=1
TEMP_HOT = 1 || TEMP_COLD = 1 || TSHUT=1
FAULT
NO
Timeout = 1
TEMP_HOT = 0 && TEMP_COLD = 0
&& TSHUT = 0
NO
PRCH_D = 1
YES
EN_CHG=0
suspend = 1
Halt safety timer
TEMP_HOT = 1 || TEMP_COLD = 1 || TSHUT=1
CC_CV_CHARGE
EN_CHG=1
DPRCHF=0
FAULT
Timeout = 1
PRCH_D = 1
YES
HALT_CC_CV_CHARGE
suspend = 0
cont safety timer
Clear precharge timer
Reset safetytimer
PRCHF = 0
NO
TAPER_D = 1
YES
Clear safety timer
EN_CHG=0
RECHARGE
EN_CHG=0
NO
RCH_D = 1
YES
EN_DCH=1 && DBATSINK = 1 for Tdet
Then release. EN_DCH returns to previous state.
BAT_SRHT_D = 1
YES
EN_ISHRT=1 for Tdet
Figure 30. Charger State Machine
30
Submit Documentation Feedback
Copyright © 2009–2018, Texas Instruments Incorporated
Product Folder Links: TPS65070 TPS65072 TPS65073 TPS650731 TPS650732
�TPS65070, TPS65072
TPS65073, TPS650731, TPS650732
www.ti.com
SLVS950I – JULY 2009 – REVISED MAY 2018
Feature Description (continued)
10.3.8 DC-DC Converters and LDOs
10.3.8.1 Operation
The TPS6507x step down converters operate with typically 2.25-MHz fixed-frequency pulse width modulation
(PWM) at moderate to heavy load currents. At light load currents the converter automatically enters power save
mode and operates in pulse frequency modulation (PFM).
During PWM operation the converter use a unique fast response voltage mode controller scheme with input
voltage feed-forward to achieve good line and load regulation allowing the use of small ceramic input and output
capacitors. At the beginning of each clock cycle initiated by the clock signal, the high side MOSFET switch is
turned on. The current flows now from the input capacitor through the high side MOSFET switch through the
inductor to the output capacitor and load. During this phase, the current ramps up until the PWM comparator trips
and the control logic will turn off the switch. The current limit comparator will also turn off the switch in case the
current limit of the high side MOSFET switch is exceeded. After a dead time preventing shoot through current,
the low side MOSFET rectifier is turned on and the inductor current will ramp down. The current flows now from
the inductor to the output capacitor and to the load. It returns back to the inductor through the low side MOSFET
rectifier.
The next cycle will be initiated by the clock signal again turning off the low side MOSFET rectifier and turning on
the on the high side MOSFET switch.
The DC-DC converters operate synchronized to each other, with converter 1 as the master. A phase shift of 180°
between converter 1 and converter 2 decreases the input RMS current. Therefore smaller input capacitors can
be used. Converter 3 operates in phase with converter 1.
10.3.8.2 DCDC1 Converter
The output voltage for converter 1 is set to a fixed voltage internally in register DEFDCDC1. The voltage can be
changed using the I2C interface. The default settings are given in Table 2.
Optionally the voltage can be set by an external resistor divider if configured in register DEFDCDC1.
10.3.8.3 DCDC2 Converter
The VDCDC2 pin must be directly connected to the DCDC2 converter's output voltage. The DCDC2 converter's
output voltage can be selected through the DEFDCDC2 pin or optionally by changing the values in registers
DEFDCDC2_LOW and DEFDCDC2_HIGH. If pin DEFDCDC2 is pulled to GND, register DEFDCDC2_LOW
defines the output voltage. If the pin DEFDCDC2 is driven HIGH, register DEFDCDC2_HIGH defines the output
voltage. Therefore, the voltage can either be changed between two values by toggling pin DEFDCDC2 or by
changing the register values. Default voltages for DCDC1, DCDC2 and DCDC3 are:
Table 2. Default Voltages
DCDC1
DCDC2
DCDC3
DEFDCDC2=LOW
DEFDCDC2=HIGH
DEFDCDC3=LOW
DEFDCDC3=HIGH
1.2 V
TPS65070
3.3 V
1.8 V
3.3 V
1.0 V
TPS65072
3.3 V
1.8 V
2.5 V
1.2 V
1.4 V
TPS65073
1.8 V
1.2 V
1.8 V
1.2 V
1.35 V
TPS650731
1.8 V
1.2 V
1.8 V
1.2 V
1.35 V
TPS650732
1.8 V
1.8 V
3.3 V
1.2 V
1.35 V
10.3.8.4 DCDC3 Converter
The VDCDC3 pin must be directly connected to the DCDC3 converter's output voltage. The DCDC3 converter's
output voltage can be selected through the DEFDCDC3 pin or optionally by changing the values in registers
DEFDCDC3_LOW and DEFDCDC3_HIGH. If pin DEFDCDC3 is pulled to GND, register DEFDCDC3_LOW
defines the output voltage. If the pin DEFDCDC3 is driven HIGH, register DEFDCDC3_HIGH defines the output
voltage. Therefore, the voltage can either be changed between two values by toggling pin DEFDCDC3 or by
changing the register values.
Copyright © 2009–2018, Texas Instruments Incorporated
Submit Documentation Feedback
Product Folder Links: TPS65070 TPS65072 TPS65073 TPS650731 TPS650732
31
�TPS65070, TPS65072
TPS65073, TPS650731, TPS650732
SLVS950I – JULY 2009 – REVISED MAY 2018
www.ti.com
LDO2 can optionally be forced to follow the voltage defined for DCDC3 by setting Bit LDO2 TRACKING in
register DEFLDO2.
10.3.9 Power Save Mode
The power save mode is enabled by default. If the load current decreases, the converter will enter power save
mode operation automatically. During power save mode the converter skips switching and operates with reduced
frequency in PFM mode and with a minimum quiescent current to maintain high efficiency. The converter will
position the output voltage typically +1% above the nominal output voltage. This voltage positioning feature
minimizes voltage drops caused by a sudden load step.
The transition from PWM mode to PFM mode occurs once the inductor current in the low side MOSFET switch
becomes 0.
During the power save mode the output voltage is monitored with a PFM comparator. As the output voltage falls
below the PFM comparator threshold of VOUTnominal +1%, the device starts a PFM pulse. For this the high side
MOSFET switch will turn on and the inductor current ramps up. Then it will be turned off and the low side
MOSFET switch will be turned on until the inductor current becomes 0.
The converter effectively delivers a current to the output capacitor and the load. If the load is below the delivered
current the output voltage will rise. If the output voltage is equal or higher than the PFM comparator threshold,
the device stops switching and enters a sleep mode with typical 19-µA current consumption.
In case the output voltage is still below the PFM comparator threshold, further PFM current pulses will be
generated until the PFM comparator threshold is reached. The converter starts switching again once the output
voltage drops below the PFM comparator threshold.
With a single threshold comparator, the output voltage ripple during PFM mode operation can be kept very small.
The ripple voltage depends on the PFM comparator delay, the size of the output capacitor and the inductor
value. Increasing output capacitor values and/or inductor values will minimize the output ripple.
The PFM mode is left and PWM mode entered in case the output current can not longer be supported in PFM
mode or if the output voltage falls below a second threshold, called PFM comparator low threshold. This PFM
comparator low threshold is set to –1% below nominal Vout, and enables a fast transition from power save mode
to PWM Mode during a load step. In power save mode the quiescent current is reduced typically to 19 µA.
The power save mode can be disabled through the I2C interface for each of the step-down converters
independent from each other. If power save mode is disabled, the converter will then operate in fixed PWM
mode.
10.3.9.1 Dynamic Voltage Positioning
This feature reduces the voltage under/overshoots at load steps from light to heavy load and vice versa. It is
active in power save mode. It provides more headroom for both the voltage drop at a load step, and the voltage
increase at a load throw-off. This improves load transient behavior. At light loads, in which the converter operates
in PFM mode, the output voltage is regulated typically 1% higher than the nominal value. In case of a load
transient from light load to heavy load, the output voltage drops until it reaches the PFM comparator low
threshold set to –1% below the nominal value and enters PWM mode. During a load throw off from heavy load to
light load, the voltage overshoot is also minimized due to active regulation turning on the low side MOSFET
switch.
Figure 31. Power Save Mode
32
Submit Documentation Feedback
Copyright © 2009–2018, Texas Instruments Incorporated
Product Folder Links: TPS65070 TPS65072 TPS65073 TPS650731 TPS650732
�TPS65070, TPS65072
TPS65073, TPS650731, TPS650732
www.ti.com
SLVS950I – JULY 2009 – REVISED MAY 2018
10.3.9.2 100% Duty Cycle Low Dropout Operation
The device starts to enter 100% duty cycle mode once the input voltage comes close the nominal output voltage.
In order to maintain the output voltage, the high side MOSFET switch is turned on 100% for one or more cycles.
With further decreasing VIN the high side MOSFET switch is turned on completely. In this case the converter
offers a low input-to-output voltage difference. This is particularly useful in battery-powered applications to
achieve longest operation time by taking full advantage of the whole battery voltage range.
The minimum input voltage to maintain regulation depends on the load current and output voltage, and can be
calculated as:
Vinmin = Voutmax + Ioutmax × (RDSonmax + RL)
where
•
•
•
•
Ioutmax = maximum output current plus inductor ripple current
RDSonmax = maximum P-channel switch RDSon
RL = DC resistance of the inductor
Voutmax = nominal output voltage plus maximum output voltage tolerance
(3)
10.3.9.3 Undervoltage Lockout
The undervoltage lockout circuit prevents the device from malfunctioning at low input voltages and from
excessive discharge of the battery and disables the DC-DC converters and LDOs. The undervoltage lockout
threshold is configurable in the range of typically 2.8 V to 3.25 V with falling voltage at the SYS pin. The default
undervoltage lockout voltage as well as the hysteresis are defined in register CON_CTRL2. The default
undervoltage lockout voltage is 3 V with 500-mV hysteresis.
10.3.10 Short-Circuit Protection
The high side and low side MOSFET switches are short-circuit protected with maximum output current = ILIMF.
Once the high side MOSFET switch reaches its current limit, it is turned off and the low side MOSFET switch is
turned. The high side MOSFET switch can only turn on again, once the current in the low side MOSFET switch
decreases below its current limit.
10.3.10.1 Soft Start
The 3 step-down converters in TPS6507x have an internal soft start circuit that controls the ramp up of the output
voltage. The output voltage ramps up from 5% to 95% of its nominal value within typical 250 µs. This limits the
inrush current in the converter during start up and prevents possible input voltage drops when a battery or high
impedance power source is used. The Soft start circuit is enabled after the start up time tStart has expired.
During soft start, the output voltage ramp up is controlled as shown in Figure 32.
EN
95%
5%
VOUT
tStart
tRAMP
Figure 32. Soft Start
Copyright © 2009–2018, Texas Instruments Incorporated
Submit Documentation Feedback
Product Folder Links: TPS65070 TPS65072 TPS65073 TPS650731 TPS650732
33
�TPS65070, TPS65072
TPS65073, TPS650731, TPS650732
SLVS950I – JULY 2009 – REVISED MAY 2018
www.ti.com
10.3.11 Enable
To start up each converter independently, the device has a separate enable pin for each of the DC-DC
converters. In order to enable any converter with its enable pins, the TPS6507x devices need to be in ON-state
by pulling PB_IN=LOW or POWER_ON=HIGH. The sequencing option programmed needs to be DCDC_SQ[2..0]
= 101.
If EN_DCDC1, EN_DCDC2, EN_DCDC3 are set to high, the corresponding converter starts up with soft start as
previously described.
Pulling the enable pin low forces the device into shutdown, with a shutdown quiescent current as defined in the
electrical characteristics. In this mode, the high side and low side MOSFETs are turned-off, and the entire
internal control circuitry is switched-off. If disabled, the outputs of the DC-DC converters are pulled low by
internal 250-Ω resistors, actively discharging the output capacitor. For proper operation the enable pins must be
terminated and must not be left floating.
Optionally, there is internal sequencing for the DC-DC converters and both LDOs available. Bits DCDC_SQ[0..2]
in register CON_CTRL1 define the start-up and shut-down sequence for the DC-DC converters. Depending on
the sequencing option, the signal at EN_DCDC1, EN_DCDC2 and EN_DCDC3 are ignored. For automatic
internal sequencing, the enable signals which are not used should be connected to GND.
LDO1 and LDO2 will start up automatically as defined in register LDO_CTRL1. See details about the sequencing
options in CON_CTRL1. Register Address: 0Dh and LDO_CTRL1. Register Address: 16h.
10.3.11.1
RESET (TPS65070, TPS65073, TPS650731, TPS650732 Only)
The TPS6507x contain circuitry that can generate a reset pulse for a processor with a certain delay time. The
input voltage at a comparator is sensed at an input called THRESHOLD. When the voltage exceeds the
threshold, the output goes high with the delay time defined in register PGOOD. The reset circuitry is not active in
OFF-state. The pullup resistor for this open-drain output must not be connected directly to the battery as this may
cause a leakage path when the power path (SYS voltage) is turned off. The reset delay time equals the setting
for the PGOOD signal. For devices that are configured with EN_wLED input, the reset output should be left open.
Vbat
THRESHOLD
/RESET
+
delay
-
Vref = 1 V
Vbat
THRESHOLD
comparator
output (internal)
RESET
T RESET
Copyright © 2016, Texas Instruments Incorporated
Figure 33. Reset Timing
10.3.11.2 PGOOD (Reset Signal For Applications Processor)
This open-drain output generates a power-good signal depending on the status of the power good Bits for the
DCDC converters and the LDOs. Register PGOODMASK defines which of the power good Bits of the converters
and LDOs are used to drive the external PGOOD signal low when the voltage is below the target value. If for
example, Bit MASK DCDC2 is set to 1, the PGOOD pin will be driven low as long as the output of DCDC2 is
below the target voltage. If the output voltage of DCDC2 rises to its nominal value, the PGOOD pin will be
released after the delay time defined. See Default Settings.
34
Submit Documentation Feedback
Copyright © 2009–2018, Texas Instruments Incorporated
Product Folder Links: TPS65070 TPS65072 TPS65073 TPS650731 TPS650732
�TPS65070, TPS65072
TPS65073, TPS650731, TPS650732
www.ti.com
10.3.11.3
SLVS950I – JULY 2009 – REVISED MAY 2018
PB_IN (Push-Button IN)
This pin is the ON/OFF button for the PMU to leave OFF-state and enter ON-state by pulling this pin to GND.
Entering ON-state will first ramp the output voltage of the power path (SYS), load the default register settings and
start up the DCDC converters and LDOs with the sequencing defined. In ON-state, the I2C interface is active and
the wLED converter can be enabled. The system turns on if PB_IN is pulled LOW for >50 ms (debounce time)
AND the output voltage of the power path manager is above the undervoltage lockout voltage (AVDD6 > 3 V).
This is for Vbat>3 V OR VAC>3 V OR VUSB>3 V. The default voltage for the undervoltage lockout voltage can
be changed with Bits , in register CON_CTRL2. The value will be valid until the device was
turned off completely by entering Off state. The system turns off if PB_IN is released OR the system voltage falls
below the undervoltage lockout voltage of 3 V. This is the case when either the battery voltage drops below 3 V
or the input voltage at the pins AC or USB is below 3 V. In order to keep the TPS6507x enabled after PB_IN is
released HIGH, there is an input pin called POWER_ON which needs to be pulled HIGH before the PB_IN button
is released. POWER_ON=HIGH will typically be asserted by the application processor to keep the PMU in ONstate after the power button at PB_IN is released.
In addition to this, there is a 15-s timer which will drive PGOOD=LOW for 0.5 ms when 15 s are expired. The 15s timer is enabled again when PB_IN is released HIGH. If PB_IN is pulled LOW for 30 s continuously, PGOOD
will be driven LOW only once after the first 15 s. When PGOOD is driven LOW due to PB_IN=low for 15 s, all
registers in TPS6507x are set to their default value. See Figure 34.
Power OFF
SYS = OFF
voltage at AC applied OR
voltage at USB applied OR
PB_IN=0
Power OFF 2
SYS = ON
all voltages powered down
voltage at AC applied OR
voltage at USB applied
all voltages powered down
YES
NO
AC=1 OR
USB=1
WAIT FOR
POWER ON
SYS = ON
PB_IN=0
PB_IN=1 &&
POWER_ON=1
POWER
OFF 3
SYS = ON
PB_IN=0 (falling edge
detect)
POWER_ON=0
POWER
ON_1
SYS = ON
POWER_ON=1
DCDC converters
power down
LDOs power down
depending on
sequencing option
POWER
ON_2
SYS = ON
DCDC converters start
LDOs start
depending on sequencing option
Figure 34. State Machine
Copyright © 2009–2018, Texas Instruments Incorporated
Submit Documentation Feedback
Product Folder Links: TPS65070 TPS65072 TPS65073 TPS650731 TPS650732
35
�TPS65070, TPS65072
TPS65073, TPS650731, TPS650732
SLVS950I – JULY 2009 – REVISED MAY 2018
www.ti.com
10.3.11.4 PB_OUT
This pin is a status output. PB_OUT is used as the wake-up interrupt to an application processor based on the
status of PB_IN. If PB_IN=LOW, PB_OUT = LOW (after 50-ms debounce). If PB_IN=HIGH, PB_OUT= high
impedance (HIGH).
The pullup resistor for this open-drain output must not be connected directly to the battery as this may cause a
leakage path when the power path (SYS) is turned off.
10.3.11.5 POWER_ON
This pin is an input to the PMU which needs to be pulled HIGH for the PMU to stay in POWER ON_2-state once
PB_IN is released. Once this pin is pulled LOW while PB_IN=LOW, the PMU is shutting down without delay,
turning off the DCDC converters and the LDOs. If POWER_ON is pulled HIGH while there is power at USB or
AC, the TPS6507x will enter POWER ON_2-state and start the DC-DC converters and LDOs according to the
sequence programmed. See Figure 34.
10.3.11.6 EN_wLED (TPS65072 Only)
If the EN_wLED pin is pulled HIGH, the boost converter is enabled with a default duty cycle of 30% for dimming.
If the pin is pulled LOW, the boost convert is disabled. The white LED boost converter can also be enabled with
its ENABLE ISINK Bit in register WLED_CTRL1. The converter is enabled whenever the pin is HIGH OR the Bit
is set to 1.
10.3.11.7 EN_EXTLDO (TPS65072 Only)
The EN_EXTLDO pin will go high during start-up depending on the sequencing option programmed. The pin will
go low again if the TPS6507x is going to OFF state (POWER OFF).
The external LDO is used for the sequencing option DCDC_SQ[0,2]=111, LDO_SQ[0,2]=010, used for the Atlas4
processor and with sequencing option DCDC_SQ[0,2]=100, LDO_SQ[0,2]=111 used for the Sirf Prima processor.
See Application and Implementation for the timing diagrams.
10.3.12 Short-Circuit Protection
All outputs are short-circuit protected with a maximum output current as defined in the electrical specifications.
10.3.13 Thermal Shutdown
As soon as the junction temperature, TJ, exceeds typically 150°C for the DC-DC converters or LDOs, the device
goes into thermal shutdown. In this mode, the high side MOSFETs are turned off. The device continues its
operation when the junction temperature falls below the thermal shutdown hysteresis again. A thermal shutdown
for one of the DCDC converters or LDOs will disable all step-down converters simultaneously.
10.3.13.1 Low Dropout Voltage Regulators
The low dropout voltage regulators are designed to operate well with low value ceramic input and output
capacitors. They operate with input voltages down to 1.8 V. The LDOs offer a maximum dropout voltage of 200
mV at rated output current. Each LDO supports a current limit feature. LDO2 is enabled internally using Bit
ENABLE_LDO2 in register CON_CTRL1. The output voltage for LDO2 is defined by the settings in register
DEFLDO2. LDO2 can also be configured in such a way that it follows the output voltage of converter DCDC3 by
setting Bit LDO2 TRACKING = 1 in register DEFLDO2.
LDO1 is enabled internally using Bit ENABLE_LDO1 in register CON_CTRL1. The output voltage for LDO1 is
defined by the settings in register LDO_CTRL1 can also be enabled automatically depending on the settings in
register LDO_CTRL1.
10.3.13.2 White LED Boost Converter
The converter is in shutdown mode by default and is being turned on by setting the enable Bit with the I2C
interface or for TPS65072 with pin EN_wLED. The enable Bit is located in register WLED_CTRL1 and is called
ENABLE ISINK as it enables the current sink for the white LEDs. Once enabled, an output voltage is
automatically generated at FB_wLED, high enough to force the programmed current through the string of white
LEDs. Two strings of white LEDs can be powered. The current in each of the two strings is regulated by an
internal current sink at pins Isink1 and Isink2. The maximum current through the current sinks is set with two
36
Submit Documentation Feedback
Copyright © 2009–2018, Texas Instruments Incorporated
Product Folder Links: TPS65070 TPS65072 TPS65073 TPS650731 TPS650732
�TPS65070, TPS65072
TPS65073, TPS650731, TPS650732
www.ti.com
SLVS950I – JULY 2009 – REVISED MAY 2018
external resistors connected from pins ISET1 and ISET2 to GND. ISET1 sets the maximum current when Bit
CURRENT LEVEL in register WLED_CTRL2 is set to 1. If this Bit is set to 0, which is the default setting, the
maximum current is defined by the resistor connected at ISET2. This allows change between two different
maximum current settings during operation. The LED current can further be dimmed with an internal PWM signal.
The duty cycle for this PWM signal can be changed with the Bits LED DUTY CYCLE 0 to LED DUTY CYCLE 6 in
register WLED_CTRL2 in a range from 1% to 100%. In case a dimming ratio higher than 1:100 is needed, the
maximum LED current need to be changed to a lower value as defined with Iset2. In order to do this without any
flicker, the PWM dimming and the current level is defined in the same register, so both settings can be changed
at the same time with a single write access to register WLED_CTRL2. An internal overvoltage protection limits
the maximum voltage at FB_wLED to 37 V typically. The output voltage at FB_WLED also has a lower limit
which is set to 12 V. In case less than 4LEDs are used, the output voltage at the boost converter will not drop
below 12 V but the voltage from ISINK1 and ISINK2 to GND is increased accordingly.
10.3.13.3 A/D Converter
The 10Bit successive approximation (SAR) A/D converter with an input multiplexer can be used to monitor
different voltages in the system. These signals are monitored:
• Battery voltage
• Voltage at AC input
• Voltage at SYS output
• Input voltage of battery charger
• Battery temperature
• Battery charge current (voltage at pin Iset; Icharge = UISET/Rset × KISET)
• External voltage 1 to external voltage 4 (AD_IN1 to AD_IN4); 0 V to 2.25 V
• Optionally: External voltage 5 to external voltage 7 (AD_IN5 to AD_IN7); 0 V to 6 V
• Internal channel AD_IN14 and AD_IN15 for touch screen measurements
The A/D converter uses an internal 2.26-V reference. The reference needs a bypass capacitor for stability which
is connected to pin BYPASS. The pin can be used as a reference output with a maximum output current of 0.1
mA. The internal reference voltage is forced to be on when the ADC or the touch screen interface is enabled.
The reference voltage can additionally forced to be on using Bit Vref_enable in register ADCONFIG while ADC
and touch screen are off to allow external circuits to be supplied with a precise reference voltage while ADC and
touch screen are not used.
10.3.13.4 Touch Screen Interface (only for TPS65070, TPS65073, TPS650731, TPS650732)
The touch screen itself consists of two parallel plates, called the X and Y plates, separated by short distance;
contact is initiated by using a stylus or your finger. This action creates a series of resistances noted by RX1,
RX2, RY1, RY2 , and Rcontact, shown in Figure 36. The points shown in the diagram as TSX1, TSX2, TSY1 and
TSY2 are connected to the TPS6507x touch screen interface. The resistances RX1 and RX2 scale linearly with
the x-position of the point of contact, where the RY1 and RY2 resistances scale with the y-position. The Rcontact
resistance decreases as the pressure applied at the point of contact increases and increases as the pressure
decreases. Using these relationships, the touch screen interface can make measurements of either position or
pressure.
Copyright © 2009–2018, Texas Instruments Incorporated
Submit Documentation Feedback
Product Folder Links: TPS65070 TPS65072 TPS65073 TPS650731 TPS650732
37
�TPS65070, TPS65072
TPS65073, TPS650731, TPS650732
SLVS950I – JULY 2009 – REVISED MAY 2018
www.ti.com
X-Plate
TSX1
TSX2
RX1
RX2
Rcontact
TSY2
RY2
Y-Plate
RY1
TSY1
Figure 35. Touch Screen
The touch screen interface consists of a digital state machine, a voltage reference, and an analog switch matrix
which is connected to the four wire resistive touch screen inputs (TSX1, TSX2, TSY1, TSY2) and an internal 10Bit ADC. The state machine controls the sequencing of the switch matrix to cycle through the three types of
measurement modes (position, pressure, plate resistance) and the low power standby mode. The separate
internal voltage reference (TSREF) is disabled in standby and off modes. The voltage is generated by an internal
LDO. Its voltage is bypassed by a capacitor connected to pin INT_LDO. The state of the touch screen is
controlled by the TSC_M[2,0] Bits of the TSCMODE register (08h) as shown in Table 3. The touch screen
controller uses transfer gates to the internal ADC on input channels AD_IN14 and AD_IN15.
Table 3. TSC Modes
CONTROL MULTIPLEXER
CONNECTIONS
MODE
MEASUREMENT
ADC_IN4
TGATE
X-Position
Voltage TSY1
TSREF
PMOS
GND
NMOS
Y-Position
Voltage TSX1
TSREF
GND
NMOS
GND
NMOS
Pressure
Current TSX1 and TSX2
TSREF
PMOS
GND
NMOS
HiZ
HiZ
Plate X
Reading on ADC_IN14
Current TSX1
0
HiZ
HiZ
TSREF
PMOS
GND
NMOS
Plate Y
Reading on ADC_IN14
Current TSY1
0
1
TSREF
TGATE
TSREF
TGATE
GND
NMOS
GND
NMOS
TSC standby
Voltage TSX1 and TSX2
1
1
0
A/D
TGATE
A/D
TGATE
A/D
TGATE
A/D
TGATE
A/D
ADC used as stand alone
ADC using its analog inputs
1
1
1
OPEN
OPEN
OPEN
OPEN
Disabled (no interrupt)
None
TSC_M2
TSC_M1
TSC_M0
TSX1
TSX2
TSY1
TSY2
0
0
0
TSREF
PMOS
GND
NMOS
ADC_IN3
TGATE
0
0
1
ADC_IN1
TGATE
ADC_IN2
TGATE
0
1
0
TSREF
0
1
1
1
0
1
If the Touch screen multiplexer is set to disabled mode [111], touch to the screen will not be detected. Standby
mode is entered by setting TSC_M[2:0] to 101. When there is a touch, the controller will detect a change in
voltage at the TSX1 point and after a 8ms deglitch the INT pin will be asserted if the interrupt is unmasked in
register INT. Once the host detects the interrupt signal, will enable the ADC converter and set the TSC_M
through the I2C bus to select any of five measurements (position, pressure, plate) as shown in Table 4.
38
Submit Documentation Feedback
Copyright © 2009–2018, Texas Instruments Incorporated
Product Folder Links: TPS65070 TPS65072 TPS65073 TPS650731 TPS650732
�TPS65070, TPS65072
TPS65073, TPS650731, TPS650732
www.ti.com
SLVS950I – JULY 2009 – REVISED MAY 2018
Table 4. TSC Equations
MEASUREMENT
CHANNEL
EQUATION
X Plate resistance
AD_IN14
Rx = VTSREF/ [(VADC / 22k) × 150]
Y plate resistance
AD_IN14
Ry = VTSREF / [(VADC / 22k) × 150]
X position
AD_IN14
Xpos = Rx2 / (Rx1 + Rx2) = Rx2 / Rx
Rx2 = VADC x Rx/ VTSREF; Rx1 = Rx – Rx2
Xpos = ADRESULT / 1024
Y position
AD_IN14
Ypos = Ry2 / (Ry1 + Ry2) = Ry2 / Ry
Ry2 = VADC x Ry/ VTSREF; Ry1 = Ry – Ry2
Ypos = ADRESULT / 1024
Pressure
AD_IN14
Rc = R – Rx1//Rx2 – Ry1//Ry2
R = VTSREF/ [(VADC / 22k) × 150]
Rx1//Rx2 = Rx × Xpos × (1 – Xpos)
Ry1//Ry2 = Ry × Ypos × (1 – Ypos)
10.3.13.4.1 Performing Measurements Using the Touch Screen Controller
To take measurements with the touch screen controller, the ADC has to be enabled and configured for use with
the touch screen controller (TSC) first. In case the TSC is planned to be operated interrupt driven, the TSC
needs to be in TSC standby mode per default. Only in TSC standby mode an interrupt is generated based on a
touch of the screen. The TSC should therefore be in this mode until a touch is detected. Afterwards, the TSC has
to be configured for x-position measurement followed by y-position measurement. Now, the TSC can be set to
TSC standby again to wait for the next touch of the screen. For a non-interrupt driven sequence, see TSCMODE.
Register Address: 08h (page 50) in the Registers section. A typical interrupt driven sequence is given below:
• Set TSCMODE to 101 to set TSC to TSC standby, so an interrupt is generated when the screen is touched
• Set Bit AD enable = 1 to provide power to the ADC
• Set input select for the ADC in register ADCONFIG to 1110 (AD_IN14 selected)
• In register INT, set MASK TSC = 1 to unmask the interrupt on a touch of the touch screen
• Read Bit TSC INT as it will be set after the TSC has been configured. Reading clears the interrupt.
• After a touch was detected, an interrupt is generated by INT pin going LOW
• Read Bit TSC INT to clear the interrupt
• Set TSCMODE to 000 to select x-position measurement
• Start an ADC conversion by setting CONVERSION START =1; wait until END OF CONVERSION = 1
• Read register ADRESULT_1 and AD_RESULT_2
• Set TSCMODE to 001 to select y-position measurement
• Start an ADC conversion by setting CONVERSION START =1; wait until END OF CONVERSION = 1
• Read register ADRESULT_1 and AD_RESULT_2
• Set TSCMODE to 101 to set TSC to TSC standby again
TO ADC
TSX1
TSY1
TGATE
TO ADC
TGATE
TSX1
TSY1
PMOS
PMOS
RX1
RY1
TSREF
RC
RX2
TSX2
TSREF
RY2
R X2
NMOS
RY1
RX1
RC
RY2
TSY2
NMOS
TSX2
X POSITION MEASUREMENT
TSY2
Y POSITION MEASUREMENT
Copyright © 2016, Texas Instruments Incorporated
Figure 36. Two Position Measurement
Copyright © 2009–2018, Texas Instruments Incorporated
Submit Documentation Feedback
Product Folder Links: TPS65070 TPS65072 TPS65073 TPS650731 TPS650732
39
�TPS65070, TPS65072
TPS65073, TPS650731, TPS650732
SLVS950I – JULY 2009 – REVISED MAY 2018
www.ti.com
TSX1
I L/150
TSY1
IL
NMOS
R X1
RY1
TGATE
RC
TSREF
TO ADC
R X2
TGATE
RY2
22 kW
NMOS
TSY2
TSX2
PRESSURE MEASUREMET
Copyright © 2016, Texas Instruments Incorporated
Figure 37. Pressure Measurement
IL/150
TSX1
IL
TSY1
R X1
TGATE
TO ADC
TSX1
TSY1
TGATE
RC
RC
TSREF
TSREF
TGATE
RX2
RX2
R Y2
IL/150
R Y1
R X1
R Y1
IL
PMOS
PMOS
R Y2
TO ADC
TGATE
22 kW
22 kW
NMOS
NMOS
TSX2
TSX2
TSY2
X PLATE RESISTANCE MEASUREMENT
TSY2
Y PLATE RESISTANCE MEASUREMENT
Copyright © 2016, Texas Instruments Incorporated
Figure 38. Two Plate Resistance Measurement
TGATE
TO INT BLOCK
TSX1
TSY1
NMOS
TRESHOLD
DETECTOR
RX1
22 kW
R Y1
RC
TSREF
RX2
R Y2
NMOS
TGATE
TSX2
TSY2
STANDBY MODE
Copyright © 2016, Texas Instruments Incorporated
Figure 39. Touch Screen Standby Mode
10.4 Device Functional Modes
The device can be in an operational charge enabled mode or overvoltage protection mode. To allow for charging
the AC or USB must be with in the valid charging range which, is between the UVLO and OVP.
40
Submit Documentation Feedback
Copyright © 2009–2018, Texas Instruments Incorporated
Product Folder Links: TPS65070 TPS65072 TPS65073 TPS650731 TPS650732
�TPS65070, TPS65072
TPS65073, TPS650731, TPS650732
www.ti.com
SLVS950I – JULY 2009 – REVISED MAY 2018
10.5 Programming
10.5.1 I2C Interface Specification
10.5.1.1 Serial interface
The serial interface is compatible with the standard and fast mode I2C specifications, allowing transfers at up to
400 kHz. The interface adds flexibility to the power supply solution, enabling most functions to be programmed to
new values depending on the instantaneous application requirements and charger status to be monitored. The
TPS6507x has a 7-Bit address: 1001000, other addresses are available upon contact with the factory. Attempting
to read data from register addresses not listed in this section will result in 00h being read out. For normal data
transfer, SDAT is allowed to change only when SCLK is low. Changes when SCLK is high are reserved for
indicating the start and stop conditions. During data transfer, the data line must remain stable whenever the clock
line is high. There is one clock pulse per Bit of data. Each data transfer is initiated with a start condition and
terminated with a stop condition. When addressed, the device generates an acknowledge Bit after the reception
of each byte. The master device (microprocessor) must generate an extra clock pulse that is associated with the
acknowledge Bit. The TPS6507x device must pull down the SDAT line during the acknowledge clock pulse so
that the SDAT line is a stable low during the high period of the acknowledge clock pulse. The SDAT line is a
stable low during the high period of the acknowledge–related clock pulse. Setup and hold times must be taken
into account. During read operations, a master must signal the end of data to the slave by not generating an
acknowledge Bit on the last byte that was clocked out of the slave. In this case, the slave TPS6507x device must
leave the data line high to enable the master to generate the stop condition.
All registers are set to their default value by one of these conditions:
• Voltage is below the UVLO threshold defined with registers ,
• PB_IN is asserted LOW for >15s (option)
DATA
CLK
Data line
stable;
data valid
Change
of data
allowed
Figure 40. Bit Transfer on the Serial Interface
DATA
CLK
S
P
START Condition
STOP Condition
Figure 41. START and STOP Conditions
Copyright © 2009–2018, Texas Instruments Incorporated
Submit Documentation Feedback
Product Folder Links: TPS65070 TPS65072 TPS65073 TPS650731 TPS650732
41
�TPS65070, TPS65072
TPS65073, TPS650731, TPS650732
SLVS950I – JULY 2009 – REVISED MAY 2018
www.ti.com
Programming (continued)
SCLK
...
SDAT
A6
...
A5 A4 ...
A0 R/W ACK
0
R7
R6
...
R5
R0 ACK
0
D7
D5 ...
D6
D0 ACK
0
Slave Address
Start
...
0
Register Address
Data
Stop
NOTE: SLAVE=TPS6507x
Figure 42. Serial Interface WRITE to TPS6507x
SCLK
...
SDAT
A6 ..
...
A0
R/W ACK
0
R7
..
...
R0
A6 ..
ACK
0
...
A0
0
R/W ACK
Register
Address
..
D0
Slave
Drives
the Data
Slave Address
Repeated
Start
NOTE: SLAVE=TPS6507x
ACK
0
1
Start
Slave Address
D7
Stop
Master
Drives
ACK and Stop
Figure 43. Serial Interface READ from TPS6507x: Protocol A
SCLK
...
SDAT
A6 ..
Start
...
A0
R/W ACK
0
R7 ..
..
Slave Address
A6 ..
R0 ACK
0
0
Register
Address
...
Stop Start
A0
R/W ACK
1
Slave Address
D7 ..
D0
0
Slave
Drives
the Data
ACK
Stop
Master
Drives
ACK and Stop
Figure 44. Serial Interface READ from TPS6507x: Protocol B
42
Submit Documentation Feedback
Copyright © 2009–2018, Texas Instruments Incorporated
Product Folder Links: TPS65070 TPS65072 TPS65073 TPS650731 TPS650732
�TPS65070, TPS65072
TPS65073, TPS650731, TPS650732
www.ti.com
SLVS950I – JULY 2009 – REVISED MAY 2018
10.6 Register Maps
Table 5. Register Summary
ADDRESS
NAME
0x01h
PPATH1
SHORT DESCRIPTION
Power Path Controls
0x02h
INT
Interrupt Reporting and Masking
0x03h
CHGCONFIG0
Battery Charger Configuration
0x04h
CHGCONFIG1
Battery Charger Configuration
0x05h
CHGCONFIG2
Battery Charger Configuration
0x06h
CHGCONFIG3
Battery Charger Configuration
0x07h
ADCONFIG
ADC Configuration and Control
0x08h
TSCMODE
Touch Screen Interface Control
0x09h
ADRESULT_1
ADC Result LSBs
0x0Ah
ADRESULT_2
ADC Result MSBs
0x0Bh
PGOOD
Power Good Reporting
0x0Ch
PGOODMASK
Power Good Masking
0x0Dh
CON_CTRL1
Sequence and Enable Control Bits for DCDCs and LDOs
0x0Eh
CON_CTRL2
Control Bits for Timers, UVLO, and DCDC2 / DCDC3
0x0Fh
CON_CTRL3
Discharge Resistors and Force PWM Mode
0x10h
DEFDCDC1
Output Voltage Setting for DCDC1
0x11h
DEFDCDC2_LOW
Output Voltage Setting for DCDC2 if DEFDCDC2 is LOW
0x12h
DEFDCDC2_HIGH
Output Voltage Setting for DCDC2 if DEFDCDC2 is HIGH
0x13h
DEFDCDC3_LOW
Output Voltage Setting for DCDC3 if DEFDCDC3 is LOW
0x14h
DEFDCDC3_HIGH
Output Voltage Setting for DCDC3 if DEFDCDC3 is HIGH
0x15h
DEFSLEW
Define Slew Rate for DCDC2 & DCDC3 DVS
0x16h
LDO_CTRL1
Sequence and Output Voltage Control for LDOs
0x17h
DEFLDO2
Output Voltage Control for LDO2
0x18h
WLED_CTRL1
wLED Control Bits
0x19h
WLED_CTRL2
wLED Control Bits
Copyright © 2009–2018, Texas Instruments Incorporated
Submit Documentation Feedback
Product Folder Links: TPS65070 TPS65072 TPS65073 TPS650731 TPS650732
43
�TPS65070, TPS65072
TPS65073, TPS650731, TPS650732
SLVS950I – JULY 2009 – REVISED MAY 2018
www.ti.com
10.6.1 PPATH1. Register Address: 01h
PPATH1
Bit name and
function
Default
Set by signal
B7
B6
USB power
AC power
x
x
B5
USB power
enable
0
Default value
loaded by:
Read/write
R
R
B4
AC power
enable
0
UVLO
UVLO
R/W
R/W
B3
AC input
current MSB
1
B2
AC input
current LSB
1
B1
USB input
current MSB
0
BO
USB input
current LSB
1
Voltage
removed at
USB OR
UVLO
R/W
Voltage
removed at
USB OR
UVLO
R/W
Voltage
Voltage
removed at
removed at
AC OR UVLO AC OR UVLO
R/W
R/W
Bit 7
USB power:
0 = USB power is not present and/or not in the range valid for charging
1 = USB source is present and in the range valid for charging. B7 remains active as long as the
charge source is present
Bit 6
AC power:
0 = wall plug is not present and/or not in the range valid for charging
1 = wall plug source is present and in the range valid for charging. B6 remains active as long as the
charge source is present
Bit 5
USB POWER ENABLE
0 = USB power input is enabled
1 = USB power input is disabled (USB suspend mode)
Bit 4
AC POWER ENABLE
0 = AC power input is enabled
1 = AC power input is disabled
Bit 3..2
AC INPUT CURRENT
00 = input current from AC
01 = input current from AC
10 = input current from AC
11 = input current from AC
Bit 1..0
input
input
input
input
USB INPUT CURRENT
00 = input current from USB
01 = input current from USB
10 = input current from USB
11 = input current from USB
is
is
is
is
100 mA max
500 mA max
1300 mA max
2500 mA
input is
input is
input is
input is
100 mA max
500 mA max
800 mA max
1300 mA max
Note: safety timers are cleared if the input voltage at both AC and USB are removed.
44
Submit Documentation Feedback
Copyright © 2009–2018, Texas Instruments Incorporated
Product Folder Links: TPS65070 TPS65072 TPS65073 TPS650731 TPS650732
�TPS65070, TPS65072
TPS65073, TPS650731, TPS650732
www.ti.com
SLVS950I – JULY 2009 – REVISED MAY 2018
10.6.2 INT. Register Address: 02h
INT
B7
B6
B5
Bit name and
function
MASK
AC/USB
MASK TSC
MASK
PB_IN
Default
0
0
0
UVLO
UVLO
UVLO
R/W
R/W
R/W
B4
0
Set by signal
Default value
loaded by:
Read/write
R
B3
B2
B1
BO
USB
or
AC
USB
or AC
PB_IN
TSC INT
input voltage input voltage
INT
applied
removed
0
0
0
0
Cleared when Cleared when Cleared when Cleared when
read
read
read
read
UVLO
UVLO
UVLO
UVLO
R
R
R
R
Bit 7
MASK AC/USB
0 = no interrupt generated if voltage at AC or USB is applied or removed
1 = the pin INT is actively pulled low if one of the Bits 1 to Bit 0 are 1
Bit 6
MASK TSC
0 = no interrupt generated if the touch screen is detecting a “touch”
1 = the pin INT is actively pulled low if a “touch” on the touch screen is detected
Bit 5
MASK PB_IN
0 = no interrupt generated if the PB_IN is pulled low.
1 = the pin INT is actively pulled low if PB_IN was pulled low.
Bit 3
TSC INT
0 = no “touch” on the touch screen detected
1 = “touch” detected and the Bit has not been read ever since
Bit 2
PB_IN INT
0 = PB_IN not active
1 = PB_IN is actively pulled low (or high optionally) and the Bit has not been read ever since
Bit 1
USB or AC INPUT VOLTAGE APPLIED
0 = no change (voltage still applied or never applied)
1 = voltage at USB or AC has been applied and the Bit has not been read ever since
Bit 0
USB or AC INPUT VOLTAGE REMOVED
0 = no change (voltage still applied or never applied)
1 = the voltage at USB or AC has been removed and the Bit has not been read ever since
Copyright © 2009–2018, Texas Instruments Incorporated
Submit Documentation Feedback
Product Folder Links: TPS65070 TPS65072 TPS65073 TPS650731 TPS650732
45
�TPS65070, TPS65072
TPS65073, TPS650731, TPS650732
SLVS950I – JULY 2009 – REVISED MAY 2018
www.ti.com
10.6.3 CHGCONFIG0. Register Address: 03h
CHGCONFIG0
Bit name and function
Default
Set by signal
Default value loaded by:
Read/write
B7
Thermal
regulation
x
B6
DPPM
active
x
B5
Thermal
Suspend
x
B4
Term
Current
x
UVLO
R
UVLO
R
UVLO
R
UVLO
R
B3
0
B2
Chg
Timeout
x
B1
Prechg
Timeout
x
BO
BatTemp
error
x
R
UVLO
R
UVLO
R
UVLO
R
Bit 7
THERMAL REGULATION:
0 = charger is in normal operation
1 = charge current is reduced due to high chip temperature
Bit 6
DPPM ACTIVE:
0 = DPPM loop is not active
1 = DPPM loop is active; charge current is reduced to support the load with the current required
Bit 5
THERMAL SUSPEND:
0 = charging is allowed
1 = charging is momentarily suspended because battery temperature is out of range
Bit 4
TERM CURRENT:
0 = charge termination current threshold has not been crossed; charging or no voltage at AC and
USB
1 = charge termination current threshold has been crossed and charging has been stopped. This
can be due to a battery reaching full capacity or to a battery removal condition
Bit 2..Bit1
CHG TIMEOUT, PRECHG TIMEOUT
0 = charging, timers did not time out
1 = one of the timers has timed out and charging has been terminated
Bit 0
BAT TEMP ERROR:
0 = battery temperature is in the allowed range for charging
1 = no temperature sensor detected
46
Submit Documentation Feedback
Copyright © 2009–2018, Texas Instruments Incorporated
Product Folder Links: TPS65070 TPS65072 TPS65073 TPS650731 TPS650732
�TPS65070, TPS65072
TPS65073, TPS650731, TPS650732
www.ti.com
SLVS950I – JULY 2009 – REVISED MAY 2018
10.6.4 CHGCONFIG1. Register Address: 04h
CHGCONFIG1
B7
B6
B5
B4
B3
Bit name and function
Charge safety
timer value1
Charge safety
timer value0
Safety timer
enable
SENSOR
TYPE
Charger
reset
0
0
1
1
UVLO
UVLO
UVLO
R/W
R/W
R/W
Default
Set by signal
Default value loaded
by:
Read/write
B1
BO
Suspend
Charge
Charger
enable
0
B2
Charge
Termination
ON/OFF
0
0
1
UVLO
UVLO
UVLO
UVLO
UVLO
R/W
R/W
R/W
R/W
R/W
Bit 7..6 CHARGE SAFETY TIMER VALUE0/1:
00 = safety timer times out after 4 hours
01 = safety timer times out after 5 hours
10 = safety timer times out after 6 hours
11 = safety timer times out after 8 hours
Bit 5
SAFETY TIMER ENABLE
0 = precharge timer, fast charge timer and taper timers are disabled
1 = precharge timer, fast charge timer and taper timers are enabled
Bit 4
SENSOR TYPE (NTC for battery temperature measurement)
0 = 100-kΩ curve 1 NTC
1 = 10-kΩ curve 2 NTC
Bit 3
CHARGER RESET:
0 = inactive
1 = Reset active. This Bit must be set and then reset through the serial interface to restart the charge
algorithm
Bit 2
CHARGE TERMINATION ON/OFF:
0 = charge termination enabled, based on timers and termination current
1 = charge termination will not occur and the charger will always be on
Bit 1
SUSPEND CHARGE:
0 = Safety Timer and Precharge timers are not suspended
1 = Safety Timer and Precharge timers are suspended
Bit 0
CHARGER ENABLE
0 = charger is disabled
1 = charger is enabled; toggling the enable Bit will not reset the charger. Use CHARGER RESET Bit to
reset charger.
Copyright © 2009–2018, Texas Instruments Incorporated
Submit Documentation Feedback
Product Folder Links: TPS65070 TPS65072 TPS65073 TPS650731 TPS650732
47
�TPS65070, TPS65072
TPS65073, TPS650731, TPS650732
SLVS950I – JULY 2009 – REVISED MAY 2018
www.ti.com
10.6.5 CHGCONFIG2. Register Address: 05h
CHGCONFIG2
Bit name and function
Default
Set by signal
Default value loaded by:
Read/write
B7
Dynamic
Timer
function
1
B6
1
B5
Charge
voltage
selection1
1
B4
Charge
voltage
selection0
0
Precharge
voltage
UVLO
R/W
UVLO
R/W
UVLO
R/W
UVLO
R/W
B3
B2
B1
BO
0
0
0
0
R
R
R
R
Bit 7
DYNAMIC TIMER FUNCTION
0 = safety timers run with their nominal clock speed
1 = clock speed is divided by 2 if thermal loop or DPPM loop is active
Bit 6
PRECHARGE VOLTAGE
0 = precharge to fast charge transition voltage is 2.5 V
1 = precharge to fast charge transition voltage is 2.9 V
Bit 5..4
CHARGE VOLTAGE SELECTION0/1:
00 = 4.1 V
01 = 4.15 V
10 = 4.2 V
11 = 4.25 V
48
Submit Documentation Feedback
Copyright © 2009–2018, Texas Instruments Incorporated
Product Folder Links: TPS65070 TPS65072 TPS65073 TPS650731 TPS650732
�TPS65070, TPS65072
TPS65073, TPS650731, TPS650732
www.ti.com
SLVS950I – JULY 2009 – REVISED MAY 2018
10.6.6 CHGCONFIG3. Register Address: 06h
CHGCONFIG3
B7
Bit name and function
Disable
Isink at AC
Default
Set by signal
Default value loaded by:
Read/write
B5
Power path
DPPM
threshold0
1
Precharge
time
0
B6
Power path
DPPM
threshold1
1
B4
B2
Termination
current
factor0
1
B1
BO
Charger
active
Disable
Isink at USB
0
B3
Termination
current
factor1
0
x
0
UVLO
R/W
UVLO
R/W
UVLO
R/W
UVLO
R/W
UVLO
R/W
UVLO
R/W
UVLO
R
UVLO
R/W
Bit 7
DISABLE ISINK AT AC (disables an internal current sink from pin AC to GND)
0 = 60 µA current sink enabled when no input voltage at pin AC detected
1 = 60 µA current sink disabled
Bit 6..5
POWER PATH DPPM THRESHOLD1/0:
00 = 3.5 V
01 = 3.75 V
10 = 4.25 V
11 = 4.50 V
Bit 4
PRECHARGE TIME
0 = precharge time is 30 min
1 = precharge time is 60 min
Bit 3..2
TERMINATION CURRENT FACTOR1/0:
00 = 0.04
01 = 0.1
10 = 0.15
11 = 0.2
Bit 1
CHARGER ACTIVE:
0 = charger is not charging
1 = charger is charging (DPPM or thermal regulation may be active)
Bit 0
DISABLE ISINK AT USB (disables an internal current sink from pin USB to GND)
0 = 60-µA current sink enabled when no input voltage at pin USB detected
1 = 60-µA current sink disabled
Note: There is a current sink on pins AC and USB which is activated when there is no voltage detected at
the pin and Bit7 or Bit0 in CHCONFIG3 are set to 0. This is implemented in order to avoid the pins to
be floating when not connected to a power source. The current sink is disabled automatically as soon
as an input voltage is detected at the pin.
Copyright © 2009–2018, Texas Instruments Incorporated
Submit Documentation Feedback
Product Folder Links: TPS65070 TPS65072 TPS65073 TPS650731 TPS650732
49
�TPS65070, TPS65072
TPS65073, TPS650731, TPS650732
SLVS950I – JULY 2009 – REVISED MAY 2018
www.ti.com
10.6.7 ADCONFIG. Register Address: 07h
ADCONFIG
B7
B5
End of
conversion
1
Vref enable
0
B6
Conversion
start
0
Bit name and function
AD enable
Default
Set by signal
Default value loaded by:
Read/write
B4
0
B3
INPUT
SELECT_3
0
B2
INPUT
SELECT_2
0
B1
INPUT
SELECT_1
0
BO
INPUT
SELECT_0
0
UVLO
R/W
UVLO
R/W
UVLO
R
UVLO
R/W
UVLO
R/W
UVLO
R/W
UVLO
R/W
UVLO
R/W
Bit 7
AD ENABLE:
0 = A/D converter disabled
1 = A/D converter enabled
Bit 6
CONVERSION START
0 = no conversion in progress
1 = start A/D conversion, Bit is automatically cleared if conversion is done
Bit 5
END OF CONVERSION
0 = conversion did not finish
1 = conversion done
Bit 4
VREF ENABLE
0 = reference voltage LDO (pin BYPASS) for ADC is disabled
1 = reference voltage LDO (pin BYPASS) for ADC is enabled
Bit 3..0
INPUT SELECT – see table
50
INPUT
SELECT_3
INPUT
SELECT_2
INPUT
SELECT_1
INPUT
SELECT_0
FULL SCALE
INPUT VOLTAGE
INPUT SELECTED
0
0
0
0
2.25V
Voltage at AD_IN1
0
0
0
1
2.25V
Voltage at AD_IN2
0
0
1
0
2.25V
Voltage at AD_IN3
0
0
1
1
2.25V
Voltage at AD_IN4
0
1
0
0
2.25V
Voltage at TS pin
0
1
0
1
2.25V
Voltage at ISET pin == battery charge
current
0
1
1
0
6.0V
Voltage at AC pin
0
1
1
1
6.0V
Voltage at SYS pin
1
0
0
0
6.0V
Input voltage of the charger
1
0
0
1
6.0V
Voltage at BAT pins
1
0
1
0
6.0V
Voltage at AD_IN5 (at pin
THRESHOLD)
1
0
1
1
6.0V
Voltage at AD_IN6 (at pin ISET1)
1
1
0
0
6.0V
Voltage at AD_IN7 (at pin ISET2)
1
1
1
0
2.25
Touch screen controller (TSC);
all functions
1
1
1
1
2.25
Touch screen controller (TSC);
x-position and y-position only
Submit Documentation Feedback
Copyright © 2009–2018, Texas Instruments Incorporated
Product Folder Links: TPS65070 TPS65072 TPS65073 TPS650731 TPS650732
�TPS65070, TPS65072
TPS65073, TPS650731, TPS650732
www.ti.com
SLVS950I – JULY 2009 – REVISED MAY 2018
10.6.8 TSCMODE. Register Address: 08h
TSCMODE
Bit name and function
Default
Set by signal
Default value loaded by:
Read/write
B7
B6
B5
B4
B3
0
B2
TSC_M2
1
B1
TSC_M1
1
BO
TSC_M0
1
0
0
0
0
R
R
R
R
R
UVLO
R/W
UVLO
R/W
UVLO
R/W
Bit 3..0 MODE SELECT BITS FOR THE TOUCH SCREEN INTERFACE
Note: Data conversions using the touch screen interface require setting the touch screen mode with register
TSCMODE and selecting the analog input channel for the ADC according to the following table.
Measurement of x-position:
• Set TSCMODE to 000 to select x-position measurement
• Set Bit AD ENABLE=1 to provide power to the ADC.
• Set input select for the ADC in register ADCONFIG to 1110 (AD_IN14 selected).
• Start a conversion by setting CONVERSION START=1; wait until END OF CONVERSION=1
• Read register ADRESULT_1 and ADRESULT_2
TSC_M2
TSC_M1
TSC_M0
TSX1
(AD_IN1)
TSX2
(AD_IN2)
TSY1(AD_ TSY2(AD_
IN3)
IN4)
MODE
MEASUREMENT
0
0
0
TSREF
GND
A/D
0
0
1
A/D
HiZ
TSREF
HiZ
X-Position
Voltage TSY1
GND
Y-Position
Voltage TSX1
0
1
0
TSREF
TSREF
GND
GND
Pressure
Current TSX1 and
TSX2
0
1
1
TSREF
GND
HiZ
HiZ
Plate X
Current TSX1
1
0
0
HiZ
1
0
1
V2
HiZ
TSREF
GND
Plate Y
Current TSY1
V2
GND
GND
TSC standby
Voltage TSX1 and
TSX2
1
1
0
A/D
A/D
A/D
A/D
A/D
Voltage measurement
with ADC
1
1
1
open
open
open
open
TSC and ADC
disabled (no interrupt
generation)
10.6.9 ADRESULT_1. Register Address: 09h
ADRESULT_1
Bit name and function
Default
Set by signal
Default value loaded
by:
Read/write
B7
AD_BIT7
x
B6
AD_BIT6
x
B5
AD_BIT5
x
B4
AD_BIT4
x
B3
AD_BIT3
x
B2
AD_BIT2
x
B1
AD_BIT1
x
BO
AD_BIT0 LSB
x
R
R
R
R
R
R
R
R
Copyright © 2009–2018, Texas Instruments Incorporated
Submit Documentation Feedback
Product Folder Links: TPS65070 TPS65072 TPS65073 TPS650731 TPS650732
51
�TPS65070, TPS65072
TPS65073, TPS650731, TPS650732
SLVS950I – JULY 2009 – REVISED MAY 2018
www.ti.com
10.6.10 ADRESULT_2. Register Address: 0Ah
ADRESULT_2
B7
B6
B5
B4
B3
B2
0
0
0
0
0
0
B1
AD_BIT9
MSB
x
R
R
R
R
R
R
R
R
B6
PGOOD
DELAY 1
B5
PGOOD
DELAY 0
B4
PGOOD
VDCDC1
B3
PGOOD
VDCDC2
B2
PGOOD
VDCDC3
B1
PGOOD
LDO1
BO
PGOOD
LDO2
x
1
1
x
0
0
PGOOD
VDCDC1
PGOOD
VDCDC1
R
PGOOD
VDCDC2
PGOOD
VDCDC2
R
PGOOD
VDCDC3
PGOOD
VDCDC3
R
PGOOD
LDO1
PGOOD
LDO1
R
PGOOD
LDO2
PGOOD
LDO2
R
Bit name and function
Default
Set by signal
Default value loaded by:
Read/write
BO
AD_BIT8
x
10.6.11 PGOOD. Register Address: 0Bh
PGOOD
B7
Bit name and function
Reset
Default for
–70, -73, -731, -732
Default for TPS65072
Set by signal
Default value loaded by:
Read/write
Bit 7
R
R/W
R/W
Reset:
0 = indicates that the comparator input voltage is above the 1V threshold.
1 = indicates that the comparator input voltage is below the 1V threshold.
Bit 6..5 PGOOD DELAY 0,1 (sets the delay time of Reset and PGOOD output):
00 = delay is 20 ms
01 = delay is 100 ms
10 = delay is 200 ms
11 = delay is 400 ms
Bit 4
PGOOD VDCDC1:
0 = indicates that the VDCDC1 converter output voltage is below its target regulation voltage or
disabled.
1 = indicates that the VDCDC1 converter output voltage is within its nominal range.
Bit 3
PGOOD VDCDC2:
0 = indicates that the VDCDC2 converter output voltage is below its target regulation voltage or
disabled.
1 = indicates that the VDCDC2 converter output voltage is within its nominal range.
Bit 2
PGOOD VDCDC3:
0 = indicates that the VDCDC3 converter output voltage is below its target regulation voltage or
disabled 1 = indicates that the VDCDC3 converter output voltage is within its nominal range.
Bit 1
PGOOD LDO1:
0 = indicates that LDO1 output voltage is below its target regulation voltage or disabled
1 = indicates that the LDO1 output voltage is within its nominal range.
Bit 0
PGOOD LDO2:
0 = indicates that the LDO2 output voltage is below its target regulation voltage or disabled.
1 = indicates that the LDO2 output voltage is within its nominal range.
52
Submit Documentation Feedback
Copyright © 2009–2018, Texas Instruments Incorporated
Product Folder Links: TPS65070 TPS65072 TPS65073 TPS650731 TPS650732
�TPS65070, TPS65072
TPS65073, TPS650731, TPS650732
www.ti.com
SLVS950I – JULY 2009 – REVISED MAY 2018
10.6.12 PGOODMASK. Register Address: 0Ch
PGOODMASK
B7
B6
0
0
0
0
B5
MASK
VDCDC3 and
LDO1
0
0
0
0
0
1
1
1
0
0
UVLO
UVLO
UVLO
UVLO
UVLO
UVLO
R/W
R/W
R/W
R/W
R/W
R/W
Bit name and function
Default for –70
Default for -72
Default for -73, -731,
-732
Set by signal
Default value loaded
by:
Read/write
R
R
B4
B3
B2
B1
BO
MASK
VDCDC1
MASK
VDCDC2
MASK
VDCDC3
MASKLDO1
MASK
LDO2
0
1
1
0
0
0
0
0
0
0
Bit 5
MASK VDCDC3 and LDO1:
0 = indicates that the output voltage of either DCDC3 or LDO1 is within its nominal range. The
PGOOD output is not affected (not driven LOW)
1 = indicates that both LDO1 AND DCDC3 output voltage is below its target regulation voltage or
disabled. This will drive the PGOOD output low.
Bit 4..0
MASK VDCDC1/2/3, LDO1,2:
0 = the status of the power good Bit in Register PGOOD does not affect the status of the PGOOD
output pin
1 = the PGOOD pin is driven low in case the output voltage of the converter or LDO is below its
target regulation voltage or disabled.
10.6.13 CON_CTRL1. Register Address: 0Dh
CON_CTRL1
B7
B6
Bit name and function
DCDC_SQ2
Default for
–70, –72, -73, -732
See Table 10
See
Table 10
Default for
TPS650731
See Table 10
See
Table 10
B5
B4
B3
B2
B1
BO
DCDC1
ENABLE
DCDC2
ENABLE
DCDC3
ENABLE
LDO1
ENABLE
LDO2
ENABLE
See
Table 10
1
1
1
1
1
See
Table 10
1
1
1
1
0
LDO_ENZ
LDO_ENZ
DCDC_SQ1 DCDC_SQ0
DCDC1_E
NZ
Set by signal
DCDC2_E DCDC3_EN
NZ
Z
Default value loaded by:
UVLO
UVLO
UVLO
UVLO
UVLO
UVLO
UVLO
UVLO
Read/write
R/W
R/W
R/W
R/W
R/W
R/W
R/W
R/W
The CON_CTRL1 register can be used to disable and enable all power supplies through the serial interface.
Default is to allow all supplies to be on, providing the relevant enable pin is high. The following tables indicate
how the enable pins and the CON_CTRL1 register are combined. The CON_CTRL1 Bits are automatically reset
to default when the corresponding enable pin is low.
Bit 7..5
DCDC_SQ2 to DCDC_SQ0: power-up sequencing (power down sequencing is the reverse)
000 = power-up sequencing is: DCDC2 only; DCDC1 and DCDC3 are not part of the automatic
sequencing and are enabled by their enable pins EN_DCDC1 and EN_DCDC3
001 = power-up sequencing is DCDC2 and DCDC3 at the same time, DCDC1 is not part of the
automatic sequencing and is enabled by its enable pin EN_DCDC1
010 = power-up sequencing is: DCDC1 when power good then DCDC2 and DCDC3 at the same time
011 = power-up sequencing is: DCDC3 when power good then DCDC2; DCDC1 is not part of the
automatic sequencing and is controlled by its EN_DCDC1 pin.
Copyright © 2009–2018, Texas Instruments Incorporated
Submit Documentation Feedback
Product Folder Links: TPS65070 TPS65072 TPS65073 TPS650731 TPS650732
53
�TPS65070, TPS65072
TPS65073, TPS650731, TPS650732
SLVS950I – JULY 2009 – REVISED MAY 2018
www.ti.com
100 = power-up sequencing is: DCDC3 is started at the same time with LDO2 if Bit
MASK_EN_DCDC3 in register 0Eh is set (default is set). DCDC1 and DCDC2 are started at the same
time when LDO2 is PGOOD (defined in LDO sequencing 111); DCDC3 is enabled or disabled with its
EN_DCDC3 pin if MASK_EN_DCDC3 in register 0Eh is cleared (set =0). (Sirf PRIMA, start-up from
OFF or start-up after SLEEP)
101 = DCDC converters are enabled individually with the external enable pins
110 = DCDC1first, when power good then DCDC2, when power good then DCDC3
111 = power-up sequencing is: DCDC1 and DCDC2 at the same time >1ms after LDO2 has been
started (defined in LDO sequencing 010); DCDC3 is not part of the automatic sequencing but is
enabled with its EN_DCDC3 pin (Atlas4)
In case of automatic sequencing other than 101, the start is initiated by going into ON-state. DCDC converters
that are not part of the automatic sequencing can be enabled by pulling their enable pin to a logic HIGH level at
any time in ON-state. The enable pins for the converters that are automatically enabled, should be tied to GND.
For sequencing option DCDC_SEQ=111, the start is initiated by going into ON-state, however, the external LDO
connected to pin EN_EXTLDO is powered first, followed by LDO2.
(The sequencing of LDO1 and LDO2 is defined in register LDO_CTRL1.)
Bit 4..0
DCDC1,2,3: See Table 6, Table 7, and Table 8
Table 6. DCDC1 Enable Control
EN_DCDC1 PIN
CON_CTRL1
DCDC1 CONVERTER
0
x
disabled
1
0
disabled
1
1
enabled
Table 7. DCDC1 Enable Control
EN_DCDC2 PIN
CON_CTRL1
DCDC2 CONVERTER
0
x
disabled
1
0
disabled
1
1
enabled
Table 8. DCDC1 Enable Control
54
EN_DCDC3 PIN
CON_CTRL1
DCDC3 CONVERTER
0
x
disabled
1
0
disabled
1
1
enabled
Submit Documentation Feedback
Copyright © 2009–2018, Texas Instruments Incorporated
Product Folder Links: TPS65070 TPS65072 TPS65073 TPS650731 TPS650732
�TPS65070, TPS65072
TPS65073, TPS650731, TPS650732
www.ti.com
SLVS950I – JULY 2009 – REVISED MAY 2018
10.6.14 CON_CTRL2. Register Address: 0Eh
CON_CTRL2
Bit name and function
Default
Default value loaded
by:
Read/write
B7
ENABLE
1s timer
0
B6
ENABLE
5s timer
0
B5
B4
B3
DS_RDY
PWR_D
S
B1
BO
UVLO1
UVLO0
1
B2
UVLO
hysteresis
1
MASK_EN_DCDC3
0
0
0
1
UVLO
UVLO
UVLO
UVLO
UVLO
BG_GOOD
BG_GOOD
BG_GOOD
R/W
R/W
R/W
R/W
R/W
R/W
R/W
R/W
Bit 7…6
ENABLE TIMERS:
0 = the state machine timers of 1 s and 5 s, respectively are disabled
1 = the state machine timers of 1 s and 5 s, respectively are enabled
Bit 5
DS_RDY (data ready, memory content valid) for use with Sirf Prima processor DEEP SLEEP
mode:
0 = status Bit which is indicating the memory content is not valid after wake up from DEEP SLEEP.
This Bit is set / cleared by the Prima application processor. Cleared when device is in UVLO to tell
processor there was a power loss. The Bits needs to be cleared by user software after a wake up
from DEEP SLEEP to enable the DCDC2 converter to be powered down in shutdown sequencing
depending on the status of LDO2.
1 = memory content is valid after wake up from DEEP SLEEP (set by I2C command by application
processor only). The Prima processor is ready to power down to DEEP SLEEP mode or was just
waking up from DEEP SLEEP mode.
Bit 4
PWR_DS (enter DEEP SLEEP for sequencing option DCDC_SEQ=100, LDO_SQ=111):
0 = PMU is in normal operation
1 = PMU powers down all rails except DCDC2 and the external LDO on pin “EXT_LDO”. PGOOD
is pulled LOW.
Bit 3
MASK_EN_DCDC3; used for Prima application processor start-up sequencing:
0 = DCDC3 is enabled or disabled by the status of EN_DCDC3 for sequencing option
DCDC_SEQ=100.
1 = DCDC3 will start at the same time with LDO2 for sequencing option DCDC_SEQ=100. The
status of EN_DCDC3 is ignored
Bit 2
UNDERVOLTAGE LOCKOUT HYSTERESIS:
0 = 400-mV hysteresis
1 = 500-mV hysteresis
Bit 1..0
UVLO1, UVLO2 (undervoltage lockout voltage):
00 = the device turns off at 2.8 V with the reverse of the sequencing defined in CON_CTRL1
01 = the device turns off at 3 V with the reverse of the sequencing defined in CON_CTRL1
10 = the device turns off at 3.1 V with the reverse of the sequencing defined in CON_CTRL1
11 = the device turns off at 3.25 V with the reverse of the sequencing defined in CON_CTRL1
Note: The undervoltage lockout voltage is sensed at the SYS pin and the device goes to OFF state when
the voltage is below the value defined in the register. BG_GOOD is the internal bandgap good
signal which occurs at lower voltages than UVLO.
Copyright © 2009–2018, Texas Instruments Incorporated
Submit Documentation Feedback
Product Folder Links: TPS65070 TPS65072 TPS65073 TPS650731 TPS650732
55
�TPS65070, TPS65072
TPS65073, TPS650731, TPS650732
SLVS950I – JULY 2009 – REVISED MAY 2018
www.ti.com
10.6.15 CON_CTRL3. Register Address: 0Fh
CON_CTRL3
Bit name and function
Default
Default value loaded by:
Read/write
B7
FPWM
DCDC3
0
UVLO
R/W
B6
FPWM
DCDC2
0
UVLO
R/W
B5
FPWM
DCDC1
0
UVLO
R/W
B4
DCDC1
discharge
1
UVLO
R/W
B3
DCDC2
discharge
1
UVLO
R/W
B2
DCDC3
discharge
1
UVLO
R/W
B1
LDO1
discharge
1
UVLO
R/W
BO
LDO2
discharge
1
UVLO
R/W
Bit 7
FPWM DCDC3:
0 = DCDC3 converter operates in PWM / PFM mode
1 = DCDC3 converter is forced into fixed frequency PWM mode
Bit 6
FPWM DCDC2:
0 = DCDC2 converter operates in PWM / PFM mode
1 = DCDC2 converter is forced into fixed frequency PWM mode
Bit 5
FPWM DCDC1:
0 = DCDC1 converter operates in PWM / PFM mode
1 = DCDC1 converter is forced into fixed frequency PWM mode
Bit 4–0
0 = the output capacitor of the associated converter or LDO is not actively discharged when
the converter or LDO is disabled
1 = the output capacitor of the associated converter or LDO is actively discharged when the
converter or LDO is disabled. This decreases the fall time of the output voltage at light load
10.6.16 DEFDCDC1. Register Address: 10h
DEFDCDC1
Bit name and function
Default for –70, –72
Default for –73, –731,
–732
Default value loaded by:
Read/write
B7
DCDC1
extadj
0
B6
B5
B4
B3
B2
B1
BO
DCDC1[5]
DCDC1[4]
DCDC1[3]
DCDC1[2]
DCDC1[1]
DCDC1[0]
0
1
1
1
1
1
1
0
0
1
0
0
1
0
1
UVLO
R/W
UVLO
R
UVLO
R/W
UVLO
R/W
UVLO
R/W
UVLO
R/W
UVLO
R/W
UVLO
R/W
DEFDCDC1 sets the output voltage for the DCDC1 converter. Per default the converter is internally fixed but can
be programmed to an externally adjustable version by setting Bit 7 (Ext adj). The default setting is defined in an
EEPROM Bit. In case the externally adjustable version is programmed, the external resistor divider need to be
connected to the VDCDC1 pin, otherwise this pin needs to be connected to the output voltage directly. For the
fixed voltage version, the output voltage is set with Bits B0 to B5 (DCDC1[5] to DCDC1[0]):
All step-down converters provide the same output voltage range, see DEFDCDC3_LOW. Register Address: 13h.
56
Submit Documentation Feedback
Copyright © 2009–2018, Texas Instruments Incorporated
Product Folder Links: TPS65070 TPS65072 TPS65073 TPS650731 TPS650732
�TPS65070, TPS65072
TPS65073, TPS650731, TPS650732
www.ti.com
SLVS950I – JULY 2009 – REVISED MAY 2018
10.6.17 DEFDCDC2_LOW. Register Address: 11h
DEFDCDC2_LOW
Bit name and function
Default for -70, -72,
-732
Default for -73, -731
Default value loaded by:
Read/write
B7
B6
B5
DCDC2[5]
B4
DCDC2[4]
B3
DCDC2[3]
B2
DCDC2[2]
B1
DCDC2[1]
BO
DCDC2[0]
0
0
1
0
0
1
0
1
0
0
R
R
0
UVLO
R/W
1
UVLO
R/W
0
UVLO
R/W
0
UVLO
R/W
1
UVLO
R/W
1
UVLO
R/W
B5
DCDC2[5]
1
1
1
B4
DCDC2[4]
1
1
0
B3
DCDC2[3]
1
0
0
B2
DCDC2[2]
1
0
1
B1
DCDC2[1]
1
1
0
BO
DCDC2[0]
1
1
1
UVLO
UVLO
UVLO
UVLO
UVLO
UVLO
R/W
R/W
R/W
R/W
R/W
R/W
10.6.18 DEFDCDC2_HIGH. Register Address: 12h
DEFDCDC2_HIGH
Bit name and function
Default –70, –732
Default for-72
Default for -73, -731
Default value loaded
by:
Read/write
B7
DCDC2 extadj
0
0
0
B6
0
0
0
UVLO
R/W
R
The output voltage for DCDC2 is switched between the value defined in DEFDCDC2_LOW and
DEFDCDC2_HIGH depending on the status of the DEFDCDC2 pin. IF DEFDCDC2 is LOW the value in
DEFDCDC2_LOW is selected, if DEFDCDC2 = HIGH, the value in DEFDCDC2_HIGH is selected. Per default
the converter is internally fixed but can be programmed to an externally adjustable version by EEPROM similar to
DCDC1.
10.6.19 DEFDCDC3_LOW. Register Address: 13h
DEFDCDC3_LOW
Bit name and function
Default for –70
Default for -72, –73,
–731, –732
Default value loaded by:
Read/write
B7
B6
0
B5
DCDC3[5]
0
B4
DCDC3[4]
0
B3
DCDC3[3]
1
B2
DCDC3[2]
0
B1
DCDC3[1]
1
BO
DCDC3[0]
1
0
0
0
0
1
0
0
1
1
R/W
R
UVLO
R/W
UVLO
R/W
UVLO
R/W
UVLO
R/W
UVLO
R/W
UVLO
R/W
Copyright © 2009–2018, Texas Instruments Incorporated
Submit Documentation Feedback
Product Folder Links: TPS65070 TPS65072 TPS65073 TPS650731 TPS650732
57
�TPS65070, TPS65072
TPS65073, TPS650731, TPS650732
SLVS950I – JULY 2009 – REVISED MAY 2018
www.ti.com
10.6.20 DEFDCDC3_HIGH. Register Address: 14h
DEFDCDC3_HIGH
Bit name and function
Default -70
Default for -72
Default for –73, –731,
–732
Default value loaded by:
Read/write
B7
DCDC3
extadj
0
0
B6
B5
B4
B3
B2
B1
BO
DCDC3[5]
DCDC3[4]
DCDC3[3]
DCDC3[2]
DCDC3[1]
DCDC3[0]
0
0
0
0
1
1
0
1
0
0
1
1
1
1
0
0
0
1
1
0
0
1
UVLO
R/W
R
UVLO
R/W
UVLO
R/W
UVLO
R/W
UVLO
R/W
UVLO
R/W
UVLO
R/W
The output voltage for DCDC3 is switched between the value defined in DEFDCDC3_LOW and
DEFDCDC3_HIGH depending on the status of the DEFDCDC3 pin. IF DEFDCDC3 is LOW the value in
DEFDCDC3_LOW is selected, if DEFDCDC3 = HIGH, the value in DEFDCDC3_HIGH is selected. Per default
the converter is internally fixed but can be programmed to an externally adjustable version by EEPROM similar to
DCDC2.
Table 9. DCDC Output Voltage Range
58
OUTPUT VOLTAGE
[V]
B5
B4
B3
B2
B1
B0
0.725
0
0
0
0
0
0
0.750
0
0
0
0
0
1
0.775
0
0
0
0
1
0
0.800
0
0
0
0
1
1
0.825
0
0
0
1
0
0
0.850
0
0
0
1
0
1
0.875
0
0
0
1
1
0
0.900
0
0
0
1
1
1
0.925
0
0
1
0
0
0
0.950
0
0
1
0
0
1
0.975
0
0
1
0
1
0
1.000
0
0
1
0
1
1
1.025
0
0
1
1
0
0
1.050
0
0
1
1
0
1
1.075
0
0
1
1
1
0
1.100
0
0
1
1
1
1
1.125
0
1
0
0
0
0
1.150
0
1
0
0
0
1
1.175
0
1
0
0
1
0
1.200
0
1
0
0
1
1
1.225
0
1
0
1
0
0
1.250
0
1
0
1
0
1
1.275
0
1
0
1
1
0
1.300
0
1
0
1
1
1
1.325
0
1
1
0
0
0
1.350
0
1
1
0
0
1
1.375
0
1
1
0
1
0
1.400
0
1
1
0
1
1
1.425
0
1
1
1
0
0
1.450
0
1
1
1
0
1
1.475
0
1
1
1
1
0
1.500
0
1
1
1
1
1
Submit Documentation Feedback
Copyright © 2009–2018, Texas Instruments Incorporated
Product Folder Links: TPS65070 TPS65072 TPS65073 TPS650731 TPS650732
�TPS65070, TPS65072
TPS65073, TPS650731, TPS650732
www.ti.com
SLVS950I – JULY 2009 – REVISED MAY 2018
Table 9. DCDC Output Voltage Range (continued)
OUTPUT VOLTAGE
[V]
B5
B4
B3
B2
B1
B0
1.550
1
0
0
0
0
0
1.600
1
0
0
0
0
1
1.650
1
0
0
0
1
0
1.700
1
0
0
0
1
1
1.750
1
0
0
1
0
0
1.800
1
0
0
1
0
1
1.850
1
0
0
1
1
0
1.900
1
0
0
1
1
1
1.950
1
0
1
0
0
0
2.000
1
0
1
0
0
1
2.050
1
0
1
0
1
0
2.100
1
0
1
0
1
1
2.150
1
0
1
1
0
0
2.200
1
0
1
1
0
1
2.250
1
0
1
1
1
0
2.300
1
0
1
1
1
1
2.350
1
1
0
0
0
0
2.400
1
1
0
0
0
1
2.450
1
1
0
0
1
0
2.500
1
1
0
0
1
1
2.550
1
1
0
1
0
0
2.600
1
1
0
1
0
1
2.650
1
1
0
1
1
0
2.700
1
1
0
1
1
1
2.750
1
1
1
0
0
0
2.800
1
1
1
0
0
1
2.850
1
1
1
0
1
0
2.900
1
1
1
0
1
1
3.000
1
1
1
1
0
0
3.100
1
1
1
1
0
1
3.200
1
1
1
1
1
0
3.300
1
1
1
1
1
1
Copyright © 2009–2018, Texas Instruments Incorporated
Submit Documentation Feedback
Product Folder Links: TPS65070 TPS65072 TPS65073 TPS650731 TPS650732
59
�TPS65070, TPS65072
TPS65073, TPS650731, TPS650732
SLVS950I – JULY 2009 – REVISED MAY 2018
www.ti.com
10.6.21 DEFSLEW. Register Address: 15h
DEFSLEW
Bit name and function
Default
Default value loaded by:
Read/write
B7
B6
B5
B4
B3
0
0
0
0
0
R
R
R
R
R
B2
SLEW2
1
UVLO
R/W
B1
SLEW1
1
UVLO
R/W
BO
SLEW0
0
UVLO
R/W
The DEFSLEW register defines the slew rate of the output voltage for DCDC2 and DCDC3 in case the voltage is
changed during operation. In case Bit “LDO2 tracking“ in register DEFLDO2 is set, this is also valid for LDO2.
When the voltage change is initiated by toggling pin DEFDCDC2 or DEFDCDC3, the start of the voltage change
is triggered by the rising or falling edge of the DEFDCDC2 or DEFDCDC3 pin. If a voltage change is done
internally be re-programming register DEFDCDC2_LOW, DEFDCDC2_HIGH, DEFDCDC3_LOW or
DEFDCDC3_HIGH, the voltage change is initiated immediately after the new value has been written to the
register with the slew rate defined.
SLEW2 SLEW SLEW
1
0
60
VDCDC3
SLEW RATE
0
0
0
0.11 mV/µs
0
0
1
0.22 mV/µs
0
1
0
0.45 mV/µs
0
1
1
0.9 mV/µs
1
0
0
1.8 mV/µs
1
0
1
3.6 mV/µs
1
1
0
7.2 mV/µs
1
1
1
Immediate
Submit Documentation Feedback
Copyright © 2009–2018, Texas Instruments Incorporated
Product Folder Links: TPS65070 TPS65072 TPS65073 TPS650731 TPS650732
�TPS65070, TPS65072
TPS65073, TPS650731, TPS650732
www.ti.com
SLVS950I – JULY 2009 – REVISED MAY 2018
10.6.22 LDO_CTRL1. Register Address: 16h
LDO_CTRL1
Bit name and function
Default for
–70
Default for
–73, –731, –732,
Default for
–72
Default value loaded by:
Read/write
Bit 7..5
B7
LDO_SQ2
B6
LDO_SQ1
B5
LDO_SQ0
B4
B3
LDO1[3]
B2
LDO1[2]
B1
LDO1[1]
BO
LDO1[0]
See
Table 10
See
Table 10
See
Table 10
0
1
0
0
1
See
Table 10
See
Table 10
See
Table 10
0
1
0
0
1
See
Table 10
See
Table 10
See
Table 10
0
0
0
1
0
UVLO
R/W
UVLO
R/W
UVLO
R/W
R
UVLO
R/W
UVLO
R/W
UVLO
R/W
UVLO
R/W
LDO_SQ2 to LDO_SQ0: power-up sequencing: (power down sequencing is the reverse)
000 = LDO1 and LDO2 are enabled as soon as device is in ON-state by pulling PB_IN=LOW or
POWER_ON=HIGH
001 = LDO1 and LDO2 are enabled after DCDC3 was enabled and its power good Bit is high.
010 = external pin at “EN_EXTLDO” is driven HIGH first, after >1ms LDO2 is enabled, LDO1 is
enabled at the same time with DCDC3. EN_EXTLDO is driven LOW by going into OFF-state, LDO2
is disabled at the same time with EN_EXTLDO going LOW. Disabling LDO2 in register CON_CTRL1
will not drive EN_EXTLDO=LOW. (Atlas4)
011 = LDO1 is enabled 300us after PGOOD of DCDC1, LDO2 is off. LDO2 can be enabled/disabled
by an I2C command in register CON_CTRL1.
100 = LDO1 is enabled after DCDC1 shows power good; LDO2 is enabled with DCDC3
101 = LDO1 is enabled with DCDC2; LDO2 is enabled after DCDC1 is enabled and its power good
Bit is high
110 = LDO1 is enabled 10ms after DCDC2 is enabled and its power good Bit is high, LDO2 is off.
LDO2 can be enabled / disabled by an I2C command in register CON_CTRL1.
111 = external pin at EN_EXTLDO is driven HIGH first, after >1ms LDO2 is enabled, LDO1 is
enabled when EN_DCDC3 pin is pulled high AND DCDC3 is power good (first power–up from OFF
state). LDO1 is disabled when EN_DCDC3 pin goes LOW for SLEEP mode. LDO2 is disabled at the
same time with DCDC2 and DCDC1 during shutdown (Sirf PRIMA).
Automatic sequencing sets the enable Bits of the LDOs accordingly, so the LDOs can be enabled or disabled
by the I2C interface in ON-state.
All sequencing options that define a ramp in sequence for the DC-DC converters and the LDOs, (not at the
same time) are timed such that the power good signal triggers the start for the next converter. If there is a time
defined such as 1-ms delay, the timer is started after the power good signal of the previous converter is high.
LDO enable is delayed by 170 µs internally to match the delay for the DC-DC converters. By this, for
sequencing options that define a ramp at the same time for an LDO and a DC-DC converter, it is made sure
they will ramp at the same time, given the fact the DC-DC converters have an internal 170-µs delay as well.
Copyright © 2009–2018, Texas Instruments Incorporated
Submit Documentation Feedback
Product Folder Links: TPS65070 TPS65072 TPS65073 TPS650731 TPS650732
61
�TPS65070, TPS65072
TPS65073, TPS650731, TPS650732
SLVS950I – JULY 2009 – REVISED MAY 2018
Bit 3..0
www.ti.com
LDO1(3) to LDO1(0):
The Bits define the default output voltage of LDO1 according to the table below:
LDO1[3]
LDO1[2]
LDO1[1]
LDO1[0]
LDO1 OUTPUT
VOLTAGE
0
0
0
0
1.0 V
0
0
0
1
1.1 V
0
0
1
0
1.2 V
0
0
1
1
1.25 V
0
1
0
0
1.3 V
0
1
0
1
1.35 V
0
1
1
0
1.4 V
0
1
1
1
1.5 V
1
0
0
0
1.6 V
1
0
0
1
1.8 V
1
0
1
0
2.5 V
1
0
1
1
2.75 V
1
1
0
0
2.8 V
1
1
0
1
3.0 V
1
1
1
0
3.1 V
1
1
1
1
3.3 V
10.6.23 DEFLDO2. Register Address: 17h
DEFLDO2
Bit name and function
Default for –70, –72
Default for –73, –731,
–732
Default value loaded
by:
Read/write
B7
0
B6
LDO2 tracking
0
B5
LDO2[5]
0
B4
LDO2[4]
1
B3
LDO2[3]
0
B2
LDO2[2]
0
B1
LDO2[1]
1
BO
LDO2[0]
1
0
0
1
0
0
1
0
1
UVLO
UVLO
UVLO
UVLO
UVLO
UVLO
UVLO
R/W
R/W
R/W
R/W
R/W
R/W
R/W
R
The DEFLDO2 register is used to set the output voltage of LDO2 according to the voltage table defined under
DEFDCDC3 when Bit LDO2 tracking is set to 0. In case Bit LDO2 tracking is set to 1, the output voltage of LDO2
is defined by the contents defined for DCDC3.
Bit 6
LDO2 TRACKING:
0 = the output voltage is defined by register DEFLDO2
1 = the output voltage follows the setting defined for DCDC3 (DEFDCDC3_LOW or
DEFDCDC3_HIGH, depending on the state of pin DEFDCDC3)
Bit 5..0
LDO2[5] to LDO2[0]:
output voltage setting for LDO2 similar to DCDC3
62
Submit Documentation Feedback
Copyright © 2009–2018, Texas Instruments Incorporated
Product Folder Links: TPS65070 TPS65072 TPS65073 TPS650731 TPS650732
�TPS65070, TPS65072
TPS65073, TPS650731, TPS650732
www.ti.com
SLVS950I – JULY 2009 – REVISED MAY 2018
10.6.24 WLED_CTRL1. Register Address: 18h
WLED_CTRL1
Bit name and function
Default
Default value loaded by:
Read/write
B7
Enable
ISINK
0
UVLO
R/W
B6
0
R
B5
Dimming
frequency1
0
UVLO
R/W
B4
Dimming
frequency0
1
UVLO
R/W
B3
B2
B1
BO
0
0
0
0
R
R
R
R
B1
LED DUTY
CYCLE_1
1
UVLO
R/W
BO
LED DUTY
CYCLE_0
0
UVLO
R/W
Bit 7
ENABLE ISINK:
0 = both current sinks are turned OFF, the wLED boost converter is disabled
1 = both current sinks are turned on, the wLED boost converter is enabled
Bit 5..4
DIMMING FREQUENCY 0/1:
00 = 100 Hz
01 = 200 Hz
10 = 500 Hz
11 = 1000 Hz
10.6.25 WLED_CTRL2. Register Address: 19h
WLED_CTRL2
Bit name and function
Default
Default value loaded by:
Read/write
B7
Current
level
0
UVLO
R/W
B6
LED DUTY
CYCLE_6
0
UVLO
R/W
B5
LED DUTY
CYCLE_5
0
UVLO
R/W
B4
LED DUTY
CYCLE_4
1
UVLO
R/W
B3
LED DUTY
CYCLE_3
1
UVLO
R/W
B2
LED DUTY
CYCLE_2
1
UVLO
R/W
Bit 7
CURRENT LEVEL:
0 = current defined with resistor connected from ISET2 to GND
1 = current defined with resistor connected from ISET1 to GND
Bit 6..0
sets the duty cycle for PWM dimming from 1% (0000000) to 100% (1100011).
Values above 1100011 set the duty cycle to 0 %; default is 30% duty cycle
Copyright © 2009–2018, Texas Instruments Incorporated
Submit Documentation Feedback
Product Folder Links: TPS65070 TPS65072 TPS65073 TPS650731 TPS650732
63
�TPS65070, TPS65072
TPS65073, TPS650731, TPS650732
SLVS950I – JULY 2009 – REVISED MAY 2018
www.ti.com
11 Application and Implementation
NOTE
Information in the following applications sections is not part of the TI component
specification, and TI does not warrant its accuracy or completeness. TI’s customers are
responsible for determining suitability of components for their purposes. Customers should
validate and test their design implementation to confirm system functionality.
11.1 Application Information
The TPS6507x is designed to pair with various application processors. This section describes how use the
TPS6507x for an application and provides some examples for designing for certain applications and processors
including OMAP-L138, OMAP35xx, AM3505, and Atlas IV.
11.1.1 Power Solutions For Different Application Processors
11.1.1.1 Default Settings
For proper power supply design with TPS6507x, not only the default output voltage is relevant but also in what
sequence the different power rails are enabled. The voltages are typically enabled internally based on the
sequencing options programmed. For different application processors, there are different sequencing options
available. In addition, the delay time and pulse for the reset signal to the application processor is different. See
Table 10 with the default settings for sequencing, output voltages and reset options for the TPS6507x family:
Table 10. Sequencing Settings
PART
NUMBER
DEDICATED
FOR
DCDC_SQ[2..0]
LDO_SQ[2..0]
COMMENT
TPS65070
OMAP-L138
011
001
DCDC1= I/O, (3.3 V); enabled by EN_DCDC1
DCDC2= DVDD3318 (1.8 V or 3.3 V)
(DEFDCDC2=LOW: 1.8 V; DEFDCDC2=HIGH: 3.3 V)
DCDC3=core voltage CVDD
(DEFDCDC3=LOW: 1 V; DEFDCDC3=HIGH: 1.2 V)
LDO1= 1.8 V, delayed by external PMOS
LDO2= 1.2 V
PGOOD delay time (reset delay): 400ms =08h:
reset based on VDCDC2
TPS65072
Sirf Atlas 4
111
010
DCDC1=VDDIO (3.3 V)
DCDC2=VMEM (1.8 V)
DCDC3= VDD_PDN (1.2 V) driven by X_PWR_EN
LDO1=VDD_PLL (1.2 V)
LDO2=VDD_PRE (1.2 V)
EN_EXTLDO=VDDIO_RTC
PGOOD delay time (reset delay): 20 ms
=10h: reset based on VDCDC1
TPS65073
OMAP3503
OMAP3515
OMAP3525
OMAP3530
101
Supporting
SYS-OFF mode
001
Supporting SYS-OFF mode:
DCDC1=VDDS_WKUP_BG, VDDS_MEM, VDDS,
VDDS_SRAM (1.8 V)
DCDC2=VDDCORE (1.2 V)
DCDC3=VDD_MPU_IVA (1.2 V)
LDO1= VDDS_DPLL_DLL, VDDS_DPLL_PER (1.8 V)
LDO2=VDDS_MMC1 (1.8 V)
PGOOD delay time (reset delay): 400 ms
=1Ch: based on VDCDC1, VDCDC2, VDCDC3
64
Submit Documentation Feedback
Copyright © 2009–2018, Texas Instruments Incorporated
Product Folder Links: TPS65070 TPS65072 TPS65073 TPS650731 TPS650732
�TPS65070, TPS65072
TPS65073, TPS650731, TPS650732
www.ti.com
SLVS950I – JULY 2009 – REVISED MAY 2018
Application Information (continued)
Table 10. Sequencing Settings (continued)
PART
NUMBER
DEDICATED
FOR
DCDC_SQ[2..0]
LDO_SQ[2..0]
COMMENT
TPS650731
OMAP35xx
110
011
DCDC1=VDDS_WKUP_BG, VDDS_MEM, VDDS,
VDDS_SRAM (1.8 V)
DCDC2=VDDCORE (1.2 V)
DCDC3=VDD_MPU_IVA (1.2 V)
LDO1=VDDS_DPLL_DLL (1.8 V)
LDO2=VDDA_DAC (1.8 V): OFF, enabled by I2C
PGOOD delay time (reset delay): 400 ms
=1Ch: reset based on VDCDC1, VDCDC2,
VDCDC3
TPS650732
AM3505
AM3517
110
001
DCDC1=VDDS1-5 (1.8 V)
DCDC2=VDDSHV (3.3 V)
DCDC3=VDD_CORE (1.2 V)
LDO1=VDDA1P8V (1.8 V)
LDO2=VDDS_DPLL (1.8 V)
PGOOD delay time (reset delay): 400 ms
=1Ch: reset based on VDCDC1, VDCDC2,
VDCDC3
11.1.1.2 Starting TPS6507x
TPS6507x was developed for battery powered applications with focus on lowest shutdown and quiescent current.
To achieve this, in shutdown all mayor blocks and the system voltage at the output of the power path (SYS) are
turned off and only the input that turns on TPS6507x, pin PB_IN, is supervised. TPS6507x is designed such that
only an ON-key on PB_IN is needed pulling this pin LOW to enable TPS6507x. No external pullup is needed as
this is integrated into TPS6507x.
Once PB_IN is pulled LOW, the system voltage is ramped and the DC-DC converters and LDOs are started with
the sequencing defined for the version used. If PB_IN is released again, TPS6507x would turn off, so a pin was
introduced to keep TPS6507x enabled after PB_IN was released. Pin POWER_ON serves this function and
needs to be pulled HIGH before the user releases the ON-key (PB_IN = HIGH). This HIGH signal at
POWER_ON can be provided by the GPIO of a processor or by a pullup resistor to any voltage in the system
which is higher than 1.2 V. Pulling POWER-ON to a supply voltage would significantly reduce the time PB_IN
has to be asserted LOW. If POWER_ON is tied to a GPIO, the processor has to boot up first which may take
some time. In this case however, the processor could do some additional debouncing, hence does not keep the
power enabled if the ON-key is only pressed for a short time. When there is a supply voltage for the battery
charger at pins AC or USB, the situation is slightly different. In this case, the power path is enabled and the
system voltage (SYS) has ramped already to whatever the voltage at AC or USB is. The dcdc converters are not
enabled yet but the start-up could not only be done by pulling PB_IN=LOW but also by pulling
POWER_ON=HIGH.
In applications that do not require an ON-key but shall power-up automatically once supply voltage is applied,
there are two cases to consider. If TPS6507x is powered from its AC or USB pin (not powered from its BAT pin),
POWER-ON just needs to be pulled HIGH to enable the converters. PB_IN must not be tied LOW in this case.
If TPS6507x is powered from its BAT pin, PB_IN needs to be tied LOW to start up the converters.
Copyright © 2009–2018, Texas Instruments Incorporated
Submit Documentation Feedback
Product Folder Links: TPS65070 TPS65072 TPS65073 TPS650731 TPS650732
65
�TPS65070, TPS65072
TPS65073, TPS650731, TPS650732
SLVS950I – JULY 2009 – REVISED MAY 2018
www.ti.com
11.2 Typical Applications
11.2.1 General PMIC Application
AC
SYS
AC
switch
22 mF
SYS
USB
USB
switch
AVDD6
Iset
4.7 mF
Batt
BAT
switch
Charger/power path mgmt
Batt
10 mF
TS
TSX1 TSX2
INT_LDO
AD_IN1
INTERNAL BIASING
Thermistor
biasing
Touch
screen
biasing
AD_IN2
BYPASS
AD_IN3
TSY1 TSY2
AD_IN4
AD_IN1
AD_IN2
AD_IN3
AD_IN4
V_TS
ANALOG MUX
I_Ch
V_AC
V_USB
AD_IN5
V_SYS
V_BAT_SNS
10 BIT SAR
ADC
SCLK
State
machine
I²C
SDAT
INT
Power_ON
PB_IN
PB_OUT
ON/OFF circuitry / power good logic
undervoltage lockout
PGOOD
2.2 mH
L1
VIN_DCDC1/2
DCDC1
STEP-DOWN CONVERTER
600mA
EN_DCDC1
VI/O
VDCDC1
10 mF
PGND1
L2
DCDC2
STEP-DOWN CONVERTER
600mA / 1500mA
DEFDCDC2
EN_DCDC2
2.2 mH
Vmem
VDCDC2
10 mF
PGND2/PAD
2.2 mH
L3
VIN_DCDC3
DCDC3
STEP-DOWN CONVERTER
DEFDCDC3
EN_DCDC3
Sequencing
600mA / 1500mA
10 mF
PGND3/PAD
VINLDO1/2
EN_LDO1(I2C)
Vcore
VDCDC3
VLDO1
LDO1
200mA LDO
VLDO1
2.2 mF
VLDO2
EN_LDO2(I2C)
VLDO2
LDO2
200mA LDO
2.2 mF
L4
SYS
FB_wLED
iset1
1 mF
wLED boost
I2C controlled
up to 25mA per string
iset2
Isink1
Isink2
THRESHOLD
PGND4/PAD
(EN_wLED)
Reset
-
(EN_EXTLDO )
delay
+
Vref =1V
AGND
PGND(PAD)
Copyright © 2016, Texas Instruments Incorporated
Figure 45. Application Schematic for TPS6507x
66
Submit Documentation Feedback
Copyright © 2009–2018, Texas Instruments Incorporated
Product Folder Links: TPS65070 TPS65072 TPS65073 TPS650731 TPS650732
�TPS65070, TPS65072
TPS65073, TPS650731, TPS650732
www.ti.com
SLVS950I – JULY 2009 – REVISED MAY 2018
Typical Applications (continued)
11.2.1.1 Design Requirements
All converters and LDOs must have appropriate output filters or be terminated properly. The device also includes
a battery charger, wLEDs, and digital logic signals for PGOODs and RESETs.
11.2.1.2 Detailed Design Procedure
11.2.1.2.1 Output Filter Design (Inductor and Output Capacitor)
11.2.1.2.1.1 Inductor Selection
The step-down converters operate typically with 2.2-µH output inductor. Larger or smaller inductor values can be
used to optimize the performance of the device for specific operation conditions. The selected inductor has to be
rated for its DC resistance and saturation current. The DC resistance of the inductance will influence directly the
efficiency of the converter. Therefore an inductor with lowest DC resistance should be selected for highest
efficiency.
Equation 4 can be used to calculate the maximum inductor current under static load conditions. The saturation
current of the inductor should be rated higher than the maximum inductor current as calculated with Equation 4.
This is recommended because during heavy load transient the inductor current will rise above the calculated
value.
Vout
1Vin
D IL = Vout ´
L ´ ¦
(4)
ILmax = Ioutmax +
DIL
2
where
•
•
•
•
f = Switching Frequency (2.25 MHz typical)
L = Inductor Value
ΔIL= Peak to Peak inductor ripple current
ILmax = Maximum Inductor current
(5)
The highest inductor current will occur at maximum Vin.
Open core inductors have a soft saturation characteristic and they can usually handle higher inductor currents
versus a comparable shielded inductor.
A more conservative approach is to select the inductor current rating just for the maximum switch current of the
corresponding converter. It must be considered, that the core material from inductor to inductor differs and will
have an impact on the efficiency especially at high switching frequencies.
Refer to Table 11 and the typical applications for possible inductors.
Table 11. Tested Inductors
INDUCTOR TYPE
RECOMMENDED
MAXIMUM DC
CURRENT
INDUCTOR VALUE
SUPPLIER
LPS3010
0.6 A
2.2 µH
Coilcraft
LPS3015
1.2 A
2.2 µH
Coilcraft
LPS4018
1.5 A
2.2 µH
Coilcraft
VLCF4020
1.5 A
2.2 µH
TDK
11.2.1.2.1.2 Output Capacitor Selection
The advanced Fast Response voltage mode control scheme of the two converters allow the use of small ceramic
capacitors with a typical value of 10µF, without having large output voltage under and overshoots during heavy
load transients. Ceramic capacitors having low ESR values result in lowest output voltage ripple and are
therefore recommended. Please refer to for recommended components.
Copyright © 2009–2018, Texas Instruments Incorporated
Submit Documentation Feedback
Product Folder Links: TPS65070 TPS65072 TPS65073 TPS650731 TPS650732
67
�TPS65070, TPS65072
TPS65073, TPS650731, TPS650732
SLVS950I – JULY 2009 – REVISED MAY 2018
www.ti.com
If ceramic output capacitors are used, the capacitor RMS ripple current rating will always meet the application
requirements. Just for completeness the RMS ripple current is calculated as:
Vout
11
Vin ´
IRMSCout = Vout ´
L ´ ¦
2 ´ 3
(6)
At nominal load current the inductive converters operate in PWM mode and the overall output voltage ripple is
the sum of the voltage spike caused by the output capacitor ESR plus the voltage ripple caused by charging and
discharging the output capacitor:
Vout
1ö
1
Vin ´ æ
DVout = Vout ´
+ ESR ÷
ç
´
´
¦
L ´ ¦
8
Cout
è
ø
(7)
Where the highest output voltage ripple occurs at the highest input voltage Vin.
At light load currents the converters operate in Power Save Mode and the output voltage ripple is dependent on
the output capacitor value. The output voltage ripple is set by the internal comparator delay and the external
capacitor. The typical output voltage ripple is less than 1% of the nominal output voltage.
11.2.1.2.1.3 Input Capacitor Selection/Input Voltage
Because of the nature of the buck converter having a pulsating input current, a low ESR input capacitor is
required for best input voltage filtering and minimizing the interference with other circuits caused by high input
voltage spikes. The converters need a ceramic input capacitor of 10 µF. The input capacitor can be increased
without any limit for better input voltage filtering.
The input voltage for the step-down converters needs to be connected to pin VINDCDC1/2 for DCDC1 and
DCDC2 and to pin VINDCDC3 for DCDC3. These pins need to be tied together to the power source on pin SYS
(output of the power path). The 3 step-down converters must not be supplied from different input voltages.
Table 12. Possible Capacitors
CAPACITOR
VALUE
CASE SIZE
MANUFACTURER AND PART
NUMBER
TYPE
22 µF
22 µF
0805
TDK C2012X5R0J226MT
Ceramic
0805
Taiyo Yuden JMK212BJ226MG
Ceramic
10 µF
0805
Taiyo Yuden JMK212BJ106M
Ceramic
10 µF
0805
TDK C2012X5R0J106M
Ceramic
11.2.1.2.1.4 Output Voltage Selection
The DEFDCDC2 and DEFDCDC3 pins are used to set the output voltage for step-down converter DCDC2 and
DCDC3. See Table 2 for the default voltages if the pins are pulled to GND or to Vcc.
11.2.1.2.1.5 Voltage Change on DCDC2 and DCDC3
The output voltage of DCDC2 and DCDC3 can be changed during operation from, for example, 1 V to 1.2 V
(TPS65070) and back by toggling the DEFDCDC2 or DEFDCDC3 pin. The status of the DEFDCDC3 pin is
sensed during operation and the voltage is changed as soon as the logic level on this pin changes from low to
high or vice versa.
The output voltage for DCDC2 and DCDC3 can also be changed by changing the register content in registers
DEFDCDC2_LOW, DEFDCDC2_HIGH, DEFDCDC3_LOW and DEFDCDC3_HIGH.
11.2.1.2.2 LDOs
11.2.1.2.2.1 Output Capacitor Selection
The control loop of the LDOs is compensated such that it requires a minimum of 2.2 µF as an output capacitor.
Ceramic X5R or X7R capacitors should be used.
68
Submit Documentation Feedback
Copyright © 2009–2018, Texas Instruments Incorporated
Product Folder Links: TPS65070 TPS65072 TPS65073 TPS650731 TPS650732
�TPS65070, TPS65072
TPS65073, TPS650731, TPS650732
www.ti.com
SLVS950I – JULY 2009 – REVISED MAY 2018
11.2.1.2.2.2 Input Capacitor Selection
The input voltage for the two LDOs should be bypassed by a ceramic capacitor of 2.2 µF minimum.
11.2.1.2.2.3 Output Voltage Change For LDO1 and LDO2
The output voltage of LDO1 and LDO2 is defined in registers LDO_CTRL1 for LDO1 and in register DEFLDO2
for LDO2. The output voltage can be changed in these registers after power-up.
11.2.1.2.2.4 Unused LDOs
In case both LDOS are unused, connect VINLDO1/2 to the SYS node. If VINLDO1/2 is tied to GND, the SYS
voltage will not be turned off during a power-down with only a battery connected and a transit to ON-state is not
possible afterwards.
11.2.1.2.3 White-LED Boost Converter
11.2.1.2.3.1 LED-Current Setting/Dimming
The white LED boost converter generates an output voltage, high enough to drive current through up to 10 white
LEDs connected in series. TPS6507x support one or two strings of white LEDs. If two strings of white LEDs are
used, the number of LEDs in each string is limited to 6LEDs due to the switch current limit as defined in the
electrical characteristics. The boost converter block contains two current sinks to control the current through the
white LEDs. The anodes of the “upper” white-LEDs are directly connected to the output voltage at the output
capacitor. The cathode of the “lowest” LED is connected to the input of the current sink at pin ISINK1 or ISINK2.
The internal current sink controls the output voltage of the boost converter such that there is a minimum voltage
at the current sink to regulate the defined current. The maximum current is set with a resistor connected from pin
ISET1 to GND. Dimming is done with an internal PWM modulator by changing the duty cycle in the current sinks
from 1% to 100%. In order to set a LED current of less than 1% of the current defined at ISET1, a second current
range is set with a resistor at pin ISET2 to GND. By changing between the two current ranges and varying the
duty cycle, it is possible to achieve a dimming ratio of > 1:100. The main functions of the converter like enable /
disable of the converter, PWM duty cycle and dimming frequency are programmed in registers WLED_CTRL1
and WLED_CTRL2 – see the register description for details.
If only one string of white LEDs are used, ISINK1 and ISINK2 need to be connected in parallel.
11.2.1.2.3.2 Setup
In applications not requiring the wLED boost converter, the pins should be tied to a GND as stated below:
Pins L4, FB_wLED, ISINK1 and ISINK2 should be directly connected to GND. Each ISET1 and ISET2 should be
connected to GND with a 100-kΩ resistor. Optionally ISET1 and ISET2 can be used as analog inputs to the
ADC. In this case, these pins can be tied to a voltage source in the range from 0 V to 2.25 V.
11.2.1.2.3.3 Setting the LED Current
There are two resistors which set the default current for the current sinks at ISINK1 and ISINK2.
The resistor connected to ISET1 is used if Bit CURRENT LEVEL is set 1 in register 19h.
The resistor connected to ISET2 is used if Bit CURRENT LEVEL is set 0 in register 19h (default).
This allows switching between two different maximum values for the LED current with one Bit to extend the
resolution for dimming.
Dimming is done by an internal PWM signal that turns on and off the current sinks ISINK1 and ISINK2 at 200Hz
(default). The duty cycle range is 1% to 100% with a 1% resolution and a default duty cycle of 30%. In order to
get the full scale LED current, the PWM dimming needs to be set to 100% in register 19h. This is done by writing
63h to register 19h.
KISET is defined to be 1000 in the electrical spec, the reference voltage at ISET1 and ISET2 is 1.24 V.
The current for each string is set by the resistor to:
ISINK1=ISINK2= KISET × 1.24V/RISETx
RISET1, RISET2 = KISET × 1.24V/10mA=124 kΩ
(8)
(9)
A resistor value of 124 kΩ sets the current on each string to 10 mA.
Copyright © 2009–2018, Texas Instruments Incorporated
Submit Documentation Feedback
Product Folder Links: TPS65070 TPS65072 TPS65073 TPS650731 TPS650732
69
�TPS65070, TPS65072
TPS65073, TPS650731, TPS650732
SLVS950I – JULY 2009 – REVISED MAY 2018
www.ti.com
For one string of wLEDs, both strings need to be connected in parallel, so the current in the wLEDs is twice the
current programmed by the resistor at ISET1 or ISET2.
Connecting both strings in parallel is required because the wLED converter generates its output voltage
dependant on the current in ISINK1 and ISINK2. If the current falls below the target, the output voltage is
increased. If one string is open, the wLED driver will boost the output voltage to its maximum because it
assumes the voltage is not high enough to drive current into this string (there could be different numbers of
wLEDs in the two strings).
11.2.1.2.3.4 Inductor Selection
The inductor in a boost converter serves as an energy storage element. The energy stored equals ½ L × I2.
Therefore, the inductor must not be saturated as the inductance will drop and the energy stored will be reduced
causing bad efficiency. The converter operates with typically 15-µH to 22-µH inductors. A design example for an
application powering 6LEDs in one string given below:
Vin = 2.8 V — minimum input voltage for the boost converter
Vo = 6 × 3.2 V = 19.2 V — assuming a forward voltage of 3.2 V per LED
Vf = 0.5 V — forward voltage of the Schottky diode
Io = 25 mA maximum LED current
Fsw = 1.125 MHz — switching frequency — T=890 ns
Rds(on) = 0.6R — drain-source resistance of the internal NMOS switch
Vsw — voltage drop at the internal NMOS switch
IAVG — average current in NMOS when turned on
The duty cycle for a boost converter is:
Vo + V ¦ - Vin
D=
Vo + V ¦ - Vsw
(10)
With:
Vsw = Rds(on) ´ IAVG
Iavg =
Io
1 - D
(11)
A different approach to calculate the duty cycle is based on the efficiency of the converter. The typical number
can be found in the graphs, or as a first approach, we can assume to get an efficiency of about 80% as a typical
value.
æ
ö
Vi
D » ç1 - h ´
÷
Vo + V ¦ ø
è
(12)
With the values given above
2.8 V
æ
ö
D » ç 1 - 0.8
÷ » 89%
19.2
V
+
0.5
V
è
ø
(13)
ton = T × D = 890 ns × 0.89 = 792 ns
toff = 890 ns – 792 ns = 98ns
Vsw = Rds(on)
´
IAVG = Rds(on)
´
Io
25 mA
= 0.6W ´
» 140 mV
1 - D
1 - 0.89
(14)
When the NMOS switch is turned on, the input voltage is forcing a current into the inductor. The current slope
can be calculated with:
V L ´ dt
(Vin - Vsw) ´ dt
(2.8V - 0.14V) ´ 792 ns
di =
=
=
= 117 mA
L
L
18 mH
(15)
Iavg =
Io
25 mA
=
= 227 mA
1 - D
1 - 0.89
(16)
The minimum and maximum inductor current can be found by adding half of the inductor current ripple (di) to the
average value, which gives:
70
Submit Documentation Feedback
Copyright © 2009–2018, Texas Instruments Incorporated
Product Folder Links: TPS65070 TPS65072 TPS65073 TPS650731 TPS650732
�TPS65070, TPS65072
TPS65073, TPS650731, TPS650732
www.ti.com
SLVS950I – JULY 2009 – REVISED MAY 2018
117 mA
= 285 m A
2
117 mA
Imin = 227 m A = 169 mA
2
Imax = 227 mA +
(17)
Given the values above, an inductor with a current rating greater than 290 mA is needed. Plenty of margin
should be kept to the rating in the inductor vendors data sheets as the maximum current is typically specified at a
inductance drop of 20% or even 30%. A list of tested inductors is given in Table 13 with the following test
conditions.
Test conditions:
• Vin = 2.8 V
• Vf = 3.2 V (per LED)
• Vf = 0.5 V (Schottky diode)
• Iout = 25 mA per string; no dimming
Table 13. Tested Inductors
LED CONFIGURATION
INDUCTOR TYPE
INDUCTOR VALUE
SUPPLIER
1 × 6LEDs
LPS3015
18 µH
Coilcraft
2 × 6LEDs
LPS4018
47 µH
Coilcraft
1 × 10LEDs
LPS4018
47 µH
Coilcraft
Other inductors, with lower or higher inductance values can be used. A higher inductance will cause a lower
inductor current ripple and therefore will provide higher efficiency. The boost converter will also stay in
continuous conduction mode over a wider load current range. The energy stored in an inductor is given by
E=1/2L × I2 where I is the peak inductor current. The maximum current in the inductor is limited by the internal
current limit of the device, so the maximum power is given by the minimum peak current limit (see electrical
specifications) times the inductance value. For highest output power, a large inductance value is needed. The
minimum inductor value possible is limited by the energy needed to supply the load. The limit for the minimum
inductor value is given during the on-time of the switch such that the current limit is not reached.
Example for the minimum inductor value:
Vin = 4.2 V, Vout = 19.7 V, Iout = 5 mA, Vsw =0.1 V
→ D = 79%
→ ton = 703 ns
During the on-time, the inductor current should not reach the current limit of 1.4 A.
With V… voltage across the inductor (V = Vin–Vsw)
→ L = V × dt/di = (4.2 V–0.1 V) × 703 ns/1.4 A = 2µH
11.2.1.2.3.5 Diode Selection
Due to the non-synchronous design of the boost converter, an external diode is needed. For best performance, a
Schottky diode with a voltage rating of 40V or above should be used. A diode such as the MBR0540 with an
average current rating of 0.5 A is sufficient.
11.2.1.2.3.6 Output Capacitor Selection
A ceramic capacitor such as X5R or X7R type is required at the output. See Table 14 for reference.
Table 14. Tested Capacitor
LED
CONFIGURATION
TYPICAL VOLTAGE
ACROSS OUTPUT
CAPACITOR
CAPACITOR
VALUE
CAPACITOR
SIZE
2x6LEDs or 1x6LEDs
21 V
4.7 µF / 50 V
1x10LEDs
35 V
4.7 µF / 50 V
Copyright © 2009–2018, Texas Instruments Incorporated
CAPACITOR TYPE
MANUFACTURER
1206
UMK316BJ475KL
Taiyo Yuden
1210
GRM32ER71H475KA
Murata
Submit Documentation Feedback
Product Folder Links: TPS65070 TPS65072 TPS65073 TPS650731 TPS650732
71
�TPS65070, TPS65072
TPS65073, TPS650731, TPS650732
SLVS950I – JULY 2009 – REVISED MAY 2018
www.ti.com
11.2.1.2.3.7 Input Capacitor Selection
A small ceramic input capacitor of 10 µF is needed at the input of the boost converter. If the inductor is directly
connected to the SYS output of TPS6507x, the capacitor can be shared. In this case the capacitance needs to
be 22 µF or above. Only X5R or X7R ceramic capacitors should be used.
11.2.1.2.4 Battery Charger
11.2.1.2.4.1 Temperature Sensing
The battery charger integrated in TPS6507x has an over temperature protection for the Li-ion cell. The
temperature is sensed with a NTC located at the battery. Comparators in TPS6507x suspend charge at a
temperature below 0°C and above 45°C. The charger supports two different resistor values for the NTC. The
default is internally programmed to 10 kΩ. It is possible to change to a 100-kΩ NTC with the I2C interface.
Table 15. NTCs Supported
RESISTANCE AT 25°C
CURVE / B VALUE
RT2 NEEDED FOR
LINEARIZATION
MANUFACTURER
10 kΩ
Curve 2 / B=3477
75 kΩ
Several
100 kΩ
Curve 1 / B=3964
370 kΩ
Several
For best performance, the NTC needs to be linearized by connecting a resistor (RT2) in parallel to the NTC as
shown in Figure 47. The resistor value of RT2 needed for linearization can be found in Table 15.
If the battery charger needs to be operated without a NTC connected, for example, for test purposes, a resistor
of 10 kΩ or 100 kΩ needs to be connected from TS to GND, depending for which NTC TPS6507x is configured
to in register CHCONFIG1.
RT1
2.25 V
TS
NTC
RT2
VHOT(45)
VCOLD(0)
+
+
Copyright © 2016, Texas Instruments Incorporated
Figure 46. Linearizing the NTC
11.2.1.2.4.2 Changing the Charging Temperature Range (Default 0°C to 45°C)
The battery charger is designed to operate with the two NTCs listed above. These will give a cold and hot
temperature threshold of 0°C and 45°C. If the charger needs to operate (charge) in a wider temperature range,
for example, –5°C to 50°C, the circuit can be modified accordingly. The NTC changes its resistance based on the
equation listed below:
RNTC (T ) =
æ æ 1 1 öö
ç B´ç ÷
T T 0 ÷ø ø
è
R 25 ´ e è
(18)
With:
R25 = NTC resistance at 25°C
T = temperature in Kelvin
T0 = reference temperature (298K)
72
Submit Documentation Feedback
Copyright © 2009–2018, Texas Instruments Incorporated
Product Folder Links: TPS65070 TPS65072 TPS65073 TPS650731 TPS650732
�TPS65070, TPS65072
TPS65073, TPS650731, TPS650732
www.ti.com
SLVS950I – JULY 2009 – REVISED MAY 2018
Resistor RT2 in parallel to the NTC is used to linearize the resistance change with temperature of the NTC. As
the NTC has a high resistance at low temperature, the resulting resistance of NTC in parallel with RT2 is lower
especially for low temperatures where the NTC has a high resistance, so RT2 in parallel has a significant impact.
For higher temperatures, the resistance of the NTC dropped significantly, so RT2 in parallel does not change the
resulting resistance a lot. See Figure 47.
RT1
TS
RT3
2.25 V
NTC
RT2
VHOT(45)
VCOLD(0)
+
+
Copyright © 2016, Texas Instruments Incorporated
Figure 47. Changing the Temperature Range
11.2.1.3 Application Curves
As Figure 48 shows, the result is an extended charging temperature range at lower temperatures. The upper
temperature limit is shifted to lower values as well resulting in a V(HOT) temperature of slightly less than 45°C.
Therefore RT3 is needed to shift the temperature range to higher temperatures again. Figure 49 shows the result
for:
• RT2 = 47 kΩ
• RT3 = 820 R
Using these values will extend the temperature range for charging to –5°C to 50°C.
40000
1.8
36000
1.7
1.6
32000
RNTC (T)
28000
1.5
24000
1.4
20000
1.3
16000
1.2
VTS (T)
12000
Rp (T)
1.1
8000
1
4000
0.9
0
-5
0.8
0
5
10 15 20 25 30 35
Temperature - (T)
40 45
50
Figure 48. NTC [R(T)] and NTC in Parallel to RT2 [Rges(T)]
Copyright © 2009–2018, Texas Instruments Incorporated
-5
0
5
10
15 20 25 30 35
Temperature - (T)
40 45
50
Figure 49. Resulting TS Voltage
Submit Documentation Feedback
Product Folder Links: TPS65070 TPS65072 TPS65073 TPS650731 TPS650732
73
�TPS65070, TPS65072
TPS65073, TPS650731, TPS650732
SLVS950I – JULY 2009 – REVISED MAY 2018
www.ti.com
11.2.2 Powering OMAP-L138
TPS65070
AC
BAT
BAT
1 mF
charger / power
path
USB
1 mF
10 mF
NTC
TS
ISET
RTC_CVDD (1.2V)
Vin
DEFDCDC2
L1
SYS
DCDC1
600 mA
DEFDCDC3
AVDD6
EN
10 mF
2.2 mH
USB0_VDDA33 (3.3 V)
USB1_VDDA33 (3.3 V)
VDCDC1
TPS3805H33
10 mF
VDD
SYS
EN_DCDC1
Sense
Reset
VINLDO1/2
SYS
LDO
VINDCDC3
BYPASS
sets default
voltage of
DCDC3 to
1.0 V or 1.2 V
OMAP-L138
TPS78101
22 mF
SYS
VINDCDC1/2
set charge
current
SYS
sets default
voltage of
DCDC2 to
1.8 V or 3.3 V
LiIon
L2
1 mF
DCDC2
1500 mA
INT_LDO
2.2 mF
AVDD6
PB_IN
LDO2
200 mA
DVDD3318_A (3.3V or 1.8 V)
VDCDC2
L3
DCDC3
1500 mA
2.2 mH
DVDD3318_B (3.3V or 1.8 V)
10 mF
DVDD3318_C (3.3V or 1.8 V)
2.2 mH
CVDD (1.2 V)
VDCDC3
10 mF
4.7 mF
SATA_VDD (1.2 V)
VLDO2
ON
PLL0_VDDA (1.2 V)
PLL1_VDDA (1.2 V)
2.2 mF
USBs CVDD (1.2 V)
VDDARNWA/1 (1.2 V)
EN_DCDC2
2.2 mF
SATA_VDDR (1.8 V)
10 kW
L4
SYS
Si2333
VLDO1
100 kW
LDO1
200 mA
EN_DCDC3
USB0_VDDA18 (1.8 V)
1 mF
USB1_VDDA18 (1.8 V)
DDR_DVDD18 (1.8 V)
FB_wLED
PGND
1 mF
BC847
ISINK1
VDDIO
wLED
boost
PowerPad(TM)
ISINK2
ISET1
AD_IN1(TSX1)
100 kW
3.3 kW
100 kW
PB_INTERRUPT
PGOOD
RESET
SDAT
SDAT
SCLK
AD_IN2(TSX2)
SCLK
INT
POWER_ON
AD_IN3(TSY1)
AD_IN4(TSY2)
THRESHOLD
3.3 kW
PB_OUT
100 kW
AGND
ISET2
+
INT
GPIO (power hold)
Reset
delay
Copyright © 2016, Texas Instruments Incorporated
Figure 50. Powering OMAP-L138
11.2.2.1 Design Requirements
Table 16. OMAP - L138 Power Table
DEVICE REGULATOR
VOLTAGE
PROCESSOR RAIL NAME
SEQUENCE
DCDC1
3.3 V
USB0_VDDA33
USB1_VDDA33
5
DCDC2
3.3 V or 1.8 V
DVDD3318_A
DVDD3318_B
DVDD3318_C
3
DCDC3
1.2 V
CVDD
1
1.2 V
SATA_VDD
PLL0_VDDA
PLL1_VDDA
USBs CVDD
VDDARNWA/1
4
1.8 V
SATA_VDDR
USB0_VDDA18
USB1_VDDA18
DDR_DVDD18
2
LDO1
LDO2
74
Submit Documentation Feedback
Copyright © 2009–2018, Texas Instruments Incorporated
Product Folder Links: TPS65070 TPS65072 TPS65073 TPS650731 TPS650732
�TPS65070, TPS65072
TPS65073, TPS650731, TPS650732
www.ti.com
SLVS950I – JULY 2009 – REVISED MAY 2018
11.2.2.2 Detailed Design Procedure
Using the requirements above follow the procedure from Detailed Design Procedure to design the TPS6507x for
the OMAP-L138.
PB_IN
can be released HIGH any time
after POWR_ON = HIGH
PB_OUT
level not defined as
voltage at pull-up has
not ramped at that time
50ms debounce
50 ms debounce
SYS
POWER_ON
asserted HIGH by the application processor
any time while PB_IN = LOW to keep the
system alive
external LDO
(RTC_CVDD)
1.2 V
VDCDC3
(CVDD)
1.2 V
170 ms
250 ms
VLDO2
(SATA_VDD)
1.2 V
VDCDC2
(VDDSHV)
1.8 V
170 ms
250 ms
VLDO1
(SATA_VDDR)
1.8 V
VDCDC1
(USB0_VDDA33)
3.3 V
250 ms
170 ms
PGOOD
(Reset)
400 ms
Figure 51. Sequence for OMAP-L138
Copyright © 2009–2018, Texas Instruments Incorporated
Submit Documentation Feedback
Product Folder Links: TPS65070 TPS65072 TPS65073 TPS650731 TPS650732
75
�TPS65070, TPS65072
TPS65073, TPS650731, TPS650732
SLVS950I – JULY 2009 – REVISED MAY 2018
www.ti.com
11.2.3 Powering Atlas IV
AC
TPS65072
BAT
BAT
1 mF
10 mF
USB
charger / power path
TS
LiIon
NTC
SYS
1 mF
2 x 10 mF
VINDCDC1/2
ISET
VINDCDC3
set
charge
current
BYPASS (2.25 V reference output)
DEFDCDC2
ALTAS IV
L1
DEFDCDC3
DCDC1
600 mA
VINLDO1/2
SYS
1 mF
2.2 mH
VCC_3V3 (VDDIO)
VDCDC1
10 mF
L2 2.2 mH
DCDC2
600 mA
INT_LDO
VCC_1V8 (VDDIO_MEM)
VDCDC2
2.2 mF
L3
DCDC3
600 mA
AVDD6
4.7 mF
10 mF
2.2 mH
VDD_PDN (1.2 V)
VDCDC3
10 mF
VLDO2
/PB_IN
VDD_PRE (1.2 V)
LDO2
200 mA
2.2 mF
LDO1
200 mA
2.2 mF
ON /
OFF
VDDPLL (1.2 V)
EN_DCDC1
VIN
SYS
EN_DCDC2
EN_EXTLDO
L4
SYS
VDD_RTCIO
LDO
EN
EN_wLED
FB_wLED
1 mF
ISINK1
GPIO (enable wLED)
GPIO (power hold)
POWER_ON
EN_DCDC3
wLED
boost
X_PWR_EN
VIO
ISET1
ISET2
PB_OUT
4.7k
4.7k
ISINK2
PB_INTERRUPT
RESET
SDAT
PGOOD
SDAT
SCLK
SCLK
INT
INT
Note: /Reset to Atlas 4 may need to
be a RC delay from VDDIO
Copyright © 2016, Texas Instruments Incorporated
Figure 52. Powering Atlas IV
11.2.3.1 Design Requirements
Table 17. Atlas IV Power Table
76
DEVICE REGULATOR
VOLTAGE
PROCESSOR RAIL NAME
SEQUENCE
DCDC1
DCDC2
3.3 V
VCC_3V3 (VDDIO)
2
1.8 V
VCC_1V8 (VDDIO_MEM)
2
DCDC3
1.2 V
VDD_PDN
3
LDO1
1.2 V
VDD_PRE
3
LDO2
1.2 V
VDDPLL
1
Submit Documentation Feedback
Copyright © 2009–2018, Texas Instruments Incorporated
Product Folder Links: TPS65070 TPS65072 TPS65073 TPS650731 TPS650732
�TPS65070, TPS65072
TPS65073, TPS650731, TPS650732
www.ti.com
SLVS950I – JULY 2009 – REVISED MAY 2018
11.2.3.2 Detailed Design Procedure
Using the requirements above follow the procedure from Detailed Design Procedure to design the TPS6507x for
the Atlas IV.
PB_IN
can be released HIGH any time
after POWR_ON=HIGH
15s
PB_OUT
level not defined as
voltage at pull-up has
not ramped at that time
50ms debounce
50ms debounce
SYS
POWER_ON
asserted HIGH by the application processor
any time while /PB_IN=LOW to keep the
system alive
EN_EXTLDO
(VDD_RTCIO)
VLDO2
(VDD_PRE)
VDCDC1
(VCC_3V3)
1ms
0.95 x Vout,nominal
1ms
0.95 x Vout,nominal
1ms
250 ms
1ms
250 ms
VDCDC2
(VCC_1V8)
EN_DCDC3
(X_PWR_EN)
VDCDC3
(VDD_PDN)
170 ms
VLDO1
(VDDPLL)
250 ms
170 ms
250 ms
PGOOD
(X_RESET_B)
20ms
0.5ms
Figure 53. Sequence for Atlas IV
Copyright © 2009–2018, Texas Instruments Incorporated
Submit Documentation Feedback
Product Folder Links: TPS65070 TPS65072 TPS65073 TPS650731 TPS650732
77
�TPS65070, TPS65072
TPS65073, TPS650731, TPS650732
SLVS950I – JULY 2009 – REVISED MAY 2018
www.ti.com
11.2.3.2.1 Prima SLEEP Mode and DEEP SLEEP Mode Support
TPS6507x contains a sequencing option for the Sirf Prima processor. The sequencing option defines how the
voltages are ramped at initial power-up and shutdown as well as the timing for entering power save mode for the
processor (SLEEP mode). The Prima processor supports SLEEP mode and also DEEP SLEEP mode. The main
difference from a power supply point of view is:
• How the supply voltages are turned off
• Which voltages are turned off
• How power save mode is exited into normal mode
• Reset asserted or not (PGOOD pin of TPS6507x going actively low)
The sequencing option for Prima is defined in one register each for the sequencing of the DC-DC converters and
for the LDOs. DCDC_SQ[2..0]=100 in register CON_CTRL1 defines the start-up sequence for the DC-DC
converters while LDO_SQ[2..0]=111 defines the sequence for the LDOs. The default is factory programmed
therefore it is ensured the first power-up is done in the right sequence.
When TPS6507x is off, a small state machine supervises the status of pin PB_IN while major blocks are not
powered for minimum current consumption from the battery as long as there is no input voltage to the charger.
Power-up for the TPS6507x is started by PB_IN going LOW. This will turn on the power-FET from the battery so
the system voltage (SYS) is rising and the main blocks of the PMU are powered. After a debounce time of 50
ms, the main state machine will pull PB_OUT = LOW to indicate that there is a “keypress” by the user and will
ramp the DC-DC converters and LDOs according to the sequence programmed. It is important to connect the
power rails for the processor to exactly the DC-DC converters and LDOs as shown in the schematic and
sequencing diagrams for proper sequencing. For Prima, the voltage rails for VDD_RTCIO needs to ramp first.
This power rail is not provided by the PMU but from an external LDO which is enabled by a signal called
EN_EXTLDO from the PMU. The PMU will therefore first rise the logic level an pin EN_EXTLDO high to enable
the external LDO. After a 1-ms delay the PMU will ramp LDO2 for VDD_PRE and DCDC3 for VDD_PDN. When
the output voltage of LDO2 is within it s nominal range the internal power good comparator will trigger the state
machine which will ramp DCDC1 and DCDC2 to provide the supply voltage for VCC_3V3 and VCC_1V8. Now
Prima needs to pull its X_PWR_EN signal high which drives EN_DCDC3 on the PMU. This will now enable
LDO1 to power VDDPLL. X_RESET_B will be released by the PMU on pin PGOOD based on the voltage of
DCDC1 after a delay of 20 ms.
11.2.3.2.2 SLEEP Mode
At first power-up (start-up from OFF state), the voltage for VDD_PDN is ramped at the same time than
VDD_PRE. This is defined by Bit MASK_EN_DCDC3 in register CON_CTRL2 which is “1” per default. For
enabling SLEEP mode, Prima needs to clear this Bit, so the EN_DCDC3 pin takes control over the DCDC3
converter. Prima SLEEP mode is initialized by Prima pulling its X_PWR_EN pin LOW which is driving the
EN_DCDC3 pin of TPS6507x. This will turn off the power for VDDPLL (LDO1) and also for VDD_PDN (DCDC3).
All other voltage rails will stay on. Based on a “keypress” with PB_OUT going LOW, Prima will wake up and
assert EN_DCDC3=HIGH. This will turn DCDC3 and LDO1 back on and Sirf PRIMA will enter normal operating
mode.
78
Submit Documentation Feedback
Copyright © 2009–2018, Texas Instruments Incorporated
Product Folder Links: TPS65070 TPS65072 TPS65073 TPS650731 TPS650732
�TPS65070, TPS65072
TPS65073, TPS650731, TPS650732
www.ti.com
SLVS950I – JULY 2009 – REVISED MAY 2018
PB_IN
can be released HIGH any time
after POWR_ON=HIGH
15s
PB_OUT
level not defined as
voltage at pull-up has
not ramped at that time
50ms debounce
50ms debounce
SYS
POWER_ON
asserted HIGH by the application processor
any time while /PB_IN=LOW to keep the
system alive
EN_EXTLDO
(VDD_RTCIO)
VLDO2
(VDD_PRE)
VDCDC1
(VCC_3V3)
1ms
0.95 x Vout,nominal
1ms
0.95 x Vout,nominal
250 ms
170 ms
VDCDC2
(VCC_1V8)
250 ms
170 ms
Bit
MASK_EN_DCDC3
Bit MASK_EN_DCDC3 is cleared by the application processor.
DCDC3 and LDO1 are enabled / disabled by EN_DCDC3 to
enter / exit SLEEP mode
EN_DCDC3
(X_PWR_EN)
VDCDC3
(VDD_PDN)
Bit MASK_EN_DCDC3 is
set per default. DCDC3 is
startted with LDO2
170 ms
VLDO1
(VDDPLL)
170 ms
250 ms
250 ms
170 ms
PGOOD
(X_RESET_B)
20ms
0.5ms
Figure 54. Sequence for Sirf Prima SLEEP Mode
Copyright © 2009–2018, Texas Instruments Incorporated
Submit Documentation Feedback
Product Folder Links: TPS65070 TPS65072 TPS65073 TPS650731 TPS650732
79
�TPS65070, TPS65072
TPS65073, TPS650731, TPS650732
SLVS950I – JULY 2009 – REVISED MAY 2018
www.ti.com
11.2.3.2.3 DEEP SLEEP Mode
Entry into DEEP SLEEP mode is controlled by Prima by writing to register CON_CTRL2 of TPS6507x. Before
entering DEEP SLEEP mode, Prima will back up all memory and set Bit DS_RDY=1 to indicate the memory was
saved and the content is valid. Setting PWR_DS=1 will turn off all voltage rails except DCDC2 for the memory
voltage and the PMU will apply a reset signal by pulling PGOOD=LOW. Prima can not detect logic level change
by PB_OUT going low in DEEP SLEEP mode. A wakeup from DEEP sleep is therefore managed by the PMU.
The PMU will clear Bit PWR_DS and turn on the converters again based on a user “keypress” when PB_IN is
being pulled LOW. Prima will now check if DS_RDY=1 to determine if the memory content is still valid and clear
the Bit afterwards. In case there is a power loss and the voltage of the PMU is dropping below the undervoltage
lockout threshold, the registers in the PMU are re-set to the default and DS_RDY is cleared. The PMU would
perform a start-up from OFF state instead of exit from DEEP SLEEP and Sirf PRIMA would read DS_RDY=0,
which indicates memory data is not valid.
See Sequence diagrams for Sirf Prima SLEEP and DEEP SLEEP in Figure 54 and Figure 55.
80
Submit Documentation Feedback
Copyright © 2009–2018, Texas Instruments Incorporated
Product Folder Links: TPS65070 TPS65072 TPS65073 TPS650731 TPS650732
�TPS65070, TPS65072
TPS65073, TPS650731, TPS650732
www.ti.com
SLVS950I – JULY 2009 – REVISED MAY 2018
PB_IN
can be released HIGH any time
after POWR_ON=HIGH
startup from OFF state
PB_OUT
wakeup
from
DEEP
SLEEP
level not defined as
voltage at pull-up has
not ramped at that time
50ms debounce
50ms debounce
SYS
POWER_ON
asserted HIGH by the application processor
any time while /PB_IN=LOW to keep the
system alive
EN_EXTLDO
(VDD_RTCIO)
VLDO2
(VDD_PRE)
VDCDC1
(VCC_3V3)
1ms
0.95 x Vout,nominal
0.95 x Vout,nominal
1ms
0.95 x Vout,nominal
250 ms
170 ms
VDCDC2
(VCC_1V8)
250 ms
170 ms
Bit
MASK_EN_DCDC3
set Bits DS_RDY to indicate
memory was backed-up
Bit
DS_RDY
Bit
PWR_DS
DS_RDY=0, start with
initial power-up sequence
DS_RDY=1, start wake-up sequence;
otherwise start initial power-up from OFF state
set Bits PWR_DS to set Titan 2
to DEEP SLEEP mode
DS_RDY is
cleared by user
software
PWR_DS is
cleared by
PB_IN going
LOW
EN_DCDC3
(driven from
VDCDC1)
VDCDC3 Bit MASK_EN_DCDC3 is
(VDD_PDN) set per default. DCDC3 is
startted at the same time
with LDO2
VLDO1
(VDDPLL)
PGOOD
(X_RESET_B)
20ms
20ms
Figure 55. Sequence for Sirf Prima DEEP SLEEP Mode
Copyright © 2009–2018, Texas Instruments Incorporated
Submit Documentation Feedback
Product Folder Links: TPS65070 TPS65072 TPS65073 TPS650731 TPS650732
81
�TPS65070, TPS65072
TPS65073, TPS650731, TPS650732
SLVS950I – JULY 2009 – REVISED MAY 2018
www.ti.com
11.2.4 OMAP35xx (Supporting SYS-OFF Mode)
TPS65073
AC
1uF
charger / power path
1uF
LiIon
TS
SYS NTC
ISET
VINDCDC1/2
set charge
current
VINDCDC3
DEFDCDC2
L1
DCDC1
600mA
DEFDCDC3
VINLDO1/2
SYS
VDDS_MMC1(1.8V / 3.0V)
SYS
BAT
USB
OMAP35xx
TPS79901
Vin
LDO
10uF EN
BAT
VDCDC1
L2
1uF
DCDC2
600mA
L3
DCDC3
1500mA
AVDD6
VDDS_WKUP_BG (1.8V)
VDDS_MEM; VDDS
VDDS_SRAM
10uF
1.5uH
VDDCORE (1.2V)
VDCDC2
/PB_IN
ON /
OFF
2 x 10uF
1.5uH
10uF
1.5uH
VDD_MPU_IVA (1.2V)
VDCDC3
10uF
LDO2
LDO2
200mA
AD_IN1 (TSX1)
VDDA_DAC (1.8V)
2.2uF
LDO1
AD_IN2 (TSX2)
LDO1
200mA
AD_IN3 (TSY1)
AD_IN4 (TSY2)
VDDS_DPLL_DLL (1.8V)
VDDS_DPLL_PER (1.8V)
2.2uF
VDDS
EN_DCDC1
BYPASS
SYS
SN74LVC1G06DCK
VDDS VCC
INT_LDO
EN_DCDC2
TPS3825-33DBVT
VDD
/RST
/MR
L4
SYS
Y
SYS
EN_DCDC3
A
SYS_OFF_MODE
GND
VDDS
GND
FB_wLED
1uF
PB_OUT
100k
4.7k
4.7k
100k
wLED
boost
100k
100kk
ISINK1
POWER_ON
ISINK2
PGOOD
ISET1
SDAT
ISET2
SCLK
/INT
THRESHOLD
GPIO (push-button int)
GPIO (/disable power)
SYS.nRESPWRON
SDAT
SCLK
/INT
/Reset
+
delay
Copyright © 2016, Texas Instruments Incorporated
Figure 56. OMAP35xx (Supporting SYS-OFF Mode)
11.2.4.1 Design Requirements
Table 18. OMAP - 35xx Power Table
DEVICE REGULATOR
VOLTAGE
PROCESSOR RAIL NAME
SEQUENCE
DCDC1
1.8 V
VDDS_WKUP_BG
VDDS_MEM; VDDS
VDDS_SRAM
1
DCDC2
1.2 V
VDDCORE
2
DCDC3
1.2 V
VDD_MPU_IVA
3
LDO1
1.8 V
VDDA_DAC
4
1.8 V
VDDS_DPLL_DLL
VDDS_DPLL_PER
4
LDO2
82
Submit Documentation Feedback
Copyright © 2009–2018, Texas Instruments Incorporated
Product Folder Links: TPS65070 TPS65072 TPS65073 TPS650731 TPS650732
�TPS65070, TPS65072
TPS65073, TPS650731, TPS650732
www.ti.com
SLVS950I – JULY 2009 – REVISED MAY 2018
11.2.4.2 Detailed Design Procedure
Using the requirements above follow the procedure from Detailed Design Procedure to design the TPS6507x for
the OMAP-35xx.
PB_IN
can be released HIGH any time
after POWR_ON=HIGH
PB_OUT
level not defined as
voltage at pull-up has
not ramped at that time
50ms debounce
SYS
POWER_ON
asserted HIGH by the application processor (OMAP)
any time while /PB_IN=LOW to keep the system alive
VDCDC1
(VDDS_WKUP_BG,
VDDS, VDDS_MEM
)
250 ms
170 ms +
RC delay
VDCDC2
(VDD_CORE)
170 ms +
RC delay
250 ms
VDCDC3
(VDD_MPU_IVA)
VLDO1
250 ms
170 ms +
RCdelay
(VDDS_DPLL_DLL,
VDDS_DPLL_PER)
VLDO2
(VDDA_DAC)
PGOOD
(SYS.nRESPWRON)
400ms
Figure 57. OMAP35xx Sequence (Supporting SYS-OFF Mode)
Copyright © 2009–2018, Texas Instruments Incorporated
Submit Documentation Feedback
Product Folder Links: TPS65070 TPS65072 TPS65073 TPS650731 TPS650732
83
�TPS65070, TPS65072
TPS65073, TPS650731, TPS650732
SLVS950I – JULY 2009 – REVISED MAY 2018
www.ti.com
11.2.5 TPS650731 for OMAP35xx
TPS650731
BAT
AC
BAT
10 mF
1 mF
USB
charger / power path
TS
LiIon
NTC
SYS
1 mF
VINDCDC1/2
ISET
VINDCDC3
set
charge
current
L1
DCDC1
600mA
DEFDCDC2
OMAP35xx
2 x 10 mF
2.2 mH
VDCDC1
VDDS_WKUP_BG (1.8 V)
VDDS_MEM; VDDS
10 mF
VDDS_SRAM
DEFDCDC3
L2
SYS
DCDC2
600mA
VINLDO1/2
2.2 mH
VDDCORE (1.2 V)
VDCDC2
10 mF
2.2 mH
1uF
L3
DCDC3
1500mA
VDD_MPU_IVA (1.2 V)
VDCDC3
10 mF
LDO2
PB_IN
LDO2
200mA
ON /
OFF
VDDA_DAC (1.8 V)
2.2 mF
VDDDLL
VDDS_DPLL_DLL (1.8 V)
VDDS_DPLL_PER (1.8 V)
LDO1
LDO1
200mA
AD_IN1 (TSX1)
AD_IN2 (TSX2)
2.2 mF
VIO
AD_IN3 (TSY1)
EN_DCDC1
AD_IN4 (TSY2)
EN_DCDC2
SYS
POWER_ON
FB_wLED
4.7k
1M
1M
4.7 k
SYS
100 K
EN_DCDC3
PB_OUT
L4
GPIO (/disable power)
PGOOD
1 mF
SYS.nRESPWRON
SDAT
SCLK
/INT
SDAT
ISINK1
SCLK
wLED
boost
/INT
AVDD6
ISINK2
ISET1
ISET2
BYPASS
INT_LDO
THRESHOLD
/Reset
+
delay
Copyright © 2016, Texas Instruments Incorporated
Figure 58. TPS650731 for OMAP35xx
11.2.5.1 Design Requirements
Table 19. OMAP - 35xx Power Table
DEVICE REGULATOR
VOLTAGE
PROCESSOR RAIL NAME
SEQUENCE
DCDC1
1.8 V
VDDS_WKUP_BG
VDDS_MEM; VDDS
VDDS_SRAM
1
DCDC2
1.2 V
VDDCORE
2
DCDC3
1.2 V
VDD_MPU_IVA
4
LDO1
1.8 V
VDDA_DAC
3
1.8 V
VDDS_DPLL_DLL
VDDS_DPLL_PER
LDO2
84
Submit Documentation Feedback
Copyright © 2009–2018, Texas Instruments Incorporated
Product Folder Links: TPS65070 TPS65072 TPS65073 TPS650731 TPS650732
�TPS65070, TPS65072
TPS65073, TPS650731, TPS650732
www.ti.com
SLVS950I – JULY 2009 – REVISED MAY 2018
11.2.5.2 Detailed Design Procedure
Using the requirements above follow the procedure from Detailed Design Procedure to design the TPS6507x for
the OMAP-35xx.
PB_IN
can be released HIGH any time
after POWR_ON=HIGH
PB_OUT
level not defined as
voltage at pull-up has
not ramped at that time
50ms debounce
50ms debounce
SYS
POWER_ON
asserted HIGH by the application processor
any time while /PB_IN=LOW to keep the
system alive
VDCDC1
(VDDS_WKUP_BG,
VDDS, VDDS_MEM
)
250 ms
170 ms
VDCDC2
(VDD_CORE)
170 ms
250 ms
VDCDC3
(VDD_MPU_IVA)
250 ms
170 ms
VLDO1
(VDDS_DPLL_DLL,
VDDS_DPLL_PER)
VLDO2
300 ms
(VDDA_DAC)
enabled by OMAP35xx by I2C command
PGOOD
(SYS.nRESPWRON)
400ms
Figure 59. TPS650731: OMAP35xx Sequence
Copyright © 2009–2018, Texas Instruments Incorporated
Submit Documentation Feedback
Product Folder Links: TPS65070 TPS65072 TPS65073 TPS650731 TPS650732
85
�TPS65070, TPS65072
TPS65073, TPS650731, TPS650732
SLVS950I – JULY 2009 – REVISED MAY 2018
www.ti.com
11.2.6 Powering AM3505 Using TPS650732
TPS650732
BAT
AC
BAT
1uF
charger / power path
USB
1uF
SYS
VINDCDC3
set
charge
current
VDDS1-5 (1.8V)
VDCDC1
DEFDCDC3
VINLDO1/2
1uF
VDDSHV (3.3V)
VDCDC2
L3
DCDC3
1500mA
/PB_IN
10uF
2.2uH
L2
DCDC2
600mA
AM3505
2 x 10uF
2.2uH
L1
DCDC1
600mA
DEFDCDC2
SYS
NTC
VINDCDC1/2
ISET
SYS
10uF
LiIon
TS
10uF
2.2uH
VDD_CORE (1.2V)
VDCDC3
10uF
LDO2
LDO2
200mA
ON /
OFF
VDDS_DPLL (1.8V)
2.2uF
LDO1
LDO1
200mA
AD_IN1 (TSX1)
AD_IN2 (TSX2)
VDDA1P8V(1.8V)
2.2uF
AD_IN3 (TSY1)
EN_DCDC1
AD_IN4 (TSY2)
EN_DCDC2
SYS
1M
1M
4.7 k
POWER_ON
4.7 k
100K
EN_DCDC3
PB_OUT
L4
SYS
GPIO (/disable power)
SYS.nRESPWRON
SDAT
SCLK
/INT
PGOOD
FB_wLED
1uF
SDAT
ISINK1
SCLK
wLED
boost
/INT
AVDD6
ISINK2
ISET1
ISET2
BYPASS
SYS
TPS79918
Vin
EN
VDDS_SRAM (1.8V)
LDO
INT_LDO
/Reset
THRESHOLD
+
delay
SYS
TPS79933
Vin
VDDA3P3V (3.3V)
LDO
EN
Copyright © 2016, Texas Instruments Incorporated
Figure 60. Powering AM3505 Using TPS650732
11.2.6.1 Design Requirements
Table 20. AM3505 Power Table
86
DEVICE REGULATOR
VOLTAGE
PROCESSOR RAIL NAME
SEQUENCE
DCDC1
1.8V
VDDS1-5
1
DCDC2
3.3V
VDDSHV
2
DCDC3
1.2V
VDD_CORE
4
LDO1
1.8V
VDDS_DPLL
5
LDO2
1.8V
VDDA1P8V
5
external LDO1
1.8V
VDDS_SRAM
3
external LDO2
3.3V
VDDA3P3V
6
Submit Documentation Feedback
Copyright © 2009–2018, Texas Instruments Incorporated
Product Folder Links: TPS65070 TPS65072 TPS65073 TPS650731 TPS650732
�TPS65070, TPS65072
TPS65073, TPS650731, TPS650732
www.ti.com
SLVS950I – JULY 2009 – REVISED MAY 2018
11.2.6.2 Detailed Design Procedure
Using the requirements above follow the procedure from Detailed Design Procedure to design the TPS6507x for
the AM505.
/PB_IN
can be released HIGH any time
after POWR_ON=HIGH
PB_OUT
level not defined as
voltage at pull-up has
not ramped at that time
50ms debounce
50ms debounce
SYS
POWER_ON
asserted HIGH by the application processor
any time while /PB_IN=LOW to keep the
system alive
VDCDC1
(VDDS1-5
1.8V
)
170us
250us
VDCDC2
(VDDSHV)
3.3V
170us
250us
VLDO_ext1
(VDDS_SRAM)
1.8V
VDCDC3
(VDD_CORE)
1.2V
250us
170us
VLDO2
(VDDS_DPLL)
1.8V
VLDO1
(VDDA1P8V)
1.8V
VLDO_ext2
(VDDA3P3V)
3.3V
PGOOD
(SYS.nRESPWRON)
400ms
Figure 61. Sequence Using TPS650732 for AM3505
12 Power Supply Recommendations
Power to the TPS6507x can receive power from one of the following three different inputs: AC, USB, or battery.
A signal cell Li-Ion battery is recommended for use. A supply from 4.3 V to 5.8 V is recommended for the AC and
USB inputs.
Copyright © 2009–2018, Texas Instruments Incorporated
Submit Documentation Feedback
Product Folder Links: TPS65070 TPS65072 TPS65073 TPS650731 TPS650732
87
�TPS65070, TPS65072
TPS65073, TPS650731, TPS650732
SLVS950I – JULY 2009 – REVISED MAY 2018
www.ti.com
13 Layout
13.1 Layout Guidelines
As for all switching power supplies, the layout is an important step in the design. Proper function of the device
demands careful attention to PCB layout. Care must be taken in board layout to get the specified performance. If
the layout is not carefully done, the regulators may show poor line and/or load regulation, and stability issues as
well as EMI problems. It is critical to provide a low impedance ground path. Therefore, use wide and short traces
for the main current paths. The input capacitors should be placed as close as possible to the IC pins as well as
the inductor and output capacitor.
For TPS6507x, connect the PGND pin of the device to the thermal pad land of the PCB and connect the analog
ground connection (GND) to the PGND at the thermal pad. The thermal pad serves as the power ground
connection for the DCDC1 and DCDC2 converters. Therefore it is essential to provide a good thermal and
electrical connection to GND using multiple vias to the GND-plane. Keep the common path to the GND pin,
which returns the small signal components, and the high current of the output capacitors as short as possible to
avoid ground noise. The VDCDCx line should be connected right to the output capacitor and routed away from
noisy components and traces (for example, the L1, L2, L3 and L4 traces). See the TPS6507xEVM users guide
for details about the layout for TPS6507x.
13.2 Layout Example
VIN
Cout
L3
Cout
CIN
VDCDC3
PGND3
Figure 62. Converter Layout Example
88
Submit Documentation Feedback
Copyright © 2009–2018, Texas Instruments Incorporated
Product Folder Links: TPS65070 TPS65072 TPS65073 TPS650731 TPS650732
�TPS65070, TPS65072
TPS65073, TPS650731, TPS650732
www.ti.com
SLVS950I – JULY 2009 – REVISED MAY 2018
14 Device and Documentation Support
14.1 Device Support
14.1.1 Third-Party Products Disclaimer
TI'S PUBLICATION OF INFORMATION REGARDING THIRD-PARTY PRODUCTS OR SERVICES DOES NOT
CONSTITUTE AN ENDORSEMENT REGARDING THE SUITABILITY OF SUCH PRODUCTS OR SERVICES
OR A WARRANTY, REPRESENTATION OR ENDORSEMENT OF SUCH PRODUCTS OR SERVICES, EITHER
ALONE OR IN COMBINATION WITH ANY TI PRODUCT OR SERVICE.
14.2 Documentation Support
14.2.1 Related Documentation
For related documentation, see the following:
• Texas Instruments, Basic Calculation of a Boost Converter's Power Stage application report
• Texas Instruments, Basic Calculation of a Buck Converter's Power Stage application report
• Texas Instruments, Choosing an Appropriate Pull-up/Pull-down Resistor for Open Drain Outputs application
report
• Texas Instruments, Dynamic Power-Path Management and Dynamic Power Management application report
• Texas Instruments, How to Power the TPS6507x On and Off application report
• Texas Instruments, Powering OMAP-L132/L138, C6742/4/6, and AM18x with TPS65070 application report
• Texas Instruments, TPS6507xEVM user's guide
• Texas Instruments, Understanding the Absolute Maximum Ratings of the SW Node application report
14.3 Related Links
The table below lists quick access links. Categories include technical documents, support and community
resources, tools and software, and quick access to sample or buy.
Table 21. Related Links
PARTS
PRODUCT FOLDER
ORDER NOW
TECHNICAL
DOCUMENTS
TOOLS &
SOFTWARE
SUPPORT &
COMMUNITY
TPS65070
Click here
Click here
Click here
Click here
Click here
TPS65072
Click here
Click here
Click here
Click here
Click here
TPS65073
Click here
Click here
Click here
Click here
Click here
TPS650731
Click here
Click here
Click here
Click here
Click here
TPS650732
Click here
Click here
Click here
Click here
Click here
14.4 Receiving Notification of Documentation Updates
To receive notification of documentation updates, navigate to the device product folder on ti.com. In the upper
right corner, click on Alert me to register and receive a weekly digest of any product information that has
changed. For change details, review the revision history included in any revised document.
14.5 Community Resources
The following links connect to TI community resources. Linked contents are provided "AS IS" by the respective
contributors. They do not constitute TI specifications and do not necessarily reflect TI's views; see TI's Terms of
Use.
TI E2E™ Online Community TI's Engineer-to-Engineer (E2E) Community. Created to foster collaboration
among engineers. At e2e.ti.com, you can ask questions, share knowledge, explore ideas and help
solve problems with fellow engineers.
Design Support TI's Design Support Quickly find helpful E2E forums along with design support tools and
contact information for technical support.
Copyright © 2009–2018, Texas Instruments Incorporated
Submit Documentation Feedback
Product Folder Links: TPS65070 TPS65072 TPS65073 TPS650731 TPS650732
89
�TPS65070, TPS65072
TPS65073, TPS650731, TPS650732
SLVS950I – JULY 2009 – REVISED MAY 2018
www.ti.com
14.6 Trademarks
OMAP, E2E are trademarks of Texas Instruments.
All other trademarks are the property of their respective owners.
14.7 Electrostatic Discharge Caution
This integrated circuit can be damaged by ESD. Texas Instruments recommends that all integrated circuits be handled with
appropriate precautions. Failure to observe proper handling and installation procedures can cause damage.
ESD damage can range from subtle performance degradation to complete device failure. Precision integrated circuits may be more
susceptible to damage because very small parametric changes could cause the device not to meet its published specifications.
14.8 Glossary
SLYZ022 — TI Glossary.
This glossary lists and explains terms, acronyms, and definitions.
15 Mechanical, Packaging, and Orderable Information
The following pages include mechanical, packaging, and orderable information. This information is the most
current data available for the designated devices. This data is subject to change without notice and revision of
this document. For browser-based versions of this data sheet, refer to the left-hand navigation.
90
Submit Documentation Feedback
Copyright © 2009–2018, Texas Instruments Incorporated
Product Folder Links: TPS65070 TPS65072 TPS65073 TPS650731 TPS650732
�PACKAGE OPTION ADDENDUM
www.ti.com
10-Dec-2020
PACKAGING INFORMATION
Orderable Device
Status
(1)
Package Type Package Pins Package
Drawing
Qty
Eco Plan
(2)
Lead finish/
Ball material
MSL Peak Temp
Op Temp (°C)
Device Marking
(3)
(4/5)
(6)
TPS65070RSLR
ACTIVE
VQFN
RSL
48
2500
RoHS & Green
NIPDAU
Level-3-260C-168 HR
-40 to 85
TPS
65070
TPS65070RSLT
ACTIVE
VQFN
RSL
48
250
RoHS & Green
NIPDAU
Level-3-260C-168 HR
-40 to 85
TPS
65070
TPS65072RSLR
ACTIVE
VQFN
RSL
48
2500
RoHS & Green
NIPDAU
Level-3-260C-168 HR
-40 to 85
TPS
65072
TPS65072RSLT
ACTIVE
VQFN
RSL
48
250
RoHS & Green
NIPDAU
Level-3-260C-168 HR
-40 to 85
TPS
65072
TPS650731RSLR
ACTIVE
VQFN
RSL
48
2500
RoHS & Green
NIPDAU
Level-3-260C-168 HR
-40 to 85
TPS
650731
TPS650731RSLT
ACTIVE
VQFN
RSL
48
250
RoHS & Green
NIPDAU
Level-3-260C-168 HR
-40 to 85
TPS
650731
TPS650732RSLR
ACTIVE
VQFN
RSL
48
2500
RoHS & Green
NIPDAU
Level-3-260C-168 HR
-40 to 85
TPS
650732
TPS650732RSLT
ACTIVE
VQFN
RSL
48
250
RoHS & Green
NIPDAU
Level-3-260C-168 HR
-40 to 85
TPS
650732
TPS65073RSLR
ACTIVE
VQFN
RSL
48
2500
RoHS & Green
NIPDAU
Level-3-260C-168 HR
-40 to 85
TPS
65073
TPS65073RSLT
ACTIVE
VQFN
RSL
48
250
RoHS & Green
NIPDAU
Level-3-260C-168 HR
-40 to 85
TPS
65073
(1)
The marketing status values are defined as follows:
ACTIVE: Product device recommended for new designs.
LIFEBUY: TI has announced that the device will be discontinued, and a lifetime-buy period is in effect.
NRND: Not recommended for new designs. Device is in production to support existing customers, but TI does not recommend using this part in a new design.
PREVIEW: Device has been announced but is not in production. Samples may or may not be available.
OBSOLETE: TI has discontinued the production of the device.
(2)
RoHS: TI defines "RoHS" to mean semiconductor products that are compliant with the current EU RoHS requirements for all 10 RoHS substances, including the requirement that RoHS substance
do not exceed 0.1% by weight in homogeneous materials. Where designed to be soldered at high temperatures, "RoHS" products are suitable for use in specified lead-free processes. TI may
reference these types of products as "Pb-Free".
RoHS Exempt: TI defines "RoHS Exempt" to mean products that contain lead but are compliant with EU RoHS pursuant to a specific EU RoHS exemption.
Green: TI defines "Green" to mean the content of Chlorine (Cl) and Bromine (Br) based flame retardants meet JS709B low halogen requirements of
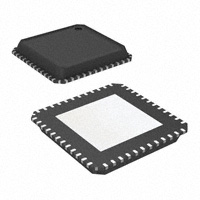


 工商网监
湘ICP备2023018690号
工商网监
湘ICP备2023018690号
