TPS92682-Q1
TPS92682-Q1
SLUSCX8C – MARCH 2019 – REVISED
MARCH 2021
SLUSCX8C – MARCH 2019 – REVISED MARCH 2021
www.ti.com
TPS92682-Q1 Dual-Channel Constant-Voltage and Constant-Current Controller
with SPI Interface
1 Features
•
•
•
•
•
•
•
•
•
•
•
•
•
•
AEC-Q100 grade 1 qualified
Functional Safety-Capable
– Documentation available to aid functional safety
system design
Wide input voltage range: 4.5 V to 65 V
± 4% LED current accuracy over –40°C to 150°C
junction temperature range
SPI communication interface
SPI programmable features:
– Spread spectrum for improved EMI
– Soft-start timing
– ILED current and output voltage settings
– Current limit, overvoltage, fault-timer
– Single versus dual phase
– CV and CC mode configuration
Dual channel peak-current-mode (PCM) controller
Low input offset rail-to-rail current sense amplifier
Analog dimming
External series FET PWM dimming with integrated
P-channel driver interface
– Over 1000:1 PWM dimming range
Open-drain fault flag indicator per channel
Up to 1-MHz programmable switching frequency
with external clock synchronization capability
Comprehensive programmable fault protection
circuitry
Wettable flank with VQFN package
2 Applications
•
•
•
In CC mode, the device is designed to support dual
channel step-up or step-down LED driver topologies.
LED current can be independently modulated
using analog or PWM dimming techniques. Analog
dimming with over 28:1 range is obtained using a
programmable 8-bit DAC. PWM dimming of LED
current is achieved either by directly modulating the
PWM input pins with the desired duty cycle, or using a
SPI-programmable 10-bit PWM counter. The optional
PDRV gate driver output can be used to drive an
external P-Channel series MOSFET.
The TPS92682-Q1 incorporates an advanced
SPI-programmable diagnostic and fault protection
mechanism including: cycle-by-cycle current limit,
output overvoltage and undervoltage protection, ILED
overcurrent protection, and thermal warning. The
device also includes an open-drain fault indicator
output per channel.
The TPS92682-Q1 includes an LH pin, when pulled
high, initiates the limp home (LH) condition. In
LH mode, the device uses a separate set of SPIprogrammed registers.
Device Information
PART NUMBER
PACKAGE
(1)
BODY SIZE (NOM)
TPS92682-Q1
VQFN (32)
5.0 mm x 5.0 mm
TPS92682-Q1
HTSSOP (32)
11.0 mm x 6.1 mm
(1)
For all available packages, see the orderable addendum at
the end of the data sheet.
Automotive forward lighting
Emergency vehicles
General lighting
3 Description
The TPS92682-Q1 is a dual-channel, peak currentmode controller with SPI communication interface.
The device is programmable to operate in constantvoltage (CV) or constant-current (CC) modes.
In CV mode, TPS92682-Q1 can be programmed
to operate as two independent or dual-phase
Boost voltage regulators. The output voltage can
be programmed using an external resistor voltage
divider, and a SPI-programmable 8-bit DAC.
Typical Application
An©IMPORTANT
NOTICEIncorporated
at the end of this data sheet addresses availability, warranty, changes, use in
safety-critical
applications,
Copyright
2021 Texas Instruments
Submit
Document
Feedback
intellectual property matters and other important disclaimers. PRODUCTION DATA.
Product Folder Links: TPS92682-Q1
1
�TPS92682-Q1
www.ti.com
SLUSCX8C – MARCH 2019 – REVISED MARCH 2021
Table of Contents
1 Features............................................................................1
2 Applications..................................................................... 1
3 Description.......................................................................1
4 Revision History.............................................................. 2
5 Pin Configuration and Functions...................................3
6 Specifications.................................................................. 5
6.1 Absolute Maximum Ratings........................................ 5
6.2 ESD Ratings............................................................... 5
6.3 Recommended Operating Conditions.........................5
6.4 Thermal Information....................................................6
6.5 Electrical Characteristics.............................................7
6.6 Typical Characteristics.............................................. 11
7 Detailed Description......................................................15
7.1 Overview................................................................... 15
7.2 Functional Block Diagram......................................... 15
7.3 Feature Description...................................................18
7.4 Device Functional Modes..........................................31
7.5 Programming............................................................ 35
7.6 TPS92682 Registers.................................................37
8 Application and Implementation.................................. 53
8.1 Application Information General Design
Considerations............................................................ 53
8.2 Application Information CC Mode............................. 55
8.3 Typical Application CV Mode.................................... 62
8.4 Typical Application CC Mode.................................... 69
8.5 Typical Application CV Mode.................................... 77
9 Power Supply Recommendations................................83
10 Layout...........................................................................84
10.1 Layout Guidelines................................................... 84
10.2 Layout Example...................................................... 84
11 Device and Documentation Support..........................86
11.1 Receiving Notification of Documentation Updates.. 86
11.2 Support Resources................................................. 86
11.3 Trademarks............................................................. 86
11.4 Electrostatic Discharge Caution.............................. 86
11.5 Glossary.................................................................. 86
12 Mechanical, Packaging, and Orderable
Information.................................................................... 86
4 Revision History
NOTE: Page numbers for previous revisions may differ from page numbers in the current version.
Changes from Revision B (July 2020) to Revision C (March 2021)
Page
• Added RHB (VQFN) package.............................................................................................................................1
• Added RHB package thermal information.......................................................................................................... 6
• Added Equation 12 for the BUCK-BOOST FET RMS current.......................................................................... 53
• Added Programming Example for Two-Channel CC Mode section..................................................................60
• Added Programming Example for Two-Phase CV BOOST section..................................................................67
Changes from Revision A (August 2019) to Revision B (July 2020)
Page
• Added functional safety bullet to the Features ...................................................................................................1
• Updated the numbering format for tables, figures and cross-references throughout the document...................1
• Added HTSSOP package................................................................................................................................... 3
• Added DAP package thermal information...........................................................................................................6
Changes from Revision * (March 2019) to Revision A (August 2019)
Page
• Changed from Advance Information to Production Data ................................................................................... 1
2
Submit Document Feedback
Copyright © 2021 Texas Instruments Incorporated
Product Folder Links: TPS92682-Q1
�TPS92682-Q1
www.ti.com
SLUSCX8C – MARCH 2019 – REVISED MARCH 2021
RT
VDD
AGND
COMP1
PDRV1
CSN1
CSP1
FB1/OV1
32
31
30
29
28
27
26
25
5 Pin Configuration and Functions
VIN
1
24
ISN1
EN
2
23
ISP1
PWM1
3
22
GATE1
PWM2
4
SSN
5
Thermal
Pad
21
VCC
20
PGND
SCK
6
19
GATE2
MISO
7
18
ISP2
MOSI
8
17
ISN2
FB2/OV2
CSP2
CSN2
PDRV2
11 12 13 14 15 16
COMP2
FLT1
10
FLT2/SYNC
LH
9
(Not to scale)
Figure 5-1. RHM/RHB Package 32-Pin VQFN with PowerPAD Top View
PGND
1
32
GATE2
VCC
2
31
ISP2
GATE1
3
30
ISN2
ISP1
4
29
FB2/OV2
ISN1
5
28
CSP2
FB1/OV1
6
27
CSN2
CSP1
7
26
PDRV2
CSN1
8
25
COMP2
PDRV1
9
24
FLT2/SYNC
COMP1
10
23
FLT1
AGND
11
22
LH
VDD
12
21
MOSI
RT
13
20
MISO
VIN
14
19
SCK
EN
15
18
SSN
PWM1
16
17
PWM2
Thermal
Pad
Figure 5-2. DAP Package 32-Pin TSSOP with PowerPAD Top View
Submit Document Feedback
Copyright © 2021 Texas Instruments Incorporated
Product Folder Links: TPS92682-Q1
3
�TPS92682-Q1
www.ti.com
SLUSCX8C – MARCH 2019 – REVISED MARCH 2021
Table 5-1. Pin Functions
PIN
4
(1)
DESCRIPTION
VQFN
NO.
AGND
30
11
P
COMP1
29
10
I/O
Connect to an integral or integral-proportional compensation network to ensure stability for
channel-1.
COMP2
12
25
I/O
Connect to an integral or integral-proportional compensation network to ensure stability for
channel-2.
CSN1
27
8
I
High-side current sense amplifier input (–) for channel-1
CSN2
14
27
I
High-side current sense amplifier input (–) for channel-2
CSP1
26
7
I
High-side current sense amplifier input (+) for channel-1
CSP2
15
28
I
High-side current sense amplifier input (+) for channel-2
EN
2
15
I
Hardware enable. Pull this pin low to enter shutdown.
FB1/OV1
25
6
I/O
Connect using a resistor divider to VOUT1 to set OVP threshold (and VOUT in CV mode) for
channel-1.
FB2/OV2
16
29
I/O
Connect using a resistor divider to VOUT2 to set OVP threshold (and VOUT in CV mode) for
channel-2.
FLT1
10
23
O
Open-drain fault output for channel-1 (or both channels if PIN-11 is programmed to be
SYNC).
FLT2/
SYNC
11
24
I/O
Dual function pin (programmable) either open-drain fault output for channel-2 or SYNC input
GATE1
22
3
I/O
Channel-1 gate driver output for external N-channel FET
GATE2
19
32
I/O
Channel-2 gate driver output for external N-channel FET
ISN1
24
5
I
Switch current sense input (-) for channel-1. Connect to the GND connection of the external
switch-current sense resistor.
ISN2
17
30
I
Switch current sense input (-) for channel-2. Connect to the GND connection of the external
switch-current sense resistor.
ISP1
23
4
I
Switch current sense input (+) for channel-1. Connect to external switch current sense resistor
between N-channel FET and ground.
ISP2
18
31
I
Switch current sense input (+) for channel-2. Connect to external switch current sense resistor
between N-channel FET and ground.
LH
9
22
I
Digital input, when set high, the device enters the limp home mode.
MISO
7
20
O
SPI slave data output
MOSI
8
21
I
SPI slave data input
PDRV1
28
9
I/O
PDRV2
13
26
I/O
PWM1
3
16
I
Connect to external PWM signal to enable PWM dimming for channel-1.
PWM2
4
17
I
Connect to external PWM signal to enable PWM dimming for channel-2.
PGND
20
1
P
Power ground
RT
32
13
I/O
SCK
6
19
I
SPI clock input
SSN
5
18
I
SPI chip select input
VCC
21
2
P
7.5-V low-dropout regulator output
VDD
31
12
P
5-V LDO output
VIN
1
14
P
High-voltage input (65 V) to internal LDO
(1)
HTSSOP
NO.
I/O
NAME
Signal ground
Channel-1 P-channel gate driver. Connect to gate of external series P-channel FET switch.
Channel-2 P-channel gate driver. Connect to gate of external series P-channel FET switch.
Set internal clock frequency by connecting a resistor to ground
I = input, O = output, P = power
Submit Document Feedback
Copyright © 2021 Texas Instruments Incorporated
Product Folder Links: TPS92682-Q1
�TPS92682-Q1
www.ti.com
SLUSCX8C – MARCH 2019 – REVISED MARCH 2021
6 Specifications
6.1 Absolute Maximum Ratings
over operating free-air temperature range (unless otherwise noted)(1) (2)
VIN, EN, CSPx, CSNx
CSPx to CSNx
Input voltage
(3)
MAX
UNIT
65
V
–0.3
0.3
V
ISPx, ISNx
–0.3
8.8
V
SSN, SCK, MOSI, LH, RT, FLTx
–0.3
5.5
V
FBx/OVx
–0.3
5.5
V
PWMx
–0.3
5.5
V
VCC, GATEx
–0.3
8.8
V
VDD
Output voltage(4)
MIN
–0.3
–0.3
5.5
V
PDRV
VCSP –8.8
VCSP
V
MISO
–0.3
5.5
V
COMPx
–0.3
IGATE, (pulsed < 20 ns)
Source current
Sink current
50
mA
IGATE (pulse < 20 ns)
500
mA
IDDRV (pulse < 10 µs)
–40
Storage temperature, Tstg
(2)
(3)
(4)
V
mA
IPDRV, (pulsed < 10 µs)
Operating junction temperature, TJ
(1)
4
500
50
mA
150
°C
165
°C
Stresses beyond those listed under Absolute Maximum Ratings may cause permanent damage to the device. These are stress ratings
only, and do not imply functional operation of the device at these or any other conditions beyond those indicated under Recommended
Operating Conditions. Exposure to absolute-maximum-rated conditions for extended periods may affect device reliability.
All voltages are with respect to GND unless otherwise noted
Continuous sustaining voltage
All output pins are not specified to have an external voltage applied.
6.2 ESD Ratings
VALUE
V(ESD)
(1)
Electrostatic
discharge
Human-body model (HBM), per AEC Q100-002, all pins(1)
±2000
Charged-device model (CDM), per AEC Q100-011
±500
UNIT
V
AEC Q100-002 indicates that HBM stressing shall be in accordance with the ANSI/ESDA/JEDEC JS-001 specification.
6.3 Recommended Operating Conditions
over operating free-air temperature range (unless otherwise noted)
MIN
NOM
MAX
UNIT
VIN
Supply input voltage
6.5
14
65
V
VIN, crank
Supply input, battery crank voltage
4.5
VCSP, VCSN
Current sense common mode voltage (1)
fSW
Switching frequency
fSYNC
Synchronization frequency range, vs fCLK set by RT
0
V
60
V
100
700
kHz
0.8×fCLK
1.2×fCLK
Hz
FSS
Spread-spectrum modulation frequency
0.1
10
kHz
TA
Operating ambient temperature
–40
125
°C
(1)
For current sense common mode voltage below 6.5 V, PFET dimming may not be applied
Submit Document Feedback
Copyright © 2021 Texas Instruments Incorporated
Product Folder Links: TPS92682-Q1
5
�TPS92682-Q1
www.ti.com
SLUSCX8C – MARCH 2019 – REVISED MARCH 2021
6.4 Thermal Information
TPS92682-Q1
THERMAL METRIC(1)
RHB
(VQFN)
DAP
(HTSSOP)
UNIT
32 PINS
32 PINS
32 PINS
RθJA
Junction-to-ambient thermal resistance
31.2
31.6
27.3
°C/W
RθJC(top)
Junction-to-case (top) thermal resistance
21.9
22.0
18.7
°C/W
RθJB
Junction-to-board thermal resistance
12.1
11.7
9.7
°C/W
ψJT
Junction-to-top characterization parameter
0.2
0.3
0.2
°C/W
ψJB
Junction-to-board characterization parameter
12.0
11.7
9.6
°C/W
RθJC(bot)
Junction-to-case (bottom) thermal resistance
2.3
2.3
2.1
°C/W
(1)
6
RHM
(VQFN)
For more information about traditional and new thermal metrics, see the Semiconductor and IC Package Thermal Metrics application
report.
Submit Document Feedback
Copyright © 2021 Texas Instruments Incorporated
Product Folder Links: TPS92682-Q1
�TPS92682-Q1
www.ti.com
SLUSCX8C – MARCH 2019 – REVISED MARCH 2021
6.5 Electrical Characteristics
–40°C < TJ < 150°C, VIN= 14V, VIADJDACx = 0xDF, CVCC = 1μF, CVDD = 1μF, CCOMP = 2.2nF, RCS = 100mΩ, RT = 50kΩ,
VPWM = 5V, no load on GATE and PDRV, DIV=4 (unless otherwise noted)
PARAMETER
TEST CONDITIONS
MIN
TYP
MAX
UNIT
INPUT VOLTAGE (VIN)
IIN-SHDN
Input shutdown current
VEN = 0 V, VCSP = VCSN = VPDRV = 0
V
10
VEN = 0 V, VCSP = 14 V
10.5
µA
IIN-STBY
Input standby current
Software EN1 and EN2 = 0, VPWM1 =
VPWM2 = 0 V
2.3
mA
IIN-SW
Supply switching current
VCC=7.5V, CGATEx = 1nF, Both
channels are switching
10
mA
VCC rising threshold,
VVIN = 8 V
4.5
VCC BIAS SUPPLY
VCCUVLO
Supply under-voltage protection
VCC falling threshold,
VVIN = 8 V
3.7
Hysteresis
VCC(REG)
VCC regulation voltage
No load
7
IVCC(LIMIT)
VCC current limit
VVCC = 0 V
40
VCCDO
VCC LDO dropout voltage
IVCC = 30 mA, VVIN = 4.5 V
4.9
V
4.1
V
411
mV
7.5
8
V
mA
300
475
mV
5
5.25
V
4.1
V
400
mV
VDD BIAS SUPPLY
VDD(REG)
VDD regulation voltage
No load
VDD(POR-RISE)
VDD rising threshold
VVIN = 5 V
VDD(POR-FALL)
VDD falling threshold
VVIN = 5 V
VDDDO
VDD LDO dropout voltage
IVDD = 15 mA, VVIN = 4.5 V
IVDD(LIMIT)
VDD current limit
VVDD = 0 V
4.85
2.58
V
30
39
50
mA
1.12
1.21
1.3
V
ENABLE INPUT
VEN
EN voltage threshold
VEN-HYS
EN pin hysteresis
Difference between rising and falling
threshold
IEN
EN PIN input bias current
VEN = 14 V
100
mV
5
µA
OSCILLATOR
fSW
Switching frequency
VRT
RT PIN voltage
RT = 200kΩ, DIV=4
85
100
115
kHz
RT = 50kΩ, DIV=4
340
400
460
kHz
1
V
SPREAD SPECTRUM DAC
DACDT-BITs
Internal DAC resolution
8
Bits
DACDT-MAX
DAC maximum voltage
1.156
V
DACDT-MIN
DAC minimum voltage
855
mV
GATE DRIVER
RGH
Driver pull-up resistance
IGATE = –10 mA
5.1
11.2
Ω
RGL
Driver pull-down resistance
IGATE = 10 mA
4.1
10.5
Ω
SWITCH CURRENT SENSE and ILIMIT
ILIM threshold PWM = LOW
VILIM(THR)
ILIM threshold PWM = HIGH
VPWMx= 0 V, CHxILIM = XX
649
711
769
mV
VPWMx= 5 V, CHxILIM = 11
228
253
277
mV
VPWMx= 5 V, CHxILIM = 10
132
151
171
mV
VPWMx= 5 V, CHxILIM = 01
82
100.6
119
mV
VPWMx= 5 V, CHxILIM = 00
57
75.2
93
mV
Submit Document Feedback
Copyright © 2021 Texas Instruments Incorporated
Product Folder Links: TPS92682-Q1
7
�TPS92682-Q1
www.ti.com
SLUSCX8C – MARCH 2019 – REVISED MARCH 2021
6.5 Electrical Characteristics (continued)
–40°C < TJ < 150°C, VIN= 14V, VIADJDACx = 0xDF, CVCC = 1μF, CVDD = 1μF, CCOMP = 2.2nF, RCS = 100mΩ, RT = 50kΩ,
VPWM = 5V, no load on GATE and PDRV, DIV=4 (unless otherwise noted)
PARAMETER
tIS(BLANK)
Leading edge blanking
tILIMIT(DELAY)
ISx to GATEx delay
TEST CONDITIONS
MIN
TYP
MAX
UNIT
CHxLEB = 0
75
ns
CHxLEB = 1
150
ns
86
ns
90
%
PWM COMPARATOR
DMAX
Maximum duty cycle
VLVx-Delta
Difference between CH1 and CH2
PWM comparator offset
ILVx
IS level shift bias current
TPWM-Delta
Turn-off propagation delay from
input of PWM comp. to gate
output
TPWMDEL-Delta
Difference between CH1 and CH2
PWM comp. propagation delay
–17.5
No slope compensation added
17.5
mV
40
µA
100
ns
–30
30
ns
CURRENT SENSE AMPLIFIER (CSP, CSN)
V(CSP-CSN)x
Current Sense REG Voltage
CS(BW)
Current sense unity gain
bandwidth
VCSP(CM) = 14 V, IADJDAC = 0×FF
165.8
172.7
179.6
mV
VCSP(CM) = 14V, IADJDAC = 0x95
96.5
100.8
104.5
mV
VCSP(CM) = 14V, IADJDAC = 0×0F
Current Sense Gain = VIADJ/V(CSP-
GCS
CSN)
VCS = 150 mV, VCSP = 60 V
10.3
mV
500
kHz
14
V/V
K(OCP)
Ratio of over-current detection
threshold to VIADJ
K(OCP) = V(OCP-THR)/VIADJ
K(UC)
Ratio of under-current detection
threshold to VIADJ
K(UC) = V(UC-THR)/VIADJ
0.5
V/V
1.41
1.53
1.66
V/V
ICSP(BIAS)
CSP bias current
VCSP = VCSN = VPDRV = 14 V
59
µA
ICSN(BIAS)
CSN bias current
VCSP = VCSN = VPDRV = 14 V
59
µA
SSDAC
DACSS-BITs
Internal DAC resolution
8
Bits
DACSS-FS
DAC full scale voltage
2.8
V
3
Bits
2.5
mV
36
Ω
CALDAC
DACCAL-BITs
Switch current sense calibration
DAC
DACCAL-RES
Offset-per-Bit applied to the switch
current sense
FAULT FLAG ( FLTx)
R( FLT)
Open-drain pull down resistance
VIADJDAC
DACADJ-BITs
Internal DAC resolution
DACADJ-FS
DAC full scale voltage
8
2.32
2.4
Bits
2.48
V
ERROR AMPLIFIER (COMP)
gM
Transconductance
ICOMP(SRC)
8
COMP source current capacity
HG = 0
122
HG = 1
914
IADJx = 0×95, V(CSP-CSN) = 0 V, HG =
0
129
IADJx = 0×95, V(CSP-CSN) = 0 V, HG =
1
777
Submit Document Feedback
µA/V
µA
Copyright © 2021 Texas Instruments Incorporated
Product Folder Links: TPS92682-Q1
�TPS92682-Q1
www.ti.com
SLUSCX8C – MARCH 2019 – REVISED MARCH 2021
6.5 Electrical Characteristics (continued)
–40°C < TJ < 150°C, VIN= 14V, VIADJDACx = 0xDF, CVCC = 1μF, CVDD = 1μF, CCOMP = 2.2nF, RCS = 100mΩ, RT = 50kΩ,
VPWM = 5V, no load on GATE and PDRV, DIV=4 (unless otherwise noted)
PARAMETER
ICOMP(SINK)
TEST CONDITIONS
COMP sink current capacity
MIN
TYP
IADJx = 0×00, V(CSP-CSN) = 0.1 V, HG
=0
129
IADJx = 0×00, V(CSP-CSN) = 0.1 V, HG
=1
783
MAX
UNIT
µA
Gain = –3 dB, HG = 0
5
Gain = –3 dB, HG = 1
1
EA(BW)
Error amplifier bandwidth
MHz
VCOMP(RST)
VCOMP reset voltage
100
mV
RCOMP(DCH)
COMPx discharge FET RDSON
248
Ω
RCOMP(DIFF)
COMP1 to COMP2 short path
resistance
300
Ω
DAC full scale voltage
0.36
V
SLOPEDAC
DACSLP-FS
VFB
VFBERR
Regulation voltage error
VFBBIAS
VFB pin pull up bias current
–4
4
200
%
nA
OVDAC
VOV(THR)
IOV-HYS
OV limit threshold, 0%
CHxOVDAC = 000
OV limit threshold, 2.5%
CHxOVDAC = 001
1.268
V
OV limit threshold, 5%
CHxOVDAC = 010
1.299
V
OV limit threshold, 7.5%
CHxOVDAC = 011
1.329
V
OV limit threshold, 10%
CHxOVDAC = 100
1.36
V
OV limit threshold, 12.5%
CHxOVDAC = 101
1.391
V
OV limit threshold, 15%
CHxOVDAC = 110
1.422
V
OV limit threshold, 20%
CHxOVDAC = 111
1.483
OV hysteresis current
1.2
1.237
1.27
V
V
11.5
20.5
28.5
µA
40
53.2
67
mV
UV (Output Under Voltage)
VUV(THR)
Under voltage protection threshold
tUV(BLANK)
Under voltage blanking period
5
µs
DIGITAL INPUTs (PWMx, SYNC, LH, SSN, SCK, MOSI)
IBIAS
Input bias current
VTINPUT-FALL
Falling threshold
VTINPUT-RISE
Rising threshold
Except PWM inputs
1
0.7
µA
V
1.85
V
PWM INPUT (PWM)
RPWM(PD)
PWM pull-down resistance
10
MΩ
tDLY(RISE)
PWM rising to PDRV delay
CPDRV = 1 nF
235
ns
tDLY(FALL)
PWM falling to PDRV delay
CPDRV = 1 nF
222
ns
PFET GATE DRIVE
VPDRV(OFF)
PDRV off-state voltage
VCSP = 14 V
14
V
VPDRV(ON)
PDRV on-state voltage
VCSP = 14 V
7.34
V
IPDRV(SINK)
PDRV sink current
VCSP – VPDRV = 5 V, pulsed < 100 µs
29
mA
RPDRV
PDRV pull up resistance
VCSP – VPDRV = 0 V, pulsed < 100 µs
83.5
Ω
Output low voltage threshold
I(MISO) = 10 mA
0.25
V
25
Ω
SPI INTERFACE
VOL-MISO
RDS-MISO
Submit Document Feedback
Copyright © 2021 Texas Instruments Incorporated
Product Folder Links: TPS92682-Q1
9
�TPS92682-Q1
www.ti.com
SLUSCX8C – MARCH 2019 – REVISED MARCH 2021
6.5 Electrical Characteristics (continued)
–40°C < TJ < 150°C, VIN= 14V, VIADJDACx = 0xDF, CVCC = 1μF, CVDD = 1μF, CCOMP = 2.2nF, RCS = 100mΩ, RT = 50kΩ,
VPWM = 5V, no load on GATE and PDRV, DIV=4 (unless otherwise noted)
PARAMETER
TEST CONDITIONS
MIN
CMISO
TYP
MAX
10
1st
pF
tSS-SU
SSN setup time
Falling edge of SSN to
edge
tSS-H
SSN hold time
Falling edge of 16th SCK to SSN
rising edge
tSS-HI
SSN high time
Time SSN must remain high between
transactions
tSCK
SCK period
Clock period
DSCK
SCK duty cycle
Clock duty cycle
40
tMOSI-SU
MOSI setup time
MOSI valid to rising edge SCK
125
ns
tMOSI-H
MOSI hold time
MOSI valid after rising edge SCK
140
ns
tMISO-HIZ
MISO tristate time
Time to tristate MISO after SSN rising
edge
110
tMISO-HL
MISO valid high-to-low
tMISO-LH
TZO-HL
10
SCK rising
UNIT
500
ns
250
ns
1
µs
500
ns
60
%
320
ns
Time to place valid "0" on MISO after
falling SCK edge.
320
ns
MISO valid low-to-high
Time to tri-state MISO after falling
SCK edge. tRC is the time added by
the application total capacitance and
resistance.
320+tRC
ns
MISO drive time high-to-low
SSN Falling Edge to MISO Falling
320
ns
Submit Document Feedback
Copyright © 2021 Texas Instruments Incorporated
Product Folder Links: TPS92682-Q1
�TPS92682-Q1
www.ti.com
SLUSCX8C – MARCH 2019 – REVISED MARCH 2021
6.6 Typical Characteristics
TA = 25°C free air, VIN = 14 V, DIV = 2 (CHxDIV = 0x00) unless otherwise specified
5.02
Internal Regulator VDD Voltage (V)
Internal Regulator VCC Voltage (V)
7.54
7.53
7.52
7.51
7.5
7.49
7.48
7.47
7.46
7.45
7.44
-50
-30
-10
10
30
50
70
90
110
130
5.01
5
4.99
4.98
4.97
4.96
4.95
-50
150
-30
-10
o
Junction Temperature ( C)
IVCC = 20 mA
Figure 6-1. Regulated VCC Voltage vs Junction Temperature
70
90
110
130
150
VDD_
50.5
400
VCC Current Limit (mA)
VCC Dropout Voltage (mV)
50
51
350
300
250
200
50
49.5
49
48.5
48
47.5
-30
-10
10
30
50
70
90
110
130
47
-50
150
-30
-10
o
Junction Temperature ( C)
10
30
50
70
90
110
130
Junction Temperature (oC)
VCC_
VIN = 4.5 V, IVCC = 30 mA
Figure 6-3. VCC Dropout Voltage vs Junction Temperature
150
VCC_
Figure 6-4. VCC Current Limit vs Junction Temperature
1.01
4.6
4.55
4.5
1.006
4.45
RT Pin Voltage (V)
VCC Undervoltage Lockout Thresholds (V)
30
IVDD = 20 mA
Figure 6-2. Regulated VDD Voltage vs Junction Temperature
450
150
-50
10
Junction Temperature (oC)
VCC_
4.4
4.35
4.3
4.25
4.2
4.15
4.1
0.998
0.994
4.05
4
Rising
Falling
3.95
3.9
-50
1.002
-30
-10
10
30
50
70
90
o
Junction Temperature ( C)
110
130
150
0.99
-50
-30
10
30
50
70
90
Junction Temperature (oC)
VCC_
Figure 6-5. VCC UVLO Threshold vs Junction Temperature
-10
110
130
150
VRT_
Figure 6-6. RT Pin Voltage vs Junction Temperature
Submit Document Feedback
Copyright © 2021 Texas Instruments Incorporated
Product Folder Links: TPS92682-Q1
11
�TPS92682-Q1
www.ti.com
SLUSCX8C – MARCH 2019 – REVISED MARCH 2021
6.6 Typical Characteristics (continued)
TA = 25°C free air, VIN = 14 V, DIV = 2 (CHxDIV = 0x00) unless otherwise specified
402
201
200.8
Switching Frequency (kHz)
Switching Frequency (kHz)
401.5
401
400.5
400
399.5
399
398.5
398
-50
200.6
200.4
200.2
200
199.8
199.6
199.4
199.2
-30
-10
10
30
50
70
90
110
130
199
-50
150
-30
-10
o
Junction Temperature ( C)
RT = 50 kΩ, CHxDIV = 01
Figure 6-7. Switching Frequency vs Junction Temperature
ILIM Current Limit Threshold (mV)
Maximum Duty Cycle (%)
90.2
90
89.8
89.6
89.4
89.2
70
90
110
130
150
FSW_
-30
-10
10
30
50
70
90
110
130
251
250
249
248
247
-50
150
-30
-10
o
Junction Temperature ( C)
10
30
50
70
90
110
130
Junction Temperature (oC)
DMAX
RT = 50 kΩ, CHxDIV = 01
Figure 6-9. Maximum Duty Cycle vs Junction Temperature
150
ILIM
CHxILIM = 11
Figure 6-10. ISP Current Limit Threshold vs Junction
Temperature
1.236
100.6
100.4
1.232
100.2
OVP Threshold (V)
ILIM Current Threshold (mV)
50
252
90.4
100
99.8
99.6
99.4
1.228
1.224
1.22
99.2
99
-50
-30
-10
10
30
50
70
90
Junction Temperature (oC)
110
130
150
1.216
-50
-30
-10
10
30
50
70
90
Junction Temperature (oC)
ILIM
CHxILIM = 01
Figure 6-11. ISP Current Limit Threshold vs Junction
Temperature
12
30
RT = 100 kΩ, CHxDIV = 01
Figure 6-8. Switching Frequency vs Junction Temperature
90.6
89
-50
10
Junction Temperature (oC)
FSW_
110
130
150
VOV_
CHxOV = 000
Figure 6-12. Over Voltage Protection Threshold vs Junction
Temperature
Submit Document Feedback
Copyright © 2021 Texas Instruments Incorporated
Product Folder Links: TPS92682-Q1
�TPS92682-Q1
www.ti.com
SLUSCX8C – MARCH 2019 – REVISED MARCH 2021
6.6 Typical Characteristics (continued)
TA = 25°C free air, VIN = 14 V, DIV = 2 (CHxDIV = 0x00) unless otherwise specified
20.8
OVP Hysteresis Current (PA)
1.49
OVP Threshold (V)
1.485
1.48
1.475
1.47
1.465
1.46
-50
-30
-10
10
30
50
70
90
110
130
20.6
20.4
20.2
20
19.8
19.6
19.4
-50
150
-30
-10
o
Junction Temperature ( C)
CHxOV = 111
Figure 6-13. Over Voltage Protection Threshold vs Junction
Temperature
CSN Pin Input Bias Current (PA)
CSP Pin Input Bias Current (PA)
61
60.5
60
59.5
59
58.5
-30
-10
10
30
50
70
90
110
130
Junction Temperature (oC)
70
90
110
130
150
IOV_
61.5
61
60.5
60
59.5
59
58.5
58
-50
150
-30
-10
2.406
1.406
IADJ DAC Voltage (V)
1.408
2.402
2.4
2.398
2.396
2.394
30
50
70
90
110
130
150
CSN_
VCSN = 14 V
Figure 6-16. CSN Pin Input Bias Current vs Junction
Temperature
2.408
2.404
10
Junction Temperature (oC)
CSP_
VCSP = 14 V
Figure 6-15. CSP Pin Input Bias Current vs Junction
Temperature
IADJ DAC Voltage (V)
50
62
61.5
2.392
-50
30
Figure 6-14. OVP Hysteresis Current vs Junction Temperature
62
58
-50
10
Junction Temperature (oC)
VOV_
1.404
1.402
1.4
1.398
1.396
1.394
-30
-10
10
30
50
70
90
110
130
150
1.392
-50
-30
o
Junction Temperature ( C)
CHxIADJ = FF (hex)
Figure 6-17. VIADJ Voltage vs Junction Temperature
-10
10
30
50
70
90
Junction Temperature (oC)
VIAD
110
130
150
VIAD
CHxIADJ = 95 (hex)
Figure 6-18. VIADJ Voltage vs Junction Temperature
Submit Document Feedback
Copyright © 2021 Texas Instruments Incorporated
Product Folder Links: TPS92682-Q1
13
�TPS92682-Q1
www.ti.com
SLUSCX8C – MARCH 2019 – REVISED MARCH 2021
6.6 Typical Characteristics (continued)
TA = 25°C free air, VIN = 14 V, DIV = 2 (CHxDIV = 0x00) unless otherwise specified
170.5
171
100.5
99.5
V(CSP
V(CSP
171.5
172
Threshold (mV)
101.5
CSN)
172.5
Threshold (mV)
102
CSN)
173
170
169.5
169
-50
101
100
99
98.5
-30
-10
10
30
50
70
90
110
130
98
-50
150
-30
o
Junction Temperature ( C)
CHxIADJ = FF (hex)
Figure 6-19. V(CSP – VCSN) Voltage vs Junction Temperature
Switching Frequency (kHz)
OCP Gain
30
50
70
90
110
130
150
VCSP
1000
1.505
1.5
1.495
-30
-10
10
30
50
70
90
110
130
150
800
600
400
200
0
20
30
o
Junction Temperature ( C)
40 50 6070
100
200
300
Resistance RT (k:)
KOCP
CHxIADJ = 95 (hex)
Figure 6-21. Over Current Protection Gain vs Junction
Temperature
14
10
CHxIADJ = 95 (hex)
Figure 6-20. V(CSP – VCSN) Voltage vs Junction Temperature
1.51
1.49
-50
-10
Junction Temperature (oC)
VCSP
500 700 1000
FSW_
Figure 6-22. Channel Switching Frequency FSW vs RT
Resistance
Submit Document Feedback
Copyright © 2021 Texas Instruments Incorporated
Product Folder Links: TPS92682-Q1
�TPS92682-Q1
www.ti.com
SLUSCX8C – MARCH 2019 – REVISED MARCH 2021
7 Detailed Description
7.1 Overview
The TPS92682-Q1 device is an automotive-grade two-channel controller with Serial Peripheral Interface (SPI)
interface, ideally suited for exterior lighting applications. The device is optimized to achieve high-performance
solutions and features all of the functions necessary to implement LED drivers based on step-up or step-down
power converter topologies with a small form-factor at a lower cost.
The two channels of the TPS92682-Q1 device can be configured independently as CC (constant current) or
CV (constant voltage) mode. The device implements fixed-frequency peak current mode control to achieve
regulation and fast dynamic response. Each channel can be configured as boost, boost-to-battery, SEPIC, or
other converter topologies.
In CC mode, the integrated low offset and rail-to-rail current sense amplifier provide the flexibility required
to power a single string consisting of 1 to 20 series connected LEDs while maintaining 4% current accuracy
over the operating temperature range. The LED current regulation threshold is set by the analog adjust input
CHxIADJ register over 28:1 dimming range. The TPS92682-Q1 incorporates an internal 10-bit counter for
the PWM dimming function for each channel. The PWM width and frequency are programmable through the
SPI registers. Alternatively, the device can also be configured to implement direct PWM dimming based on
the duty cycle of the external PWM signal connected to PWM1 or PWM2 pins for channel-1 or channel-2,
respectively. The internal PWM signals control the GATEx and PDRVx outputs, which control the external
N-channel switching FETs and P-channel dimming FETs connected in series with LED strings.
The TPS92682-Q1 can be configured in CV mode. In this mode, the device regulates the voltage connected
to the FBx/OVx pins to an internal programmable reference voltage, set by the CHxIADJ register. In CV mode,
the TPS92682-Q1 can be used as the first stage of a two-stage LED driver in an ECU (electronic control unit)
of an exterior lighting application. The device can also be configured to operate in two-phase mode, where the
switching frequencies of the two channels are phase-shifted by 180° and the channel-1 compensation loop,
including COMP1 and the FB1/OV1, is shared between the two channels.
The TPS92682-Q1 incorporates an enhanced programmable fault feature. A selected number of faults,
including ILIMIT (cycle-by-cycle current limit), OV (output Overvoltage), UV (output Undervoltage), and OC (LED
Overcurrent), can be programmed to be latched faults, or automatically re-start the channel when the fault is
cleared and after a programmed timer is expired. In addition, the TPS92682-Q1 includes open-pin faults for the
FBx, ISNx, and RT pins. Other fault and diagnostic features include Thermal Shutdown (TSD), Thermal Warning
(TW), LED Undercurrent (UC), and POR. Each channel includes an active-low fault pin ( FLT) that is pulled low
when a fault occurs. For each fault, there is an associated fault read-bit in the register map that can be read
through SPI communication interface. For a complete list of the fault and diagnostic features, refer to the Faults
and Diagnostics section.
The TPS92682-Q1 includes a limp home (LH) function that is initiated when the LH pin is set high. In LH mode,
the operation of the device is set by the LH registers. The LH registers are programmed upon initialization of the
device. To exit the LH mode, the LH pin must be set low and the LH bit in the CFG1 register must be written to
“0”.
The TPS92682-Q1 device has numerous enhanced programmable features that can be accessed through the
4-wire SPI bus. The SPI bus consists of four signals: SSN, SCK, MOSI, and MISO. The SSN, SCK, and MOSI
pins are TTL inputs into the device.
7.2 Functional Block Diagram
The block diagram below shows the associated blocks for channel-1. Channel-2 has a similar configuration.
Submit Document Feedback
Copyright © 2021 Texas Instruments Incorporated
Product Folder Links: TPS92682-Q1
15
�TPS92682-Q1
www.ti.com
SLUSCX8C – MARCH 2019 – REVISED MARCH 2021
5V LDO
VDD
TSD
Thermal
Limit
VIN
POR
POR
TW
7.5V LDO
VCC
EN
UVLO
UVLO
CH1_Gate
EN
CH1_MAXD
CH1_Clk100p
RT OPEN
1
CH1_MAXD
RT
CH1_Clk10p
OSCILLATOR
DAC
Dither
Dither_EN
SYNC
R
CSP1
0
CH1_s
PWM1
CH1_EN
100%
CH1&2_Clk10p
PDRV1
Power_FLT
CH1_nPDRV
10%
CH1&2_ISLP
PGND
1
CH1&2_Clk100p
Slope Gen. &
MAX Duty
GATE1
Q
R
Dominant
POR
Clk_M
CH1_Clk100p
CH1&2_CLK
CH1&2_DIV
S
0
RT_Open
CH1_MAXD_EN
FMDAC
CH1_s
PWM1
Power_FLT
CHx_Islope
Clk10p
Clk100p
VDD
PWM1
CH1_OV_EN
CH1_close_comp_n
R
1
CH1_Duty
Q
R
Dominant
CH1_close_comp
S
CH1_PWM_O
±
1.23V
ref
100mV
+
0
CH1_OVDAC
CH2_comp
CH1_EAref
CH1_complow
±
2PH
DAC
OV
0
1
1
CH1_CV
CH1_comp
CH1_close_comp
COMP1
CH1_UV
Power_FLT
5Ps
Delay
50mV
+
CH1_PD_O
DAC1
IADJ
CH1_Islope
VDD
OC/UC
SENSE
(150%/50%)
CH1_UC
CH1_EAref
CH1_LBSEL
+
CH1_Duty
gM
CH1_EA_FB
CSP1
±
CH1_Isense
x14
CH1_Gate
±
CH1_comp
1
CH1_PD_O
CH1_CV
CH1_close_comp
DAC
SS1
CH1_SSDAC
FLT1
ISP1
0
CH1_ILIMIT
CH1_FAULT
1
CH2_FAULT
+
CH1_FILT1
±
ISN1
SYNC_EN
SYNC
TSD
BG_NOK
UVLO
POR
CH1_close_comp_n
Power_FLT
CH1ILIM
CH1_IS_OPEN
16
LEB
0
±
CH1_VFB
CH1_close_comp
+
CH1_HG
+
SYNC/FLT2
CH1_VFB
CH1_close_comp
CH1_OC 10Ps
Filter
CSN1
FB1/OV1
±
CH1_PD_comp
CH1_IADJ
VDD
+
CH1_OV
INT_PWM
CH1_FBO_EN
PWM1
0
PWM1
Submit Document Feedback
20PA
VDD
Copyright © 2021 Texas Instruments Incorporated
Product Folder Links: TPS92682-Q1
�TPS92682-Q1
www.ti.com
SLUSCX8C – MARCH 2019 – REVISED MARCH 2021
VDD
CH1&2_IADJ
CH1&2_PWM
Clk_M
CH1&2_IS_OPEN
CH1&2_OV
CH1&2_UV
CH1&2_OC
CH1&2_UC
CH1&2_ILIMIT
CH1&2_complow
POR
TW
RTOP
LH
AGND
LH
CH1&2ILIM
DIGITAL
BLOCK
CH1&2_ISLP
CH1&2_OVDAC
CH1&2_SSDAC
CH1&2_DIV
FMDAC
CH1&2_LBSEL
CH1&2_FILT1
RSVD
RSVD
CH1&2_HG
CH1&2_EN
CH1&2_CLK
CH1&2_OVEN
CH1&2_UV_EN
CH1&2_OC_EN
CH1&2_FBO_EN
CH1&2_PWM_O
CH1&2_PD_comp
INT_PWM
CH1&2_nPDRV
2PH
CH1&2_CV
CH1&2_MAXD_EN
CH1&2_FAULT
SYNC_EN
DITHER_EN
LH
MOSI
MOSI
SSN
SSN
SCK
SCK
SPI
Interface
MISO
MISO
Submit Document Feedback
Copyright © 2021 Texas Instruments Incorporated
Product Folder Links: TPS92682-Q1
17
�TPS92682-Q1
www.ti.com
SLUSCX8C – MARCH 2019 – REVISED MARCH 2021
7.3 Feature Description
The TPS92682-Q1 device implements a fixed frequency Peak Current Mode (PCM) control. In PCM, the
switching cycle starts with a rising edge of the clock. The switching cycle ends when the sensed switch current,
ViSW (added with VSLOPE), exceeds the compensator voltage, VCOMP. As shown in Figure 7-1 and Figure
7-2, a transconductance gM error amplifier generates an error signal by comparing the feedback signal and
the reference voltage, VREF. The resulting error current generates the compensator voltage VCOMP, through a
compensator impedance, connected to the COMPx pin.
For stability at high duty cycle and better noise immunity, a compensation ramp VSLOPE is added to the sensed
switch current ViSW.
VIN
L
CHxCLK
S
RCS
Q
R
Dominant
GATEx
R
RIS
COUT
VSLOPE
PWM
Comp
+
ViSW
6
ISPx
±
EA
Amp
VCOMP
CS
Amp
VREF
+
CSPx
+
gM
±
±
CSNx
CCOMP
COMPx
Figure 7-1. PCM Control in CC Mode
VOUT
VIN
L
CHxCLK
S
RFB2
GATEx
Q
R
Dominant
R
RIS
COUT
RFB1
VSLOPE
PWM
Comp
+
6
ViSW
ISPx
±
VCOMP
EA
Amp
+
gM
±
CCOMP
VREF
FBx
COMPx
Figure 7-2. PCM Control in CV Mode
18
Submit Document Feedback
Copyright © 2021 Texas Instruments Incorporated
Product Folder Links: TPS92682-Q1
�TPS92682-Q1
www.ti.com
SLUSCX8C – MARCH 2019 – REVISED MARCH 2021
VCOMP
VSLOPE
ViSW
DTSW
TSW
Figure 7-3. PCM Control and Ramp Compensation
7.3.1 Device Enable
The TPS92682-Q1 can be enabled or disabled by the EN pin or the software enable bits. When EN pin is pulled
low, the device enters shutdown state, where the quiescent current of the device is decreased to IIN-SHDN. In
shutdown state, the internal regulators are turned off and the registers are reset. When the voltage on the enable
pin is increased above the voltage threshold of VEN, the two channels can be enabled. In addition to the EN pin,
there are two enable bits for the two channels of the TPS92682-Q1 as shown in Table 7-2. In order for each
channel to be turned on, the associated CHxEN bit must be set to "1" in EN Register.
In addition to the EN pin and the CHxEN bits, the PWMx signals (hardware or software) must be set high and the
associated CHxIADJ must be set to a value greater than eight (refer to the CH1IADJ Register) in order for the
associated channel to be turned on.
7.3.2 Internal Regulator and Undervoltage Lockout (UVLO)
The device incorporates 65-V input voltage rated linear regulators to generate the 7.5-V (typical) VCC bias
supply, the 5-V (typical) VDD supply, and other internal reference voltages. The device monitors the VCC
output to implement UVLO protection. Operation is enabled when VCC exceeds the 4.5-V (typ) threshold and is
disabled when VCC drops below the 4.1-V (typical) threshold. The UVLO comparator provides a hysteresis to
avoid chatter during transitions. The UVLO thresholds are internally fixed and cannot be adjusted. An internal
current limit circuit is implemented to protect the device during VCC pin short-circuit conditions. The VCC supply
powers the internal circuitry and the N-channel gate driver outputs, GATEx. Place a bypass capacitor in the
range of 2.2 μF to 4.7 μF across the VCC output and GND to ensure proper operation. The regulator operates in
dropout when input voltage VIN falls below 7.5 V. The VCC is a regulated output of the internal regulator and is
not recommended to be driven with an external power supply.
The internal VDD regulator is used to generate supply voltage for various internal analog and digital circuits. The
supply current is internally limited to protect the device from output overload and short-circuit conditions. Place
a bypass capacitor in the range of 2.2 μF to 4.7 μF across the VDD output to GND to ensure proper operation.
The POR circuit of the device is placed at the output of the VDD regulator. The POR rise and fall thresholds are
provided in the Electrical Characteristics.
7.3.3 Oscillator
The internal clock frequency of the TPS92682-Q1 device is programmable by a single external resistor,
connected between the RT pin and the GND. The relationship between the resistor RT and the internal main
clock (CLKM) frequency is shown in Equation 1 and Figure 6-22.
fCLKM
1012
12.5 u RT
(1)
The relationship between the channel clock, CHxCLK (or the channel switching frequency fSW), and fCLKM is
shown in the SWDIV Register section. TI recommends a switching frequency setting between 100 kHz to 700
kHz for best efficiency and for optimal performance over input and output voltage operating range. Operation at
higher switching frequencies requires careful selection of N-channel MOSFET characteristics as well as detailed
analysis of switching losses.
Submit Document Feedback
Copyright © 2021 Texas Instruments Incorporated
Product Folder Links: TPS92682-Q1
19
�TPS92682-Q1
www.ti.com
SLUSCX8C – MARCH 2019 – REVISED MARCH 2021
To use the synchronization functionality of the TPS92682-Q1, the SYNCEN bit shown in Table 7-3 must be set to
"1", and a square wave signal with the desired fCLKM frequency must be applied to the SYNC pin.
RT
RT
Oscillator
CLKM
SYNC
fSYNC
Figure 7-4. TPS92682 SYNC Function
7.3.4 Spread Spectrum Function
The main clock of the TPS92682-Q1, CLKM, is generated using an internal ramp generator as shown in Figure
7-5. The internal ramp, RAMPCLKM, is compared with a reference voltage of VOSCREF to reset the ramp at
the end of the clock period, TCLKM. When the reference voltage VOSCREF is constant (1 V), the main clock
frequency is fixed. The frequency modulation of the main clock is achieved using an internal 8-bit digital counter
DAC, and by modulating the reference voltage as shown in Figure 7-6. Both modulation frequency, FM, and the
modulation magnitude, ΔFM, are programmable in the FM Register.
VDD
RampCLKM
1V
Ref
+
+
RampRESET
±
1V
Ref
0
VOSCREF
±
8-Bit
DAC &
Counter
1
1V ± 'FM
RT
RT
Figure 7-5. Internal Ramp for CLKM Generation
1/FM
'Fm
1V
RampCLKM
TCLKM
Figure 7-6. Internal Ramp Waveform
To achieve maximum attenuation in average-EMI scan, set a modulation frequency of FM ranging from 100 Hz
to 1.2 kHz. A low modulating frequency has a small impact on the quasi-peak EMI scan. Set the modulation
frequency to 10 KHz or higher to achieve attenuation for quasi-peak EMI measurements. A modulation
20
Submit Document Feedback
Copyright © 2021 Texas Instruments Incorporated
Product Folder Links: TPS92682-Q1
�TPS92682-Q1
www.ti.com
SLUSCX8C – MARCH 2019 – REVISED MARCH 2021
frequency higher than the receiver resolution bandwidth (RBW) of 9 kHz impacts only the quasi-peak EMI scan
and has little impact on the average EMI measurement. The TPS92682-Q1 device simplifies EMI compliance
by providing the means to tune the modulation frequency, FM, and modulation magnitude, ΔFM, based on the
measured EMI signature.
Equation 2 shows the relation between the channel switching frequency, fSW, and the desired modulation
frequency FM.
FM
DIV u fSW
FMFREQ
(2)
In Equation 2, DIV is the division factor between CLKM and the CHxCLK provided in SWDIV Register, and
FMFREQ is the division factor given in the FM Register.
The output of the FM 8-bit digital counter always resets and starts from 1 V when a register write is performed to
FM Register.
7.3.5 Gate Driver
The TPS92682-Q1 contains an N-channel gate driver that switches the output GATEx between VCC and GND.
A peak source and sink current of 500 mA allows controlled slew-rate of the MOSFET gate and drain voltages,
limiting the conducted and radiated EMI generated by switching.
The gate driver supply current, ICC(GATE), depends on the total gate drive charge (QG) of the MOSFET and
the operating frequency of the converter, fSW, ICC(GATE) = QG × fSW. Select a MOSFET with a low gate charge
specification to limit the junction temperature rise and switch transition losses.
It is important to consider a MOSFET threshold voltage when operating in the dropout region (input voltage VIN
is below the VCC regulation level). TI recommends a logic level device with a threshold voltage below 5 V when
the device is required to operate at an input voltage less than 7 V.
7.3.6 Rail-to-Rail Current Sense Amplifier
The internal rail-to-rail current sense amplifier measures the average LED current based on the differential
voltage drop between the CSPx and CSNx inputs over a common mode range of 0 V to 65 V. The differential
voltage, V(CSPx-CSNx), is amplified by a voltage-gain factor of 14 and is connected to the negative input of the
transconductance error amplifier. Accurate LED current feedback is achieved by limiting the cumulative input
offset voltage (represented by the sum of the voltage-gain error, the intrinsic current sense offset voltage,
and the transconductance error amplifier offset voltage) over the recommended common-mode voltage and
temperature range.
An optional common-mode (CFCM) or differential mode (C FDM) low-pass filter implementation, as shown in Figure
7-7, can be used to filter the effects of large output current ripple, and switching current spikes caused by diode
reverse recovery. TI recommends a filter resistance in the range of 10 Ω to 100 Ω to limit the additional offset
caused by amplifier bias current mismatch to achieve the best accuracy and line regulation.
CSPx
RFS
+
CFDM
RCS
x14
RFS
CHxIsense
±
CSNx
CFCM
CFCM
Figure 7-7. Current Sense Amplifier
Submit Document Feedback
Copyright © 2021 Texas Instruments Incorporated
Product Folder Links: TPS92682-Q1
21
�TPS92682-Q1
www.ti.com
SLUSCX8C – MARCH 2019 – REVISED MARCH 2021
7.3.7 Transconductance Error Amplifier
As shown in Figure 7-8, the internal transconductance error amplifier generates an error signal proportional to
the difference between the internal programmable 8-bit CHxIADJ-DAC (CH1IADJ Register) and the feedback
signal. The feedback signal is the sensed current CHxIsense in CC mode, or the sense output voltage, CHxVFB,
in CV mode. The gain gM of the error amplifier is programmable through the CHx_HG bit in the CFG1 Register.
The gain values for CHx_HG = 0 or 1 are provided in the Electrical Characteristics. Based on the value of
CHx_CV bit in Table 7-4, either CHxIsense or CHxVFB is connected to the input of the error amplifier. Therefore,
the TPS92682-Q1 device either operates in CV or CC mode.
The output of the error amplifier is connected to an external compensation network to achieve closed-loop LED
current (CC), or output voltage (CV) regulation. In most LED driver applications, a simple integral compensation
circuit consisting of a capacitor connected from COMPx output to GND provides a stable response over a
wide range of operating conditions. TI recommends a capacitor value between 10 nF and 100 nF as a good
starting point. To achieve higher closed-loop bandwidth, a proportional-integral compensator, consisting of a
series resistor and a capacitor network connected across the COMPx output and GND, is required. Application
and Implementation includes a summarized detailed design procedure.
COMPx
CHx_comp
±
100mV
CHx_complow
+
CHx_PD_comp
CHx_IADJ
0 ± 2.4V
8-Bit
DAC
CHx_close_comp
EAREF
CSPx
+
RCS
CHx_Isense
x14
0
EAFB
±
+
±
gM
1
VDD
CHx_CV
0.2PA
Transconductance
Error Amp
CHx_HG
CHx_VFB
CSNx
500 :
CHx_SSDAC
0 ± 2.8V
8-Bit
DAC
CH1_FBO_EN
FBx
VOUTx
RFB2
RFB1
Figure 7-8. Feedback Connection to the Error Amplifier
7.3.8 Switch Current Sense
Figure 7-9 shows the simplified block diagram of the switch current sense circuitry. The ISPx input pin monitors
the main MOSFET current to implement peak current mode control. The GATEx output duty cycle is derived by
comparing the peak switch current, measured by the RIS resistor, to the internal CHx_COMP voltage threshold.
An internal slope signal, CHx_ISLOPE, is added to the measured sense voltage to prevent sub-harmonic
oscillations for duty cycles greater than 50%.
An internal leading-edge blanking (LEB) is applied to the switch current sense at the beginning of each switching
cycle by shunting the ISPx input to the ISNx (GND connection of the RIS) for the duration of the LEB time. The
LEB circuit prevents unwanted duty cycle termination due to MOSFET switching-current spike at the beginning
of the new switching cycle. The LEB time can be set to 150 ns or 75 ns (typical) using the CHxLEB bit set in
Table 7-5. For additional noise suppression, connect an external low-pass RC filter with resistor values ranging
from 100 Ω to 500 Ω and a 1000-pF capacitor across RIS.
22
Submit Document Feedback
Copyright © 2021 Texas Instruments Incorporated
Product Folder Links: TPS92682-Q1
�TPS92682-Q1
www.ti.com
SLUSCX8C – MARCH 2019 – REVISED MARCH 2021
Cycle-by-cycle current limit is accomplished by a separate internal comparator. The current limit threshold is set
based on the status of internal PWM signal and the CHxILIM setting. The current limit threshold is set to a value
programmed in the CHxILIM in Table 7-17 when PWM signal is high. The current limit threshold is set to 700 mV
(typical) when PWM signal is low. In CC mode, the transition between the two thresholds in conjunction with the
slope compensation and the error amplifier circuit allows for higher inductor current immediately after the PWM
transition, to improve LED current transient response in PWM dimming.
The device immediately terminates the GATEx and PDRVx outputs when the sensed voltage at the ISPx input
exceeds the current limit threshold. For more detail on the cycle-by-cycle current limit, refer to the Faults and
Diagnostics section.
CHx_Gate
VDD
CHxLEB
CHx_Islope
LEB
75ns/150ns
20PA
CHx_close_comp
CHx_DUTY
+
comp
±
CHx_COMP
5k:
CHx_ISW
ISPx
CHx_ILIMIT
+
comp
CHx_ILIM
±
ILIM_DAC
RIS
CHx_PWM
ISNx
Figure 7-9. Switch Current Sense and Current Limit
7.3.9 Slope Compensation
Switching converters with peak current mode control are subject to subharmonic oscillation for duty cycles
greater than 50%. To avoid instability, the control scheme adds an artificial ramp to the sensed switch current
(shown in Figure 7-9). The required slope of the artificial ramp depends on the input voltage, VIN, output voltage,
VO, inductor L, and switch current sense resistor RIS. The TPS92682-Q1 device provides a programmable
slope compensation with seven levels of slope magnitude to simplify and enhance the performance of common
switching converter topologies, such as boost, boost-to-battery, and SEPIC. The slope magnitude can be
programmed through CHxISLP in the ISLOPE Register. The Application and Implementation section includes
calculations for the choice of correct slope magnitude for a given application.
7.3.10 ILED Setting in CC Mode
In CC mode, as shown in Figure 7-8, the voltage across the LED current sense resistor, V(CSP–CSN), is regulated
to the output of the programmable 8-bit CHxIADJ-DAC, scaled by the current sense amplifier voltage gain of 14.
The LED current can be linearly adjusted by writing a different value to the CHxIADJ register. The 8-bit DAC
output can be set in the range of 85 mV (CHxIADJ = 9) to 2.4 V (CHxIADJ = 255). The associated channel is
turned off for CHxIADJ ≤ 8.
7.3.11 Output Voltage Setting in CV Mode
In CV mode, as shown in Figure 7-8, the voltage at the FBx pin (output voltage divider) is regulated to the output
of the programmable 8-bit CHxIADJ-DAC. The FBx voltage can be adjusted in the range of 85 mV (CHxIADJ =
9) to 2.4 V (CHxIADJ = 255). The associated channel is turned off for CHxIADJ ≤ 8.
Submit Document Feedback
Copyright © 2021 Texas Instruments Incorporated
Product Folder Links: TPS92682-Q1
23
�TPS92682-Q1
www.ti.com
SLUSCX8C – MARCH 2019 – REVISED MARCH 2021
7.3.12 PWM Dimming
As shown in Figure 7-10, the TPS92682-Q1 device incorporates both internal and external PWM dimming. To
select between external or internal PWM dimming, the INTPWM bit in CFG1 Register must be set to "0" or "1",
respectively. If internal PWM dimming operation is selected, the state of the PWMx pins do not have any effect
on the operation of the device. For external PWM dimming, apply a square-wave signal to the PWMx pin with the
rising and falling thresholds provided in the Electrical Characteristics. The LED current modulates based on the
duty cycle of the external PWM signal, DPWM(EXT).
PWMxINT
PWMxINT
0
PWMx
CHxPWM_dig
CHx_close_comp
R
1
Q
R
Dominant
S
INT_PWM
CHx_Duty
Figure 7-10. PWM Dimming Circuit
To use internal PWM dimming, the INTPWM bit in CFG1 Register must be set to "1". The TPS92682-Q1 device
incorporates a 10-bit PWM counter for each channel. The duty cycle of the internal PWM can be set using
a 10-bit value in the CHxPWML and CHxPWMH registers. Because CHxPWM is a 10-bit value, a PWM duty
cycle update can require two SPI writes, one to the CHxPWMH and another to the CHxPWML register. To
prevent transferring incoherent values, the contents of the two registers transfer to the CHxPWM counter only
upon the write to the CHxPWML register. Therefore, for an update to the PWM duty cycle, it is recommended
consecutively writing to CHxPWMH first and CHxPWML second. In addition, in order to avoid corrupting the
progress of the current PWM duty cycle, the update from the CHxPWM registers to the CHxPWM counter occurs
two PWMCLK before the end of each PWM period (at the count of 1022).
Due to synchronization of the external PWM with internal clock, when switching from external PWM to internal
PWM, a glitch for the total of one PWM period can be observed in the output.
The clock to the 10-bit PWM counter is related to the main clock, CLKM, by a division factor set by a 3-bit value
in the PWMDIV Register. The relation between the PWMCLK and PWM frequency with CLKM frequency are
shown in Equation 3 and Equation 4.
PWMCLK
PWMFREQ
fCLKM
PWMDIV
(3)
PWMCLK
1024
(4)
For example, if the CLKM frequency is set to fCLKM = 800 kHz and PWMDIV = 001 (division value of 2), the PWM
frequency is PWMFREQ ≈ 390 Hz.
The phase between the internal PWM dimming for the two channels can be set to 180° if the PWMPH bit in
CFG1 Register is set to 0. For PWMPH = 1, there is zero phase shift between the internal 10-bit PWM counters
of the two channels.
The PWM signal controls the GATEx and PDRVx outputs. If PWMxINT is set low, the associated channel is
turned off, the COMPx pin is disconnected from the error amplifier, and the PDRVx output is set to VCSP to
maintain the charge on the compensation network and output capacitors. On the rising edge of the PWMxINT,
the GATEx and PDRVx outputs are enabled to ramp the inductor current to the previous steady-state value.
The COMPx pin connects to the error amplifier only when the switch current sense voltage VISPx exceeds
the COMPx voltage, CHx_comp. This connection immediately forces the converter into steady-state operation
with minimum LED current overshoot. When dimming is not required, connect the PWMx pins to the VDD pin.
An internal pull-down resistor sets the PWM inputs to logic-low and disables the device when the pins are
disconnected or left floating, and the INTPWM bit in CFG1 Register is set to the default value of "0".
24
Submit Document Feedback
Copyright © 2021 Texas Instruments Incorporated
Product Folder Links: TPS92682-Q1
�TPS92682-Q1
www.ti.com
SLUSCX8C – MARCH 2019 – REVISED MARCH 2021
7.3.13 P-Channel FET Gate Driver Output
The PDRVx output is a function of the internal PWM signal and is capable of sinking and sourcing up to 50 mA
of peak current to control a high-side series connected P-channel dimming FET. The PDRV switches between
VCSP and (VCSP – 7 V) is based on the status of the PWM signal to completely turn off and turn on the external
P-channel dimming FET. In CC mode, a series dimming FET is required to achieve high contrast ratio since it
ensures fast rise and fall times of the LED current in response to the PWM input. Without any dimming FET,
the rise and fall times are limited by the inductor slew rate and the closed-loop bandwidth of the system. In CC
mode, leave the PDRVx pin unconnected if not used. In CV mode, the PDRVx together with CSPx and CSNx
pins can be connected to GND to limit the shutdown current. The PDRVx can also be disabled by setting the
CHxPDRVEN bit in Table 7-3 to zero.
7.3.14 Soft Start
The soft start feature helps the regulator gradually reach the steady-state operating point, thus reducing start-up
stresses and current surges. The device clamps the COMPx pin to the output of the SSDAC plus the threshold
voltage of a P-FET, until the LED current or the output voltage approaches the regulation threshold. The soft
start is controlled with an 8-bit DAC which ramps from 0 V to 2.8 V during start-up of an associated channel.
The rate of the soft-start ramp (or the ramp time) can be controlled by programming the clock of the internal
digital ramp counter. The clock of the digital ramp counter is related to the associated channel clock (switching
frequency fSW) by:
SSCLK
CHxCLK
SSxDIV
(5)
The SSxDIV is a division factor provided in the SOFTSTART Register. For example, if the channel switching
frequency is set to 400 kHz, the soft-start ramp time can be programmed between 1.3 ms and 64 ms. It is
important to note that the ramp time is the time for the SSDAC output to ramp from 0 V to 2.8 V (digital ramp
counter to count from 0 to 255), but the controller can reach the regulation point before the ramp is completed.
COMPx
CHx_comp
CHx_EAref
500 :
+
CCOMP
gM
CHx_EA_FB
±
CHx_HG
CHx_SSDAC
8-Bit
DAC
0 ± 2.8V
Figure 7-11. Soft-Start Circuit
When programming the soft-start ramp, It is essential to ensure that the soft-start ramp time is longer than the
time required to charge the output capacitor.
To initiate the soft-start ramp, the PWM signal (internal or external) must be set high. If PWM dimming occurs
during the soft-start period, the digital ramp counter holds the ramp value when PWM = LOW, and re-starts the
ramp from the last ramp value when PWM = HIGH. Figure 7-12 shows an example of this feature.
Submit Document Feedback
Copyright © 2021 Texas Instruments Incorporated
Product Folder Links: TPS92682-Q1
25
�TPS92682-Q1
www.ti.com
SLUSCX8C – MARCH 2019 – REVISED MARCH 2021
219
255
2.8 V
146
SSDAC
0V
73
0
PWM
Figure 7-12. Soft-start Period During PWM Dimming
7.3.15 Two-Phase Operation
The TPS92682-Q1 device can be programmed in two-phase mode by setting the 2PH bit to "1" in CFG1
Register. In two-phase mode, the CH1_comp is internally connected to the CH2_comp with 500 Ω (max) of
resistance. In this case, the error amplifier of channel-2 is disabled and only the error amplifier of channel-1
connects to both COMP1 and COMP2 pins. TI recommends that external compensators be connected to both
COMP1 and COMP2 pins, and that these two pins be shorted together externally.
Two-phase mode uses only the channel-1 soft-start DAC and controls both phases. To generate the channel
clocks, only the division factor for the channel-1, programmed in SWDIV Register, is used. The two channel
clocks (switching frequency fSW) are the same and are 180° out-of-phase.
In two-phase mode, in the case of internal PWM, only CH1PWM is used for both channels. When external PWM
is used, it is recommended to short both PWMx pins together and use only one PWM signal for both channels.
A selected number of the faults (CH2_OV, CH2_UV, CH2_OC, and CH2_UC) have no effect in the operation of
two-phase mode. For more detail about faults and diagnostics in TPS92682-Q1, refer to Faults and Diagnostics
section.
7.3.15.1 Current Sharing In Two-Phase
In two-phase operation, the current sharing between the two phases depends on the mismatch between the
current sense circuitry of the two channels. The TPS92682-Q1 incorporates a feature and a register setting
to improve the current sharing in two-phase operation. Table 7-40 includes three bits of calibration settings,
CHxCAL2:0, which introduce an offset of 0 to 17.5 mV (with a resolution of 2.5 mV) to the channel switch
current sense voltage. The calibration offset can be used to compensate for the mismatch offset between the
two channels.
The following procedure is recommended for offset calibration between the two phases in a CV two-phase
design:
•
•
•
•
•
•
•
•
26
In two-phase CV, Comp1 and Comp2 pins are connected together.
Configure the registers for the application and turn on the two-phase converter.
Set the load at the output of the two-phase converter to half of the maximum load in the application.
Set CH2GOFF = 1 and CH1GOFF = 0 in Table 7-40. This setting turns off channel-2. Measure the COMP
voltage as shown in Figure 7-13 and record the measurement as VCOMP1.
Set the CH1GOFF = 1 and CH2GOFF = 0 in Table 7-40. This setting turns off channel-1. Measure the COMP
voltage and record the measurement as VCOMP2.
The difference between the two measurements, ΔVOFST = VCOMP1 – VCOMP2, is the offset mismatch between
the two phases.
By setting a similar offset voltage through CHxCAL bits, the mismatch can be corrected (offset must be set in
CH2CAL if VCOMP1 > VCOMP2, and in CH1CAL if VCOMP1 < VCOMP2).
At the end of the procedure, set both CH1GOFF and CH2GOFF bits to zero.
Submit Document Feedback
Copyright © 2021 Texas Instruments Incorporated
Product Folder Links: TPS92682-Q1
�TPS92682-Q1
www.ti.com
SLUSCX8C – MARCH 2019 – REVISED MARCH 2021
10k
CHF1
V
10k
COMP1
TPS92682-Q1
COMP2
CCOMP
RCOMP
CHF2
Figure 7-13. Current Sharing Calibration Setup
7.3.16 Faults and Diagnostics
The TPS92682-Q1 includes a comprehensive configurable faults and diagnostics feature. Table 7-1 shows the
list of the faults and diagnostics. A selected number of the faults (UVLO, RTOPEN, TW, TSD, and POR) are
shared between the two channels.
As shown in Table 7-1, a selected number of the faults can be enabled or disabled using FLT EN-bits in the
FEN1 and FEN2 registers. The rest of the faults and diagnostics feature are always enabled and operational.
All the faults and diagnostics features, except FBOPEN, TSD, and UVLO, have an associated Fault-Read-bit in
the FLT1 and FLT2 registers. Upon occurrence of the fault, the associated Fault-Read-bit is set in the register
map. Reading these registers clears the bits that are set if the condition no longer exists. The clearing of the
Fault-Read-bits happens at the end of the SPI transfer read response, not at the end of the read command.
Although FBOPEN fault does not have a dedicated Fault-Read-bit, this fault sets the OV-fault read bit.
In TPS92682-Q1, the OV, UV, ILIM, and OC faults can be configured to be a non-latched fault in the FLATEN
Register. If a fault is configured as non-latched, upon occurrence of the fault, the associated channel turns off.
The channel performs a soft start after expiration of a configurable fault timer and when the fault is cleared. In
latched fault condition, the associated channel is turned off and remains off until the channel enable-bits are
re-programmed in the EN Register.
Table 7-1. TPS92682 Faults and Diagnostics
LIST
DESCRIPTION
FAULT OR
FLT EN-BIT FLT R-BIT
DIAGNOS.
ENABLE
FTIMER
F-PIN
TRIGGER
DISABLE
LATCH
OV
Output over voltage fault
Fault
Yes
Yes
No
Yes
Yes
UV
Output under voltage fault
Fault
Yes
Yes
Yes
Yes
Yes
ILIM
Cycle/Cycle switch current limit
Fault
Yes
Yes
Yes
Yes
Yes
UVLO
Input under voltage lockout
Fault
No
No
No
No
No
OC
ILED over current
Fault
Yes
Yes
Yes
Yes
Yes
UC
ILED under current
Diagnos.
No
Yes
No
No
No
ISNOPEN
ISNx open pin fault
Fault
Yes
Yes
No
Yes
No
RTOPEN
RT open pin fault
Fault
No
Yes
No
Yes
No
FBOPEN
FB pin open pin fault
Fault
Yes
No
No
Yes
No
Submit Document Feedback
Copyright © 2021 Texas Instruments Incorporated
Product Folder Links: TPS92682-Q1
27
�TPS92682-Q1
www.ti.com
SLUSCX8C – MARCH 2019 – REVISED MARCH 2021
Table 7-1. TPS92682 Faults and Diagnostics (continued)
LIST
FAULT OR
FLT EN-BIT FLT R-BIT
DIAGNOS.
DESCRIPTION
ENABLE
FTIMER
F-PIN
TRIGGER
DISABLE
LATCH
TW
Thermal warning at 150°C (typ.)
Diagnos.
No
Yes
No
No
No
TSD
Thermal shutdown
Fault
No
No
No
Yes
No
POR
Power On Reset
Fault
No
Yes
No
Yes
No
As shown in Table 7-1, all faults, except UVLO, UC, and TW, set the active low fault pins, FLT1 and FLT2. Figure
7-14 shows the functionality of the fault pins. SYNC/ FLT2 is a dual function pin. When the SYNCEN bit in the
EN Register is set to "1", SYNC/ FLT2 is an input pin and a square wave signal with the desired fCLKM frequency
must be applied to this pin. In this case, faults on both channels are ORed and applied to the FLT1 pin.
FLT1
0
CH1_FAULT
1
CH2_FAULT
SYNC_EN
SYNC/FLT2
SYNC
Figure 7-14. Fault PINs
7.3.16.1 Main Fault Timer (MFT)
For each channel of the TPS92682-Q1, there is a 14-bit counter that implements a main fault timer. The timer
can be programmed by a 4-bit value for each channel in the MFT Register. The MFT time can be set to a value
between 1000 and 16383 times the input clock period. The input clock of the MFT is the channel clock, CHxCLK
(the switching frequency fSW). For example, for a channel with a switching frequency of fSW = 400 kHz, the timer
can be programmed from 2.5 to 41 ms.
Only UV and OC faults can trigger the MFT. When either of these two faults are enabled as a non-latched
fault, the fault event turns off the channel and triggers the MFT. The associated channel is turned back on by a
soft-start process when the MFT count is completed and the fault is cleared.
7.3.16.2 OV Fault
If CHxOVEN is set to "1" in the FEN1 Register, the output over voltage fault is enabled. When VFBx exceeds the
threshold voltage OVTHR, the CHx_OV fault is set high and turns off the associated channel. The OVTHR voltage
is set by OV_DAC; OVTHR = VFBREF × OV%, where OV% is provided in the OV Register. The VFBREF in CC
mode is set to 1.228 V (typical), and in CV mode, is set to the output of the CHxIADJ register. When CHx_OV is
high, OVTHR is set to VFBREF and a 20 µA hysteresis current is applied to the feedback resistor divider. For the
boost converter with the output voltage sensing according to Figure 7-15, VOUT must decrease to a level shown
in Equation 6 for the CHx_OV to be cleared.
VO d
28
RFB1 RFB2
u VFBREF
RFB1
I20P u RFB2
Submit Document Feedback
(6)
Copyright © 2021 Texas Instruments Incorporated
Product Folder Links: TPS92682-Q1
�TPS92682-Q1
www.ti.com
SLUSCX8C – MARCH 2019 – REVISED MARCH 2021
20PA
CHx_OV_EN
+
CHx_OV
OV
±
CHx_OVDAC
CHx_CV
CHx_EAref
DAC
OV
0
VFBREF
VOUT
0.2PA
0
RFB2
1
FBx/OVx
1
CHx_UV
UV
5Ps
Delay
±
+
1.23V
ref
OVTHR
VDD
CHx_FBO_EN
VDD
RFB1
50mV
CHx_VFB
CHx_close_comp
Figure 7-15. OV and UV Faults
If the CHxOVFL bit is set to "1" in the FLATEN Register, the OV fault is configured as a latched fault and the
associated channel turns off with the rising edge of CHx_OV. The channel can be turned on again only by
re-setting the CHxEN bit in the EN Register.
For CHxOVFL = 0, the OV fault is a non-latched fault. In this case, the associated channel turns off when the
OV fault occurs, but the channel goes through a restart and soft-start ramp when CHx_OV goes low. Figure 7-16
shows a non-latched OV situation for a converter in CV mode, where the output voltage (VFBx) is regulated to
VFBREF in normal condition.
CHx is
off
Soft-Start
OVTHR
VFBx
CHx_OV
VFBREF
VFBREF ±
I20P x (RFB1||RFB2)
Figure 7-16. Non-latched OV Fault in CV Mode
7.3.16.3 UV Fault
If CHxUVEN is set to "1" in the FEN1 Register, the output under voltage fault is enabled. Figure 7-15 shows
when VFBx decreases below the UVTHR of 50 mV (typ.), CHx_UV is set high and turns off the associated
channel. If the CHxUVFL bit is set to "1" in the FLATEN Regiser, the UV fault is configured as a latched fault and
the associated channel turns off and remains off with the rising edge of CHx_UV. The channel can be turned on
again only by re-setting the CHxEN bit to "1". For CHxUVFL = 0, the UV fault is a non-latched fault. In this case,
the associated channel turns off when a UV fault occurs, but the channel goes through a restart and soft-start
ramp when CHx_UV is cleared and the MFT is expired.
The UV fault is disabled during the soft-start ramp if the CHxRFEN bit is set to "0" in the FEN1 Register.
7.3.16.4 ILIM Fault
Figure 7-9 shows that the cycle-by-cycle switch current limit is achieved by comparing the sensed switch current
with a programmable ILIM threshold and terminating the duty cycle when VISPx ≥ V ILIM(THR). The ILIMTHR can be
set using a 2-bit value in the ILIM Register. If CHxILIMEN is set to zero in the FEN2 Register, the ILIM fault is
disabled. However, the cycle-by-cycle current limit is always active as long as the sensed switch current exceeds
ILIMTHR.
Submit Document Feedback
Copyright © 2021 Texas Instruments Incorporated
Product Folder Links: TPS92682-Q1
29
�TPS92682-Q1
www.ti.com
SLUSCX8C – MARCH 2019 – REVISED MARCH 2021
If CHxILIMEN is set to "1", the ILIM fault is enabled, and it can be set as a latched or non-latched fault. There
is an ILIM event counter for each channel that counts the number of ILIM fault events. When the ILIM event
counter reaches a programmed value, the associated channel is turned off. The maximum number of ILIM fault
events can be set using a 2-bit CHxILIMCNT in ILIM Register. The ILIM event counter is reset every 100-CHxCLK
cycles to prevent transients and non-real faults, resulting in an unwanted channel disable.
If CHxILIMFL is set to "1" in the FLATEN Register, the ILIM event is set to a latched fault. The associated
channel is turned off and remains off when the ILIM event counter reaches the programmed value. The channel
can be turned on again only by re-setting the CHxEN bit to "1" in the EN Register.
For CHxILIMFL = 0, the ILIM fault is a non-latched fault. When the ILIM event counter reaches the programmed
value, the associated channel is turned off and an ILIM fault timer, IFT, is triggered. The associated channel is
turned back on by a soft-start ramp when the ILIM fault timer count is completed and the output of the ILIM event
counter is cleared. The ILIM fault timer can be programmed using a 2-bit value CHxIFT in the IFT Register. The
IFT time can be set to a value between four and 32 cycles of the input clock. The input clock of the IFT is the
channel clock, CHxCLK (the switching frequency fSW). For example, for a channel with a switching frequency of
fSW = 400 kHz, the timer can be programmed from 10 to 80 µs.
Figure 7-17 shows the simplified functional block diagram of the ILIM fault. Figure 7-18 shows the progress of
the cycle by cycle current limit, the ILIM event counter (IFEC), the ILIM Fault Timer (IFT), and the restart of the
channel for a non-latched ILIM fault.
IFEC
Counter
R
CHx_ILIMIT
IFT
Timer
IFT_done
S
Q
0
R
CHx
Disable
CLR
1
IFEC_rst
100 Count
CHx_CLK
CHxILIMFL
From SS
state-machine
Figure 7-17. ILIM Fault Diagram
Soft-Start is
initiated
VCOMPx
ILIM
IL
ILIM Event Counter
(IFEC) is counting
GATEx
IFEC reaches
max. count
IFECCNT
ILIM
Fault
ILIM Fault Signal
IFT active
Figure 7-18. ILIM Fault
The ILIM fault in CV mode is disabled during the soft-start ramp if the CHxRFEN bit is set to "0" in the FEN1
Register.
As stated before, it is important to note that the cycle-by-cycle switch current limit is always active even if the
ILIM fault is disabled.
30
Submit Document Feedback
Copyright © 2021 Texas Instruments Incorporated
Product Folder Links: TPS92682-Q1
�TPS92682-Q1
www.ti.com
SLUSCX8C – MARCH 2019 – REVISED MARCH 2021
7.3.16.5 UVLO
For details on the UVLO fault, refer to the Internal Regulator and Undervoltage Lockout section.
7.3.16.6 ILED Over Current (OC)
When CHxOCEN is set to "1" in FEN2 Register, the ILED overcurrent fault is enabled, and the voltage across
the current sense inputs (CSPx and CSNx) is monitored. The device sets the OC fault signal when the voltage at
the output of the current sense amplifier exceeds the regulation set point VIADJ by 50%. The OC fault threshold is
calculated as follows:
V CSPx
CSNx
1.5 u
VIADJ
14
(7)
If the CHxOCFL bit is set to "1" in FLATEN Register, the OC fault is configured as a latched fault and the
associated channel turns off and remains off with the rising edge of CHx_OC. The channel can be turned on
again only by re-setting the CHxEN bit to "1" in EN Register. For CHxOCFL = 0, the OC fault is a non-latched
fault. In this case, the associated channel turns off when an OC fault occurs, but the channel goes through a
restart and soft-start ramp when CHx_OC is cleared and the MFT is expired.
7.3.16.7 ILED Undercurrent (UC)
The ILED Undercurrent (UC) is a diagnostic feature and not a fault event. Therefore, the UC event sets the fault
read bits in the FLT2 register only, and does not have any effect on the operation of the associated channel or
trigger the fault pins.
The device sets the UC event when the voltage at the output of the current sense amplifier decreases by 50%
from the regulation set point VIADJ. The UC threshold is calculated as follows:
V CSPx
CSNx
0.5 u
VIADJ
14
(8)
When PWM dimming, the UC fault read bit might be set during the time when PWM is low.
7.3.16.8 ISNOPEN, FBOPEN, and RTOPEN Faults
The device can detect open pin fault on ISNx, FBx, and RT pins. If any of these pins are opened during
operation, the device turns off the associated channel (or both channels for RT open pin). The channels can be
turned on again only by re-setting the CHxEN bits high and if the faults are removed.
7.3.16.9 TW and TSD
The thermal warning (TW) bit is set in the FLT1 Register when the junction temperature exceeds 150°C (typ).
The TW event is a diagnostic feature and not a fault event. As a result, TW does not have any effect on the
operation of the device.
Internal thermal shutdown (TSD) circuitry is implemented to protect the controller in the event the junction
temperature exceeds a value of 175°C. In the event of TSD, the controller is forced into a shutdown mode,
disabling the internal regulator. This feature is designed to prevent overheating and damage to the device.
7.3.16.10 COMPx Pull-Down and Comp-Low signal
As shown in Figure 7-8, an internal switch pulls down the COMPx pin when there is a fault. The Comp-PullDown discharges the compensator capacitors, such that the converter start-up always begins from a known
state.
The converter does not start unless the COMPx voltage decreases below 100 mV (when CHx_complow goes
high).
7.4 Device Functional Modes
The TPS92682-Q1 operates in the functional modes shown in Figure 7-19.
Submit Document Feedback
Copyright © 2021 Texas Instruments Incorporated
Product Folder Links: TPS92682-Q1
31
�TPS92682-Q1
www.ti.com
SLUSCX8C – MARCH 2019 – REVISED MARCH 2021
POR
CLKM exists
LH = High
POR
Mode
CLKM exists
LH = Low
LH = High
Limp
Home
Normal
Operation
LH = Low
& LH-bit = 0
Figure 7-19. TPS92682 Functional Mode
7.4.1 POR Mode
Upon POR, all the register settings are reset to their default values and both channels are turned off. The device
enters functional modes if the main clock, CLKM, is active.
7.4.2 Normal Operation
In Normal operation mode, the registers can be programmed and the channels can be turned on. To operate in
this mode, the LH pin must be low. The state machine for this mode is shown in Figure 7-20 and Figure 7-21.
Note
The operational mode shown in Figure 7-20 and Figure 7-21 is only intended to describe the operation
of the internal state machine and is not meant to be used as a guideline for the firmware development.
•
•
•
•
32
State 0: After POR, all the registers are reset to their default values, and the two channels are off.
State 1 (CHx_EN-BIT = 0): In this state, the device registers are ready to be programmed. Read FLT1 and
FLT2 registers to clear all the fault read bits and the PC bit. Set the FPINRST bit in the EN register in order
for the fault pins to be cleared. All the initializations must be completed before turning on the channels. The
device stays in state-1 unless the condition of CHx_IADJ > 8 is met.
State 2 (CHx_EN-BIT = 1): The device advances to state-2 when the CHx_EN bit is set to "1". In this
state, all the necessary conditions for initiating the soft-start ramp are checked. The CHx_complow signal
and CHx_PWM are high, and the condition of CHx_IADJ > 8 is met. If a latched fault occurs in this state,
the CHx_comp pin is pulled low, the CHx_EN bits are set to zero and the device returns to state-1. For a
non-latched fault, the device remains in this mode until the fault is removed.
State 3 (SSDAC_RAMP): The SSDAC_RAMP state begins when all the conditions for the soft-start ramp
initialization are met. In this state, the soft-start ramp DAC increments only when CHx_PWM is high. For
CHx_PWM = LOW, the ramp is held constant. The DAC ramp re-starts the increment from the previous
value at the next PWM dimming cycle, and when CHx_PWM = HIGH. If a latched-fault occurs in this state,
the CHx_comp pin is pulled low, the CHx_EN bit is set to zero, and the device returns to state-1. For a
non-latched fault, the associated channel is turned off, the CHx_comp pin is pulled low and the device returns
to state-2. At the end of the soft-start ramp, read the FLT1 and FLT2 registers and set the FPINRST bit in the
EN register in order for the fault read-bits and the fault pins to be cleared.
Submit Document Feedback
Copyright © 2021 Texas Instruments Incorporated
Product Folder Links: TPS92682-Q1
�TPS92682-Q1
www.ti.com
SLUSCX8C – MARCH 2019 – REVISED MARCH 2021
0
POR
POR
Reset: CHx_SSDAC,
CHx_EN, CHx_PFETDRV,
CHx_ramp_done
Set: CHx_PD_comp
CHx_FPIN
1
CHx_EN-BIT=0
Reset: CHx_EN, CHx_PFETDRV,
CHx_ramp_done, CHx_SSDAC
Set: CHx_PD_comp
NO
PC-bit cleared?
YES
CHx_Latch_FLT?
YES
Reset: CHx_EN-BIT
Set: CHx_FPIN
NO
CHx_NonLatch_FLT?
YES
Set: CHx_FPIN
NO
YES
CHx_,$'-”8?
NO
NO
2 3
CHx_EN-BIT=1?
YES
2
Figure 7-20. Operational Mode, States 0 and 1
Submit Document Feedback
Copyright © 2021 Texas Instruments Incorporated
Product Folder Links: TPS92682-Q1
33
�TPS92682-Q1
www.ti.com
SLUSCX8C – MARCH 2019 – REVISED MARCH 2021
1
2
1
CHx_EN-BIT=1
Reset: CHx_EN, CHx_PFETDRV,
CHx_ramp_done, CHx_SSDAC
Set: CHx_PD_comp
CHx_Latch_FLT?
Reset: CHx_EN-BIT
YES
Set: CHx_FPIN
NO
Set: CHx_FPIN
YES
CHx_NonLatch_FLT?
NO
YES
CHx_,$'-”8?
NO
CHx_EN-BIT=1?
NO
YES
NO
(CHx_PWM_active
&& CHx_complow)?
YES
3
1
SSDAC_RAMP
Reset: CHx_PD_comp
CHx_Latch_FLT?
YES
Reset: CHx_EN-BIT
Set: CHx_FPIN
NO
Set: CHx_FPIN
YES
CHx_NonLatch_FLT?
NO
YES
CHx_,$'-”8?
NO
CHx_EN-BIT=1?
NO
YES
NO
CHx_PWM_active?
YES
CHx_ssdac==255?
YES
Set: CHx_ramp_done
NO
Increment SS-DAC
Reset: CHx_ramp_done
Set: CHx_EN
Figure 7-21. Operational Mode, States 2 and 3
34
Submit Document Feedback
Copyright © 2021 Texas Instruments Incorporated
Product Folder Links: TPS92682-Q1
�TPS92682-Q1
www.ti.com
SLUSCX8C – MARCH 2019 – REVISED MARCH 2021
7.4.3 Limp Home
The TPS92682-Q1 device enters the limp home (LH) mode, when the LH pin is pulled high (VDD, or logic level
voltage). In LH mode, the device sets the operation of the device based on the SPI programmable LH-registers
(register addresses 0x17 to 0x24). The LH-registers should be programmed during initialization of the device. To
exit the LH mode, the LH pin must be pulled low, and the LH bit in CFG1 Register must be written to "0". The LH
bit is set to "1" when the LH pin is pulled high. Writing a value of "1" to the LH bit does not have any effect and
does not change the operation of the device.
7.5 Programming
The programming of the TPS92682-Q1 registers can be performed through a serial interface communication.
The 4-wire control interface in the TPS92682-Q1 device is compatible with the Serial Peripheral Interface (SPI)
bus. A Micro-Controller-Unit (MCU) can write to and read from the device registers to configure the channel
operation and enable or disable a specific channel.
7.5.1 Serial Interface
The SPI bus consists of four signals: SSN, SCK, MOSI, and MISO. The SSN, SCK, and MOSI pins are TTL
inputs into the TPS92682-Q1 while the MISO pin is an open-drain output. The SPI bus can be configured for
both star-connect and daisy chain hardware connections.
A bus transaction is initiated by the MCU creating a falling edge on SSN. While SSN is low, the input data
present on the MOSI pin is sampled on the rising edge of SCK, with MS-bit first. The output data is asserted on
the MISO pin at the falling edge of the SCK. Figure 7-22 shows the data transition and sampling edges of SCK.
SSN
SCK
1
2
3
4
4
15
16
MOSI
D15
D14
D13
D12
D1
D0
MISO
D15
D14
D13
D12
D1
D0
Figure 7-22. SPI DATA Format
A valid transfer requires a non-zero integer multiple of 16 SCK cycles (16, 32, 48, and so forth). If SSN is pulsed
low and no SCK pulses are issued before SSN rises, a SPI error is reported. Similarly, if SSN is raised before
the 16th rising edge of SCK, the transfer is aborted and a SPI error is reported. If SSN is held low after the 16th
falling edge of SCK and additional SCK edges occur, the data continues to flow through the TPS92682-Q1 shift
register and out of the MISO pin. When SSN transitions from low-to-high, the internal digital block decodes the
most recent 16 bits that were received prior to the SSN rising edge.
SSN must transition to high after a multiple of 16 SCK cycles for a transaction to be valid and does not set the
SPI error bit. In the case of a write transaction, the TPS92682-Q1 logic performs the requested operation when
SSN transitions high. In the case of a read transaction, the read data is output during the next frame, regardless
of whether a SPI error has occurred.
The data bit on MOSI is shifted into an internal 16-bit shift register (MS-bit first) while data is simultaneously
shifted out of the MISO pin. While SSN is high (bus idle), MISO is tri-stated by the open-drain driver. While
SSN is low, MISO is driven according to the 16-bit data pattern being shifted out based on the prior received
command. At the falling edge of the SSN, to begin a new transaction, MISO is driven with the MS-bit of the
outbound data, and is updated on each subsequent falling edge of SCK.
7.5.2 Command Frame
The command frames are the only defined frame-format that are sent from master to slave on MOSI. A
command frame can be either a read command or a write command. A Command frame consists of a CMD bit,
Submit Document Feedback
Copyright © 2021 Texas Instruments Incorporated
Product Folder Links: TPS92682-Q1
35
�TPS92682-Q1
www.ti.com
SLUSCX8C – MARCH 2019 – REVISED MARCH 2021
six bits of ADDRESS, a PARITY bit (odd parity), and eight bits of DATA. The format of the Command frame is
shown in Figure 7-23. The bit sequence is as follows:
1. The COMMAND bit (CMD). CMD = 1 means the transfer is a write command; CMD = 0 means it is a read
command.
2. Six bits of ADDRESS (A5..A0)
3. The PARITY bit (PAR). This bit is set by the following equation: PARITY = XNOR(CMD, A5..A0, D7..D0).
4. Eight bits of DATA (D7..D0). For read commands, the DATA bits must be set to zero.
Both the Read and the Write Command follow the Command frame format.
SSN
SCK
MOSI
1
2
3
4
5
6
7
8
9
10 11 12 13 14 15 16
C
M
D
A
5
A
4
A
3
A
2
A
1
A
0
P
A
R
D
7
D
6
D
5
D
4
D
3
D
2
D
1
D
0
Figure 7-23. Command Frame Format
7.5.3 Response Frame
There are three possible response frame formats: Read Response, Write Response, and Write Error/POR.
These formats are further described below.
7.5.3.1 Read Response Frame Format
The Read Response has the following format:
1. The SPI Error bit (SPE)
2. Four reserved bits (always ‘1100’)
3. The RT Open Fault bit (RTO)
4. The Power-Cycled bit (PC)
5. The Thermal Warning bit (TW)
6. Eight bits of DATA (D7..D0)
This is shown in Figure 7-24. This frame is sent out by the TPS92682-Q1 following a read command.
SSN
SCK
1
MISO
S
P
E
2
1
3
1
4
0
5
6
7
8
9
10 11 12 13 14 15 16
0
R
T
O
P
C
T
W
D
7
D
6
D
5
D
4
D
3
D
2
D
1
D
0
Figure 7-24. Read Response Frame Format
7.5.3.2 Write Response Frame Format
The Write Response frame has the following format:
1. The SPI Error bit (SPE)
2. The COMMAND bit (CMD)
3. Six bits of ADDRESS (A5..A0)
4. Eight bits of DATA (D7..D0)
This is shown in Figure 7-25. This frame is sent out following a write command if the previously received frame
was a write command and no SPI Error occurred during that frame.
The data and address bits in the write response are the data and address that were sent in the previous write
command.
36
Submit Document Feedback
Copyright © 2021 Texas Instruments Incorporated
Product Folder Links: TPS92682-Q1
�TPS92682-Q1
www.ti.com
SLUSCX8C – MARCH 2019 – REVISED MARCH 2021
SSN
SCK
MISO
1
2
3
4
5
6
7
8
9
10 11 12 13 14 15 16
S
P
E
C
M
D
A
5
A
4
A
3
A
2
A
1
A
0
D
7
D
6
D
5
D
4
D
3
D
2
D
1
D
0
Figure 7-25. Write Response Frame Format
7.5.3.3 Write Error/POR Frame Format
The Write Error/POR frame is simply a ‘1’ in the MSB, followed by all zeroes (see Figure 7-26). This frame
is sent out by the TPS92682-Q1 internal digital block during the first SPI transfer following power-on reset, or
following a write command with a SPI Error.
SSN
SCK
1
2
3
4
5
6
7
8
9
10 11 12 13 14 15 16
MISO
Figure 7-26. Write Error/POR
7.5.4 SPI Error
The TPS92682-Q1 device records a SPI Error if any of the following conditions occur:
•
•
•
The SPI command has a non-integer multiple of 16 SCK pulses.
Any of the DATA bits during a read command are non-zero.
There is a parity error in the previously received command.
If any of these conditions are true, the TPS92682 sets the SPE bit high in the next response frame. A write
command with a SPI Error (not 16-bit aligned or bad parity) does NOT write to the register being addressed.
Similarly, a read command to FLT1 or FLT2 does not clear any active fault bits in those registers if the command
has a SPI Error.
7.6 TPS92682 Registers
The SPI-accessible registers are 8-bits wide and exist in a 6-bit-addressable register array (0x00 through 0x3F).
The registers in the TPS92682 device contain programmed information and operating status. Upon power-up
the registers are reset to their default values. Writes to unlisted addresses are not permitted and may result in
undesired operation. Reads of unlisted addresses return the zero value.
Reserved bits (“RSVD”) must be written with ‘0’ values when writing. Registers are read/write unless indicated in
the description of the register. Table 7-2 lists the TPS92682 register map.
Table 7-2. TPS92682 Register Map
ADDR
REGISTER
00h
EN
01h
02h
D7
D6
D5
D4
D3
D2
CH2MAXD CH1MAXD CH2PDRV CH1PDRV
EN
EN
EN
EN
D1
D0
DEFAULT
CH2EN
CH1EN
00111100
FPINRST
SYNCEN
CFG1
PWMPH
INTPWM
2PH
LH
CH2HG
CH1HG
CH2CV
CH1CV
00000000
CFG2
CH2LEB
CH1LEB
RSVD
RSVD
CH2FILT1
RSVD
RSVD
CH1FILT1
00000000
03h
SWDIV
RSVD
RSVD
RSVD
RSVD
04h
ISLOPE
RSVD
05h
FM
RSVD
06h
SOFTSTART
07h
CH1IADJ
CH2ISLP2:0
RSVD
CH2DIV1:0
RSVD
FMMAG1:0
CH2SS3:0
CH1IADJ7:0
CH1DIV1:0
CH1ISLP2:0
00000000
01010101
FMFREQ3:0
00000101
CH1SS3:0
01110111
00000000
Submit Document Feedback
Copyright © 2021 Texas Instruments Incorporated
Product Folder Links: TPS92682-Q1
37
�TPS92682-Q1
www.ti.com
SLUSCX8C – MARCH 2019 – REVISED MARCH 2021
Table 7-2. TPS92682 Register Map (continued)
ADDR
REGISTER
08h
CH2IADJ
09h
PWMDIV
0Ah
CH1PWML
0Bh
CH1PWMH
0Ch
CH2PWML
0Dh
CH2PWMH
0Eh
ILIM
0Fh
IFT
10h
MFT
D7
D6
D5
D4
D3
D2
D1
D0
CH2IADJ7:0
RSVD
RSVD
RSVD
RSVD
00000000
RSVD
PWMDIV2:0
00000001
CH1PWM7:0
RSVD
RSVD
RSVD
RSVD
00000000
RSVD
RSVD
CH1PWM9:8
CH2PWM7:0
RSVD
RSVD
RSVD
CH2ILIMCNT1:0
RSVD
RSVD
RSVD
RSVD
RSVD
CH2PWM9:8
00000000
CH1ILIM1:0
00001111
CH1IFT1:0
00001010
CH2ILIM1:0
RSVD
00000000
00000000
RSVD
CH1ILIMCNT1:0
DEFAULT
CH2IFT1:0
CH2MFT3:0
CH1MFT3:0
10011001
11h
FLT1
RTO
RSVD
PC
TW
CH2OV
CH1OV
CH2UV
CH1UV
read
12h
FLT2
CH2UC
CH1UC
CH2OC
CH1OC
CH2ILIM
CH1ILIM
CH2ISO
CH1ISO
read
13h
FEN1
14h
FEN2
OVOPT
RSVD
15h
FLATEN
CH2ILIMF
L
CH1ILIMF
L
16h
OV
RSVD
17h
LHCFG
LHPWMP
H
CH2FBOE CH1FBOE
CH2OVEN CH1OVEN CH2UVEN CH1UVEN
N
N
CH2RFEN CH1RFEN
CH2OCEN CH1OCEN
CH2ILIME
N
CH2OCFL CH1OCFL CH2OVFL
CH2OV2:0
00111100
CH1ILIME
CH1ISOE
CH2ISOEN
N
N
00001111
CH1OVFL
00000000
CH2UVFL
RSVD
CH1UVFL
CH1OV2:0
00100010
LHINTPW LHCH2MA LHCH1MA LHCH2PD LHCH1PD
LHCH2EN LHCH1EN
M
XDEN
XDEN
RVEN
RVEN
00111100
18h
LHCH1IADJ
LHCH1IADJ7:0
00000000
19h
LHCH2IADJ
LHCH2IADJ7:0
00000000
1Ah
LHCH1PWM
L
LHCH1PWM7:0
00000000
1Bh
LHCH1PWM
H
1Ch
LHCH2PWM
L
1Dh
LHCH2PWM
H
1Eh
LHILIM
LHCH2ILIMCNT1:0
LHCH1ILIMCNT1:0
1Fh
LHIFT
RSVD
RSVD
20h
LHMFT
21h
LHFEN1
22h
LHFEN2
RSVD
RSVD
23h
LHFLATEN
LHCH2ILI
MFL
LHCH1ILI
MFL
24h
LHOV
RSVD
25h
CAL
26h
RESET
RSVD
RSVD
RSVD
RSVD
RSVD
RSVD
LHCH1PWM9:8
LHCH2PWM7:0
RSVD
RSVD
RSVD
RSVD
RSVD
RSVD
LHCH2FB
OEN
00000000
LHCH2ILIM1:0
LHCH1ILIM1:0
00001111
LHCH2IFT1:0
LHCH1IFT1:0
00001010
RSVD
RSVD
LHCH1MFT3:0
10011001
LHCH1FB LHCH2OV LHCH1OV LHCH2UV LHCH1UV
OEN
EN
EN
EN
EN
LHCH2OC LHCH1OC
EN
EN
LHCH2ILI
MEN
00111100
LHCH1ILI LHCH2ISO LHCH1ISO
MEN
EN
EN
00001111
LHCH2OC LHCH1OC LHCH2OV LHCH1OV LHCH2UV LHCH1UV
FL
FL
FL
FL
FL
FL
00000000
LHCH2OV2:0
CH2CAL2:0
00000000
LHCH2PWM9:8
LHCH2MFT3:0
LHCH2RF LHCH1RF
EN
EN
00000000
RSVD
CH2GOFF
LHCH1OV2:0
CH1CAL2:0
RESET7:0
00100010
CH1GOFF
00000000
00000000
In the following sub-sections the descriptions of different registers in Table 7-2 are provided.
7.6.1 EN Register
EN is the channel enable register. This register contains bits associated with the enabling of channels and
several channel-related functions.
38
Submit Document Feedback
Copyright © 2021 Texas Instruments Incorporated
Product Folder Links: TPS92682-Q1
�TPS92682-Q1
www.ti.com
SLUSCX8C – MARCH 2019 – REVISED MARCH 2021
Table 7-3. EN Register
ADDR
REGISTER
00h
•
EN
D7
FPINRST
D6
D5
SYNCEN
CH2MAX
DEN
D4
D3
D2
CH1MAX CH2PDRV CH1PDRV
DEN
EN
EN
D1
D0
DEFAULT
CH2EN
CH1EN
00111100
FPINRST:
Setting this bit to one resets both fault pins, if there are no active faults in the system. Note that this bit is
write-only. Any reads of this register return 0 in the FPINRST bit location.
•
SYNCEN:
0: SYNC input is disabled.
1: SYNC input is enabled.
•
CHxMAXDEN:
0: Maximum duty cycle for the associated channel is disabled.
1: Maximum duty cycle for the associated channel is enabled.
•
CHxPDRVEN:
0: The associated channel PFET driver is disabled.
1: The associated channel PFET driver is enabled.
•
CHxEN:
0: The associated channel is disabled.
1: The associated channel is enabled. SPI writes of ‘1’ to these bits are blocked if the PC bit in the FLT1
register is high.
7.6.2 CFG1 Register
Configuration register 1
Table 7-4. CFG1 Register
•
ADDR
REGISTER
D7
D6
D5
D4
D3
D2
D1
D0
DEFAULT
01h
CFG1
PWMPH
INTPWM
2PH
LH
CH2HG
CH1HG
CH2CV
CH1CV
00000000
PWMPH:
0: Phase shift of 180° between internal PWM signals
1: Zero phase shift between internal PWM signals
•
INTPWM:
0: External PWM inputs are used.
1: Internal PWM inputs are used.
•
2PH:
0: Single phase, two-channel configuration
1: Dual phase configuration
•
LH:
This bit is latched high when the LH pin is set high. The LH bit remains high until this bit is written back to
zero through SPI (the LH pin cannot set this bit to zero). If the LH bit is high, the LH registers are used to
control the logic instead of the normal registers. The part comes out of LH mode when LH pin is pulled low
and the LH bit is written to 0.
Submit Document Feedback
Copyright © 2021 Texas Instruments Incorporated
Product Folder Links: TPS92682-Q1
39
�TPS92682-Q1
www.ti.com
SLUSCX8C – MARCH 2019 – REVISED MARCH 2021
It is recommended that the LH bit always be written with a ‘1’ during normal programming. This will ensure
that a true limp-home event triggered by LH pin is captured.
•
CHxHG:
0: The error-amp of the associated channel is set to low gain.
1: The error-amp of the associated channel is set to high gain.
•
CHxCV:
0: The associated channel is set in CC mode.
1: The associated channel is set in CV mode.
7.6.3 CFG2 Register
Configuration register 2
Table 7-5. CFG2 Register
ADDR
REGISTER
D7
D6
D5
D4
D3
D2
D1
02h
CFG2
CH2LEB
CH1LEB
RSVD
RSVD
CH2FILT1
RSVD
RSVD
•
D0
DEFAULT
CH1FILT1 00000000
CHxLEB:
0: Short Leading Edge Blanking
1: Long Leading Edge Blanking
•
CHxFILT1: ILIM comparator filter
7.6.4 SWDIV Register
SWDIV register holds the divider value associated with dividing down the main clock to generate the channel
clocks (switching frequency fSW).
Table 7-6. SWDIV Register
ADDR
REGISTER
D7
D6
D5
D4
03h
SWDIV
RSVD
RSVD
RSVD
RSVD
•
D3
D2
CH2DIV1:0
D1
D0
CH1DIV1:0
DEFAULT
00000000
CHxDIV:
00: Division = 2. CHxCLK = fCLKM / 2
01: Division = 4. CHxCLK = fCLKM / 4
10: Division = 8. CHxCLK = fCLKM / 8
11: Division = 8. CHxCLK = fCLKM / 8
7.6.5 ISLOPE Register
The CHxISLP in ISLOPE register programs the CHx_Islope current into a 5-kΩ resistor shown in Figure 7-9,
which generates a slope compensation ramp with the magnitude of VSLP(PK) = CHx_Islope × 5 kΩ.
Table 7-7. ISLOPE Register
ADDR
REGISTER
D7
04h
ISLOPE
RSVD
•
D6
D5
CH2ISLP2:0
D4
D3
RSVD
D2
D1
CH1ISLP2:0
D0
DEFAULT
01010101
CHxISLP:
000: VSLP(PK) = 0 mV
001: VSLP(PK) = 50 mV
010: VSLP(PK) = 100 mV
40
Submit Document Feedback
Copyright © 2021 Texas Instruments Incorporated
Product Folder Links: TPS92682-Q1
�TPS92682-Q1
www.ti.com
SLUSCX8C – MARCH 2019 – REVISED MARCH 2021
011: VSLP(PK) = 150 mV
100: VSLP(PK) = 200 mV
101: VSLP(PK) = 250 mV
110: VSLP(PK) = 300 mV
111: VSLP(PK) = 350 mV
7.6.6 FM Register
FM contains the Frequency Modulation configuration bits.
Table 7-8. FM Register
•
ADDR
REGISTER
D7
D6
05h
FM
RSVD
RSVD
D5
D4
D3
FMMAG1:0
D2
D1
FMFREQ3:0
D0
DEFAULT
00000101
The CLKM frequency is varied by a percentage defined by FMMAG:
00: Frequency modulation is disabled.
01: The modulation magnitude is set to ±3.75%.
10: The modulation magnitude is set to ±7.5%.
11: The modulation magnitude is set to ±15%.
•
The FMFREQ programs a division factor applied to CLKM that sets the frequency modulation:
0000: FM frequency is 1÷4096 of CLKM frequency.
0001: FM frequency is 1÷3584 of CLKM frequency.
0010: FM frequency is 1÷3072 of CLKM frequency.
0011: FM frequency is 1÷2560 of CLKM frequency.
0100: FM frequency is 1÷2048 of CLKM frequency.
0101: FM frequency is 1÷1536 of CLKM frequency.
0110: FM frequency is 1÷1024 of CLKM frequency.
0111: FM frequency is 1÷512 of CLKM frequency.
1000: FM frequency is 1÷256 of CLKM frequency.
1001: FM frequency is 1÷128 of CLKM frequency.
1010: FM frequency is 1÷64 of CLKM frequency.
1011: FM frequency is 1÷32 of CLKM frequency.
1100: FM frequency is 1÷16 of CLKM frequency.
1101: FM frequency is 1÷8 of CLKM frequency.
1110: Frequency modulation is disabled.
1111: Frequency modulation is disabled.
7.6.7 SOFTSTART Register
The SOFTSTART register determines the division factor to be applied to the input clock of the soft-start 8-bit
ramp counter.
Submit Document Feedback
Copyright © 2021 Texas Instruments Incorporated
Product Folder Links: TPS92682-Q1
41
�TPS92682-Q1
www.ti.com
SLUSCX8C – MARCH 2019 – REVISED MARCH 2021
Table 7-9. SOFTSTART Register
ADDR
REGISTER
06h
SOFTSTART
•
D7
D6
D5
D4
D3
CH2SS3:0
D2
D1
D0
CH1SS3:0
DEFAULT
01110111
CHxSS:
0000: Soft-start is disabled.
0001: Division factor = 2
0010: Division factor = 4
0011: Division factor = 6
0100: Division factor = 8
0101: Division factor = 12
0110: Division factor = 16
0111: Division factor = 20
1000: Division factor = 26
1001: Division factor = 32
1010: Division factor = 38
1011: Division factor = 46
1100: Division factor = 54
1101: Division factor = 64
1110: Division factor = 80
1111: Division factor = 100
If 2PH is set to '1', only CH1 parameter is used.
7.6.8 CH1IADJ Register
CH1IADJ register programs the 8-bit IADJ DAC for the channel-1. If CH1IADJ ≤ 8, channel-1 is turned off. The
DAC output can be set from 85 mV (code 9) to 2.4 V (code 255).
Table 7-10. CH1IADJ Register
ADDR
REGISTER
07h
CH1IADJ
D7
D6
D5
D4
D3
D2
D1
D0
CH1IADJ7:0
DEFAULT
00000000
7.6.9 CH2IADJ Register
CH2IADJ register programs the 8-bit IADJ DAC for the channel 2. If CH2IADJ ≤ 8, channel-2 is turned off. The
DAC output can be set from 85 mV (code 9) to 2.4 V (code 255).
Table 7-11. CH2IADJ Register
ADDR
REGISTER
08h
CH2IADJ
D7
D6
D5
D4
D3
CH2IADJ7:0
D2
D1
D0
DEFAULT
00000000
If 2PH is set to '1', only CH1 parameter is used.
7.6.10 PWMDIV Register
PWMDIV register sets the clock divider for the internal PWM generator block.
42
Submit Document Feedback
Copyright © 2021 Texas Instruments Incorporated
Product Folder Links: TPS92682-Q1
�TPS92682-Q1
www.ti.com
SLUSCX8C – MARCH 2019 – REVISED MARCH 2021
Table 7-12. PWMDIV Register
•
ADDR
REGISTER
D7
D6
D5
D4
D3
09h
PWMDIV
RSVD
RSVD
RSVD
RSVD
RSVD
D2
D1
D0
PWMDIV2:0
DEFAULT
00000001
PWMDIV:
000: PWMCLK = CLKM ÷ 1
001: PWMCLK = CLKM ÷ 2
010: PWMCLK = CLKM ÷ 3
011: PWMCLK = CLKM ÷ 4
100: PWMCLK = CLKM ÷ 5
101: PWMCLK = CLKM ÷ 6
110: PWMCLK = CLKM ÷ 7
111: PWMCLK = CLKM ÷ 8
7.6.11 CH1PWML Register
CH1PWML register sets the eight LSBs of the PWM-width on a 10-bit counter for channel-1.
Table 7-13. CH1PWML Register
ADDR
REGISTER
0Ah
CH1PWML
D7
D6
D5
D4
D3
D2
D1
D0
CH1PWM7:0
DEFAULT
00000000
7.6.12 CH1PWMH Register
CH1PWMH register sets the two MSBs of the PWM-width on a 10-bit counter for channel-1.
Table 7-14. CH1PWMH Register
ADDR
REGISTER
D7
D6
D5
D4
D3
D2
0Bh
CH1PWMH
RSVD
RSVD
RSVD
RSVD
RSVD
RSVD
D1
D0
CH1PWM9:8
DEFAULT
00000000
7.6.13 CH2PWML Register
CH2PWML register sets the eight LSBs of the PWM-width on a 10-bit counter for channel-2.
Table 7-15. CH2PWML Register
ADDR
REGISTER
0Ch
CH2PWML
D7
D6
D5
D4
D3
D2
D1
D0
CH2PWM7:0
DEFAULT
00000000
7.6.14 CH2PWMH Register
CH2PWMH register sets the two MSBs of the PWM-width on a 10-bit counter for channel-2.
Table 7-16. CH2PWMH Register
ADDR
REGISTER
D7
D6
D5
D4
D3
D2
0Dh
CH2PWMH
RSVD
RSVD
RSVD
RSVD
RSVD
RSVD
D1
D0
CH2PWM9:8
DEFAULT
00000000
7.6.15 ILIM Register
ILIM register configures the ILIM event counter and the VILIM(THR) of channel-1 and channel-2.
Table 7-17. ILIM Register
ADDR
REGISTER
0Eh
ILIM
D7
D6
CH2ILIMCNT1:0
D5
D4
CH1ILIMCNT1:0
D3
D2
CH2ILIM1:0
D1
D0
CH1ILIM1:0
DEFAULT
00001111
Submit Document Feedback
Copyright © 2021 Texas Instruments Incorporated
Product Folder Links: TPS92682-Q1
43
�TPS92682-Q1
www.ti.com
SLUSCX8C – MARCH 2019 – REVISED MARCH 2021
ILIM event counter counts the number of ILIM fault events before disabling the associated channel completely or
initiating the ILIM Fault Timer.
•
CHxILIMCNT:
00: ILIM event counter threshold = 1
01: ILIM event counter threshold = 4
10: ILIM event counter threshold = 16
11: ILIM event counter threshold = 32
•
The current limit threshold voltage of the associated channel is set by CHxILIM:
00: VILIM(THR) = 75 mV
01: VILIM(THR) = 100 mV
10: VILIM(THR) = 150 mV
11: VILIM(THR) = 250 mV
7.6.16 IFT Register
ILIM Fault Timer register, IFT, determines the maximum count value of a 6-bit counter used for the ILIM Fault
Timer. The clock for the ILIM Fault Timer is the CHxCLK.
Table 7-18. IFT Register
ADDR
REGISTER
D7
D6
D5
D4
0Fh
IFT
RSVD
RSVD
RSVD
RSVD
•
D3
D2
D1
CH2IFT1:0
D0
CH1IFT1:0
DEFAULT
00001010
CHxIFT:
00: ILIM Fault Timer maximum count = 4
01: ILIM Fault Timer maximum count = 8
10: ILIM Fault Timer maximum count = 16
11: ILIM Fault Timer maximum count = 32
If 2PH is set to '1', only CH1 parameters are used and only ILIM Fault Timer 1 is active. In this case, ILIM Fault
Timer 1 affects both channels.
7.6.17 MFT Register
Main Fault Timer register, MFT, determines the maximum count value of a 14-bit counter, used for the Main Fault
Timer. The clock for the MFT is the CHxCLK.
Table 7-19. MFT Register
ADDR
REGISTER
10h
MFT
•
D7
D6
D5
D4
D3
CH2MFT3:0
D2
D1
CH1MFT3:0
D0
DEFAULT
10011001
CHxMFT:
0000: Main Fault Timer maximum count = 0 (Main Fault Timer is disabled)
0001: Main Fault Timer maximum count = 1000
0010: Main Fault Timer maximum count = 1500
0011: Main Fault Timer maximum count = 2000
0100: Main Fault Timer maximum count = 2500
0101: Main Fault Timer maximum count = 3000
0110: Main Fault Timer maximum count = 3500
44
Submit Document Feedback
Copyright © 2021 Texas Instruments Incorporated
Product Folder Links: TPS92682-Q1
�TPS92682-Q1
www.ti.com
SLUSCX8C – MARCH 2019 – REVISED MARCH 2021
0111: Main Fault Timer maximum count = 4000
1000: Main Fault Timer maximum count = 5000
1001: Main Fault Timer maximum count = 6000
1010: Main Fault Timer maximum count = 7000
1011: Main Fault Timer maximum count = 8000
1100: Main Fault Timer maximum count = 10000
1101: Main Fault Timer maximum count = 12000
1110: Main Fault Timer maximum count = 14000
1111: Main Fault Timer maximum count = 16383
If 2PH is set to '1', only CH1 parameters are used and only Fault Timer 1 is active. In this case, Fault Timer 1
affects both channels.
7.6.18 FLT1 Register (read only)
FLT1 register bits are set if a selected fault shown in Table 7-20 occurs. Reading this register clears the bits that
are set, if the associated faults no longer exist. Note that the clearing of the bits happens at the end of the read
response SPI transfer, not at the end of the read command SPI transfer.
Table 7-20. FLT1 Register
•
•
•
•
•
ADDR
REGISTER
D7
D6
D5
D4
D3
D2
D1
D0
DEFAULT
11h
FLT1
RTO
RSVD
PC
TW
CH2OV
CH1OV
CH2UV
CH1UV
read
RTO: RT pin is open.
PC: Power Cycled bit; This bit is set at power up and upon POR. Neither of the two channels can be enabled
while this bit is set. The PC bit must be cleared before the soft-start DAC state machine can progress
and the channels can be turned on. To clear the PC bit, FLT1 register should be read. The clearing of the
Fault-Read-bits happens at the end of the SPI transfer read response, not at the end of the read command.
TW: Thermal Warning bit
CHxOV: Output overvoltage fault (CH2OV is disabled if 2PH is set to '1').
CHxUV: Output undervoltage fault (CH2UV is disabled if 2PH is set to '1').
7.6.19 FLT2 Register (read only)
FLT2 register bits are set if a selected fault shown in Table 7-21 occurs. Reading this register clears the bits that
are set, if the associated faults no longer exist. Note that the clearing of the bits happens at the end of the read
response SPI transfer, not at the end of the read command SPI transfer.
Table 7-21. FLT2 Register
•
•
•
•
ADDR
REGISTER
D7
D6
D5
D4
D3
D2
D1
D0
DEFAULT
12h
FLT2
CH2UC
CH1UC
CH2OC
CH1OC
CH2ILIM
CH1ILIM
CH2ISO
CH1ISO
read
CHxUC: CHx output current less than 0.5 times of the set value (CH2UC is disabled if 2PH is set to '1').
CHxOC: CHx output current more then 1.5 times of the set value (CH2OC is disabled if 2PH is set to '1').
CHxILIM: ILIM bit is only set after CHxILIMCNT counter has reached the programmed value.
CHxISO: Open pin detection on ISN pins
7.6.20 FEN1 Register
Fault Enable-1 register, FEN1, determines which of the faults shown in Table 7-22 are enabled. If a fault enable
is set to '1', it is enabled and it will affect the operation of the associated channel. The faults that are disabled will
not affect the CHx fault pin output.
Submit Document Feedback
Copyright © 2021 Texas Instruments Incorporated
Product Folder Links: TPS92682-Q1
45
�TPS92682-Q1
www.ti.com
SLUSCX8C – MARCH 2019 – REVISED MARCH 2021
Table 7-22. FEN1 Register
ADDR
13h
•
REGISTER
FEN1
D7
D6
D5
D4
D3
D2
D1
D0
DEFAULT
CH2FBOE CH1FBOE
CH2RFEN CH1RFEN
CH2OVEN CH1OVEN CH2UVEN CH1UVEN 00111100
N
N
Ramp Fault Enable, CHxRFEN:
0: Disables the CHxUV fault from affecting channel operation before or during the Soft-start ramp. In CV
mode, CHx ILIM neither triggers the IFT, nor turns off the channel before or during the Soft-start ramp. Note
that the cycle-by-cycle current limit is still active.
1: All the enabled faults are active before or during the Soft-start ramp.
CHxFBOEN: if set to '1', FB pin open fault is enabled. There are no associated fault read bits for this fault.
CHxOVEN: if set to '1', output overvoltage fault is enabled. CH2OV fault is disabled if 2PH bit is set to '1'.
CHxUVEN: if set to '1', output undervoltage fault is enabled. CH2UV fault is disabled if 2PH bit is set to '1'.
•
•
•
If 2PH is set to '1', only CH1 parameter is used.
7.6.21 FEN2 Register
Fault Enable-2 register, FEN2, determines which of the faults shown in Table 7-23 are enabled. If a fault enable
is set to '1', it is enabled and it will affect the operation of the associated channel. The faults that are disabled will
not affect the CHx fault pin output.
Table 7-23. FEN2 Register
ADDR
14h
•
REGISTER
D7
FEN2
OVOPT
D6
D5
D4
RSVD
CH2OCE
N
CH1OCE
N
D3
D2
D1
CH2ILIME CH1ILIME CH2ISOE
N
N
N
D0
DEFAULT
CH1ISOE
N
00001111
OVOPT: if set to '1', the OV fault is only captured by the analog block and the digital state machine is not
affected by the overvoltage fault.
CHxOCEN: if set to '1', output overcurrent fault is enabled.
CHxILIMEN: if set to '1', ILIM fault is enabled.
CHxISOEN: if set to '1', ISN open pin fault is enabled.
•
•
•
If 2PH is set to '1', only CH1 parameter is used.
7.6.22 FLATEN Register
Fault Latch Enable register, FLATEN, determines which of the faults shown in Table 7-24 are latched faults. A
latched fault turns off the channel. In this case, to turn the channel back on, the CHxEN should be set to '1' in
Table 7-3 through a SPI write command.
Table 7-24. FLATEN Register
ADDR
15h
•
•
•
•
REGISTER
FLATEN
D7
D6
D5
D4
D3
D2
D1
D0
DEFAULT
CH2ILIMF CH1ILIMF
CH2OCFL CH1OCFL CH2OVFL CH1OVFL CH2UVFL CH1UVFL 00000000
L
L
CHxILIMFL: if set to '1', ILIM fault is set to a latched fault.
CHxOCFL: if set to '1', output overcurrent fault is set to a latched fault.
CHxOVFL: if set to '1', output overvoltage fault is set to a latched fault.
CHxUVFL: if set to '1', output undervoltage fault is set to a latched fault.
If 2PH is set to '1', only CH1 parameter is used.
7.6.23 OV Register
CHxOV programs a 3-bit DAC to set the OV threshold relative to the VFBREF.
46
Submit Document Feedback
Copyright © 2021 Texas Instruments Incorporated
Product Folder Links: TPS92682-Q1
�TPS92682-Q1
www.ti.com
SLUSCX8C – MARCH 2019 – REVISED MARCH 2021
Table 7-25. OV Register
•
ADDR
REGISTER
D7
16h
OV
RSVD
D6
D5
D4
CH2OV2:0
D3
D2
RSVD
D1
D0
CH1OV2:0
DEFAULT
00100010
CHxOV:
000: OVTHR = VFBREF×(1.000)
001: OVTHR = VFBREF×(1.025)
010: OVTHR = VFBREF×(1.050)
011: OVTHR = VFBREF×(1.075)
100: OVTHR = VFBREF×(1.100)
101: OVTHR = VFBREF×(1.125)
110: OVTHR = VFBREF×(1.150)
111: OVTHR = VFBREF×(1.200)
If 2PH is set to '1', only CH1 parameter is used.
7.6.24 LHCFG Register
LHCFG is the Limp-Home Configuration register. The settings in this register are applied when LH pin is set
high.
Table 7-26. LHCFG Register
ADDR
17h
•
REGISTER
LHCFG
D7
D6
D5
D4
D3
D2
D1
D0
DEFAULT
LHPWMP LHINTPW LHCH2MA LHCH1MA LHCH2PD LHCH1PD
LHCH2EN LHCH1EN 00111100
H
M
XDEN
XDEN
RVEN
RVEN
LHPWMPH:
0: Phase shift of 180° between internal PWM signals
1: Zero phase shift between internal PWM signals
•
LHINTPWM:
0: External PWM inputs are used.
1: Internal PWM inputs are used.
•
LHCHxMAXDEN:
0: Maximum duty cycle for the associated channel is disabled.
1: Maximum duty cycle for the associated channel is enabled.
•
LHCHxPDRVEN:
0: The associated channel PFET driver is disabled.
1: The associated channel PFET driver is enabled.
•
LHCHxEN:
0: The associated channel is disabled.
1: The associated channel is enabled.
If 2PH is set to '1', only CH1 parameter is used.
Submit Document Feedback
Copyright © 2021 Texas Instruments Incorporated
Product Folder Links: TPS92682-Q1
47
�TPS92682-Q1
www.ti.com
SLUSCX8C – MARCH 2019 – REVISED MARCH 2021
7.6.25 LHCH1IADJ Register
LHCH1IADJ register programs the 8-bit IADJ DAC for channel-1. The settings in this register are applied when
LH pin is set high. If LHCH1IADJ ≤ 8, the channel-1 is turned off. The DAC output can be set from 85 mV (code
9) to 2.4 V (code 255).
Table 7-27. LHCH1IADJ Register
ADDR
REGISTER
18h
LHCH1IADJ
D7
D6
D5
D4
D3
D2
D1
D0
LHCH1IADJ7:0
DEFAULT
00000000
7.6.26 LHCH2IADJ Register
LHCH2IADJ register programs the 8-bit IADJ DAC for channel-2. The settings in this register are applied when
LH pin is set high. If LHCH2IADJ ≤ 8, the channel-2 is turned off. The DAC output can be set from 85 mV (code
9) to 2.4 V (code 255).
Table 7-28. LHCH2IADJ Register
ADDR
REGISTER
19h
LHCH2IADJ
D7
D6
D5
D4
D3
D2
D1
D0
LHCH2IADJ7:0
DEFAULT
00000000
If 2PH is set to '1', only CH1 parameter is used.
7.6.27 LHCH1PWML Register
LHCH1PWML register sets the eight LSBs of the PWM-width on a 10-bit counter for channel-1. The settings in
this register are applied when LH pin is set high.
Table 7-29. LHCH1PWML Register
ADDR
REGISTER
1Ah
LHCH1PWML
D7
D6
D5
D4
D3
D2
D1
D0
LHCH1PWM7:0
DEFAULT
00000000
7.6.28 LHCH1PWMH Register
LHCH1PWMH register sets the two MSBs of the PWM-width on a 10-bit counter for channel-1. The settings in
this register are applied when LH pin is set high.
Table 7-30. LHCH1PWMH Register
ADDR
REGISTER
D7
D6
D5
D4
D3
D2
1Bh
LHCH1PWMH
RSVD
RSVD
RSVD
RSVD
RSVD
RSVD
D0
DEFAULT
LHCH1PWM9:8
D1
00000000
7.6.29 LHCH2PWML Register
LHCH2PWML register sets the eight LSBs of the PWM-width on a 10-bit counter for channel-2. The settings in
this register are applied when LH pin is set high.
Table 7-31. LHCH2PWML Register
ADDR
REGISTER
1Ch
LHCH2PWML
D7
D6
D5
D4
D3
LHCH2PWM7:0
D2
D1
D0
DEFAULT
00000000
If 2PH is set to '1', only CH1 parameter is used.
7.6.30 LHCH2PWMH Register
LHCH2PWMH register sets the two MSBs of the PWM-width on a 10-bit counter for channel-2. The settings in
this register are applied when LH pin is set high.
48
Submit Document Feedback
Copyright © 2021 Texas Instruments Incorporated
Product Folder Links: TPS92682-Q1
�TPS92682-Q1
www.ti.com
SLUSCX8C – MARCH 2019 – REVISED MARCH 2021
Table 7-32. LHCH2PWMH Register
ADDR
REGISTER
D7
D6
D5
D4
D3
D2
1Dh
LHCH2PWMH
RSVD
RSVD
RSVD
RSVD
RSVD
RSVD
D0
DEFAULT
LHCH2PWM9:8
D1
00000000
If 2PH is set to '1', only CH1 parameter is used.
7.6.31 LHILIM Register
LHILIM register configures the ILIM event counter and the VILIM(THR) of channel-1 and channel-2. The settings in
this register are applied when LH pin is set high.
Table 7-33. LHILIM Register
ADDR
REGISTER
1Eh
LHILIM
D7
D6
D5
LHCH2ILIMCNT1:0
D4
LHCH1ILIMCNT1:0
D3
D2
LHCH2ILIM1:0
D1
D0
DEFAULT
LHCH1ILIM1:0
00001111
LHILIM-counter counts the number of ILIM fault events before disabling the associated channel completely or
initiating the ILIM Fault Timer.
•
LHCHxILIMCNT:
00: ILIM event counter threshold = 1
01: ILIM event counter threshold = 4
10: ILIM event counter threshold = 16
11: ILIM event counter threshold = 32
•
The current limit threshold voltage of the associated channel is set by LHCHxILIM:
00: VILIM(THR) = 75 mV
01: VILIM(THR) = 100 mV
10: VILIM(THR) = 150 mV
11: VILIM(THR) = 250 mV
7.6.32 LHIFT Register
LHIFT register determines the maximum count value of a 6-bit counter used for the ILIM Fault Timer. The clock
for the ILIM Fault Timer is the CHxCLK. The settings in this register are applied when LH pin is set high.
Table 7-34. LHIFT Register
•
ADDR
REGISTER
D7
D6
D5
D4
1Fh
LHIFT
RSVD
RSVD
RSVD
RSVD
D3
D2
LHCH2IFT1:0
D1
D0
DEFAULT
LHCH1IFT1:0
00001010
LHCHxIFT:
00: ILIM Fault Timer maximum count = 4
01: ILIM Fault Timer maximum count = 8
10: ILIM Fault Timer maximum count = 16
11: ILIM Fault Timer maximum count = 32
If 2PH is set to '1', only CH1 parameters are used and only ILIM Fault Timer 1 is active. In this case, ILIM Fault
Timer-1 affects both channels.
7.6.33 LHMFT Register
LHMFT register determines the maximum count value of a 14-bit counter, used for the Main Fault Timer. The
clock for the MFT is the CHxCLK. The settings in this register are applied when LH pin is set high.
Submit Document Feedback
Copyright © 2021 Texas Instruments Incorporated
Product Folder Links: TPS92682-Q1
49
�TPS92682-Q1
www.ti.com
SLUSCX8C – MARCH 2019 – REVISED MARCH 2021
Table 7-35. LHMFT Register
ADDR
REGISTER
20h
LHMFT
•
D7
D6
D5
D4
D3
LHCH2MFT3:0
D2
D1
D0
LHCH1MFT3:0
DEFAULT
10011001
LHCHxMFT:
0000: Main Fault Timer maximum count = 0 (Main Fault Timer is disabled)
0001: Main Fault Timer maximum count = 1000
0010: Main Fault Timer maximum count = 1500
0011: Main Fault Timer maximum count = 2000
0100: Main Fault Timer maximum count = 2500
0101: Main Fault Timer maximum count = 3000
0110: Main Fault Timer maximum count = 3500
0111: Main Fault Timer maximum count = 4000
1000: Main Fault Timer maximum count = 5000
1001: Main Fault Timer maximum count = 6000
1010: Main Fault Timer maximum count = 7000
1011: Main Fault Timer maximum count = 8000
1100: Main Fault Timer maximum count = 10000
1101: Main Fault Timer maximum count = 12000
1110: Main Fault Timer maximum count = 14000
1111: Main Fault Timer maximum count = 16383
If 2PH is set to '1', only CH1 parameters are used and only Fault Timer 1 is active. In this case, Fault Timer 1
affects both channels.
7.6.34 LHFEN1 Register
LHFEN1 register determines which of the faults shown in Table 7-36 are enabled. If a fault enable is set to '1', it
is enabled and it will affect the operation of the associated channel. The faults that are disabled will not affect the
CHx fault pin output. The settings in this register are applied when LH pin is set high.
Table 7-36. LHFEN1 Register
ADDR
21h
•
REGISTER
LHFEN1
D7
D6
D5
D4
D3
D2
D1
D0
DEFAULT
LHCH2RF LHCH1RF LHCH2FB LHCH1FB LHCH2OV LHCH1OV LHCH2UV LHCH1UV
00111100
EN
EN
OEN
OEN
EN
EN
EN
EN
LHCHxRFEN:
0: Disables the CHxUV fault from affecting channel operation before or during the Soft-start ramp. In CV
mode, CHx ILIM neither triggers the IFT, nor turns off the channel before or during the Soft-start ramp. Note
that the cycle-by-cycle current limit is still active.
•
•
•
1: All the enabled faults are active before or during the Soft-start ramp.
LHCHxFBOEN: if set to '1', FB pin open fault is enabled. There are no associated fault read bits for these
faults.
LHCHxOVEN: if set to '1', output overvoltage fault is enabled. CH2OV fault is disabled if 2PH bit is set to '1'.
LHCHxUVEN: if set to '1', output undervoltage fault is enabled. CH2UV fault is disabled if 2PH bit is set to '1'.
If 2PH is set to '1', only CH1 parameter is used.
50
Submit Document Feedback
Copyright © 2021 Texas Instruments Incorporated
Product Folder Links: TPS92682-Q1
�TPS92682-Q1
www.ti.com
SLUSCX8C – MARCH 2019 – REVISED MARCH 2021
7.6.35 LHFEN2 Register
LHFEN2 register determines which of the faults shown in Table 7-37 are enabled. If a fault enable is set to '1', it
is enabled and it will affect the operation of the associated channel. The faults that are disabled will not affect the
CHx fault pin output. The settings in this register are applied when LH pin is set high.
Table 7-37. LHFEN2 Register
ADDR
22h
•
•
•
REGISTER
LHFEN2
D7
RSVD
D6
RSVD
D5
D4
D3
LHCH2OC LHCH1OC LHCH2ILI
EN
EN
MEN
D2
D1
D0
DEFAULT
LHCH1ILI
MEN
LHCH2IS
OEN
LHCH1IS
OEN
00001111
LHCHxOCEN: if set to '1', output overcurrent fault is enabled.
LHCHxILIMEN: if set to '1', ILIM fault is enabled.
LHCHxISOEN: if set to '1', ISN open pin fault is enabled.
If 2PH is set to '1', only CH1 parameter is used.
7.6.36 LHFLATEN Register
LHFLATEN register determines which of the faults shown in Table 7-38 are latched faults. A latched fault turns
off the channel. In this case, to turn on the channel back on, the CHxEN should be set to '1' in Table 7-3 through
a SPI write command. The settings in this register are applied when LH pin is set high.
Table 7-38. LHFLATEN Register
ADDR
23h
•
•
•
•
REGISTER
D7
LHFLATEN
LHCH2ILI
MFL
D6
D5
D4
D3
D2
D1
D0
DEFAULT
LHCH1ILI LHCH2OC LHCH1OC LHCH2OV LHCH1OV LHCH2UV LHCH1UV
00000000
MFL
FL
FL
FL
FL
FL
FL
LHCHxILIMFL: if set to '1', ILIM fault is set to a latched fault.
LHCHxOCFL: if set to '1', output overcurrent fault is set to a latched fault.
LHCHxOVFL: if set to '1', output overvoltage fault is set to a latched fault.
LHCHxUVFL: if set to '1', output undervoltage fault is set to a latched fault.
If 2PH is set to '1', only CH1 parameter is used.
7.6.37 LHOV Register
LHCHxOV register programs a 3-bit DAC to set the OV threshold relative to the VFBREF. The settings in this
register are applied when LH pin is set high.
Table 7-39. LHOV Register
•
ADDR
REGISTER
D7
24h
LHOV
RSVD
D6
D5
LHCH2OV2:0
D4
D3
RSVD
D2
D1
LHCH1OV2:0
D0
DEFAULT
00100010
LHCHxOV:
000: OVTHR = VFBREF × (1.000)
001: OVTHR = VFBREF × (1.025)
010: OVTHR = VFBREF × (1.050)
011: OVTHR = VFBREF × (1.075)
100: OVTHR = VFBREF × (1.100)
101: OVTHR = VFBREF × (1.125)
110: OVTHR = VFBREF × (1.150)
111: OVTHR = VFBREF × (1.200)
If 2PH is set to '1', only CH1 parameter is used.
Submit Document Feedback
Copyright © 2021 Texas Instruments Incorporated
Product Folder Links: TPS92682-Q1
51
�TPS92682-Q1
www.ti.com
SLUSCX8C – MARCH 2019 – REVISED MARCH 2021
7.6.38 CAL Register
The CAL register includes calibration bits for the switch current sense circuitry.
Table 7-40. CAL Register
ADDR
REGISTER
25h
CAL
D7
D6
D5
CH2CAL2:0
D4
D3
CH2GOFF
D2
D1
CH1CAL2:0
D0
DEFAULT
CH1GOFF 00000000
CHxCAL: Each channel has three calibration bits, which adds 2.5 mV of offset per bit (2.5 mV to 17.5 mV) to
the switch current sense voltage threshold. The calibration bits can decrease the offset mismatch between the
switch current sense of the two channels and improve the current sharing in two phase applications.
CHxGOFF: This bit turns off the associated channel, when set to "1".
•
7.6.39 RESET Register
Writing 0xC3 to the RESET register resets all writable registers to their default values. This register is write-only
and reads from this register return 0. Note that a RESET command does not reset the PC bit in Table 7-20 to its
power-on default value of '1'.
Table 7-41. RESET Register
ADDR
REGISTER
26h
RESET
52
D7
D6
D5
D4
D3
RESET7:0
Submit Document Feedback
D2
D1
D0
DEFAULT
00000000
Copyright © 2021 Texas Instruments Incorporated
Product Folder Links: TPS92682-Q1
�TPS92682-Q1
www.ti.com
SLUSCX8C – MARCH 2019 – REVISED MARCH 2021
8 Application and Implementation
Note
Information in the following applications sections is not part of the TI component specification,
and TI does not warrant its accuracy or completeness. TI’s customers are responsible for
determining suitability of components for their purposes, as well as validating and testing their design
implementation to confirm system functionality.
8.1 Application Information General Design Considerations
The TPS92682-Q1 can be configured both in CC and CV mode. In both cases, the following general design
procedures are applicable.
8.1.1 Switching Frequency, fSW
To set the switching frequency for each channel, refer to the Oscillator section.
8.1.2 Duty Cycle Considerations
The switch duty cycle, D, defines the converter operation and is a function of the input and output voltages. In
steady state, the duty cycle is derived using the expression:
Boost:
D
VO
VIN
VO
(9)
Buck-Boost:
D
VO
VO VIN
(10)
The minimum duty cycle, DMIN, and maximum duty cycle, DMAX, are calculated by substituting maximum
input voltage, VIN(MAX), and the minimum input voltage, VIN(MIN), respectively in the previous expressions. The
minimum duty cycle achievable by the device is determined by the leading edge blanking period and the
switching frequency. The maximum duty cycle is limited by the internal oscillator to 90% (typ) to allow for
minimum off-time. It is necessary for the operating duty cycle to be within the operating limits of the device to
ensure closed-loop regulation over the specified input and output voltage range.
8.1.3 Main Power MOSFET Selection
The power MOSFET is required to sustain the maximum switch node voltage, VSW, and switch RMS current
derived based on the converter topology. TI recommends a drain voltage VDS rating of at least 10% greater than
the maximum switch node voltage to ensure safe operation.
The worst case MOSFET RMS current for Boost and Buck-Boost topology depends on the maximum output
power, PO(MAX), and is calculated for Boost in Equation 11 and for Buck-Boost in Equation 12.
IQ(RMS)
IQ(RMS)
PO(MAX)
VIN(MIN)
PO(MAX)
VIN(MIN)
§
VIN(MIN)
u ¨1
¨
VO(MAX)
©
·
¸
¸
¹
(11)
§
VIN(MIN)
u ¨1
¨
VO(MIN)
©
·
¸
¸
¹
(12)
Select a MOSFET with low total gate charge, Qg, to minimize gate drive and switching losses.
Submit Document Feedback
Copyright © 2021 Texas Instruments Incorporated
Product Folder Links: TPS92682-Q1
53
�TPS92682-Q1
www.ti.com
SLUSCX8C – MARCH 2019 – REVISED MARCH 2021
8.1.4 Rectifier Diode Selection
A Schottky diode (when used as a rectifier) provides the best efficiency due to its low forward voltage drop and
near-zero reverse recovery time. TI recommends a diode with a reverse breakdown voltage, VD(BR), greater than
or equal to MOSFET drain-to-source voltage, VDS, for reliable performance. It is important to understand the
leakage current characteristics of the Schottky diode, especially at high operating temperatures as it impacts the
overall converter operation and efficiency.
The diode power rating and package is selected based on the calculated current, the ambient temperature and
the maximum allowable temperature rise.
8.1.5 Switch Current Sense Resistor
The switch current sense resistor, RIS, is used to implement peak current mode control and to set the peak
switch current limit. The value of RIS is selected to protect the main switching MOSFET under fault conditions.
RIS can be calculated based on peak inductor current, IL(PK), and switch current limit threshold, VILIM(THR).
RIS
VILIM(THR)
1.2 u IL(PK)
(13)
In Equation 13, 20% margin is considered for transient conditions.
GATEx
100 :
ISPx
1 nF
RIS
ISNx
Figure 8-1. IS Input Filter
The use of a 1-nF and 100-Ω low-pass filter is optional. The recommended filter resistor value is less than 500 Ω
to limit its influence on the internal slope compensation signal.
8.1.6 Slope Compensation
The magnitude of internal artificial ramp, VSLP, is set by the ISLOPE register shown in Table 7-7. The slope of
the artificial ramp is VSLP / TSW, where TSW is the switching period. Equation 14 shows a choice of VSLP, which is
sufficient for the stability of the Boost or Buck-Boost topologies over the entire range of duty-cycle D. In practice,
slightly smaller VSLP can be selected for a given application. The value of VSLP in Equation 14 is determined by
the inductor, L, the switch current sense resistor, RIS, output voltage, VO, and the switching period, TSW.
VSLP t
VO
u RIS u TSW
2uL
(14)
8.1.7 Soft Start
As described in the Soft Start section, the ramp can be programmed using SOFTSTART Register. The soft-start
time, tSS, is the time for the internal digital ramp to complete the 256 counts (from 0-V to 2.8-V typ). Program the
SOFTSTART Register with a SSxDIV that is found using Equation 15. The maximum time, tSS, for each channel
is related to the maximum value of SSxDIV in SOFTSTART Register.
SSxDIV t
54
tSS u fSW
256
(15)
Submit Document Feedback
Copyright © 2021 Texas Instruments Incorporated
Product Folder Links: TPS92682-Q1
�TPS92682-Q1
www.ti.com
SLUSCX8C – MARCH 2019 – REVISED MARCH 2021
8.2 Application Information CC Mode
The TPS92682-Q1 controller, when configured in CC mode, is suitable for implementing step-up or step-down
LED driver topologies including BOOST, BUCK-BOOST, SEPIC, and so forth. This section presents the design
process for the BOOST and BUCK-BOOST converters. The expressions derived for the BUCK-BOOST topology
can be altered to select components for a 1:1 coupled-inductor SEPIC converter. The design procedure can be
easily adapted for FLYBACK and similar converter topologies.
LED1+
LED1RCS1
Q3
27
CSN1
26
25
FB1/OV1
28
CSP1
29
PDRV1
VIN
30
COMP1
1
31
VDD
RT
32
CVIN
CCOMP1
CVDD
RT
AGND
VIN
RFB12
RFB11
COUT1
ISN1
24
RIS1
7
D1
22
VIN
Q1
21
20
GATE2
L1
CVCC
SSN
L2
Q2
19
D2
SCK
ISP2
MOSI
9
10
11
VDD
VDD
COUT3
RIS2
12
LH
13
14
15
ISN2
DAP
17
COUT2
16
CCOMP2
RFLT1
FAULT1
CIN
18
MISO
LH
8
PGND
FB2/OV2
SPI
TPS92682-Q1
CSP2
6
VCC
PWM2
CSN2
5
23
PWM1
PDRV2
4
GATE1
COMP2
VPWM2
3
ISP1
FLT2/SYNC
VPWM1
EN
FLT1
EN
2
RFLT2
FAULT2
Q4
RCS2
RFB22
Q5
LED2+
RFB21
LED2-
Figure 8-2. Two-Channel LED Driver, BOOST, and BUCK-BOOST Topology (CC mode)
8.2.1 Inductor Selection
The choice of inductor sets the continuous conduction mode (CCM) and discontinuous conduction mode (DCM)
boundary condition. Therefore, one approach of selecting the inductor value is by deriving the relationship
between the output power corresponding to CCM-DCM boundary condition, PO(BDRY), and inductance, L. This
approach ensures CCM operation in battery-powered LED driver applications that are required to support
different LED string configurations with a wide range of programmable LED current set points. The CCM-DCM
boundary condition can be estimated either based on the lowest LED current and the lowest output voltage
requirements for a given application or as a fraction of maximum output power, PO(MAX).
Submit Document Feedback
Copyright © 2021 Texas Instruments Incorporated
Product Folder Links: TPS92682-Q1
55
�TPS92682-Q1
www.ti.com
SLUSCX8C – MARCH 2019 – REVISED MARCH 2021
PO(BDRY) d ILED(MIN) u VO(MIN)
PO(MAX)
d PO(BDRY) d
4
(16)
PO(MAX)
(17)
2
Boost:
L
2
VIN
2 u PO(BDRY) u fSW
§
VIN ·
u ¨1
¸
VO ¹
©
(18)
Buck-Boost:
L
1
§ 1
2 u PO(BDRY) u fSW u ¨
© VO
1 ·
¸
VIN ¹
2
(19)
Select an inductor with a saturation current rating greater than the peak inductor current, IL(PK), at the maximum
operating temperature.
Boost:
IL(PK)
PO(MAX)
VIN(MIN)
VIN(MIN)
2 u L u fSW
§
VIN(MIN)
u ¨1
¨
VO(MAX)
©
·
¸
¸
¹
(20)
Buck-Boost:
IL(PK)
§
1
PO(MAX) u ¨
¨ VO(MIN)
©
1
VIN(MIN)
·
¸
¸
¹
VO(MIN) u VIN(MIN)
2 u L u fSW u VO(MIN)
VIN(MIN)
(21)
8.2.2 Output Capacitor Selection
The output capacitors are required to attenuate the discontinuous or large ripple output current, and achieve the
desired peak-to-peak LED current ripple, ΔiLED(PP). The capacitor value depends on the total series resistance of
the LED string, rD, and the switching frequency, fSW.The capacitance required for the target LED ripple current
can be calculated based on following equations.
Boost:
COUT
ILED(MAX)
'iLED(PP) u fSW
§
VIN(MIN)
u ¨1
u rD ¨©
VO(MAX)
·
¸
¸
¹
(22)
Buck-Boost:
COUT
ILED(MAX) u VO(MIN)
'iLED(PP) u fSW u rD(MIN) u VO(MIN)
VIN(MIN)
(23)
When choosing the output capacitors, it is important to consider the ESR and the ESL characteristics as they
directly impact the LED current ripple. Ceramic capacitors are the best choice due to their low ESR, high
ripple current rating, long lifetime, and good temperature performance. When selecting ceramic capacitors, it
is important to consider the derating factors associated with higher temperature and the DC bias operating
conditions. TI recommends an X7R dielectric with voltage rating greater than maximum LED stack voltage. An
aluminum electrolytic capacitor can be used in parallel with ceramic capacitors to provide bulk energy storage.
56
Submit Document Feedback
Copyright © 2021 Texas Instruments Incorporated
Product Folder Links: TPS92682-Q1
�TPS92682-Q1
www.ti.com
SLUSCX8C – MARCH 2019 – REVISED MARCH 2021
The aluminum capacitors must have necessary RMS current and temperature ratings to ensure prolonged
operating lifetime. The minimum allowable RMS output capacitor current rating, ICOUT(RMS), can be approximated
as:
Boost and Buck-Boost:
ICOUT RMS
ILED u
DMAX
1 DMAX
(24)
8.2.3 Input Capacitor Selection
The input capacitor, CIN, reduces the input voltage ripple and stores energy to supply input current during
input voltage or PWM dimming transients. The series inductor in the Boost and SEPIC topologies provides
continuous input current and requires a smaller input capacitor to achieve desired input voltage ripple, ΔvIN(PP).
The Buck-Boost and Flyback topologies have discontinuous input current and require a larger capacitor to
achieve the same input voltage ripple. Based on the switching frequency, fSW, and the maximum duty cycle,
DMAX, the input capacitor value can be calculated for each channel as follows:
Boost:
CIN
VIN(MIN)
2
8 u L u fSW
u 'vIN(PP)
§
VIN(MIN)
u ¨1
¨
VO(MAX)
©
·
¸
¸
¹
(25)
Buck-Boost:
CIN
PO(MAX)
fSW u 'vIN(PP) u VIN(MIN)
(26)
X7R dielectric-based ceramic capacitors are the best choice due to their low ESR, high ripple current rating, and
good temperature performance. For applications using PWM dimming, TI recommends large bulk capacitors in
addition and in parallel to the ceramic capacitors to minimize the voltage deviation due to large input current
transients generated in conjunction with the rising and falling edges of the LED current.
Decouple the VIN pin with a 0.1-µF ceramic capacitor, placed as close as possible to the device, and optionally
in series with a 10-Ω resistor to create a 160-kHz low-pass filter.
VIN
RVIN
VIN
CVIN
Figure 8-3. VIN Filter
8.2.4 Programming LED Current
The LED current can be programmed to match the LED string configuration by writing an 8-bit value to the
CH1IADJ Register and the CH2IADJ Register. Equation 27 shows the relation between the programmed LED
current ILED, the register CHxIADJ, and the LED current sense resistor, RCS.
ILED
CHxIADJ u 2.4
14 u RCSx u 255
(27)
8.2.5 Feedback Compensation
The loop gain T(s) is the product of the converter transfer function Givc(s) (Equation 28) and the feedback
transfer function Gc(s).
Submit Document Feedback
Copyright © 2021 Texas Instruments Incorporated
Product Folder Links: TPS92682-Q1
57
�TPS92682-Q1
www.ti.com
SLUSCX8C – MARCH 2019 – REVISED MARCH 2021
Using a first-order approximation, the converter transfer function can be modeled as a single pole created by the
output capacitor and the LED string dynamic resistance, rD. In the boost and buck-boost topologies, the transfer
function has a right half-plane zero created by the inductor, and the DC output current ILED. The ESR of the
output capacitor is neglected in this analysis.
Givc s
Öi
LED
vÖ COMP
§
s ·
¨1
¸
Z
Z ¹
Go u ©
§
s ·
¨1
¸
ZP ¹
©
(28)
Table 8-1 summarizes the expression for the small-signal model parameters.
Table 8-1. Small-Signal Model Parameters for CC Operation
DC GAIN (G0)
POLE FREQUENCY (ωP)
1 D u VO
Boost
RIS u VO
VO
rD u ILED
RIS u VO
VO u 1 D
VO u rD u COUT
1 D u VO
Buck-Boost
rD u ILED
VO
D u rD u ILED
ZERO FREQUENCY (ωZ)
2
L u ILED
D u rD u ILED
VO u 1 D
VO u rD u COUT
2
D u L u ILED
The feedback transfer function includes the current sense resistor and the loop compensation of the
transconductance amplifier. A compensation network at the output of the error amplifier is used to configure
loop gain and phase characteristics. A simple capacitor, CCOMP, from COMPx to GND (as shown in Figure 8-4)
provides integral compensation and creates a pole at the origin. Alternatively, a network of RCOMP, CCOMP, and
CHF, shown in Figure 8-5, can be used to implement Proportional-Integral (PI) compensation to create a pole at
the origin, a low-frequency zero, and a high-frequency pole.
The feedback transfer function is defined as follows.
Feedback transfer function with integral compensation:
GC s
vÖ COMP
Öi
LED
14 u gM u RCS
s u CCOMP
(29)
Feedback transfer function with proportional integral compensation:
GC s
vÖ COMP
Öi
LED
58
1 s u RCOMP u CCOMP
14 u gM u RCS
u
s u CCOMP CHF
§
§C
u CHF
¨¨ 1 s u RCOMP u ¨ COMP
C
© COMP CHF
©
Submit Document Feedback
··
¸ ¸¸
¹¹
(30)
Copyright © 2021 Texas Instruments Incorporated
Product Folder Links: TPS92682-Q1
�TPS92682-Q1
www.ti.com
SLUSCX8C – MARCH 2019 – REVISED MARCH 2021
COMPx
COMPx
CHx_comp
CHx_comp
RCOMP
CCOMP
CHF
0 ± 2.4V
CHx_IADJ
8-Bit
DAC
ILED
CCOMP
CHx_IADJ
CHxEAREF
ILED
CSPx
+
RCS
x14
±
CSNx
CHxEAREF
CSPx
+
RCS
CHx_Isense
0 ± 2.4V
8-Bit
DAC
±
+
gM
±
+
gM
x14
±
CHx_Isense
CSNx
Figure 8-4. Integral Compensator
Figure 8-5. Proportional Integral Compensator
The pole at the origin minimizes output steady-state error. High bandwidth is achieved with the PI compensator
by introducing a phase lead using a low-frequency zero. Use the following expressions to calculate the
compensation network.
•
BOOST and BUCK-BOOST with an Integral Compensator:
CCOMP
•
20 u gM u RCS u G0
ZP
(31)
BOOST and BUCK-BOOST with a Proportional-Integral Compensator:
CCOMP
CHF
RCOMP
14 u gM u RCS u G0
ZP u ZZ
(32)
CCOMP
100
(33)
1
ZP u CCOMP
(34)
The above compensation values are calculated to provide reasonable phase margin (> 45°) and bandwidth.
In practice, the above values can be modified for desired dynamic performance (for example: PWM dimming
rise/fall-time or overshoot/undershoot).
8.2.6 Overvoltage and Undervoltage Protection
In BOOST and SEPIC topologies, the Overvoltage threshold is programmed using a resistor divider, RFBx1 and
RFBx2, from the output voltage VO to GND. If the LEDs are referenced to a potential other than GND, as in the
BUCK-BOOST, the output voltage is sensed and translated to ground by using a PNP transistor and level-shift
resistors, as shown in Figure 8-2 for the channel-2. The Overvoltage turnoff threshold, VO(OV), is:
Boost:
VO OV
VOV
THR
§R
RFB2 ·
u ¨ FB1
¸
RFB1
©
¹
(35)
Buck and Buck-Boost:
Submit Document Feedback
Copyright © 2021 Texas Instruments Incorporated
Product Folder Links: TPS92682-Q1
59
�TPS92682-Q1
www.ti.com
SLUSCX8C – MARCH 2019 – REVISED MARCH 2021
VO OV
VOV
THR
u
RFB2
RFB1
0.7
(36)
In CC mode, VOV(THR) = 1.24 V (typ), when CHxOV register is set to 000.
The Overvoltage hysteresis, VOV(HYS), is:
VOV HYS
IOV HYS u RFB2
(37)
where
•
IOV(HYS) is 20 µA (typ.)
The corresponding undervoltage fault threshold, VO(UV), is:
VO UV
0.05 u
RFB1 RFB2
RFB1
(38)
8.2.7 Series P-Channel MOSFET Selection
In the applications with PWM dimming, the device requires a P-channel MOSFET placed in series with the LED
load. Select a P-channel MOSFET with gate-to-source voltage rating of 10 V or higher and with a drain-to-source
breakdown voltage rating greater than the output voltage. Ensure that the drain current rating of the P-channel
MOSFET exceeds the programmed LED current by at least 10%.
It is important to consider the FET input capacitance and on-resistance as it impacts the accuracy and efficiency
of the LED driver. TI recommends a FET with lower input capacitance and gate charge to minimize the errors
caused by rise and fall times when PWM dimming at low duty cycles is applied.
8.2.8 Programming Example for Two-Channel CC Mode
Figure 8-6 shows an example for initialization of the TPS92682 registers for the two-channel CC BOOST
application.
60
Submit Document Feedback
Copyright © 2021 Texas Instruments Incorporated
Product Folder Links: TPS92682-Q1
�TPS92682-Q1
www.ti.com
SLUSCX8C – MARCH 2019 – REVISED MARCH 2021
EN (0x00)
t Set to 0xBC if PWM PFET is used
t Set to 0xB0 if PWM PFET is not used
CFG1 (0x01)
Set to 0x40 for internal PWM
Set to 0x00 for external PWM
ILIM (0x0E)
SWDIV (0x03)
t Change to the desired value of
iLIMTHR and event counter
t Change to the desired value.
Default FSW divider: DIV = 2
FEN1 (0x13)
Set to 0x3F
t Enables FB open-pin, OV, and
UV faults
ISLOPE (0x04)
Set to 0x22 (or desired value)
t This will set VSLP(PK) = 100 mV
FEN2 (0x14)
SOFTSTART (0x06)
t Set to 0xFF or the desired Soft-Start
clock division
Set to 0x3F
t Enables OC, ILIM and ISN
open-pin faults
CH1IADJ (0x07)
OV (0x16)
t Set CH1IADJ for the desired ILED1
based on the ILED1 current sense
resistor value, RCS1
Set to 0x00
t In CC mode, OVTHR is set by
external VOUT resistor divider
CH2IADJ (0x08)
FLT1 (0x11) & FLT2 (0x12)
t Set CH2IADJ for the desired ILED2
based on the ILED2 current sense
resistor value, RCS2
t Read Fault-1 register twice
t Read Fault-2 register twice
EN (0x00)
YES
Internal
PWM?
NO
t Set to 0xBF if PWM PFET is used
t Set to 0xB3 if PWM PFET is not used
Enable CH1 and CH2 in CC mode
FLT1 (0x11) & FLT2 (0x12)
CH1PWMH (0x0B)
t Read Fault-1 register twice
t Read Fault-2 register twice
Set to the desired value
CH1PWML (0x0A)
Set to the desired value
CH2PWMH (0x0D)
Set to the desired value
Apply external PWM for CH1
to PWM1 pin
Apply external PWM for CH2
to PWM2 pin
CH2PWML (0x0C)
Set to the desired value
Figure 8-6. Register Programing for Two-Channel CC BOOST
Submit Document Feedback
Copyright © 2021 Texas Instruments Incorporated
Product Folder Links: TPS92682-Q1
61
�TPS92682-Q1
www.ti.com
SLUSCX8C – MARCH 2019 – REVISED MARCH 2021
8.3 Typical Application CV Mode
The TPS92682-Q1 controller, when configured in CV mode, is suitable for implementing step-up voltage
regulator topologies including BOOST, SEPIC, and so forth. The device can also be configured in two-phase
mode for efficiency optimization and reduced input and output current ripple. This section presents the design
process for the BOOST voltage regulator. The design procedure can be easily adapted for other converter
topologies, like 1:1 coupled-inductor SEPIC converter.
VOUT1
27
RFB12
26
25
FB1/OV1
28
CSP1
VDD
VIN
29
RFB11
CSN1
1
30
COMP1
31
RT
32
CVIN
CCOMP1
CVDD
PDRV1
RT
AGND
VIN
COUT1
ISN1
24
RIS1
7
VIN
Q1
21
20
GATE2
L1
CVCC
L2
Q2
19
CIN
D2
SCK
ISP2
18
MISO
MOSI
9
10
11
VDD
VDD
RIS2
12
13
CCOMP2
LH
RFLT1
FAULT1
D1
22
SSN
LH
8
PGND
14
FB2/OV2
SPI
TPS92682-Q1
CSP2
6
VCC
PWM2
CSN2
5
23
PWM1
PDRV2
4
GATE1
COMP2
3
ISP1
FLT2/SYNC
VDD
EN
FLT1
EN
2
15
ISN2
17
COUT2
DAP
16
RFB21
RFB22
VOUT2
RFLT2
FAULT2
Figure 8-7. Two-Channel BOOST Voltage Regulator (CV mode)
62
Submit Document Feedback
Copyright © 2021 Texas Instruments Incorporated
Product Folder Links: TPS92682-Q1
�TPS92682-Q1
www.ti.com
SLUSCX8C – MARCH 2019 – REVISED MARCH 2021
COMP
CCOMP
27
RFB2
26
CSP1
28
CSN1
29
PDRV1
VIN
30
COMP1
1
31
VDD
RT
32
CVIN
VOUT
RFB1
CVDD
25
FB1/OV1
RT
AGND
VIN
COUT
ISN1
24
RIS1
7
D1
22
PGND
20
GATE2
VIN
L2
CVCC
Q2
19
L1
SCK
ISP2
D2
Q1
21
SSN
CIN
18
MISO
MOSI
LH
8
TPS92682-Q1
9
RIS2
10
11
VDD
VDD
LH
12
13
14
15
FB2/OV2
SPI
PWM2
CSP2
6
VCC
CSN2
5
23
PWM1
PDRV2
4
GATE1
COMP2
3
ISP1
FLT2/SYNC
VDD
EN
FLT1
2
EN
ISN2
17
DAP
16
CCOMP
RFLT1
FAULT1
RFLT2
COMP
FAULT2
Figure 8-8. Two-Phase BOOST Voltage Regulator (CV mode)
8.3.1 Inductor Selection
The choice of the inductors in CV BOOST is highly dependent on the efficiency and the form-factor targets. One
parameter that affects these specifications is the desired inductor current ripple. A common first choice for the
inductor current ripple, ΔiL-PP, is 50% of the nominal inductor current IL.
VIN u VO
L
'iL
PP
VIN
u VO u fSW
(39)
where
•
M = VO / VIN
BOOST voltage regulators can be configured to operate in Discontinuous Conduction Mode (DCM) to achieve
higher efficiency at light load. The condition to operate in DCM versus CCM are shown in Equation 40 and
Equation 41:
CCM Operation:
PO !
2
u VO
VIN
VIN
2 u VO u L u fSW
(40)
DCM Operation:
Submit Document Feedback
Copyright © 2021 Texas Instruments Incorporated
Product Folder Links: TPS92682-Q1
63
�TPS92682-Q1
www.ti.com
SLUSCX8C – MARCH 2019 – REVISED MARCH 2021
PO d
2
u VO
VIN
VIN
2 u VO u L u fSW
(41)
8.3.2 Output Capacitor Selection
The output capacitors are required to attenuate the discontinuous output current of the BOOST converter, as
well as decreasing the output voltage undershoot and overshoot during load transient. The capacitance required
for the target output peak-to-peak ripple is provided in the following equations:
For one-phase operation:
COUT
§
VIN(MIN)
¨1
¨
VO(MAX)
©
·
IOUT(MAX)
¸u
¸ 'v O PP u fSW
¹
(42)
For two-phase operation, fSW in Equation 42 must be substituted with twice of the switching frequency.
When choosing the output capacitors, it is important to consider the ESR and the ESL characteristics as they
directly impact the output voltage ripple. Ceramic capacitors are the best choice due to their low ESR, high
ripple current rating, long lifetime, and good temperature performance. When selecting ceramic capacitors, it
is important to consider the derating factors associated with higher temperature and the DC bias operating
conditions. TI recommends an X7R dielectric with voltage rating greater than maximum output voltage, VOUT. An
aluminum electrolytic capacitor can be used in parallel with ceramic capacitors to provide bulk energy storage.
The aluminum capacitors must have necessary RMS current and temperature ratings to ensure prolonged
operating lifetime. The minimum allowable RMS output capacitor current rating, ICOUT(RMS), can be approximated
as:
ICOUT RMS
IOUT u
DMAX
1 DMAX
(43)
8.3.3 Input Capacitor Selection
The input capacitors for one-phase CV BOOST can be obtained in the same way found in Equation 25 for CC
mode.
For two-phase operation, the input capacitor can be obtained as shown in Equation 44.
CIN
VIN(MIN)
2
8 u (L / 2) u (2xfSW ) u 'vIN(PP)
§
VIN(MIN)
u ¨1
¨
VO(MAX)
©
·
¸
¸
¹
(44)
8.3.4 Programming Output Voltage VOUT
The output voltage VOUT can be programmed using the feedback resistors and by writing an 8-bit value to the
CH1IADJ Register and the CH2IADJ Register. Equation 45 shows the relationship between the programmed
VOUT, the register CHxIADJ, and the feedback resistors.
VOUT
§ RFB2 · CHxIADJ u 2.4
¨1
¸u
RFB1 ¹
255
©
(45)
8.3.5 Feedback Compensation
The loop gain T(s) is the product of the converter transfer function GVVC(s) and the feedback transfer function
GC(s). The TPS92682-Q1 device, when configured as a BOOST voltage regulator, is normally followed by a
second stage switching converter, which acts as a power sink load. In this case, the converter transfer function,
GVVC(s), can be approximated as shown in Equation 46. The GVVC(s) has a low frequency pole, ωP1, and a high
frequency pole, ωP2, when the converter operates in CCM. In DCM, ωP2 can be ignored. In a BOOST topology,
the transfer function has a right half-plane zero.
64
Submit Document Feedback
Copyright © 2021 Texas Instruments Incorporated
Product Folder Links: TPS92682-Q1
�TPS92682-Q1
www.ti.com
SLUSCX8C – MARCH 2019 – REVISED MARCH 2021
Gvvc s
§
s ·
¨1
¸
ZZ ¹
©
Go u
§
s · §
s ·
¨1
¸ u ¨1
¸
ZP1 ¹ ©
ZP2 ¹
©
vÖ o
vÖ COMP
(46)
Table 8-2 summarizes the expressions for the small-signal model parameters of a BOOST converter operating in
CCM or DCM.
Table 8-2. Small-Signal Model Parameters for CV BOOST
BOOST
TOPOLOGY
G0
ωP1
Fm u VO2
CCM
RIS u VIN
2 u VO
DCM
§ VIN
VIN
u¨
VO u COUT ¨© Fm u VO2
Fm u Fv u VO2
·
Fv ¸
¸
¹
ωP2
ωZ
Fm u VO
L
2
VIN
PO u L
∞
S u fSW
VIN u IO
VO u VO VIN u COUT
VIN u VO
VIN u VC
In Table 8-2, Fm is the compensation ramp gain, Fv is the VO feedback gain, IO is the DC output current, and VC
is the DC compensation voltage. In a BOOST topology:
Fm
Fv
VC
RIS
VSLP
(47)
2
VIN
2 u L u fSW u VO2
RIS u
(48)
2 u IO u VO
L u fSW
VIN
§ L u fSW
u¨
© Fm u VIN
·
1¸
¹
(49)
The feedback transfer function includes the voltage divider gain (HFB = RFB1 / (RFB1 + RFB2)) and the
transconductance amplifier gain. A compensation network at the output of the error amplifier is used to configure
loop gain and phase characteristics. In CV BOOST application, a Proportional-Integral (PI) compensation is
recommended. A network of RCOMP, CCOMP, and CHF, shown in Figure 8-9, can be used to implement PI
compensation to create a pole at the origin, a low-frequency zero, and a high-frequency pole.
The feedback transfer function is defined as follows.
Feedback transfer function with proportional integral compensation:
GC s
vÖ COMP
vÖ O
1 s u RCOMP u CCOMP
gM u HFB
u
s u CCOMP CHF
§
§C
u CHF
¨¨ 1 s u RCOMP u ¨ COMP
C
© COMP CHF
©
··
¸ ¸¸
¹¹
(50)
Submit Document Feedback
Copyright © 2021 Texas Instruments Incorporated
Product Folder Links: TPS92682-Q1
65
�TPS92682-Q1
www.ti.com
SLUSCX8C – MARCH 2019 – REVISED MARCH 2021
COMPx
CHx_comp
RCOMP
vC
CHF
CCOMP
CHx_IADJ
VO
0 ± 2.4V
8-Bit
DAC
±
+
gM
CHxEAREF
RFB2
FBx
RFB1
Figure 8-9. Proportional Integral Compensator
The pole at the origin minimizes output steady-state error. High bandwidth is achieved with the PI compensator
by introducing a phase lead using a low-frequency zero.
PI compensator component values can be found by selecting a reasonable bandwidth and phase-margin. It is
recommended to select a bandwidth of ωC smaller than the RHP zero ωZ by a factor of KC in the range of 5 to
10. Assuming ωC = ωZ / KC and ωC >> ωP1:
ZZ
K C u gM u G0 u HFB u ZP1
RCOMP
(51)
The compensator zero, generated by the RCOMP and CCOMP is recommended to be placed far below the
bandwidth ωC and above ωP1 to provide adequate phase-margin. It is recommended to set the low-frequency
zero of the compensator as follows:
1
CCOMP u RCOMP
KP u ZP1
(52)
where
•
KP is a factor in the range of 1 to 5
From Equation 51 and Equation 52, CCOMP can be found.
CHF
CCOMP
100
(53)
8.3.6 Overvoltage and Undervoltage Protection
In CV mode, the output Overvoltage level is set in OV Register as a percentage above the programmed
regulated value of VOUT.
The Overvoltage hysteresis, VOV(HYS), is:
VOV HYS
IOV HYS u RFB2
(54)
where
•
66
IOV(HYS) is 20 µA (typ.)
Submit Document Feedback
Copyright © 2021 Texas Instruments Incorporated
Product Folder Links: TPS92682-Q1
�TPS92682-Q1
www.ti.com
SLUSCX8C – MARCH 2019 – REVISED MARCH 2021
The corresponding undervoltage fault threshold, VO(UV), is:
VO UV
0.05 u
RFB1 RFB2
RFB1
(55)
8.3.7 Programing Example for Two-Phase CV BOOST
Figure 8-10 shows an example for initialization of the TPS92682 registers for the two-phase CV BOOST
application.
Submit Document Feedback
Copyright © 2021 Texas Instruments Incorporated
Product Folder Links: TPS92682-Q1
67
�TPS92682-Q1
www.ti.com
SLUSCX8C – MARCH 2019 – REVISED MARCH 2021
EN (0x00)
Set to 0xB0
t Reset fault pins
t Disable CHxPDRV
YES
Internal
PWM?
NO
CFG1 (0x01)
Set to 0x63 for internal PWM
Set to 0x23 for external PWM
t Both channels are set to CV mode
and two-phase configuration
CH1PWMH (0x0B)
Set to 0x03
t Set MSBs of the CH1 PWM
CH1PWML (0x0A)
Set to 0xFF
t Set the LSBs of the CH1 PWM
SWDIV (0x03)
t Change to desired value. Default
FSW divider: DIV = 2
Pull-high PWM1 and PWM2
pins
CH2PWMH (0x0D)
Set to 0x03
t Set the MSBs of the CH2 PWM
ISLOPE (0x04)
t Change to desired value. Default
slope compensation: 250mV
CH2PWML (0x0C)
Set to 0xFF
t Set the LSBs of the CH2 PWM
SOFTSTART (0x06)
t Set to 0xFF or the desired Soft-Start
clock division
ILIM (0x0E)
CH1IADJ (0x07)
t Set CH1IADJ for the desired VOUT
based on the output feedback
resistor divider, RFB1 and RFB2
t Change to the desired value of
iLIMTHR and event counter
OV (0x16)
t Change OV threshold to the
desired value. Default OV
threshold is 5% of the set VOUT
FLT1 (0x11) & FLT2 (0x12)
t Read Fault-1 register twice
t Read Fault-2 register twice
EN (0x00)
Set to 0xB3
t Enable two-phase CV BOOST
FLT1 (0x11) & FLT2 (0x12)
t Read Fault-1 register twice
t Read Fault-2 register twice
Figure 8-10. Register Programing for Two-Phase CV BOOST
68
Submit Document Feedback
Copyright © 2021 Texas Instruments Incorporated
Product Folder Links: TPS92682-Q1
�TPS92682-Q1
www.ti.com
SLUSCX8C – MARCH 2019 – REVISED MARCH 2021
8.4 Typical Application CC Mode
Figure 8-11 shows the schematic for a dual channel, high-side current sense, Boost and Buck-Boost LED driver with PFET dimming. In this application,
the Channel-1 of the device is configured as Boost and the Channel-2 as Buck-Boost.
Figure 8-11. CC Mode LED Driver, BOOST, and Buck-Boost
Submit Document Feedback
Copyright © 2021 Texas Instruments Incorporated
Product Folder Links: TPS92682-Q1
69
�TPS92682-Q1
www.ti.com
SLUSCX8C – MARCH 2019 – REVISED MARCH 2021
8.4.1 CC Boost Design Requirements
Table 8-3 shows the design parameters for the boost LED driver application.
Table 8-3. Design Parameters
PARAMETER
TEST CONDITIONS
MIN
TYP
MAX
UNIT
7
14
18
V
2.8
3.2
3.6
V
INPUT CHARACTERISTICS
VIN
Input voltage range
OUTPUT CHARACTERISTICS
VF(LED)
LED forward voltage
NLED
Number of LEDs in series
VO
Output voltage
38.4
43.2
V
ILED
Output current
350
550
mA
4%
25
W
RRilED
LED current ripple ratio
rD
LED string resistance
PO(MAX)
Maximum output power
fPWM
PWM dimming frequency
12
LED+ to LED–
33.6
3
Ω
400
Hz
Output power at CCM-DCM boundary
condition
8
W
ΔvIN(PP)
Input voltage ripple
20
mV
VO(OV)
Output Overvoltage protection threshold
50
V
SYSTEMS CHARACTERISTICS
PO(BDRY)
VOV(HYS)
Output Overvoltage protection hysteresis
fDM
Dither Modulation Frequency
fSW
Switching frequency
2.4
400
V
600
400
Hz
kHz
8.4.2 CC Boost Detailed Design Procedure
In the following section, the detailed design procedure for the CC BOOST LED driver is provided.
8.4.2.1 Calculating Duty Cycle
From Equation 9 and the input and output characteristics in Table 8-3, you can solve for DTYP, DMAX, and DMIN.
•
•
•
DTYP = 0.64
DMAX = 0.84
DMIN = 0.46
8.4.2.2 Setting Switching Frequency
For the default division factor of 2 in the SWDIV Register and from Equation 1, the RT value for fSW = 400 kHz
can be obtained:
RT
1012
12.5 u SW DIV ufSW
(56)
RT = 100 kΩ
8.4.2.3 Setting Dither Modulation Frequency
The dither modulation frequency can be set using the the FM Register in Equation 2. For the dither modulation
frequency of less than 600 Hz, the FMFREQ must be set to 0101, which corresponds to a division factor of 1536
and sets FM = 521 Hz.
70
Submit Document Feedback
Copyright © 2021 Texas Instruments Incorporated
Product Folder Links: TPS92682-Q1
�TPS92682-Q1
www.ti.com
SLUSCX8C – MARCH 2019 – REVISED MARCH 2021
8.4.2.4 Inductor Selection
The inductor is selected to meet the CCM-DCM boundary power requirement, PO(BDRY). In most applications,
PO(BDRY) is set to be 1/3 of the maximum output power, PO(MAX). The inductor value is calculated for typical input
voltage, VIN(TYP), and output voltage, VO(TYP). From Equation 18, the inductor L is calculated to be:
L ≥ 19.5 µH
The value of L = 22 µH is selected for this application.
Ensure that the inductor saturation current rating is greater than 1.2 × IL(PK) found from Equation 20:
IL(PK) = 3.9 A
8.4.2.5 Output Capacitor Selection
The specified peak-to-peak LED current ripple, ΔiLED(PP), is:
ΔiLED(PP) = RRiLED × ILED(MAX) = 22 mA
The output capacitance required to achieve the target LED current ripple can be obtained from Equation 22. The
resulting capacitance value is calculated to be: COUT ≥ 17.5 µF.
Four 4.7-µF 100-V ceramic capacitors are used in parallel to achieve a combined required output capacitance.
8.4.2.6 Input Capacitor Selection
The input capacitor is required to reduce switching noise conducted through the input terminal and to reduce the
input impedance of the LED driver. Equation 25 is used to calculate the required capacitance of CIN ≥ 10 µF to
limit peak-to-peak input voltage ripple, ΔvIN(PP), to 20 mV.
Two 4.7-µF, 50-V ceramic capacitors are used in parallel to achieve the combined input capacitance of 9.4 µF.
As shown in Figure 8-11, an additional 33-µF 50-V electrolytic capacitor and more ceramic capacitors are also
used at the input terminal to further decrease the overshoot and undershoot of VIN during PWM dimming.
8.4.2.7 Main N-Channel MOSFET Selection
Ensure that the MOSFET ratings exceed the maximum output voltage and RMS switch current.
VDS = VO(OV) × 1.1 = 55 V
The maximum RMS switch current can be found from Equation 11 to be 3.3 A.
An N-channel MOSFET with a voltage rating of 100 V and a current rating of more than 4 A is required for this
design.
8.4.2.8 Rectifier Diode Selection
Select a diode with a reverse breakdown voltage, VD(BR), greater than or equal to MOSFET drain-to-source
voltage, VDS, for reliable performance.
The DC current rating of the diode rectifier for the Boost LED driver must be greater than ILED(MAX).
8.4.2.9 Setting ILED and Selecting RCS
The LED current can be programmed by writing an 8-bit value to the CH1IADJ Register, and as described in the
Programming LED Current section.
The value of the current sense resistor, RCS, can be selected to result in the ILED(MAX) for the maximum
programmed value of 255 in the CHxIADJ register.
RCS
2.4
14 u ILED(MAX)
(57)
Substituting ILED(MAX) = 0.55 A in Equation 57 results in RCS = 0.31 Ω. A current sense value of 0.3 Ω is selected
for this design.
Submit Document Feedback
Copyright © 2021 Texas Instruments Incorporated
Product Folder Links: TPS92682-Q1
71
�TPS92682-Q1
www.ti.com
SLUSCX8C – MARCH 2019 – REVISED MARCH 2021
8.4.2.10 Setting Switch Current Limit
As shown in Equation 13, the switch current limit is determined by the switch current sense resistor, RIS, and
the switch current threshold. For VILIM(THR) = 250 mV and 1.2 × IL(PK) = 4.7 A, RIS ≤ 53 mΩ. A standard sense
resistor of RIS = 40 mΩ is selected for this application.
8.4.2.11 Slope Compensation
The recommended slope compensation magnitude can be obtained from Equation 14, VSLP ≥ 100 mV.
The VSLP can be programmed in the ISLOP Register. The ISLOPE =011 is selected, which corresponds with
VSLP = 150 mV.
8.4.2.12 Compensator Parameters
Proportional-Integral Compensator is selected for this design. The initial compensator component values can
be obtained from Equation 32, Equation 33, and Equation 34 The final values are tuned to get the best overall
dynamic performance.
CCOMP = 33 nF
CHF = 3.3 nF
RCOMP = 715 Ω
It is be noted that the above compensator components are fine-tuned to provide improved transient performance
in PWM dimming.
8.4.2.13 Overvoltage Protection
The output Overvoltage level is programmed using a resistor divider, RFB2 and RFB1, from the output voltage, VO,
to GND. RFB2 can be calculated from the VOV(HYS) = 2.4 V and Equation 37:
RFB2 = 120 kΩ
RFB1 can be calculated from Equation 35 and the required value of VO(OV) = 50 V:
RFB1 = 3 kΩ
8.4.2.14 Series P-Channel MOSFET Selection
In applications with PWM dimming, the device requires a P-channel MOSFET placed in series with the LED
load. Select a P-channel MOSFET with a gate-to-source voltage rating of 10 V or higher and with a drain-tosource breakdown voltage rating greater than the output voltage. Ensure that the drain current rating of the
P-channel MOSFET exceeds the programmed LED current by at least 10%. It is important to consider the FET
input capacitance and on-resistance as it impacts the accuracy and efficiency of the LED driver. TI recommends
a FET with lower input capacitance and gate charge to minimize the errors caused by rise and fall times when
PWM dimming at low duty cycles is applied.
8.4.3 CC Buck-Boost Design Requirements
Buck-Boost LED drivers provide the flexibility needed in applications, where the load voltage (LED string voltage)
maybe less or more than the input battery voltage or the application supports multiple LED load configurations.
For such applications, it is necessary to modify the design procedure presented to account for the wider range of
output voltage and LED current specifications. Table 8-4 shows the design parameters for the Buck-Boost (BtB)
LED driver application.
Table 8-4. Design Parameters
PARAMETER
TEST CONDITIONS
MIN
TYP
MAX
UNIT
7
14
18
V
2.8
3.2
3.6
V
3
6
9
INPUT CHARACTERISTICS
VIN
Input voltage range
OUTPUT CHARACTERISTICS
VF(LED)
LED forward voltage
NLED
Number of LEDs in series
72
Submit Document Feedback
Copyright © 2021 Texas Instruments Incorporated
Product Folder Links: TPS92682-Q1
�TPS92682-Q1
www.ti.com
SLUSCX8C – MARCH 2019 – REVISED MARCH 2021
Table 8-4. Design Parameters (continued)
PARAMETER
VO
TEST CONDITIONS
Output voltage
ILED
Output current
RRilED
LED current ripple ratio
rD
LED string resistance
PO(MAX)
Maximum output power
fPWM
PWM dimming frequency
LED+ to LED–
MIN
TYP
MAX
UNIT
8.4
19.2
32.4
V
500
1200
mA
200
7.5%
0.8
1.5
2.3
Ω
12
W
400
Hz
Output power at CCM-DCM boundary
condition
3.5
W
ΔvIN(PP)
Input voltage ripple
100
mV
VO(OV)
Output Overvoltage protection threshold
40
V
VOV(HYS)
Output Overvoltage protection hysteresis
fDM
Dither Modulation Frequency
fSW
Switching frequency
SYSTEMS CHARACTERISTICS
PO(BDRY)
3
400
V
600
400
Hz
kHz
8.4.4 CC Buck-Boost Detailed Design Procedure
In the following section, the detailed design procedure for the CC Buck-Boost LED driver is provided.
8.4.4.1 Calculating Duty Cycle
From Equation 10 and the input and output characteristics in Table 8-4, you can solve for DTYP, DMAX, and DMIN.
DTYP = 0.58
DMAX = 0.82
DMIN = 0.32
8.4.4.2 Setting Switching Frequency
The RT value that sets the internal clock is calculated from Equation 56 in the CC Boost Detailed Design
Procedure section. For the default division factor of 2 in the SWDIV Register, the value for fSW = 400 kHz can be
obtained.
8.4.4.3 Setting Dither Modulation Frequency
Frequency modulation is shared between both channels of the TPS92682-Q1. As a result, the same frequency
modulation is applied to both Boost and Buck-Boost LED drivers.
8.4.4.4 Inductor Selection
The inductor is selected to meet the CCM-DCM boundary power requirement, PO(BDRY). Typically, the boundary
condition is set to enable CCM operation at the lowest possible operating power. The inductor value is calculated
for typical input voltage, VIN(TYP), and output voltage, VO(TYP). From Equation 19, the inductor L is calculated to
be:
L = 23.4 µH
The value of L = 22 µH is selected for this application.
Ensure that the inductor saturation current rating is greater than the 1.2 × IL(PK) found from Equation 21:
IL(PK) = 3.4 A
8.4.4.5 Output Capacitor Selection
The specified peak-to-peak LED current ripple, ΔiLED(PP), is:
ΔiLED(PP) = RRiLED × ILED(MAX) = 90 mA
Submit Document Feedback
Copyright © 2021 Texas Instruments Incorporated
Product Folder Links: TPS92682-Q1
73
�TPS92682-Q1
www.ti.com
SLUSCX8C – MARCH 2019 – REVISED MARCH 2021
The output capacitance required to achieve the target LED current ripple can be obtained from Equation 23. The
resulting capacitance value is calculated to be COUT ≥ 23 µF.
Five 4.7-µF 100-V ceramic capacitors are used in parallel to achieve a combined required output capacitance.
8.4.4.6 Input Capacitor Selection
The input capacitor is required to reduce switching noise conducted through the input terminal and to reduce the
input impedance of the LED driver. Equation 26 is used to calculate the required capacitance of CIN ≥ 43 µF to
limit peak-to-peak input voltage ripple, ΔvIN(PP), to 100 mV.
Four 10-µF, 50-V ceramic capacitors are used in parallel to achieve a combined input capacitance of 40 µF. As
shown in Figure 8-11, an additional 33-µF 50-V electrolytic capacitor and more ceramic capacitors are also used
at the input terminal to further decrease the overshoot and undershoot of VIN during PWM dimming.
8.4.4.7 Main N-Channel MOSFET Selection
Maximum transistor voltage rating must exceed the following:
VDS = 1.2 × (VO(OV) + VIN(MAX)) = 70 V
The maximum RMS switch current can be found from Equation 12 to be 2.3 A.
An N-channel MOSFET with a voltage rating of 100 V and a current rating of more than 3 A is required for this
design.
8.4.4.8 Rectifier Diode Selection
Select a diode with a reverse breakdown voltage, VD(BR), greater than or equal to MOSFET drain-to-source
voltage, VDS, for reliable performance.
The DC current rating of the diode rectifier for the Buck-Boost LED driver must be greater than ILED(MAX).
8.4.4.9 Setting ILED and Selecting RCS
The LED current can be programmed by writing an 8-bit value to CH2IADJ Register, and as described in the
Programming LED Current section.
The value of the current sense resistor, RCS, can be selected to result in the ILED(MAX) for the maximum
programmed value of 255 in the CHxIADJ register.
Substituting ILED(MAX) = 1.2 A in Equation 57 results in RCS = 0.14 Ω. A current sense value of 0.1 Ω is selected
for this design.
8.4.4.10 Setting Switch Current Limit
As shown in Equation 13, the switch current limit is determined by the switch current sense resistor, RIS, and the
switch current threshold. For VILIM(THR) = 250 mV and 1.2 × IL(PK) = 4 A, RIS ≤ 62 mΩ. A standard sense resistor
of RIS = 60 mΩ is selected in this design.
8.4.4.11 Slope Compensation
The recommended slope compensation magnitude can be obtained from Equation 14, VSLP ≥ 110 mV.
The VSLP can be programmed in the ISLOPE Register. The ISLOPE =011 is selected, which corresponds with
VSLP = 150 mV.
8.4.4.12 Compensator Parameters
An integral compensator can be selected for this design. The CCOMP can be calculated from Equation 31 . A
standard capacitor value is selected for this design:
CCOMP = 100 nF
A proportional integral compensator can be used to achieve higher bandwidth and improved transient
performance. However, it is necessary to experimentally tune the compensator parameters over the entire
operating range to ensure stable operation.
74
Submit Document Feedback
Copyright © 2021 Texas Instruments Incorporated
Product Folder Links: TPS92682-Q1
�TPS92682-Q1
www.ti.com
SLUSCX8C – MARCH 2019 – REVISED MARCH 2021
8.4.4.13 Overvoltage Protection
The output Overvoltage level is programmed using RFB2 and RFB1. RFB2 can be calculated from the VOV(HYS) = 3
V and Equation 37:
RFB2 = 150 kΩ
RFB1 can be calculated from Equation 36 and the required value of VO(OV) = 40 V:
RFB1 = 4.75 kΩ
8.4.5 PWM Dimming Consideration
A 60-V, 2-A P-channel FET is used to achieve series FET PWM dimming.
Submit Document Feedback
Copyright © 2021 Texas Instruments Incorporated
Product Folder Links: TPS92682-Q1
75
�TPS92682-Q1
www.ti.com
SLUSCX8C – MARCH 2019 – REVISED MARCH 2021
8.4.6 Application Curves
The following waveform curves are for the Boost and the Buck-Boost LED drivers. Channel-1 of the TPS92682Q1 is configured as a Boost LED driver and the Channel-2 as a Buck-Boost.
CH1: Boost ILED
CH2: Buck-Boost
CH3: Boost LED+
CH4: Buck-Boost
current
ILED current
voltage (12×LED)
LED+ voltage
CH1: Boost ILED
CH2: Buck-Boost
CH3: Boost LED+
CH4: Buck-Boost
current
ILED current
voltage (12×LED)
LED+ voltage
(3×LED)
(3×LED)
Figure 8-13. PWM Dimming Transient with FM
Figure 8-12. PWM Dimming Transient
CH1: Boost ILED current
CH2: Boost switch current CH3: Boost LED+ voltage
CH2: Buck-Boost ILED
CH4: Buck-Boost switch
CH3: Buck-Boost LED+
sense voltage
current
current sense voltage
voltage (3×LED)
(12xLED)
Figure 8-14. Boost PWM Dimming, Switch Current
CH1: Boost ILED
CH2: Buck-Boost
CH3: Boost LED+
CH4: Buck-Boost
current
ILED current
voltage (12×LED)
LED+ voltage
Figure 8-15. Buck-Boost PWM Dimming, Switch
Current
CH1: Boost ILED current
76
CH4: COMP1-PIN voltage
(12×LED)
(6×LED)
Figure 8-16. Buck-Boost PWM Dimming, Switch
Current
CH3: Boost LED+ voltage
Figure 8-17. Boost LED Open Fault
Submit Document Feedback
Copyright © 2021 Texas Instruments Incorporated
Product Folder Links: TPS92682-Q1
�TPS92682-Q1
www.ti.com
SLUSCX8C – MARCH 2019 – REVISED MARCH 2021
CH3: FB2/OV2 PIN voltage
CH4: COMP2 PIN voltage
CH2: Buck-Boost ILED
CH3: FB2/OV2 PIN
CH4: Buck-Boost VSW
current
voltage
voltage
Figure 8-18. Buck-Boost LED Open Fault
Figure 8-19. Buck-Boost LED Open Fault
CH1: Boost ILED current
CH3: Boost LED+ voltage
CH4: Boost VSW voltage
Figure 8-20. Boost Output Short Fault
CH2: Buck-Boost ILED
CH3: Buck-Boost LED+
CH4: Buck-Boost VSW
current
voltage
voltage
Figure 8-21. Buck-Boost Output Short Fault
12×LED, ILED = 560 mA
6×LED, ILED = 700 mA
Figure 8-22. Boost Conducted EMI Scan with FM
Figure 8-23. Buck-Boost Conducted EMI Scan with
FM
8.5 Typical Application CV Mode
Figure 8-24 shows the schematic for a two-phase Boost Constant Voltage (CV) regulator.
Submit Document Feedback
Copyright © 2021 Texas Instruments Incorporated
Product Folder Links: TPS92682-Q1
77
�TPS92682-Q1
www.ti.com
SLUSCX8C – MARCH 2019 – REVISED MARCH 2021
Figure 8-24. CV Mode Two-Phase BOOST
8.5.1 CV Design Requirements
Table 8-5 shows the design parameters for the CV two-phase boost.
Table 8-5. Design Parameters
PARAMETER
TEST CONDITIONS
MIN
TYP
MAX
UNIT
8
14
28
V
10
A
INPUT CHARACTERISTICS
VIN
Input voltage range
IIN(MAX)
Maximum input current
OUTPUT CHARACTERISTICS
VO
Output voltage
IO(MAX)
Maximum output current
50
2
V
A
PO(MAX)
Maximum output power
100
W
SYSTEMS CHARACTERISTICS
PR
Peak Ratio: peak to average inductor current
at POUT(MAX), IL(PK)/IL
1.4
ΔvIN(PP)
Input voltage ripple
10
mV
ΔvOUT(PP)
Output voltage ripple
50
mV
VO(OV)
Output Overvoltage protection threshold
55
V
VOV(HYS)
Output Overvoltage protection hysteresis
fDM
Dither Modulation Frequency
fSW
Switching frequency
2.0
400
V
600
200
Hz
kHz
8.5.2 Detailed Design Procedure
In the following section, the detailed design procedure for the two-phase CV Boost is provided.
8.5.2.1 Calculating Duty Cycle
From Equation 9 and the input and output characteristics in Table 8-5, you can solve for DTYP, DMAX, and DMIN.
DTYP = 0.72
DMAX = 0.84
78
Submit Document Feedback
Copyright © 2021 Texas Instruments Incorporated
Product Folder Links: TPS92682-Q1
�TPS92682-Q1
www.ti.com
SLUSCX8C – MARCH 2019 – REVISED MARCH 2021
DMIN = 0.44
8.5.2.2 Setting Switching Frequency
Assuming the division factor of 4 in SWDIV Register and from Equation 1, the RT value for the fSW = 200 kHz
can be obtained:
RT
1012
12.5 u SW DIV ufSW
(58)
RT = 100 kΩ
8.5.2.3 Setting Dither Modulation Frequency
The dither modulation frequency can be set using the FM Register in Equation 2. For the dither modulation
frequency of less than 600 Hz, the FMFREQ must be set to 0101, which corresponds to a division factor of 1536
and sets FM = 521 Hz.
8.5.2.4 Inductor Selection
The inductor is selected to meet the peak-to-peak inductor current ripple at POUT(MAX). The inductor current
ripple, ΔiL-PP, can be obtained from the PR = IL(PK) / IL at POUT(MAX):
'iL
PP
2 u PR 1 u
PO(MAX)
VIN
(59)
In Equation 59, it is important to note that the POUT(MAX) is the maximum output power per phase, 50 W in this
design.
The value of ΔiL-PP is calculated for typical input voltage, VIN(TYP). From Equation 39, the inductor L is calculated
to be:
L ≥ 17 µH
The value of L = 15 µH is selected for this application.
Ensure that the inductor saturation current rating is greater than 1.1 × IL(PK) = 6.5 A (IL(PK) is calculated with 90%
CV BOOST efficiency assumption).
8.5.2.5 Output Capacitor Selection
The output capacitors are required to attenuate the discontinuous output current of the BOOST converter,
as well as decreasing the output voltage undershoot and overshoot during load transient. The total required
output capacitor, COUT, can be found from Equation 42, where fSW is replaced with 2 × 200 kHz = 400 kHz for
two-phase operation.
COUT ≥ 84 µF
10 × 4.7-µF, 100-V ceramic capacitors are used in parallel, at the output of each phase, to achieve a combined
required output capacitance. It is important to note that the CV Boost output capacitor also plays an important
role in decreasing the output undershoot and overshoot voltage during load transient.
8.5.2.6 Input Capacitor Selection
The input capacitor is required to reduce switching noise conducted through the input terminal and to reduce the
input impedance of the CV Boost. Equation 44 is used to calculate the required capacitance of CIN ≥ 70 µF to
limit peak-to-peak input voltage ripple, ΔvIN(PP), to 10 mV.
Eight 10-µF, 50-V ceramic capacitors are used in parallel to achieve a combined input capacitance of 80 µF.
As shown in Figure 8-24, an additional 33-µF, 50-V electrolytic capacitor and a 1-µH inductor are also used at
the input terminal. The electrolytic capacitor is used to further decrease overshoot and undershoot during load
transient. The input inductor is used to decrease the switching noise and improve EMI performance.
Submit Document Feedback
Copyright © 2021 Texas Instruments Incorporated
Product Folder Links: TPS92682-Q1
79
�TPS92682-Q1
www.ti.com
SLUSCX8C – MARCH 2019 – REVISED MARCH 2021
8.5.2.7 Main N-Channel MOSFET Selection
Ensure that the MOSFET ratings exceed the maximum output voltage and RMS switch current.
VDS = VO(OV) × 1.1 = 61 V
The maximum RMS switch current can be found from Equation 11, where PO(MAX) is replaced by half of the total
maximum output power for two-phase operation.
An N-channel MOSFET with a voltage rating of 100 V and a current rating of more than 7 A is required for this
design.
8.5.2.8 Rectifier Diode Selection
Select a diode with a reverse breakdown voltage, VD(BR), greater than or equal to MOSFET drain-to-source
voltage, VDS, for reliable performance.
The DC current rating of the diode rectifier for the Boost LED driver must be greater than half of the total output
current, IO(MAX) = 2 A.
8.5.2.9 Programming VOUT
The output voltage VOUT can be programmed using the feedback resistors and by writing an 8-bit value to
CH1IADJ Register and CH2IADJ Register. Equation 45 shows the relation between the programmed VOUT, the
register CHxIADJ, and the feedback resistors.
It is recommended to set the ratio of the feedback resistors RFB2 / RFB1 such that for the maximum CHxIADJ =
255, VOUT does not increase above the maximum desired limit (for example, VO(LIM) = 60 V).
In this design for VO(LIM) = 60 V, RFB2 / RFB1 = 24.
In this design, CHxIADJ is set to the value of 212 to achieve VO = 50 V, for the RFB2 / RFB1 = 24.
8.5.2.10 Setting Switch Current Limit
As shown in Equation 13, the switch current limit is determined by the switch current sense resistor, RIS, and the
switch current threshold. For VILIM(THR) = 100 mV and IL(PK) = 6 A, RIS ≤ 16 mΩ. A standard sense resistor of RIS
= 10 mΩ is selected for this application.
The maximum power loss introduced by RIS can be found from Equation 60, to be 0.45 W.
PRIS
Loss
RIS u IQ(RMS)
2
(60)
8.5.2.11 Slope Compensation
The recommended slope compensation magnitude can be obtained from Equation 14, VSLP ≥ 100 mV.
In CV mode for RIS values smaller than 20 mΩ, it is recommended to use VSLP ≥ 250 mV for better noise
immunity.
The VSLP can be programmed in the ISLOPE Register. The ISLOPE =101 is selected, which corresponds with
VSLP = 250 mV.
8.5.2.12 Compensator Parameters
Proportional-Integral Compensator is selected for this design. The compensator component can be obtained
from Equation 51, Equation 52 and Equation 53:
CCOMP = 33 nF
CHF = 100 pF
RCOMP = 15 kΩ
It is noted that the above compensator components are fine-tuned to provide improved load transient
performance.
80
Submit Document Feedback
Copyright © 2021 Texas Instruments Incorporated
Product Folder Links: TPS92682-Q1
�TPS92682-Q1
www.ti.com
SLUSCX8C – MARCH 2019 – REVISED MARCH 2021
8.5.2.13 Overvoltage Protection
In CV mode, the output Overvoltage level is set in the OV Register as a percentage above the programmed
regulated value of VOUT. For VO(OV) = 55 V, OV Register is set to 10%, which corresponds with CHxOV = 100.
RFB2 can be calculated from the VOV(HYS) = 2 V and from Equation 54:
RFB2 = 100 kΩ
RFB1 can be calculated from the ratio of RFB2 / RFB1 = 24, found in the VOUT setting.
RFB1 = 4.12 kΩ
Submit Document Feedback
Copyright © 2021 Texas Instruments Incorporated
Product Folder Links: TPS92682-Q1
81
�TPS92682-Q1
www.ti.com
SLUSCX8C – MARCH 2019 – REVISED MARCH 2021
8.5.3 Application Curves
The following waveform curves are for the two-phase CV Boost.
CH1: Phase-1 VSW CH2: Phase-2 VSW CH3: CV Boost
voltage
voltage
VOUT
CH2: IOUT, 0.2 A to 2 A
transient
CH3: CV Boost VOUT
Figure 8-25. Normal Operation, POUT = 50 W
Figure 8-26. Load Transient
CH1: VCOMP1 pin
82
CH3: CV Boost VOUT
CH1: VCOMP1 pin
CH3: CV Boost VOUT
Figure 8-27. Start-up, SOFTSTART = 0111
Figure 8-28. Start-up, SOFTSTART = 1111
Figure 8-29. CV Conducted EMI Scan, fSW = 100
kHz
Figure 8-30. CV Conducted EMI Scan, fSW = 200
kHz
Submit Document Feedback
Copyright © 2021 Texas Instruments Incorporated
Product Folder Links: TPS92682-Q1
�TPS92682-Q1
www.ti.com
SLUSCX8C – MARCH 2019 – REVISED MARCH 2021
9 Power Supply Recommendations
This device is designed to operate from an input voltage supply range between 4.5 V and 65 V. The input can be
a car battery or another pre-regulated power supply. If the input supply is located more than a few inches from
the TPS92682-Q1 device, additional bulk capacitance or an input filter can be required in addition to the ceramic
bypass capacitors to address noise and EMI concerns.
Submit Document Feedback
Copyright © 2021 Texas Instruments Incorporated
Product Folder Links: TPS92682-Q1
83
�TPS92682-Q1
www.ti.com
SLUSCX8C – MARCH 2019 – REVISED MARCH 2021
10 Layout
10.1 Layout Guidelines
•
•
•
•
•
•
The performance of the switching regulator depends as much on the layout of the PCB as the component
selection. Following a few simple guidelines maximizes noise rejection and minimizes the generation of EMI
within the circuit.
Discontinuous currents are the most likely to generate EMI. Therefore, take care when routing these paths.
The main path for discontinuous current in the device using a buck regulator topology contains the input
capacitor, CIN, the recirculating diode, D, the N-channel MOSFET, Q1, and the sense resistor, RIS. In the
TPS92682-Q1 device using a boost regulator topology, the discontinuous current flows through the output
capacitor COUT, diode, D, N-channel MOSFET, Q1, and the current sense resistor, RIS. When using a
buck-boost regulator topology, implement the layout of both input and output loops carefully. Make sure that
these loops are as small as possible. In order to minimize parasitic inductance, ensure that the connection
between all the components are short and thick. In particular, make the switch node (where L, D, and Q1
connect) just large enough to connect the components. To minimize excessive heating, large copper pours
can be placed adjacent to the short current path of the switch node.
Route the CSP and CSN together with kelvin connections to the current sense resistor with traces as short
as possible. If needed, use common mode and differential mode noise filters to attenuate switching and diode
reverse recovery noise from affecting the internal current sense amplifier.
Because the COMPx, ISPx, ISNx, and FBx pins are all high-impedance inputs that may couple external
noise, ensure that the loops containing these nodes are minimized whenever possible.
In some applications, the LED or LED array can be far away from the TPS92682-Q1 device, or on a separate
PCB connected by a wiring harness. When an output capacitor is used and the LED array is large or
separated from the rest of the regulator, place the output capacitor close to the LEDs to reduce the effects of
parasitic inductance on the AC impedance of the capacitor.
The TPS92682-Q1 has an exposed thermal pad to aid power dissipation. Adding several vias under the
exposed pad helps conduct heat away from the device. The junction-to-ambient thermal resistance varies
with application. The most significant variables are the area of copper in the PCB and the number of vias
under the exposed pad. The integrity of the solder connection from the device exposed pad to the PCB is
critical. Excessive voids greatly decrease the thermal dissipation capacity.
10.2 Layout Example
Figure 10-1 shows a layout example for a CC boost LED driver, which is connected to the channel-1 of the
TPS92682-Q1.
84
Submit Document Feedback
Copyright © 2021 Texas Instruments Incorporated
Product Folder Links: TPS92682-Q1
�TPS92682-Q1
www.ti.com
SLUSCX8C – MARCH 2019 – REVISED MARCH 2021
VIN
GND
LED+
FB1/OV1
CSP1
CSN1
PDRV1
COMP1
AGND
VDD
VIN
ISN1
EN
ISP1
PWM1
GATE1
PWM2
VCC
SSN
PGND
SCK
GATE2
FB2/OV2
CSP2
CSN2
PDRV2
COMP2
ISN2
FLT2/SY
ISP2
MOSI
LH
MISO
FLT1
To MCU
RT
LED-
GATE2
ISP2
FB2/OV2
CSP2
CSN2
PDRV2
Figure 10-1. CC Boost Layout Example
Submit Document Feedback
Copyright © 2021 Texas Instruments Incorporated
Product Folder Links: TPS92682-Q1
85
�TPS92682-Q1
www.ti.com
SLUSCX8C – MARCH 2019 – REVISED MARCH 2021
11 Device and Documentation Support
11.1 Receiving Notification of Documentation Updates
To receive notification of documentation updates, navigate to the device product folder on ti.com. Click on
Subscribe to updates to register and receive a weekly digest of any product information that has changed. For
change details, review the revision history included in any revised document.
11.2 Support Resources
TI E2E™ support forums are an engineer's go-to source for fast, verified answers and design help — straight
from the experts. Search existing answers or ask your own question to get the quick design help you need.
Linked content is provided "AS IS" by the respective contributors. They do not constitute TI specifications and do
not necessarily reflect TI's views; see TI's Terms of Use.
11.3 Trademarks
TI E2E™ is a trademark of Texas Instruments.
All trademarks are the property of their respective owners.
11.4 Electrostatic Discharge Caution
This integrated circuit can be damaged by ESD. Texas Instruments recommends that all integrated circuits be handled
with appropriate precautions. Failure to observe proper handling and installation procedures can cause damage.
ESD damage can range from subtle performance degradation to complete device failure. Precision integrated circuits may
be more susceptible to damage because very small parametric changes could cause the device not to meet its published
specifications.
11.5 Glossary
TI Glossary
This glossary lists and explains terms, acronyms, and definitions.
12 Mechanical, Packaging, and Orderable Information
The following pages include mechanical, packaging, and orderable information. This information is the most
current data available for the designated devices. This data is subject to change without notice and revision of
this document. For browser-based versions of this data sheet, refer to the left-hand navigation.
86
Submit Document Feedback
Copyright © 2021 Texas Instruments Incorporated
Product Folder Links: TPS92682-Q1
�PACKAGE OPTION ADDENDUM
www.ti.com
23-Mar-2021
PACKAGING INFORMATION
Orderable Device
Status
(1)
Package Type Package Pins Package
Drawing
Qty
Eco Plan
(2)
Lead finish/
Ball material
MSL Peak Temp
Op Temp (°C)
Device Marking
(3)
(4/5)
(6)
TPS92682QDAPRQ1
ACTIVE
HTSSOP
DAP
32
2000
RoHS & Green
NIPDAU
Level-3-260C-168 HR
-40 to 125
TPS92682Q
TPS92682QRHBRQ1
ACTIVE
VQFN
RHB
32
2000
RoHS & Green
NIPDAU
Level-3-260C-168 HR
-40 to 125
92682Q
TPS92682QRHMRQ1
ACTIVE
VQFN
RHM
32
3000
RoHS & Green
NIPDAUAG
Level-3-260C-168 HR
-40 to 125
TPS
92682Q
(1)
The marketing status values are defined as follows:
ACTIVE: Product device recommended for new designs.
LIFEBUY: TI has announced that the device will be discontinued, and a lifetime-buy period is in effect.
NRND: Not recommended for new designs. Device is in production to support existing customers, but TI does not recommend using this part in a new design.
PREVIEW: Device has been announced but is not in production. Samples may or may not be available.
OBSOLETE: TI has discontinued the production of the device.
(2)
RoHS: TI defines "RoHS" to mean semiconductor products that are compliant with the current EU RoHS requirements for all 10 RoHS substances, including the requirement that RoHS substance
do not exceed 0.1% by weight in homogeneous materials. Where designed to be soldered at high temperatures, "RoHS" products are suitable for use in specified lead-free processes. TI may
reference these types of products as "Pb-Free".
RoHS Exempt: TI defines "RoHS Exempt" to mean products that contain lead but are compliant with EU RoHS pursuant to a specific EU RoHS exemption.
Green: TI defines "Green" to mean the content of Chlorine (Cl) and Bromine (Br) based flame retardants meet JS709B low halogen requirements of
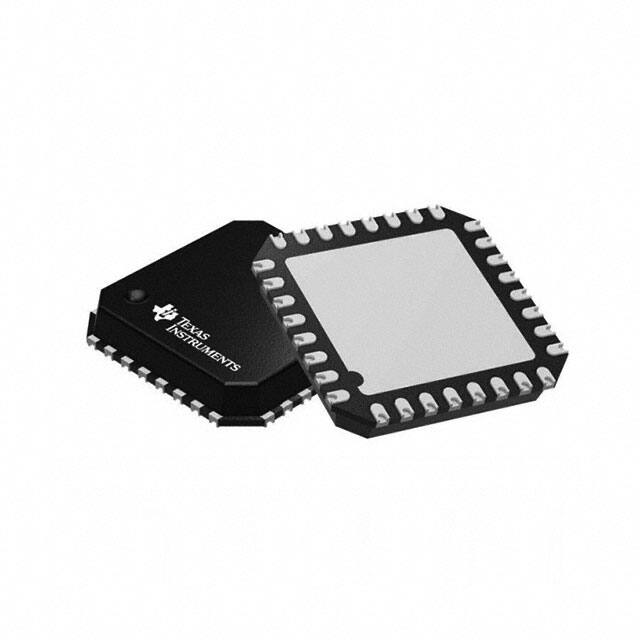


 工商网监
湘ICP备2023018690号
工商网监
湘ICP备2023018690号

