Future Technology Devices International Ltd.
V2-EVAL
Vinculum II Evaluation Board
Datasheet
Document Reference No.: FT_000247
Version 2.0
Issue Date: 2010-07-29
Future Technology Devices International Ltd (FTDI)
Unit 1, 2 Seaward Place, Centurion Business Park, Glasgow, G41 1HH, United Kingdom
Tel.: +44 (0) 141 429 2777
Fax: + 44 (0) 141 429 2758
E-Mail (Support): support1@ftdichip.com
Web: http://www.vinculum.com
Neither the whole nor any part of the information contained in, or the product described in this manual, may be adapted or reproduced
in any material or electronic form without the prior written consent of the copyright holder. This product and its documentation are
supplied on an as-is basis and no warranty as to their suitability for any particular purpose is either made or implied. Future Technology
Devices International Ltd will not accept any claim for damages howsoever arising as a result of use or failure of this product. Your
statutory rights are not affected. This product or any variant of it is not intended for use in any medical appliance, device or system in
which the failure of the product might reasonably be expected to result in personal injury. This document provides preliminary
information that may be subject to change without notice. No freedom to use patents or other intellectual property rights is implied by
the publication of this document. Future Technology Devices International Ltd, Unit 1, 2 Seaward Place, Centurion Business Park,
Glasgow, G41 1HH, United Kingdom. Scotland Registered Number: SC136640
Copyright © 2010 Future Technology Devices International Limited
�Document Reference No.: FT_000247
V2-EVAL Vinculum II Evaluation Board Datasheet Version 2.0
Clearance No.: FTDI#148
Table of Contents
1
2
3
Introduction .................................................................... 3
1.1
Handling the board ................................................................... 3
1.2
Environmental requirements ..................................................... 3
1.3
Part Numbers ............................................................................ 4
1.4
References ................................................................................ 4
1.5
Acronyms and Abbreviations..................................................... 5
Board Description............................................................ 6
2.1
V2-EVAL Board Features ........................................................... 6
2.2
Specifications ............................................................................ 6
V2-Eval Board Components and Interfaces ..................... 7
3.1
4
5
Block Diagram ........................................................................... 8
3.1.1
Components. ............................................................................................ 9
3.1.2
Interfaces. .............................................................................................. 10
Initial Board Set-up & Test ............................................ 11
4.1
Installing VNC2 Daughterboard .............................................. 11
4.2
Testing the board. ................................................................... 12
Detailed Description of Board Components. .................. 13
5.1
Power Select Jumper JP6. ....................................................... 13
5.2
GPIO BUS Connectors ............................................................. 14
5.2.1
GPIO [0:7] Connector CN3 ....................................................................... 14
5.2.2
GPIO [8:15] Connector CN4 ...................................................................... 15
5.2.3
GPIO [16:23] Connector CN5 .................................................................... 16
5.2.4
GPIO [24:31] Connector CN6 .................................................................... 17
5.2.5
GPIO [32:39] Connector CN7 .................................................................... 18
5.2.6
GPIO [40:43] Connector CN8 .................................................................... 19
5.3
SPI Connector C9 .................................................................... 20
5.4
UART Interface Connector C10 ................................................ 21
5.5
FIFO Interface Connector CN11 .............................................. 22
5.6
Prototyping area ..................................................................... 23
5.7
USB1 interface CN1 ................................................................. 26
5.8
USB2 interface CN2. ................................................................ 27
5.9
VNC1L Interface Mode Select / GPIO Jumpers JP1, JP2 .......... 28
5.10 User LEDs. LED3 – LED6. ......................................................... 29
Copyright © 2010 Future Technology Devices International Limited
1
�Document Reference No.: FT_000247
V2-EVAL Vinculum II Evaluation Board Datasheet Version 2.0
Clearance No.: FTDI#148
5.11 LED enable/disable jumpers JP10 – JP14. .............................. 30
5.12 User push button switches ...................................................... 30
5.13 Host USB power jumpers JP4, JP5. ......................................... 31
5.14 Remote Wakeup jumper JP3. .................................................. 32
5.15 Reset Push-button Switch ....................................................... 33
5.16 ‘PROG’ LED .............................................................................. 33
5.17 VNC2 Daughterboard Connector – J1 ...................................... 34
5.18 VNC2 Daughterboard Connector – J2 ...................................... 35
5.19 VNC2 Daughterboard Connector – J3 ...................................... 36
5.20 VNC2 Daughterboard Connector – J4 ...................................... 37
6
7
FT4232H Configuration ................................................. 38
6.1
UART Interface ....................................................................... 39
6.2
Debug Interface – UART Mode ................................................ 40
6.3
UART ‘Spy’ Interface ............................................................... 40
6.4
Device Control – Bit Bang Mode .............................................. 40
Connecting to a PC Host ................................................ 41
7.1
8
9
Driver Installation................................................................... 41
V2-EVAL Software ......................................................... 45
8.1
V2-EVAL Terminal Installation ................................................ 45
8.2
Using V2-EVAL Terminal ......................................................... 46
Board Schematics. ......................................................... 49
9.1
V2-EVAL Board Schematics ..................................................... 50
9.2
VNC2 Daughterboard - 32-pin QFN Schematic ........................ 55
9.3
VNC2 Daughterboard - 48-pin QFN Schematic ........................ 56
9.4
VNC2 Daughterboard - 64-pin QFN Schematic ........................ 57
10 V2-EVAL Board Assembly Drawing ................................ 58
Contact Information........................................................... 59
Appendix A – List of Figures and Tables .......................................... 60
List of Figures ................................................................................. 60
List of Tables ................................................................................... 62
Appendix B – Revision History ........................................... 63
Copyright © 2010 Future Technology Devices International Limited
2
�Document Reference No.: FT_000247
V2-EVAL Vinculum II Evaluation Board Datasheet Version 2.0
Clearance No.: FTDI#148
1
Introduction
The following document details the features and specifications of the V2-EVAL board. The V2-EVAL is a
hardware platform designed to support easy evaluation of FTDI‟s Vinculum-II (VNC2) series of
embedded USB host controller devices.
The V2-Eval kit includes the following hardware items as standard
1 x V2-Eval base board.
1 x 5V/1A mains adapter PSU – UK, US, European and Japanese versions available.
1 x USB A/B cable to connect to a host PC in programming / terminal emulation or debugging
modes.
1 x USB gender changer for USB slave mode applications.
NOTE:
The V2-EVAL kit requires a VNC2 based daughterboard module to be installed into the V2-EVAL
base board socket site, in order to enable development with the kit.
Daughterboard modules are sold separately, with 3 versions available for 32-pin, 48-pin and 64-pin
package devices.
Daughterboard modules can be purchased from FTDI or via our website
http://www.ftdichip.com.
Before you proceed:
Please check that all the contents of the package are not damaged.
Ensure that your kit includes a proper version of the power supply, depending on the region where you
live. Eval application software and project examples can be downloaded from: http://www.ftdichip.com
1.1
Handling the board
Static discharge precaution – Without proper anti-static handling the board can be damaged.
Therefore, take anti-static precautions while handling the board.
1.2
Environmental requirements
The V2-Eval Board must be stored between -40°C and 80°C. The recommended operating temperature is
between 0°C and 55°C
Figure 1.1 - V2-EVAL Motherboard(left) with Daughterboard Module(right)
Copyright © 2010 Future Technology Devices International Limited
3
�Document Reference No.: FT_000247
V2-EVAL Vinculum II Evaluation Board Datasheet Version 2.0
Clearance No.: FTDI#148
1.3
Part Numbers
Part Number
Description
V2-EVAL
V2-EVAL kit with base board, power supply and cables.
V2-EVAL-EXT32
VNC2 daughterboard module with 32-pin QFN VNC2 device for use with V2-EVAL.
V2-EVAL-EXT48
VNC2 daughterboard module with 48-pin QFN VNC2 device for use with V2-EVAL.
V2-EVAL-EXT64
VNC2 daughterboard module with 64-pin QFN VNC2 device for use with V2-EVAL.
Table 1.0
1.4
Part Numbers
References
The document contains references to the following websites and documents. Links to most documents
are available from the FTDI website, http://www.ftdichip.com.
Document Name
Description
1. FT_000138
Vinculum-II Embedded Dual USB Host Controller IC Data Sheet.
2. FT_000060
FT4232H Data Sheet.
3. AN_137
Vinculum-II IO Cell Description.
4. AN_138
Vinculum-II Debug Interface Description.
5. AN_139
Vinculum-II IO Mux Explained.
6. AN_140
Vinculum-II PWM Example.
7. FT_000006
Vinculum Firmware User Manual.
8. USB 2.0
Universal Serial Bus Specification Revision 2.0 USB Implementers Forum
http://www.usb.org.
Table 1.1
Document References
Copyright © 2010 Future Technology Devices International Limited
4
�Document Reference No.: FT_000247
V2-EVAL Vinculum II Evaluation Board Datasheet Version 2.0
Clearance No.: FTDI#148
1.5
Acronyms and Abbreviations
Terms
Description
FIFO
First In First Out.
GPIO
General Purpose Input Output.
I/O
Input / Output.
MISO
Master In Slave Out.
MOSI
Master Out Slave In.
SPI
Serial Peripheral Interface.
UART
Universal Asynchronous Receiver/Transmitter.
USB
Universal Serial Bus.
VNC2
Vinculum-II.
Table 1.2
Acronyms and Abbreviations
Copyright © 2010 Future Technology Devices International Limited
5
�Document Reference No.: FT_000247
V2-EVAL Vinculum II Evaluation Board Datasheet Version 2.0
Clearance No.: FTDI#148
2
Board Description
V2-Eval Board is intended for use as a hardware platform to enable easy evaluation of FTDI‟s Vinculum-II
VNC2 series of embedded USB Host / Slave controllers. The V2-Eval Board includes all the necessary
components required by a user to begin developing USB Host / Slave system applications based on the
VNC2 device.
2.1
V2-EVAL Board Features
VNC2 – Embedded USB Host / Slave chip accessible via daughterboard.
Selection of VNC2 daughterboards to support 32-pin, 48-pin and 64-pin QFN packages.
Two USB type A connectors for connecting to USB slave peripherals.
VNC2 IO port connectors grouped by port name/or function.
FT42232H –USB to quad channel UART device for VNC2 programming & debug functions.
One USB type B connector for connection to PC host via FT4232H.
4 User-programmable LEDs.
4 User-programmable push button switches.
2.2
Specifications
Board supply voltage: 4.75V … 5.25V.
Board supply current: 60mA (with no USB devices on USB1 or USB2 port).
IO connectors power output: 5V/150mA, 3.3V/150mA.
Base board dimensions: 167mm x 156mm x 1.5mm (L x W x H).
VNC2 daughterboard dimensions: 37.9mm x 32.48mm x 10.0mm (L x W x H).
Copyright © 2010 Future Technology Devices International Limited
6
�Document Reference No.: FT_000247
V2-EVAL Vinculum II Evaluation Board Datasheet Version 2.0
Clearance No.: FTDI#148
3
V2-Eval Board Components and Interfaces
This chapter describes the operational and connectivity information for the V2-Eval board major
components and interfaces.
Figure 3.1
V2-EVAL Board Layout
Copyright © 2010 Future Technology Devices International Limited
7
�Document Reference No.: FT_000247
V2-EVAL Vinculum II Evaluation Board Datasheet Version 2.0
Clearance No.: FTDI#148
Block Diagram
GPIO[40:43]
Host
USB2
CN3
Host
USB1
CN2
Slave
USB
CN4
GPIO [32:39]
3.1
FT4232H
ECHO
CH.C
UART
CH.A
PROG /
RESET
PROG /
RESET
IOBUS
Prototype area
VNC2 Device
FIFO IF
UART IF
74CBT3257
MUX
GPIO[24:31]
DEBUG
GPIO[15:23]
PROG
/ RESET
SELECT
SPI IF
CH.D CH.B
GPIO[0:7]
Figure 3.2
GPIO[8:15]
V2-EVAL Board Block Diagram
Copyright © 2010 Future Technology Devices International Limited
8
�Document Reference No.: FT_000247
V2-EVAL Vinculum II Evaluation Board Datasheet Version 2.0
Clearance No.: FTDI#148
3.1.1
Components.
Component
Board designator
Description
USB-UART bridge
U2
FT4232H USB Quad UART/FIFO device.
Configuration memory
U3
9356 Serial SPI EEPROM for FT4232H configuration data.
IO multiplexer
U4
74CBT3257 4-bit, 1to2, FET Multiplexer/Demultiplexer.
3.3V regulator
U1
AIC1735-33 Ultra low dropout 3.3V voltage regulator.
Dual port buffer
U5
Inverter
U6
12MHz crystal
Y2
12MHz crystal for FT4232H.
Single 5V DC power
supply
CN12
Board adapter for included 5V DC power supply.
Power switch
SW1
Power On/Off switch.
Power source select
JP6
Power source selection jumper.
Reset button
SW2
Push-button switch for manual reset of VNC2 device.
Keyboard
SW3-SW6
Four user push-button switches.
User LEDs
LED3-LED6
Four green user LEDs.
PROG LED
LED1
Red LED.
Power LED
LED2
Green LED.
UART RX LED
LED7
Green LED.
UART TX LED
LED8
Red LED.
Debug TX
LED9
Red LED.
Debug RX
LED10
Green LED.
SPI_RX
LED11
Green LED.
LEDs enable jumpers
JP7-JP10
Enable/disable user-defined LEDs.
GPIO I/O Jumpers
JP1, JP2
GPIO I/O jumpers .
REMOTE WAKEUP
JP3
VNC2 remote wakeup jumper.
VBUS jumpers
JP4, JP5
USB1, USB2 power bus enable jumpers.
Table 3.1
SN74LVC2G125 dual port buffer used to convert bidirectional debug signal into separate TX and RX signals.
SN74LVC1G14 inverter device used to invert the TXDEN
output from FT4232H to control output enable signal for
dual port buffer.
V2-Eval Board Components
Copyright © 2010 Future Technology Devices International Limited
9
�Document Reference No.: FT_000247
V2-EVAL Vinculum II Evaluation Board Datasheet Version 2.0
Clearance No.: FTDI#148
3.1.2
Interfaces.
Component
Board designator
Description
CN1, CN2
VNC2 USB host ports 1&2.
USB Type B
CN13
FT4232H USB Slave connection.
VNC2 Socket
J1 -J4
Daughterboard connectors for VNC2 Daughterboard.
CN9
VNC2 SPI interface pins.
CN10
VNC2 UART interface pins.
CN11
VNC2 FIFO interface pins.
CN3
VNC2 IOBUS [7:0] port pins.
USB1, USB2
SPI
(1)
(2)
UART
FIFO
(2)
(2)
IOBUS[7..0]
(2)
IOBUS[8..15]
(2)
CN4
VNC2 IOBUS [8:15] port pins.
IOBUS[16..23]
(2)
CN5
VNC2 IOBUS [16:23] port pins.
IOBUS[24..31]
(2)
CN6
VNC2 IOBUS [24:31] port pins.
IOBUS[32..39]
(2)
CN7
VNC2 IOBUS [32:39] port pins.
IOBUS[40..43]
(2)
CN8
VNC2 IOBUS [40:43] port pins.
P1
All of VNC2 IO ports and PROG#, RESET# pins are
brought on to this area.
Prototyping area
Notes
(1)
(2)
Table 3.2
(2)
Gender changer required when ports are configured as slave ports by VNC2 firmware,
to enable connection to a USB host port.
Those pins are shared between different areas and connectors on the board. You can
use only one device at time connected to those pins.
V2-Eval Board Interfaces
Copyright © 2010 Future Technology Devices International Limited
10
�Document Reference No.: FT_000247
V2-EVAL Vinculum II Evaluation Board Datasheet Version 2.0
Clearance No.: FTDI#148
4
Initial Board Set-up & Test
4.1
Installing VNC2 Daughterboard
Prior to first powering the board, users must ensure that the daughterboard module hosting the VNC2
chip is correctly installed on to the main V2-Eval board. The V2-Eval board has 4 socket connectors, J1J4, onto which the VNC2 daughterboard module is installed.
On the VNC2 daughterboard module, connector JN1 connects to corresponding socket J1, JN2 connects to
socket J2, JN3 connects to socket J3 and JN4 connects to J4 on the V2-Eval board.
Warning!
Please check that the VNC2 daughterboard module is correctly installed onto the V2-Eval
board prior to power-up. Incorrect installation can cause the VNC2 to not function.
Figure 4.1
V2-EVAL Board with VNC2 Daughterboard Installed
Copyright © 2010 Future Technology Devices International Limited
11
�Document Reference No.: FT_000247
V2-EVAL Vinculum II Evaluation Board Datasheet Version 2.0
Clearance No.: FTDI#148
4.2
Testing the board.
Ensure that the Power Select jumper JP6 is in „P.S.‟ position (pins 2 & 3 shorted), to enable the board to
be powered from the external power adapter.
Connect the 5V DC/1A power supply included in V2-Eval Kit to the external input power adapter
connector (CN12), connect USB A/B cable to USB B connector (CN13) on V2-Eval Board and to a free
USB port on host PC. Switch SW1 to the ON position (towards board edge). LED2 – POWER should now
be on.
Figure 4.2
Power connector with Jumper JP6
The PCB circuitry will draw power either directly from the board 5V supply or from a 3.3V regulator that is
powered by this 5V supply. This includes the VNC2 daughterboard module that is installed on the board.
Upon power up, the power LED (LED2) will illuminate.
Copyright © 2010 Future Technology Devices International Limited
12
�Document Reference No.: FT_000247
V2-EVAL Vinculum II Evaluation Board Datasheet Version 2.0
Clearance No.: FTDI#148
5 Detailed Description of Board Components.
5.1
Power Select Jumper JP6.
Figure 5.1
Power Select Jumper Configuration for USB Power
V2-Eval Board can draw its power either from the external 5V/1A DC Power Supply or from the USB
interface when connected to a USB host via the B type connector (CN13). To enable USB power supply
feature, switch the jumper JP6 to USB position, pins 1&2 shorted (pin 1 has a rectangle shaped pad on
the bottom side of the board).
Warning!
Please remember that every device connected to the PC through USB port can draw NO MORE
than 500mA from the USB host PC 5V power bus.
Copyright © 2010 Future Technology Devices International Limited
13
�Document Reference No.: FT_000247
V2-EVAL Vinculum II Evaluation Board Datasheet Version 2.0
Clearance No.: FTDI#148
5.2 GPIO BUS Connectors
The V2-EVAL board features a set of 6 connectors providing access to GPIO capable pins on the VNC2
device. The GPIO pins are distributed across 6 connectors. The configuration of each connector is
outlined in subsequent sections. Further each connector has a 5V and 3.3V power and GND pins.
5.2.1
GPIO [0:7] Connector CN3
Figure 5.2
Signal
name
GPIO[0:7] Connector CN3
Connector
pin
VCN2 Pin No
32-PIN
48-PIN
64-PIN
IO
type
Description
GPIO0
(3)
1
11
11
11
IO
GPIO data bit 0
GPIO1
(3)
2
12
12
12
IO
GPIO data bit 1
GPIO2
(3)
3
14
13
13
IO
GPIO data bit 2
GPIO3
(3)
4
15
14
14
IO
GPIO port, data bit 3
GPIO4
(3)
5
-
-
15
IO
GPIO port, data bit 4
GPIO5
(3)
6
-
-
16
IO
GPIO port, data bit 5
GPIO6
(3)
7
-
-
17
IO
GPIO port, data bit 6
GPIO7
(3)
8
-
-
18
IO
GPIO port, data bit 7
9
-
-
-
-
Ground pin
3.3V(4)
10
-
-
-
-
3.3V power rail.
GND
11
-
-
-
-
Ground pin
5V(5)
12
-
-
-
-
5V power rail.
GND
Notes:
(3)
(4)
(5)
All VNC2‟s IO pins can be driven from 3.3V LVTTL TTL logic levels.
The use of these pins for GPIO is set by the IOMUX on the VNC2 device. The pins are shared by other
connectors on the board. Care should be taken to ensure that pins are not driven from other headers
on the board.
This pin is connected to 3.3V regulator output. External device can draw no more than 100mA when
board is powered from an external power supply and no more than 50mA when the board is powered
from USB bus.
This pin is connected to the board‟s 5V power rail. External device can draw no more than 250mA when
board is powered from an external power supply and no more than 50mA when the board is powered
from USB bus.
Table 5.1
GPIO[0:7] port connector CN3
Copyright © 2010 Future Technology Devices International Limited
14
�Document Reference No.: FT_000247
V2-EVAL Vinculum II Evaluation Board Datasheet Version 2.0
Clearance No.: FTDI#148
5.2.2
GPIO [8:15] Connector CN4
Figure 5.3
Signal name
GPIO[8:15] Connector CN4
Connector
pin
VCN2 Pin No
32-PIN
48-PIN
64-PIN
IO
type
Description
GPIO8
(6)
1
-
-
19
IO
GPIO port, data bit 8
GPIO9
(6)
2
-
-
20
IO
GPIO port, data bit 9
GPIO10
(6)
3
-
-
22
IO
GPIO port, data bit 10
GPIO11
(6)
4
-
-
23
IO
GPIO port, data bit11
GPIO12
(6)
5
-
-
24
IO
GPIO port, data bit 12
GPIO13
(6)
6
-
-
25
IO
GPIO port, data bit 13
GPIO14
(6)
7
-
-
26
IO
GPIO port, data bit 14
GPIO15
(6)
8
-
-
27
IO
GPIO port, data bit 15
GND
9
-
-
-
-
Ground pin
3.3V(7)
10
-
-
-
-
3.3V power rail.
GND
11
-
-
-
-
Ground pin
5V(8)
12
-
-
-
-
5V power rail.
Notes:
(6)
(7)
(8)
All VNC2‟s IO pins can be driven from 3.3V LVTTL TTL logic levels.
The use of these pins for GPIO is set by the IOMUX on the VNC2 device. The pins are shared by other
connectors on the board. Care should be taken to ensure that pins are not driven from other headers
on the board.
This pin is connected to 3.3V regulator output. External device can draw no more than 100mA when
board is powered from an external power supply and no more than 50mA when the board is powered
from USB bus.
This pin is connected to the board‟s 5V power rail. External device can draw no more than 250mA when
board is powered from an external power supply and no more than 50mA when the board is powered
from USB bus.
Table 5.2
GPIO[8:15] connector CN4
Copyright © 2010 Future Technology Devices International Limited
15
�Document Reference No.: FT_000247
V2-EVAL Vinculum II Evaluation Board Datasheet Version 2.0
Clearance No.: FTDI#148
5.2.3
GPIO [16:23] Connector CN5
Figure 5.4
Signal name
GPIO[16:23] Connector CN5
VCN2 Pin No
Connector
pin
32-PIN
48-PIN
64-PIN
IO
type
Description
GPIO16
(9)
1
-
-
27
IO
GPIO port, data bit 16
GPIO17
(9)
2
-
46
28
IO
GPIO port, data bit 17
GPIO18
(9)
3
-
45
29
IO
GPIO port, data bit 18
GPIO19
(9)
4
-
48
31
IO
GPIO port, data bit19
GPIO20
(9)
5
23
31
32
IO
GPIO port, data bit 20
GPIO21
(9)
6
39
IO
GPIO port, data bit 21
GPIO22
(9)
7
25
33
40
IO
GPIO port, data bit 22
GPIO23
(9)
8
26(10)
34 (10)
41
IO
GPIO port, data bit 23
9
-
-
-
-
Ground pin
10
-
-
-
-
3.3V power rail.
11
-
-
-
-
Ground pin
12
-
-
-
-
5V power rail.
GND
3.3V
(11)
GND
5V
(12)
24
(10)
32
(10)
Notes:
(9)
All VNC2‟s IO pins can be driven from 3.3V LVTTL TTL logic levels.
The use of these pins for GPIO is set by the IOMUX on the VNC2 device. The pins are shared by other
connectors on the board. Care should be taken to ensure that pins are not driven from other headers
on the board.
(10) The following pins are only accessible on VNC2 when the onboard multiplexer select input is high. See
section 6.4 for details.
(11) This pin is connected to 3.3V regulator output. External device can draw no more than 100mA when
board is powered from an external power supply and no more than 50mA when the board is powered
from USB bus.
(12) This pin is connected to the board‟s 5V power rail. External device can draw no more than 250mA when
board is powered from an external power supply and no more than 50mA when the board is powered
from USB bus.
Table 5.3
GPIO port connector CN5
Copyright © 2010 Future Technology Devices International Limited
16
�Document Reference No.: FT_000247
V2-EVAL Vinculum II Evaluation Board Datasheet Version 2.0
Clearance No.: FTDI#148
5.2.4
GPIO [24:31] Connector CN6
Figure 5.5
Signal name
GPIO[24:31] Connector CN6
Connecto
r pin
32-PIN
VCN2 Pin No
48-PIN
64-PIN
IO
type
Description
GPIO24
(13)
1
-
35
43
IO
GPIO port, data bit 24
GPIO25
(13)
2
-
36
44
IO
GPIO port, data bit 25
GPIO26
(13)
3
-
37
45
IO
GPIO port, data bit 26
GPIO27
(13)
4
-
38
46
IO
GPIO port, data bit 27
GPIO28
(13)
5
-
41
47
IO
GPIO port, data bit 28
GPIO29
(13)
6
-
42
48
IO
GPIO port, data bit 29
GPIO30
(13)
7
-
43
49
IO
GPIO port, data bit 30
GPIO31
(13)
8
-
44
50
IO
GPIO port, data bit 31
9
-
GND
-
-
-
Ground pin
3.3V(14)
10
-
-
-
3.3V power rail.
GND
11
-
-
-
Ground pin
5V(15)
12
-
-
-
5V power rail.
Notes:
(13) All VNC2‟s IO pins can be driven from 3.3V LVTTL TTL logic levels.
The use of these pins for GPIO is set by the IOMUX on the VNC2 device. The pins are shared by other
connectors on the board. Care should be taken to ensure that pins are not driven from other headers
on the board.
(14) This pin is connected to 3.3V regulator output. External device can draw no more than 100mA when
board is powered from an external power supply and no more than 50mA when the board is powered
from USB bus.
(15) This pin is connected to the board‟s 5V power rail. External device can draw no more than 250mA when
board is powered from power supply and no more than 50mA when the board is powered from USB bus.
Table 5.4
GPIO port connector CN6
Copyright © 2010 Future Technology Devices International Limited
17
�Document Reference No.: FT_000247
V2-EVAL Vinculum II Evaluation Board Datasheet Version 2.0
Clearance No.: FTDI#148
5.2.5
GPIO [32:39] Connector CN7
Figure 5.6
GPIO[32:39] Connector CN7
VCN2 Pin No
Signal name
Connector
pin
IO type
32-PIN
48-PIN
64-PIN
Description
GPIO32
(16)
1
29
15
51
IO
GPIO port, data bit 32
GPIO33
(16)
2
30
16
52
IO
GPIO port, data bit 33
GPIO34
(16)
3
31
18
55
IO
GPIO port, data bit 34
GPIO35
(16)
4
32
19
56
IO
GPIO port, data bit 35
GPIO36
(16)
5
-
-
57
IO
GPIO port, data bit 36
GPIO37
(16)
6
-
-
58
IO
GPIO port, data bit 37
GPIO38
(16)
7
-
-
59
IO
GPIO port, data bit 38
GPIO39
(16)
8
-
-
60
IO
GPIO port, data bit 39
9
-
-
-
-
GND
3.3V
(17)
10
-
-
-
-
GND
11
-
-
-
-
5V(18)
12
-
-
-
-
Ground pin
3.3V power rail.
Ground pin
5V power rail.
Notes:
(16) All VNC2‟s IO pins can be driven from 3.3V LVTTL TTL logic levels.
The use of these pins for GPIO is set by the IOMUX on the VNC2 device. The pins are shared by other
connectors on the board. Care should be taken to ensure that pins are not driven from other headers on
the board.
(17) This pin is connected to 3.3V regulator output. External device can draw no more than 100mA when board
is powered from an external power supply and no more than 50mA when the board is powered from USB
bus.
(18) This pin is connected to the board‟s 5V power rail. External device can draw no more than 250mA when
board is powered from power supply and no more than 50mA when the board is powered from USB power
bus.
Table 5.5
GPIO port connector CN7
Copyright © 2010 Future Technology Devices International Limited
18
�Document Reference No.: FT_000247
V2-EVAL Vinculum II Evaluation Board Datasheet Version 2.0
Clearance No.: FTDI#148
5.2.6
GPIO [40:43] Connector CN8
Figure 5.7
GPIO[32:39] Connector CN8
VCN2 Pin No
Signal
name
Connector
pin
32-PIN
48-PIN
64-PIN
IO
type
Description
GPIO40
(19)
1
-
20
61
IO
GPIO port, data bit 40
GPIO41
(19)
2
-
21
62
IO
GPIO port, data bit 41
GPIO42
(19)
3
-
22
63
IO
GPIO port, data bit 42
GPIO43
(19)
4
-
23
64
IO
GPIO port, data bit 43
5
-
-
-
-
Ground pin
GND
3.3V
(20)
6
-
-
-
-
3.3V power rail.
GND
7
-
-
-
-
Ground pin
5V(21)
8
-
-
-
-
5V power rail.
Notes:
(19) All VNC2‟s IO pins can be driven from 3.3V LVTTL TTL logic levels.
The use of these pins for GPIO is set by the IOMUX on the VNC2 device. The pins are shared by other
connectors on the board. Care should be taken to ensure that pins are not driven from other headers on
the board.
(20) This pin is connected to 3.3V regulator output. External device can draw no more than 100mA when board
is powered from an external power supply and no more than 50mA when the board is powered from USB
bus.
(21) This pin is connected to the board‟s 5V power rail. External device can draw no more than 250mA when
board is powered from an external power supply and no more than 50mA when the board is powered from
USB bus.
Table 5.6
GPIO port connector CN8
Copyright © 2010 Future Technology Devices International Limited
19
�Document Reference No.: FT_000247
V2-EVAL Vinculum II Evaluation Board Datasheet Version 2.0
Clearance No.: FTDI#148
5.3
SPI Connector C9
Table 5.7 details connector pinout for the SPI connector C9. A full description of each signal is available
in the VNC2 data sheet.
Figure 5.8
SPI Connector CN9
VCN2 Pin No
Connector
pin
48-PIN
64-PIN
5V(22)
1
-
-
-
5V power rail.
GND
2
-
-
-
Ground pin
3.3V(23)
3
-
-
-
3.3V power rail.
4
20
61
Input
5
21
62
Output
SPI Master out slave in
6
22
63
Input
SDI Master in slave out
7
23
64
Output
8
-
-
-
Signal name
SCLK
SDO
SDI
(24)
(24)
(24)
CS#
(24)
GND
IO type
Description
SPI CLK Input
Active low slave chip select 0 from master to
slave 0
Ground pin
Notes:
(22) This pin is connected to the board‟s 5V power rail. External device can draw no more than 250mA when
board is powered from an external power supply and no more than 50mA when the board is powered from
USB bus.
(23) This pin is connected to 3.3V regulator output. External device can draw no more than 100mA when board
is powered from an external power supply and no more than 50mA when the board is powered from USB
bus.
(24) All VNC2‟s IO pins can be driven from 3.3V LVTTL TTL logic levels..
The use of these pins for GPIO is set by the IOMUX on the VNC2 device. The pins are shared by other
connectors on the board. Care should be taken to ensure that pins are not driven from other headers on
the board.
Table 5.7
SPI Port Connector CN9
Copyright © 2010 Future Technology Devices International Limited
20
�Document Reference No.: FT_000247
V2-EVAL Vinculum II Evaluation Board Datasheet Version 2.0
Clearance No.: FTDI#148
5.4
UART Interface Connector C10
Table 5.8 details connector pinout for the UART connector C10. A full description of each signal is
available in the VNC2 data sheet.
Figure 5.9
UART Connector CN10
VCN2 Pin No
Signal
name
Connector
pin
32-PIN
48-PIN
64-PIN
TXD
(25)
1
23
31
39
Output
Transmit data
RXD
(25)
40
Input
Receive data
2
24
(26)
32
(26)
IO type
Description
Request to Send Control Output / Handshake
signal.
RTS#
(25)
3
25
33
41
Output
CTS#
(25)
4
26(26)
34(26)
42
Input
DTR#
(25)
5
35
43
Output
Data Terminal Ready Output / Handshake
signal.
DSR#
(25)
6
36
44
Input
Data Set Ready Input / Handshake signal.
DCD#
(25)
7
37
45
Input
Data Carrier Detect Control Input
8
38
46
Input
Ring Indicator Control Input
9
-
47
Output
RI#
(25)
TXDEN#
3.3V
(25)
(27)
Clear to Send Input / Handshake signal.
Transmit Data Enable
10
-
-
-
3.3V power rail.
GND
11
-
-
-
Ground pin
5V(28)
12
-
-
-
5V power rail.
Notes:
(25) All VNC2‟s IO pins can be driven from 3.3V LVTTL TTL logic levels..
The use of these pins for GPIO is set by the IOMUX on the VNC2 device. The pins are shared by other
connectors on the board. Care should be taken to ensure that pins are not driven from other headers on
the board.
(26) The following pins are only accessible on VNC2 when the onboard multiplexer select input is high. See
section 6.4 for details.
(27) This pin is connected to 3.3V regulator output. External device can draw no more than 100mA when board
is powered from power supply and no more than 50mA when the board is powered from USB power bus.
(28) This pin is connected to the board‟s 5V power rail. External device can draw no more than 250mA when
board is powered from power supply and no more than 50mA when the board is powered from USB power
bus.
Table 5.8
UART Interface Connector CN10
Copyright © 2010 Future Technology Devices International Limited
21
�Document Reference No.: FT_000247
V2-EVAL Vinculum II Evaluation Board Datasheet Version 2.0
Clearance No.: FTDI#148
5.5
FIFO Interface Connector CN11
Table 5.9 details connector pinout for the FIFO connector C11. A full description of each signal is
available in the VNC2 data sheet.
Figure 5.10
FIFO Connector CN11
VCN2 Pin No
Signal
name
Connector pin
D0
(29)
D1
(29)
D2
(29)
IO type
Description
32-PIN
48-PIN
64-PIN
1
-
-
15
IO
FIFO data bit 0, bidirectional
2
-
-
16
IO
FIFO data bit 1, bidirectional
3
-
-
17
IO
FIFO data bit 2, bidirectional
D3
(29)
4
-
-
18
IO
FIFO data bit 3, bidirectional
D4
(29)
5
-
-
19
IO
FIFO data bit 4, bidirectional
D5
(29)
6
-
-
20
IO
FIFO data bit 5, bidirectional
D6
(29)
7
-
-
22
IO
FIFO data bit 6, bidirectional
D7
(29)
8
-
-
23
IO
FIFO data bit 7, bidirectional
RXF#
9
-
-
24
Output
FIFO receive full output
TXE#
10
-
-
25
Output
FIFO transmitter buffer empty
output
RD#
11
-
-
26
Input
FIFO read enable input
WR#
12
-
-
27
Input
FIFO write enable input
OE#
13
-
-
28
Input
FIFO output enable –
synchronous FIFO only
3.3V(30)
14
-
-
-
-
3.3V power rail.
GND
15
-
-
-
-
Ground pin
16
-
-
-
-
5V power rail.
5V
(31)
Notes:
(29) All VNC2‟s IO pins can be driven from 3.3V LVTTL TTL logic levels.
The use of these pins for GPIO is set by the IOMUX on the VNC2 device. The pins are shared
by other connectors on the board. Care should be taken to ensure that pins are not driven
from other headers on the board.
(30) This pin is connected to 3.3V regulator output. External device can draw no more than 100mA
when board is powered from an external power supply and no more than 50mA when the
board is powered from USB bus.
(31) This pin is connected to the board‟s 5V power rail. External device can draw no more than
250mA when board is powered from an external power supply and no more than 50mA when
the board is powered from USB bus.
Table 5.9
FIFO Interface Connector CN11
Copyright © 2010 Future Technology Devices International Limited
22
�Document Reference No.: FT_000247
V2-EVAL Vinculum II Evaluation Board Datasheet Version 2.0
Clearance No.: FTDI#148
5.6
Prototyping area
Figure 5.11
Prototyping area P1
A prototype area consisting of an array of 1100, 0.1-inch pitch holes is provided. The area can be used
to create custom circuitry and connect components to the V2-EVAL board. The prototyping area includes
connections to the 5V, 3.3 V planes and ground planes. The silk-screen text on the board indicates which
holes are connected to which signals. Only the first column is connected to VNC2 IO ports, power and
ground planes. All the other holes are not connected to anything on the board.
Signal pins are shared between other IO connectors on the board. For more information refer to the V2Eval Board schematics.
Copyright © 2010 Future Technology Devices International Limited
23
�Document Reference No.: FT_000247
V2-EVAL Vinculum II Evaluation Board Datasheet Version 2.0
Clearance No.: FTDI#148
Connector
pin
number
Silk Screen
Signal Label
1
GND
2
5V
(32)
VCN2 Pin No
IO
type
32-PIN
48-PIN
64-PIN
-
-
-
-
-
-
-
-
Description
Ground pin
5V power rail.
Can be used to power external devices
3.3V power rail.
Can be used to power external devices
IOBUS port Data Bit 0. Debug port – default
configuration.
3
3.3V(33)
-
-
-
-
4
IOBUS0(34)
11
11
11
IO
5
IOBUS1
(34)
12
12
12
IO
IOBUS port Data Bit 1.
IOBUS2
(34)
14
13
13
IO
IOBUS port Data Bit 2.
7
IOBUS3
(34)
15
14
14
IO
IOBUS port Data Bit 3.
8
IOBUS4(34)
-
-
15
IO
IOBUS port Data Bit 4.
9
IOBUS5
(34)
-
-
16
IO
IOBUS port Data Bit 5.
IOBUS6
(34)
-
-
17
IO
IOBUS port Data Bit 6.
IOBUS7
(34)
-
-
18
IO
IOBUS port Data Bit 7.
IOBUS8
(34)
-
-
19
IO
IOBUS port Data Bit 8.
IOBUS9
(34)
6
10
11
12
13
-
-
20
IO
IOBUS port Data Bit 9.
IOBUS10
(34)
-
-
22
IO
IOBUS port Data Bit 10.
15
IOBUS11
(34)
-
-
23
IO
IOBUS port Data Bit 11.
16
IOBUS12(34)
-
-
24
IO
IOBUS port Data Bit 12.
17
IOBUS13(34)
-
-
25
IO
IOBUS port Data Bit 13.
18
(34)
-
-
26
IO
IOBUS port Data Bit 14.
14
IOBUS14
19
GND
-
-
-
-
20
IOBUS15(34)
-
-
27
IO
IOBUS port Data Bit 15.
21
IOBUS16
(34)
-
-
27
IO
IOBUS port Data Bit 16.
IOBUS17
(34)
-
46
28
IO
IOBUS port Data Bit 17.
IOBUS18
(34)
-
45
29
IO
IOBUS port Data Bit 18.
IOBUS19
(34)
-
48
31
IO
IOBUS port Data Bit 19.
25
IOBUS20
(34)
23
31
32
IO
IOBUS port Data Bit 20.
26
IOBUS21(34)
24(35)
32(35)
39
IO
IOBUS port Data Bit 21.
27
IOBUS22
(34)
25
33
40
IO
IOBUS port Data Bit 22.
28
IOBUS23
(34)
41
IO
IOBUS port Data Bit 23.
29
IOBUS24(34)
-
35
43
IO
IOBUS port Data Bit 24.
30
IOBUS25
(34)
-
36
44
IO
IOBUS port Data Bit 25.
IOBUS26
(34)
-
37
45
IO
IOBUS port Data Bit 26.
IOBUS27
(34)
-
38
46
IO
IOBUS port Data Bit 27.
33
IOBUS28
(34)
-
41
47
IO
IOBUS port Data Bit 28.
34
IOBUS29(34)
-
42
48
IO
IOBUS port Data Bit 29.
35
GND
22
23
24
31
32
36
37
38
39
40
41
26
(35)
34
(35)
Ground pin
-
-
-
IOBUS30
(34)
-
43
49
IO
IOBUS port Data Bit 30.
IOBUS31
(34)
-
44
50
IO
IOBUS port Data Bit 31.
IOBUS32
(34)
29
15
51
IO
IOBUS port Data Bit 32.
IOBUS33
(34)
30
16
52
IO
IOBUS port Data Bit 33.
IOBUS34
(34)
31
18
55
IO
IOBUS port Data Bit 34.
IOBUS35
(34)
32
19
56
IO
IOBUS port Data Bit 35.
Copyright © 2010 Future Technology Devices International Limited
24
�Document Reference No.: FT_000247
V2-EVAL Vinculum II Evaluation Board Datasheet Version 2.0
Clearance No.: FTDI#148
42
IOBUS36(34)
-
-
43
IOBUS37
(34)
-
-
44
IOBUS38(34)
-
-
45
IOBUS39(34)
-
-
46
IOBUS40
(34)
-
IOBUS41
(34)
47
57
IO
IOBUS port Data Bit 36.
58
IO
IOBUS port Data Bit 37.
59
IO
IOBUS port Data Bit 38.
60
IO
IOBUS port Data Bit 39.
20
61
IO
IOBUS port Data Bit 40.
-
21
62
IO
IOBUS port Data Bit 41.
48
GND
-
-
-
-
Ground pin
49
PROG#
9
10
10
I
VNC2 PROG# pin
50
RESET#
51
52
53
10
9
9
I
VNC2 RESET# pin
IOBUS42
(35)
-
22
63
-
IOBUS port Data Bit 42.
IOBUS43
(35)
-
23
64
-
-
-
-
-
IOBUS port Data Bit 43.
3.3V power rail.
Can be used to power external devices
5V power rail.
Can be used to power external devices
3.3V
(33)
54
5V(32)
-
-
-
-
55
GND
-
-
-
-
Ground pin
Notes:
(32) This pin is connected to the board‟s 5V power rail. External device can draw no more than 250mA when board
is powered from power supply and no more than 50mA when the board is powered from USB power bus.
(33) This pin is connected to 3.3V regulator output.
(34) The IOBUS signal labels on the PCB silk screen do directly relate to the IOBUS signal names for the VNC2
device on the daughterboard. See VNC2 pin number for signal mapping on the device.
(35) The following pins are only accessible when the onboard multiplexer select input is high. See section 6.4 for
details.
Table 5.10
Prototyping Area Pinout
Copyright © 2010 Future Technology Devices International Limited
25
�Document Reference No.: FT_000247
V2-EVAL Vinculum II Evaluation Board Datasheet Version 2.0
Clearance No.: FTDI#148
5.7
USB1 interface CN1
Figure 5.12
USB1 Interface CN1
VNC2 USB1 transceiver pins are brought on this connector. Depending on the firmware version this port
can be configured as host or slave port.
VCN2 pin number
Connector
pin
number
VCN2 pin
name
(36)
1
-
USB1-DM
2
USB1 DM
17
25
33
IO
USB1 transceiver, data line Minus
USB1-DP
3
USB1 DP
18
26
34
IO
USB1 transceiver, data line Plus
GND
4
-
-
-
Ground pin
5, 6
-
-
-
Connector shield. Connected to
ground.
Signal
name
5V
Shield
32PIN
48PIN
64PIN
-
IO
type
-
Description
5V power rail. Can be used to power
external devices
Notes:
(36) This pin is connected to the board‟s 5V power rail. External device can draw no more than 250mA when
board is powered from power supply and no more than 50mA when the board is powered from USB power
bus.
Table 5.11
USB1 Host/Slave Connector CN1
Copyright © 2010 Future Technology Devices International Limited
26
�Document Reference No.: FT_000247
V2-EVAL Vinculum II Evaluation Board Datasheet Version 2.0
Clearance No.: FTDI#148
5.8
USB2 interface CN2.
Figure 5.13
USB2 Interface CN2
VNC2 USB2 transceiver pins are brought on this connector. Depending on the version of the firmware
running on the device, the port can be configured as host or slave port.
VCN2 pin number
Connector
pin
number
VCN2 pin
name
(37)
1
-
USB2-DM
2
USB2 DM
20
28
36
IO
USB2 transceiver, data line Minus
USB2-DP
3
USB2 DP
21
29
37
IO
USB2 transceiver, data line Plus
GND
4
-
-
-
Ground pin
5, 6
-
-
-
Connector shield. Connected to ground.
Signal
name
5V
Shield
32PIN
48PIN
64PIN
-
IO
type
-
Description
5V power rail.
Can be used to power external devices
Notes:
(37) This pin is connected to the board‟s 5V power rail. External device can draw no more than 250mA when
board is powered from power supply and no more than 50mA when the board is powered from USB power
bus.
Table 5.12
USB2 Host / Slave connector CN2
Copyright © 2010 Future Technology Devices International Limited
27
�Document Reference No.: FT_000247
V2-EVAL Vinculum II Evaluation Board Datasheet Version 2.0
Clearance No.: FTDI#148
5.9
VNC1L Interface Mode Select / GPIO Jumpers JP1, JP2
Figure 5.14
GPIO Jumper pins, JP1, JP2
JP1 and JP2 jumpers are designed to provide backwards compatibility for VNC1L firmwares migrated to
the VNC2. The jumpers are used select between the UART, FIFO and SPI slave interface for use as the
monitor port on the VNC1L. The jumper configurations for each interface are listed in Table 5.14. More
details on the monitor port are available in the VNC1L Firmware User Manual (FT_000006).
When not running VNC1L firmwares, jumpers JP1 and JP2 can be used by designers as general purpose
GPIO jumper select inputs to the VNC2.
Jumper
VNC2 Pin Number / Signal Name
64-PIN
48-PIN
46 / IOBUS25(38)
JP1
29 / IOBUS17
VNC2 Signal Name
Comments
INT_SEL0. Signal also connected to LED5
INT_SEL1.
JP2
47 / IOBUS26
Notes:
(38) To run VNC1L firmwares, jumper JP9 must also be removed.
(39) The use of these pins for GPIO is set by the IOMUX on the VNC2 device. The pins are shared by
other connectors on the board. Care should be taken to ensure that pins are not driven from
other headers on the board.
Table 5.13
GPIO jumpers JP1, JP2
JP1 (INT_SEL0)
JP2 (INT_SEL1)
Mode
Pull-up
Pull-up
Serial UART
Pull-down
Pull-up
SPI
Pull-up
Pull-down
FIFO
Pull-down
Pull-down
Serial UART
Table 5.14
Monitor Interface Select – VNC1L Firmware Backwards Compatiblity
Copyright © 2010 Future Technology Devices International Limited
28
�Document Reference No.: FT_000247
V2-EVAL Vinculum II Evaluation Board Datasheet Version 2.0
Clearance No.: FTDI#148
5.10
User LEDs. LED3 – LED6.
Figure 5.15
User LEDs
Four LEDs is provided on board. The LEDs enabled or disabled via jumpers JP7 – JP10. The LEDs are
controlled by the IOBUS signals on the VNC2.
Note - LED5 is also connected to jumper JP1 on the board. Care should be taken to ensure that LED is
not being driven by JP1 when controlling the LED from the VNC2.
VCN2 pin number
Designator
32-PIN
48-PIN
64-PIN
12
12
12
14
13
13
-
46
29
-
45
31
LED3
LED4
LED5
(40)
LED6
Notes:
(40) LED5 is also connected to jumper JP1 on the board. Care should be taken to ensure
that LED is not being driven by JP1 when controlling the LED from the VNC2. Further,
when running VNC1L migrated firmwares, LED5 is not available on 48-pin package as
the I/O signal is used for interface selection purposes by the firmware.
Table 5.15
User LED connections
Copyright © 2010 Future Technology Devices International Limited
29
�Document Reference No.: FT_000247
V2-EVAL Vinculum II Evaluation Board Datasheet Version 2.0
Clearance No.: FTDI#148
5.11
LED enable/disable jumpers JP10 – JP14.
Figure 5.16
LED Enable/Disable jumpers
Every user-defined LED have an enable/disable jumper. When jumper is closed LED will be illuminate
when driven low by one of the VNC2 pins. When jumper is opened LED is disconnected from the VCN2
pin.
Designator
LED affected
JP7
LED3
JP8
JP9
LED4
(41)
LED5
JP10
LED6
Notes:
(41) When running VNC1L migrated firmwares on 48-pin package, the jumper JP9 must be
removed, thus disabling this LED.
Table 5.16
5.12
LED Enable/Disable Jumpers.
User push button switches
Figure 5.17
User Push Button Switches
Push button switches connected straight to VNC2
a logic LOW appears on the corresponding VNC2 pin.
Designator
SW3
pins. When the
switch is pressed
down,
VNC2 Pin Number
32-PIN
48-PIN
64-PIN
(42)
15
14
14
SW4(42)
-
48
32
SW5
(42)
-
42
48
SW6
(42)
-
43
49
Notes:
(42) The IOBUS pins are shared by other connectors on the board. Care should be taken to
ensure that operation of the switches does not interfere with pins used by other headers
on the board.
Table 5.17
User Switches
Copyright © 2010 Future Technology Devices International Limited
30
�Document Reference No.: FT_000247
V2-EVAL Vinculum II Evaluation Board Datasheet Version 2.0
Clearance No.: FTDI#148
5.13
Host USB power jumpers JP4, JP5.
Figure 5.18
USB Power Enable Jumpers JP4 and JP5
When either USB1 and/or USB2 ports are used as a host ports, the jumpers JP4 and/or JP5 accordingly
should be closed to allow peripheral devices to draw power from board‟s +5V power rail.
Warning!
When using USB1 and USB2 ports as a USB slave ports, remove the shunts from jumpers JP4
and JP5. Failure to do so could cause damage to the USB host or to the V2-EVAL board.
Copyright © 2010 Future Technology Devices International Limited
31
�Document Reference No.: FT_000247
V2-EVAL Vinculum II Evaluation Board Datasheet Version 2.0
Clearance No.: FTDI#148
5.14
Remote Wakeup jumper JP3.
Figure 5.19
Remote Wakeup Jumper
The remote wakeup jumper enables any firmware running on the VNC2 to support Suspend Monitor
(SUM) mode, allowing the device to reduce power consumption when idle. The VNC2 device can be
configured to wakeup when any data arrives on the receive data (RXD) pin, by connecting the RXD pin
to ring indicator (RI#) input via jumper JP3. When RI# pin is driven low, VNC2 will resume from the
SUM mode immediately. The remote wakeup feature is only available when using the UART interface
on the VNC2. The feature can be enabled when a jumper is present on jumper JP3.
Copyright © 2010 Future Technology Devices International Limited
32
�Document Reference No.: FT_000247
V2-EVAL Vinculum II Evaluation Board Datasheet Version 2.0
Clearance No.: FTDI#148
5.15
Reset Push-button Switch
Figure 5.20
Reset Switch
A „RESET‟ push button switch is provided on switch SW2, to enable manual resetting of the VNC2 device.
5.16
‘PROG’ LED
Figure 5.21
‘PROG’ LED
LED1 (red) is provided to indicate when VNC2 device is in Flash programming mode.
Copyright © 2010 Future Technology Devices International Limited
33
�Document Reference No.: FT_000247
V2-EVAL Vinculum II Evaluation Board Datasheet Version 2.0
Clearance No.: FTDI#148
5.17
VNC2 Daughterboard Connector – J1
1
16
Figure 5.22
VNC2 Daughterboard Connector J1
Schematic
Connector
Signal Name(43)
Pin
VCN2 Pin No
32-PIN
48-PIN
64-PIN
IO
type
Description
3.3V
1
-
-
-
-
3.3V power rail.
3.3V
2
-
-
-
-
3.3V power rail.
GND
3
-
-
-
-
Ground pin.
USB1DP
4
17
25
33
IO
USB1DM
5
18
26
34
IO
SPI_S0_CLK
6
29
15
51
IO
Connected to P1 pin 38 / CN7 pin 1.
SPI_S0_MOSI
7
30
16
52
IO
Connected to P1 pin 39 / CN7 pin 2.
SPI_S0_MISO
8
31
18
55
IO
Connected to P1 pin 40 / CN7 pin 3.
SPI_S0_CS#
9
32
19
56
IO
Connected to P1 pin 40 / CN7 pin 4.
USB2DP
10
20
28
36
IO
USB2DM
11
21
29
37
IO
V_TXD
12
23
31
39
IO
V_RXD
13
24
32
40
IO
V_RTS#
14
25
33
41
IO
V_CTS#
15
26
34
42
IO
V_DTR#
16
-
35
43
IO
USB1 transceiver, data line positive connected
to CN1.
USB1 transceiver, data line minus connected to
CN1.
USB2 transceiver, data line positive connected
to CN2.
USB2 transceiver, data line minus connected to
CN2.
Connected to
P1 pin 25 / CN10 pin 1 / CN5 pin 5.
Connected to
P1 pin 26 / CN10 pin 2 / CN5 pin 6.
Connected to
P1 pin 27 / CN10 pin 3 / CN5 pin 7.
Connected to
P1 pin 28 / CN10 pin 4 / CN5 pin 8.
Connected to
P1 pin 29 / CN10 pin 5 / CN6 pin 1.
Notes:
(43) The signal names relate to the labels used on pages 1 & 2 of the V2-EVAL base board schematic. Unless
otherwise stated, the function of the IO signals is be set by the user application running on the VNC2.
Table 5.18
Connector J1 Pinout
Copyright © 2010 Future Technology Devices International Limited
34
�Document Reference No.: FT_000247
V2-EVAL Vinculum II Evaluation Board Datasheet Version 2.0
Clearance No.: FTDI#148
5.18
VNC2 Daughterboard Connector – J2
2
1
Figure 5.23
VNC2 Daughterboard Connector J2
Schematic
Connector
Signal Name(44)
Pin
VCN2 Pin No
32-PIN
48-PIN
64-PIN
IO
type
Description
Connected to
P1 pin 30 / CN10
Connected to
P1 pin 31 / CN10
Connected to
P1 pin 32 / CN10
Connected to
P1 pin 33 / CN10
V_DSR#
1
-
36
44
IO
V_DCD#
2
-
37
45
IO
V_RI#
3
-
38
46
IO
V_TXDEN
4
-
41
47
IO
3.3V
5
-
-
-
-
3.3V power rail.
3.3V
6
-
-
-
-
3.3V power rail.
GPIO7
7
-
42
48
IO
Connected to P1 pin 34 / CN6 pin 6.
GPIO8
8
-
43
49
IO
Connected to P1 pin 36 / CN6 pin 7.
GPIO9
9
-
44
50
IO
Connected to P1 pin 37 / CN6 pin 8.
SPI_S1_CLK
10
-
-
57
IO
Connected to P1 pin 42 / CN7 pin 5.
SPI_S1_MOSI
11
-
-
58
IO
Connected to P1 pin 43 / CN7 pin 6.
SPI_S1_MISO
12
-
-
59
IO
Connected to P1 pin 44 / CN7 pin 7.
GND
13
-
-
-
-
SPI_S1_CS#
14
-
-
60
IO
Connected to P1 pin 45 / CN7 pin 8.
DEBUG_IF
15
11
11
11
IO
Debug pin. Connected to P1 pin 4 / CN3 pin 1.
GND
16
-
-
-
-
pin 6 / CN6 pin 2.
pin 7 / CN6 pin 3.
pin 8 / CN6 pin 4.
pin 9 / CN6 pin 5.
Ground pin.
Ground pin.
Notes:
(44) The signal names relate to the labels used on pages 1 & 2 of the V2-EVAL base board schematic. Unless
otherwise stated, the function of the IO signals is set by the user application running on the VNC2.
Table 5.19
Connector J2 Pinout
Copyright © 2010 Future Technology Devices International Limited
35
�Document Reference No.: FT_000247
V2-EVAL Vinculum II Evaluation Board Datasheet Version 2.0
Clearance No.: FTDI#148
5.19
VNC2 Daughterboard Connector – J3
16
1
Figure 5.24
VNC2 Daughterboard Connector J3
Schematic
Connector
Signal Name(45)
Pin
VCN2 Pin No
32-PIN
48-PIN
64-PIN
IO
type
Description
PROG# input to VNC2. Connected via
multiplexer U4.
RESET# input to VNC2. Connected via
multiplexer U4.
PROG#
1
9
10
10
Input
RESET#
2
10
9
9
Input
SPI_M_CS#
3
-
23
64
IO
Connected to P1 pin 52 / CN9 pin 7/ CN8 pin 4.
SPI_M_MISO
4
-
22
63
IO
Connected to P1 pin 51 / CN9 pin 6/ CN8 pin 3.
SPI_M_MOSI
5
-
21
62
IO
Connected to P1 pin 47 / CN9 pin 5/ CN8 pin 2.
SPI_M_CLK
6
-
20
61
IO
Connected to P1 pin 46 / CN9 pin 4/ CN8 pin 1.
XTOUT
7
5
5
5
XTIN
8
4
4
4
Input
GPIO2
9
14
13
13
IO
Connected to P1 pin 6 / CN3 pin 3.
GPIO1
10
12
12
12
IO
Connected to P1 pin 5 / CN3 pin 2.
FIFO_DATA0
11
-
-
15
IO
Connected to P1 pin 8/CN3 pin 5 /CN11 pin 1.
GPIO3
12
15
14
14
IO
Connected to P1 pin 7 / CN3 pin 4.
FIFO_DATA2
13
-
-
17
IO
Connected to P1 pin 10/CN3 pin 7 /CN11 pin 3.
FIFO_DATA1
14
-
-
16
IO
Connected to P1 pin 9/CN3 pin 6 /CN11 pin 2.
GND
15
-
-
-
-
Ground pin.
GND
16
-
-
-
-
Ground pin.
Output Output from 12MHz oscillator cell on VNC2.
Input to 12MHz oscillator cell on VNC2.
Notes:
(45) The signal names relate to the labels used on pages 1 & 2 of the V2-EVAL base board schematic. Unless
otherwise stated, the function of the IO signals is set by the user application running on the VNC2.
Table 5.20
Connector J3 Pinout
Copyright © 2010 Future Technology Devices International Limited
36
�Document Reference No.: FT_000247
V2-EVAL Vinculum II Evaluation Board Datasheet Version 2.0
Clearance No.: FTDI#148
5.20
VNC2 Daughterboard Connector – J4
16
1
Figure 5.25
VNC2 Daughterboard Connector J4
Schematic
Connector
Signal Name(46)
Pin
VCN2 Pin No
32-PIN
48-PIN
64-PIN
IO
type
Description
Connected to
P1 pin 12 / CN4 pin 1/ CN11 pin 5.
Connected to
P1 pin 11 / CN3 pin 8/ CN11 pin 4.
Connected to
P1 pin 14 / CN4 pin 3/ CN11 pin 7.
Connected to
P1 pin 13 / CN4 pin 2/ CN11 pin 6.
Connected to
P1 pin 16 / CN4 pin 5/ CN11 pin 9.
Connected to
P1 pin 15 / CN4 pin 4/ CN11 pin 8.
Connected to
P1 pin 18 / CN4 pin 7/ CN11 pin 11.
Connected to
P1 pin 17 / CN4 pin 6/ CN11 pin 10.
Connected to
P1 pin 21 / CN5 pin 1 / CN11 pin 13.
Connected to
P1 pin 20 /CN4 pin 8 / CN11 pin 12.
FIFO_DATA4
1
-
-
19
IO
FIFO_DATA3
2
-
-
18
IO
FIFO_DATA6
3
-
-
22
IO
FIFO_DATA5
4
-
-
20
IO
FIFO_RXF#
5
-
-
24
IO
FIFO_DATA7
6
-
-
23
IO
FIFO_RD#
7
-
-
26
IO
FIFO_TXE#
8
-
-
25
IO
FIFO_OE#
9
-
-
28
IO
FIFO_WR#
10
-
-
27
IO
GPIO5
11
-
45
31
IO
Connected to P1 pin 23 / CN5 pin 3.
INT_SEL0
12
-
46
29
IO
Connected to P1 pin 22 / CN5 pin 2.
INT_SEL1
13
-
47
-
IO
Connected to jumper JP2.
GPIO6
14
-
48
32
IO
Connected to P1 pin 24 / CN5 pin 4.
GND
15
-
-
-
-
-
GND
16
-
-
-
-
-
Notes:
(46) The signal names relate to the labels used on pages 1 & 2 of the V2-EVAL base board schematic. Unless
otherwise stated, the function of the IO signals is set by the user application running on the VNC2.
Table 5.21
Connector J4 Pinout
Copyright © 2010 Future Technology Devices International Limited
37
�Document Reference No.: FT_000247
V2-EVAL Vinculum II Evaluation Board Datasheet Version 2.0
Clearance No.: FTDI#148
6
FT4232H Configuration
The V2-EVAL board features a FT4232H, a high speed USB to quad channel UART / serial converter
device. The device is primarily featured to provide a connection from the board to a PC host via the
onboard USB type B connector. Each of the four channels on the FT4232H device are used to provide a
separate functions on the V2-EVAL board.
The functions of the FT4232H include:
Channel A – UART interface. The FT4232H provides USB to UART conversion to allow a PC / USB
host PC to communicate with the VNC2, via the UART interface.
Channel B – Debug interface control. Enable software tool chain connectivity to the VNC2 debug
interface via the the USB type B connector on the board.
Channel C - Provide a UART data „sniffer‟ interface allowing inputs to the VNC2 UART interface to
be displayed on the host PC software.
Channel D – Device control. I/O pins are used to control the onboard multiplexer. The
multiplexer allows different interfaces to drive the VNC2 UART interface as well as the VNC2
PROG# and RESET# pins.
Figure 6.1, outlines the configuration circuit for FT4232H I/O ports.
Copyright © 2010 Future Technology Devices International Limited
38
�Document Reference No.: FT_000247
V2-EVAL Vinculum II Evaluation Board Datasheet Version 2.0
Clearance No.: FTDI#148
IOPROG#
From board I/O
header pins
IORESET
IOBUS23
IOBUS21
FT4232H I/O
ADBUS0
ADBUS1
ADBUS2
UART
ADBUS3
FT_TXD
FT_RTS
ADBUS4
ADBUS5
FT_DTR
ADBUS6
FT_DCD
ADBUS7
FT_RI#
BDBUS1
1A VNC2_UART_RX
U4
4 PORT
VNC2_CTS#
MUX 2A
2B1
2B2
FT_CTS
FT_DSR
BDBUS0
1B1
1B2
FT_RXD
3B1
3B2
4B1
4B2
3A
4A
To VNC2
Device
VNC2_RESET#
VNC2_PROG#
SELECT
SN74CBT3257D
DB_TXD
DB_RXD
BDBUS2
DEBUG
BDBUS3
BDBUS4
BDBUS5
BDBUS6
BDBUS7
CDBUS0
CDBUS1
UART
‘SNIFFER’
INTERFACE
DB_TX_ENABLE
VNC2_UART_RXD
CDBUS2
CDBUS3
CDBUS4
CDBUS5
CDBUS6
CDBUS7
MUX SELECT
DDBUS0
DDBUS1
MUX
CONTROL
DDBUS2
FT VNC RESET
FT VNC PROG
DDBUS3
SN74LVC2G125
INPUT EN
DDBUS5
IN
INPUT
DDBUS6
VNC2_DEBUG
U5 -2 PORT
BUFFER
DDBUS7
OUTPUT
OUT
OUTPUT EN
U6 -INVERTER
Figure 6.1: FT4232H Configuration
6.1
UART Interface
The FT4232H channel A, ADBUS I/O, pins are used for UART operation with the VNC2. The UART inputs
to the FT4232H are supplied directly from the VNC2 device pins, while the UART outputs from the
FT4232H, are passed to an external multiplexer. The multiplexer allows the UART interface to the VNC2
to be driven by either by the FT4232H device or by an external UART device, which is connected to the
V2-EVAL board via the various board I/O header pins. The multiplexer select pin is controlled by pin
DDBUS0 on the FT4232H, where a logic „0‟ on the select pin will force the FT4232H device to drive the
UART interface on the VNC2, while a logic „1‟ will allow IOBUS21 and IOBUS23 header pins on the board
to drive the UART.
Copyright © 2010 Future Technology Devices International Limited
39
�Document Reference No.: FT_000247
V2-EVAL Vinculum II Evaluation Board Datasheet Version 2.0
Clearance No.: FTDI#148
6.2
Debug Interface – UART Mode
The FT4232H channel B I/O pins are used to control the debug interface on the VNC2 device. The
channel is used to allow the device debug pin to be connected to a software debugger environment
running on a PC. The single bit, bi-directional debug signal from VNC2 is converted into a UART style
interface, with separate transmit and receive signals via a 2-port buffer. The signal on the BDBUS0 pin
corresponds to the transmit data from the debug software, while BDBUS1 corresponds to the receive
output from the VNC2. Pin BDBUS7, DB_TX_ENABLE, on the FT4232H is used for controlling transmit
and receive operation on the 2 port buffer. When signal DB_TX_ENABLE is „1‟ then the signal
VNC2_DEBUG will drive the DB_RXD input to the FT4232H. Alternatively when DB_TX_ENABLE is „0‟ then
the FT4232H UART output DB_TXD will drive the VNC2_DEBUG signal.
6.3
UART ‘Spy’ Interface
Channel C on the FT4232H device is configured as a UART interface. The channel is used as a „data spy‟
to detect any data sent to the VNC2 UART interface. The detected data is passed to software running on
the PC for display. The feature is used for detecting and displaying UART data from external sources
which are connected to the VNC2 UART interface, via the board I/O headers.
6.4
Device Control – Bit Bang Mode
The I/O signals on FT4232H channel D are used for additional control functions on the board. Pin
DDBUS0 is used to control the channel select input on the multiplexer. A logic „0‟ on the multiplexer
select pin will force multiplexer input B1 to drive the multiplexer output A, while a logic „1‟ will force
multiplexer input B2 to drive the multiplexer output.
Pins DDBUS1 and DDBUS2 are used for controlling the PROG# and RESET# inputs on the VNC2 from the
software via the FT4232H. Both pins are passed to the onboard multiplexer. A logic „0‟ on the
multiplexer select input will allow the VNC2 PROG# and RESET# pins to be controlled by the FT4232H.
Table 6.1, summarises the V2-EVAL board settings based on the value of the multiplexer select pin.
Multiplexer Select Pin Status
(Set by FT4232H DDBUS0)
Board Configuration Status
0
VNC2 UART interface connected to FT4232H channel A.
VNC2 RESET# connected to FT4232H DDBUS1 output.
VNC2 PROG# connected to FT4232H DDBUS2 output.
1
VNC2 UART interface connected to header pins on V2-EVAL board.
VNC2 RESET# connected to prototyping area header pin 50.
VNC2 PROG# connected to prototyping area header pin 49.
Table 6.1:
Multiplexer Configuration Settings
Copyright © 2010 Future Technology Devices International Limited
40
�Document Reference No.: FT_000247
V2-EVAL Vinculum II Evaluation Board Datasheet Version 2.0
Clearance No.: FTDI#148
7 Connecting to a PC Host
Connect a USB A/B cable to USB slave connector CN13 on the V2-EVAL board. Connect the other end to
PC computer and power-up the board. The PC should detect that new hardware has been plugged into
the PC and will launch the Hardware Wizard for installing the drivers. The driver installation procedure is
outlined in the following section.
7.1
Driver Installation
The FTDI USB drivers are required for the USB slave interface to FT4232H on the V2-EVAL board. The
latest drivers can be downloaded from the FTDI website http://www.ftdichip.com/Drivers/VCP.htm.
Installation instructions detailing all the steps required to install drivers on different operating systems
are available from http://www.ftdichip.com/Documents/InstallGuides.htm. A summary of the installation
steps for a Windows XP system are shown below.
Upon connection, the New Hardware Wizard should produce the following screen
shown in
1. Figure 7.1.
As FTDI supply WHQL certified drivers a user may select the option „Yes, this time only‟, which
will cause the Hardware Wizard to download compatible FTDI drivers from the internet. However
to avoid internet connectivity issues, users may carry out a manual installation using the
following steps.
Figure 7.1: Found New Hardware Wizard Screen
2.
With the manual installation, select the option to "Install from a list or specific location
(Advanced)" as shown in Figure 7.2 below and then click "Next".
Copyright © 2010 Future Technology Devices International Limited
41
�Document Reference No.: FT_000247
V2-EVAL Vinculum II Evaluation Board Datasheet Version 2.0
Clearance No.: FTDI#148
Figure 7.2: Select installation option
3. Select "Search for the best driver in these locations" and enter the file path in the combo-box
("C:\ CDM 2.06.00 WHQL Certified\CDM 2.06.00 WHQL Certified" in Figure 7.3 below) or browse
to it by clicking the browse button. Once the file path has been entered in the box, click next to
proceed.
Figure 7.3: Select location of the driver
If installing a non-WHQL certified driver, then users may receive a warning, similar to Figure 7.4,
stating that the driver has not passed Windows Logo testing. If the warning is received, click on
„Continue Anyway‟ to continue with the installation.
Copyright © 2010 Future Technology Devices International Limited
42
�Document Reference No.: FT_000247
V2-EVAL Vinculum II Evaluation Board Datasheet Version 2.0
Clearance No.: FTDI#148
Figure 7.4: Non-WHQL Driver Warning
4. In the next screen the Hardware Wizard will copy the the required driver files.
Figure 7.5: Driver installation
5. In the next stage, the process will repeat another three times until all four ports on the FT4232H
have been identified by the operating system. Windows should present a message to inform
whether or not the drivers for each port have been successfully installed.
6. To verify that the drivers have been installed successfully, open the Device Manager located in
"Control Panel\System" then select the "Hardware" tab and click "Device Manger") and select
"View > Devices by Connection". Each FT4232H port should appear as a "USB Serial Converter”
under the “USB Serial Bus Controllers”. Further under the “Ports” section four “USB Serial Ports”
should be listed, as per Figure 7.6.
Copyright © 2010 Future Technology Devices International Limited
43
�Document Reference No.: FT_000247
V2-EVAL Vinculum II Evaluation Board Datasheet Version 2.0
Clearance No.: FTDI#148
Each port of FT4232H
is recognised as a USB
Serial COM Port with a
relevant port number.
USB Serial Converter
ports of FT4232H
Figure 7.6: Device Manager Screen
Copyright © 2010 Future Technology Devices International Limited
44
�Document Reference No.: FT_000247
V2-EVAL Vinculum II Evaluation Board Datasheet Version 2.0
Clearance No.: FTDI#148
8
V2-EVAL Software
The following section details instructions on how to install and use the V2-EVAL software terminal utility
for the V2-EVAL board.
8.1
V2-EVAL Terminal Installation
A simple terminal application has been designed for use with the VNC2 V2-EVAL board. The application
can be downloaded as part of the Vinculum II utilities available from:
http://www.ftdichip.com/Firmware/VNC2tools.htm
Note:
The V2-EVAL terminal software is only supported under WindowXP, Vista and Windows 7
Operating Systems.
To install the terminal application, simply double click on the installer and follow the installation
instructions shown.
Figure 8.1: Installer Introduction Screen
Once installation is complete, the V2-EVAL application can be found and launched from „Start -> „All
Programs -> FTDI -> Vinculum II Utilities‟ location.
Copyright © 2010 Future Technology Devices International Limited
45
�Document Reference No.: FT_000247
V2-EVAL Vinculum II Evaluation Board Datasheet Version 2.0
Clearance No.: FTDI#148
8.2
Using V2-EVAL Terminal
The V2-EVAL terminal utility is a standard terminal application designed specifically to support the V2EVAL board. The application provides communication to the UART interface on the VNC2 device and also
provides commands to control some basic configuration functions on the V2-EVAL board. All
communication and control commands are directed to the V2-EVAL board via the onboard FT4232H USB
to quad channel serial converter.
Connection
settings - pull
down menu
Standard UART terminal control
functions
V2-EVAL specific board
functions
Connect
button
Tabs to select
between hex
or text format
console
display
UART console input and output area
Figure 8.2: V2-EVAL Terminal Utility Features
The V2-EVAL utility supports standard terminal commands and control functions. Pull down menus list
different UART speeds, and data settings. On the top right hand section of the software a set of check
buttons are available for controlling the V2-EVAL board. A summary of the function of each button on the
V2-EVAL terminal utility is outlined below:
„Connect’ button – Connects and disconnects the terminal utility from the UART hardware.
„Assert RTS’ checkbox – Assert the Request To Send line on the UART interface.
‘Asset DTR’ checkbox – Assert Data Terminal Ready line on the UART interface.
‘UART’ mode button – Enables full UART TX and RX operation through the V2-EVAL terminal
utility. Under the UART mode the select line of the V2-EVAL board multiplexer U4 is set to „0‟
forcing the FT4232H channel A to connect to UART interface on VNC2, as per the conditions
outlined in Table 6.1.
„Spy’ mode button – The „Spy‟ button sets the select line of the V2-EVAL board multiplexer U4 to
„1‟, allowing the VNC2 UART interface to be controlled by an external device connected to the V2EVAL board instead of the FT4232H, as per the conditions outlined in Table 6.1. Under this setting
a user can connect to V2-EVAL board in „Spy‟ mode via FT4232H channel C and observe VNC2
UART RX data in the terminal utility. „Spy‟ mode is a read-only UART mode. Any user data input
to the console under this mode is ignored.
‘Assert RESET’ checkbox – When checked the software will enable the RESET# input signal on
the VNC2 device. The checkbox is only available under UART mode.
‘Assert PROG’ checkbox - When checked, the software will enable the PROG# input signal on
the VNC2 device. The checkbox is only available under UART mode.
Copyright © 2010 Future Technology Devices International Limited
46
�Document Reference No.: FT_000247
V2-EVAL Vinculum II Evaluation Board Datasheet Version 2.0
Clearance No.: FTDI#148
8.2.1.1 Using the V2-EVAL Terminal ‘Spy’ Mode
The V2-EVAL hardware and terminal utility supports a „Spy‟ mode enabling the V2-EVAL terminal utility to
display data from the VNC2 UART RXD pin, when the VNC2 is communicating with an external UART
device. The following section outlines the steps to connect an external UART device to the VNC2 interface
and enabling the „Spy‟ mode.
1. The first step is to connect an external UART device to the VNC2 UART interface on the V2-EVAL
board. An external device can be connected to the board via I/O connectors CN3 – CN11 or via
the IOBUS connections in prototyping area P1.
2. The next step is to configure the IOMUX configuration settings on the VNC2 device to check that
the UART connections reflect the physical I/O pins being used on the V2-EVAL hardware. The
IOMUX settings are set within the VNC2 software code. A code example showing how to configure
the VNC2 IOMUX settings is shown in Figure 8.3.
if (vos_get_package_type() == VINCULUM_II_64_PIN)
{
// UART to V2EVAL board pins
vos_iomux_define_output(39,IOMUX_OUT_UART_TXD); //UART Tx to pin 39
vos_iomux_define_input(40,IOMUX_IN_UART_RXD); //UART Rx to pin 40
vos_iomux_define_output(41,IOMUX_OUT_UART_RTS_N); //UART RTS# to pin 41
vos_iomux_define_input(42,IOMUX_IN_UART_CTS_N); //UART CTS# to pin 42
}
else // VINCULUM_II_48_PIN
{
// UART to V2EVAL board pins
vos_iomux_define_output(31,IOMUX_OUT_UART_TXD); //UART Tx to pin 31
vos_iomux_define_input(32,IOMUX_IN_UART_RXD); //UART Rx to pin 32
vos_iomux_define_output(33,IOMUX_OUT_UART_RTS_N);//UART RTS# to pin 33
vos_iomux_define_input(34,IOMUX_IN_UART_CTS_N); //UART CTS# to pin 34
}
Figure 8.3: Example IOMUX configuration code
The IOMUX configuration code can also be automatically generated using the Vinculum IOMUX
configuration utility, which is available as part of the Vinculum II development tools.
The IOMUX settings are incorporated into the VNC2 firmware file as part of the VNC2 software
development process. The settings are applied to the VNC2 when the firmware image is
downloaded to the VNC2 device.
3. With the VNC2 device now programmed for UART operation, the next stage is to configure the
V2-EVAL terminal utility for „Spy‟ mode. Open the utility and connect to the board. In the „Board
Control‟ panel select the „Spy‟ button. The step will reconfigure the onboard multiplexer. After
changing to „Spy‟ mode disconnect the terminal connection.
Figure 8.4: V2-EVAL Terminal connection with ‘Spy’ connection enabled
Copyright © 2010 Future Technology Devices International Limited
47
�Document Reference No.: FT_000247
V2-EVAL Vinculum II Evaluation Board Datasheet Version 2.0
Clearance No.: FTDI#148
4. Next open a connection to the „Spy‟ channel on the V2-EVAL board. From the Vinculum logo pull
down menu, select „Connect to UART->VII Eval Board C‟ to open the UART connection to channel
C on the FT4232H.
Figure 8.5: Connect to ‘Spy’ channel on V2-EVAL board
The V2-EVAL board and software is now ready to display „Spy‟ data being sent to the VNC2 device
from an external device.
An example displaying „Spy‟ mode operation is shown in Figure 8.6. The example displays „Spy‟
mode operation with an FTDI USB to 3.3V TTL level UART cable connected to the V2-EVAL board
via connector CN10. The terminal connection on the right represents the terminal connection for
the FTDI TTL USB cable showing data being transmitted from this console to the V2-EVAL
terminal utility in the background.
Figure 8.6: ‘Spy’ mode operation
Copyright © 2010 Future Technology Devices International Limited
48
�Document Reference No.: FT_000247
V2-EVAL Vinculum II Evaluation Board Datasheet Version 2.0
Clearance No.: FTDI#148
9 Board Schematics.
Schematics for the V2-EVAL board and VNC2 daughterboards are found in the following section.
Copyright © 2010 Future Technology Devices International Limited
49
�Document Reference No.: FT_000247
V2-EVAL Vinculum II Evaluation Board Datasheet Version 2.0
Clearance No.: FTDI#148
9.1
V2-EVAL Board Schematics
Copyright © 2010 Future Technology Devices International Limited
50
�Document Reference No.: FT_000247
V2-EVAL Vinculum II Evaluation Board Datasheet Version 2.0
Clearance No.: FTDI#148
Copyright © 2010 Future Technology Devices International Limited
51
�Document Reference No.: FT_000247
V2-EVAL Vinculum II Evaluation Board Datasheet Version 2.0
Clearance No.: FTDI#148
Copyright © 2010 Future Technology Devices International Limited
52
�Document Reference No.: FT_000247
V2-EVAL Vinculum II Evaluation Board Datasheet Version 2.0
Clearance No.: FTDI#148
Copyright © 2010 Future Technology Devices International Limited
53
�Document Reference No.: FT_000247
V2-EVAL Vinculum II Evaluation Board Datasheet Version 2.0
Clearance No.: FTDI#148
Copyright © 2010 Future Technology Devices International Limited
54
�Document Reference No.: FT_000247
V2-EVAL Vinculum II Evaluation Board Datasheet Version 2.0
Clearance No.: FTDI#148
9.2
VNC2 Daughterboard - 32-pin QFN Schematic
Copyright © 2010 Future Technology Devices International Limited
55
�Document Reference No.: FT_000247
V2-EVAL Vinculum II Evaluation Board Datasheet Version 2.0
Clearance No.: FTDI#148
9.3
VNC2 Daughterboard - 48-pin QFN Schematic
Copyright © 2010 Future Technology Devices International Limited
56
�Document Reference No.: FT_000247
V2-EVAL Vinculum II Evaluation Board Datasheet Version 2.0
Clearance No.: FTDI#148
9.4
VNC2 Daughterboard - 64-pin QFN Schematic
Copyright © 2010 Future Technology Devices International Limited
57
�Document Reference No.: FT_000247
V2-EVAL Vinculum II Evaluation Board Datasheet Version 2.0
Clearance No.: FTDI#148
10 V2-EVAL Board Assembly Drawing
Dimensions in mm.Tolerance is ±0.1mm
Copyright © 2010 Future Technology Devices International Limited
58
�Document Reference No.: FT_000247
V2-EVAL Vinculum II Evaluation Board Datasheet Version 2.0
Clearance No.: FTDI#148
Contact Information
Head Office – Glasgow, UK
Future Technology Devices International Limited
Unit 1, 2 Seaward Place,
Centurion Business Park
Glasgow, G41 1HH
United Kingdom
Tel: +44 (0) 141 429 2777
Fax: +44 (0) 141 429 2758
E-mail (Sales)
sales1@ftdichip.com
E-mail (Support) support1@ftdichip.com
E-mail (General Enquiries) admin1@ftdichip.com
Web Site URL
http://www.ftdichip.com
Web Shop URL
http://www.ftdichip.com
Branch Office – Taipei, Taiwan
Future Technology Devices International Limited (Taiwan)
2F, No 516, Sec. 1 NeiHu RoIOBUS
Taipei 114
Taiwan, R.O.C.
Tel: +886 (0) 2 8791 3570
Fax: +886 (0) 2 8791 3576
E-mail (Sales)
tw.sales1@ftdichip.com
E-mail (Support) tw.support1@ftdichip.com
E-mail (General Enquiries) tw.admin1@ftdichip.com
Web Site URL
http://www.ftdichip.com
Branch Office – Hillsboro, Oregon, USA
Future Technology Devices International Limited (USA)
7235 NW Evergreen Parkway, Suite 600
Hillsboro, OR 97123-5803
USA
Tel: +1 (503) 547 0988
Fax: +1 (503) 547 0987
E-Mail (Sales)
us.sales@ftdichip.com
E-Mail (Support) us.support@ftdichip.com
E-Mail (General Enquiries) us.admin@ftdichip.com
Web Site URL
http://www.ftdichip.com
Branch Office – Shanghai, China
Future Technology Devices International Limited (China)
Room 408, 317 Xianxia RoIOBUS,
ChangNing District,
ShangHai, China
Tel: +86 (21) 62351596
Fax: +86(21) 62351595
E-Mail (Sales): cn.sales@ftdichip.com
E-Mail (Support): cn.support@ftdichip.com
E-Mail (General Enquiries): cn.admin1@ftdichip.com
Web Site URL
http://www.ftdichip.com
Distributor and Sales Representatives
Please visit the Sales Network page of the FTDI Web site for the contact details of our distributor(s) and sales
representative(s) in your country.
Copyright © 2010 Future Technology Devices International Limited
59
�Document Reference No.: FT_000247
V2-EVAL Vinculum II Evaluation Board Datasheet Version 2.0
Clearance No.: FTDI#148
Appendix A – List of Figures and Tables
List of Figures
Figure 1.1 - V2-EVAL Motherboard(left) with Daughterboard Module(right) .......................................... 3
Figure 3.1
V2-EVAL Board Layout .............................................................................................. 7
Figure 3.2
V2-EVAL Board Block Diagram............................................................................... 8
Figure 4.1
V2-EVAL Board with VNC2 Daughterboard Installed .................................................... 11
Figure 4.2
Power connector with Jumper JP6 ...................................................................... 12
Figure 5.1
Power Select Jumper Configuration for USB Power ............................................. 13
Figure 5.2
GPIO[0:7] Connector CN3 ................................................................................... 14
Figure 5.3
GPIO[8:15] Connector CN4 ................................................................................. 15
Figure 5.4
GPIO[16:23] Connector CN5 ............................................................................... 16
Figure 5.5
GPIO[24:31] Connector CN6 ............................................................................... 17
Figure 5.6
GPIO[32:39] Connector CN7 ............................................................................... 18
Figure 5.7
GPIO[32:39] Connector CN8 ............................................................................... 19
Figure 5.8
SPI Connector CN9 .............................................................................................. 20
Figure 5.9
UART Connector CN10 ......................................................................................... 21
Figure 5.10
FIFO Connector CN11 ....................................................................................... 22
Figure 5.11
Prototyping area P1 ......................................................................................... 23
Figure 5.12
USB1 Interface CN1 ......................................................................................... 26
Figure 5.13
USB2 Interface CN2 ......................................................................................... 27
Figure 5.14
GPIO Jumper pins, JP1, JP2 ............................................................................ 28
Figure 5.15
User LEDs......................................................................................................... 29
Figure 5.16
LED Enable/Disable jumpers ............................................................................ 30
Figure 5.17
User Push Button Switches .............................................................................. 30
Figure 5.18
USB Power Enable Jumpers JP4 and JP5 .......................................................... 31
Figure 5.19
Remote Wakeup Jumper .................................................................................. 32
Figure 5.20
Reset Switch .................................................................................................... 33
Figure 5.21
‘PROG’ LED ....................................................................................................... 33
Figure 5.22
VNC2 Daughterboard Connector J1 ................................................................. 34
Figure 5.23
VNC2 Daughterboard Connector J2 ................................................................. 35
Figure 5.24
VNC2 Daughterboard Connector J3 ................................................................. 36
Figure 5.25
VNC2 Daughterboard Connector J4 ................................................................. 37
Figure 6.1: FT4232H Configuration ............................................................................................... 39
Figure 7.1: Found New Hardware Wizard Screen............................................................................. 41
Figure 7.2: Select installation option ............................................................................................. 42
Figure 7.3: Select location of the driver ......................................................................................... 42
Figure 7.4: Non-WHQL Driver Warning .......................................................................................... 43
Figure 7.5: Driver installation ....................................................................................................... 43
Figure 7.6: Device Manager Screen ............................................................................................... 44
Figure 8.1: Installer Introduction Screen ....................................................................................... 45
Figure 8.2: V2-EVAL Terminal Utility Features ................................................................................ 46
Copyright © 2010 Future Technology Devices International Limited
60
�Document Reference No.: FT_000247
V2-EVAL Vinculum II Evaluation Board Datasheet Version 2.0
Clearance No.: FTDI#148
Figure 8.3: Example IOMUX configuration code ....................................................................... 47
Figure 8.4: V2-EVAL Terminal connection with ‘Spy’ connection enabled ................................ 47
Figure 8.5: Connect to ‘Spy’ channel on V2-EVAL board ........................................................... 48
Figure 8.6: ‘Spy’ mode operation ............................................................................................. 48
Copyright © 2010 Future Technology Devices International Limited
61
�Document Reference No.: FT_000247
V2-EVAL Vinculum II Evaluation Board Datasheet Version 2.0
Clearance No.: FTDI#148
List of Tables
Table 1.1
Document References ............................................................................................... 4
Table 1.2
Acronyms and Abbreviations ...................................................................................... 5
Table 3.1
V2-Eval Board Components ................................................................................... 9
Table 3.2
V2-Eval Board Interfaces..................................................................................... 10
Table 5.1
GPIO[0:7] port connector CN3 ............................................................................ 14
Table 5.2
GPIO[8:15] connector CN4 .................................................................................. 15
Table 5.3
GPIO port connector CN5 .................................................................................... 16
Table 5.4
GPIO port connector CN6 .................................................................................... 17
Table 5.5
GPIO port connector CN7 .................................................................................... 18
Table 5.6
GPIO port connector CN8 .................................................................................... 19
Table 5.7
SPI Port Connector CN9 ...................................................................................... 20
Table 5.8
UART Interface Connector CN10 .......................................................................... 21
Table 5.9
FIFO Interface Connector CN11 ........................................................................... 22
Table 5.10
Prototyping Area Pinout ...................................................................................... 25
Table 5.11
USB1 Host/Slave Connector CN1 ......................................................................... 26
Table 5.12
USB2 Host / Slave connector CN2 ....................................................................... 27
Table 5.13
GPIO jumpers JP1, JP2 ........................................................................................ 28
Table 5.14
Monitor Interface Select – VNC1L Firmware Backwards Compatiblity ................. 28
Table 5.15
User LED connections .......................................................................................... 29
Table 5.16
LED Enable/Disable Jumpers. .............................................................................. 30
Table 5.17
User Switches...................................................................................................... 30
Table 5.18
Connector J1 Pinout ............................................................................................ 34
Table 5.19
Connector J2 Pinout ............................................................................................ 35
Table 5.20
Connector J3 Pinout ............................................................................................ 36
Table 5.21
Connector J4 Pinout ............................................................................................ 37
Table 6.1:
Multiplexer Configuration Settings ...................................................................... 40
Copyright © 2010 Future Technology Devices International Limited
62
�Document Reference No.: FT_000247
V2-EVAL Vinculum II Evaluation Board Datasheet Version 2.0
Clearance No.: FTDI#148
Appendix B – Revision History
Rev 1.0
First Release
15th April 2010
Rev 2.0
Second Release
27th July 2010
Copyright © 2010 Future Technology Devices International Limited
63
�
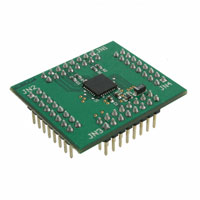


 工商网监
湘ICP备2023018690号
工商网监
湘ICP备2023018690号
