DATASHEET
ISL68200
FN8705
Rev.4.00
Jul 24, 2018
Single-Phase R4 Digital Hybrid PWM Controller with Integrated Driver,
PMBus/SMBus/I2C, and PFM
The ISL68200 is a single-phase synchronous-buck PWM
controller featuring the proprietary Renesas R4™ Technology.
The ISL68200 supports a wide 4.5V to 24V input voltage range
and a wide 0.5V to 5.5V output range. Integrated LDOs provide
controller bias voltage, allowing for single supply operation.
The ISL68200 includes a PMBus/SMBus/I2C interface for
device configuration and telemetry (VIN, VOUT, IOUT, and
temperature) and fault reporting.
The proprietary Renesas R4 control scheme has extremely fast
transient performance, accurately regulated frequency control,
and all internal compensation. An efficiency enhancing PFM
mode greatly improves light-load efficiency. The ISL68200’s
serial bus allows for easy R4 loop optimization, resulting in
fast transient performance over a wide range of applications,
including all ceramic output filters.
Built-in MOSFET drivers minimize external components,
significantly reducing design complexity and board space,
while also lowering BOM cost. The 4A drive strength allows for
faster switching time, improving regulator efficiency. An
integrated high-side gate-to-source resistor helps avoid Miller
coupling shoot-through and improves system reliability.
The ISL68200 has four 8-bit configuration pins that provide
very flexible configuration options (frequency, VOUT, R4 gain,
etc.) without the need for built-in NVM memory. This results in
a design flow that closely matches traditional analog
controllers, while still offering the design flexibility and feature
set of a digital PMBus/SMBus/I2C interface. The ISL68200
also features remote voltage sensing and completely eliminates
any potential difference between remote and local grounds. This
improves regulation and protection accuracy. A precision enable
input is available to coordinate the start-up of the ISL68200 with
other voltage rails, which is especially useful for power
sequencing.
Applications
Features
• Proprietary Renesas R4 Technology
- Linear control loop for optimal transient response
- Variable frequency and duty cycle control during load
transient for fastest possible response
- Inherent voltage feed-forward for wide range input
• Input voltage range: 4.5V to 24V
• Output voltage range: 0.5V to 5.5V
• ±0.5% DAC accuracy with remote sense
• Supports all ceramic solutions
• Integrated LDOs for single input rail solution
• SMBus/PMBus/I2C compatible, up to 1.25MHz
• 256 boot-up voltage levels with a configuration pin
• Eight switching frequency options from 300kHz to 1.5MHz
• PFM operation option for improved light-load efficiency
• Startup into precharged load
• Precision enable input to set higher input UVLO and power
sequence as well as fault reset
• Power-good monitor for soft-start and fault detection
• Comprehensive fault protection for high system reliability
- Over-temperature protection
- Output overcurrent and short-circuit protection
- Output overvoltage and undervoltage protection
- Open remote sense protection
- Integrated high-side gate-to-source resistor to prevent self
turn-on due to high input bus dV/dt
• Integrated power MOSFETs 4A drivers with adaptive
shoot-through protection and bootstrap function
• Compatible with Renesas PowerNavigator™ software
• High efficiency and high density POL digital power
• FPGA, ASIC, and memory supplies
Related Literature
• Datacenter servers and storage systems
For a full list of related documents, visit our website
• Wired infrastructure routers, switches, and optical
networking
• ISL68200 product page
• Wireless infrastructure base stations
TABLE 1. SINGLE-PHASE R4 DIGITAL HYBRID PWM CONTROLLER OPTIONS
PART
NUMBER
INTEGRATED
DRIVER
PWM
OUTPUT
PMBus/SMBus/I2C
INTERFACE
ISL68200
Yes
No
Yes
Discrete MOSFETs or Dual Channel MOSFETs
ISL68201
No
Yes
Yes
Renesas Power Stages: ISL99140
Renesas Drivers: ISL6596, ISL6609, ISL6627, ISL6622, ISL6208
FN8705 Rev.4.00
Jul 24, 2018
COMPATIBLE DEVICES
Page 1 of 33
�ISL68200
Table of Contents
Typical Applications Circuits . . . . . . . . . . . . . . . . . . . . . . . . . . . . . . . . . . . . . . . . . . . . . . . . . . . . . . . . . . . . . . . . . . . . . . . . . . . . . . . . . . 3
Block Diagram . . . . . . . . . . . . . . . . . . . . . . . . . . . . . . . . . . . . . . . . . . . . . . . . . . . . . . . . . . . . . . . . . . . . . . . . . . . . . . . . . . . . . . . . . . . . . . 4
Pin Configuration. . . . . . . . . . . . . . . . . . . . . . . . . . . . . . . . . . . . . . . . . . . . . . . . . . . . . . . . . . . . . . . . . . . . . . . . . . . . . . . . . . . . . . . . . . . . 5
Functional Pin Descriptions. . . . . . . . . . . . . . . . . . . . . . . . . . . . . . . . . . . . . . . . . . . . . . . . . . . . . . . . . . . . . . . . . . . . . . . . . . . . . . . . . . . 5
Ordering Information . . . . . . . . . . . . . . . . . . . . . . . . . . . . . . . . . . . . . . . . . . . . . . . . . . . . . . . . . . . . . . . . . . . . . . . . . . . . . . . . . . . . . . . . 6
Absolute Maximum Ratings . . . . . . . . . . . . . . . . . . . . . . . . . . . . . . . . . . . . . . . . . . . . . . . . . . . . . . . . . . . . . . . . . . . . . . . . . . . . . . . . . . . 7
Thermal Information . . . . . . . . . . . . . . . . . . . . . . . . . . . . . . . . . . . . . . . . . . . . . . . . . . . . . . . . . . . . . . . . . . . . . . . . . . . . . . . . . . . . . . . . . 7
Recommended Operating Conditions . . . . . . . . . . . . . . . . . . . . . . . . . . . . . . . . . . . . . . . . . . . . . . . . . . . . . . . . . . . . . . . . . . . . . . . . . . 7
Electrical Specifications . . . . . . . . . . . . . . . . . . . . . . . . . . . . . . . . . . . . . . . . . . . . . . . . . . . . . . . . . . . . . . . . . . . . . . . . . . . . . . . . . . . . . 7
Operation . . . . . . . . . . . . . . . . . . . . . . . . . . . . . . . . . . . . . . . . . . . . . . . . . . . . . . . . . . . . . . . . . . . . . . . . . . . . . . . . . . . . . . . . . . . . . . . . .
IC Supplies . . . . . . . . . . . . . . . . . . . . . . . . . . . . . . . . . . . . . . . . . . . . . . . . . . . . . . . . . . . . . . . . . . . . . . . . . . . . . . . . . . . . . . . . . . . . . . . . . . . . .
Enable and Disable . . . . . . . . . . . . . . . . . . . . . . . . . . . . . . . . . . . . . . . . . . . . . . . . . . . . . . . . . . . . . . . . . . . . . . . . . . . . . . . . . . . . . . . . . . . . . .
Resistor Reader (Patented) . . . . . . . . . . . . . . . . . . . . . . . . . . . . . . . . . . . . . . . . . . . . . . . . . . . . . . . . . . . . . . . . . . . . . . . . . . . . . . . . . . . . . . .
Soft-Start. . . . . . . . . . . . . . . . . . . . . . . . . . . . . . . . . . . . . . . . . . . . . . . . . . . . . . . . . . . . . . . . . . . . . . . . . . . . . . . . . . . . . . . . . . . . . . . . . . . . . . .
Boot-Up Voltage Programming . . . . . . . . . . . . . . . . . . . . . . . . . . . . . . . . . . . . . . . . . . . . . . . . . . . . . . . . . . . . . . . . . . . . . . . . . . . . . . . . . . . .
Current Sensing . . . . . . . . . . . . . . . . . . . . . . . . . . . . . . . . . . . . . . . . . . . . . . . . . . . . . . . . . . . . . . . . . . . . . . . . . . . . . . . . . . . . . . . . . . . . . . . . .
Thermal Monitoring and Compensation . . . . . . . . . . . . . . . . . . . . . . . . . . . . . . . . . . . . . . . . . . . . . . . . . . . . . . . . . . . . . . . . . . . . . . . . . . . . .
IOUT Calibration . . . . . . . . . . . . . . . . . . . . . . . . . . . . . . . . . . . . . . . . . . . . . . . . . . . . . . . . . . . . . . . . . . . . . . . . . . . . . . . . . . . . . . . . . . . . . . . . .
Fault Protection . . . . . . . . . . . . . . . . . . . . . . . . . . . . . . . . . . . . . . . . . . . . . . . . . . . . . . . . . . . . . . . . . . . . . . . . . . . . . . . . . . . . . . . . . . . . . . . . .
PGOOD Monitor . . . . . . . . . . . . . . . . . . . . . . . . . . . . . . . . . . . . . . . . . . . . . . . . . . . . . . . . . . . . . . . . . . . . . . . . . . . . . . . . . . . . . . . . . . . . . . . . .
Adaptive Shoot-Through Protection. . . . . . . . . . . . . . . . . . . . . . . . . . . . . . . . . . . . . . . . . . . . . . . . . . . . . . . . . . . . . . . . . . . . . . . . . . . . . . . . .
PFM Mode Operation. . . . . . . . . . . . . . . . . . . . . . . . . . . . . . . . . . . . . . . . . . . . . . . . . . . . . . . . . . . . . . . . . . . . . . . . . . . . . . . . . . . . . . . . . . . . .
SMBus, PMBus, and I2C Operation . . . . . . . . . . . . . . . . . . . . . . . . . . . . . . . . . . . . . . . . . . . . . . . . . . . . . . . . . . . . . . . . . . . . . . . . . . . . . . . . .
R4 Modulator . . . . . . . . . . . . . . . . . . . . . . . . . . . . . . . . . . . . . . . . . . . . . . . . . . . . . . . . . . . . . . . . . . . . . . . . . . . . . . . . . . . . . . . . . . . . . . . . . . .
10
10
10
10
12
12
16
17
19
20
21
21
21
21
26
General Application Design Guide . . . . . . . . . . . . . . . . . . . . . . . . . . . . . . . . . . . . . . . . . . . . . . . . . . . . . . . . . . . . . . . . . . . . . . . . . . . .
Output Filter Design. . . . . . . . . . . . . . . . . . . . . . . . . . . . . . . . . . . . . . . . . . . . . . . . . . . . . . . . . . . . . . . . . . . . . . . . . . . . . . . . . . . . . . . . . . . . . .
Input Capacitor Selection . . . . . . . . . . . . . . . . . . . . . . . . . . . . . . . . . . . . . . . . . . . . . . . . . . . . . . . . . . . . . . . . . . . . . . . . . . . . . . . . . . . . . . . . .
Design and Layout Considerations . . . . . . . . . . . . . . . . . . . . . . . . . . . . . . . . . . . . . . . . . . . . . . . . . . . . . . . . . . . . . . . . . . . . . . . . . . . . . . . . .
Voltage Regulator Design Materials . . . . . . . . . . . . . . . . . . . . . . . . . . . . . . . . . . . . . . . . . . . . . . . . . . . . . . . . . . . . . . . . . . . . . . . . . . . . . . . .
28
28
28
29
30
Revision History. . . . . . . . . . . . . . . . . . . . . . . . . . . . . . . . . . . . . . . . . . . . . . . . . . . . . . . . . . . . . . . . . . . . . . . . . . . . . . . . . . . . . . . . . . . . 31
Package Outline Drawing . . . . . . . . . . . . . . . . . . . . . . . . . . . . . . . . . . . . . . . . . . . . . . . . . . . . . . . . . . . . . . . . . . . . . . . . . . . . . . . . . . . . 32
FN8705 Rev.4.00
Jul 24, 2018
Page 2 of 33
�ISL68200
Typical Applications Circuits
1.0µF
4.7µF
VCC
7VLDO
PVCC
VIN
1.0µF
4.75V TO 24V
0.1µF
I2C/SMBus/
PMBus
SALERT
SCL
SDA
PGOOD
PGOOD
EN
BOOT
V OUT < 7VLDO - 1.7V
UGATE
0.5V TO 5.5V
PHASE
EN
VCC
IOUT
LGATE
10k
NTC
VCC
VCC
NTC
4
1.54k
0.1µF NCP15XH103J03RC
BETA = 3380
PROG1-4
CSEN
CSRTN
VSEN
RGND
GND
FIGURE 1. WIDE RANGE INPUT AND OUTPUT APPLICATIONS
1.0µF
4.7µF
VCC
7VLDO
PVCC
VIN
1.0µF
2
I C/SMBus/
PMBus
SALERT
SCL
SDA
PGOOD
PGOOD
EN
4.5V TO 5.5V
0.1µF
BOOT
V OUT < 7VLDO - 1.7V
UGATE
0.5V TO 2.5V
PHASE
EN
VCC
IOUT
LGATE
10k
NTC
VCC
VCC
NTC
4
1.54k
0.1µF NCP15XH103J03RC
BETA = 3380
PROG1-4
CSEN
CSRTN
VSEN
RGND
GND
FIGURE 2. 5V INPUT APPLICATION
FN8705 Rev.4.00
Jul 24, 2018
Page 3 of 33
�ISL68200
Block Diagram
PROG4
SCL
SDA SALERT
PROG2 PROG3
7VLDO VINPVCC
POR
VCC
SOFT-START
AND
FAULT LOGIC
SMBUS/PMBUS/I2C
INTERFACE
BOOT
EN
OTP OCP
VIN VOUT IOUT TEMP
DRIVER
UGATE
PGOOD
CIRCUITRY
PGOOD
PHASE
DEAD TIME
GENERATION
RGND
VSEN
+
INTERNAL
COMPENSATION
AMPLIFIER
PVCC
OVERVOLTAGE/
UNDERVOLTAGE
DRIVER
LGATE
GND
5V LDO
R4
MODULATOR
PROG1
VIN
7V LDO
REFERENCE
VOLTAGE
CIRCUITRY
OVERCURRENT (OCP) AND
OVER-TEMPERATURE (OTP)
7VLDO
CURRENT SENSE
AND TEMPERATURE
COMPENSATION
SWITCHING
FREQUENCY
CSEN
CSRTN
NTC
GND
IOUT
FIGURE 3. SIMPLIFIED FUNCTIONAL BLOCK DIAGRAM OF ISL68200
FN8705 Rev.4.00
Jul 24, 2018
Page 4 of 33
�ISL68200
Pin Configuration
PVCC
BOOT
UGATE
PHASE
LGATE
GND
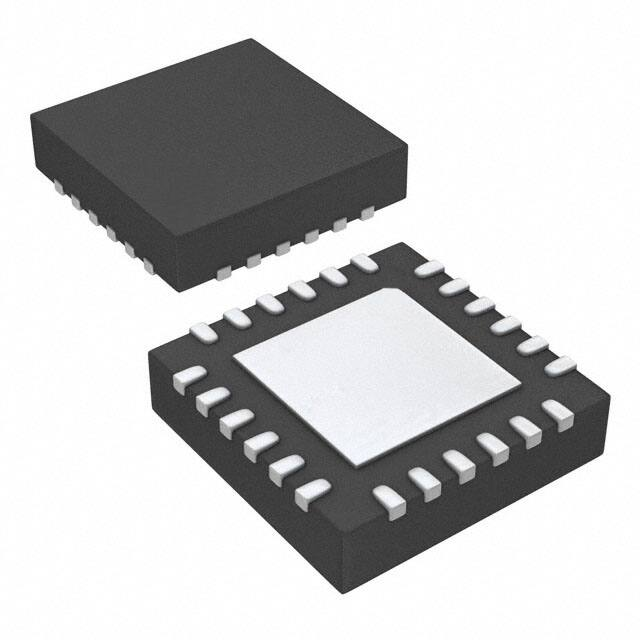
24 LD 4x4 QFN
TOP VIEW
24
23
22
21
20
19
EN
1
18 PROG1
VIN
2
17 PROG2
7VLDO
3
25
16 PROG3
GND PAD
15 PROG4
6
13 NTC
7
8
9
10
11
12
CSEN
SALERT
CSRTN
14 IOUT
VSEN
5
RGND
SCL
PGOOD
4
SDA
VCC
Functional Pin Descriptions
PIN NUMBER
SYMBOL
DESCRIPTION
1
EN
Precision enable input. Pulling EN above the rising threshold voltage initiates the soft-start sequence, while pulling EN below the
failing threshold voltage suspends the Voltage Regulator (VR) operation.
2
VIN
Input voltage pin for the R4 loop and LDOs (5V and 7V). Place a high quality low ESR ceramic capacitor (1.0μF, X7R) in close
proximity to the pin. An external series resistor is not advised.
3
7VLDO
The 7V LDO from VIN biases the current sensing amplifier. Place a high quality low ESR ceramic capacitor (1.0μF, X7R, 10V+)
in close proximity to the pin.
4
VCC
Logic bias supply that should be connected to the PVCC rail externally. Place a high quality low ESR ceramic capacitor (1.0μF,
X7R) from this pin to GND.
5
SCL
Synchronous SMBus/PMBus/I2C clock signal input.
6
SALERT
7
SDA
8
PGOOD
9
RGND
Monitors the negative rail of the regulator output. Connect to ground at the point of regulation.
10
VSEN
Monitors the positive rail of the regulator output. Connect to the point of regulation.
11
CSRTN
Uses a series resistor to monitor the negative flow of output current for overcurrent protection and telemetry. The series
resistor sets the current gain and should be within 40Ωand 3.5kΩ.
12
CSEN
Monitors the positive flow of output current for overcurrent protection and telemetry.
13
NTC
Input pin for temperature measurement. Connect this pin through an NTC thermistor (10kΩ, ~ 3380) and a decoupling
capacitor (~0.1μF) to GND and a resistor (1.54kΩ)to VCC of the controller. The voltage at this pin is inversely proportional to
the VR temperature.
14
IOUT
Output current monitor pin. An external resistor sets the gain and an external capacitor provides the averaging function; an
external pull-up resistor to VCC is recommended to calibrate the no load offset. See “IOUT Calibration” on page 19.
15
PROG4
Programming pin for Modulator (R4) RR impedance and output slew rate during Soft-Start (SS) and Dynamic VID (DVID).
It also sets AV gain multiplier to 1x or 2x and determines the AV gain on PROG3.
16
PROG3
Programming pin for ultrasonic PFM operation, fault behavior, switching frequency, and R4 (AV) control loop gain.
17
PROG2
Programming pin for PWM/PFM mode, temperature compensation, and serial bus (SMBus/PMBus/I2C) address.
FN8705 Rev.4.00
Jul 24, 2018
Output pin for transferring the active low signal driven asynchronously from the VR controller to SMBus/PMBus.
I/O pin for transferring data signals between the SMBus/PMBus/I2C host and VR controller.
Open-drain indicator output.
Page 5 of 33
�ISL68200
Functional Pin Descriptions (Continued)
PIN NUMBER
SYMBOL
18
PROG1
19
GND
20
LGATE
Low-side MOSFET gate driver output. Connect to the gate terminal of the low-side MOSFET of the converter.
21
PHASE
Return path for the UGATE high-side MOSFET driver, and zero inductor current detector input for diode emulation.
22
UGATE
High-side MOSFET gate driver output. Connect to the gate terminal of the high-side MOSFET of the converter.
23
BOOT
Positive input supply for the UGATE high-side MOSFET gate driver. Connect an MLCC (0.22µF, X7R) between the BOOT and
PHASE pins.
24
PVCC
Output of the 5V LDO and input for the LGATE and UGATE MOSFET driver circuits. Place a high quality low ESR ceramic
capacitor (4.7μF, X7R) in close proximity to the pin.
25
DESCRIPTION
Programming pin for boot-up voltage.
Return current path for the LGATE MOSFET driver. Connect directly to the system ground plane.
GND PAD Return of logic bias supply VCC. Connect directly to the system ground plane with at least five vias.
Ordering Information
PART NUMBER
(Notes 2, 3)
PART
MARKING
TEMP RANGE
(°C)
TAPE AND REEL
(UNITS) (Note 1)
PACKAGE
(RoHS Compliant)
ISL68200IRZ
ISL 68200I
-40 to +85
-
24 Ld 4x4 QFN
L24.4x4C
ISL68200IRZ-T
ISL 68200I
-40 to +85
6k
24 Ld 4x4 QFN
L24.4x4C
ISL68200IRZ-T7A
ISL 68200I
-40 to +85
250
24 Ld 4x4 QFN
L24.4x4C
ISL68200IRZ-TK
ISL 68200I
-40 to +85
1k
24 Ld 4x4 QFN
L24.4x4C
ISL68200DEMO1Z
PKG.
DWG. #
20A Demonstration Board with on-board transient
NOTES:
1. Refer to TB347 for details about reel specifications.
2. These Pb-free plastic packaged products employ special Pb-free material sets, molding compounds/die attach materials, and 100% matte tin plate
plus anneal (e3 termination finish, which is RoHS compliant and compatible with both SnPb and Pb-free soldering operations). Pb-free products are
MSL classified at Pb-free peak reflow temperatures that meet or exceed the Pb-free requirements of IPC/JEDEC J STD-020.
3. For Moisture Sensitivity Level (MSL), refer to the ISL68200 product information page. For more information about MSL, refer to TB363.
FN8705 Rev.4.00
Jul 24, 2018
Page 6 of 33
�ISL68200
Absolute Maximum Ratings
Thermal Information
VCC, PVCC, VSEN. . . . . . . . . . . . . . . . . . . . . . . . . . . . . . . . . . . . -0.3V to +7.0V
Input Voltage, VIN . . . . . . . . . . . . . . . . . . . . . . . . . . . . . . . . . . . . . . . . . . . +27V
7VLDO . . . . . . . . . . . . . . . . . . . . . . . . . . . . . . . . . . . . . . . .-0.3V to GND, 7.75V
BOOT Voltage (VBOOT-GND) . . . . . . . . . . . . . . . . . . . . . . . . . . . . . -0.3V to 33V
BOOT to PHASE Voltage (VBOOT-PHASE) . . . . . . . . . . . . . . . . -0.3V to 7V (DC)
-0.3V to 9V ( UVLO
an external divider for higher
level. See Figures 4 and 5 on
page 10.
Bias UVLO
VCC, PVCC, 7VLDO UVLO
Shutdown and recover
when Bias > UVLO
Start-Up
OVP
Higher than VBOOT. See
“Electrical Specifications” on
page 7.
Latch OFF, reset by VCC
or toggling Enable
(including EN pin and/
or OPERATION
command based upon
ON_OFF_CONFIG
setting)
Output OVP
Rising = 116%; Falling = 100%
Output UVP
74% of VOUT, Latch OFF
Output OCP Average OCP = 100µA with
128µs blanking time.
Short-Circuit Peak OCP = 130% of Average
Protection
OCP with 50ns filter.
OTP
Rising = 22.31%VCC (~+136°C);
Falling =27.79%VCC (~+122°C).
Latch OFF (reset by
VCC or toggling enable
including EN pin and/
or OPERATION
command based upon
ON_OFF_CONFIG
setting), or retry every
9ms; option is
programmable by
PROG3 or D3[0]
Shut down above
+136°C and recover
when temperature
drops below +122°C
Input UVLO and OTP faults respond to the current state with
hysteresis, output OVP and output UVP faults are latch events,
while output OCP and output short-circuit faults can be latch or
retry events depending upon the PROG3 or D3[0] setting. All fault
latch events can be reset by VCC cycling, toggling the Enable pin,
and/or with the serial bus OPERATION command based on the
ON_OFF_CONFIG setting. The OCP retry event has a hiccup time
of 9ms and the regulator can be recovered when the fault is
removed.
OVERVOLTAGE PROTECTION
MOSFET when the output voltage is above the rising overvoltage
threshold (typically 120%). By doing so, the IC protects the load in
consistent overvoltage conditions.
In addition to normal OVP operation, the start-up OVP circuits are
enabled 5.5ms (typically, worst 6.5ms) after all rails (VCC, PVCC,
7VLDO, VIN) POR and before the end of soft-start to protect
against OVP events, while the OVP level is set higher than VBOOT.
See “Electrical Specifications” on page 7.
UNDERVOLTAGE PROTECTION
The UVP fault detection circuit triggers after the output voltage is
below the undervoltage threshold (typically 74% of DAC). When an
UVP fault is declared, the controller is latched off, forcing the
LGATE and UGATE gate-driver outputs low, and the PGOOD pin is
asserted low. The fault remains latched and can be reset by VCC
cycling, toggling the EN pin, and/or with the serial bus
OPERATION command based on the ON_OFF_CONFIG setting.
OVERCURRENT AND SHORT-CIRCUIT PROTECTION
The average Overcurrent Protection (OCP) is triggered when the
internal current out of the IOUT pin goes above the fault
threshold (typically 100µA) with 128µs blanking time. The device
also has a fast (50ns filter) secondary overcurrent protection
threshold +30% above average OCP; this protects inductor
saturation from a short-circuit event and provides a more robust
power train and system protection. When an OCP or short-circuit
fault is declared, the controller is latched off, forcing the LGATE
and UGATE gate-driver outputs low, or it retries with a hiccup time
of 9ms; the fault response is programmable by PROG3 or D3[0].
The latched off event can be reset by VCC cycling, toggling the EN
pin, and/or with the serial bus OPERATION command based on
the ON_OFF_CONFIG setting.
Equation 14 provides a starting point to set a preliminary OCP trip
point, where IOCP is the targeted OCP trip point and I (as shown
in Equation 15 on page 28) is the peak-to-peak inductor ripple
current.
R x xI OCP
R ISEN1 = -----------------------100A
I
R x x ----- + I OCP
2
R ISEN2 = ------------------------------------------------------------100Ax 100% + 30%
(EQ. 14)
R ISEN = MAX (RISEN1, R ISEN2
The OVP fault detection circuit triggers after the voltage between
VSEN+ and VSEN- is above the rising overvoltage threshold. When
an OVP fault is declared, the controller is latched off and the
PGOOD pin is asserted low. The fault remains latched and can be
reset by VCC cycling, toggling the EN pin, and/or with the serial bus
OPERATION command based on the ON_OFF_CONFIG setting.
To deal with layout and PCB contact impedance variation,
complete the following fine-tuning procedure below step-by-step
for a more precision OCP; steps 1 through 3 must be completed
before step 4.
Although the controller latches off in response to an OVP fault,
the LGATE gate-driver output retains the ability to toggle the lowside MOSFET on and off in response to the output voltage
transversing the OVP rising and falling thresholds. The LGATE
gate-driver turns on the low-side MOSFET to discharge the output
voltage, protecting the load. The LGATE gate driver turns off the
low-side MOSFET when the sensed output voltage is lower than
the falling overvoltage threshold (typically 100%). If the output
voltage rises again, the LGATE driver again turns on the low-side
2. Properly complete thermal compensation as described in
“Thermal Monitoring and Compensation” on page 17.
FN8705 Rev.4.00
Jul 24, 2018
1. Properly tune L/DCR or ESL/RSEN over the range of
temperature operation matching as shown on page 17. +25%
over-matching L/DCR at room temperature is needed for
-40°C operation.
3. Collect OCP trip points (IOCP_MEASURED) with sufficient
prototypes and determine the means for overall operating
conditions and board variations.
Page 20 of 33
�ISL68200
4. Change RISEN by IOCP_TARGETED/IOCP_MEASURED
percentage to meet the targeted OCP.
Note that if the inductor peak-to-peak current is higher or closer
to 30%, the +30% threshold can be triggered instead of the
average OCP threshold. However, the fine-tune procedure still
can be used.
OVER-TEMPERATURE PROTECTION
Figure 16 shows a comparator with hysteresis that compares the
NTC pin voltage to the threshold set. When the NTC pin voltage is
lower than 22.31% of VCC voltage (typically +136°C), it triggers
Over-Temperature Protection (OTP) and shuts down ISL68200
operation. When the NTC pin voltage is above 27.79% of VCC
voltage (typically +122.4°C), the ISL68200 resumes normal
operation. When an OTP fault is declared, the controller forces
the LGATE and UGATE gate-driver outputs low.
PGOOD Monitor
The PGOOD pin indicates when the converter is capable of
supplying regulated voltage. PGOOD is asserted low if a fault
condition occurs on a rail’s (VCC, PVCC, 7VLDO, or VIN) UVLO,
output Overcurrent (OCP), Overvoltage (OVP), Undervoltage (UVP),
or Over-Temperature (OTP). Note that the PGOOD pin is an
undefined impedance with insufficient VCC (typically
VOUT_MAX, or VOUT OPEN SENSE)
Input Voltage (N = - 4, Max = 31.9375V)
VIN (V) = HEX2DEC(88 hex data - E000h) * 0.0625V
Page 25 of 33
�ISL68200
TABLE 11. SMBus, PMBus, AND I2C SUPPORTED COMMANDS (Continued)
COMMAND
CODE
ACCESS
WORD
LENGTH
(BYTE)
8Dh[15:0]
R
TWO
98h[7:0]
R
ONE
02h
PMBUS_REVISION
AD[15:0]
BLOCK R
TWO
8200h
IC_DEVICE_ID
AE[15:0]
BLOCK R
TWO
0003h
D0[0:0]
R/W
ONE
PROG2[7:7]
ENABLE_PFM
PFM OPERATION
0h = PFM enabled (DCM at light load)
1h = PFM disabled (always CCM mode)
D1[1:0]
R/W
ONE
PROG2[6:5]
TEMP_COMP
Thermal Compensation:
0h = 30°C; 01h = 15°C; 02h = 5°C; 03h = OFF
D2[0:0]
R/W
ONE
PROG3[7:7]
D3[0:0]
R/W
ONE
PROG3[6:6]
OCP_BEHAVIOR
D4[2:0]
R/W
ONE
PROG3[2:0]
AV_GAIN
D5{2:0]
R/W
ONE
PROG4[7:5]
RAMP_RATE
D6[1:0]
R/W
ONE
PROG4[4:3]
SET_RR
DC[7:0]
R
ONE
READ_PROG1
Read PROG1
DD{7:0]
R
ONE
READ_PROG2
Read PROG2
DE[7:0]
R
ONE
READ_PROG3
Read PROG3
DF[7:0]
R
ONE
READ_PROG4
Read PROG4
DEFAULT
VALUE
COMMAND NAME
READ_TEMP
DESCRIPTION
VR temperature
TEMP (°C) = 1/{ln[Rup*HEX2DEC(8D hex
data)/(511 - HEX2DEC(8D hex data)/RNTC(at +25°C)]/Beta +
1/298.15} -273.15
Indicates PMBus Revision 1.2
ISL68200 device ID
IC_DEVICE_REVISION ISL68200 device revision
ENABLE_ULTRASONIC Ultrasonic PFM enable
0h = 25kHz clamp disabled
1h = 25kHz clamp enabled
Set latch or infinite retry for OCP fault:
0h = Retry every 9ms; 01 = Latch-OFF
R4 AV GAIN (PROG4, AV Gain Multiplier = 2x)
0h = 84; 1h = 73; 2h = 61; 3h = 49
4h = 38; 5h = 26; 6h = 14; 7h = 2
R4 AV GAIN (PROG4, AV Gain Multiplier = 1x)
0h = 42; 1h = 36.5; 2h = 30.5; 3h = 29.5
4h = 19; 5h = 13; 6h = 7; 7h = 1
Soft-Start and Margining DVID Rate (mV/µs)
0h = 1.25; 1h = 2.5; 2h = 5; 3h = 10; 4h = 0.078; 5h = 0.157
6h = 0.315; 7h = 0.625;
Set RR
0h = 200k; 01h = 400k; 02h = 600k; 03h = 800k
NOTE: Serial bus communication is valid 5.5m (typically, worst 6.5ms) after VCC, VIN, 7VLDO, and PVCC above POR. The telemetry update rate is 108µs.
R4 Modulator
STABILITY
The R4 modulator is an evolutionary step in R3™ technology.
Like R3, the R4 modulator is a linear control loop and variable
frequency control during load transients that eliminates beat
frequency oscillation at the switching frequency and maintains
the benefits of current-mode hysteretic controllers. The R4
modulator also reduces regulator output impedance and uses
accurate referencing to eliminate the need for a high-gain
voltage amplifier in the compensation loop. The result is a
topology that can be tuned to voltage-mode hysteretic transient
speed while maintaining a linear control model and removes the
need for any compensation. This greatly simplifies the regulator
design for customers and reduces external component cost.
The removal of compensation derives from the R4 modulator’s
lack of need for high DC gain. In traditional architectures, high DC
gain is achieved with an integrator in the voltage loop. The
integrator introduces a pole in the open-loop transfer function at
low frequencies. This pole, combined with the double-pole from
the output L/C filter, creates a three pole system that must be
compensated to maintain stability.
FN8705 Rev.4.00
Jul 24, 2018
Classic control theory requires a single-pole transition through
unity gain to ensure a stable system. Current-mode architectures
(including peak, peak-valley, current-mode hysteric, R3, and R4)
generate a zero at or near the L/C resonant point, effectively
canceling one of the system’s poles. The system still contains
two poles, one of which must be canceled with a zero before
unity gain crossover to achieve stability.
Page 26 of 33
�ISL68200
COMPENSATION TO COUNTER
INTEGRATOR POLE
INTEGRATOR
FOR HIGH DC GAIN
Figure 28 shows the R4 error-amplifier that does not require an
integrator for high DC gain to achieve accurate regulation. The
result to the open-loop response can be seen in Figure 29.
R4 LOOP GAIN (dB)
VOUT
L/C DOUBLE-POLE
VCOMP
VDAC
p1
Because R4 does not require a high-gain voltage loop, the
integrator can be removed, reducing the number of inherent
poles in the loop to two. The current-mode zero continues to
cancel one of the poles, ensuring a single-pole crossover for a
wide range of output filter choices. The result is a stable system
with no need for compensation components or complex
equations to properly tune the stability.
CURRENT-MODE
ZERO
z1
NO COMPENSATOR IS
NEEDED
ec
/d
B
0d dec
-2
/
B
c
0d
/ de
-2
dB
-40
Figure 26 illustrates the classic integrator configuration for a
voltage loop error amplifier. While the integrator provides the
high DC gain required for accurate regulation in traditional
technologies, it also introduces a low-frequency pole into the
control loop. Figure 27 shows the open-loop response that results
from the addition of an integrating capacitor in the voltage loop.
The compensation components found in Figure 26 are necessary
to achieve stability.
SYSTEM HAS 2 POLES
AND 1 ZERO
p2
FIGURE 26. CLASSICAL INTEGRATOR ERROR-AMPLIFIER
CONFIGURATION
f (Hz)
FIGURE 29. UNCOMPENSATED R4 OPEN-LOOP RESPONSE
TRANSIENT RESPONSE
In addition to requiring a compensation zero, the integrator in
traditional architectures also slows system response to transient
conditions. The change in COMP voltage is slow in response to a
rapid change in output voltage. If the integrating capacitor is
removed, COMP moves as quickly as VOUT, and the modulator
immediately increases or decreases switching frequency to
recover the output voltage.
R3 LOOP GAIN (dB)
IOUT
INTEGRATOR POLE
p1
t
R4
L/C DOUBLE-POLE
R3
VCOMP
p2
-20dB CROSSOVER
REQUIRED FOR STABILITY
p3
VOUT
COMPENSATOR TO
ADD z2 IS NEEDED
CURRENT-MODE
ZERO
z1
-2
dB
-40
/d
B
0d
FIGURE 30. R3 vs R4 IDEALIZED TRANSIENT RESPONSE
ec
c
ec
/de
-60dB/d
t
f (Hz)
FIGURE 27. UNCOMPENSATED INTEGRATOR OPEN-LOOP RESPONSE
R2
VOUT
VCOMP
R1
VDAC
FIGURE 28. NON-INTEGRATED R4 ERROR-AMPLIFIER
CONFIGURATION
FN8705 Rev.4.00
Jul 24, 2018
t
The dotted red and blue lines in Figure 30 represent the time
delayed behavior of VOUT and VCOMP in response to a load
transient when an integrator is used. The solid red and blue lines
illustrate the increased response of R4 in the absence of the
integrator capacitor.
To optimize transient response and improve phase margin for
very wide range applications, the ISL68200 integrates two
selectable AV and RR options that move DC gain and point z1, as
shown in Figure 27. The default AV gain of 42 and RR of 200kΩ
however, can cover many cases and provides sufficient gain and
phase margin. For some extreme cases, lower AV gain and higher
RR values are needed to provide a better phase margin and
improve transient ringback. The optimal choice AV and RR can
be obtained by simple monitoring transient response when
experimenting with AV and RR values through the serial bus.
Page 27 of 33
�ISL68200
General Application Design
Guide
Thus, when the output capacitors are selected, the maximum
allowable ripple voltage, VP-P(MAX), determines the lower limit on
the inductance, as shown in Equation 16.
This design guide provides a high-level explanation of the steps
necessary to design a single-phase buck converter. It is assumed
that the reader is familiar with many of the basic skills and
techniques referenced in the following. In addition to this guide,
Renesas provides complete reference designs that include
schematics, bills of materials, and example board layouts.
Output Filter Design
The output inductors and the output capacitor bank together to
form a low-pass filter that smooths the pulsating voltage at the
phase nodes. The output filter must also provide the transient
energy until the regulator can respond. The output filter
necessarily limits the system transient response because it has a
low bandwidth compared to the switching frequency. The output
capacitor must supply or sink load current while the current in
the output inductors increases or decreases to meet the
demand.
In high-speed converters, the output capacitor bank is usually the
most costly (and often the largest) part of the circuit. Output filter
design begins with minimizing the cost of this part of the circuit.
The critical load parameters in choosing the output capacitors are
the maximum size of the load step, I; the load current slew rate,
di/dt; and the maximum allowable output voltage deviation under
transient loading, VMAX. Capacitors are characterized according
to their capacitance, ESR, and ESL (Equivalent Series Inductance).
At the beginning of the load transient, the output capacitors
supply all of the transient current. The output voltage initially
deviates by an amount approximated by the voltage drop across
the ESL. As the load current increases, the voltage drop across
the ESR increases linearly until the load current reaches its final
value. The capacitors selected must have sufficiently low ESL and
ESR so that the total output voltage deviation is less than the
allowable maximum. Neglecting the contribution of inductor
current and regulator response, the output voltage initially
deviates by an amount, as shown in Equation 15:
I
ESL
1
V I ESR + ---------------- V IN + ----------------- ----------------------------L OUT
C OUT 8 N f
(EQ. 15)
SW
V OUT 1 – D
I = ---------------------------------------L OUT f
SW
The filter capacitor must have sufficiently low ESL and ESR so
that V < VMAX.
Most capacitor solutions rely on a mixture of high-frequency
capacitors with relatively low capacitance in combination with bulk
capacitors having high capacitance but limited high-frequency
performance. Minimizing the ESL of the high-frequency capacitors
allows them to support the output voltage as the current increases.
Minimizing the ESR of the bulk capacitors allows them to supply the
increased current with less output voltage deviation. The ESR of the
bulk capacitors also creates the majority of the output voltage
ripple. As the bulk capacitors sink and source the inductor AC
ripple current, a voltage develops across the bulk-capacitor ESR
equal to IL(P-P) (ESR).
FN8705 Rev.4.00
Jul 24, 2018
V OUT V IN – V OUT
L OUT ESR -------------------------------------------------------------f SW V IN V P – P MAX
(EQ. 16)
The capacitor voltage becomes slightly depleted because the
capacitors are supplying a decreasing portion of the load current
while the regulator recovers from the transient. The output
inductors must be capable of assuming the entire load current
before the output voltage decreases more than VMAX. This
places an upper limit on inductance.
Equation 17 gives the upper limit on L for cases when the trailing
edge of the current transient causes a greater output-to-voltage
deviation than the leading edge. Equation 18 addresses the
leading edge. Normally, the trailing edge dictates the selection of
L because duty cycles are usually less than 50%. Nevertheless,
both inequalities should be evaluated, and L should be selected
based on the lower of the two results. In each equation, L is the
per-channel inductance, C is the total output capacitance.
2 C V OUT
L OUT ---------------------------------- V MAX – I ESR
I 2
(EQ. 17)
C
L OUT 1.25
--------------------- V MAX – I ESR V IN – V OUT
I 2
(EQ. 18)
Input Capacitor Selection
The input capacitors are responsible for sourcing the AC
component of the input current flowing into the upper MOSFETs.
Their RMS current capacity must be sufficient to handle the AC
component of the current drawn by the upper MOSFETs, which is
related to duty cycle and the number of active phases. The input
RMS current can be calculated with Equation 19.
I IN RMS =
D
D – D 2 Io 2 + ------ I 2
12
(EQ. 19)
Use Figure 31 on page 29 to determine the input capacitor RMS
current requirement given the duty cycle, maximum sustained
output current (IO), and the ratio of the per-phase peak-to-peak
inductor current (IL(P-P) to IO). Select a bulk capacitor with a ripple
current rating, which will minimize the total number of input
capacitors required to support the RMS current calculated. The
voltage rating of the capacitors should also be at least 1.25x greater
than the maximum input voltage.
Low capacitance, high-frequency ceramic capacitors are needed
in addition to the bulk capacitors to suppress leading and falling
edge voltage spikes. The result from the high current slew rates
produced by the upper MOSFETs turn on and off. Select low ESL
ceramic capacitors and place one as close as possible to each
upper MOSFET drain to minimize board parasitic impedances
and maximize noise suppression.
Page 28 of 33
�ISL68200
TABLE 12. DESIGN AND LAYOUT CHECKLIST
INPUT-CAPACITOR CURRENT (IRMS/IO)
0.6
IL(P-P) = 0.75 IO
0.4
PIN
NAME
NOISE
SENSITIVITY
EN
Yes
Contains an internal 1µs filter. Decoupling the
capacitor is not required. If a capacitor is
needed, use a low time constant one to avoid
too large a shutdown delay.
VIN
Yes
Place 16V+ X7R 1µF in close proximity to the
VIN pin and the system ground plane.
7VLDO
Yes
Place 10V+ X7R 1µF in close proximity to the
7VLDO pin and the system ground plane.
VCC
Yes
Place X7R 1µF in close proximity to the VCC
pin and the system ground plane.
SCL, SDA
Yes
50kHz to 1.25MHz signal when the SMBus,
PMBus, or I2C is sending commands. Pair with
SALERT and route carefully back to the SMBus,
PMBus, or I2C master. Provide 20 mils spacing
within SDA, SALERT, and SCL; and more than
30 mils to all other signals. Refer to the
SMBus, PMBus, or I2C design guidelines and
place proper terminated (pull-up) resistance
for impedance matching. Tie these pins to
GND when not used.
SALERT
No
Open drain and high dv/dt pin during
transitions. Route this pin in the middle of SDA
and SCL. Tie to GND when not used.
PGOOD
No
Open-drain pin. Tie to ground when not used.
RGND,
VSEN
Yes
Route this differential pair to the remote
sensing points with sufficient decoupling
ceramics capacitors. Do not cross or go
above/under any switching nodes (BOOT,
PHASE, UGATE, LGATE) or planes (VIN, PHASE,
VOUT) even though they are not in the same
layer. Provide at least 20 mils spacing from
other traces. Do not share the same trace with
CSRTN.
CSRTN
Yes
Connect to the output rail side of the output
inductor or current sensing resistor pin with a
series resistor in close proximity to the pin. The
series resistor sets the current gain and should
be within 40Ωand 3.5kΩ. Decoupling
(~0.1µF/X7R) on the output end (not the pin)
is optional and might be required for long
sense trace and a poor layout (see Figures 9
and 10 on page 16).
CSEN
Yes
Connect to the phase node side of the output
inductor or current sensing resistor pin with
L/DCR or ESL/RSEN matching network in close
proximity to CSEN and CSRTN pins.
Differentially route back to the controller with
at least 20 mils spacing from other traces. Do
not cross or go above/under the switching
nodes (BOOT, PHASE, UGATE, LGATE) and
power planes (VIN, PHASE, VOUT) even though
they are not in the same layer.
IL(P-P) = 0
IL(P-P) = 0.5 IO
0.2
0
0
0.2
0.4
0.6
DUTY CYCLE (VOUT/VIN)
0.8
1.0
FIGURE 31. NORMALIZED INPUT-CAPACITOR RMS CURRENT vs
DUTY CYCLE FOR SINGLE-PHASE CONVERTER
Design and Layout Considerations
To ensure a first pass design, the schematics design must be
done correctly and the board must be laid out carefully.
As a general rule, power layers should be close together, either
on the top or bottom of the board, with the weak analog or logic
signal layers on the opposite side of the board or internal layers.
The ground-plane layer should be in between power layers and
the signal layers to provide shielding, often the layer below the
top and the layer above the bottom should be the ground layers.
DC/DC converters consist of two sets of components: the power
components and the small signal components. The power
components are the most critical because they switch large
amount of energy. The small signal components connect to
sensitive nodes or supply critical bypassing current and signal
coupling.
Place the power components first. The power components
include MOSFETs, input and output capacitors, and the inductor.
Keeping the distance between the power train and the control IC
short helps keep the gate drive traces short. These drive signals
include LGATE, UGATE, GND, PHASE, and BOOT.
When placing MOSFETs, keep the source of the upper MOSFETs
and the drain of the lower MOSFETs as close as thermally
possible. Place input high frequency capacitors close to the drain
of the upper MOSFETs and the source of the lower MOSFETs.
Place the output inductor and output capacitors between the
MOSFETs and the load. High frequency output decoupling
capacitors (ceramic) should be placed as close as possible to the
decoupling target, making use of the shortest connection paths
to any internal planes. Place the components in such a way that
the area under the IC has fewr noise traces with high dV/dt and
di/dt, such as gate signals, phase node signals and the VIN
plane.
Tables 12 and 13 provide important design and layout checklists
that can help the designer.
FN8705 Rev.4.00
Jul 24, 2018
DESCRIPTION
Page 29 of 33
�ISL68200
TABLE 12. DESIGN AND LAYOUT CHECKLIST (Continued)
PIN
NAME
NOISE
SENSITIVITY
NTC
Yes
IOUT
Yes
DESCRIPTION
Place an NTC 10k (Murata,
NCP15XH103J03RC, = 3380) in close
proximity to the output inductor’s output rail,
not close to MOSFET side (see Figure 19); the
return trace should be 20 mils away from
other traces. Place a 1.54kΩ pull-up and
decoupling capacitor (typically 0.1µF) in close
proximity to the controller. The pull-up resistor
should be exactly tied to the same point as the
VCC pin, not through an RC filter. If not used,
connect this pin to VCC.
Scale R so that the IOUT pin voltage is 2.5V at
63.875A load. Place R and C in the general
proximity of the controller. The RC time
constant should be sufficient as an averaging
function for the digital IOUT. An external pull-up
resistor to VCC is recommended to cancel the
IOUT offset at 0A load. See “IOUT Calibration”
on page 19.
PROG1-4
No
A resistor divider must be referenced to the
VCC pin and the system ground; they can be
placed anywhere. Do not use decoupling
capacitors on these pins.
GND
Yes
Directly connect to a low noise area of the
system ground. The GND PAD should use at
least four vias. Warning: do not use separate
analog grounds and power grounds with a 0Ω
resistor.
LGATE
No
Low-side driver output. The trace between this
pin and the MOSFET gate pin shoudl be as
short and wide as possible. High dV/dt signals
should not be close to any sensitive signals.
UGATE
BOOT,
PHASE
PVCC
No
Yes
Yes
High-side driver output. The trace between this
pin and the MOSFET gate pin should be as
short and wide as possible. High dV/dt signals
should not be close to any sensitive signals.
Place an X7R 0.1µF or 0.22µF in proximity to
the BOOT and PHASE pins. High dV/dt signals
should not be close to any sensitive signals.
Place an X7R 4.7µF in proximity to the PVCC
pin and the system ground plane.
TABLE 13. TOP LAYOUT TIPS
#
DESCRIPTION
1
The layer next to the controller (top or bottom) should be a
ground layer. Warning: do not use separate analog grounds
and power grounds with a 0Ω resistor. Directly connect the
GND PAD to a low noise area of the system ground with at
least four vias.
2
Never placethe controller and its external components above
or under the VIN plane or any switching nodes.
3
Never share CSRTN and VSEN on the same trace.
4
Place the input rail decoupling ceramic capacitors close to
the high-side FET on the same layer as possible. Never use
only one via and a trace to connect the input rail decoupling
ceramics capacitors; must connect to the VIN and GND
planes.
5
Place all decoupling capacitors in close proximity to the
controller and the system ground plane.
6
Connect remote sense (VSEN and RGND) to the load and
ceramic decoupling capacitors nodes; never run this pair
below or above switching noise plane.
7
Always double check critical component pinouts and their
respective footprints.
Voltage Regulator Design Materials
To support VR design and layout, Renesas has developed a set of
tools and evaluation boards listed in Tables 14 and 15,
respectively. Contact a local office or field support for the latest
available information.
TABLE 14. AVAILABLE DESIGN ASSISTANCE MATERIALS
ITEM
DESCRIPTION
SMBus/PMBus/I2C communication tool with
1
PowerNavigator GUI
2
Evaluation board schematics in OrCAD format and
layout in allegro format. See Table 15 for details.
TABLE 15. AVAILABLE DEMO BOARDS
DEMO BOARD
ISL68200DEMO1Z
400kHz, with Dual FET
ISL68201_99140DEMO1Z
FN8705 Rev.4.00
Jul 24, 2018
DESCRIPTION
17x17mm2 1-phase, 20A solution,
17x17mm2 1-phase, 35A solution,
400kHz, with ISL99140
Page 30 of 33
�ISL68200
Revision History
The revision history provided is for informational purposes only and is believed to be accurate, but not warranted.
Please visit our website to make sure you have the latest revision.
DATE
REVISION
CHANGE
Jul 24, 2018
FN8705.4
Added column for tape and reel information and updated Note 1 in Ordering Information table on page 6.
Switched the position of the natural log’s numerator and denominator in Equation 10 on page 19.
Removed About Intersil section and updated Renesas disclaimer.
Oct 17, 2017
FN8705.3
Updated Pin 11 and 12 descriptions on page 5.
Sep 25, 2017
FN8705.2
Applied new header/footer.
Updated Related Literature section.
In Figure 4 on page 10, changed VIN UVLO from “10.2V/9.24V” to “10.08V/9.12V”.
In Table 3 on page 11, changed the 3Fh RUP value from “20” to “21.5”.
Updated the first paragraph on page 11.
In the third paragraph on page 17, added “Ω” after “R = 348”.
In the sixth paragraph on page 28, changed “IC(P-P)” to “IL(P-P)”.
In the second to last paragraph on page 28, added a closing parenthesis to “(IL(P-P) to I0)”.
Mar 7, 2016
FN8705.1
Removed unreleased parts from Tables 1 and 15
Mar 2, 2016
FN8705.0
Initial release
FN8705 Rev.4.00
Jul 24, 2018
Page 31 of 33
�ISL68200
Package Outline Drawing
For the most recent package outline drawing, see L24.4x4C.
L24.4x4C
24 LEAD QUAD FLAT NO-LEAD PLASTIC PACKAGE
Rev 2, 10/06
4.00
4X 2.5
A
20X 0.50
B
PIN 1
INDEX AREA
PIN #1 CORNER
(C 0 . 25)
24
19
1
18
4.00
2 . 50 ± 0 . 15
13
0.15
(4X)
12
7
0.10 M C A B
0 . 07
24X 0 . 23 +- 0
. 05 4
24X 0 . 4 ± 0 . 1
TOP VIEW
BOTTOM VIEW
SEE DETAIL "X"
0.10 C
C
0 . 90 ± 0 . 1
BASE PLANE
( 3 . 8 TYP )
SEATING PLANE
0.08 C
SIDE VIEW
(
2 . 50 )
( 20X 0 . 5 )
C
0 . 2 REF
5
( 24X 0 . 25 )
0 . 00 MIN.
0 . 05 MAX.
( 24X 0 . 6 )
DETAIL "X"
TYPICAL RECOMMENDED LAND PATTERN
NOTES:
1. Dimensions are in millimeters.
Dimensions in ( ) for Reference Only.
2. Dimensioning and tolerancing conform to AMSE Y14.5m-1994.
3. Unless otherwise specified, tolerance : Decimal ± 0.05
4. Dimension b applies to the metallized terminal and is measured
between 0.15mm and 0.30mm from the terminal tip.
5. Tiebar shown (if present) is a non-functional feature.
6. The configuration of the pin #1 identifier is optional, but must be
located within the zone indicated. The pin #1 indentifier may be
either a mold or mark feature.
FN8705 Rev.4.00
Jul 24, 2018
Page 32 of 33
�Notice
1.
Descriptions of circuits, software and other related information in this document are provided only to illustrate the operation of semiconductor products and application examples. You are fully responsible for
the incorporation or any other use of the circuits, software, and information in the design of your product or system. Renesas Electronics disclaims any and all liability for any losses and damages incurred by
you or third parties arising from the use of these circuits, software, or information.
2.
Renesas Electronics hereby expressly disclaims any warranties against and liability for infringement or any other claims involving patents, copyrights, or other intellectual property rights of third parties, by or
arising from the use of Renesas Electronics products or technical information described in this document, including but not limited to, the product data, drawings, charts, programs, algorithms, and application
examples.
3.
No license, express, implied or otherwise, is granted hereby under any patents, copyrights or other intellectual property rights of Renesas Electronics or others.
4.
You shall not alter, modify, copy, or reverse engineer any Renesas Electronics product, whether in whole or in part. Renesas Electronics disclaims any and all liability for any losses or damages incurred by
5.
Renesas Electronics products are classified according to the following two quality grades: “Standard” and “High Quality”. The intended applications for each Renesas Electronics product depends on the
you or third parties arising from such alteration, modification, copying or reverse engineering.
product’s quality grade, as indicated below.
"Standard":
Computers; office equipment; communications equipment; test and measurement equipment; audio and visual equipment; home electronic appliances; machine tools; personal electronic
equipment; industrial robots; etc.
"High Quality": Transportation equipment (automobiles, trains, ships, etc.); traffic control (traffic lights); large-scale communication equipment; key financial terminal systems; safety control equipment; etc.
Unless expressly designated as a high reliability product or a product for harsh environments in a Renesas Electronics data sheet or other Renesas Electronics document, Renesas Electronics products are
not intended or authorized for use in products or systems that may pose a direct threat to human life or bodily injury (artificial life support devices or systems; surgical implantations; etc.), or may cause
serious property damage (space system; undersea repeaters; nuclear power control systems; aircraft control systems; key plant systems; military equipment; etc.). Renesas Electronics disclaims any and all
liability for any damages or losses incurred by you or any third parties arising from the use of any Renesas Electronics product that is inconsistent with any Renesas Electronics data sheet, user’s manual or
other Renesas Electronics document.
6.
When using Renesas Electronics products, refer to the latest product information (data sheets, user’s manuals, application notes, “General Notes for Handling and Using Semiconductor Devices” in the
reliability handbook, etc.), and ensure that usage conditions are within the ranges specified by Renesas Electronics with respect to maximum ratings, operating power supply voltage range, heat dissipation
characteristics, installation, etc. Renesas Electronics disclaims any and all liability for any malfunctions, failure or accident arising out of the use of Renesas Electronics products outside of such specified
ranges.
7.
Although Renesas Electronics endeavors to improve the quality and reliability of Renesas Electronics products, semiconductor products have specific characteristics, such as the occurrence of failure at a
certain rate and malfunctions under certain use conditions. Unless designated as a high reliability product or a product for harsh environments in a Renesas Electronics data sheet or other Renesas
Electronics document, Renesas Electronics products are not subject to radiation resistance design. You are responsible for implementing safety measures to guard against the possibility of bodily injury, injury
or damage caused by fire, and/or danger to the public in the event of a failure or malfunction of Renesas Electronics products, such as safety design for hardware and software, including but not limited to
redundancy, fire control and malfunction prevention, appropriate treatment for aging degradation or any other appropriate measures. Because the evaluation of microcomputer software alone is very difficult
and impractical, you are responsible for evaluating the safety of the final products or systems manufactured by you.
8.
Please contact a Renesas Electronics sales office for details as to environmental matters such as the environmental compatibility of each Renesas Electronics product. You are responsible for carefully and
sufficiently investigating applicable laws and regulations that regulate the inclusion or use of controlled substances, including without limitation, the EU RoHS Directive, and using Renesas Electronics
products in compliance with all these applicable laws and regulations. Renesas Electronics disclaims any and all liability for damages or losses occurring as a result of your noncompliance with applicable
laws and regulations.
9.
Renesas Electronics products and technologies shall not be used for or incorporated into any products or systems whose manufacture, use, or sale is prohibited under any applicable domestic or foreign laws
or regulations. You shall comply with any applicable export control laws and regulations promulgated and administered by the governments of any countries asserting jurisdiction over the parties or
transactions.
10. It is the responsibility of the buyer or distributor of Renesas Electronics products, or any other party who distributes, disposes of, or otherwise sells or transfers the product to a third party, to notify such third
party in advance of the contents and conditions set forth in this document.
11. This document shall not be reprinted, reproduced or duplicated in any form, in whole or in part, without prior written consent of Renesas Electronics.
12. Please contact a Renesas Electronics sales office if you have any questions regarding the information contained in this document or Renesas Electronics products.
(Note 1)
“Renesas Electronics” as used in this document means Renesas Electronics Corporation and also includes its directly or indirectly controlled subsidiaries.
(Note 2)
“Renesas Electronics product(s)” means any product developed or manufactured by or for Renesas Electronics.
(Rev.4.0-1 November 2017)
http://www.renesas.com
SALES OFFICES
Refer to "http://www.renesas.com/" for the latest and detailed information.
Renesas Electronics America Inc.
1001 Murphy Ranch Road, Milpitas, CA 95035, U.S.A.
Tel: +1-408-432-8888, Fax: +1-408-434-5351
Renesas Electronics Canada Limited
9251 Yonge Street, Suite 8309 Richmond Hill, Ontario Canada L4C 9T3
Tel: +1-905-237-2004
Renesas Electronics Europe Limited
Dukes Meadow, Millboard Road, Bourne End, Buckinghamshire, SL8 5FH, U.K
Tel: +44-1628-651-700, Fax: +44-1628-651-804
Renesas Electronics Europe GmbH
Arcadiastrasse 10, 40472 Düsseldorf, Germany
Tel: +49-211-6503-0, Fax: +49-211-6503-1327
Renesas Electronics (China) Co., Ltd.
Room 1709 Quantum Plaza, No.27 ZhichunLu, Haidian District, Beijing, 100191 P. R. China
Tel: +86-10-8235-1155, Fax: +86-10-8235-7679
Renesas Electronics (Shanghai) Co., Ltd.
Unit 301, Tower A, Central Towers, 555 Langao Road, Putuo District, Shanghai, 200333 P. R. China
Tel: +86-21-2226-0888, Fax: +86-21-2226-0999
Renesas Electronics Hong Kong Limited
Unit 1601-1611, 16/F., Tower 2, Grand Century Place, 193 Prince Edward Road West, Mongkok, Kowloon, Hong Kong
Tel: +852-2265-6688, Fax: +852 2886-9022
Renesas Electronics Taiwan Co., Ltd.
13F, No. 363, Fu Shing North Road, Taipei 10543, Taiwan
Tel: +886-2-8175-9600, Fax: +886 2-8175-9670
Renesas Electronics Singapore Pte. Ltd.
80 Bendemeer Road, Unit #06-02 Hyflux Innovation Centre, Singapore 339949
Tel: +65-6213-0200, Fax: +65-6213-0300
Renesas Electronics Malaysia Sdn.Bhd.
Unit 1207, Block B, Menara Amcorp, Amcorp Trade Centre, No. 18, Jln Persiaran Barat, 46050 Petaling Jaya, Selangor Darul Ehsan, Malaysia
Tel: +60-3-7955-9390, Fax: +60-3-7955-9510
Renesas Electronics India Pvt. Ltd.
No.777C, 100 Feet Road, HAL 2nd Stage, Indiranagar, Bangalore 560 038, India
Tel: +91-80-67208700, Fax: +91-80-67208777
Renesas Electronics Korea Co., Ltd.
17F, KAMCO Yangjae Tower, 262, Gangnam-daero, Gangnam-gu, Seoul, 06265 Korea
Tel: +82-2-558-3737, Fax: +82-2-558-5338
© 2018 Renesas Electronics Corporation. All rights reserved.
Colophon 7.0
�


 工商网监
湘ICP备2023018690号
工商网监
湘ICP备2023018690号
