DATASHEET
ISL85009
FN8918
Rev.3.00
Nov 11, 2021
9A, 3.8V to 18V Input, Synchronous Buck Regulator
The ISL85009 is a highly efficient, monolithic, synchronous
buck regulator that can deliver 9A of continuous output current
from a 3.8V to 18V input supply. The device uses current mode
control architecture with a fast transient response and
excellent loop stability.
Features
The ISL85009 integrates very low ON-resistance high-side and
low-side FETs to maximize efficiency and minimize external
component count. The minimum BOM and easy layout
footprint are extremely friendly to space constraint systems.
• Prebias start-up, fixed 3ms soft-start
• Power input voltage range variable 3.8V to 18V
• PWM output voltage adjustable from 0.6V
• Up to 9A output load
• Selectable fSW of 300kHz, 600kHz, and external
synchronization up to 1MHz
• Peak current mode control
- DCM/CCM
- Thermally compensated current limit
- Internal/external compensation
The operation frequency of this device can be set using the
FREQ pin: 600kHz (FREQ = float) and 300kHz (FREQ = GND).
The device can also be synchronized to an external clock up to
1MHz.
Both high-side and low-side MOSFET current limit along with
reverse current limit, fully protect the regulator in an
overcurrent event. Selectable OCP schemes can fit various
applications. Other protections, such as input/output
overvoltage and over-temperature, are also integrated into the
device which give required system level safety in the event of
fault conditions.
• Open-drain PG window comparator
• Output overvoltage and thermal protection
• Input overvoltage protection
• Integrated boot diode with undervoltage detection
• Selectable OCP schemes
- Hiccup OCP
- Latch-off
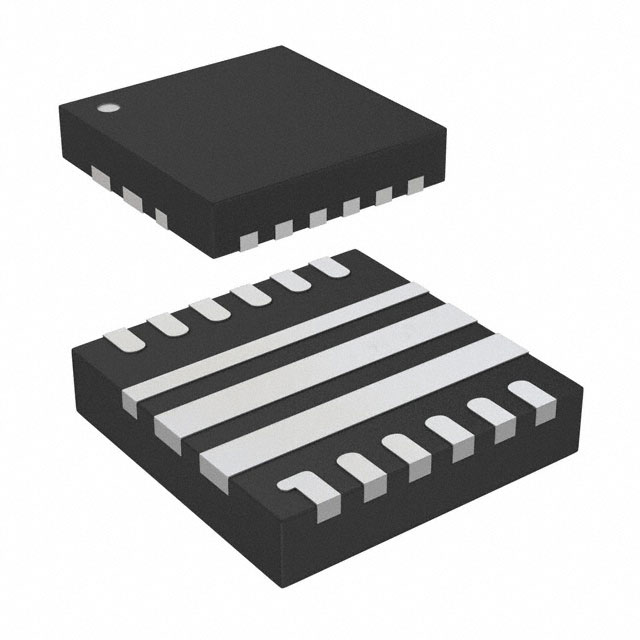
The ISL85009 is offered in a space saving 15 Ld 3.5mmx3.5mm
Pb-free TQFN package with great thermal performance and
0.8mm maximum height.
• Compact size 3.5mmx3.5mm, 15 Ld TQFN
Applications
• Servers and cloud infrastructure POLs
• IPCs, factory automation, and PLCs
• Telecom and networking systems
• Storage systems
• Test measurement
R2
CVIN
C1
R3
100
90
15
14
VIN EN
9
VIN
4.5V TO
18V
13
12
11
10
DNC DNC COMP FB
L1
PVIN
8
PHASE
7
GND
VOUT
CIN
SYNC MODE FREQ PG
1
2
3
4
COUT
VDD BOOT
5
6
EFFICIENCY (%)
R1
80
70
60
50
Vout = 5V, fsw = 600kHz
40
CVDD
2.2µF
CBOOT
100nF
FIGURE 1. TYPICAL APPLICATION SCHEMATIC FOR INTERNAL COMPENSATION
FN8918 Rev.3.00
Nov 11, 2021
Vout = 3.3V, fsw = 600kHz
30
0
1
2
3
4
5
6
7
OUTPUT CURRENT (A)
8
FIGURE 2. EFFICIENCY (VIN = 12V)
Page 1 of 20
© 2017 Renesas Electronics
9
�ISL85009
Typical Application Schematic
C1
CVIN
C2
R3
R1
R2
15
14
VIN EN
9
VIN
4.5 TO
18V
CIN
13
12
11
10
DNC DNC COMP FB
L1
PVIN
8
PHASE
7
GND
SYNC MODE FREQ PG
1
2
3
4
VOUT
COUT
VDD BOOT
5
6
CVDD
2.2µF
CBOOT
100nF
FIGURE 3. TYPICAL APPLICATION SCHEMATIC FOR EXTERNAL COMPENSATION
TABLE 1. DESIGN TABLE FOR DIFFERENT OUTPUT VOLTAGE USING INTERNAL COMPENSATION (See Figure 1)
VOUT (V)
1
1.2
1.8
3.3
5
VIN (V)
4.5 to 18
4.5 to 18
4.5 to 18
4.5 to 18
6 to 18
FREQ (kHz)
300
300
600
600
600
Compensation
Internal
Internal
Internal
Internal
Internal
CIN (µF)
3x22
3x22
3x22
3x22
3x22
COUT (µF)
560 + 3x100
560 + 3x100
3x100
4x47
4x47
L1 (µH)
1
1
1
1.5
1.5
R1 (kΩ)
100
147
200
365
365
R2 (kΩ)
150
147
100
80.6
49.9
C1 (pF)
DNP
DNP
4.7
3.3
3.3
NOTES:
1. The design table is referencing the schematic shown in Figure 1.
2. Ceramic capacitors are selected for 22µF, 47µF, and 100µF in the table.
3. 560µF (4.5mΩ) low ESR conductive polymer aluminum solid capacitors are selected.
4. Recommend to keep the inductor peak-to-peak current to less than 5A.
Ordering Information
PART NUMBER
(Notes 6, 7)
ISL85009FRZ-T
PART
MARKING
5009
PACKAGE DESCRIPTION
(RoHS COMPLIANT)
15 Ld 3.5mmx3.5mm TQFN
ISL85009FRZ-T7A
ISL85009EVAL1Z
PKG.
DWG. #
L15.3.5x3.5
CARRIER TYPE
(Note 5)
Reel, 6k
TEMP. RANGE
-40 to +125°C
Reel, 250
Evaluation Board
NOTES:
5. See TB347 for details on reel specifications.
6. These Pb-free plastic packaged products employ special Pb-free material sets, molding compounds/die attach materials, and 100% matte tin plate
plus anneal (e3 termination finish, which is RoHS compliant and compatible with both SnPb and Pb-free soldering operations). Pb-free products are
MSL classified at Pb-free peak reflow temperatures that meet or exceed the Pb-free requirements of IPC/JEDEC J-STD-020.
7. For Moisture Sensitivity Level (MSL), please see product information page for ISL85009. For more information on MSL, see TB363.
FN8918 Rev.3.00
Nov 11, 2021
Page 2 of 20
�ISL85009
TABLE 2. KEY DIFFERENCES BETWEEN FAMILY OF PARTS
PART NUMBER
INTERNAL/EXTERNAL COMPENSATION
EXTERNAL FREQUENCY SYNC
CURRENT RATING
ISL85009
Yes
Yes
9A
ISL85012
Yes
Yes
12A
ISL85014
Yes
Yes
14A
Functional Block Diagram
MODE
SYNC
FREQ
VIN
2
1
3
15
HIGH-SIDE
OCP
SCHEME
SETTING
6 BOOT
LDO
EN
BOOT
UVP
5 VDD
UNDERVOLTAGE
LOCKOUT
OSCILLATOR
9 PVIN
CSA
EN 14
0.6V
REFERENCE
FAULT
MONITOR
CIRCUITS
PG 4
+
SLOPE
COMP
+
-
SOFT-START
CONTROL
THERMAL
SHUTDOWN
+
+
GATE DRIVE
CONTROL
CIRCUIT
EA
800/1200kΩ
FREQ
30pF
COMP 11
GND DETECTION
CIRCUIT
8 PHASE
7 GND
-
FB 10
VDD
ZERO CROSS
DETECTOR
AND
NEGATIVE
CURRENT
LIMIT
13 DNC
12 DNC
POSITIVE
LS OCP
FIGURE 4. FUNCTIONAL BLOCK DIAGRAM
FN8918 Rev.3.00
Nov 11, 2021
Page 3 of 20
�ISL85009
Pin Configuration
ISL85009
(15 LD 3.5mmx3.5mm TQFN)
TOP VIEW
15
14
13
VIN
EN
DNC
12
9
PVIN
8
PHASE
7
GND
SYNC MODE FREQ
1
2
3
11
DNC COMP
PG
4
10
FB
VDD BOOT
5
6
Pin Descriptions
PIN#
PIN
NAME
1
SYNC
Synchronization and FCCM/DEM selection pin. Connect to VDD or float for Forced Continuous Conduction Mode. Connect to GND
for Diode Emulation Mode in the light-load condition. Connect to an external clock signal for synchronization with the rising edge
trigger.
2
MODE
OCP scheme select pin. Short it to GND for Latch-Off mode. Float it for Hiccup mode.
3
FREQ
Default frequency selection pin. Short it to GND for 300kHz. Float it for 600kHz.
4
PG
Power-good open-drain output. It requires a pull-up resistor (10kΩ to 100kΩ) between PG and VDD or a voltage not exceeding
5.5V. PG pulls high when FB is in the range of ~90% to ~116% of its intended value.
5
VDD
Low dropout linear regulator decoupling pin. The VDD is the internally generated 5V supply voltage and is derived from VIN. The
VDD is used to power all the internal core analog control blocks and drivers. Connect a 2.2µF capacitor from VDD to the board
ground plane. If the VIN is between 3V to 5.5V, then connect VDD directly to VIN to improve efficiency.
6
BOOT
BOOT is the floating bootstrap supply pin for the high-side power MOSFET gate driver. A bootstrap capacitor, usually 0.1µF, is
required between BOOT and PHASE.
7
GND
Reference of the power circuit. For thermal relief, this pin should be connected to the ground plane by vias.
8
PHASE
9
PVIN
10
FB
11
COMP
12, 13
DNC
14
EN
Enable input. The regulator is held off when this pin is pulled to ground. The device is enabled when the voltage on this pin rises
to about 0.6V.
15
VIN
Input supply for the control circuit and the source for the internal linear regulator that provides bias for the IC.
A decoupling capacitor, typically 1µF ceramic, is required between VIN and GND.
DESCRIPTION
Switch node connection to the internal power MOSFETs (source of upper FET and drain of lower FET) and the external output
inductor.
Input supply for the PWM regulator power stage. A decoupling capacitor, typically ceramic, is required to be connected between
this pin and GND.
Inverting input to the voltage loop error amplifier. The output voltage is set by an external resistor divider connected to FB.
Output of the error amplifier. Compensation network between COMP and FB to configure external compensation. Place a 200Ω
resistor between COMP and GND for internal compensation, which is used to meet most applications.
Do Not Connect to pin. Float the pins in the design.
FN8918 Rev.3.00
Nov 11, 2021
Page 4 of 20
�ISL85009
Absolute Maximum Ratings
Thermal Information
VIN, EN to GND . . . . . . . . . . . . . . . . . . . . . . . . . . . . . . . . . . . . . -0.3V to +22V
PVIN to GND . . . . . . . . . . . . . . . . . . . . . . . . . . . . . . . . . . . . . . . -0.3V to +22V
PHASE to GND. . . . . . . . . . . . . . . . . . . . . . . . . . . . . . . . . . -0.7V to +22V (DC)
PHASE to GND. . . . . . . . . . . . . . . . . . . . . . . . . . . . . . . . . . -2V to +22V (40ns)
BOOT to PHASE. . . . . . . . . . . . . . . . . . . . . . . . . . . . . . . . . . . . . . . -0.3V to +7V
VDD, COMP, SYNC, PG, FB, MODE, FREQ, SS, IOCP to GND . . . -0.3V to +7V
ESD Rating
Human Body Model (Tested per JS-001-2014). . . . . . . . . . . . . . . . .2.5kV
Charged Device Model (Tested per JS-002-2014) . . . . . . . . . . . . . . . 1kV
Latch-Up (Tested per JESD78E; Class 2, Level A, +125°C). . . . . . . 100mA
Thermal Resistance
JA (°C/W) JC (°C/W)
TQFN Package (Notes 8, 9) . . . . . . . . . . . . .
33
1.2
Maximum Storage Temperature Range . . . . . . . . . . . . . .-65°C to +150°C
Junction Temperature Range . . . . . . . . . . . . . . . . . . . . . . .-55°C to +150°C
Pb-Free Reflow Profile . . . . . . . . . . . . . . . . . . . . . . . . . . . . . . . . . . see TB493
Recommended Operating Conditions
VIN Supply Voltage Range. . . . . . . . . . . . . . . . . . . . . . . . . . . . . . 4.5V to 18V
PVIN Supply Voltage Range . . . . . . . . . . . . . . . . . . . . . . . . . . . . 3.8V to 18V
Load Current Range . . . . . . . . . . . . . . . . . . . . . . . . . . . . . . . . . . . . . . 0A to 9A
CAUTION: Do not operate at or near the maximum ratings listed for extended periods of time. Exposure to such conditions may adversely impact product
reliability and result in failures not covered by warranty.
NOTES:
8. JA is measured in free air with the component mounted on a high-effective thermal conductivity test board with “direct attach” features, except with
three vias under the GND EPAD strip contacting the GND plane and two vias under the VIN EPAD strip contacting the VIN plane. See TB379.
9. For JC, the case temperature location is the center of the exposed metal pad on the package underside.
Electrical Specifications Unless otherwise noted, all parameter limits are established over the recommended operating conditions and
the typical specifications are measured at the following conditions: TJ = -40°C to +125°C, VIN = 4.5V to 18V, unless otherwise noted. Typical values are at
TA = +25°C. Boldface limits apply across the operating temperature range, -40°C to +125°C.
PARAMETER
SYMBOL
TEST CONDITIONS
MIN
(Note 10)
TYP
MAX
(Note 10)
UNIT
18
V
SUPPLY VOLTAGE
PVIN Voltage Range
PVIN
VIN Voltage Range
VIN
3.8
18
V
VIN Quiescent Supply Current
IQ
EN = 2V, FB = 0.64V
4.5
3
5
mA
VIN Shutdown Supply Current
ISD
EN = GND
8
13
µA
POWER-ON RESET
PVIN POR Threshold
Rising edge
Falling edge
VIN POR Threshold
2.9
V
Rising edge
EN POR Threshold
4.49
Falling edge
3.4
Rising edge
0.5
Hysteresis
VDD POR Threshold
V
1.9
V
V
0.6
0.7
100
Rising edge
V
mV
3.6
Falling edge
2.4
VIN = 6V to 18V, IVDD = 0mA to 30mA
4.3
V
V
INTERNAL VDD LDO
VDD Output Voltage Regulation Range
VDD Output Current Limit
5.0
5.5
80
VIN = 5V, IVDD = 30mA
LDO Dropout Voltage
V
mA
0.65
V
660
kHz
OSCILLATOR
Nominal Switching Frequency
fSW1
FREQ = float
540
600
Nominal Switching Frequency
250
280
310
kHz
90
150
ns
fSW2
FREQ = GND
Minimum On-Time
tON
IOUT = 0mA
Minimum Off-Time
tOFF
Synchronization Range
140
100
SYNC Logic Input Low
SYNC Logic Input High
FN8918 Rev.3.00
Nov 11, 2021
170
ns
1000
kHz
0.5
1.2
V
V
Page 5 of 20
�ISL85009
Electrical Specifications Unless otherwise noted, all parameter limits are established over the recommended operating conditions and
the typical specifications are measured at the following conditions: TJ = -40°C to +125°C, VIN = 4.5V to 18V, unless otherwise noted. Typical values are at
TA = +25°C. Boldface limits apply across the operating temperature range, -40°C to +125°C. (Continued)
PARAMETER
SYMBOL
TEST CONDITIONS
MIN
(Note 10)
TYP
MAX
(Note 10)
UNIT
0.5895
0.6
0.6105
V
ERROR AMPLIFIER
FB Regulation Voltage
VFB
VFB = 0.6V
FB Leakage Current
Open Loop Bandwidth
10
BW
5.5
Gain
Output Drive
High-side clamp = 1.5V, low-side clamp = 0.4V
Current Sense Gain
RT
Slope Compensation
Se
0.05
Tested at 600kHz
nA
MHz
70
dB
±100
µA
0.055
0.063
470
Ω
mV/µs
SOFT-START
Default Soft-Start Time
1.9
3
4.7
ms
PG
IPG = 5mA
Output Low Voltage
0.3
PG Pin Leakage Current
V
0.01
PG Lower Threshold
µA
Percentage of output regulation
81
87
92
%
110
116
121
%
PG Upper Threshold
Percentage of output regulation
PG Thresholds Hysteresis
SYNC is short-to-GND
Delay Time
3
%
Rising edge
1.5
ms
Falling edge
23
µs
FAULT PROTECTION
VIN/PVIN Overvoltage Lockout
Rising edge
19
20.5
22
V
Falling edge
18
19.5
21
V
Hysteresis
Positive Overcurrent Protection Threshold
IPOCP
High-side OCP
1
12.5
Low-side OCP
Negative Overcurrent Protection Threshold
INOCP
Current forced into PHASE node, high-side MOSFET is off
V
15
16.5
-10.8
Hiccup Blanking Time
-7.5
A
-5.5
150
FB Overvoltage Threshold
A
21
110
116
A
ms
121
%
TSD
Rising threshold
160
°C
THYS
Hysteresis
10
°C
High-Side
RHDS
IPHASE = 900mA
17
mΩ
Low-Side
RLDS
IPHASE = 900mA
8.5
mΩ
EN = GND
22.5
kΩ
Thermal Shutdown Temperature
POWER MOSFET
PHASE Pull-Down Resistor
NOTE:
10. Compliance to datasheet limits is assured by one or more methods: production test, characterization, and/or design.
FN8918 Rev.3.00
Nov 11, 2021
Page 6 of 20
�ISL85009
Typical Characteristics
4.0
VIN QUIESCENT CURRENT (mA)
VIN SHUTDOWN CURRENT (µA)
12
10
8
6
4
2
0
-40
-25
-10
5
20
35
50
65
80
95
110 125
3.8
3.6
3.4
3.2
3.0
2.8
2.6
2.4
2.2
2.0
-40
-25
-10
JUNCTION TEMPERATURE (°C)
FIGURE 5. VIN SHUTDOWN CURRENT vs TEMPERATURE
35
50
65
80
95
110 125
EN RISING THRESHOLD (V)
0.65
0.604
FB VOLTAGE (V)
20
FIGURE 6. VIN QUIESCENT CURRENT vs TEMPERATURE
0.606
0.602
0.600
0.598
0.596
0.594
0.63
0.61
0.59
0.57
0.55
-40
-25
-10
5
20
35
50
65
80
95
110 125
-40
-25
-10
JUNCTION TEMPERATURE (°C)
5
20
35
50
65
80
95
110 125
JUNCTION TEMPERATURE (°C)
FIGURE 7. FEEDBACK VOLTAGE vs TEMPERATURE
FIGURE 8. ENABLE THRESHOLD vs TEMPERATURE
4.130
3.72
VIN FALLING THRESHOLD (V)
VIN RISING THRESHOLD (V)
5
JUNCTION TEMPERATURE (°C)
4.125
4.120
4.115
4.110
4.105
4.100
3.71
3.70
3.69
3.68
3.67
3.66
-40
-25
-10
5
20
35
50
65
80
95
JUNCTION TEMPERATURE (°C)
FIGURE 9. VIN POR (RISING) vs TEMPERATURE
FN8918 Rev.3.00
Nov 11, 2021
110 125
-40
-25
-10
5
20
35
50
65
80
95
110 125
JUNCTION TEMPERATURE (°C)
FIGURE 10. VIN POR (FALLING) vs TEMPERATURE
Page 7 of 20
�ISL85009
(Continued)
700
680
660
640
620
600
580
560
540
520
500
-40
-25
-10
5
20
35
50
65
80
95
400
FREQUENCY WHEN SYNC IS GND (kHz)
FREQUENCY WHEN SYNC IS FLOAT (kHz)
Typical Characteristics
110 125
380
360
340
320
300
280
260
240
220
200
-40
-25
-10
FIGURE 11. FREQUENCY (600kHz DEFAULT) vs TEMPERATURE
20
35
50
65
80
95
110 125
FIGURE 12. FREQUENCY (300kHz DEFAULT) vs TEMPERATURE
1.40
25
HIGH-SIDE rDS(ON) (mΩ)
1.35
PG DELAY (ms)
5
JUNCTION TEMPERATURE (°C)
JUNCTION TEMPERATURE (°C)
1.30
1.25
1.20
1.15
1.10
20
15
10
5
0
-40
-25
-10
5
20
35
50
65
80
95
110 125
-40
-25
-10
JUNCTION TEMPERATURE (°C)
5
20
35
50
65
80
95
110 125
JUNCTION TEMPERATURE (°C)
FIGURE 13. PG DELAY vs TEMPERATURE
FIGURE 14. HIGH-SIDE rDS(ON) vs TEMPERATURE
10
LOW-SIDE rDS(ON) (mΩ)
9
8
7
6
5
4
3
2
1
0
-40
-25
-10
5
20
35
50
65
80
95
110 125
JUNCTION TEMPERATURE (°C)
FIGURE 15. LOW-SIDE rDS(ON) vs TEMPERATURE
FN8918 Rev.3.00
Nov 11, 2021
Page 8 of 20
�ISL85009
Typical Performance Curves
100
100
90
90
80
80
EFFICIENCY (%)
EFFICIENCY (%)
Circuit of Figure 3. Design table on page 2 shows the components value for different
output voltages. Plots are captured from ISL85009EVAL1Z boards. VIN = 12V, VOUT = 1.8V, FREQ = 600kHz, CCM, TJ = -40°C to +125°C unless otherwise
noted. Typical values are at TA = +25°C.
70
60
50
40
70
60
50
Vin = 12V, fsw = 600kHz
40
Vout = 5V, fsw = 600kHz
Vin = 5V, fsw = 600kHz
30
30
0
1
2
3
4
5
6
7
OUTPUT CURRENT (A)
8
9
0
100
100
90
90
80
80
70
60
50
Vin = 12V, fsw = 600kHz
40
2
4
5
6
7
OUTPUT CURRENT (A)
8
9
70
60
50
Vin = 12V, fsw = 300kHz
40
Vin = 5V, fsw = 300kHz
Vin = 5V, fsw = 600kHz
30
30
0
1
2
3
4
5
6
OUTPUT CURRENT (A)
7
8
0
9
FIGURE 18. EFFICIENCY vs LOAD (VOUT = 1.8V, fSW = 600kHz)
100
1.872
90
1.854
80
70
60
50
40
1
2
3
4
5
6
OUTPUT CURRENT (A)
7
8
9
FIGURE 19. EFFICIENCY vs LOAD (VOUT = 1.2V, fSW = 300kHz)
OUTPUT VOLTAGE (V)
EFFICIENCY (%)
3
FIGURE 17. EFFICIENCY vs LOAD (VOUT = 3.3V, fSW = 600kHz)
EFFICIENCY (%)
EFFICIENCY (%)
FIGURE 16. EFFICIENCY vs LOAD (VOUT = 5V, fSW = 600kHz)
1
Vin = 12V, fsw = 300kHz
1.836
1.818
1.800
1.782
1.764
VIN = 12V
1.746
Vin = 5V, fsw = 300kHz
VIN = 5V
30
1.728
0
1
2
3
4
5
6
OUTPUT CURRENT (A)
7
8
FIGURE 20. EFFICIENCY vs LOAD (VOUT = 1.0V, fSW = 300kHz)
FN8918 Rev.3.00
Nov 11, 2021
9
0
1
2
3
4
5
6
OUTPUT CURRENT (A)
7
8
9
FIGURE 21. VOUT REGULATION vs LOAD (VOUT = 1.8V, fSW = 600kHz)
Page 9 of 20
�ISL85009
Typical Performance Curves
Circuit of Figure 3. Design table on page 2 shows the components value for different
output voltages. Plots are captured from ISL85009EVAL1Z boards. VIN = 12V, VOUT = 1.8V, FREQ = 600kHz, CCM, TJ = -40°C to +125°C unless otherwise
noted. Typical values are at TA = +25°C. (Continued)
C2: EN, 10V/DIV
C2: EN, 10V/DIV
C1: VOUT, 1V/DIV
C1: VOUT, 1V/DIV
C4: IL, 5A/DIV
C4: IL, 5A/DIV
C3: PGOOD, 5V/DIV
C3: PGOOD, 5V/DIV
1ms/DIV
1ms/DIV
FIGURE 22. START-UP BY EN (VIN = 12V, VOUT = 1.8V AT 0A, 600kHz,
DCM)
C2: EN, 10V/DIV
C1: VOUT, 1V/DIV
C4: IL, 5A/DIV
C3: PGOOD, 5V/DIV
FIGURE 23. START-UP BY EN (VIN = 12V, VOUT = 1.8V AT 0A, 600kHz,
FCCM)
C2: EN, 10V/DIV
C1: VOUT, 1V/DIV
C4: IL, 5A/DIV
C3: PGOOD, 5V/DIV
1ms/DIV
200µs/DIV
FIGURE 24. START-UP BY EN (VIN = 12V, VOUT = 1.8V AT 9A, 600kHz)
FIGURE 25. SHUT DOWN BY EN (VIN = 12V, VOUT = 1.8V AT 9A, 600kHz)
C2: PHASE, 10V/DIV
C1: VOUT, 1V/DIV
C4: IL, 5A/DIV
C3: PGOOD, 5V/DIV
C2: PHASE, 10V/DIV
C1: VOUT, 1V/DIV
C4: IL, 5A/DIV
C3: PGOOD, 5V/DIV
50ms/DIV
50ms/DIV
FIGURE 26. LATCH-OFF OCP (VIN = 12V, VOUT = 1.8V, 600kHz)
FIGURE 27. HICCUP OCP (VIN = 12V, VOUT = 1.8V, 600kHz)
FN8918 Rev.3.00
Nov 11, 2021
Page 10 of 20
�ISL85009
Typical Performance Curves
Circuit of Figure 3. Design table on page 2 shows the components value for different
output voltages. Plots are captured from ISL85009EVAL1Z boards. VIN = 12V, VOUT = 1.8V, FREQ = 600kHz, CCM, TJ = -40°C to +125°C unless otherwise
noted. Typical values are at TA = +25°C. (Continued)
C2: PHASE, 10V/DIV
C2: PHASE, 10V/DIV
C1: VOUT, 20mV/DIV, AC-COUPLED
C1: VOUT, 20mV/DIV, AC-COUPLED
C4: IL, 5A/DIV
C4: IL, 5A/DIV
5µs/DIV
2ms/DIV
FIGURE 28. OUTPUT VOLTAGE RIPPLE (VIN = 12V, VOUT = 1.8V AT 0A,
600kHz, FCCM)
FIGURE 29. OUTPUT VOLTAGE RIPPLE (VIN = 12V, VOUT = 1.8V AT 0A,
600kHz, DEM)
C2: PHASE, 10V/DIV
C1: VOUT, 20mV/DIV, AC-COUPLED
C4: IL, 5A/DIV
5µs/DIV
FIGURE 30. OUTPUT VOLTAGE RIPPLE (VIN = 12V, VOUT = 1.8V AT 9A, 600kHz)
FN8918 Rev.3.00
Nov 11, 2021
Page 11 of 20
�ISL85009
Detailed Description
The ISL85009 combines a synchronous buck controller with a
pair of integrated switching MOSFETs. The buck controller drives
the internal high-side and low-side N-channel MOSFETs to deliver
load currents up to 9A. The buck regulator can operate from an
unregulated DC source, such as a battery, with a voltage ranging
from +3.8V to +18V. An internal 5V LDO voltage regulator is used
to bias the controller. The converter output voltage is
programmed using an external resistor divider and will generate
regulated voltages down to 0.6V. These features make the
regulator suited for a wide range of applications.
The controller uses a current mode loop, which simplifies the
loop compensation and permits fixed frequency operation over a
wide range of input and output voltages. The internal feedback
loop compensation option allows for simple circuit design.
600kHz (FREQ = float) and 300kHz (FREQ = GND) can be
selected as the default switching frequency. The regulator can be
synchronized from 100kHz to 1MHz by the SYNC pin as well.
The buck regulator is equipped with a lossless current limit
scheme. The current in the output stage is derived from
temperature compensated measurements of the drain-to-source
voltage of the internal power MOSFETs.
Operation Initialization
The power-on reset circuitry and enable inputs prevent false
start-up of the PWM regulator output. Once all the input criteria
are met (see Figure 31), the controller soft-starts the output
voltage to the programmed level.
EN
+
0.6V
-
VIN
+
4.4V
-
PVIN
+
3.8V
-
VDD
+
3.4V
-
POR
PWM Control Scheme
The ISL85009 employs the current-mode Pulse-Width
Modulation (PWM) control scheme for fast transient response.
The current loop consists of the oscillator, the PWM comparator,
current-sensing circuit, and the slope compensation circuit. The
gain of the current-sensing circuit is typically 55mV/A and the
slope compensation is 780mV/tSS (tSS = period). The control
reference for the current loop comes from the Error Amplifier’s
(EA) output, which compares the feedback signal at FB pin to the
integrated 0.6V reference.
To use internal compensation, connect COMP to ground via a
200Ω resistor. When the default frequency 600kHz is used,
either by floating the FREQ pin, or by applying a 600kHz square
wave at the SYNC pin, the voltage loop is internally compensated
with a 30pF and 800kΩ RC network. When the frequency is set
to 300kHz, the voltage loop is internally compensated with a
30pF and 1200kΩ RC network. A 30pF and 1200kΩ RC network
is implemented for internal compensation when It works at
default 300kHz (FREQ = GND).
The PWM operation is initialized by the clock from the oscillator.
The high-side MOSFET is turned on at the beginning of a PWM
cycle and the current in the MOSFET starts to ramp-up. When the
sum of the current amplifier (CSA) and the slope compensation
(780mV/tSS) reaches the control reference of the current loop
(COMP), the PWM comparator sends a signal to the PWM logic to
turn off the upper MOSFET and turn on the lower MOSFET. The
lower MOSFET stays on until the end of the PWM cycle. Figure 32
shows the typical operating waveforms during Continuous
Conduction Mode (CCM) operation. The dotted lines illustrate
the sum of the compensation ramp and the current sense
amplifier’s output.
VEAMP
VCSA
FIGURE 31. POR CIRCUIT
Enable and Soft-Start
Chip operation begins after VIN, PVIN, and VDD exceed their rising
POR trip points. If EN is held low externally, nothing happens until
this pin is released. Once the voltage on the EN pin is above 0.6V,
the LDO powers up and soft-start control begins. The ISL85009
operates with Diode Emulation Mode (DEM) during soft-start
regardless the setting on SYNC pin. The soft-start time is 3ms
(typical).
FN8918 Rev.3.00
Nov 11, 2021
The part is designed to support start-up into a prebiased load
(the prebiased voltage is required to be less than the output
voltage setting). Both high-side and low-side switches are
disabled until the internal SS voltage exceeds the FB voltage
during start-up. It is recommended to connect an RC filter
between an external EN input and the EN pin if a long trace or
pull-up to VIN is used. An RC filter of 100kΩ and 1nF is
recommended.
DUTY
CYCLE
IL
VOUT
FIGURE 32. PWM OPERATION WAVEFORMS
Page 12 of 20
�ISL85009
Light-Load Operation
The ISL85009 monitors both the current in the low-side MOSFET
and the voltage of the FB node for regulation. Pulling the SYNC
pin low allows the regulator to enter discontinuous operation
when lightly loaded by operating the low-side MOSFET in Diode
Emulation Mode (DEM). In this mode, reverse current is not
allowed in the inductor and the output falls naturally to the
regulation voltage before the high-side MOSFET is switched for
the next cycle. In CCM mode, the boundary is set by Equation 1:
V OUT 1 – D
I OUT = ----------------------------------2Lf SW
(EQ. 1)
The output voltage programming resistor, R2, will depend on the
value chosen for the feedback resistor, R1, and the desired
output voltage, VOUT ; see Equation 3. The R1 value will
determine the gain of the feedback loop. See “Loop
Compensation Design” on page 16 for more details. The value for
the feedback resistor is typically between 1kΩ and 370kΩ.
R 1 0.6V
R 2 = ---------------------------------V OUT – 0.6V
(EQ. 3)
If the desired output voltage is 0.6V, then R2 is left unpopulated.
R1 is still required to set the low frequency pole of the modulator
compensation.
where D = duty cycle, fSW = switching frequency, L = inductor
value, IOUT = output loading current, VOUT = output voltage.
Table 3 shows the operating modes determined by the SYNC pin.
VOUT
R1
TABLE 3. OPERATION MODE SETTING
LIGHT-LOAD OPERATION
Float
Forced CCM
GND
DEM
R2
FIGURE 33. EXTERNAL RESISTOR DIVIDER
The ISL85009’s switching frequency can be set by the FREQ pin.
Floating the FREQ pin sets the switching frequency to 600kHz,
while shorting the FREQ pin to ground sets the switching
frequency to 300kHz. The ISL85009 can also be synchronized
from 100kHz to 1MHz by an external signal applied to the SYNC
pin. The rising edge on the SYNC triggers the rising edge of the
PHASE pulse. Make sure the on-time of the SYNC pulse is longer
than 100ns.
When floating the FREQ pin for 600kHz switching frequency, or
using synchronizing to an external clock on the SYNC pin, along
with the internal compensation option (COMP short to GND
through a 200Ω resistor), the voltage loop is internally
compensated with a 30pF and 800kΩ RC network. A 30pF and
1200kΩ RC network is implemented for internal compensation
when It works with FREQ = GND (fSW = 300kHz).
In applications, the minimum on-time requirement of the
regulator limits the range of the switching frequency. The
maximum switching frequency can be calculated using
Equation 2:
Protection Features
The regulator limits current in all on-chip power devices.
Overcurrent limits are applied to the two output switching
MOSFETs as well as to the LDO linear regulator that feeds VDD.
The output overvoltage protection circuitry on the switching
regulator provides a second layer of protection.
High-Side MOSFET Overcurrent Protection
Current flowing through the internal high-side switching MOSFET
is monitored during on-time. The current, which is temperature
compensated, will compare to a default 15A overcurrent limit.
The ISL85009 offers two OCP schemes to implement the
on-time overcurrent protection, which can be configured by the
MODE pin (see Table 4).
TABLE 4. OCP SCHEME SETTING
MODE PIN SETTING
(EQ. 2)
ISL85009 requires a minimum on-time of 150ns (maximum) for
proper output regulation. For example, with 1V output voltage
and 18V maximum input voltage, the switching frequency must
be less than 370kHz.
Output Voltage Selection
The regulator output voltages can be programmed using external
resistor dividers that scale the voltage feedback relative to the
internal reference voltage. The scaled voltage is fed back to the
inverting input of the error amplifier; refer to Figure 33.
FN8918 Rev.3.00
Nov 11, 2021
EA
0.6V
REFERENCE
Switching Frequency Setting and
Synchronization
V OUT
f SW Max = -------------------------------------------------V IN MAX mint on
+
-
SYNC PIN SETTING
OCP SCHEME
Float
Enter Hiccup mode after eight consecutive
cycle-by-cycle limits. Blanking time is 150ms.
GND
Enter Latch-Off mode after eight consecutive
cycle-by-cycle limits.
If the measured current exceeds the overcurrent limit, the high-side
MOSFET is immediately turned off and will not turn on again until
the next switching cycle. After eight consecutive cycles of
overcurrent events detected, the converter will operate at the
selected OCP scheme according to the MODE pin configuration. A
cycle where an overcurrent condition is not detected will reset the
counter.
The switching frequency will be folded back if the OCP is tripped
and the on-time of the PWM is less than 250ns to lower down the
average inductor current.
Page 13 of 20
�ISL85009
Low-Side MOSFET Overcurrent Protection
BOOT Undervoltage Detection
Low-side current limit consists of forward current limit (from GND
to PHASE) and reverse current limit (from PHASE to GND).
The internal driver of the high-side FET is equipped with a BOOT
Undervoltage (UV) detection circuit. In the event the voltage
difference between BOOT and PHASE falls below 2.8V, the UV
detection circuit allows the low-side MOSFET on for 250ns to
recharge the bootstrap capacitor.
Current through the low-side switching MOSFET is sampled
during off time. The low-side OCP comparator is flagged if the
low-side MOSFET current exceeds 21A (forward). It resets the flag
when the current falls below 15A. The PWM will skip cycles when
the flag is set, allowing the inductor current to decay to a safe
level before resuming switching (see Figure 34).
Similar to the forward overcurrent, the reverse current protection
is realized by monitoring the current across the low-side MOSFET.
When the low-side MOSFET current reaches -7.5A, the
synchronous rectifier is turned off. This limits the ability of the
regulator to actively pull-down on the output.
CLOCK
PWM
21A
15A
IL
While the ISL85009 includes an internal bootstrap diode,
efficiency can be improved by using an external supply voltage
and bootstrap Schottky diode. The external diode is then sourced
from a fixed external 5V supply or from the output of the
switching regulator if this is at 5V. The bootstrap diode can be a
low cost type, such as the BAT54 (see Figure 35).
Power-Good
ISL85009 has a Power-Good (PG) indicator which is an open drain
of a MOSFET. It requires pull-up to VDD or other voltage source
lower than 5.5V through a resistor (usually from 10k to 100kΩ).
The PG is asserted 1.5ms after the FB voltage reaches 90% of the
reference voltage in soft-start. It pulls low if the FB voltage drops to
87% of the reference voltage or exceeds 116% of the reference
voltage during the normal operation. Disabling the part also pulls
the PG low. The PG will reassert when the FB voltage drops back to
113% (100%) of the reference voltage after tripping the
overvoltage protection when SYNC is low (float/high).
PHASE
FIGURE 34. LOW-SIDE FORWARD OCP
Output Overvoltage Protection
The overvoltage protection triggers when the output voltage
exceeds 116% of the set voltage. In this condition, high-side and
low-side MOSFETs are off until the output drops to within the
regulation band. Once the output is in regulation, the controller
will restart under internal SS control.
Input Overvoltage Protection
The input overvoltage protection system prevents operation of
the switching regulator whenever the input voltage is higher than
20V. The high-side and low-side MOSFETs are off and the
converter will restart under internal SS control when the input
voltage returns to normal.
Thermal Overload Protection
Thermal overload protection limits the maximum die
temperature, and thus the total power dissipation in the
regulator. A sensor on the chip monitors the junction
temperature. A signal is sent to the fault monitor circuits
whenever the junction temperature (TJ) exceeds +160°C, which
causes the switching regulator and LDO to shut down.
The switching regulator turns on again and soft-starts after the
IC’s junction temperature cools by 10°C. The switching regulator
exhibits hiccup mode operation during continuous thermal
overload conditions. For continuous operation, do not exceed the
+125°C junction temperature rating.
FN8918 Rev.3.00
Nov 11, 2021
ISL85009
BOOT
C4
0.1µF
BAT54
5VOUT OR 5V SOURCE
FIGURE 35. EXTERNAL BOOTSTRAP DIODE
Application Guidelines
Buck Regulator Output Capacitor Selection
An output capacitor is required to filter the inductor current and
supply the load transient current. The filtering requirements are a
function of the switching frequency, the ripple current, and the
required output ripple. The load transient requirements are a
function of the slew rate (di/dt) and the magnitude of the
transient load current. These requirements are generally met
with a mix of capacitor types and careful layout.
High frequency ceramic capacitors initially supply the transient
and slow the current load rate seen by the bulk capacitors. The
bulk filter capacitor values are generally determined by the
Equivalent Series Resistance (ESR) and voltage rating
requirements rather than actual capacitance requirements.
Page 14 of 20
�ISL85009
2
L out I TRAN
V SAG = -------------------------------------------------------------2C OUT V IN – V OUT
VHUMP
(EQ. 6)
2
L out I TRAN
V HUMP = -----------------------------------------2C OUT V OUT
VOUT
VESR
(EQ. 7)
where ITRAN = Output Load Current Transient and COUT = Total
Output Capacitance.
VSAG
In a typical converter design, the ESR of the output capacitor
bank dominates the transient response. The ESR and the ESL are
typically the major contributing factors in determining the output
capacitance. The number of output capacitors can be
determined by using Equation 8, which relates the ESR and ESL
of the capacitors to the transient load step and the tolerable
output voltage excursion during load transient (Vo):
VESL
IOUT
Itran
ESL I TRAN
---------------------------------- + ESR I TRAN
dt
Number of Capacitors = -----------------------------------------------------------------------------V o
FIGURE 36. TYPICAL TRANSIENT RESPONSE
High frequency decoupling capacitors should be placed as close
to the power pins of the load as physically possible. Be careful
not to add inductance in the circuit board wiring that could
cancel the usefulness of these low inductance components.
Consult with the manufacturer of the load on specific decoupling
requirements.
The shape of the output voltage waveform during a load transient
that represents the worst case loading conditions will ultimately
determine the number of output capacitors and their type. When
this load transient is applied to the converter, most of the energy
required by the load is initially delivered from the output
capacitors. This is due to the finite amount of time required for
the inductor current to slew up to the level of the output current
required by the load. This phenomenon results in a temporary dip
in the output voltage. At the very edge of the transient, the
Equivalent Series Inductance (ESL) of each capacitor induces a
spike that adds on top of the existing voltage drop due to the
Equivalent Series Resistance (ESR).
After the initial spike, attributable to the ESR and ESL of the
capacitors, the output voltage experiences sag. This sag is a
direct consequence of the amount of capacitance on the output.
During the removal of the same output load, the energy stored in
the inductor is dumped into the output capacitors. This energy
dumping creates a temporary hump in the output voltage. This
hump, as with the sag, can be attributed to the total amount of
capacitance on the output. Figure 36 shows a typical response to
a load transient.
The amplitudes of the different types of voltage excursions can
be approximated using Equations 4, 5, 6, and 7:
V ESR = ESR I TRAN
(EQ. 4)
I TRAN
V ESL = ESL ----------------dt
(EQ. 5)
FN8918 Rev.3.00
Nov 11, 2021
(EQ. 8)
If VSAG and/or VHUMP are found to be too large for the output
voltage limits, then the amount of capacitance may need to be
increased. In this situation, a trade-off between output
inductance and output capacitance may be necessary.
The ESL of the capacitors, which is an important parameter in
the previous equations, is not usually listed in the specification.
Practically, it can be approximated using Equation 9 if an
Impedance vs Frequency curve is given for a specific capacitor:
1
ESL = ---------------------------------------2
C 2 f res
(EQ. 9)
where fres is the frequency where the lowest impedance is
achieved (resonant frequency).
The ESL of the capacitors becomes a concern when designing
circuits that supply power to loads with high rates of change in
the current.
Output Inductor Selection
The output inductor is selected to meet the output voltage ripple
requirements and minimize the converter’s response time to the
load transient. The inductor value determines the converter’s
ripple current and the ripple voltage is a function of the ripple
current. The ripple voltage and current are approximated by
Equations 10 and 11:
V IN – V OUT V OUT
I = ------------------------------------ ---------------V IN
f SW L
(EQ. 10)
V OUT = I ESR
(EQ. 11)
Increasing the value of inductance reduces the ripple current and
voltage. However, the large inductance values reduce the
converter’s response time to a load transient. It is recommended
to set the ripple inductor current to approximately 30% of the
maximum output current for optimized performance. It is
recommend that the design of the inductor ripple current does
not exceed 5A in the applications of ISL85009.
Page 15 of 20
�ISL85009
One of the parameters limiting the converter’s response to a load
transient is the time required to change the inductor current.
Given a sufficiently fast control loop design, the ISL85009 will
provide either 0% or 100% duty cycle in response to a load
transient. The response time is the time required to slew the
inductor current from an initial current value to the transient
current level. During this interval, the difference between the
inductor current and the transient current level must be supplied
by the output capacitor. Minimizing the response time can
minimize the output capacitance required.
The response time to a transient is different for the application of
load and the removal of load. Equations 12 and 13 give the
approximate response time interval for application and removal
of a transient load:
L x ITRAN
tRISE =
tFALL =
VIN - VOUT
L x ITRAN
VOUT
(EQ. 12)
(EQ. 13)
where ITRAN is the transient load current step, tRISE is the
response time to the application of load, and tFALL is the
response time to the removal of load. The worst case response
time can be either at the application or removal of load. Be sure
to check both of these equations at the minimum and maximum
output levels for the worst case response time.
With the overcurrent protection thresholds of 15A (typical) on the
high-side MOSFET and 21A(typical) on the low-side MOSFET, it is
recommended to use the inductor with saturated current higher
than 21A. Metal Alloy Powder material core inductors are
typically recommended due to their better saturation
characteristics.
temperature and cause input line oscillation. In this case, a more
thermally stable capacitor such as X7R ceramic should be used.
For surface mount designs, solid tantalum capacitors can be
used, but caution must be exercised with regard to the capacitor
surge current rating. Some capacitor series available from
reputable manufacturers are surge current tested.
Loop Compensation Design
When COMP is not connected to GND through a 200Ω resistor,
the COMP pin is active for external loop compensation. The
regulator uses constant frequency peak current mode control
architecture to achieve a fast loop transient response. An
accurate current sensing pilot device in parallel with the
high-side switch is used for peak current control signal and
overcurrent protection. The inductor is not considered as a state
variable since its peak current is constant, and the system
becomes a single order system. It is much easier to design a
Type II compensator to stabilize the loop than to implement
voltage mode control. Peak current mode control has an inherent
input voltage feed-forward function to achieve good line
regulation. Figure 37 shows the small signal model of the
synchronous buck regulator.
^I
IN
^
VIN
-+
^
ILd
+
-
^
IL
LP
^
VINd
1:D
^
Vo
RLP
Rc
Co
RT
Ro
^
d
Fm
K
Ti(S)
Input Capacitor Selection
Use a mix of input bypass capacitors to control the input voltage
ripple. Use ceramic capacitors for high frequency decoupling and
bulk capacitors to supply the current needed each time the
switching MOSFET turns on. Place the ceramic capacitors
physically close to the MOSFET VIN pins (switching MOSFET
drain) and PGND.
The important parameters for the bulk input capacitance are the
voltage rating and the RMS current rating. For reliable operation,
select bulk capacitors with voltage and current ratings above the
maximum input voltage and largest RMS current required by the
circuit. Their voltage rating should be at least 1.25x greater than
the maximum input voltage, while a voltage rating of 1.5x is a
conservative guideline. For most cases, the RMS current rating
requirement for the input capacitor of a buck regulator is
approximately 1/2 the DC load current.
The maximum RMS current required by the regulator may be
closely approximated through Equation 14:
I RMS
MAX
=
2
V OUT
2
1 V IN – V OUT V OUT
-------------- I OUT
+ ------ ----------------------------- --------------
V IN
V IN
12 L f SW
MAX
(EQ. 14)
For a through-hole design, several electrolytic capacitors may be
needed, especially at temperatures less than -25°C. The
electrolytic's ESR can increase ten times higher than at room
FN8918 Rev.3.00
Nov 11, 2021
He(s)
+
TV(s)
^
Vcomp
-Av(s)
FIGURE 37. SMALL SIGNAL MODEL OF SYNCHRONOUS BUCK
REGULATOR
To simplify the analysis, sample and hold effect block He(s) and
slope compensation are not taken into account. Assume Vcomp
is equal to the current sense signal IL x Rt and ignore the DCR of
the inductor. The power train can be approximated by a voltage
controlled current source supplying current to the output
capacitor and load resistor (see Figure 38). The transfer function
frequency response is presented in Figure 39.
^
IL
^
Vcomp
+
-
1/Rt
^
Vo
Rc
Ro
Co
FIGURE 38. POWER TRAIN SMALL SIGNAL MODEL
Page 16 of 20
�ISL85009
fp
Gdc
R3/R1
fp
fZ2
fZ1
fC
fpc
fZ
FIGURE 39. POWER TRAIN SMALL FREQUENCY RESPONSE
The simplified transfer function is derived in Equation 15.
S
1 + -----z
vˆ o
- = Gdc ----------------Gp S = ---------------S
vˆ comp
1 + ------p
(EQ. 15)
Ro
1
1
Gdc = ------- ; z = 2fz = ------------------ ; p = 2fp = ------------------------------------Rt
R o + R c xC o
R c xC o
(EQ. 16)
Note that Co is the actual capacitance seen by the regulator,
which may include ceramic high frequency decoupling and bulk
output capacitors. Ceramic may have to be derated by
approximately 40% depending on dielectric, voltage stress, and
temperature.
Usually, a Type II compensation network is used to compensate
the peak current mode control converter. Figure 40 shows a
typical Type II compensation network and its transfer function is
expressed in Equation 17. The frequency response is shown in
Figure 41.
VOUT
R3
C1
VFB
R2
VREF
-
C2
Vcomp
+
Design example: VIN = 12V, VO = 1.8V, IO = 9A, fSW = 600kHz,
R1 = 200kΩ, R2 = 100kΩ, Co = 3x100µF/3mΩ 6.3V ceramic
(actually ~150µF), L = 0.68µH.
S
S
1 + ------------ 1 + -------------
cz1
cz2
vˆ comp
- = --------------------------------------------------------A v S = ---------------SC R
vˆ
(EQ. 18)
R 3 = 2f c C o R t R 1 = 829k
Select 800kΩ for R3. Place the zero fz1 around the pole fp to
achieve -20db/dec roll off
Ro + Rc xC o
C 2 = -------------------------------------- = 38pF
R3
(EQ. 19)
where Rc is the ESR of the output capacitor.
Select 30pF for C2. Zero fz2 is a phase boost zero to increase the
phase margin. Place it between fc and 1/2 switching frequency.
In this case, 4.7pF capacitor is selected and the zero is placed at
fz2:
1
f z2 = ---------------------- = 169kHz
2R 1 C 1
(EQ. 20)
The calculated values for R1, R2, R3, C1, and C2 match with the
1.8V output application in the recommended design with internal
compensation shown in Table 1 on page 2. Do not select
resistance higher than 370kΩ for R1 in real applications, since it
will result in a very small C1, which might be overwhelmed by
parasitic capacitances.
In practice, it is recommended to select lower resistance for
R1/R2 and R3 in the external compensation applications.
Usually, 10 times lower compared with the internal
compensation is a good start.
Layout Considerations
FIGURE 40. TYPE II COMPENSATION NETWORK
o
FIGURE 41. TYPE II COMPENSATION FREQUENCY RESPONSE
Select fc = 80kHz. The gain of the Gp(s)xAv(s) should have a unity
gain at crossover frequency. Thus, R3 can be derived as:
where:
R1
fC
(EQ. 17)
2 1
where:
1
1
1
cz1 = 2f z1 = --------------- cz2 = 2f z2 = --------------- f pc = ---------------------R3 C2
R1 C1
2R 1 C 2
The layout is very important in high frequency switching
converter design. With power devices switching efficiently at
600kHz, the resulting current transitions from one device to
another causes voltage spikes across the devices and other
circuit elements. These voltage spikes can degrade efficiency,
radiate noise into the circuit, and lead to device overvoltage
stress. Careful component layout and printed circuit board design
minimizes these voltage spikes.
As an example, consider the turn-off transition of the upper
MOSFET. Prior to turn-off, the MOSFET is carrying the full load
current. During turn-off, current transfers from the MOSFET to the
FN8918 Rev.3.00
Nov 11, 2021
Page 17 of 20
�ISL85009
internal body diode of the adjacent MOSFET. Any parasitic
inductance in the switched current path generates a large
voltage spike during the switching interval. Careful component
selection, tight layout of the critical components, and short, wide
traces minimize the magnitude of voltage spikes.
A multilayer printed circuit board is recommended. Figures 42
and 43 show the recommended layout of the top layer and the
inner layer 1 of the schematic in Figure 1 on page 1.
1. Place the input ceramic capacitors between PVIN and GND
pins. Put them as close to the pins as possible.
2. A 1µF decoupling input ceramic capacitor is recommended.
Place it as close to the VIN pin as possible.
3. A 2.2µF decoupling ceramic capacitor is recommended for
the VDD pin. Place it as close to the VDD pin as possible.
4. The entire inner layer 1 is recommended to be the GND plane
in order to reduce the noise coupling.
FIGURE 42. RECOMMENDED TOP LAYER LAYOUT
5. The switching node (PHASE) plane needs to be kept away
from the feedback network. Place the resistor divider close to
the IC.
6. Put three to five vias on the GND pin to connect the GND plane
of other layers for better thermal performance. This allows the
heat to move away from the IC. Keep the vias small enough to
prevent solder wicking through the holes during reflow. An
8 mil hole with 15 mil diameter vias are used on the
evaluation board. Do not use “thermal relief” patterns to
connect the vias. It is important to have a complete
connection of the plated-through hole to each plane.
FIGURE 43. SOLID GND PLANE OF INNER LAYER 1
FN8918 Rev.3.00
Nov 11, 2021
Page 18 of 20
�ISL85009
Revision History
The revision history provided is for informational purposes only and is believed to be accurate, but not warranted. Please visit our website to make sure
that you have the latest revision.
DATE
REVISION
Nov 11, 2021
3.00
Removed Related Literature section.
Updated Ordering Information table formatting.
Updated POD L15.3.5x3.5 to the latest revision, changes are as follows:
-Revised pin#1 L-shape width from 0.37 to 0.4 to reflect actual dimension.
Jul 31, 2020
2.00
Updated links throughout.
Updated the abs max section by changing the maximum rating of the following from +24V to +22V
•VIN, EN to GND
•PVIN to GND
•PHASE to GND …. (DC)
•PHASE to GND -----(40ns
On page 6 changed the FB Regulation Voltage parameter minimum value from 0.588 to 0.5895 and the
maximum value from 0.612 to 0.6105 .
Removed About Intersil section
Mar 28, 2017
1.00
In “Power-Good” on page 14, updated 88% to 87% and 114% to 113%.
Updated verbiage above Equation 8.
Updated verbiage after Equation 19.
Feb 13, 2017
0.00
Initial Release
FN8918 Rev.3.00
Nov 11, 2021
CHANGE
Page 19 of 20
�ISL85009
Package Outline Drawing
For the most recent package outline drawing, see L15.3.5x3.5.
L15.3.5x3.5
15 Lead Thin Quad Flat No-Lead Package (TQFN)
Rev 3, 10/2021
FN8918 Rev.3.00
Nov 11, 2021
Page 20 of 20
�IMPORTANT NOTICE AND DISCLAIMER
RENESAS ELECTRONICS CORPORATION AND ITS SUBSIDIARIES (“RENESAS”) PROVIDES TECHNICAL
SPECIFICATIONS AND RELIABILITY DATA (INCLUDING DATASHEETS), DESIGN RESOURCES (INCLUDING
REFERENCE DESIGNS), APPLICATION OR OTHER DESIGN ADVICE, WEB TOOLS, SAFETY INFORMATION, AND
OTHER RESOURCES “AS IS” AND WITH ALL FAULTS, AND DISCLAIMS ALL WARRANTIES, EXPRESS OR IMPLIED,
INCLUDING, WITHOUT LIMITATION, ANY IMPLIED WARRANTIES OF MERCHANTABILITY, FITNESS FOR A
PARTICULAR PURPOSE, OR NON-INFRINGEMENT OF THIRD PARTY INTELLECTUAL PROPERTY RIGHTS.
These resources are intended for developers skilled in the art designing with Renesas products. You are solely responsible
for (1) selecting the appropriate products for your application, (2) designing, validating, and testing your application, and (3)
ensuring your application meets applicable standards, and any other safety, security, or other requirements. These
resources are subject to change without notice. Renesas grants you permission to use these resources only for
development of an application that uses Renesas products. Other reproduction or use of these resources is strictly
prohibited. No license is granted to any other Renesas intellectual property or to any third party intellectual property.
Renesas disclaims responsibility for, and you will fully indemnify Renesas and its representatives against, any claims,
damages, costs, losses, or liabilities arising out of your use of these resources. Renesas' products are provided only subject
to Renesas' Terms and Conditions of Sale or other applicable terms agreed to in writing. No use of any Renesas resources
expands or otherwise alters any applicable warranties or warranty disclaimers for these products.
(Rev.1.0 Mar 2020)
Corporate Headquarters
Contact Information
TOYOSU FORESIA, 3-2-24 Toyosu,
Koto-ku, Tokyo 135-0061, Japan
www.renesas.com
For further information on a product, technology, the most
up-to-date version of a document, or your nearest sales
office, please visit:
www.renesas.com/contact/
Trademarks
Renesas and the Renesas logo are trademarks of Renesas
Electronics Corporation. All trademarks and registered
trademarks are the property of their respective owners.
�


 工商网监
湘ICP备2023018690号
工商网监
湘ICP备2023018690号
