Grove - Dry-Reed Relay
User Manual
Release date:
2015/9/22
Version:
1.0
Wiki: http://www.seeedstudio.com/wiki/Grove_-_Dry-Reed_Relay
Bazaar: http://www.seeedstudio.com/depot/Grove-DryReed-Relay-p1412.html
1
�Document Revision History
Revision
Date
Author
Description
1.0
Sep 22, 2015
Jiankai.li
Create file
2
�Contents
Document Revision History ·········································································2
1. Introduction ·······················································································2
2. Feature ·····························································································3
3. Specification ······················································································4
4. Usage ······························································································5
With Arduino ························································································5
With Raspberry Pi ··················································································5
5.
Resource ···························································································7
3
�Disclaimer
For physical injuries and possessions loss caused by those reasons which are not related to
product quality, such as operating without following manual guide, natural disasters or force
majeure, we take no responsibility for that.
Under the supervision of Seeed Technology Inc., this manual has been compiled and published
which covered the latest product description and specification. The content of this manual is
subject to change without notice.
Copyright
The design of this product (including software) and its accessories is under tutelage of laws. Any
action to violate relevant right of our product will be penalized through law. Please consciously
observe relevant local laws in the use of this product.
1
�1. Introduction
The Grove-Dry-Reed Relay is a relay module which works through magnetizing the vibration reed
via the current in the coils. Compared to electromagnetic relays, the contacts completely sealed is
the biggest feature of the Dry-Reed Relay. Besides, it features simplicity in construct, compactness,
fast speed and long life, which make it widely applied in many fields such as microelectronic
detection, Automatic Control etc.
2
�2. Feature
Grove Interface
High Speed
Good stability
Long contact life
Contact fully sealed
3
�3. Specification
Item
Min
Typical
Max
Unit
Voltage
4.8
5.0
5.2
VDC
Coil Resistance
225
250
275
Ω
Pick-Up Voltage
3.75
VDC
Switching Current(Max)
0.5
A
Switching Voltage(Max)
120 VAC/60VDC
-
Carrying Current(Max)
1.0
A
Operate Time(Max)
1.0
mS
Release Time(Max)
0.5
mS
Mechanical Life(at no load)
1×10⁸ operations
-
Ambient Temperature
-30
4
/
70
˚C
�4. Usage
With Arduino
The Dry-Reed Relay can support up to 60VDC 1A load. You can use it to control resistance
load, but it is not applicable to inductive load(such as Motor).
the usage if this Dry-reed relay is quite alike that of common relays.
Connect electric light to Grove - Dry-Reed Relay and power for electric light.
Connect Grove - Dry-Reed Relay to port D2 of Grove - Base Shield and plug it into
Arduino/Seeeduino.
Upload the below code. Please click here if you do not know how to upload.
int Relay = 2;
// the setup routine runs once when you press reset:
void setup() {
// initialize the digital pin as an output.
pinMode(Relay, OUTPUT);
}
// the loop routine runs over and over again forever:
void loop() {
digitalWrite(Relay, HIGH);
delay(5000);
digitalWrite(Relay, LOW);
delay(5000);
//the Relay close(HIGH is the voltage level)
// wait for five seconds
//the Relay normally open by making the voltage LOW
// wait for five seconds
}
The electric light will light up for seconds, then off for seconds, repeatedly. For the special
applications, you may need to write the code by yourself.
With Raspberry Pi
1.You should have got a raspberry pi and a grovepi or grovepi+.
2.You should have completed configuring the development enviroment, otherwise follow here.
3.Connection.
Plug the sensor to grovepi socket D4 by using a grove cable.
5
�4.Navigate to the demos' directory:
cd yourpath/GrovePi/Software/Python/
To see the code
nano grove_relay.py
# "Ctrl+x" to exit #
import time
import grovepi
# Connect the Grove Relay to digital port D4
# SIG,NC,VCC,GND
relay = 4
grovepi.pinMode(relay,"OUTPUT")
while True:
try:
# switch on for 5 seconds
grovepi.digitalWrite(relay,1)
print "on"
time.sleep(5)
# switch off for 5 seconds
grovepi.digitalWrite(relay,0)
print "off"
time.sleep(5)
except KeyboardInterrupt:
grovepi.digitalWrite(relay,0)
break
except IOError:
print "Error"
5.Run the demo.
sudo python grove_relay.py
6
�5.
Resource
Grove - Dry-Reed Relay Eagle File
Dry-Reed Relay Datasheet
7
��
很抱歉,暂时无法提供与“103020014”相匹配的价格&库存,您可以联系我们找货
免费人工找货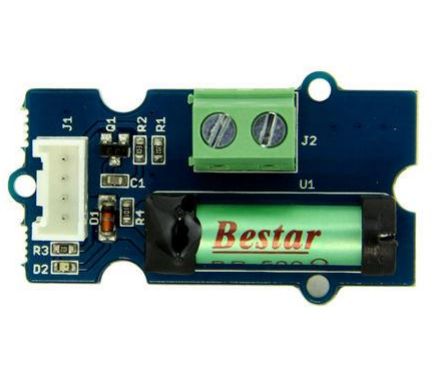


 工商网监
湘ICP备2023018690号
工商网监
湘ICP备2023018690号
