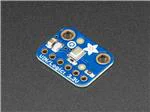
Adafruit I2S MEMS Microphone Breakout
Created by lady ada
https://learn.adafruit.com/adafruit-i2s-mems-microphone-breakout
Last updated on 2022-04-07 07:22:23 PM EDT
©Adafruit Industries
Page 1 of 35
�Table of Contents
Overview
3
Assembly
5
• Prepare the header strip:
• Add the breakout board:
• And Solder!
5
5
6
Pinouts
6
• Power Pins
• I2S Data Pins
7
7
Arduino Wiring & Test
8
•
•
•
•
8
9
11
12
Wiring
I2S Library
VU Meter Demo
ArduinoSound Library
Raspberry Pi Wiring & Test
14
•
•
•
•
•
•
•
•
•
•
•
•
Wiring For Mono Mic
Wiring For Stereo Mic
Install Raspbian on an SD Card
Update the Pi
Python and Pip
Installer Script
Run the Script
Test & Record!
Test Playback
Manual Load
Rebuilding After System Update
Adding Volume Control
15
15
16
16
16
17
17
18
19
20
20
21
Old Kernel Install Method
23
•
•
•
•
•
•
•
•
•
Wiring For Mono Mic
Wiring For Stereo Mic
Raspberry Pi i2s Configuration
Kernel Compiling
Prepare to Compile the i2s module
Auto-load the module on startup
Test & Record!
Test Playback
Adding Volume control
Downloads
• Files
• Schematic & Fab Print
©Adafruit Industries
24
25
25
27
28
30
31
32
32
34
34
35
Page 2 of 35
�Overview
For many microcontrollers, adding audio input is easy with one of our analog
microphone breakouts (http://adafru.it/1063). But as you get to bigger and better
microcontrollers and microcomputers, you'll find that you don't always have an analog
input, or maybe you want to avoid the noise that can seep in with an analog mic
system. Once you get past 8-bit micros, you will often find an I2S peripheral, that can
take digital audio data in! That's where this I2S Microphone Breakout comes in.
Instead of an analog output, there are three digital pins: Clock, Data and Word-Select.
When connected to your microcontroller/computer, the 'I2S Main' will drive the clock
and word-select pins at a high frequency and read out the data from the microphone.
No analog conversion required!
©Adafruit Industries
Page 3 of 35
�The microphone is a single mono element. You can select whether you want it to be
on the Left or Right channel by connecting the Select pin to power or ground. If you
have two microphones, you can set them up to be stereo by sharing the Clock, WS
and Data lines but having one with Select to ground, and one with Select to high
voltage.
This I2S MEMS microphone is bottom ported, so make sure you have the hole in the
bottom facing out towards the sounds you want to read. It's a 1.6-3.3V device only, so
not for use with 5V logic (its really unlikely you'd have a 5V-logic device with I2S
©Adafruit Industries
Page 4 of 35
�anyways). Many beginner microcontroller boards don't have I2S, so make sure its a
supported interface before you try to wire it up!
This microphone is best used with microcontrollers or computers that have hardware
I2S peripheral support such as the Cortex M-series chips like the Arduino Zero,
Feather M0, or single-board computers like the Raspberry Pi.
Assembly
Assembly is really easy, you can use straight or 'right-angle' style headers to attach to
the PCB. We'll be using the plain straight headers included
The board comes with all surface-mount components pre-soldered. The included
header strip can be soldered on for convenient use on a breadboard or with 0.1"
connectors. You can also skip this step and solder on wires.
Prepare the header strip:
Cut the strip to length if necessary. It will
be easier to solder if you insert it into a
breadboard - long pins down
Add the breakout board:
Place the breakout board over the pins so
that the short pins poke through the
breakout pads
Make sure the side with the components is face down, as shown in the photos in
this guide!
©Adafruit Industries
Page 5 of 35
�And Solder!
Be sure to solder all 5 pins for reliable
electrical contact.
(For tips on soldering, be sure to check out
our Guide to Excellent Soldering (https://
adafru.it/aTk)).
You're done! Check your solder joints
visually and continue onto the next steps
Pinouts
Unlike most of our breakouts, this sensor has the detection element on the bottom of
the PCB, so we expect you to solder it 'upside down' with the sensor package on the
bottom and the port on top!
©Adafruit Industries
Page 6 of 35
�Power Pins
• 3V - this is the power in pin. Technically it can be powered from as low as 1.6V to
3.6V but you'll need to make sure your logic level matches!
• GND - power and data ground
I2S Data Pins
• BCLK - the bit clock, also known as the data clock or just 'clock' - comes from
the I2S main to tell the microphone its time to transmit data. This should run at
2-4 MHz but we've found you can often run it a little slower and it'll work fine
• DOUT - the data output from the mic!
• LRCLK - the left/right clock, also known as WS (word select), this tells the mic
when to start transmitting. When the LRCLK is low, the left channel will transmit.
When LRCLK is high, the right channel will transmit.
• SEL - the channel select pin. By default this pin is low, so that it will transmit on
the left channel mono. If you connect this to high logic voltage, the microphone
will instantly start transmitting on the right channel.
©Adafruit Industries
Page 7 of 35
�Arduino Wiring & Test
Remember, the I2S microphone requires an I2S peripheral and won't work with chips
that don't support it in hardware! For this example we'll use a Feather M0, but you can
also use an Arduino Zero.
Wiring
For Feather M0, Ardruino Zero and friends, use the following wiring:
• GND connected GND
• 3.3V connected 3.3V (Feather, Zero) or VCC (MKR1000, MKRZero)
• LRCLK / WS connected to pin 0 (Feather, Zero) or pin 3 (MKR1000, MKRZero)
• BCLK connected to pin 1 (Feather, Zero) or pin 2 (MKR1000, MKRZero)
• Data /SD connected to pin 9 (Zero) or pin A6 (MKR1000, MKRZero
You can leave Select disconnected
i2sfeatherm0.fzz
https://adafru.it/uya
©Adafruit Industries
Page 8 of 35
�I2S Library
Luckily, there's a nice little I2S library already written for Arduinos based on the SAMD
processor. Make sure you have the most recent Arduino IDE and SAMD core. Then
select the board you're using (e.g. Adafruit Feather M0) and you'll see the I2S library
examples show up in the pulldown menu
You could try the InputPlotter demo but this code is higher resolution:
/*
This example reads audio data from an I2S microphone
breakout board, and prints out the samples to the Serial console. The
Serial Plotter built into the Arduino IDE can be used to plot the audio
data (Tools -> Serial Plotter)
Circuit:
* Arduino/Genuino Zero, MKRZero or MKR1000 board
* GND connected GND
* 3.3V connected 3.3V (Zero) or VCC (MKR1000, MKRZero)
* WS connected to pin 0 (Zero) or pin 3 (MKR1000, MKRZero)
* CLK connected to pin 1 (Zero) or pin 2 (MKR1000, MKRZero)
* SD connected to pin 9 (Zero) or pin A6 (MKR1000, MKRZero)
created 17 November 2016
by Sandeep Mistry
*/
#include <I2S.h>
void setup() {
// Open serial communications and wait for port to open:
// A baud rate of 115200 is used instead of 9600 for a faster data rate
// on non-native USB ports
Serial.begin(115200);
while (!Serial) {
; // wait for serial port to connect. Needed for native USB port only
}
// start I2S at 16 kHz with 32-bits per sample
if (!I2S.begin(I2S_PHILIPS_MODE, 16000, 32)) {
Serial.println("Failed to initialize I2S!");
while (1); // do nothing
©Adafruit Industries
Page 9 of 35
�}
}
void loop() {
// read a sample
int sample = I2S.read();
if ((sample == 0) || (sample == -1) ) {
return;
}
// convert to 18 bit signed
sample >>= 14;
// if it's non-zero print value to serial
Serial.println(sample);
}
Upload to your Arduino Zero/Feather wired up as above, and open up the Serial
Plotter
Try blowing or whistling at the sensor to see response in real time
©Adafruit Industries
Page 10 of 35
�VU Meter Demo
Often times you don't want the actual audio data but the overall "sound pressure
level". This example will take a bunch of samples, normalize the data to be around 0,
then give you the maximum difference between the waveforms for a 'volume graph'
/*
This example reads audio data from an Invensense's ICS43432 I2S microphone
breakout board, and prints out the samples to the Serial console. The
Serial Plotter built into the Arduino IDE can be used to plot the audio
data (Tools -> Serial Plotter)
Circuit:
* Arduino/Genuino Zero, MKRZero or MKR1000 board
* ICS43432:
* GND connected GND
* 3.3V connected 3.3V (Zero) or VCC (MKR1000, MKRZero)
* WS connected to pin 0 (Zero) or pin 3 (MKR1000, MKRZero)
* CLK connected to pin 1 (Zero) or pin 2 (MKR1000, MKRZero)
* SD connected to pin 9 (Zero) or pin A6 (MKR1000, MKRZero)
created 17 November 2016
by Sandeep Mistry
*/
#include <I2S.h>
void setup() {
// Open serial communications and wait for port to open:
// A baud rate of 115200 is used instead of 9600 for a faster data rate
// on non-native USB ports
Serial.begin(115200);
while (!Serial) {
; // wait for serial port to connect. Needed for native USB port only
}
// start I2S at 16 kHz with 32-bits per sample
if (!I2S.begin(I2S_PHILIPS_MODE, 16000, 32)) {
Serial.println("Failed to initialize I2S!");
while (1); // do nothing
}
}
#define SAMPLES 128 // make it a power of two for best DMA performance
void loop() {
// read a bunch of samples:
int samples[SAMPLES];
for (int i=0; i<SAMPLES; i++) {
int sample = 0;
while ((sample == 0) || (sample == -1) ) {
sample = I2S.read();
}
// convert to 18 bit signed
sample >>= 14;
samples[i] = sample;
}
// ok we hvae the samples, get the mean (avg)
float meanval = 0;
for (int i=0; i<SAMPLES; i++) {
meanval += samples[i];
©Adafruit Industries
Page 11 of 35
�}
meanval /= SAMPLES;
//Serial.print("# average: " ); Serial.println(meanval);
// subtract it from all sapmles to get a 'normalized' output
for (int i=0; i<SAMPLES; i++) {
samples[i] -= meanval;
//Serial.println(samples[i]);
}
// find the 'peak to peak' max
float maxsample, minsample;
minsample = 100000;
maxsample = -100000;
for (int i=0; i<SAMPLES; i++) {
minsample = min(minsample, samples[i]);
maxsample = max(maxsample, samples[i]);
}
Serial.println(maxsample - minsample);
}
Open up the serial plotter to see how making noises will create peaks!
ArduinoSound Library
For most uses, its better to have a higher-level library for managing sound. The
ArduinoSound library works with I2S mics and can do filtering, amplitude detection,
etc!
Install it using the Arduino library manager
©Adafruit Industries
Page 12 of 35
�Various examples come with the library, check them out in the File->Examples>ArduinoSound sub menu
For example, amplitude Serial plotter will do basic amplitude plotting:
©Adafruit Industries
Page 13 of 35
�You can also do FFT spectral diagramming using SpectrumSerialPlotter. We made a
small change to the example so that all 128 bins are plotted:
Raspberry Pi Wiring & Test
You can add mono or stereo I2S microphones to your Raspberry Pi, too! This will work
with any Raspberry with a 2x20 GPIO connector.
This guide is largely based on this great git repo (https://adafru.it/KBh), which we
forked for use here. Also useful was the information provided in this forum post (https:
//adafru.it/fEw).
©Adafruit Industries
Page 14 of 35
�Wiring For Mono Mic
• Mic 3V to Pi 3.3V
• Mic GND to Pi GND
• Mic SEL to Pi GND (this is used for channel selection, connect to either 3.3V or
GND)
• Mic BCLK to BCM 18 (pin 12)
• Mic DOUT to BCM 20 (pin 38)
• Mic LRCL to BCM 19 (pin 35)
Wiring For Stereo Mic
Connect both mics as above except for the SEL pin.
• Left Mic SEL to Pi GND
• Right Mic SEL to Pi 3.3V
©Adafruit Industries
Page 15 of 35
�Be sure to follow all these steps in the order shown to insure the I2S mic module
is built against the proper kernel headers.
Install Raspbian on an SD Card
You'll need to start with Raspbian or Raspbian Lite. Get the latest version from the Ras
pberry Pi Download page (https://adafru.it/fQi) and follow these instructions to install
the OS image to the SD card (https://adafru.it/jd0).
Update the Pi
Run these commands:
sudo apt-get -y update
sudo apt-get -y upgrade
and then REBOOT THE PI.
Python and Pip
Run the following command to make sure you have Python 3 and Pip installed:
sudo apt install python3-pip
©Adafruit Industries
Page 16 of 35
�Installer Script
This script will do all the work for you. Here are the commands to run. Make sure your
Pi has network access, it needs to download the software!
cd ~
sudo pip3 install --upgrade adafruit-python-shell
wget https://raw.githubusercontent.com/adafruit/Raspberry-Pi-Installer-Scripts/
master/i2smic.py
sudo python3 i2smic.py
Run the Script
Once you run the script, you will be presented with options for configuration.
©Adafruit Industries
Page 17 of 35
�Auto Load at Boot
The Pi model should be automatically
detected.
If you want the I2S mic module support to
be loaded at boot, select Yes here.
Otherwise you'll have to manually install
the module each time you want to use it.
Reboot
Since the script runs a system update and
installs some other needed support
software, it may take a while to run. Just
let it go. When it's finished, you should be
prompted with an option to reboot.
You need to reboot for the settings to take
effect.
Test & Record!
OK, that probably took a bit of time, but now you are ready to rock!
Use the following command to list the available input devices:
arecord -l
You should see a card entry with information similar to this:
©Adafruit Industries
Page 18 of 35
�Note the card number. In the screen shot above it is 0 . You can record a wav file in
mono with this command (change the -plughw parameter to match the card number
from above):
arecord -D plughw:0 -c1 -r 48000 -f S32_LE -t wav -V mono -v file.wav
Or, if you have two i2s mics installed, record in stereo with this command:
arecord -D plughw:0 -c2 -r 48000 -f S32_LE -t wav -V stereo -v file_stereo.wav
If all is working correctly, you should see the VU meter react at the bottom of the
terminal window:
Test Playback
If you have speakers hooked up to the Pi, you can play the file back directly on the
device:
aplay file.wav
Or, you can copy it over to your computer for playback :), make sure SSH is enabled
and then:
scp pi@raspberrypi:file.wav ~/Desktop/file.wav
©Adafruit Industries
Page 19 of 35
�Manual Load
If you chose not to auto load the module at boot, then you will need to manually load
it with the following command:
sudo modprobe snd-i2smic-rpi rpi_platform_generation=PI_SEL
Replace PI_SEL with the approriate value for your Pi Model:
• 0 = Pi Zero or Zero W
• 1 = Pi 2 or 3
• 2 = Pi 4
You can use the arecord -l command to verify it loaded. Example on a Pi 3:
Rebuilding After System Update
If you later run a system update and find that the I2S mic no longer works, you may
need to rebuild and reinstall the driver. To do so, simply run the install script again:
sudo ./i2smic.sh
It may complain about things, like git, already being installed. But you can generally
ignore those error messages.
If you've deleted the repo directory since the original install, then just reclone it.
©Adafruit Industries
Page 20 of 35
�Adding Volume Control
You can add volume control to your mic via alsamixer and alsa config. (Hat tip to
RickTracer (https://adafru.it/doW)). To do so, create and edit a file .asoundrc in your
home directory.
nano ~/.asoundrc
and put the following in:
#This section makes a reference to your I2S hardware, adjust the card name
# to what is shown in arecord -l after card x: before the name in []
#You may have to adjust channel count also but stick with default first
pcm.dmic_hw {
type hw
card sndrpii2scard
channels 2
format S32_LE
}
#This is the software volume control, it links to the hardware above and after
# saving the .asoundrc file you can type alsamixer, press F6 to select
# your I2S mic then F4 to set the recording volume and arrow up and down
# to adjust the volume
# After adjusting the volume - go for 50 percent at first, you can do
# something like
# arecord -D dmic_sv -c2 -r 48000 -f S32_LE -t wav -V mono -v myfile.wav
pcm.dmic_sv {
type softvol
slave.pcm dmic_hw
control {
name "Boost Capture Volume"
card sndrpii2scard
}
min_dB -3.0
max_dB 30.0
}
©Adafruit Industries
Page 21 of 35
�Now before you can change the volume you need to use the device once (this is an
alsa thing)
Run:
arecord -D dmic_sv -c2 -r 44100 -f S32_LE -t wav -V mono -v file.wav
And cancel with ^C once it starts recording.
Now you can run alsamixer - press F6 and select the I2S sound card
©Adafruit Industries
Page 22 of 35
�It will complain there are no playback controls (because its for recording only).
Press F4 to switch to Capture mode and you should be able to adjust the volume with
up/down arrow keys.
Then you can record with the i2c mic device using:
arecord -D dmic_sv -c2 -r 48000 -f S32_LE -t wav -V mono -v recording.wav
and playback with:
aplay recording.wav
Old Kernel Install Method
This technique is not suggested, see previous page for a better working method!!!
You can add mono or stereo I2S microphones to your Raspberry Pi, too!
This will work with Raspberry Pi B+, 2, 3, Zero and any other 2x20-connector-Pi
This guide is largely based on this great git repo https://github.com/nejohnson2/rpii2s (https://adafru.it/vka)
©Adafruit Industries
Page 23 of 35
�Wiring For Mono Mic
• Mic 3V - Pi 3.3v
• Mic Gnd - Pi Gnd
• Mic SEL - Pi Gnd (this is used for channel selection. Connect to 3.3 or GND)
• Mic BCLK - BCM 18 (pin 12)
• Mic LRCL - BCM 19 (pin 35)
• Mic DOUT - BCM 20 (pin 38)
Pi i2s Mono Fritzing File
https://adafru.it/vkb
©Adafruit Industries
Page 24 of 35
�Wiring For Stereo Mic
Pi i2s Stereo Fritzing File
https://adafru.it/vkc
Raspberry Pi i2s Configuration
Start by logging into your Raspberry Pi via a terminal, we recommend ssh so you can
copy + paste the many commands.
Turn on i2s support by editing /boot/config.txt with:
sudo nano /boot/config.txt
Uncomment #dtparam=i2s=on
©Adafruit Industries
Page 25 of 35
�Next, we'll make sure sound support is enabled in the kernel with:
sudo nano /etc/modules
Add snd-bcm2835 on its own line, to the modules file as shown below
Now reboot your pi with:
sudo reboot
©Adafruit Industries
Page 26 of 35
�Once rebooted, re-log in.
Enter the following to confirm the modules are loaded
lsmod | grep snd
Kernel Compiling
Ok now its time for the fun part! You'll manually compile in i2s support.
Start by updating your Pi:
sudo apt-get update
sudo apt-get install rpi-update
sudo rpi-update
Then reboot!
Install the compilation dependencies:
sudo apt-get install git bc libncurses5-dev bison flex libssl-dev
Download kernel source & compile:
sudo wget https://raw.githubusercontent.com/notro/rpi-source/master/rpi-source -O /
usr/bin/rpi-source
©Adafruit Industries
Page 27 of 35
�sudo chmod +x /usr/bin/rpi-source
/usr/bin/rpi-source -q --tag-update
rpi-source --skip-gcc
On a Pi 3 this will take many many minutes, so don't worry if its taking 15 minutes. On
a Pi Zero it can take an hour or longer!
If the script pauses at this prompt:
Code coverage for fuzzing (KCOV) [N/y/?] (NEW)
Just press enter to accept the default and continue.
Prepare to Compile the i2s module
Now you're ready to compile i2s support:
sudo mount -t debugfs debugs /sys/kernel/debug
This may already be done - mount: debugs is already mounted - in which case keep
going
If you are using Pi 3 or Pi 2 - make sure the module name is 3f203000.i2s
If you are using Pi Zero - the module name is 20203000.i2s
©Adafruit Industries
Page 28 of 35
�Run rpi-i2s-audio
Download the module, written by Paul Creaser (https://adafru.it/vkd)
git clone https://github.com/PaulCreaser/rpi-i2s-audio
cd rpi-i2s-audio
Pi Zero Only
If you are using a Raspberry Pi Zero, edit my_loader.c with nano my_loader.c and
change the two lines
.platform = "3f203000.i2s",
and
.name = "3f203000.i2s",
with
.platform = "20203000.i2s",
and
.name = "20203000.i2s",
If you aren't using a Pi Zero, continue on!
©Adafruit Industries
Page 29 of 35
�Compile the module with
make -C /lib/modules/$(uname -r )/build M=$(pwd) modules
sudo insmod my_loader.ko
Verify that the module was loaded:
lsmod | grep my_loader
dmesg | tail
Note that on the Pi 2/3 you'll see asoc-simple-card asoc-simple-card.0: sndsoc-dummy-dai 3F203000.i2s mapping ok on the last line and on Pi Zero
you'll see asoc-simple-card asoc-simple-card.0: snd-soc-dummy-dai
20203000.i2s mapping ok
Auto-load the module on startup
Now you can set it up so the module is loaded every time you boot the Pi
sudo
echo
sudo
sudo
cp my_loader.ko /lib/modules/$(uname -r)
'my_loader' | sudo tee --append /etc/modules > /dev/null
depmod -a
modprobe my_loader
And reboot!
sudo reboot
©Adafruit Industries
Page 30 of 35
�Test & Record!
OK that was a lot of effort but now you are ready to rock!
Use the following command to list the available input devices:
arecord -l
you should see a snd_rpi_simple_card
You can record a wav file in mono with this command:
arecord -D plughw:1 -c1 -r 48000 -f S32_LE -t wav -V mono -v file.wav
Or, if you have two i2s mics installed, record in stereo with this command:
arecord -D plughw:1 -c2 -r 48000 -f S32_LE -t wav -V stereo -v file_stereo.wav
If all is working correctly, you should see the VU meter react at the bottom of the
terminal window
©Adafruit Industries
Page 31 of 35
�Test Playback
If you have speakers hooked up to the Pi, you can play the file back directly on the
device:
aplay file.wav
Or, you can copy it over to your computer for playback :), just insert your Pi's IP
address below:
scp pi@<local-ip>:/home/pi/file.wav ~/Desktop/file.wav
Adding Volume control
You can add volume control to your mine via alsamixer and alsa config. (Hat tip to
RickTracer (https://adafru.it/doW))
Run sudo nano ~/.asoundrc
and put the following in:
#This section makes a reference to your I2S hardware, adjust the card name
# to what is shown in arecord -l after card x: before the name in []
#You may have to adjust channel count also but stick with default first
pcm.dmic_hw {
type hw
card sndrpisimplecar
channels 2
format S32_LE
}
#This is the software volume control, it links to the hardware above and after
# saving the .asoundrc file you can type alsamixer, press F6 to select
# your I2S mic then F4 to set the recording volume and arrow up and down
# to adjust the volume
# After adjusting the volume - go for 50 percent at first, you can do
# something like
# arecord -D dmic_sv -c2 -r 48000 -f S32_LE -t wav -V mono -v myfile.wav
pcm.dmic_sv {
type softvol
slave.pcm dmic_hw
control {
name "Boost Capture Volume"
card sndrpisimplecar
}
min_dB -3.0
max_dB 30.0
}
©Adafruit Industries
Page 32 of 35
�Now before you can change the volume you need to use the device once (this is an
alsa thing)
Run
arecord -D dmic_sv -c2 -r 44100 -f S32_LE -t wav -V mono -v file.wav
And cancel with ^C once it starts recording.
Now you can run alsamixer - press F6 and select the I2S simple sound card
©Adafruit Industries
Page 33 of 35
�It will complain there are no playback controls (because its for recording only).
Press F5 to change the volume.
Then you can record with the i2c mic device using
arecord -D dmic_sv -c2 -r 48000 -f S32_LE -t wav -V mono -v
recording.wav
and playback with
aplay recording.wav
Downloads
Files
• EagleCAD PCB Files on GitHub (https://adafru.it/uyb)
• Fritzing object in the Adafruit Fritzing library (https://adafru.it/aP3)
©Adafruit Industries
Page 34 of 35
�Schematic & Fab Print
©Adafruit Industries
Page 35 of 35
�


 工商网监
湘ICP备2023018690号
工商网监
湘ICP备2023018690号

