Arduino RS485 Shield SKU: DFR0259
Contents
1 Introduction
2 Specification
3 Pin Definition
4 Simple Application
4.1 Use Setups
4.2 Sample Code
Introduction
This is a RS485 shield,especially designed for the Arduino controller board. It can easily convert the
UART to the RS485. This shield integrates a standard RS485 port ,a mini RS485 port(PH2.0
interface), RS485 headers, and provides the welding areas, so it's convenient for your DIY
design.One key changes automatic and manual transmission mode, which expand the scope of
application.
Specification
Power module: +5.0V
Module size: 55mmx53mm
16 digital IO port (including a I2C interface)
�
6 analog IO port and power
Operation/programming mode switch
Automatic/manual transceiver mode switch (When in manual transceiver mode, the enable end is
the 2nd digital IO port)
Transceiver indicating LED
Standard RS485 interface, mini RS485 interface(PH2.0) and RS485 pins
Weldable area
Reset button
Pin Definition
Operation and programming mode switch: To OFF, you can download the program for the
Arduino controller. To ON , the shield will convert the UART to the RS485.
Transceiver mode switch: To AUTO, the shield is automatically sending and receiving data, so you
do not care about operation timing; To MANU, the shield is in manual transceiver status, and the
enable end is the 2nd digital IO port. Enabling high-side power Ping to sending state while the low
level of the receiving state.
�Simple Application
Use Setups
When the RS485 shield is installed on your Arduino controller, and then you will wire the RS485
shiled with USB-RS485 converter to connect terminals, namely: A pair of A, B on B, GND on GND,
then download the following sample code (Note: Downloading code, run / program mode switch
must hit the OFF position, otherwise it will lead to the download fails. When downloaded,it is
complete to ON, and the shield to normal use). Open serial monitor of Arduino IDE, find USB-RS485
converter corresponding serial port, send characters "V", you can see the LED status may change,
and reply "OK".
�Sample Code
Automatic Transmission Mode
/*
# This sample codes is for testing the RS485 shiled(automatic transmission mo
de).
# Editor : YouYou
# Date
: 2013.9.16
# Ver
: 0.1
# Product: RS485 shield
# SKU
: DFR0259
*/
int led = 13;
void setup()
{
Serial.begin(9600);
pinMode(led,OUTPUT);
}
void loop()
{
int temp;
if(Serial.available())
{
temp=Serial.read();
if(temp=='V'){
digitalWrite(led,1-digitalRead(led));
Serial.println("OK");
}
}
}
Manual Transmission Mode
/*
�# This sample codes is for testing the RS485 shiled(manual transmission mode)
.
# EN=2;
# Editor : YouYou
# Date
: 2013.9.16
# Ver
: 0.1
# Product: RS485 shield
# SKU
: DFR0259
*/
int led = 13;
int EN = 2;
rts),
//Definition RS485 shield enable terminal (the 2nd digital IO po
//high for the sending state, the low level of receiving state
void setup()
{
Serial.begin(9600);
pinMode(led,OUTPUT);
pinMode(EN,OUTPUT);
}
void loop()
{
int temp;
digitalWrite(EN,LOW);
//Enable low, RS485 shield waiting to receive data
if(Serial.available())
{
temp=Serial.read();
if(temp=='V')
{
digitalWrite(led,1-digitalRead(led));
digitalWrite(EN,HIGH);
it data
//Enable high, RS485 shield waiting to transm
Serial.println("OK");
delay(10);
}
}
//Delay for some time, waiting for data transmitted
�}
Powered By DFRobot © 2008-2017
�
很抱歉,暂时无法提供与“DFR0259”相匹配的价格&库存,您可以联系我们找货
免费人工找货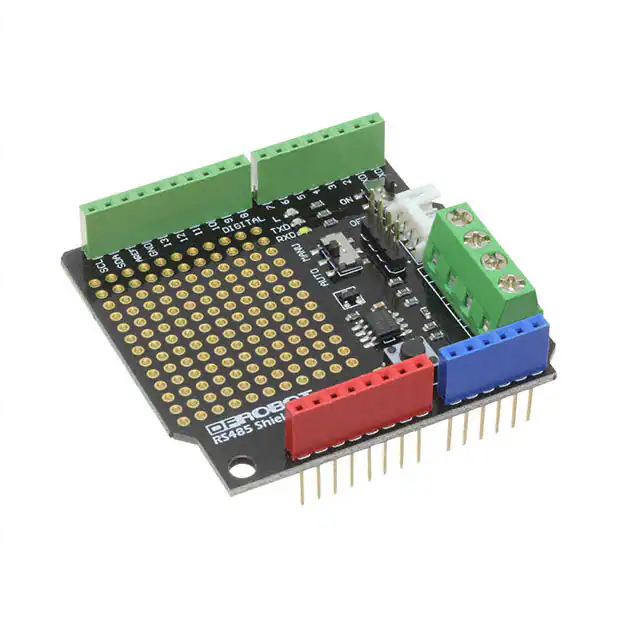


 工商网监
湘ICP备2023018690号
工商网监
湘ICP备2023018690号
