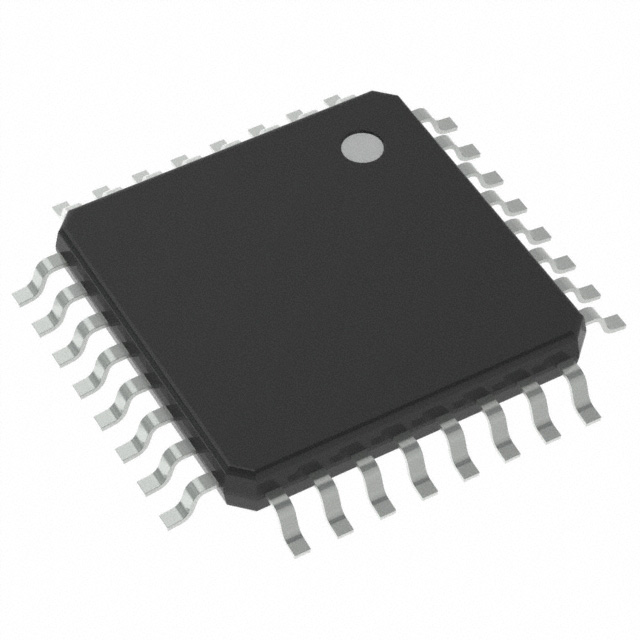
Atmel AT42QT1085
Eight-key QTouch® Touch Sensor IC
DATASHEET
Features
QTouch® Sensor Channels
Up to eight keys
Integrated Haptic Engine
Haptic events may be triggered by touch detection or controlled by a host
microcontroller over SPI
Data Acquisition
QTouchADC key measurement/touch detection method
Configurable measurement timing and averaging
Spread spectrum charge transfer
Raw data from channel measurement can be read over the SPI interface
GPIO Pins
12 dedicated bi-directional GPIO pins, plus up to 4 additional pins (replacing keys)
Configurable as software PWM Drive, digital inputs or outputs
Device setup
Device configuration may be stored in NVRAM
Operation
Power-On reset and brown-out detection
Internal calibrated oscillator
Key Outline Sizes
6 mm × 6 mm or larger (panel thickness dependent); widely different sizes and shapes
possible, including solid or ring shapes
Key Spacing
7 mm or more, center to center (panel thickness dependent)
Layers required
One
Electrode Materials:
Etched copper, silver, carbon, ITO
Electrode Substrates:
PCB materials; polyamide FPCB; PET films, glass
Panel materials:
Plastic, glass, composites, painted surfaces (low particle density metallic paints
possible)
Panel Thickness:
Up to 10 mm glass, 5 mm plastic (electrode size dependent)
Key Sensitivity:
Individually configured over SPI interface
Signal Processing:
Self-calibration, auto drift compensation, noise filtering
Patented Adjacent Key Suppression® (AKS®) technology to ensure accurate key
detection
Interface:
Master/Slave SPI interface, up to 750 kHz
Object-based communications protocol
Power:
2.0 V to 5.5 V
Packages:
32-pin 5 × 5 mm QFN RoHS compliant
32-pin 7 × 7 mm TQFP RoHS compliant
9625D–AT42–05/2013
�KEY2
KEY3
KEY4 / GPIO15
KEY5 / GPIO14
RESET
Pinout Configuration
CHANGE
1.1
GPIO10
Pinout and Schematic
GPIO11
1.
GPIO0
1
29 28 27 26 25
24
KEY1
GPIO1
2
23
KEY0
GPIO2
3
22
KEY7 / GPIO12
VDD
4
21
VSS
VSS
5
20
GPIO9
GPIO3
6
19
KEY6 / GPIO13
GPIO4
7
18
AVDD
GPIO5
8
17
9 10 11 12 13 14 15 16
MOSI
SS
HAPTIC_PWM
HAPTIC_EN
GPIO8
GPIO7
GPIO6
AT42QT1085
SCK
MISO
32 31 30
AT42QT1085 [DATASHEET]
9625D–AT42–05/2013
2
�1.2
Pinout Descriptions
Table 1-1.
Pin Listing
Pin
Name
Type
Comments
If Unused, Connect
To...
1
GPIO0
I/O
General Purpose IO
Leave open
2
GPIO1
I/O
General Purpose IO
Leave open
3
GPIO2
I/O
General Purpose IO
Leave open
4
VDD
P
Power
–
5
VSS
P
Ground
–
6
GPIO3
I/O
General Purpose IO
Leave open
7
GPIO4
I/O
General Purpose IO
Leave open
8
GPIO5
I/O
General Purpose IO
Leave open
9
GPIO6
I/O
General Purpose IO
Leave open
10
GPIO7
I/O
General Purpose IO
Leave open
11
GPIO8
I/O
General Purpose IO
Leave open
12
HAPTIC_EN
O
Enable pin for haptic amplifier
Leave open
13
HAPTIC_PWM
O
Drive for haptic effects
Leave open
14
SS
I
SPI Enable
Pull up to VDD via a
100 k resistor
15
MOSI
I
SPI Data In
Leave open
16
MISO
O
SPI Data Out
Leave open
17
SCK
I
SPI Clock
Leave open
18
AVDD
P
Analog Power
–
19
KEY6 / GPIO13
I/O
Sense pin / General Purpose IO
Leave open
20
GPIO 9
I/O
General purpose IO
Leave open
21
VSS
Ground
–
22
KEY7 / GPIO12
I/O
Sense pin / General Purpose IO
Leave open
23
KEY0
I/O
Sense pin
Leave open
24
KEY1
I/O
Sense pin
Leave open
25
KEY2
I/O
Sense pin
Leave open
26
KEY3
I/O
Sense pin
Leave open
27
KEY4 / GPIO15
I/O
Sense pin / General Purpose IO
Leave open
28
KEY5 / GPIO14
I/O
Sense pin / General Purpose IO
Leave open
29
RESET
Reset, internal pull-up
Leave open
P
I
AT42QT1085 [DATASHEET]
9625D–AT42–05/2013
3
�Table 1-1.
Pin Listing (Continued)
Pin
I
O
Name
Type
Comments
If Unused, Connect
To...
30
CHANGE
OD
Status change indicator
Leave open
31
GPIO10
I/O
General Purpose IO
Leave open
32
GPIO11
I/O
General Purpose IO
Leave open
Input only
Output only, push-pull
I/O
OD
Input and output
Open drain output
P
Ground or power
AT42QT1085 [DATASHEET]
9625D–AT42–05/2013
4
�Schematic
Figure 1-1. Typical Circuit
Pin 33, which is the pad on the underside of the
device, should be connected to Vss.
Optional 1.2 W
resistor to reduce
AVdd noise
Regulated
VDD
1 µF
100 nF
31
GPIO_11
32
R3
33
VSS
21
5
VSS
VSS
18
KEY 4/GPIO
15
Key_4
/ GPIO_15
GPIO_9
GPIO_9
KEY 5/GPIO
14
Key_5
/ GPIO_14
GPIO_10
GPIO_10
KEY 6/GPIO
13
Key_6
/ GPIO_12
GPIO_11
GPIO_11
SPI_SCK
GPIO_10
GPIO_8
GPIO_8
SPI_MISO
20
KEY 3
VDD
17
GPIO_9
GPIO_7
GPIO_7
R4 R5
SPI_SCK
11
KEY 2
SPI_MOSI
GPIO_8
QT1085
GPIO_6
GPIO_6
16
10
KEY 1
SPI_MISO
GPIO_7
GPIO_5
GPIO_5
SPI_SS
9
KEY 0
15
GPIO_6
GPIO_4
GPIO_4
SPI_MOSI
GPIO_5
8
HAPTIC PWM
14
7
12
13
HAPTIC EN
HAPTIC PWM
GPIO_3
GPIO_3
29
GPIO_4
GPIO_2
GPIO_2
SPI_SS
6
RESET
GPIO_3
HAPTIC_EN
GPIO_1
GPIO_1
30
GPIO_2
3
GPIO_0
GPIO_0
RESET
2
AVDD
4
GPIO_1
VDD
1
CHANGE
GPIO_0
For haptics information refer
to the Application Note
QTAN0085, Haptics Design
Guide
VSS
VSS
CHANGE
1.3
KEY 7/GPIO 12
Key_7 / GPIO_12
23
24
Rs0
K0
Rs1
K1
25
Rs2
26
Rs3
27
Rs4
28
Rs5
19
Rs6
22
Rs7
K2
K3
K4
K5
K6
K7
Check the following sections for component values:
Section 3.2 on page 8: Series resistors (Rs0 – Rs7)
Section 3.3 on page 8: Power Supply
AT42QT1085 [DATASHEET]
9625D–AT42–05/2013
5
�2.
Overview
2.1
Introduction
The AT42QT1085 (QT1085) is an easy to use QTouchADC mode sensor IC based on Atmel principles for robust
operation and ease of design. It is intended for any touch-key application.
There are four dedicated channels configured as keys (Key 0 – Key 3). There are 12 dedicated GPIO channels
(GPIO_0 – GPIO_11).
Another four channels can be configured as keys or GPIO channels (Key 4 – Key 7 or GPIO 12 – GPIO 15).
The QT1085 is capable of detecting proximity or touch on the channels configured as keys.
The keys can be constructed in different shapes and sizes. Refer to the Touch Sensors Design Guide and
Application Note QTAN0079, Buttons, Sliders and Wheels Sensor Design Guide, for more information on
construction and design methods (both downloadable from the Atmel website).
Each GPIO channel may be configured as a digital input or output. In output mode, a GPIO pin may be set to output
a PWM signal at any of 16 duty cycles (4-bit PWM). The QT1085 allows electrodes to project sense fields through
any dielectric such as glass or plastic.
This device has many advanced features which provide for reliable, trouble-free operation over the life of the
product. In particular the QT1085 features advanced self-calibration, drift compensation, and fast thermal tracking.
The QT1085 can tolerate some fluctuations in the power supply, and in many applications will not require a
dedicated voltage regulator.
A full haptics engine is integrated into the device, allowing feedback effects to be triggered on key detection or
directly activated by a host microcontroller.
The QT1085 includes all signal processing functions necessary to provide stable sensing under a wide variety of
changing conditions. Only a few external parts are required for operation and no external Cs capacitors are required.
The QT1085 modulates its acquisition pulses in a spread-spectrum fashion in order to heavily suppress the effects of
external noise, and to suppress RF emissions. This provides greater noise immunity and eliminates the need for
external sampling capacitors, allowing touch sensing using a single pin.
2.2
Resources
The following document provides essential information on configuring the QT1085:
AT42QT1085 Protocol Guide
Other documents that may also be useful (available by contacting the Atmel Touch Technology division) are listed in
“Associated Documents” on page 28.
2.3
User Interface Layout and Options
2.3.1
Keys
There are eight keys available. Each can be individually enabled or disabled by setting a bit in the Key T13 object
(one for each key).
2.3.2
GPIO Ports
There are 12 dedicated configurable General Purpose Input Output (GPIO) pins. Up to four additional GPIO pins can
be achieved by replacing four of the keys. The GPIO pins can be enabled or disabled by setting a bit in the GPIO
Configuration T29 object.
AT42QT1085 [DATASHEET]
9625D–AT42–05/2013
6
�2.3.3
Guard Channel
A guard channel may be used to prevent accidental touch detection on other keys which share the same Adjacent
Key Suppression (AKS) group. The guard channel is made more sensitive than the others in the AKS group through
a larger touch electrode area combined with higher gain / lower threshold. The QT1085 remains in Idle mode while a
guard channel is in detect, and Touch Automatic Calibration will not occur for a guard key detection.
2.4
Proximity Effect
Any channel can function as a proximity sensor, based on hand or body proximity to a product. This is achieved by
using a relatively large electrode and tuning the QTouchADC and Threshold configuration options. Refer to
QTAN0087, Proximity Design Guide, for more information.
2.5
SPI Interface
The QT1085 is an SPI slave-mode device, utilizing a four-wire full-duplex SPI interface.
There are four standard SPI signals: SS, SCK, MOSI and MISO.
The QT1085 also provides a CHANGE signal to indicate when there is a message waiting to be read. This removes
the need for the host to poll the QT1085 continuously.
Communications are performed through Read and Write operations on the Object Protocol memory map.
2.6
Operating Modes
Cycle times, Free-run and Sleep modes are controlled by the Power Configuration T7 object settings.
2.7
Haptics Engine
The QT1085 can be configured to play a selected haptic effect in response to a touch detection, a state change on a
GPIO pin or on demand by the host microcontroller.
A selection of haptic effects is available on the device from the Haptic Event T31 object. The effects include:
Strong Click
Strong Click 60% strength
Strong Click 30% strength
Sharp Click
Sharp Click 60% strength
Sharp Click 30% strength
Soft Bump
Soft Bump 60% strength
Soft Bump 30% strength
Double Click
Double Click 60% strength
Triple Click
Soft Buzz
Strong Buzz
Effects may be assigned to events, such as a key touch or GPIO state change.
Refer to the QTAN0085 Haptics Design Guide Application Note and the AT42QT1085 Protocol Guide for more
information on this object.
AT42QT1085 [DATASHEET]
9625D–AT42–05/2013
7
�3.
Wiring and Parts
3.1
Bypass Capacitors
One 100 nF bypass capacitor and one 1 µF bypass capacitor must be used on the Vdd digital supply and a 100 nF
capacitor on AVDD. The 100 nF capacitors should be mounted close to the device, within 10 mm if possible.
3.2
Rs Series Resistors
Series Rs resistors (Rs0 – RS7) are in-line with the electrode connections and are used to limit electrostatic
discharge (ESD) currents and to suppress radio frequency interference (RFI). For most applications the Rs resistors
will be in the range 4.7 k – 33 k each. For maximum noise rejection the value may be up to 100 k.
Although these resistors may be omitted, the device may become susceptible to external noise or RFI. For details of
how to select these resistors refer to Application Note QTAN0002, Secrets of a Successful QTouch Design.
3.3
Power Supply
See Section 7. on page 19 for the power supply range. If this fluctuates slowly with temperature, the device tracks
and compensates for these changes automatically with only minor changes in sensitivity. If the supply voltage drifts
or shifts quickly, the drift compensation mechanism will not be able to keep up, causing sensitivity anomalies or false
detections. In this situation a dedicated voltage regulator should be included in the circuit.
The QT1085 power supply should be locally regulated using a three-terminal device. If the supply is shared with
another electronic system, care should be taken to ensure that the supply is free of digital spikes, sags, and surges,
all of which can cause adverse effects.
3.4
QFN Package Restrictions
The central pad on the underside of the QFN chip should be connected to ground. Do not run any tracks underneath
the body of the chip, only ground. Figure 3-1 on page 8 shows an example of good/bad tracking.
Figure 3-1. Examples of Good and Bad Tracking
Example of GOOD tracking
Example of BAD tracking
AT42QT1085 [DATASHEET]
9625D–AT42–05/2013
8
�3.5
Oscillator
The device has an internal oscillator. No external oscillator or clock input is required.
3.6
PCB Layout and Construction
Refer to Application Note QTAN0079 – Buttons, Sliders and Wheels Sensor Design Guide and the Touch Sensors
Design Guide (both downloadable from the Atmel website), for more information on construction and design
methods.
The sensing channels used for the individual keys can be implemented as per the Touch Sensors Design Guide.
3.7
PCB Cleanliness
Modern no-clean flux is generally compatible with capacitive sensing circuits.
CAUTION: If a PCB is reworked in any way, it is highly likely that the behavior of the no-clean
flux changes. This can mean that the flux changes from an inert material to one that can
absorb moisture and dramatically affect capacitive measurements due to additional leakage
currents. If so, the circuit can become erratic and exhibit poor environmental stability.
If a PCB is reworked in any way, clean it thoroughly to remove all traces of the flux residue around the capacitive
sensor components. Dry it thoroughly before any further testing is conducted.
3.8
Spread-spectrum Circuit
The QT1085 spectrally spreads its frequency of operation to heavily reduce susceptibility to external noise sources
and to limit RF emissions.
Bursts operate over a spread of frequencies, so that external fields will have a minimal effect on key operation and
emissions are very weak. Spread-spectrum operation works together with the Detect Integrator (DI) mechanism to
dramatically reduce the probability of false detection due to noise.
Spread spectrum is hardwired in the chip and is automatically enabled.
AT42QT1085 [DATASHEET]
9625D–AT42–05/2013
9
�4.
Detailed Operation
4.1
Reset
4.1.1
Introduction
When starting from power-up or RESET reset there are a few additional factors to be aware of. In most applications
the host will not need to take special action.
During a reset all outputs are disabled. To define the levels of CHANGE during reset this pin should pulled up to VDD
with a 10 k to 1M resistor.
When the initial reset phase ends the CHANGE output is enabled. CHANGE drives low.
A software reset may be requested via the Command Processor T6 object.
4.1.2
Delay to SPI Functionality
The QT1085 SPI interface is not operational while the device is being reset. However, SPI is made operational early
in the start-up procedure.
After any reset (either via the RESET pin or via power-up), SPI typically becomes operational within 50 ms of RESET
going high or power-up. CHANGE is pulled low, and held low until the message server is read by the host microcontroller, to indicate completion of the initialization sequence after power-on or reset.
4.1.3
Reset Delay to Touch Detection
After power up or reset, the QT1085 calibrates all electrodes.
During this time, touch detection cannot be reported. Calibration completes after 15 burst cycles, which takes
approximately 150 ms, with typical QTouchADC settings.
In total, 200 ms are required from reset or power-up for the device to be fully functional.
4.1.4
Mode Setting After Reset
After a reset the device loads configuration settings from nonvolatile memory, either previously stored or default
settings.
4.2
Calibration
Calibration is the process by which the sensor chip assesses the background capacitance on each channel.
Channels are only calibrated on power-up and when:
The channel is enabled (that is, activated).
OR
The channel is already enabled and one of the following applies:
Note:
The channel is held in detect for longer than the Touch Automatic Calibration setting (refer to the
AT42QT1085 Protocol Guide for more information on TCHAUTOCAL setting in the Touch Configuration
T16 object).
This does not apply to a guard channel.
The signal delta on a channel is at least the anti-touch threshold (ATCHCALTHR) in the anti-touch
direction (refer to the AT42QT1085 Protocol Guide for more information on the ATCHCALTHR in the
PROCG_TOUCHCONFIG_T16 object (Touch Configuration T16 object).
The user issues a recalibrate command.
A status message is generated on the start and completion of a calibration.
Note that the device performs a global calibration; that is, all the channels are calibrated together for power-on or
user-requested calibration. Only the individual channel is calibrated for an ATCHCALTHR recalibration.
AT42QT1085 [DATASHEET]
9625D–AT42–05/2013
10
�4.3
Communications
4.3.1
Introduction
The QT1085 communicates as a slave device over a full-duplex 4-wire (MISO, MOSI, SCK, SS) SPI interface. In
addition there is a CHANGE pin which is asserted when a message is waiting to be read:
Low = Message waiting
High = No Message waiting
See Section 7.3 on page 19 for details of the SPI Configuration and Timing Parameters.
Figure 7-1 and Figure 7-2 on page 20 show the basic timing for SPI operation. The host does the clocking and
controls the timing of the transfers from the QT1085.
After the host asserts SS low, it should wait >22 µs in low-power mode before starting SCK; in Free run mode, a
delay of 2 µs is sufficient. The QT1085 reads the MOSI pin with each rising edge of SCK, and shifts data out on the
MISO pin on falling edges. The host should do the same to ensure proper operation.
SS must be held low for the duration of a communications exchange (a Read or Write operation). To begin a new
communications exchange, SS must be pulled high for at least 2 ms after a Read or 10 ms after a Write and then
pulled low. SS should be held high when not communicating; if SS is low this is taken as an indication of impending
communications.
In this case, extra current is drawn, as the QT1085 does not enter its lowest power Sleep mode.
All timings not mentioned above should be as in Figure 7-2 on page 20.
4.3.2
CHANGE Pin
The QT1085 has an open-drain CHANGE pin which notifies the host when a message is waiting to be read.
CHANGE is released after each message has been read through an SPI transfer. If further messages are pending,
the QT1085 loads the next one into the Message Handler and then reasserts (pulls low) the CHANGE pin.
4.4
Signal Processing
4.4.1
Power-up Self-calibration
On power-up, or after reset, all channels are typically calibrated and operational within 200 ms.
4.4.2
Drift Compensation
This operates to correct the reference level of each key automatically over time; it suppresses false detections caused
by changes in temperature, humidity, dirt and other environmental effects.
The QT1085 drifts as configured in the Touch Configuration T16 object (refer to the AT42QT1085 Protocol Guide for
more information).
4.4.3
Detection Integrator Filter
The device features a touch detection integration mechanism. This acts to confirm a detection in a robust fashion. A
counter is incremented each time a touch has exceeded its threshold and has remained above the threshold for the
current acquisition. When this counter reaches a preset limit the sensor is finally declared to be touched. If, on any
acquisition, the signal is not seen to exceed the threshold level, the counter is cleared and the process has to start from
the beginning.
The detection integrator is configured using the touch object Key T13. Refer to the AT42QT1085 Protocol Guide for
more information.
AT42QT1085 [DATASHEET]
9625D–AT42–05/2013
11
�4.4.4
Adjacent Key Suppression (AKS) Technology
Adjacent Key Suppression (AKS) technology is a patented method used to detect which touch object is touched when
objects are located close together. A touch in a group of AKS objects is only indicated on the object with the strongest
touch delta. This is assumed to be the intended object. Once an object in an AKS group is in detect, there can be no
further detections within that group until the object is released.
AKS is configured using the Key T13 object (refer to the AT42QT1085 Protocol Guide for more information).
Note:
If a touch is in detect and then AKS is enabled, that touch will not be forced out of detect. It will not go
out of detect until the touch is released. AKS will then operate normally.
4.5
Operating Modes
4.5.1
Introduction
The basic operating modes are: Active, Idle and Sleep.
Cycle time for Idle and Active is set by the Power Configuration T7 object, with special cases of 255 for free run and 0
for Sleep.
If a touch is detected, the device switches to free run mode and attempts to perform the detect integrator noise filter (DI)
function to completion; if the DI filter fails to confirm a detection the device goes back to Idle mode.
If a key is found to be in detection the part switches to Active mode. If the key is enabled for reporting, a message is
generated and CHANGE is asserted (pulled low).
MISO in LP Mode: During the sleep portion of LP mode, MISO floats.
Command During LP Mode: Once set to Sleep (cycle time = 0), the device carries out no acquisitions until the cycle
time is changed to >0.
Note:
4.5.2
The SS pin must be pulled high in order for the device to enter its lowest power sleep mode. If SS is
held low, the device enters a higher power Sleep mode to enable SPI communications.
Sleep Mode
Sleep mode offers the lowest possible current drain, in the low microamp region. In this mode no acquisitions are
performed.
In Sleep mode Output GPIOs are held in their final state before going to sleep:
With a 0% PWM the GPIO is Off during sleep
With a 100% PWM the GPIO is On during sleep.
If any other PWM is applied then the state is indeterminate (could be On or Off).
If a haptic effect is playing at the time when Sleep mode is entered, the effect is paused and resumed upon exiting
Sleep mode if the trigger condition remains true.
4.5.3
Supply Sequencing
Vdd and AVdd should be powered by a single supply. Make sure that any lines connected to the device are below or
equal to Vdd during power-up. For example, if RESET is supplied from a different power domain to the QT1085 Vdd
pin, make sure that it is held low when Vdd is off. If this is not done, the RESET signal could parasitically couple
power via the QT1085 RESET pin into the Vdd supply.
4.6
Debugging
The QT1085 provides a mechanism for obtaining raw data for development and testing purposes by reading data
from the Debug Signals T4 object. Refer to the AT42QT1085 Protocol Guide for more information on this object.
AT42QT1085 [DATASHEET]
9625D–AT42–05/2013
12
�4.7
Configuring the QT1085
The QT1085 has an object-based protocol that organizes the features of the device into objects that can be
controlled individually. This is configured using the Object Protocol common to many Atmel touch sensor devices.
For more information on the Object Protocol and its implementation on the QT1085, refer to the AT42QT1085
Protocol Guide. See also Section 6. on page 17.
AT42QT1085 [DATASHEET]
9625D–AT42–05/2013
13
�5.
SPI Protocol for Object Protocol Memory Map Access
5.1
SPI Signals
The Serial Peripheral Interface (SPI) allows high-speed synchronous data transfer between the host and the
QT1085. All communication with the device is carried out over the SPI. This is a synchronous serial data link that
operates in full-duplex mode. The host communicates with the QT1085 over the SPI using a master-slave
relationship, with the QT1085 acting in slave mode.
The SPI uses four logic signals:
Serial Clock (SCK) – output from the host.
Master Output, Slave Input (MOSI) – output from the host, input to the QT1085. Used by the host to send data
to the QT1085.
Master Input, Slave Output (MISO) – input to the host, output from the QT1085. Used by the QT1085 to send
data to the host.
Slave Select (SS) – active low output from the host.
The SPI signals operate in the following way:
SCK Idles high.
MISO and MOSI are set up on falling edges, read on rising edges.
SS must be held low throughout the exchange. SS must be pulled high for at least 2 ms after a Read or 10 ms
after a Write before another exchange can be initiated.
Figure 5-1. SPI Signals
SCK
SAMPLE
MOSI/MISO
CHANGE
MOSI PIN
CHANGE
MISO PIN
SS
MSB
5.2
Communications Protocol
5.2.1
MOSI Data
Bit 6
Bit 5
Bit 4
Bit 3
Bit 2
Bit 1
LSB
A 3-byte command sequence is transmitted by the host on MOSI, setting the memory map address pointer, a Read /
Write indication, and the number of bytes which will be read or written.
Read / Write direction is set in Byte 0 Bit 0, where '0' = Write, '1' = Read.
Memory map is addressed in 15 bits, where the lower 7 bits are transmitted at Byte 0, Bits 6 – 1 and the upper 8 bits
at Byte 1.
AT42QT1085 [DATASHEET]
9625D–AT42–05/2013
14
�5.2.2
MISO Data
Default: 0x55
Returned at each byte on the MISO pin while the 3-byte command sequence is being transmitted on MOSI.
Writing: 0xAA
Returned at each byte on the MISO pin while data is being written by the host on the MOSI pin.
Error: 0xEE
Returned at each byte on the MISO pin in the case where the requested number of bytes has been read or written
but an SS high event has not been detected to begin a new exchange. Or, an attempt has been made to Write to a
read-only part of the memory map, in which case the data written for the remainder of the exchange is ignored.
5.2.3
Write Operation
Table 5-1.
MOSI Data
Bit 7
Bit 6
Bit 5
Bit 4
Bit 3
Byte 0
Memory Map Address, Lower 7 Bits (Bits 6 – 0)
Byte 1
Memory Map Address, Upper 8 Bits (Bits 14 – 7)
Byte 2
Number of Data bytes to follow = n
Byte 3
Data 0, Written to Memory Map Address
Byte 4
Data 1, Written to Memory Map Address + 1
Byte n+3
Data n, Written to Memory Map Address + n
Table 5-2.
Bit 6
Bit 5
Bit 4
Bit 3
Byte 0
0x55
Byte 1
0x55
Byte 2
0x55
Byte 3
0xAA
Byte 4
0xAA
Byte n+3
Bit 1
Bit 0
0=W
MISO Data
Bit 7
Bit 2
Bit 2
Bit 1
Bit 0
0xAA
AT42QT1085 [DATASHEET]
9625D–AT42–05/2013
15
�5.2.4
Read Operation
Table 5-3.
MOSI Data
Bit 7
Byte 0
Bit 6
Bit 5
Bit 4
Bit 3
Bit 2
Bit 1
Memory Map Address, Lower 7 Bits (Bits 6 – 0)
1=R
Byte 1
Memory Map Address, Upper 8 Bits (Bits 14 – 7)
Byte 2
Number of Data bytes to follow = n
Byte 3
N/A
Byte 4
N/A
Byte n+3
Table 5-4.
N/A
MISO Data
Bit 7
Bit 6
Bit 5
Bit 4
Bit 3
Bit 2
Byte 0
0x55
Byte 1
0x55
Byte 2
0x55
Byte 3
Data 0, Read From Memory Map Address
Byte 4
Data 1, Read From Memory Map Address + 1
Byte n+3
Bit 0
Bit 1
Bit 0
Data n, Read From Memory Map Address + n
AT42QT1085 [DATASHEET]
9625D–AT42–05/2013
16
�6.
Getting Started With the QT1085
6.1
Communication with the Host
The QT1085 uses an SPI bus to communicate with the host. See Section 5. on page 14 for more information.
6.2
Establishing Contact
The host should attempt to read the Information Block information to establish that the device is present and running
following power-up or a reset. The host should also check that there are no configuration errors reported.
6.3
Using the Object Protocol
The QT1085 has an object-based protocol that is used to communicate with the device. Typical communication
includes configuring the device, sending commands to the device, and receiving messages from the device. Refer to
the AT42QT1085 Protocol Guide.
The host must perform the following initialization so that it can communicate with the QT1085:
6.4
1.
Read the start positions and sizes of all the objects in the QT1085 from the Object Table and build up a list of
these addresses.
2.
Use the Object Table to calculate the report IDs so that messages from the device can be correctly interpreted.
Writing to the Device
See Section 5.2.3 on page 15 for information on the format of the SPI Write operation.
To communicate with the QT1085, write to the appropriate object:
To send a command to the device, write the appropriate command to the Command Processor T6 object (for
example, to send a reset, backup or calibrate command). Refer to the AT42QT1085 Protocol Guide for the full
list of available commands.
To configure the device, write to an object. For example, to configure the device power consumption write to
the global Power Configuration T7 object. Some objects are optional and need to be enabled before use.
Refer to the AT42QT1085 Protocol Guide for more information on the objects.
6.5
Reading from the Device
See Section 5.2.4 on page 16 for information on the format of the SPI Read operation.
AT42QT1085 [DATASHEET]
9625D–AT42–05/2013
17
�6.6
Configuring the Device
The objects are designed such that a default value of zero in their fields is a safe value that typically disables
functionality. The objects must be configured before use and the settings written to the nonvolatile memory using the
Command Processor T6 object. Refer to the AT42QT1085 Protocol Guide for more information.
The following objects must be configured before use:
General Objects
Power Configuration T7
QTouchADC Configuration T49
Touch Objects
Key T13 (8 instances)
Signal Processing Objects
Support Objects
Touch Configuration T16
GPIO Configuration T29 (16 instances)
Haptic Event T31 (8 instances)
Refer to the AT42QT1085 Protocol Guide for information on configuring the objects.
The following objects are also used but require no setting up:
Debug Objects
Debug Deltas T2
Debug References T3
Debug Signals T4
General Objects
Message Processor T5
Command Processor T6
Support Objects
Self Test T25
AT42QT1085 [DATASHEET]
9625D–AT42–05/2013
18
�7.
Specifications
7.1
Absolute Maximum Specifications
Vdd
2 V – 5.5 V
Max continuous pin current, any control or drive pin
20 mA
Voltage forced onto any pin
–0.5 V to (Vdd or AVdd +0.5) V
Configuration parameters maximum Writes
10,000
CAUTION: Stresses beyond those listed under Absolute Maximum Specifications may cause permanent damage to
the device. This is a stress rating only and functional operation of the device at these or other conditions beyond those
indicated in the operational sections of this specification is not implied. Exposure to absolute maximum specification
conditions for extended periods may affect device reliability
7.2
Recommended Operating Conditions
Operating temp
–40°C to +85°C
Storage temp
–65°C to +150°C
Vdd
2 V – 5.5 V
Supply ripple + noise
±20 mV
Cx transverse load capacitance per channel
1 pF to 30 pF
GPO current
":)
>":7
>"6)
� ���
�"=7
�"�)
�"�7
&
>"=)
7"))
7"�)
� &��
>":)
>":7
>"6)
� &��
�"=7
�"�)
�"�7
� ��
�
)"7)�?'�
��@�
)"�)�
)">)�
)"7)
)"9)
����
8�
8�
����
�
8�
8�
B
)"�)
8
#$%&
��A �
8
�������
�
��
�����
���������
���
�
��
����
������
� �!"��
�����
������*�����
�*�7F7F�")�
�?��G*�@�
������E
)"7)
*��"�)
��&F�������
�*�
��G�%E��*
+��������E�H.
��+!
��#��@�
���
��
���,
H+#/
���
������� �
�
��
�
�
������
�
AT42QT1085 [DATASHEET]
9625D–AT42–05/2013
23
�7.6.2
32-pin 7 × 7mm TQFP
��
�
�
&
&�
<
?$%%$��
1&C
%$��
1&C
�
)AJ:A
��
@
��
�$��$#��1�&#'1$#'
,2�����3���
�.���4�
/
�
'1�&�
1&C
#������ �����"���%E����
��
������3�� �����(&�&����3��������'�)�9*�
��
������?�"�
� �����������������"����� �����������
���&������������!.��� �!�������.����"���!!��


 工商网监
湘ICP备2023018690号
工商网监
湘ICP备2023018690号
