Evaluation Board User Guide
UG-363
One Technology Way • P.O. Box 9106 • Norwood, MA 02062-9106, U.S.A. • Tel: 781.329.4700 • Fax: 781.461.3113 • www.analog.com
ADISUSBZ iSensor Evaluation System
FEATURES
familiar software tools, provides more flexibility, and enables more
design reuse after the initial sensor evaluation is complete. For
users who are not familiar with embedded processors and their
development tools, the ADISUSBZ system provides a simple
tool for verifying parametric performance and demonstrating
most product functions.
PC USB evaluation system for inertial measurement units
PC evaluation software
ADIS16003, ADIS16006, ADIS16133, ADIS16135,
ADIS16136, ADIS16201, ADIS16203, ADIS16204,
ADIS16209, ADIS16210, ADIS16220, ADIS16223,
ADIS16227, ADIS16228, ADIS16240, ADIS16260,
ADIS16265, ADIS16300, ADIS16305, ADIS16334,
ADIS16360, ADIS16362, ADIS16364, ADIS16365,
ADIS16367, ADIS16375, ADIS16385, ADIS16400,
ADIS16405, ADIS16407
Compatible with Windows XP, Windows Vista, Windows 7
32-bit USB driver support
No external power supply required for most products
The ADISUSBZ circuit board provides tapped holes (M2 ×
0.4 mm), and the kit includes an assortment of M2 × 0.4 mm
machine screws for simple IMU attachment. The location of the
mounting holes facilitates easy electrical connection with either
mating connector on the ADISUSBZ: J1 or J4.
The power management system provides jumper selection for
three device under test (DUT) power options: 5 V (USB), 3.3 V,
and an external option. The 5 V option provides access to the
USB 5 V supply voltage for the DUT, and the 3.3 V option uses
a linear regulator to convert the USB supply to 3.3 V.
KIT CONTENTS
ADISUSBZ circuit board
12-pin ribbon connector, 2 mm
USB A-to-B cable, 6 ft
The ADISUSBZ system supports PC evaluation software packages
for most iSensor products. These software packages provide three
modes of operation: demonstration (main window), register access,
and data capture.
GENERAL DESCRIPTION
The iSensor® family of products provides a serial peripheral
interface (SPI) for data communications. The SPI interface and
a well-calibrated cluster of sensors enable quick integration into
systems that use embedded processor systems. For users who are
familiar with embedded processors, integrating the iSensor®
device with a familiar processor system enables development with
The ADISUSBZ kit includes a USB cable for quick connection to a
PC and a 12-pin ribbon cable for mounting hardware. The IMU
evaluation software package supports operation on Windows® XP,
Windows Vista®, and Windows 7 (32-bit) PC systems.
10438-001
PHOTOGRAPH OF INERTIAL SENSOR EVALUATION SYSTEM
Figure 1.
PLEASE SEE THE LAST PAGE FOR AN IMPORTANT
WARNING AND LEGAL TERMS AND CONDITIONS.
Rev. A | Page 1 of 8
�UG-363
Evaluation Board User Guide
TABLE OF CONTENTS
Features .............................................................................................. 1
Physical DUT Installation ............................................................3
Kit Contents....................................................................................... 1
Remote Connections ....................................................................5
General Description ......................................................................... 1
Software Installation .........................................................................6
Photograph of Inertial Sensor Evaluation System ........................ 1
System Requirements....................................................................6
Revision History ............................................................................... 2
Application Download and Installation .....................................6
Product Selection and Installation Guide ..................................... 3
giveio.exe Installation ...................................................................7
Getting Started .............................................................................. 3
USB Driver Installation ................................................................7
Evaluation Tool Selection ............................................................ 3
REVISION HISTORY
3/12—Rev. 0 to Rev A
Changes to Table 1 ............................................................................. 3
Changes to Installing Products with Breakout Boards
Section ................................................................................................. 4
Added Remote Connections Section .............................................. 5
1/12—Revision 0: Initial Version
Rev. A | Page 2 of 8
�Evaluation Board User Guide
UG-363
PRODUCT SELECTION AND INSTALLATION GUIDE
GETTING STARTED
Table 1. Mating Connector and Mounting Hole Identifiers
Getting started with the ADISUSBZ system involves three steps:
physical DUT installation, software installation, and functional
verification.
EVALUATION TOOL SELECTION
Table 1 provides a list of part numbers that the ADISUSBZ is
compatible with, along with the appropriate mating connector, JP1
setting, and machine screw length for physical attachment. The
mounting holes on the ADISUSBZ accommodate M2 × 0.4 mm
machine screws.
PHYSICAL DUT INSTALLATION
Mating Connector
The ADISUSBZ has mating holes and connectors for each part
number in Table 1. Start the physical installation process by
identifying the correct mating connector. For those parts that
require use of J1, the installation process involves the use of the
12-pin ribbon cable provided with the ADISUSBZ kit. For those
that require the use of J4, the installation process involves connecting the mating connector in the DUT to J4 (ADISUSBZ).
Power Supply Setting
1
Mating
Connector
J1
J1
J4
J4
J4
J1
J1
J1
J1
J1
J1
J1
J1
J1
J1
J1
J1
J4
J4
J4
J4
J4
J4
J4
J4
J4
J4
J4
J4
J4
JP1
Setting
3.3 V, 5 V
3.3 V, 5 V
5V
5V
5V
3.3 V
3.3 V
3.3 V
3.3 V
3.3 V
3.3 V
3.3 V
3.3 V
3.3 V
3.3 V
5V
5V
5V
5V
5V
5V
5V
5V
5V
5V
3.3 V
External, 5 V
5V
5V
5V
Screw
Length1
4 mm
4 mm
16 mm
16 mm
16 mm
4 mm
4 mm
4 mm
4 mm
6 mm
4 mm
6 mm
6 mm
6 mm
4 mm
4 mm
4 mm
12 mm
12 mm
12 mm
4 mm
4 mm
4 mm
4 mm
4 mm
16 mm
16 mm
4 mm
4 mm
4 mm
Machine screw lengths are not intended to imply any level of attachment
assurance. The machine screw lengths provide a minimum of 2 mm of
penetration into the ADISUSBZ holes for demonstration purposes only.
Withstanding vibration and shock conditions, may require additional
considerations.
10438-003
JP1 provides three options: 5 V, 3.3 V, and external. The 5 V option
provides direct access to the PC USB supply. The 3.3 V option
uses a linear regulator to convert the PC USB supply to a stable,
3.3 V output. The external supply option enables testing of the
DUT over a variable supply range. When using the ADISUSBZ
with the ADIS16385, the 5 V option is also available because the
start-up currents from the ADIS16385 can cause the USB supply
to reach the current limit thresholds, preventing the ADISUSBZ
from starting up. Removing C14 from the bottom side of the
ADISUSBZ can also help lower the transient current requirements
when evaluating the ADIS16385.
Part Number
ADIS16003/PCBZ
ADIS16006/PCBZ
ADIS16133BMLZ
ADIS16135BMLZ
ADIS16136AMLZ
ADIS16201/PCBZ
ADIS16203/PCBZ
ADIS16204/PCBZ
ADIS16209/PCBZ
ADIS16210/PCBZ
ADIS16220/PCBZ
ADIS16223/PCBZ
ADIS16227/PCBZ
ADIS16228/PCBZ
ADIS16240/PCBZ
ADIS16260/PCBZ
ADIS16265/PCBZ
ADIS16300/PCBZ
ADIS16305/PCBZ
ADIS16334BMLZ
ADIS16360BMLZ
ADIS16362BMLZ
ADIS16364BMLZ
ADIS16365BMLZ
ADIS16367BMLZ
ADIS16375AMLZ
ADIS16385BMLZ
ADIS16400BMLZ
ADIS16405BMLZ
ADIS16407BMLZ
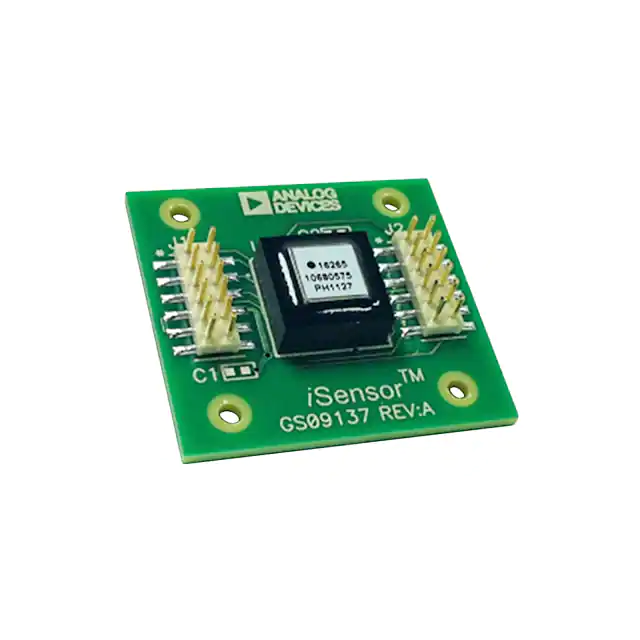
Figure 2. ADISUSBZ Top View, Dimensions and Mounting Hole Locations
Rev. A | Page 3 of 8
�UG-363
Evaluation Board User Guide
Installing Products with Breakout Boards
Installing Products with Embedded Connectors
The ADIS16003, ADIS16006, ADIS16201, ADIS16203,
ADIS16204, ADIS16209, ADIS16210, ADIS16220, ADIS16223,
ADIS16227, ADIS16228, ADIS16240, ADIS16260, and ADIS16265
products interface to the ADISUSBZ using breakout boards. These
breakout boards provide a connector that is pin compatible with J1
on the ADISUSBZ board and have mounting holes, which line up
with the M2 × 0.4 mm holes on the ADISUSBZ.
The ADIS16133, ADIS16135, ADIS16136, ADIS16375, and
ADIS16385 products connect directly to J4 using their own
embedded connectors. Use J4 (ADISUSBZ) as the guide for
installing these products in the correct location, and then secure
these devices using M2 × 0.4 mm machine screws (see Table 1).
Install these devices as follows:
2.
3.
Line up the mounting holes with the matching set on the
ADISUSBZ.
Secure the breakout board using the M2 × 0.4 mm screw
length listed in Table 1.
Connect J1 on the breakout board to J1 on the ADISUSBZ
using the 12-pin ribbon cable provided with the
ADISUSBZ kit.
10438-006
1.
Figure 5. ADIS16136AMLZ and ADISUSBZ
2.
Use a 16-pin ribbon cable connector (not included) to
connect J1, Pin 1 to Pin 12, on both ADISUSBZ and
ADIS162xx/PCBZ. For example, a 16-pin ribbon cable
connector could use Molex P/N 87568-1663 for the
connectors and 3M P/N 3625/16 for the ribbon cable.
Cut Pin 13, Pin 14, Pin 15 and Pin 16 off J1, on the
ADIS162xx/PCBZ, then use the 12-pin ribbon cable
to connect J1, Pin 1 to Pin 12, on both ADISUSBZ
and ADIS162xx/PCBZ.
10438-004
The ADIS16223/PCBZ and ADIS16227/PCBZ include the device
(ADIS16223CMLZ, for example), a machine screw (Size 10-32),
and a breakout board. Install the DUT onto the breakout board,
using the machine screw and the DUT mating connector prior to
installing it onto the ADISUSBZ.
The ADISUSBZ does not currently have mounting holes for the
ADIS16375. When evaluating the ADIS16375, start by pressing
it onto J4, and then use a nail to slide it into the mounting holes
and press it down into the PCB material. This provides a mark for
drilling and tapping holes for the ADIS16375. Use an M1.6 drill bit
and either of the following tap sizes: M2 × 0.4 mm or 2-56. Future
ADIS16375 evaluation options will be available on the EVAL-ADIS
system.
Installing IMU Products with Flexible Connectors
The ADIS16360, ADIS16362, ADIS16364, ADIS16365,
ADIS16367, ADIS16400, ADIS16405, and ADIS16407 IMU
products interface to the ADISUSBZ using the flexible interface
connector and the mounting tabs, which are located on the
package sides adjacent to the flexible connector. Protect the
flexible connector from stress when installing the devices and
extracting them from the ADISUSBZ. Start the installation process
by pressing the connector onto J4 on the ADISUSBZ. Then,
install the two M2 × 0.4 mm machine screws. See Figure 7 for
the machine screw locations and refer to AN-1041 and AN-1045
for handling requirements on these devices.
10438-005
Figure 3. ADIS16265/PCBZ and ADISUSBZ
Figure 6. ADIS16385BMLZ and ADISUSBZ
10438-008
1.
10438-007
The ADIS16210, ADIS16223, ADIS16227, and ADIS16228
breakout boards provide interface connectors that have 14 or
16 pins. In these cases, Pin 1 to Pin 12 match Pin 1 to Pin 12 on
J1 of the ADISUSBZ board. There are two options for making
this connection:
Figure 7. ADIS16407BMLZ and ADISUSBZ
Figure 4. ADIS16210/PCBZ and ADISUSBZ
Rev. A | Page 4 of 8
�Evaluation Board User Guide
UG-363
REMOTE CONNECTIONS
The ADIS16300/PCBZ, ADIS16305/PCBZ, and ADIS16334/PCBZ
include a flexible connector. Use this flexible connector to connect
the device to J4 on the ADISUSBZ (see Figure 8).
In cases that require up to 12 inches of separation between the
DUT (ADIS16xxx) and ADISUSBZ, use a longer ribbon cable
to connect J1 on the breakout board (ADIS16xxx/PCBZ) and J1
on the ADISUSBZ. When the distance must be greater than 12
inches, reliable communication on the SPI may require active
drivers. Note that Table 1 lists many part numbers that end in
“BMLZ.” When using the ADISUSB for a remote connection to
these devices, switch to using the /PCBZ version of the part
number. For example, use ADIS16362/PCBZ to use this
approach to create a remote connection to the ADISUSBZ.
10438-009
Installing the ADIS16300, ADIS16305, and ADIS16334
Figure 8. ADIS16334BMLZ and ADISUSBZ
Rev. A | Page 5 of 8
�UG-363
Evaluation Board User Guide
SOFTWARE INSTALLATION
SYSTEM REQUIREMENTS
The ADISUSBZ-compatible software works on 32-bit PC machines
that use Windows XP, Windows Vista, or Windows 7. There are
no 64-bit driver files available. See the EVAL-ADIS for an evaluation system that supports 64-bit drivers.
APPLICATION DOWNLOAD AND INSTALLATION
1.
2.
3.
4.
Click on the appropriate software package, using the DUT
part number, and download the archive file to a temporary
directory.
Extract the contents of the archive file into a temporary
directory.
Click setup.exe to start the installation process.
When the welcome screen appears, click OK to continue
the installation and then follow the prompts.
10438-012
The ADISUSBZ enables PC-based evaluation of many iSensor
products by using dedicated software packages. These software packages are available for download at the following site:
www.analog.com/ADISUSB, under the Software and Tools tab.
Figure 11. Prompt for Assigning the Program Group
10438-013
See Figure 9, Figure 10, Figure 11, and Figure 12 for the typical
prompts and options in each software installation process.
Figure 13 shows the prompt that appears when the installation
wizard requests permission to copy over a file. Click Yes to keep
the files currently installed on the PC and deny the request to
copy over them.
10438-010
Figure 12. Installation Success Message
10438-014
Figure 9. Example Setup Screen
10438-011
Figure 13. Version Conflict Message
Figure 10. Prompt for Assigning the Program Folder
Rev. A | Page 6 of 8
�Evaluation Board User Guide
UG-363
giveio.exe INSTALLATION
10438-015
10438-018
Early iSensor software packages require the use of the giveio.exe
driver. In these cases, the giveio.exe file is bundled with the application files. Double-click giveio.exe and follow the prompts in
Figure 14 and Figure 15 to install this driver. For Windows XP,
Windows Vista, and Windows 7, click No when prompted to
install this driver for Windows NT or Windows 2000 (see
Figure 16).
Figure 17. Found New Hardware Wizard Prompt
10438-016
Figure 14. Installation Start Screen for giveio.exe
10438-019
Figure 15. License Agreement for giveio.exe
Figure 18. Hardware Installation Message
10438-017
Manual USB Driver Installation
Figure 16. Click No for Windows Vista and Windows 7
USB DRIVER INSTALLATION
After the software installation is complete, install the USB driver
as follows:
1.
2.
3.
4.
5.
6.
Plug the ADISUSBZ into the PC USB port using the A-to-B
cable provided with the evaluation kit.
Wait for the PC to recognize the ADISUSBZ and display the
prompt shown in Figure 17.
Select Install the hardware automatically, and then click
Next to start the installation.
When the prompt in Figure 18 appears, select Continue
Anyway to complete the MCP USB EVAL driver installation
and setup.
After the MCP USB EVAL installation is completed,
another window, similar to the one in Figure 17, starts
a second process.
Click Next and Continue Anyway to complete this process.
If the USB driver installation does not work properly, verify that
the driver files are in the correct location, as follows:
C:\WINDOWS\system32\drivers\ezusb.sys
C:\WINDOWS\system32\drivers\MCP_SPI.sys
C:\WINDOWS\inf\mcpusb.inf
If the files are not in the correct locations, download the
ADISUSB_Drivers.zip file from www.analog.com/ADISUSB
(Software and Tools tab), extract the files to a temporary location,
and then copy the files to the correct locations. After the files
are in the correct location, plug the ADISUSBZ back into the
PC to start the automatic driver installation process. Figure 17
shows the expected response. If this window does not appear,
check the status of the driver in the Windows Device Manager:
click Start, Control Panel, System; Hardware; Device Manager;
Universal Serial Bus Controllers. MCP USB EVAL will be visible
only after connecting the ADISUSBZ to a USB port.
Rev. A | Page 7 of 8
�UG-363
Evaluation Board User Guide
When the driver installation is complete, the associated driver
listing should not have the yellow exclamation warning. Right-click
the listing and select properties to show additional information
and options. Verify that the driver has a message saying that the
driver is working properly. Use this same menu to uninstall this
driver, if necessary.
Use the following steps to do this:
1.
2.
Windows XP Service Pack 3
Windows XP Service Pack 3 does not allow the ADISUSBZ to
initiate the second driver installation. Reinstalling the USB drivers
twice helps to overcome this challenge.
3.
Connect the evaluation board. The result is unknown device.
Use the Device Manager to select the unknown USB driver
and reinstall it. Make sure that you do not delete any files
in this process. When the installation wizard asks to search
the Microsoft website for the appropriate driver, click No.
Choose the option to install automatically.
Use the Device Manager a second time to reinstall the same
driver, making the same choices in the installation wizard.
ESD Caution
ESD (electrostatic discharge) sensitive device. Charged devices and circuit boards can discharge without detection. Although this product features patented or proprietary protection
circuitry, damage may occur on devices subjected to high energy ESD. Therefore, proper ESD precautions should be taken to avoid performance degradation or loss of functionality.
Legal Terms and Conditions
By using the evaluation board discussed herein (together with any tools, components documentation or support materials, the “Evaluation Board”), you are agreeing to be bound by the terms and conditions
set forth below (“Agreement”) unless you have purchased the Evaluation Board, in which case the Analog Devices Standard Terms and Conditions of Sale shall govern. Do not use the Evaluation Board until you
have read and agreed to the Agreement. Your use of the Evaluation Board shall signify your acceptance of the Agreement. This Agreement is made by and between you (“Customer”) and Analog Devices, Inc.
(“ADI”), with its principal place of business at One Technology Way, Norwood, MA 02062, USA. Subject to the terms and conditions of the Agreement, ADI hereby grants to Customer a free, limited, personal,
temporary, non-exclusive, non-sublicensable, non-transferable license to use the Evaluation Board FOR EVALUATION PURPOSES ONLY. Customer understands and agrees that the Evaluation Board is provided
for the sole and exclusive purpose referenced above, and agrees not to use the Evaluation Board for any other purpose. Furthermore, the license granted is expressly made subject to the following additional
limitations: Customer shall not (i) rent, lease, display, sell, transfer, assign, sublicense, or distribute the Evaluation Board; and (ii) permit any Third Party to access the Evaluation Board. As used herein, the term
“Third Party” includes any entity other than ADI, Customer, their employees, affiliates and in-house consultants. The Evaluation Board is NOT sold to Customer; all rights not expressly granted herein, including
ownership of the Evaluation Board, are reserved by ADI. CONFIDENTIALITY. This Agreement and the Evaluation Board shall all be considered the confidential and proprietary information of ADI. Customer may
not disclose or transfer any portion of the Evaluation Board to any other party for any reason. Upon discontinuation of use of the Evaluation Board or termination of this Agreement, Customer agrees to
promptly return the Evaluation Board to ADI. ADDITIONAL RESTRICTIONS. Customer may not disassemble, decompile or reverse engineer chips on the Evaluation Board. Customer shall inform ADI of any
occurred damages or any modifications or alterations it makes to the Evaluation Board, including but not limited to soldering or any other activity that affects the material content of the Evaluation Board.
Modifications to the Evaluation Board must comply with applicable law, including but not limited to the RoHS Directive. TERMINATION. ADI may terminate this Agreement at any time upon giving written notice
to Customer. Customer agrees to return to ADI the Evaluation Board at that time. LIMITATION OF LIABILITY. THE EVALUATION BOARD PROVIDED HEREUNDER IS PROVIDED “AS IS” AND ADI MAKES NO
WARRANTIES OR REPRESENTATIONS OF ANY KIND WITH RESPECT TO IT. ADI SPECIFICALLY DISCLAIMS ANY REPRESENTATIONS, ENDORSEMENTS, GUARANTEES, OR WARRANTIES, EXPRESS OR IMPLIED, RELATED
TO THE EVALUATION BOARD INCLUDING, BUT NOT LIMITED TO, THE IMPLIED WARRANTY OF MERCHANTABILITY, TITLE, FITNESS FOR A PARTICULAR PURPOSE OR NONINFRINGEMENT OF INTELLECTUAL
PROPERTY RIGHTS. IN NO EVENT WILL ADI AND ITS LICENSORS BE LIABLE FOR ANY INCIDENTAL, SPECIAL, INDIRECT, OR CONSEQUENTIAL DAMAGES RESULTING FROM CUSTOMER’S POSSESSION OR USE OF
THE EVALUATION BOARD, INCLUDING BUT NOT LIMITED TO LOST PROFITS, DELAY COSTS, LABOR COSTS OR LOSS OF GOODWILL. ADI’S TOTAL LIABILITY FROM ANY AND ALL CAUSES SHALL BE LIMITED TO THE
AMOUNT OF ONE HUNDRED US DOLLARS ($100.00). EXPORT. Customer agrees that it will not directly or indirectly export the Evaluation Board to another country, and that it will comply with all applicable
United States federal laws and regulations relating to exports. GOVERNING LAW. This Agreement shall be governed by and construed in accordance with the substantive laws of the Commonwealth of
Massachusetts (excluding conflict of law rules). Any legal action regarding this Agreement will be heard in the state or federal courts having jurisdiction in Suffolk County, Massachusetts, and Customer hereby
submits to the personal jurisdiction and venue of such courts. The United Nations Convention on Contracts for the International Sale of Goods shall not apply to this Agreement and is expressly disclaimed.
©2012 Analog Devices, Inc. All rights reserved. Trademarks and
registered trademarks are the property of their respective owners.
UG10438-0-3/12(A)
Rev. A | Page 8 of 8
�