Cascadable Super Sequencer with Margin
Control and Fault Recording
ADM1266
Data Sheet
FEATURES
GENERAL DESCRIPTION
Complete supervisory and sequencing solution for up to
17 supplies
Expandable to 257 supplies with additional ADM1266 ICs
connected to the 2-wire interdevice bus
Fully programmable sequencing engine
17 supply fault detectors enable real time supervision of
supplies
0.4 V to 15 V on VH1 to VH4 (VHx)
0.4 V to 5 V on VP1 to VP13 (VPx)
Device powered by the higher of VH1 and VH2 inputs for
improved operating redundancy
12-bit ADC for readback of all supervised voltages
Black box nonvolatile fault recording
16 PDIOs
9 GPIOs
9 voltage output 8-bit DACs allow voltage margining
adjustment via dc-to-dc converter trim/feedback node
Main and backup memory
Industry standard PMBus interface compliant
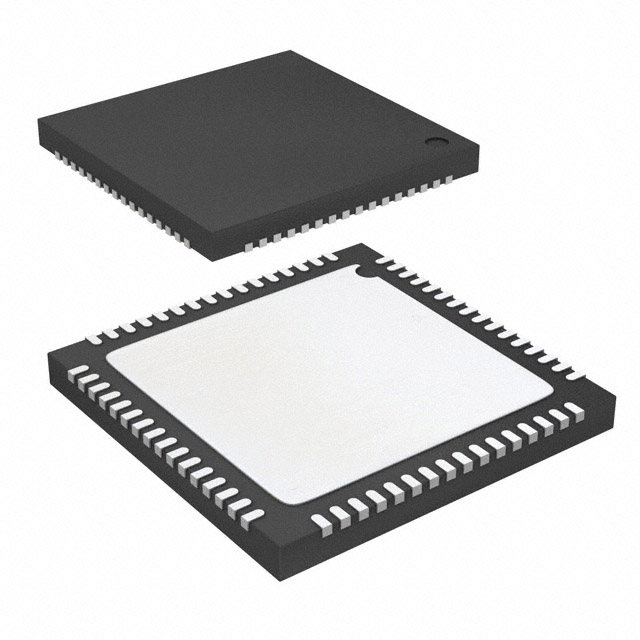
Available in a 9 mm × 9 mm, 64-lead package
The ADM1266 Super Sequencer® is a configurable supervisory/
sequencing device that offers a single-chip solution for supply
monitoring and sequencing in systems with up to 17 supplies.
For systems with more supplies (up to 257), the operation of up
to 16 ADM1266 devices can be synchronized through a proprietary 2-wire interface (interdevice bus).
The sequencing engine (SE) monitors the supply fault detectors
(SFDs), programmable driver input/outputs (PDIOs), generalpurpose inputs/outputs (GPIOs), and timers, and controls the
PDIOs and GPIOs to sequence the supplies up and down as
required. The logical core of the device is an Arm® Cortex-M3
microcontroller. The firmware is supplied by Analog Devices,
Inc., and all configuration is performed through an intuitive
graphic user interface (GUI).
Additionally, the ADM1266 integrates an analog-to-digital
converter (ADC) and voltage output digital-to-analog converters
(DACs) that can be used to adjust either the feedback node or
reference of a dc-to-dc converter to implement a closed-loop,
autonomous, margining system.
A block of nonvolatile EEPROM is available to record voltage,
time, and fault information when instructed to by the sequencing
engine configuration.
APPLICATIONS
Communications infrastructure
Industrial test and measurement
FUNCTIONAL BLOCK DIAGRAM
VH4
VP1
OV
DAC
–
UV
DAC
+
GLITCH
FILTER
GLITCH
FILTER
–
PROGRAMMABLE
SEQUENCING
ENGINE
PROGRAMMABLE
DRIVE
OUTPUTS/INPUTS
VP13
SDA
MUX
MARGINING
PMBus
INTERFACE
12-BIT
SAR ADC
PDIO16
GPIO1
GPIOs
GPIO9
LOGIC BLOCK
SCL
PDIO1
EEPROM AND SRAM
INTERDEVICE
BUS
ID_SDA
ID_SCL
DAC
DAC1
DAC
DAC9
DAC
CONTROL
15579-101
+
VH1
Figure 1.
Rev. C
Document Feedback
Information furnished by Analog Devices is believed to be accurate and reliable. However, no
responsibility is assumed by Analog Devices for its use, nor for any infringements of patents or other
rights of third parties that may result from its use. Specifications subject to change without notice.
No license is granted by implication or otherwise under any patent or patent rights of Analog
Devices. Trademarks and registered trademarks are the property of their respective owners.
One Technology Way, P.O. Box 9106, Norwood, MA 02062-9106, U.S.A.
Tel: 781.329.4700 ©2018–2021 Analog Devices, Inc. All rights reserved.
Technical Support
www.analog.com
�ADM1266
Data Sheet
TABLE OF CONTENTS
Features .............................................................................................. 1
System Logic Block ........................................................................ 26
Applications ...................................................................................... 1
Password Protection ...................................................................... 27
General Description ......................................................................... 1
Unlocking the Device ................................................................ 27
Functional Block Diagram .............................................................. 1
Locking the Device ..................................................................... 27
Revision History ............................................................................... 3
Changing the Password ............................................................. 27
Detailed Functional Block Diagram .............................................. 4
Memory ........................................................................................... 28
Specifications .................................................................................... 5
Overview...................................................................................... 28
Absolute Maximum Ratings ......................................................... 11
Power-Up .................................................................................... 28
Thermal Resistance .................................................................... 11
Manual CRC Calculations ........................................................ 28
ESD Caution................................................................................ 11
Refresh ......................................................................................... 28
Pin Configuration and Function Descriptions .......................... 12
Auto Refresh ............................................................................... 28
Typical Performance Characteristics ........................................... 14
Acceleration Factor .................................................................... 28
Theory of Operation ...................................................................... 15
Internal Watchdog Timer ............................................................. 30
Powering the ADM1266............................................................ 15
Applications Information ............................................................. 31
Inputs ........................................................................................... 16
Overview...................................................................................... 31
Programmable Driver Input/Outputs ..................................... 17
Powering the ADM1266 ........................................................... 31
General-Purpose Input/Outputs .............................................. 18
PCB Assembly and Layout Suggestions .................................. 31
Sequencing Engine (SE) ................................................................ 20
Capacitors.................................................................................... 31
Overview ...................................................................................... 20
Ground Connections ................................................................. 31
Power-Up and State 0 ................................................................ 20
PMBus/I2C .................................................................................. 31
State Sections............................................................................... 20
IDB ............................................................................................... 31
Action Types ............................................................................... 20
Voltage Sensing .......................................................................... 31
Parallel Operation and Interdevice Bus .................................. 20
PDIOs and GPIOs ...................................................................... 31
States ............................................................................................ 21
DAC Outputs .............................................................................. 31
State Machine Control via PMBus........................................... 21
Clock ............................................................................................ 31
Supply Margining ........................................................................... 22
Unused Pins ................................................................................ 31
Overview ...................................................................................... 22
PMBus Digital Communication .................................................. 32
Black Box (EEPROM) Fault Recording ...................................... 24
PMBus Features .......................................................................... 32
Black Box Writes When External Supply Is Powering Down
....................................................................................................... 24
Overview...................................................................................... 32
Triggering a Black Box Write ................................................... 24
Data Transfer Commands ........................................................ 33
Black Box Record Mode ............................................................ 24
Group Command Protocol ....................................................... 34
Power-Up Counter..................................................................... 24
Clock Generation and Stretching ............................................ 34
Black Box Write Time ............................................................... 24
Start and Stop Conditions ......................................................... 34
Black Box Contents .................................................................... 24
Repeated Start Condition .......................................................... 34
Time Stamping................................................................................ 25
General Call Support ................................................................. 34
Setting UNIX Time Using SET_RTC ...................................... 25
PMBus Address Selection ......................................................... 35
Internal Oscillator ...................................................................... 25
Fast Mode .................................................................................... 35
External Oscillator...................................................................... 25
10-Bit Addressing....................................................................... 35
Multiple Device Time Stamping .............................................. 25
Packet Error Checking .............................................................. 35
Transfer Protocol ....................................................................... 32
Rev. C | Page 2 of 68
�Data Sheet
ADM1266
Electrical Specifications..............................................................35
Outline Dimensions ....................................................................... 68
PMBus Commands .........................................................................36
Ordering Guide ........................................................................... 68
Standard PMBus Command Descriptions ..................................38
Standard PMBus Commands ....................................................38
REVISION HISTORY
6/2021—Rev. B to Rev. C
Changed CP-64-15 to CP-64-23 ................................. Throughout
Added PDIOx Control over PMBus Section and GPIOx
Control over PMBus Section .........................................................18
Added State Machine Control via PMBus Section.....................21
Changes to System Logic Block Section.......................................26
Added Internal Watchdog Timer Section ...................................30
Added Table 15; Renumbered Sequentially ................................36
Added WDT_CONFIGURATION Section and Table 109 ......63
Added PDIO_OUTPUT_STATE Section, Table 110, and
Table 111 ..........................................................................................64
Added GPIO_OUTPUT_STATE Section, Table 112, and
Table 113 ..........................................................................................65
Changes to VAR_VALUE Section................................................66
Added Table 119 .............................................................................66
Updated Outline Dimensions .......................................................68
Changes to Ordering Guide...........................................................68
7/2019—Rev. A to Rev. B
Added Table 3; Renumbered Sequentially .................................... 7
Change to Table 4 Summary ........................................................... 8
Added Table 5.................................................................................. 10
Change to Setting UNIX Time Using SET_RTC Section ......... 24
Changes to Refresh Section ........................................................... 27
Changes to Acceleration Factor Section ...................................... 28
Added Table 12 ............................................................................... 28
Changes to Table 51........................................................................ 42
Changes to Table 80........................................................................ 52
Changes to Table 83........................................................................ 53
Changes to Table 88........................................................................ 54
Changes to Table 104 ..................................................................... 59
Changes to Ordering Guide .......................................................... 63
8/2018—Rev. 0 to Rev. A
Added Applications Section ............................................................ 1
Change to Bytes[3:1] Description Column, Table 50 ................ 41
Changes to Byte 1 Description Column, Table 90 ..................... 54
Change to Byte Column, Table 94 ................................................ 55
Changes to Byte 1 Description Column, Table 100 ................... 57
5/2018—Revision 0: Initial Version
Rev. C | Page 3 of 68
�ADM1266
Data Sheet
DETAILED FUNCTIONAL BLOCK DIAGRAM
XTAL1 XTAL2
ID_SCL ID_SDA
GPIO1 GPIO2 GPIO3 GPIO4 GPIO5 GPIO6 GPIO7 GPIO8 GPIO9
INTERDEVICE BUS
GPIOS
SYNC
TIMESTAMP
CLOCK
PDIO1
PDIO2
1.8V
LDO
PDIO3
PROGRAMMABLE DRIVE OUTPUTS
DVDD_CAP
3.3V
LDO
AVDD_CAP
PROGRAMMABLE
SEQUENCING
ENGINE
VDD ARBITRATOR
RANGE
SELECT
+
VH1
VH2
VH3
VH4
OV
DAC
–
UV
DAC
+
MARGINING
–
VP1
VP2
GLITCH
FILTER
GLITCH
FILTER
PDIO5
PDIO6
PDIO7
PDIO8
PDIO9
PDIO10
PDIO11
PDIO12
PDIO13
LOGIC BLOCK
PDIO14
EEPROM AND SRAM
PDIO16
PDIO15
FILTER
SETTINGS
VP3
PDIO4
VP5
DAC
DAC1
VP6
DAC
DAC2
VP7
DAC
DAC3
DAC
DAC4
DAC
DAC5
DAC CONTROL
PMBus
VP8
ADC INPUT
VP11
MUX
VP9
VP10
12-BIT
SAR ADC
VP12
REFERENCE
VP13
GND
PMBus
INTERFACE
REFGND REFOUT ADDR SCL
Figure 2.
Rev. C | Page 4 of 68
SDA
DAC
DAC6
DAC
DAC7
DAC
DAC8
DAC
DAC9
15579-001
VP4
�Data Sheet
ADM1266
SPECIFICATIONS
TJ = 0°C to +85°C, VH1 and VH2 > 3 V, unless otherwise noted. Accuracy (%) = (measured voltage − applied voltage) × 100/applied voltage.
Table 1.
Parameter
ADC, SINGLE-ENDED
Accuracy of VHx Pins with 16× Averaging
6 V to 15 V
3 V to 7.5 V
1.5 V to 3.75 V
750 mV to 1.875 V
400 mV to 1 V
Accuracy of VPx Pins with 16× Averaging
2 V to 5 V
1.5 V to 3.75 V
750 mV to 1.875 V
400 mV to 1 V
Direct
High-Z
SUPPLY FAULT DETECTORS
Accuracy of VHx Pins
6 V to 15 V
3 V to 7.5 V
1.5 V to 3.75 V
750 mV to 1.875 V
400 mV to 1 V
Accuracy of VPx Pins
2 V to 5 V
1.5 V to 3.75 V
750 mV to 1.875 V
400 mV to 1 V
Direct
High-Z
ADC, DIFFERENTIAL
Accuracy of VPx Pins with 16× Averaging
2 V to 5 V
1.5 V to 3.75 V
750 mV to 1.875 V
400 mV to 1 V
Direct
High-Z
Min
Typ
Max
Unit
Test Conditions/Comments
±0.64
±0.64
±0.62
±0.66
±0.69
%
%
%
%
%
VHx = 10.623 V
VHx = 5.311 V
VHx = 2.656 V
VHx = 1.328 V
VHx = 708 mV
±0.79
±0.79
±0.70
%
%
%
VPx = 3.541 V
VPx = 2.656 V
VPx = 1.328 V
±0.67
±0.66
%
%
VPx = 708 mV
VPx = 708 mV
±0.65
±0.65
±0.64
±0.79
±1.02
%
%
%
%
%
VHx = 10.623 V
VHx = 5.311 V
VHx = 2.656 V
VHx = 1.328 V
VHx = 708 mV
±1.05
±0.89
±0.76
%
%
%
VPx = 3.541 V
VPx = 2.656 V
VPx = 1.328 V
±0.76
±0.71
%
%
VPx = 708 mV
VPx = 708 mV
±0.90
±0.72
±0.64
%
%
%
VPx = 3.541 V
VPx = 2.656 V
VPx = 1.328 V
±0.63
±0.61
%
%
VPx = 708 mV
VPx = 708 mV
Rev. C | Page 5 of 68
�ADM1266
Data Sheet
TJ = −40°C to +85°C, VH1 and VH2 > 3 V, unless otherwise noted. Accuracy (%) = (measured voltage − applied voltage) × 100/applied voltage.
Table 2.
Parameter
ADC, SINGLE-ENDED
Accuracy of VHx Pins
6 V to 15 V
3 V to 7.5 V
1.5 V to 3.75 V
750 mV to 1.875 V
400 mV to 1 V
Accuracy of VPx Pins
2 V to 5 V
1.5 V to 3.75 V
750 mV to 1.875 V
400 mV to 1 V
Direct
High-Z
SUPPLY FAULT DETECTORS
Accuracy of VHx Pins
6 V to 15 V
3 V to 7.5 V
1.5 V to 3.75 V
750 mV to 1.875 V
400 mV to 1 V
Accuracy of VPx Pins
2 V to 5 V
1.5 V to 3.75 V
750 mV to 1.875 V
400 mV to 1 V
Direct
High-Z
ADC, DIFFERENTIAL
Accuracy of VPx Pins with 16× Averaging
2 V to 5 V
1.5 V to 3.75 V
750 mV to 1.875 V
400 mV to 1 V
Direct
High-Z
Min
Typ
Max
Unit
Test Conditions/Comments
±0.64
±0.64
±0.62
±0.66
±0.69
%
%
%
%
%
VHx = 10.623 V
VHx = 5.311 V
VHx = 2.656 V
VHx = 1.328 V
VHx = 708 mV
±0.90
±0.79
±0.70
%
%
%
VPx = 3.541 V
VPx = 2.656 V
VPx = 1.328 V
±0.67
±0.66
%
%
VPx = 708 mV
VPx = 708 mV
±0.73
±0.67
±0.64
±0.79
±1.02
%
%
%
%
%
VHx = 10.623 V
VHx = 5.311 V
VHx = 2.656 V
VHx = 1.328 V
VHx = 708 mV
±1.15
±0.98
±0.85
%
%
%
VPx = 3.541 V
VPx = 2.656 V
VPx = 1.328 V
±0.80
±0.78
%
%
VPx = 708 mV
VPx = 708 mV
±0.99
±0.82
±0.64
%
%
%
VPx = 3.541 V
VPx = 2.656 V
VPx = 1.328 V
±0.63
±0.61
%
%
VPx = 708 mV
VPx = 708 mV
Rev. C | Page 6 of 68
�Data Sheet
ADM1266
TJ = −40°C to +105°C, VH1 and VH2 > 3 V, unless otherwise noted. Accuracy (%) = (measured voltage − applied voltage) × 100/applied voltage.
Table 3.
Parameter
ADC, SINGLE-ENDED
Accuracy of VHx Pins
6 V to 15 V
3 V to 7.5 V
1.5 V to 3.75 V
750 mV to 1.875 V
400 mV to 1 V
Accuracy of VPx Pins
2 V to 5 V
1.5 V to 3.75 V
750 mV to 1.875 V
400 mV to 1 V
Direct
High-Z
SUPPLY FAULT DETECTORS
Accuracy of VHx Pins
6 V to 15 V
3 V to 7.5 V
1.5 V to 3.75 V
750 mV to 1.875 V
400 mV to 1 V
Accuracy of VPx Pins
2 V to 5 V
1.5 V to 3.75 V
750 mV to 1.875 V
400 mV to 1 V
Direct
High-Z
ADC, DIFFERENTIAL
Accuracy of VPx Pins with 16× Averaging
2 V to 5 V
1.5 V to 3.75 V
750 mV to 1.875 V
400 mV to 1 V
Direct
High-Z
Min
Typ
Rev. C | Page 7 of 68
Max
Unit
Test Conditions/Comments
±0.74
±0.73
±0.76
±0.73
±0.77
%
%
%
%
%
VHx = 10.623 V
VHx = 5.311 V
VHx = 2.656 V
VHx = 1.328 V
VHx = 708 mV
±0.95
±0.86
±0.78
%
%
%
VPx = 3.541 V
VPx = 2.656 V
VPx = 1.328 V
±0.75
±0.74
%
%
VPx = 708 mV
VPx = 708 mV
±0.98
±1.00
±0.98
±1.13
±1.28
%
%
%
%
%
VHx = 10.623 V
VHx = 5.311 V
VHx = 2.656 V
VHx = 1.328 V
VHx = 708 mV
±1.15
±1.03
±1.01
%
%
%
VPx = 3.541 V
VPx = 2.656 V
VPx = 1.328 V
±0.97
±0.97
%
%
VPx = 708 mV
VPx = 708 mV
±0.99
±0.82
±0.73
%
%
%
VPx = 3.541 V
VPx = 2.656 V
VPx = 1.328 V
±0.94
±0.75
%
%
VPx = 708 mV
VPx = 708 mV
�ADM1266
Data Sheet
TJ = −40°C to +105°C, VH1 and VH2 > 3 V, unless otherwise noted.
Table 4.
Parameter
POWER SUPPLY
VH1 and VH2
Supply Current, IVH1/VH2
VH1 and VH2 Undervoltage Lockout
(UVLO)
VH1 and VH2 UVLO Hysteresis
VH1 and VH2 Arbitration Hysteresis
AVDD_CAP
DVDD_CAP
SUPPLY FAULT DETECTORS
VHx Pins
Input Voltage Range
Input Impedance
VH1 and VH2
VH3 and VH4
VPx Pins
Input Voltage Range
Input Impedance
VPx Pins, Differential (Odd and Next
Even) Common-Mode Voltage Offset
Min
3.0
2.59
GPIOs
VIH
VIL
VOH
VOL
IOH
ISOURCE
IOL
ISINK
16
2.71
Max
Unit
Test Conditions/Comments
15.0
V
50
2.83
mA
V
Minimum supply required on one of VH1/VH2
pins
Depends on pin configuration
Voltage below which the device turns off
111
mV
90
317
987
3.2
3.3
3.355
mv
mV
mV
V
1.79
1.82
1.85
V
15
V
0
41
153
0
5
−100
+100
8
2
100
Maximum voltage difference from VP2, VP4, VP6,
VP8, VP10, and VP12 to GND in differential sense
mode
Minimum programmable filter length
Maximum programmable filter length
9
1
V
V
V
V
µA
mA
mA
mA
kΩ
kΩ
µA
µA
IOH = 0.5 mA
IOL = 20 mA
Maximum source current per PDIOx pin
Maximum total source for all PDIOx pins
Maximum sink current per PDIOx pin
Maximum total sink for all PDIOx pins
Internal pull-up
Internal pull-down
VPDIO = 21 V
VPDIO < 3.6 V
0.8
AVDD_CAP
0.50
4
12
4
12
V
V
V
V
mA
mA
mA
mA
IOH = 4 mA
IOL = 4 mA
Maximum source current per GPIOx pin
Maximum total source for all GPIOx pins
Maximum sink current per GPIOx pin
Maximum total sink for all GPIOx pins
0.6
AVDD_CAP
0.50
500
3
20
60
20
20
1.63
2.6
0
V
kΩ
mV
Bits
µs
µs
1.4
2.8
0
Voltage, above the UVLO voltage level, at which
the device turns on
VH1 and VH2 = 3.3 V
VH1 and VH2 = 5 V
VH1 and VH2 = 12 V
Regulated AVDD_CAP low dropout (LDO) output;
VH1 and VH2 > 3.6 V
Regulated DVDD_CAP LDO output
kΩ
kΩ
62
Threshold Resolution
Digital Glitch Filter
PROGRAMMABLE DRIVER INPUT/OUTPUTS
Input Voltage, High (VIH)
Input Voltage, Low (VIL)
Output Voltage, High (VOH)
Output Voltage, Low (VOL)
Output Current, High (IOH)
Source Current (ISOURCE)
Output Current, Low (IOL)
Sink Current (ISINK)
Pull-Up Resistance (RPULL-UP)
Pull-Up Resistance (RPULL-DOWN)
Tristate Leakage Current
Typ
Rev. C | Page 8 of 68
�Data Sheet
Parameter
Tristate Leakage Current
BUFFERED VOLTAGE OUTPUT DACs
Resolution
Code 0x7F Output Voltage
0.2 V to 0.8 V
0.3 V to 0.9 V
0.5 V to 1.1 V
0.7 V to 1.3 V
0.95 V to 1.55 V
Output Voltage Range
LSB Step Size
DAC Supply Currents
DAC Leakage Current
Maximum Load Current
Source
Sink
Maximum Load Capacitance
Settling Time to 50 pF Load
ADC
Signal Range
Resolution
Round Robin Time
SERIAL BUS DIGITAL INPUTS (SCL, SDA)
Input High Voltage, VIH
Input Low Voltage, VIL
Output Low Voltage, VOL
Clock Frequency, fSCLK
Bus Free Time, tBUF
Start Setup Time, tSU;STA
Stop Setup Time, tSU;STO
Start Hold Time, tHD;STA
SCL Low Time, tLOW
SCL Low Timeout, tLOW:MAX
SCL High Time, tHIGH
SCL, SDA Rise Time, tR
SCL, SDA Fall Time, tF
Data Setup Time, tSU;DAT
Data Hold Time, tHD;DAT
ADDR PIN PULL-UP CURRENT
SYNC
Input High Voltage, VIH
Input Low Voltage, VIL
Output High Voltage, VOH
Output Low Voltage, VOL
Clock Frequency, fSCLK
INTERDEVICES BUS (IDB)
Input High Voltage, VIH
Input Low Voltage, VIL
Output Low Voltage, VOL
Clock Frequency, fSCLK
ADM1266
Min
Typ
Max
1
8
0.501
0.603
0.804
1.005
1.256
Test Conditions/Comments
Bits
0.506
0.607
0.809
1.011
1.264
606
2.376
0
0.516
0.618
0.820
1.021
1.273
3
1
V
V
V
V
V
mV
mV
mA
µA
0.25
0.25
50
2
mA
mA
pF
µs
VREF
V
Bits
ms
12
5
2.1
0.8
0.4
400
1.3
0.6
0.6
0.6
1.3
35
50
300
300
0.6
100
300
45
Unit
µA
50
55
2.1
0.8
AVDD_CAP
0.5
2.6
32.768
2.1
0.8
0.4
1
Rev. C | Page 9 of 68
V
V
V
kHz
µs
µs
µs
µs
µs
ms
µs
ns
ns
ns
ns
µA
V
V
V
V
kHz
V
V
V
MHz
Same range, independent of center point
Maximum total source for all DAC pins
PMBus resets if this value is exceeded
�ADM1266
Data Sheet
Parameter
REFERENCE OUTPUT
Reference Output Voltage (VREF)
Load Regulation
Min
Typ
Max
Unit
Test Conditions/Comments
2.006
2.020
−0.25
0.25
2.031
Minimum Load Capacitance
TEMPERATURE SHUTDOWN (TSD)
TSD Rising
TSD Hysteresis
1
V
mV
mV
µF
VREF, no load
Sourcing current, IDACxMAX = −100 µA
Sinking current, IDACxMAX = 100 µA
Capacitor required for decoupling, stability
150
20
°C
°C
TJ = −40°C to +85°C, VH1 and VH2 > 3 V, unless otherwise noted.
Table 5.
Parameter
EEPROM RELIABILITY
Endurance 1
Data Retention 2, 3
1
2
3
Min
10,000
10
Typ
Max
Unit
Test Conditions/Comments
Cycles
Years
TJ = 85°C
TJ = 85°C
Endurance is qualified as per JEDEC Standard 22, Method A117.
Retention lifetime equivalent at junction temperature (TJ) = 85°C as per JEDEC Standard 22, Method A117. Retention lifetime derates with junction temperature.
For temperatures above 85°C. Refer to the Refresh section and Acceleration Factor section.
Rev. C | Page 10 of 68
�Data Sheet
ADM1266
ABSOLUTE MAXIMUM RATINGS
THERMAL RESISTANCE
Table 6.
Parameter
VHx, PDIOx to GND
VPx, AVDD_CAP to GND
DACx to GND
REFOUT to GND
ADDR to GND
REFGND, EPAD to GND
All Other Pins to GND
Maximum Junction Temperature (TJ max)
Storage Temperature Range1
ESD Rating, All Pins
Charged Device Model
Human Body Model
1
Rating
21 V
5.5 V
3.6 V
3.6 V
3.6 V
−0.3 V to +0.3 V
3.6 V
150°C
−65°C to +125°C
750 V
2000 V
Thermal performance is directly linked to printed circuit board
(PCB) design and operating environment. Careful attention to
PCB thermal design is required.
θJA is the natural convection junction to ambient thermal resistance
measured in a one cubic foot sealed enclosure. The thermal
resistance values specified in Table 7 are calculated based on
JEDEC specs and must be used in compliance with JESD51-12.
Table 7. Thermal Resistance1
Package Type
CP-64-23
Stresses at or above those listed under Absolute Maximum
Ratings may cause permanent damage to the product. This is a
stress rating only; functional operation of the product at these
or any other conditions above those indicated in the operational
section of this specification is not implied. Operation beyond
the maximum operating conditions for extended periods may
affect product reliability.
θJC_BOTTOM3, 4
0.6
ΨJT
0.1
ΨJB
3.6
Unit
˚C/W
The values in Table 7 are calculated based on standard JEDEC test conditions,
unless otherwise specified
2
θJA is simulated using a 2S2P PCB with 49 standard JEDEC vias.
3
For the θJC_BOTTOM test, 100 µm TIM is used. TIM is assumed to have 3.6 W/mK.
4
θJC_BOTTOM is simulated using a 1S0P PCB with 49 standard JEDEC vias.
1
See the Acceleration Factor section.
θJA2
24.2
ESD CAUTION
Rev. C | Page 11 of 68
�ADM1266
Data Sheet
64
63
62
61
60
59
58
57
56
55
54
53
52
51
50
49
VP8
VP9
VP10
VP11
VP12
VP13
PDIO6
PDIO7
PDIO8
PDIO9
PDIO10
PDIO11
PDIO12
PDIO13
PDIO14
PDIO15
PIN CONFIGURATION AND FUNCTION DESCRIPTIONS
1
2
3
4
5
6
7
8
9
10
11
12
13
14
15
16
ADM1266
TOP VIEW
(Not to Scale)
48
47
46
45
44
43
42
41
40
39
38
37
36
35
34
33
PDIO16
SCL
SDA
GPIO9
GPIO8
SYNC
ID_SCL
ID_SDA
GPIO7
GPIO6
GPIO5
GPIO4
DVDD_CAP
GPIO3
GPIO2
GPIO1
NOTES
1. THE EXPOSED PAD MUST BE SOLDERED TO THE GROUND PLANE.
15579-002
ADDR
VH4
VH3
VH2
VH1
GND
AVDD_CAP
VP4
VP3
VP2
VP1
PDIO5
PDIO4
PDIO3
PDIO2
PDIO1
17
18
19
20
21
22
23
24
25
26
27
28
29
30
31
32
VP7
VP6
VP5
REFOUT
REFGND
DAC1
DAC2
DAC3
DAC4
DAC5
DAC6
DAC7
DAC8
DAC9
XTAL2
XTAL1
Figure 3. Pin Configuration
Table 8. Pin Function Descriptions
Pin No.
1 to 3, 24 to 27,
59 to 64
4
Mnemonic 1
VP1 to VP13
Description
Low Voltage Inputs to Supply Fault Detectors. These pins monitor voltages of up to 5 V.
REFOUT
5
6 to 14
15
REFGND
DAC1 to DAC9
XTAL2
16
XTAL1
17
18 to 21
ADDR
VH1 to VH4
22
23
GND
AVDD_CAP
28 to 32, 48 to
58
33 to 35, 37 to
40, 44, 45
36
PDIO1 to PDIO16
GPIO1 to GPIO9
Reference Output. A capacitor must be connected between this pin and REFGND. A 2.2 µF
capacitor is recommended for this purpose.
Ground Return for On-Chip Reference Circuits. Star connect this ground to the GND pin.
Voltage Output DACs. These DACs can be used for margining and trimming the supply rails.
Crystal Input 2. This pin is configured as the 32.768 kHz crystal input. It can also be configured
as high impedance.
Crystal Input 1. This pin is configured as the 32.768 kHz crystal input. It can also be configured
as high impedance.
PMBus Address Select Resistor. A resistor to GND sets one of 16 addresses.
High Voltage Input to Supply Fault Detectors. These pins can monitor voltages of up to 15 V. The
highest voltage from VH1 to VH2 powers the ADM1266 via the supply arbitrator.
Supply Ground.
Analog Supply Voltage. Linearly regulated from the higher voltage of the VH1 and VH2 pins
to 3.3 V (typical). Note that a capacitor must be connected between this pin and GND. A 68 µF
or larger capacitor is recommended for this purpose
Programmable Driver Inputs/Outputs. These pins default to a 20 kΩ pull-down resistor at
power-up.
General-Purpose Inputs/Outputs. The default start-up condition of these pins is high impedance.
41
ID_SDA
42
ID_SCL
DVDD_CAP
Digital Supply Voltage (1.8 V Typical). Note that a capacitor must be connected between this
pin and GND. A 2.2 µF capacitor (or larger), type X5R/10 V (or better), size 0402 (or larger) is
recommended for this purpose.
Interdevice Communications Bus Data Signal. ID_SDA is a bidirectional, open-drain pin that
requires an external pull-up resistor of 2.2 kΩ. It is recommended that the pull-up source be
AVDD_CAP. The default start-up condition of this pin is high impedance.
Interdevice Communications Bus Clock Signal. ID_SCL is a bidirectional, open-drain pin that
requires an external pull-up resistor of 2.2 kΩ. It is recommended that the pull-up source be
AVDD_CAP. The default start-up condition of this pin is high impedance.
Rev. C | Page 12 of 68
�Data Sheet
ADM1266
Pin No.
43
Mnemonic 1
SYNC
46
SDA
47
SCL
EPAD
1
Description
32.768 kHz Clock Timing Synchronization Input/Output. This pin can be used to provide a
clock signal to other ADM1266 devices on the board, or a 32.768 kHz input signal can be
provided to the ADM1266 from an external clock source. The default start-up condition of
this pin is high impedance.
PMBus Data. SDA is a bidirectional, open-drain pin that requires an external pull-up resistance
of 2.2 kΩ.
PMBus Clock. SCL is bidirectional, open-drain pin that requires an external pull-up resistance
of 2.2 kΩ.
Exposed Pad. The exposed pad must be soldered to the ground plane.
Connect all unused pins to GND.
Rev. C | Page 13 of 68
�ADM1266
Data Sheet
TYPICAL PERFORMANCE CHARACTERISTICS
48.0
1.1
47.8
47.7
47.6
47.5
47.4
47.2
3
4
5
6
7
8
9
10
11
12
VH1/VH2 SUPPLY VOLTAGE (V)
15579-203
47.3
Figure 4. VH1/VH2 Current vs. VH1/VH2 Voltage with a 42 mA Load on
AVDD_CAP
0.9
0.8
0.7
0.6
MINIMUM RANGE VALUE (V)
MAXIMUM RANGE VALUE (V)
0.8
0.7
0.6
MAXIMUM RANGE VALUE (V)
Figure 6. Relative Accuracy of VPx Pins with 16× Averaging (%) Across the
Supply Fault Detector Range
1.0
0.5
0.9
MINIMUM RANGE VALUE (V)
400mV TO 1V RANGE
750mV TO 1.875V RANGE
1.5V TO 3.75V RANGE
3V TO 7.5V RANGE
6V TO 15V RANGE
1.1
1.0
0.5
15579-204
RELATIVE ACCURACY OF VHx PINS
WITH 16× AVERAGING (%)
1.2
400mV TO 1V HIGH-Z RANGE
400mV TO 1V DIRECT RANGE
750mV TO 1.875V RANGE
1.5V TO 3.75V RANGE
2V TO 5V RANGE
15579-205
RELATIVE ACCURACY OF VPx PINS
WITH 16× AVERAGING (%)
VH1/VH2 SUPPLY CURRENT (mA)
47.9
Figure 5. Relative Accuracy of VHx Pins with 16x Averaging (%) Across the
Supply Fault Detector Range
Rev. C | Page 14 of 68
�Data Sheet
ADM1266
The ADM1266 is powered from the highest voltage input on VH1
or VH2. This technique, called supply arbitration, offers improved
redundancy because the device is not dependent on any one
particular voltage rail to keep it operational. The AVDD_CAP
arbitrator on the device chooses the supply to use. The arbitrator
can be considered an OR’ing of two LDO regulators together. A
supply comparator chooses the highest input to provide the
on-chip supply. It is not recommended to connect both VH1
and VH2 to the same voltage levels because the ripple on the two
voltages may cause the arbitrator circuit to constantly toggle.
This architecture has minimal voltage drop, resulting in the ability
to power the ADM1266 from a supply as low as 3 V. A 10 µF
bypass capacitor and 0.1 µF decoupling capacitors are needed on
both the VH1 and VH2 pins. Additionally, these capacitors ensure
a successful arbitration when switching from VH1 to VH2 and vice
versa. In a system with multiple ADM1266 devices, it is important
that all the devices are powered from the same voltage rail.
An external capacitor from AVDD_CAP to GND is required to
decouple the on-chip supply from noise, as shown in Figure 7.
The capacitor has another use during brownouts (momentary
loss of power). Under these conditions, when all the input
supplies (VHx pins) fall below AVDD_CAP, the LDO regulators
immediately turn off so that the VHx power supply does not
pull AVDD_CAP down. The AVDD_CAP capacitor can then
act as a reservoir to keep the ADM1266 active until the next
highest supply takes over the powering of the device. A capacitor
with a minimum value of 68 µF is recommended for this
reservoir/decoupling function.
When two or more supplies are within the VH1/VH2 arbitration
hysteresis value of each other, the supply that first takes control
of AVDD_CAP keeps control. For example, if VH1 is connected
to a 5.0 V supply, AVDD_CAP powers up to 3.3 V (typical)
through VH1. If VH2 is then connected to another 5.0 V supply,
VH1 still powers the device, unless VH2 goes approximately
317 mV higher than VH1.
10µF
VH1
0.1µF
3.3V
LDO
VH2
10µF
0.1µF
3.3V
LDO
AVDD_CAP
68µF
15579-003
POWERING THE ADM1266
ARBITRATOR
SUPPLY
SELECT
Figure 7. AVDD_CAP Arbitrator Operation
During power-up, the ADM1266 checks the main boot loader,
the main firmware, the main configuration, and the backup
configuration to ensure that the data in these sections is correct.
If multiple devices are connected on the same IDB, all the
devices individually check the main and backup configurations
and send this information back to the master. Then, the master
decides to run the correct configuration. The boot up time from
VH1 or VH2 crossing 3 V to the device ready to execute State 1
varies based on the size of the configuration. On the top right
corner of the GUI, an icon displays the size of the configuration
memory in a percentage. Use this percentage in the following
equation to calculate the boot up time:
Typical Boot Up Time (ms) = 1.142 × Percentage + 192
For example, if 27% of the memory is used, then,
If all supplies fail, the value of the AVDD_CAP capacitor can be
increased if it is necessary to guarantee that a complete fault
record is written into EEPROM.
The VHx input pins can accommodate supplies of up to 15 V,
which allows the ADM1266 to be powered using a 12 V backplane
supply. In cases where this 12 V supply is hot swapped, it is
recommended that the ADM1266 not be connected directly to the
supply. Take suitable precautions, such as the use of a hot swap
controller or RC filter network, to protect the device from
transients that may cause damage during hot swap events.
Rev. C | Page 15 of 68
Boot Up Time = 1.142 × 27 +192
Boot Up Time = 223 ms
15579-005
THEORY OF OPERATION
Figure 8. GUI Icon Showing Configuration Memory Size
�ADM1266
Data Sheet
INPUTS
The voltage range limits for threshold settings are
Supply Fault Detectors
•
•
•
•
•
•
The ADM1266 has 17 programmable supply fault detector (SFD)
inputs. These dedicated inputs are labeled VHx (VH1 to VH4)
and VPx (VP1 to VP13). The ADM1266 is also capable of making
precision differential voltage measurements on the VPx pins
(the exception is that VP13 cannot be used for differential
measurements). One differential measurement requires two
VPx pins. The odd numbered VPx pin (for example, VP1) must
always be the greater voltage. The next corresponding even
number VPx pin (for example, VP2) is used for that differential
measurement. Both differential VPx pins must have the same
input range selections. The SFD for the odd numbered VPx pin
responds to the differential measurement. Figure 9 shows the
arrangement of the pins. Each SFD input can be configured to
detect an undervoltage (UV) fault (the input voltage drops below a
preprogrammed value), or an overvoltage (OV) fault (the input
voltage rises above a preprogrammed value). A programmable
(up to 100 µs) glitch filter allows the user to remove any
spurious transitions such as supply bounce at turn on.
RANGE
SELECT
VHx ADC INPUT
VHx
+
OV
DAC
–
UV
DAC
+
–
GLITCH
FILTER
OV
OUT
GLITCH
FILTER
UV
OUT
OV
DAC
UV
DAC
–
+
+
–
OV
OUT
GLITCH
FILTER
UV
OUT
External resistor dividers can be used to sense higher voltages or to
achieve higher accuracy. When using an external resistor divider,
select the 0.4 V to 1 V high impedance range on the VPx pins. It is
recommended that the resistor divider be sized such that, under
nominal conditions, there is 0.7 V at the VPx pins to provide the
highest range for the OV and UV settings.
FILTER
SETTINGS
DIFFERENTIAL
SELECTION
RANGE
SELECT
VPx
(EVEN)
The size of the external resistor divider can be input into the device
using the VOUT_SCALE_MONITOR command (Register 0x2A).
Warnings
VPx ADC INPUT
HIGH-Z
OV
DAC
–
UV
DAC
+
–
GLITCH
FILTER
OV
OUT
GLITCH
FILTER
UV
OUT
FILTER
SETTINGS
Figure 9. Supply Fault Detectors
The UV and OV warnings are generated by comparing the
VOUT_OV_WARN_LIMIT (Register 0x42) and (Register 0x43)
VOUT_UV_WARN_LIMIT with the reading from the ADC.
Because the ADC round robin time is 5 ms, the maximum delay
from the warning occurring to the device detecting it is 5 ms.
15579-004
+
The UV and OV comparators shown in Figure 9 are always
monitoring and sensing the voltage on VHx and VPx. To avoid
chatter (multiple transitions when the input is very close to the set
threshold level), these comparators have digitally programmable
hysteresis. The hysteresis is added after a supply voltage goes out of
tolerance. Therefore, the user can program the amount above the
UV threshold to which the input must rise before a UV fault is
deasserted. Similarly, the user can program the amount below the
OV threshold to which an input must fall before an OV fault is
deasserted.
Using External Resistor Dividers
+ VPx ADC INPUT
–
GLITCH
FILTER
Input Comparator Hysteresis
The ADM1266 has a dedicated digital glitch filter at the output of
each comparator. For the fault to trigger, the comparator must
remain set for the time greater than the programmed glitch filter
time. This time can be programmed from 2 µs to 100 µs and is used
for filtering any transient noises that may occur on the VHx and
VPx pins.
RANGE
SELECT
+
–
When connecting directly to the voltage source, a 100 Ω resistor
in series is recommended to avoid any latch-ups on the VHx
and VPx pins. VH1 and VH2 are supply pins and do not need
the 100 Ω resistor in series.
Glitch Filter
FILTER
SETTINGS
VPx
(ODD)
HIGH-Z
0.4 V to 1.0 V
0.75 V to 1.875 V
1.5 V to 3.75 V
2.0 V to 5.0 V (VPx pins only)
3.0 V to 7.5 V (VHx pins only)
6.0 V to 15.0 V (VHx pins only)
Warnings are not sent to the sequence engine and cannot be used
to trigger events in the state machine. Instead, the warnings are
sent to the logic block and can be used to assert/deassert PDIOs
and GPIOs.
Rev. C | Page 16 of 68
�Data Sheet
ADM1266
The UV and OV thresholds are set using the commands in Table 9.
Table 9. UV and OV Threshold Commands
Command
VOUT_MODE
Register
0x20
VOUT_OV_WARN_LIMIT,
VOUT_UV_WARN_LIMIT
0x42,
0x43
VOUT_OV_FAULT_LIMIT,
VOUT_UV_FAULT_LIMIT
0x40,
0x44
VOUT_OV_HYST_LIMIT,
VOUT_UV_HYST_LIMIT
0xD0,
0xD1
Description
Used for setting the
exponent for linear
PMBus calculations for
the following commands
Used for setting mantissa
for linear PMBus
calculation of warning
limits
Used for setting mantissa
for linear PMBus
calculation of fault limits
Used for setting mantissa
for linear PMBus
calculation of hysteresis
limits
Voltage Readback and Status
SFDs goes out of specification (this power-good signal can be
used as a status signal for a DSP, FPGA, or other microcontroller).
The open-drain nature of the PDIOx pins also allows them to
be used to drive status LEDs.
The output stage of the PDIOx pins has programmable pull-up
and pull-down options. The PDIOx pins can be programmed as
follows:
•
•
•
•
•
•
•
•
The ADM1266 has an on-board, 12-bit accurate ADC for
voltage readback over the PMBus using the READ_VOUT
command (Register 0x8B). Inputs to the ADC consist of the
17 SFD inputs (VHx and VPx pins). The inputs to the ADC
come from the back of the input attenuators on the VPx and
VHx pins, as shown in Figure 9.
Supplies can also be connected to the input pins purely for
ADC readback, even though these pins may go above the
expected supervisory range limits (but not above the absolute
maximum ratings on these pins). For example, a 1.5 V supply
connected to the VP1 pin on the lowest range (0.4 V to 1.0 V) can
be correctly read out as on the ADC, but it always sits above any
supervisory limits that can be set on that pin.
Voltage Trimming
Use the VOUT_TRIM PMBus command (Register 0x22) to add
an additional offset trim to all the threshold settings and for voltage
readback. This command can be used to remove any inaccuracies
generated by the external components.
PROGRAMMABLE DRIVER INPUT/OUTPUTS
OUTPUT AVDD_CAP (3.3V)
CONFIG
10Ω 20kΩ
OUTPUT
The programmable driver input/output (PDIOx) pins are typically
used to drive logic enables on external supplies or as digital
inputs into the sequencing engine. The sequence in which the
PDIOx pins are asserted (and, therefore, the supplies are turned
on) is controlled by the SE firmware. The SE determines the action
that is taken with the PDIOx pins, based on the condition of the
ADM1266 inputs. Therefore, the PDIOx pins can be set up to
assert when the SFDs are in tolerance and no faults are received
from any of the inputs of the device.
20kΩ
12V
PDIOx
INPUT
Figure 10. Programmable Driver Input/Output
Default Output Configuration
All of the internal registers in an unprogrammed ADM1266
device from the factory are set to 0. Because of this default setting,
the PDIOx pins are pulled to GND by a weak (20 kΩ), on-chip,
pull-down resistor.
As the input supply to the ADM1266 ramps up on VHx, all
PDIOx pins behave as follows:
•
•
Supply Sequencing Through Configurable Output
Drivers
Push/pull to AVDD_CAP. When using a PDIOx pin in a
push/pull configuration, a 20 kΩ resistor in series is recommended to limit the current drawn from the PDIOx pin.
Open drain with an internal 20 kΩ pull-up resistor to
AVDD_CAP.
Open drain with an external pull-up resistor up to 20 V.
Open source with an internal 20 kΩ pull-down resistor to
GND.
Open source with external pull-down resistor to GND.
High-Z.
Internal 20 kΩ pull-up resistor to AVDD_CAP.
Internal 20 kΩ pull-down resistor to GND.
15579-006
Threshold Settings
•
The PDIOx pins can also be used to provide a power-good signal,
when all the SFDs are in tolerance, or a reset output if one of the
Rev. C | Page 17 of 68
Input supply = 0 V to 1.5 V. The PDIOx pins are high
impedance.
Input supply = 1.5 V to 2.7 V. The PDIOx pins are pulled to
GND by a weak (20 kΩ), on-chip, pull-down resistor.
Supply > 2.7 V. Factory programmed devices continue to
pull all PDIOx pins to GND by a weak (20 kΩ), on-chip,
pull-down resistor. Programmed devices download current
EEPROM configuration data, and the programmed setup is
latched. The PDIOx pin then goes to the state demanded by
the configuration. This configuration provides a known
condition for the PDIOx pins during power-up. If the pin is
configured to output, after downloading the configuration
and before the sequence is run, the ADM1266 senses the
voltage on the pin and drives the pin to the same level as the
voltage sensed on the pin.
�ADM1266
Data Sheet
The internal pull-down resistor can be overdriven with an external
pull-up resistor of suitable value tied from the PDIOx pin to the
required pull-up voltage. The 20 kΩ resistor must be accounted
for when calculating a suitable value. For example, if PDIOx
must be pulled up to 3.3 V, and 5 V is available as an external
supply, the pull-up resistor (RUP) value is given by
GENERAL-PURPOSE INPUT/OUTPUTS
There are nine dedicated pins that serve as GPIOs. Each pin can
be configured as an input, an output, or both. The GPIOs have
no internal glitch filter. The default start-up condition of the
GPIOs is high impedance.
3.3 V = 5 V × 20 kΩ/(RUP + 20 kΩ)
AVDD_CAP (3.3V)
OUTPUT
CONFIG
Therefore, RUP = (100 kΩ − 66 kΩ)/3.3 V = 10 kΩ.
10Ω
PDIOx as Inputs
The PDIOx pins can be configured as inputs to trigger the
sequence engine and cause events in the state machine. The
PDIOx pins can also be used as inputs to the logic block. They
have a dedicated glitch filter that filters out any transient noises
on the signals. The glitch filter can be programmed to values
from 500 ns to 100 µs.
PDIOx Control over PMBus
The PDIOx control over PMBus feature is only available in
Firmware Version 1.15.4 and higher.
As described in the PDIOx as Inputs section, the PDIOx output
is controlled by the sequence engine. This feature allows the
user to control the PDIOx output via the PMBus by writing to
Command 0xF0 (PDIO_OUTPUT_STATE). The user can
configure the PDIOx pin using the PDIO_CONFIGURATION
command (Register 0xD4) and then driving it high or low by
writing to Command 0xF0 (PDIO_OUTPUT_STATE).
The sequence engine and the PMBus command both control
the PDIOx output, and the last event takes precedence. For
example, if the sequence engine drives PDIO1 high in State 1
and then the PMBus command is received to drive PDIO1 low,
the PMBus command overwrites the original configuration from
the sequence engine and drives PDIO1 low. As the sequence
engine proceeds and transitions through the various states, if it
sees another action to set PDIO1 high, the sequence engine
overwrites the configuration from the PMBus command and
sets PDIO1 high.
GPIOx
INPUT
CONFIG
INPUT
15579-007
Additionally, these pins can be configured as inputs and
outputs at the same time, which is particularly useful for
multiple devices monitoring and controlling the same signal.
3.3V
OUTPUT
Figure 11. GPIOs
In input only mode, the GPIOs can be used to trigger an action
in the sequence engine, or as inputs to logic block.
In output only mode, the GPIO pins can be configured in a
push/pull configuration or as an open drain with an external
pull-up resistor. In push/pull mode, the GPIOs are internally
pulled up to 3.3 V. When using a GPIOx pin in a push/pull
configuration, a 20 kΩ resistor in series is recommended to
limit the current drawn from the GPIOx pin. In open-drain
configuration, the GPIOs are pulled up using an external
resistor up to 3.3 V. The output status of the GPIOs can be
driven from the sequence engine or logic block.
The GPIOs in output mode can be used as a power-good or
fault signal.
In input/output mode, the GPIOs can only be configured in
open-drain configuration with an external pull-up resistor. In
this mode, multiple GPIOs across several devices are OR’ed
together to create a signal.
When disabled, the GPIOx pin is high impedance.
The GPIOs are configured using the GPIO_CONFIGURATION
command (Register 0xE1).
GPIOx Control over PMBus
The GPIOx control over PMBus feature is only available in
Firmware Version 1.15.4 and higher.
As described in the General-Purpose Input/Outputs section,
the GPIO output is controlled by the sequence engine. This
feature allows the user to control the GPIO output via the PMBus
by writing to Command 0xF1 (GPIO_OUTPUT_STATE).
The user can configure the GPIOx pin using the GPIO_
CONFIGURATION command (Register 0xE1) and then
driving it high or low by writing to Command 0xF1
(GPIO_OUTPUT_STATE).
Rev. C | Page 18 of 68
�Data Sheet
ADM1266
The sequence engine and the PMBus command both control
the GPIO output, and the last event takes precedence. For
example, if the sequence engine drives GPIO1 high in State 1
and then the PMBus command is received to drive GPIO1 low,
the PMBus command overwrites the original configuration
from the sequence engine and drives GPIO1 low. As the
sequence engine proceeds and transitions through the various
states, if it see another action to set GPIO1 high, the sequence
engine overwrites the configuration from the PMBus command
and sets GPIO1 high.
Rev. C | Page 19 of 68
�ADM1266
Data Sheet
SEQUENCING ENGINE (SE)
OVERVIEW
The ADM1266 SE provides the user with powerful and flexible
control for sequencing multiple power rails. The SE
implements state machine control of the PDIOx and GPIOx
outputs, with state changes conditional on input events driven
by VHx, VPx, PDIO, GPIOs, timers, and variables. The SE
programs can enable complex control of boards such as powerup and power-down sequence control, fault event handling,
and interrupt generation.
Whenever an interrupt is generated because of a fault or a logic
change, the SE is triggered to go to the first action in the loop
actions section and starts executing the actions. By ordering the
different actions in the loop actions, the user can set a priority
on when the actions are executed to minimize any delays.
ACTION TYPES
The user can configure multiple actions. These actions are
broadly classified into three categories: set actions, monitor
actions, and special actions.
POWER-UP AND STATE 0
Set Actions
After the EEPROM data is downloaded, the Arm controller
starts execution of the core sequencer and transitions to the
following tasks, including but not limited to
Set actions set the output of a PDIO or GPIO. These actions
can also be used to set or reset variables and timers. These
actions can be configured in the enter actions and loop actions
sections of the state.
•
•
•
•
Performing a roll call of all ADM1266 devices present if
more than 16 voltage rails are sequenced using more than
one ADM1266 device.
Checking the CRC status of the main and backup
configurations of all devices.
Synchronization of the black box ID between multiple
ADM1266 devices.
Waiting for a ready signal from all ADM1266 devices on
the IDB bus to enter State 1.
If a fault is present in any of these tasks, the SE halts and
terminates immediately. A power cycle or software reset using
GO_COMMAND (Register 0xD8) can restart the sequence
engine.
If all the operations of State 0 are successful, the device enters
State 1 where sequencing beings.
STATE SECTIONS
To maintain maximum flexibility and ease of use, the SE is
divided into two sections: enter actions and loop actions.
Monitor Actions
The fault monitoring action types are used to read the status of
the VHx, VPx, PDIOx, and GPIOx pins. The monitoring
function is extended to include the monitoring of the status of
variables and timers as well. The individual status is compared
to a threshold to determine the outcome of the action as true or
false. When the outcome is determined, an action is undertaken.
To expand on the flexibility of the sequence engine over
multiple rails, the user is allowed to program and monitor any
logical combination of rails, timers, PDIO, and GPIOs to create
a fault state.
Special Actions
Two special actions are available in the ADM1266. Use the go
to action to proceed to a preprogrammed state of the SE. Use
the black box action type to capture a snapshot of the status of
all the pins and write it to the EEPROM. Refer to the Black Box
(EEPROM) Fault Recording section for more details.
Enter Actions
PARALLEL OPERATION AND INTERDEVICE BUS
The enter actions section consists of actions that are used to
initialize the system or a state. Examples range from starting
a timer to setting a PDIO. The actions programmed in this
subsection are executed only once before entering loop actions.
If more than 16 rails are to be sequenced, multiple ADM1266
devices can be connected in parallel. Communication between
the ADM1266 devices is facilitated by the IDB that operates at
1 MHz maximum, and follows the I2C protocol. The IDB is a
private bus and sends Analog Devices proprietary messages. A
maximum of 16 ADM1266 devices can be connected on the IDB.
One device is configured as a master, and the other devices are
configured as slaves. All the slaves communicate their current
status back to the master; the master, based on the user configuration and the status of all the devices, broadcasts to all the
slaves the new state that they need to go to.
Loop Actions
In the loop actions section, the SE provides monitoring and
adjustment functions. After executing the enter actions, the
ADM1266 transitions and executes the actions in the loop
actions section. The device continues to execute these actions
in a loop, until it encounters a go to action. When the device
encounters a go to action, the device aborts the rest of the
actions in the loop actions and proceeds to the next state.
Rev. C | Page 20 of 68
�Data Sheet
ADM1266
STATES
The user can configure up to 1023 states to form their desired
state machine. The user can create their virtual state machine
using the Analog Devices Power Studio™ software. If there is only
one device, the virtual state machine and the state machine
configured in the device are identical. If multiple devices are
connected together, the software compiles the virtual state
machine and programs each device with the corresponding
state machine and IDB messages. This procedure is transparent
to the user, meaning that the user does not need to individually
create a state machine for each ADM1266 device. After the user
creates the virtual state machine in the software, the software
automatically creates the corresponding state machine for each
device.
For example, the user creates a virtual state machine in the
software consisting of 20 states. For a single device, the device
has 20 states. For multiple devices, each device has 20 states. All
the devices move through the different states in
synchronization and work in parallel.
Breakpoints and Debug Mode
During development, the user can set the ADM1266 to be in
debug mode. The user can set breakpoints for each of the
1023 states as desired. When the ADM1266 enters a state, if the
breakpoint for the state is enabled, the SE pauses at the start of
the state. The SE can resume by sending a start message using
GO_COMMAND (Register 0xD8). When resuming, the SE
executes the actions in that state, which is helpful in pausing the
SE at the desired breakpoints without modifying the configured
state machine. In normal mode, the breakpoints are ignored.
Stop, Start, and Reset
At any point, GO_COMMAND (Register 0xD8) can be issued to
the ADM1266 to start or stop the SE. This command can also be
used to reset the state machine to State 0. By default at power-up,
the SE is in start mode and does not need a start command. If
multiple devices are connected, GO_COMMAND (Register 0xD8)
must be sent to all the devices as part of the group command
protocol.
STATE MACHINE CONTROL VIA PMBus
The state machine control via PMBus feature is only available
in Firmware Version 1.15.4 and higher.
The ADM1266 has four variables per device named Var0 to
Var3. In the sequence engine, set actions can be used to set
these variables to values from 0 to 255. Monitor actions can be
used to read these variables and create complex state machines.
These variables can be read back from PMBus Command 0xF7
(VAR_VALUE).
For Firmware Version 1.15.4 and higher. The user can use
PMBus Command 0xF7 (VAR_VALUE) to also write to these
variables. For example, in State 1, the user can add multiple
monitor actions relating to Var0, and based on the value of
Var0, the sequence engine can decide which state to go to next.
Then the user can send the PMBus command to change the
value of Var0. The sequence engine reads this value and, based
on the users configuration, goes to the right state.
Rev. C | Page 21 of 68
�ADM1266
Data Sheet
SUPPLY MARGINING
OVERVIEW
Table 10. DAC_CODE_CONFIGURATION[3:1],
Register 0xEB, DAC Ranges
Due to tolerances of circuit components, input voltage ranges,
and variations in reference voltages, load, and temperature, for
example, the output voltage of the dc-to-dc converter deviates
from the nominal setpoint value. The worst case conditions
need to be simulated on the power supply during manufacturing
and production, and the corner conditions can be measured to
check for an out-of-limit condition. Additionally, the accuracy
of the output voltage is also a critical factor for some applications
and must be tightly maintained when the tolerance of the output
voltage resistive divider is large (see Figure 12).
Bits[3:1]
0x00= 3’b000
0x01= 3’b001
0x02= 3’b010
0x03= 3’b011
0x04= 3’b100
Because the ADM1266 has nine internal DACs, margining is
possible on nine rails.
R4
R1
ADM1266
MUX
DACx
FEEDBACK
ADC
DAC
CONTROL
BLOCK
R2
15579-008
ATTENUATION
RESISTOR
R3
GND
Figure 12. Typical Application Circuit for Margining
Margining can be performed two ways: open-loop margining
and closed-loop margining.
The margining is actuated by a DAC and a series resistor that are
connected to the feedback node of the power supply controller
(see Figure 12). The equivalent change in output voltage can be
determined by the following equations:
VDAC − VFB
R3
+
VFB = VOUT ×
VFB VOUT − VFB
=
R2
R1
(1)
R2
R1 + R2
(2)
Subtracting the two equations yields
∆VOUT =
Maximum
Voltage
Output (V)
0.808
0.909
1.111
1.313
1.565
In open-loop margining, the user has direct access to the
internal DACs. The DAC forces a voltage on the feedback node
of the power controller, which causes a deviation in the output
voltage. Typical values for this test are ±1%, ±2.5%, ±5%,
±7.5%, and ±10% of the nominal output voltage. The user can
program up to 16 preset values, and can use a pointer command to
instruct the device regarding the value that must be loaded into the
DAC. Both the preset values and the value of the pointer can be
saved into the memory. At power-up, the device downloads the
settings and configures the DAC automatically.
Closed-Loop Margining
VHx/VPx
R5
OUTPUT
Minimum
Voltage
Output (V)
0.202
0.303
0.505
0.707
0.959
Open-Loop Margining
The procedure of ensuring this output voltage regulation is
called margining (or voltage margining). This voltage margining is
accomplished by the use of an on-chip DAC that pulls up/down
the feedback node of the error amplifier of the power
controller. A typical application circuit for margining is shown in
Figure 12. Using nodal analysis and basic circuit theory,
modifying the feedback node changes the output voltage and,
typically, there is an inversely proportional relationship
between the output of the DAC and the output voltage.
DC-TO-DC
CONVERTER
Midcode
Voltage (V)
0.506
0.607
0.809
1.011
1.263
Closed-loop margining is the preferred method of margining. It
determines the ability of the power supply to regulate the
output under extreme corner conditions. It is recommended to
use the Power Studio software because it provides all related
calculations for resistors and parameters for this feature.
The ADM1266 uses the PMBus Power System Management
Protocol Specification (Revision 1.2, September 6, 2010)
command set that offers the margining commands through the
following commands:
•
•
•
•
•
•
•
OPERATION (Register 0x01)
VOUT_MARGIN_HIGH (Register 0x25)
VOUT_MARGIN_LOW (Register 0x26)
VOUT_SCALE_LOOP (Register 0x29)
VOUT_COMMAND (Register 0x21)
VOUT_MARGIN_LOOP (Register 0xDA)
MARGIN_CONFIGURATION (Register 0xDB)
These commands enable margining, position the output voltage
at either the high or low value, monitor the feedback node, and
set the ratio of R1 and R3.
R1
(VFB − VDAC )
R3
Rev. C | Page 22 of 68
�Data Sheet
ADM1266
OPERATION COMMAND
REG 0x01[7:6] = 10
REG 0x01[5:4] = 10
During the closed-loop margining process, the UV and OV
faults are active and take the appropriate programmed action.
The DAC is disabled (high-Z state) immediately and does not
perform a soft disconnect.
OPERATION COMMAND
REG 0x01[7:6] = 00
VOUT_MARGIN_HIGH
One Shot Mode and Continuous Mode
VOUT_COMMAND
The ADM1266 offers two modes of operation in closed-loop
margining: one shot and continuous mode.
VOUT_MARGIN_LOW
In one shot mode, the process of closed-loop margining (see
the Closed-Loop Margining section) occurs once, that is, the
DAC changes the output voltage as per the margin command
and remains fixed, and no further changes in the DAC output
are allowed. In continuous mode, this process occurs
continuously. In one shot mode, a new margin command must
be issued to change the DAC output.
15579-009
DAC ENABLE
Figure 13. Margining Example 1
MARGIN LOW
TO
MARGIN OFF
MARGIN OFF
TO
MARGIN HIGH
MARGIN HIGH
TO
MARGIN VOUT
VOUT_MARGIN_HIGH
TRANSITION
SPEED
TRANSITION
SPEED
Continuous mode can be used for increasing the accuracy of a
power supply that suffers from wide tolerances in component
or reference voltage levels. Use this method when the ADC
accuracy is greater than the accuracy of the external
components.
VOUT_COMMAND
TRANSITION
SPEED
DAC ENABLE
15579-010
VOUT_MARGIN_LOW
Figure 14. Margining Example 2
Figure 13 and Figure 14 show examples of margining. When
margining is turned off, the DAC returns the output voltage to
the nominal level at the transition rate (0xDB) and then enters
a high-Z state.
To enable a smooth start of the margining process, the
ADM1266 uses a smart connect mode. Smart connect mode
calculates the DAC code that is equal to the feedback node such
that there is no current flowing in Resistor R3 (see Figure 12).
Smart connect mode prevents any sudden glitches in the output
voltage. Following smart connect mode, the DAC code is
changed as per the margin command.
The closed-loop margining process differs from open-loop
margining with the following differences:
•
•
The DAC is continuously repositioned until the 16 averages
of the high accuracy ADC monitoring the output rail result
in a value that equals the VOUT_MARGIN_x command.
This repositioning ensures that the output voltage does
indeed reach the command value. The output voltage is
sampled using the ADC at a rate of 5 ms. Therefore,
16 average readings complete in approximately 80 ms.
Whenever a margin command is issued, the DAC changes
its output based on the rate programmed in Register 0xDB.
Therefore, the output of the power supply rail also transitions
at this rate. All the DACs are controlled using the same rate.
The Power Studio software provides all the extensive configurations, from selecting the DAC range to margining commands.
Closed-Loop Margining Enable Timings
If the rail is in steady state and the ADM1266 receives the
operation command to go from the margin being off to the
servo VOUT_COMMAND (margin high or margin low), the
ADM1266 enables closed-loop margining. The ADM1266 also
performs the smart connection, waiting 5 ms for an updated
ADC reading before starting the ramp to obtain the desired
voltage level.
If the rail is in a steady state and the ADM1266 receives the
operation command to go from the servo VOUT_COMMAND
to margin high (margin low or margin off), the ADM1266
immediately starts the ramp to obtain the desired voltage level.
This process is also true when the starting point is margin high
or margin low.
If the device is programmed to wake up and immediately start
to the servo VOUT_COMMAND (margin high or margin low),
the ADM1266 enables the rail. After the rail clears the UV
threshold, the ADM1266 enables closed-loop margining and
performs smart connect after 20 ms to 25 ms. Then, the
ADM1266 waits 5 ms to obtain an updated ADC reading and
starts the ramp to obtain the desired voltage level.
Rev. C | Page 23 of 68
�ADM1266
Data Sheet
BLACK BOX (EEPROM) FAULT RECORDING
The ADM1266 has a configurable black box feature. Using this
feature, the device is capable of recording to nonvolatile flash
memory the vital data about the system status that caused the
system to perform a black box write.
BLACK BOX WRITES WHEN EXTERNAL SUPPLY IS
POWERING DOWN
When all the input supplies fail, the state machine can be
programmed to trigger a write into the black box flash. Provided
that the AVDD_CAP voltage remains above 3.0 V during the
memory write, the entire fault record is written to the EEPROM.
To ensure a complete black box write, it is recommended to place
a capacitor of at least 68 µF on the AVDD_CAP pin.
TRIGGERING A BLACK BOX WRITE
Black box information can be captured in the loop action or
enter action of a state, when the black box action is triggered.
If the black box action is triggered in the loop action, the device
takes a snapshot immediately and writes it to the flash memory
at the end of the enter actions of the next state.
If the black box action is triggered in the enter actions, the
device takes a snapshot immediately and writes it at the end of
the enter actions of the same state.
When multiple ADM1266 devices are connected though the
IDB, a black box write trigger in each device initiates a black
box write to ensure that the status of the entire system is
captured. Each black box record has a unique ID that is the
same across all the devices, which enables combining
information together from multiple devices.
BLACK BOX RECORD MODE
There are two types of black box record mode: single mode and
cyclic mode. Four pages of flash memory are reserved for a
single mode black box record, and five pages of flash memory
for cyclic mode. Each black box record has 64 bytes. The black
box mode can be changed without power cycling the device.
Single Mode
In single mode, the black box can write up to 32 fault records.
When the 32 records are filled, the ADM1266 black box does
not write anymore until the records are erased. Single mode is
useful for keeping the initial fault records and preventing them
from being overwritten.
Cyclic Mode
In cyclic mode, the black box operates in a circular recording
mode, and after writing the eighth record of any page, the next
page is automatically erased to allow continuous black box
recording. In cyclic mode, there can be up to 32 records at a
time. Cyclic mode is useful to keep the most recent black box
information.
POWER-UP COUNTER
The power-up counter in the ADM1266 keeps a record of the
number of times the ADM1266 has been powered up. It is stored
in nonvolatile memory. The power-up counter is 2 bytes and
has a maximum count up to 65,535 power cycles. The counter
increments automatically at every power cycle of ADM1266
and cannot be reset by the user.
BLACK BOX WRITE TIME
Writing 4 bytes of data to the flash memory takes 46 µs, and
each fault record has 64 bytes of data. The total time taken to
write one fault record is approximately 736 µs.
BLACK BOX CONTENTS
The total number of black box records in the device can be read
from the record count byte of the BLACKBOX_INFORMATION
register. The index of the last record that was written to the black
box is pointed by the logic index byte of the BLACKBOX_
INFORMATION register. The value is only valid when the
record count is greater than zero.
The last black box record number can be read back by the
READ_BLACKBOX register.
The black box record data can be read by READ_BLACKBOX.
The record number and the last record index can be read back
by BLACKBOX_INFORMATION.
Rev. C | Page 24 of 68
�Data Sheet
ADM1266
TIME STAMPING
INTERNAL OSCILLATOR
In the black box records, there is an option to save the time of
the black box write, which is beneficial in tracking the time of
the failures. ADM1266 has a real-time counter (RTC) that
keeps track of time. The RTC is reset to zero when ADM1266 is
powered down.
The internal oscillator in ADM1266 can be used for RTC where
the accuracy of time stamping is not critical. If the RTC is used
for the UNIX time with the internal oscillator, it is recommended
that the system host frequently send the time stamp to the
ADM1266 to synchronize the UNIX time and reduce the time
from drifting.
The RTC can be used in two ways. The RTC can be used to
measure the time elapsed since the last time the ADM1266 was
powered up, which is helpful in determining how much time
passed when the system failed after powering up.
EXTERNAL OSCILLATOR
In an application where accurate time stamping is required, it is
recommended to use an external 32,768 Hz crystal to generate a
time base for the RTC. An external crystal is connected to the
ADM1266 using the XTAL1 and XTAL2 pins. In a system with
multiple ADM1266 devices, only one crystal is required.
In a system, the host controller can send the UNIX® time to the
ADM1266. If a UNIX time is received, the RTC can be used as a
reference to start counting from the UNIX time. When the
UNIX time is set, the device increments from this time and uses
it in black box records to convert to real time. The UNIX time
must be set every time the ADM1266 powers up, because the
RTC resets at power-down.
MULTIPLE DEVICE TIME STAMPING
In a system where multiple ADM1266 devices are connected
and an external crystal is used, connect the SYNC pins so that
the RTC is using the same oscillator across all devices. This
configuration minimizes drift in time between devices caused
by variation in oscillating frequency, and requires one external
crystal. Configure the SYNC pin of the device with the external
crystal connected as an output, and the SYNC pin of the other
devices as an input. The SYNC pin configuration can be set
using the GPIO_SYNC_CONFIGURATION (Register 0xE1).
SETTING UNIX TIME USING SET_RTC
The SET_RTC register consist of six bytes that can be used to
set the time elapsed since January 1, 1970, according to the
UNIX time system. Each LSB represents 1/(216) s. In a system
where multiple ADM1266 devices are connected together, use
the SYNC pin to synchronize the time counter between all
ADM1266 devices.
In a multiple device system, the real time can be set by sending
the UNIX time to the SET_RTC register of only one device.
The time is broadcast to the other devices in the system using
the IDB to ensure that all the devices have the same real time.
3.3V
PMBus
SDA SCL
SDA SCL
SDA SCL
ADM1266
ADM1266
1
ADM1266
2
3
XTAL1, XTAL2
AVDD_CAP
IDSCL IDSDL SYNC
IDSCL IDSDL SYNC
15579-011
IDSCL IDSDL SYNC
Figure 15. Setting Up Time Stamping in a Multidevice Setup
Rev. C | Page 25 of 68
�ADM1266
Data Sheet
SYSTEM LOGIC BLOCK
The ADM1266 features a user configurable combinational logic
block. The input to the logic block can be the status of VHx, VPx, a
GPIO, or PDIO, and the output sets the PDIOs or GPIOs.
The logic block operates independent of the SE and margining
block. The logic block has lower priority than the SE. As a
result, if the sequencing engine is busy running a sequence, the
output of the logic blocks is delayed until completion of the
present task.
from one ADM1266 device can be propagated to another by
using a GPIO or PDIO.
The maximum number of inputs to a logic element or a
cascaded logic element is 256.
The logic is configured using the manufacture specific command,
LOGIC_CONFIGURATION (Register 0xE0). It is recommended
to use the Power Studio software for programming the logic
blocks to the specifications of the user.
The logic function consists of five core logic elements: AND,
OR, NAND, NOR, and NOT. Multiple logic elements can be
cascaded to achieve any user defined logic combination.
For example, in a system with three voltage rails, UV or OV
warning status of each rail can be logically OR’ed together to
set a single status signal.
The inputs to the logic gates can be a combination of PDIOs,
GPIOs, VHx/VPx warnings, VHx/VPx faults, and the output of
other logic gates.
The ADM1266 has four variables per device named Var0 to
Var3. In the logic block, the input to a logic gate can be the
output of a comparison to these variable values. The output of
the logic gates (1 or 0) can be assigned to these variables. This
assignment allows the user to set or monitor a variable using
the logic block, and then set or monitor it using the sequence
engine, effectively tying the two blocks together. This feature is
only available in Firmware Version 1.15.4 and higher.
The output of the logic gates can be used to drive the GPIOs,
PDIOs, or the input of other logic gates.
In a multiple device system, the inputs and outputs from multiple
devices cannot be used in the same logic block because the logic
function block does not use the IDB. The output of logic function
Rev. C | Page 26 of 68
�Data Sheet
ADM1266
PASSWORD PROTECTION
The unlock status can be confirmed by the PART_LOCKED bit
of the STATUS_MFR_SPECFIC command (Register 0x80)
which is set to 0 when the device is successfully unlocked.
Specific commands are password protected to avoid unintended
modification of the firmware, sequence, and project configuration
data in the ADM1266. These commands must be unlocked only
when updating the firmware, sequence, and project configuration
data. Table 11 shows the list of password protected commands.
It is not required to unlock the device for regular operation. The
password is 16 bytes, and for the default password, those 16 bytes
are all 0xFF.
LOCKING THE DEVICE
Upon a power cycle, the device is automatically locked. The
device can also be locked by writing any 17 bytes of data once
to the FW_PASSWORD command (Register 0xFD). The block
write command for locking the device is shown in Figure 17.
Table 11. Password Protected Commands
Command
UPDATE_FW
SEQUENCE_CONFIGURATION
SYSTEM_CONFIGURATION
LOGIC_CONFIGURATION
USER_DATA
STORE_USER_ALL
REFRESH_FLASH
ERASE_MEMORY
MEMORY_CONFIGURATION
The lock status can be confirmed by the PART_LOCKED bit of
the STATUS_MFR_SPECFIC (Register 0x80) command, which
is set to 1 when the device is successfully locked.
Address
0xFC
0xD6
0xD7
0xE0
0xE3
0x15
0xF5
0xFB
0xF8
CHANGING THE PASSWORD
The password can be changed by the user to any 16-byte value.
For password less than 16 bytes, set the remaining bytes as 0x00.
To update the password, the device must be unlocked by following
the procedure described in the Unlocking the Device section.
After the device is unlocked, the new password must be written
two consecutive times to the FW_PASSWORD command
(Register 0xFD). The block write command for changing the
password is shown in Figure 18.
UNLOCKING THE DEVICE
The ADM1266 can be unlocked by performing two consecutives
writes of the correct password to the FW_PASSWORD command
(Register 0xFD). The block write command for unlocking the
device is shown in Figure 16.
W
PASSWORD
BYTE 1
A
A
0xFD
...
A
PASSWORD
BYTE 16
BYTE
COUNT = 17
A
A
PASSWORD
COMMAND = 2
A
P
A
P
15579-012
7-BIT
SLAVE
ADDRESS
S
After the password is updated, the new password is immediately
committed to the memory. The device is automatically locked
and must be unlocked using the new password.
= MASTER-TO-SLAVE
= SLAVE-TO-MASTER
Figure 16. Block Write Command for Unlocking the Device
W
PASSWORD
BYTE 1
A
A
0xFD
...
A
PASSWORD
BYTE 16
BYTE
COUNT = 17
A
A
PASSWORD
COMMAND = 3
15579-013
7-BIT
SLAVE
ADDRESS
S
= MASTER-TO-SLAVE
= SLAVE-TO-MASTER
Figure 17. Block Write Command for Locking the Device
7-BIT
SLAVE
ADDRESS
W
NEW PASSWORD
BYTE 1
A
A
0xFD
...
A
NEW PASSWORD
BYTE 16
BYTE
COUNT = 17
A
A
PASSWORD
COMMAND = 1
A
P
15579-014
S
= MASTER-TO-SLAVE
= SLAVE-TO-MASTER
Figure 18. Block Write Command for Changing the Password
Rev. C | Page 27 of 68
�ADM1266
Data Sheet
MEMORY
OVERVIEW
The ADM1266 contains internal EEPROM (nonvolatile memory)
to store the mini boot loader, the boot loader, firmware, configuration settings, and fault log information. The mini boot loader,
boot loader, firmware, and configuration settings each have a
main copy and a backup copy in the memory. Each section has
its own unique cyclic redundancy check (CRC), and each black
box record has its own unique CRC.
POWER-UP
At power-up, the main mini boot loader checks the data of the
main boot loader and compares it to the CRC. If the data is
corrupted, the main mini boot loader checks the data of the
backup bootloader and compares it with its CRC. If the backup
bootloader data matches the CRC, this data is copied to the
main boot loader and is fixed (the ADM1266 copies the data
from backup memory to main memory and corrects the
corrupted data). Then, the main boot loader starts to execute
the boot loader. The main boot loader checks the data of the
main firmware and compares it to the CRC. If the data is
corrupted, the main boot loader checks the data of the backup
firmware and compares this data to the CRC. If the backup
firmware data matches the CRC, the ADM1266 copies it over
to the main firmware and fixes the data. Then, the ADM1266
starts to execute the firmware. The firmware then checks the
data of the main and backup configuration and compares it with
the respective CRCs. If both sections match the calculated CRC
value of memory with the saved CRC value, then the ADM1266
runs the main configuration. If one of the sections matches the
CRC, the ADM1266 runs the correct configuration. In a multidevice system, all the devices share the information about their
main and backup configuration with the master device. Then, the
master device makes a decision and communicates to all the
devices which section of the configuration memory to run.
If at any given point for any of the sections both the main and
backup sections are corrupted, the device does not proceed.
MANUAL CRC CALCULATIONS
The ADM1266 has several commands to validate the condition
of the memory. Use MEMORY_RECALCULATE_CRC
(Register 0xF9) to trigger the device to recalculate the CRC
of all the sections and to report the status in STATUS_MFR_
SPECIFIC_2 (Register 0xED). The time required to recalculate
the CRC of all the sections is approximately 500 ms.
REFRESH
The ADM1266 allows data to be copied from the main sections
to the backup sections, and vice versa. REFRESH_FLASH
(Register 0xF5) can be used to trigger this function. When this
function is triggered, the ADM1266 checks the CRC of both the
main and backup sections and copies data from the expected
data (not corrupted) section over to the corrupted section, and
vice versa. Based on the data written to REFRESH_FLASH, the
user can choose to refresh certain sections of the memory.
To increase the reliability of the memory, it is recommended to
run this refresh feature once every 30 days. For operating
temperatures above 85°C, it is mandatory to refresh once every
30 days. Every time the refresh is run, the data retention timer
resets.
When the refresh feature is running, it takes 32 ms to refresh
each page. During this time, all faults are latched but not processed.
After refreshing each page, if there is any sequence event, the
refreshing is temporarily aborted and the sequencing and fault
handling functions are executed. At the end of this process, the
ADM1266 resumes the refreshing function. It takes approximately
9 sec to finish refreshing all the sections of the ADM1266.
PMBus write operations are not allowed when the refresh feature is
running. PMBus read operations are clock stretched and
processed at the end of refreshing each page.
AUTO REFRESH
The ADM1266 can be configured to run the refresh feature
automatically after this feature is enabled and saved to the
memory. After one day, each time the device is powered up the
device automatically starts the refresh of the boot loader,
firmware, and configuration sections. Once a day, the device
runs the CRC check. If any of the mini boot loader, boot loader,
firmware, or configuration sections are corrupted, the device
automatically starts the refresh of the mini boot loader, the boot
loader, firmware, and the configuration sections. After the initial
refresh that occurs after one day, the ADM1266 can be preprogrammed to automatically start refresh every N days, where
N varies from 1 day to 255 days. The default setting is 30 days.
ACCELERATION FACTOR
The ADM1266 contains internal EEPROM (nonvolatile memory)
to store the mini boot loader, the boot loader, the firmware,
configuration settings, and fault log information. EEPROM
endurance and retention are specified over the operating junction
temperature range (see the Absolute Maximum Ratings section
and the Electrical Specifications section).
Nondestructive operation above TJ = 85°C is possible.
However, the electrical specifications are not guaranteed and, in
this case, the EEPROM degrades. Operating the EEPROM above
TJ = 85°C may result in a degradation of retention characteristics.
The fault logging function, which is useful in debugging system
problems that may occur at high temperatures, only writes to fault
log EEPROM locations. If occasional writes to these registers occur
above TJ = 85°C, a slight degradation in the data retention
characteristics of the fault log may occur. It is recommended
that the EEPROM not be written using STORE_USER_ALL or
bulk programming when TJ > 85°C. The degradation in EEPROM
retention for temperatures TJ > 85°C can be approximated by
Rev. C | Page 28 of 68
�Data Sheet
ADM1266
calculating the dimensionless acceleration factor using the
following equation:
AF = e
Therefore, the overall retention of the EEPROM degrades by
60.62 hours as a result of operation at a junction temperature of
125°C for 10 hours. The effect of this overstress is negligible
when compared to the overall EEPROM retention rating of
87,600 hours at a maximum junction temperature of 85°C.
Ea
1
1
×
−
k TUSE + 273 TSTRESS + 273
where:
AF is the acceleration factor.
Ea, the activation energy, = 0.6 eV.
k = 8.617 × 10⁻⁵ eV/°K.
TUSE = 85°C, the specified junction temperature.
TSTRESS is the actual junction temperature.
Using the previously mentioned equation, data retention can be
calculated at different temperatures, as shown in Table 12.
Table 12. Data Retention vs. Temperature
For example, calculate the effect on retention when operating at
a junction temperature of 125°C for 10 hours.
Junction Temperature
85°C
95°C
105°C
TSTRESS = 125°C
AF = 7.062
The equivalent operating time at 85°C = 70.62 hours.
Rev. C | Page 29 of 68
Data Retention
10 years
5 years and 10 months
3 years and 7 months
�ADM1266
Data Sheet
INTERNAL WATCHDOG TIMER
The ADM1266 contains an Arm Cortex-M3 microcontroller. If
this microcontroller freezes for any reason, the user can restart
it automatically using an internal watchdog timer. This timer
can be enabled or disabled and its time can be configured using
PMBus Command 0xEE (WDT_CONFIGURATION). This
command can be written to and saved to the EEPROM to take
effect the next time the ADM1266 is power cycled.
In an application where there are multiple ADM1266 devices
connected via the IDB, if one of the devices restarts because of
the watchdog timer, that device broadcasts a unique message
over the IDB, and all other devices also restart. This restart
occurs to ensure that all the devices remain in synchronization.
Rev. C | Page 30 of 68
�Data Sheet
ADM1266
APPLICATIONS INFORMATION
OVERVIEW
PMBUS/I2C
The ADM1266 Super Sequencer is capable of sequencing,
margining, trimming, supervising output voltage for OV and
UV conditions, providing fault management, and voltage readback for 16 dc-to-dc converters. Multiple ADM1266 devices
can be synchronized to operate in unison using the ID_SCL
and ID_SDA pins. The ADM1266 uses a PMBus-compliant
interface and command set.
Each ADM1266 must be configured for a unique address. The
address can be set by connecting a resistor between the ADDR pin
and the GND pin. See Table 13 for the corresponding address
values. Check addresses for collision with other devices on the
bus and any global addresses.
POWERING THE ADM1266
The ADM1266 can be powered by applying a voltage from 3 V
to 15 V on the VH1 or VH2 pin. Internal linear regulators convert
this voltage down to 3.3 V, which drives all of the internal circuitry
in each device. It is not recommended to connect both VH1
and VH2 to the same voltage levels because the ripple on the two
voltages may cause the arbitrator circuit to constantly toggle. In
a system with multiple ADM1266 devices, it is important that all
the devices are powered from the same voltage rail.
PCB ASSEMBLY AND LAYOUT SUGGESTIONS
The ADM1266 requires capacitors (see the Capacitors section).
To be effective, these capacitors must be high quality, ceramic
dielectric capacitors, such as X5R or X7R, and must be placed
as close to the chip as possible. The PCB layout must adhere to
layout guidelines. A multilayer PCB that dedicates a layer to
power and ground is recommended. Low resistance and low
inductance power and ground connections are important to
minimize power supply noise and ensure proper device
operation.
CAPACITORS
Place a 10 µF bypass capacitor and a 0.1 µF decoupling
capacitor on both the VH1 and VH2 pins.
Place a 68 µF capacitor and a 0.1 µF capacitor on the
AVDD_CAP pin.
Place a 10 µF capacitor and a 0.1 µF capacitor on the
DVDD_CAP pin
Place a 2.2 µF capacitor and a 0.1 µF capacitor between the
REFOUT and REFGND pins.
GROUND CONNECTIONS
Connect the exposed pad to the GND pin. Star connect the
GND pin to the REFGND pin.
The pull-up resistors on the PMBus pins must not be
connected to AVDD_CAP. If another device on the PMBus line
provides a strong pull-down on AVDD_CAP, the ADM1266
shuts down or enters UVLO.
IDB
For a board with multiple ADM1266 devices that are part of the
same system, connect the ID_SCL and ID_SDA pin, using an
external pull-up resistor of 2.2 kΩ that is connected to the
AVDD_CAP pin of any ADM1266.
VOLTAGE SENSING
If an external resistor divider is used, calculate the size of the
resistors so that 0.7 V shows up on the VPx pins of the ADM1266.
When sensing directly, use a 100 Ω resistor in series to avoid
any latch-ups on the pins. The VH1 and VH2 pins do not
require this series resistance.
PDIOs AND GPIOs
The PDIOs have a weak, 20 kΩ, internal pull-down resistor.
Therefore, the PDIOs do not require the external pull-down
resistors during power-up.
Verify that the voltage and current ratings are not exceeded.
DAC OUTPUTS
Select an appropriate resistor for the desired margin range on a
DAC output. Refer to the Power Studio GUI for assistance.
CLOCK
To use the accurate time stamping and clocking function, use
an external oscillator and capacitors between the XTAL1 and
XTAL2 pins. If this function is not used, an external clock
source is not required.
On a board with multiple ADM1266 devices, only one external
oscillator is required. Connect the SYNC pins of all the
ADM1266 devices.
UNUSED PINS
Connect all unused pins to GND.
Rev. C | Page 31 of 68
�ADM1266
Data Sheet
PMBus DIGITAL COMMUNICATION
The PMBus slave with packet error checking (PEC) allows a
device to interface to a PMBus compliant master device, as
specified by the PMBus Power System Management Protocol
Specification (Revision 1.2, September 6, 2010). The PMBus slave
is a 2-wire interface that can be used to communicate with
other PMBus compliant devices and is compatible in a
multimaster, multislave bus configuration. The PMBus slave can
communicate with master PMBus devices that support packet
error checking (PEC), as well as with master devices that do not
support PEC.
Communication is initiated when the master device sends a
command to the PMBus slave device. Commands can be read
or write commands. Data is transferred between the devices in
a byte wide format. Commands can also be send commands.
The command is executed by the slave device upon receiving
the stop bit. The stop bit is the last bit in a complete data
transfer, as defined in the PMBus/SMBus/I2C communication
protocol. During communication, the master and slave devices
send acknowledge or no acknowledge bits as a method of
handshaking between devices.
The pull-up resistors on the PMBus pins must not be connected to
AVDD_CAP. If another device on the PMBus line provides a
strong pull-down AVDD_CAP, the ADM1266 shuts down or
enters UVLO.
In addition, the PMBus slave on the ADM1266 supports PEC
to improve reliability and communication robustness. The
ADM1266 can communicate with master PMBus devices that
support PEC, as well as with master devices that do not support
PEC. See the SMBus Specification (Version 2.0) for a more detailed
description of the communication protocol.
The function of the PMBus slave is to decode the command
sent from the master device and to respond as requested.
Communication is established using an I2C like 2-wire interface
with a clock line (SCL) and data line (SDA). The PMBus slave is
designed to externally move blocks of 8-bit data (bytes) while
maintaining compliance with the PMBus protocol. The PMBus
protocol is based on the SMBus Specification (Version 2.0,
August 2000). The SMBus specification is, in turn, based on the
Philips I2C Bus Specification (Version 2.1, January 2000). The
PMBus incorporates the following features:
•
•
•
•
•
•
•
•
•
•
Slave operation on multiple device systems
7-bit addressing
100 kbps and 400 kbps data rates
PEC
Support for the group command protocol
Support for the alert response address protocol with
arbitration
General call address support
Support for clock low extension (clock stretching)
Separate multiple byte receive and transmit first in, first
out (FIFO)
Extensive fault monitoring
OVERVIEW
The PMBus slave module is a 2-wire interface that can be used
to communicate with other PMBus compliant devices. Its transfer
protocol is based on the Philips I2C transfer mechanism. The
ADM1266 is always configured as a slave device in the overall
system. The ADM1266 communicates with the master device
using one data pin (SDA) and one clock pin (SCL). Because the
ADM1266 is a slave device, it cannot generate the clock signal.
However, the ADM1266 is capable of clock stretching the SCL
line to put the master device in a wait state when the ADM1266
is not ready to respond to the request of the master.
When communicating with the master device, it is possible for
illegal or corrupted data to be received by the PMBus slave
device. In this case, the PMBus slave device responds to the
invalid command or data, as defined by the PMBus specification,
and indicates to the master device that an error or fault condition
has occurred. This method of handshaking can be used as a first
level of defense against inadvertent programming of the slave
device that can potentially damage the chip or system.
The PMBus specification defines a set of generic PMBus
commands that are recommended for a power management
system. However, each PMBus device manufacturer can choose
to implement and support certain commands as the manufacturer
deems fit for a specific system. In addition, the PMBus device
manufacturer can choose to implement manufacturer specific
commands with functions not included in the generic PMBus
command set.
TRANSFER PROTOCOL
The PMBus slave follows the transfer protocol of the SMBus
Specification (Version 2.0), which is based on the fundamental
transfer protocol format of the Philips I2C Bus Specification
(Version 2.1). Data transfers are byte wide, lower byte first.
Each byte is transmitted serially, most significant bit (MSB)
first. Figure 19 shows a basic transfer.
S
7-BIT
ADDRESS
R/W
A
8-BIT DATA
A
= MASTER TO SLAVE
= SLAVE TO MASTER
...
P
15579-015
PMBus FEATURES
Figure 19. Basic Data Transfer
For an in depth description of the transfer protocols, see the
SMBus and I2C specifications.
Rev. C | Page 32 of 68
�Data Sheet
ADM1266
DATA TRANSFER COMMANDS
S
Data transfer using the PMBus slave is established using
PMBus commands. The PMBus specification requires that all
PMBus commands start with a slave address with the R/W bit
cleared (set to 0), followed by the command code. (The only
exception is the alert response address protocol.)
A
COMMAND
CODE
DATA
BYTE HIGH
PEC
BYTE
A
A
NA
P
15579-020
A
R
Figure 24. Read Word Protocol with PEC
7-BIT
SLAVE
ADDRESS
W
A
DATA
BYTE
1
A
...
COMMAND
CODE
BYTE
COUNT = M
A
DATA
BYTE
M
PEC
BYTE
A
A
A
P
15579-021
S
= MASTER TO SLAVE
= SLAVE TO MASTER
Figure 25. Block Write Protocol with PEC
7-BIT
SLAVE
ADDRESS
A
PEC
BYTE
A
P
15579-016
W
7-BIT
SLAVE
ADDRESS
Sr
A
= SLAVE TO MASTER
S
7-BIT SLAVE
ADDRESS
COMMAND
CODE
A
= MASTER TO SLAVE
S is the start condition
P is the stop condition
Sr is the repeated start condition
W is the write bit (0)
R is the read bit (1)
A is the acknowledge bit (0)
NA is the no acknowledge bit (1)
S
W
DATA
BYTE LOW
All PMBus commands supported by the ADM1266 device follow
one of the protocol types shown in Figure 20 to Figure 27. (For
PMBus master devices that do not support PEC, the PEC byte is
removed.) Figure 20 to Figure 27 use the following abbreviations:
7-BIT
SLAVE
ADDRESS
= MASTER TO SLAVE
= SLAVE TO MASTER
W
BYTE
COUNT = N
A
A
COMMAND
CODE
DATA
BYTE 1
A
A
7-BIT
SLAVE
ADDRESS
Sr
DATA
BYTE N
...
R
PEC
BYTE
A
A
NA
P
15579-022
Figure 20. Send Protocol with PEC
= MASTER TO SLAVE
= SLAVE TO MASTER
7-BIT SLAVE
ADDRESS
W
COMMAND
CODE
A
A
DATA
BYTE
A
PEC
BYTE
A
P
Figure 26. Block Read Protocol with PEC
15579-017
S
= MASTER TO SLAVE
= SLAVE TO MASTER
S
7-BIT
SLAVE
ADDRESS
W
A
COMMAND
CODE
BYTE
COUNT = M
A
A
Figure 21. Write Byte Protocol with PEC
PEC
BYTE
A
W
COMMAND
CODE
A
A
DATA
BYTE
LOW
A
DATA
BYTE
HIGH
DATA
BYTE
1
A
BYTE
COUNT = N
P
= MASTER TO SLAVE
= SLAVE TO MASTER
W
DATA
BYTE
COMMAND
CODE
A
A
PEC
BYTE
A
7-BIT
SLAVE
ADDRESS
Sr
A
R
= SLAVE TO MASTER
Figure 23. Read Byte Protocol with PEC
DATA
BYTE 1
A
A
...
Sr
7-BIT
SLAVE
ADDRESS
DATA
BYTE N
A
R
PEC
BYTE
A
NA
P
Figure 27. Block Write and Block Read Protocol with PEC
The PMBus slave module of the ADM1266 also supports
manufacturer specific extended commands. These commands
follow the same protocol as the standard PMBus commands.
However, the command code consists of two bytes:
A
P
= MASTER TO SLAVE
A
DATA
BYTE
M
= SLAVE TO MASTER
15579-019
7-BIT
SLAVE
ADDRESS
...
= MASTER TO SLAVE
Figure 22. Write Word Protocol with PEC
S
A
15579-023
7-BIT
SLAVE
ADDRESS
15579-018
S
Command code extension: 0xFE
Extended command code: 0x00 to 0xFF
Using the manufacturer specific extended commands, the PMBus
device manufacturer can add an additional 256 manufacturer
specific commands to its PMBus command set.
Rev. C | Page 33 of 68
�ADM1266
Data Sheet
GROUP COMMAND PROTOCOL
In addition to the communication protocols described in the
Data Transfer Commands section, the PMBus slave supports
a special group command in which commands are sent to
multiple slaves in a single serial transmission. The commands
to each slave can be different from one another, with each set
of slave address and command separated by a repeated start (Sr)
bit (see Figure 28). At the end of a transmission to all slaves, a
single stop (P) bit is sent to initiate concurrent execution of the
received commands by all slaves.
The PEC byte transmitted to each slave is calculated using only
its slave address, command code, and data bytes.
SLAVE 1
ADDRESS
W
A
COMMAND
CODE
1
A
DATA
1...N
A
PEC
1
A
Sr
SLAVE 2
ADDRESS
W
A
COMMAND
CODE
2
A
DATA
1...N
A
PEC
2
A
Sr
SLAVE M
ADDRESS
W
A
A
DATA
1...N
A
PEC
M
A
= MASTER TO SLAVE
= SLAVE TO MASTER
Figure 29. Start and Stop Transitions
Figure 28. Group Command Protocol with PEC
CLOCK GENERATION AND STRETCHING
The ADM1266 is always a PMBus slave device in the overall
system; therefore, the device never needs to generate the clock,
which is performed by the master device in the system.
However, the PMBus slave device is capable of clock stretching
to place the master in a wait state. By stretching the SCL signal
during the low period, the slave device communicates to the
master device that it is not ready and that the master device
must wait.
Conditions where the PMBus slave device stretches the SCL
line low include the following:
•
•
•
Start and stop conditions involve serial data transitions while
the serial clock is at a logic high level. The PMBus slave device
monitors the SDA and SCL lines to detect the start and stop
conditions and transition to its internal state machine accordingly.
Figure 29 shows typical start and stop conditions.
P
15579-024
COMMAND
CODE
M
START AND STOP CONDITIONS
15579-025
S
The slave device can stretch the SCL line only during the low
period. Whereas the I2C specification allows indefinite
stretching of the SCL line, the PMBus specification limits the
maximum time that the SCL line can be held low to 25 ms, after
which the ADM1266 must release the communication lines and
reset its state machine.
REPEATED START CONDITION
In general, a repeated start (Sr) condition is the absence of a
stop condition between two transfers. The PMBus communication protocol makes use of the repeated start condition only when
performing a read access (read byte, read word, and block read).
Other uses of the repeated start condition are not allowed.
GENERAL CALL SUPPORT
The PMBus slave is capable of decoding and acknowledging
a general call address. The PMBus device responds to both its
own address and the general call address (0x00).
All PMBus commands must start with the slave address with the
R/W bit cleared (set to 0), followed by the command code, when
using the general call address to communicate with the PMBus
slave device.
The master device is transmitting at a higher baud rate
than the slave device.
The receive FIFO buffer of the slave device is full and must
be read before continuing to prevent a data overflow
condition.
The slave device is not ready to send data that the master
has requested.
Rev. C | Page 34 of 68
�Data Sheet
ADM1266
PMBus ADDRESS SELECTION
10-BIT ADDRESSING
Control of the ADM1266 is implemented via the I C interface.
The ADM1266 device is connected to the I2C bus as a slave
device under the control of a master device. The PMBus address of
the ADM1266 is set by connecting an external resistor from the
ADDR pin to GND. Table 13 lists the recommended resistor
values and associated PMBus addresses.
2
Table 13. PMBus Address Settings
PMBus Address
0x40
0x41
0x42
0x43
0x44
0x45
0x46
0x47
0x48
0x49
0x4A
0x4B
0x4C
0x4D
0x4E
0x4F
1% Resistor (kΩ) (E96 Series)
0.422
1.5
2.67
4.12
5.36
7.15
8.87
10.7
12.7
14.7
16.9
19.1
21.5
24.3
27.4
31.6
The PMBus slave device does not support 10-bit addressing as
defined in the I2C specification.
PACKET ERROR CHECKING
The PMBus controller implements PEC to improve reliability
and communication robustness. Packet error checking is
implemented by appending a PEC byte at the end of the
message transfer. The PEC byte is calculated using a CRC-8
algorithm on all address, command, and data bytes from the
start to stop bits (excluding the acknowledge, no acknowledge,
start, restart, and stop bits). The PEC byte is appended to the
end of the message by the device that supplied the last data byte.
The receiver of the PEC byte is responsible for calculating its
internal PEC code and comparing it to the received PEC byte.
The ADM1266 can communicate with master PMBus devices
that support PEC, as well as with master devices that do not
support PEC. If a PEC byte is available, the PMBus device
checks the PEC byte and issues an acknowledge if the PEC byte
is correct. If the PEC byte comparison fails, the PMBus device
issues a no acknowledge in response to the PEC byte and does
not process the command sent from the master.
FAST MODE
Fast mode (400 kHz) uses essentially the same mechanics as
the standard mode of operation. The PMBus slave is capable of
communicating with a master device operating in standard
mode (100 kHz) or fast mode.
The PMBus device uses built in hardware to calculate the PEC
code using the CRC-8 polynomial, C(x) = x8 + x2 + x1 + 1. The
PEC code is calculated one byte at a time, in the order that the
bytes are received. In a read transaction, the PMBus device
appends the PEC byte following the last data byte. In a write
transaction, the PMBus device compares the received PEC byte
to the internally calculated PEC code.
ELECTRICAL SPECIFICATIONS
All logic complies with the electrical specification outlined in
the PMBus Power System Management Protocol Specification
Part 1 (Revision 1.2, September 6, 2010).
Rev. C | Page 35 of 68
�ADM1266
Data Sheet
PMBus COMMANDS
Table 14 lists the standard PMBus commands that are
implemented on the ADM1266. Many of these commands are
implemented in registers that share the same hexadecimal value
as the PMBus command code.
Code
0xD5
Name
DAC_CONFIGURATION
0xD6
SEQUENCE_CONFIGURATION
Table 14. PMBus Command List
0xD7
SYSTEM_CONFIGURATION
0xD8
0xD9
0xDA
0xDB
0xDC
GO_COMMAND
READ_STATE
VOUT_MARGIN_LOOP
MARGIN_CONFIGURATION
BREAKPOINTS
0xDD
0xDE
ICB_CONFIGURATION
READ_BLACKBOX
0xDF
0xE0
SET_RTC
LOGIC_CONFIGURATION
0xE1
GPIO_SYNC_CONFIGURATION
0xE3
USER_DATA
0xE4
0xE5
POWERUP_COUNTER
VOUT_RESISTOR
0xE6
0xE7
0xE8
0xE9
0xEA
0xEB
BLACKBOX_INFORMATION
ALL_STATUS_VOUT
ALL_READ_VOUT_MODE
PDIO_STATUS
GPIO_STATUS
DAC_CODE_CONFIGURATION
0xEC
0xED
0xF4
RTS_CONFIGURATION
STATUS_MFR_SPECIFIC_2
REFRESH_CONFIGURATION
0xF5
0xF6
0xF7
0xF8
0xF9
0xFA
0xFB
0xFC
0xFD
REFRESH_FLASH
HITLESS_TIMEOUT
VAR_VALUE
MEMORY_CONFIGURATION
MEMORY_RECALCULATE_CRC
SWITCH_MEMORY
ERASE_MEMORY
UPDATE_FW
FW_PASSWORD
Code
0x00
0x01
0x03
0x15
0x16
0x19
0x20
0x21
0x22
0x25
0x26
0x29
0x2A
0x40
0x42
0x43
0x44
0x78
0x79
0x7A
0x7E
0x80
0x8B
0x98
0x99
Name
PAGE
OPERATION
CLEAR_FAULTS
STORE_USER_ALL
RESTORE_USER_ALL
CAPABILITY
VOUT_MODE
VOUT_COMMAND
VOUT_TRIM
VOUT_MARGIN_HIGH
VOUT_MARGIN_LOW
VOUT_SCALE_LOOP
VOUT_SCALE_MONITOR
VOUT_OV_FAULT_LIMIT
VOUT_OV_WARN_LIMIT
VOUT_UV_WARN_LIMIT
VOUT_UV_FAULT_LIMIT
STATUS_BYTE
STATUS_WORD
STATUS_VOUT
STATUS_CML
STATUS_MFR_SPECIFIC
READ_VOUT
PMBUS_REVISION
MFR_ID
0x9A
MFR_MODEL
0x9B
MFR_REVISION
0x9C
MFR_LOCATION
0x9D
MFR_DATE
0x9E
MFR_SERIAL
0xAD
0xAE
0xD0
0xD1
0xD2
0xD3
0xD4
IC_DEVICE_ID
IC_DEVICE_REV
VOUT_OV_HYST_LIMIT
VOUT_UV_HYST_LIMIT
Vx_CONFIGURATION
BLACKBOX_CONFIGURATION
PDIO_CONFIGURATION
Type 1
R/W
R/W
S
S
S
R
R/W
R/W
R/W
R/W
R/W
R/W
R/W
R/W
R/W
R/W
R/W
R/W
R/W
R
R
R
R
R
Block
WR/W
Block
WR/W
Block
WR/W
Block
WR/W
Block
WR/W
Block
WR/W
Block R
Block R
R/W
R/W
R/W
R/W
Block WR,
Block W
Bytes
1
1
0
0
0
1
1
2
2
2
2
2
2
2
2
2
2
1
2
1
1
1
2
1
1 to 32
1 to 32
1 to 8
1 to 48
1 to 16
1 to 32
3
8
2
2
2
2
2 to 32,
3 to 33
1
Type 1
Block WR,
Block W
Block
WR/W
Block
WR/W
R/W
R
R/W
R/W
Block
WR/W
Block R/W
Block WR,
Block W
Block R/W
Block
WR/W
Block WR
Block W
Block
WR/W
Block R
Block
WR/W
Block R
Block R
Block R
Block R
Block R
Block WR,
Block W
R/W
R
Block W
Block WR
R/W
R/W
Block WR
Block R/W
W
Block W
Block W
W
Block W
Bytes
2 to 18,
3 to 19
3 to 250
3 to 250
2
2
2
2
1 to 128
8
65, 2
6
3 to 250
1
2
3 to 250
2
5 to 16
4
17
51
2
2
3 to 19,
4 to 20
2
2
3 to 4
2 to 9
2
2
2 to 5
3
2
1
1
2
17
S is the send byte command, no data. Block WR is the block write parameter
and block read data. Block W is the block write command. Block R is the
block read command. Block WR/W means a standard block write is
performed to write to the command, but the command must be written first
before it can be read back.
Rev. C | Page 36 of 68
�Data Sheet
ADM1266
Table 15. PMBus Command List for Firmware Version 1.15.4
and Higher
Code
0xEE
0xF0
Name
WDT_CONFIGURATION
PDIO_OUTPUT_STATE
0xF1
GPIO_OUTPUT_STATE
0xF7
VAR_VALUE
1
Type1
R/W
Block W
Block WR
Block W
Block WR
Block WR/W
Bytes
2
3
4
3
4
2 to 5
Block W is the block write command. Block WR is the block write parameter
and block read data. Block WR/W means a standard block write is performed
to write to the command, but the command must be written first before it
can be read back.
Rev. C | Page 37 of 68
�ADM1266
Data Sheet
STANDARD PMBus COMMAND DESCRIPTIONS
All commands designated as Block WR/W consist of two writes and a read. A standard block write is performed to write to the
command, but the command must be written first before it can be read back.
STANDARD PMBus COMMANDS
Page
The page command provides the ability to configure, control, and monitor using only one physical address.
Table 16. Register 0x00—Page
Bits
[7:0]
Bit Name
PAGE
Type
R/W
Description
00000 = VH1.
00001 = VH2.
00010 = VH3.
00011 = VH4.
00100 = VP1.
00101 = VP2.
00110 = VP3.
00111 = VP4.
01000 = VP5.
01001 = VP6.
01010 = VP7.
01011 = VP8.
01100 = VP9.
01101 = VP10.
01110 = VP11.
01111 = VP12.
10000 = VP13.
Setting the page to 0xFF means that all following commands are to be applied to all inputs.
Operation
The operation command turns the closed-loop margining on and off, and determines which voltage to margin to.
Table 17. Register 0x01—Operation
Bits
[7:6]
[5:4]
Bit Name
MARGIN_EN
MARGIN_VOLTAGE
R/W
R/W
R/W
[3:2]
[1:0]
Fault
Reserved
R/W
R
Description
01 is soft off, 10 is margin on, and others are reserved.
00 is VOUT_COMMAND (closed-loop servo to the voltage set in VOUT_COMMAND), 01 is margin
low, 10 is margin high, and others are reserved.
01 is ignore fault and others are reserved.
Reserved.
CLEAR_FAULTS
The CLEAR_FAULTS command is a send byte, with no data. This command clears all fault bits in all PMBus status registers simultaneously.
Table 18. Register 0x03—CLEAR_FAULTS
Bits
Not Applicable
Bit Name
CLEAR_FAULTS
Type
Send
Description
Clears all bits in the PMBus status registers (Register 0x78 to Register 0x7A) simultaneously.
Rev. C | Page 38 of 68
�Data Sheet
ADM1266
STORE_USER_ALL
Table 19. Register 0x15—STORE_USER_ALL
Bits
Not Applicable
Bit Name
STORE_USER_ALL
Type
Send
Description
This command copies the entire contents of the operating memory into the device
memory.
RESTORE_USER_ALL
Table 20. Register 0x16—RESTORE_USER_ALL
Bits
Not Applicable
Bit Name
RESTORE_USER_ALL
Type
Send
Description
This command downloads the stored user settings from device memory into
operating memory.
Capability
This command allows host systems to determine the capabilities of the PMBus device.
Table 21. Register 0x19—Capability
Bits
7
[6:5]
Bit Name
Packet error checking
Maximum bus speed
R/W
R
R
4
SMBALRT
R
[3:0]
Reserved
R
Description
Checks packet error capability of the device. 1 is supported.
Checks the PMBus speed capability of the device. 01 is the maximum supported bus speed,
400 kHz.
Checks support for the SMBus alert pin and the SMBus alert response address protocol. 0 =
not supported.
Reserved.
VOUT_MODE
The VOUT_MODE command sets the data format for output voltage related data. The data byte for the VOUT_MODE command consists
of a 3-bit mode and 5-bit exponent parameter. The 3-bit mode determines whether the device uses linear format or direct format for the
output voltage related commands. The 5-bit parameter sets the exponent value for linear format.
Table 22. Register 0x20—VOUT_MODE
Bits
[7:5]
Bit Name
Mode
R/W
R
[4:0]
Exponent N
R/W
Description
Returns the output voltage data format. The value is fixed at 000, which means that only linear
data format is supported.
Twos complement of Exponent N used in the output voltage related commands in linear data
format (V = Y × 2N), where Y is mantissa.
VOUT_COMMAND
The VOUT_COMMAND command sets the output voltage. Exponent N is set using VOUT_MODE[4:0].
Table 23. Register 0x21—VOUT_COMMAND
Bits
[15:0]
Bit Name
Mantissa Y
R/W
R/W
Description
16-bit unsigned integer Y value for linear data format (V = Y × 2N). N is defined using
VOUT_MODE[4:0].
VOUT_TRIM
The VOUT_TRIM command applies a fixed offset voltage to the VOUT_COMMAND value.
Table 24. Register 0x22—VOUT_TRIM
Bits
[15:0]
Bit Name
Offset trim
R/W
R/W
Description
Twos complement integer that applies a fixed offset voltage to the VOUT_COMMAND value.
Rev. C | Page 39 of 68
�ADM1266
Data Sheet
VOUT_MARGIN_HIGH
The VOUT_MARGIN_HIGH command sets the margin high voltage. Exponent N is set using VOUT_MODE[4:0].
Table 25. Register 0x25—VOUT_MARGIN_HIGH
Bits
[15:0]
Bit Name
Mantissa Y
R/W
R/W
Description
16-bit unsigned Integer Y value for linear data format (V = Y × 2N). N is defined using VOUT_MODE[4:0].
VOUT_MARGIN_LOW
The VOUT_MARGIN_LOW command sets the margin low voltage. Exponent N is set using VOUT_MODE[4:0].
Table 26. Register 0x26—VOUT_MARGIN_LOW
Bits
[15:0]
Bit Name
Mantissa Y
R/W
R/W
Description
16-bit unsigned Integer Y value for linear data format (V = Y × 2N). N is defined using VOUT_MODE[4:0].
VOUT_SCALE_LOOP
The VOUT_SCALE_LOOP command sets the gain (KR) by which the commanded voltage (VOUT) is scaled to generate the internal
reference voltage (VREF). VREF = VOUT × KR, where KR = Y × 2N.
Table 27. Register 0x29—VOUT_SCALE_LOOP
Bits
[15:11]
[10:0]
Bit Name
Exponent N
Mantissa Y
R/W
R/W
R/W
Description
Twos complement of Exponent N used in linear data format (X = Y × 2N).
Twos complement of Mantissa Y used in linear data format (X = Y × 2N).
VOUT_SCALE_MONITOR
The VOUT_SCALE_MONITOR command sets the gain (KVOUT) by which the sensed output voltage at the device under test (DUT)
(VOUT_DUT) is scaled to generate the reading for the READ_VOUT command. READ_VOUT = VOUT_DUT × KVOUT, where KVOUT = Y × 2N.
Table 28. Register 0x2A—VOUT_SCALE_MONITOR
Bits
[15:11]
[10:0]
Bit Name
Exponent N
Mantissa Y
R/W
R/W
R/W
Description
Twos complement of Exponent N used in linear data format (X = Y × 2N).
Twos complement of Mantissa Y used in linear data format (X = Y × 2N).
VOUT_OV_FAULT_LIMIT
The VOUT_OV_FAULT_LIMIT command sets the overvoltage threshold (in volts) measured at the sense/output pin, VHx/VPx, that
causes an overvoltage fault condition. Exponent N is set using VOUT_MODE[4:0].
Table 29. Register 0x40—VOUT_OV_FAULT_LIMIT
Bits
[15:0]
Bit Name
Mantissa Y
R/W
R/W
Description
Unsigned Mantissa Y used in output voltage related commands in linear data format (V = Y × 2N).
VOUT_OV_WARN_LIMIT
The VOUT_OV_WARN_LIMIT command sets the overvoltage threshold (in volts) measured at the sense/output pin, VHx/VPx, that
causes an overvoltage warning condition. Exponent N is set using VOUT_MODE[4:0].
Table 30. Register 0x42—VOUT_OV_WARN_LIMIT
Bits
[15:0]
Bit Name
Mantissa Y
R/W
R/W
Description
Unsigned Mantissa Y used in output voltage related commands in linear data format (V = Y × 2N).
Rev. C | Page 40 of 68
�Data Sheet
ADM1266
VOUT_UV_WARN_LIMIT
The VOUT_UV_WARN_LIMIT command sets the undervoltage threshold (in volts) measured at the sense/output pin, VHx/VPx, that
causes an undervoltage warning condition. Exponent N is set using VOUT_MODE[4:0].
Table 31. Register 0x43—VOUT_UV_WARN_LIMIT
Bits
[15:0]
Bit Name
Mantissa Y
R/W
R/W
Description
Unsigned Mantissa Y used in output voltage related commands in linear data format (V = Y × 2N).
VOUT_UV_FAULT_LIMIT
The VOUT_UV_FAULT_LIMIT command sets the undervoltage threshold value (in volts) measured at the sense/output pin, VHx/VPx,
that causes an undervoltage fault condition. Exponent N is set using VOUT_MODE[4:0].
Table 32. Register 0x44—VOUT_UV_FAULT_LIMIT
Bits
[15:0]
Bit Name
Mantissa Y
R/W
R/W
Description
Unsigned Mantissa Y used in output voltage related commands in linear data format (V = Y × 2N).
STATUS_BYTE
The STATUS_BYTE command returns one byte of information with a summary of the most critical faults.
Table 33. Register 0x78—STATUS_BYTE
Bits
[7:6]
5
[4:2]
1
0
Bit Name
Reserved
VOUT_OV_FAULT
Reserved
CML
Reserved
R/W
R
R/W
R
R/W
R
Description
Reserved.
VOUT OV fault status.
Reserved.
Communication, memory, or logic event.
Reserved.
STATUS_WORD
The STATUS_WORD command returns two bytes of information with a summary of the unit’s fault condition.
Table 34. Register 0x79—STATUS_WORD
Bits
15
[14:6]
5
[4:2]
1
0
Bit Name
VOUT
Reserved
VOUT_OV_FAULT
Reserved
CML
Reserved
R/W
R/W
R
R/W
R
R/W
R
Description
Logic OR of STATUS_VOUT, Bits[7:0].
Reserved.
VOUT OV fault status.
Reserved.
Communication, memory, logic.
Reserved.
STATUS_VOUT
The STATUS_VOUT command obtains the status of the rail comparators.
Table 35. Register 0x7A—STATUS_VOUT
Bits
7
6
5
4
[3:0]
Bit Name
VOUT_OV_FAULT
VOUT_OV_WARNING
VOUT_UV_WARNING
VOUT_UV_FAULT
Reserved
R/W
R
R
R
R
R
Description
VOUT OV fault status.
VOUT OV warning status.
VOUT UV warning status.
VOUT UV fault status.
Reserved.
Rev. C | Page 41 of 68
�ADM1266
Data Sheet
STATUS_CML
The STATUS_CML command returns one data byte with contents as described in Table 36.
Table 36. Register 0x7E—STATUS_CML
Bits
7
6
5
4
[3:0]
Bit Name
INVALID_COMMAND
Reserved
PEC_ERROR
MEMORY_FAULT_DETECTED
Reserved
R/W
R
R
R
R
R
Description
Invalid or unsupported command received.
Reserved.
PEC failed.
Memory fault detected.
Reserved.
STATUS_MFR_SPECIFIC
The STATUS_MFR_SPECIFIC command returns one data byte with contents as described in Table 37.
Table 37. Register 0x80—STATUS_MFR_SPECFIC
Bits
[7:6]
5
4
3
2
1
Bit Name
Reserved
ALL_CRC_FAULT
Reserved
RUNNING_REFRESH
PART_LOCKED
PART_DATA_COMPATIBLE
R/W
R
R
R
R
R
R
0
SILICON_COMPATIBLE
R
Description
Reserved.
0 means all CRC checks passed, 1 means all CRC checks failed.
Reserved.
0 means refresh is complete, 1 means refresh is running.
0 means device is unlocked, 1 means device is locked.
0 means settings and sequence data is compatible, 1 means settings and sequence
data are not compatible.
0 means silicon version check passed, 1 means silicon version check failed.
READ_VOUT
The READ_VOUT command returns the actual, measured output voltage, V = Y × 2N. Exponent N is set using VOUT_MODE[4:0].
Table 38. Register 0x8B—READ_VOUT
Bits
[15:0]
Bit Name
Mantissa Y
R/W
R
Description
Unsigned Mantissa Y used in output voltage related commands in linear data format (V = Y × 2N).
PMBUS_REVISION
The PMBUS_REVISION command returns the PMBus version information. The ADM1266 is compliant with PMBus Revision 1.2.
Reading this command results in a value of 0x22.
Table 39. Register 0x98—PMBUS_REVISION
Bits
[7:4]
[3:0]
Bit Name
Part 1 revision
Part 2 revision
R/W
R
R
Description
Compliant to PMBus Part 1 specification: 0010 = Revision 1.2.
Compliant to PMBus Part 2 specification: 0010 = Revision 1.2.
Rev. C | Page 42 of 68
�Data Sheet
ADM1266
MFR_ID
The MFR_ID command either sets or reads the manufacturer ID. MFR_ID is typically set only once, at the time of manufacture. The
maximum length of the ID is 32 bytes.
Table 40. Register 0x99—MFR_ID (for Block WR)
Byte
0
1
0
[64:1]
Byte Name
Parameter length
ID length
Data length
Data
R/W
Block W
Block W
Block R
Block R
Description
Parameter data length, fixed to 1.
The length of the manufacturer ID data to read back. Maximum = 32 bytes.
The length of the manufacturer ID data that the ADM1266 returns.
Manufacturer ID data.
Table 41. Register 0x99—MFR_ID (for Block W)
Byte
0
[64:1]
Byte Name
Data length
Data
R/W
Block W
Block W
Description
The length of the manufacturer ID data to write. Maximum = 32 bytes.
Manufacturer ID data.
MFR_MODEL
The MFR_MODEL command either sets or reads the manufacturer model number. MFR_MODEL is typically set only once, at the time
of manufacture. The maximum length of the model number is 32 bytes.
Table 42. Register 0x9A—MFR_MODEL (for Block WR)
Byte
0
1
0
[64:1]
Byte Name
Parameter length
ID length
Data length
Data
R/W
Block W
Block W
Block R
Block R
Description
Parameter data length, fixed to 1.
The length in bytes of manufacturer model number to read back. Maximum = 32 bytes.
The length of the manufacturer model number that the ADM1266 returns.
Manufacturer model data.
Table 43. Register 0x9A—MFR_MODEL (for Block W)
Byte
0
[64:1]
Byte Name
Data length
Data
R/W
Block W
Block W
Description
The length in bytes of manufacturer model number to write. Maximum = 32 bytes.
Manufacturer model data.
MFR_REVISION
The MFR_REVISION command either sets or reads the manufacturer revision number. MFR_REVISION is typically set only once, at
the time of manufacture. The maximum length of the revision number is 8 bytes.
Table 44. Register 0x9B—MFR_REVISION (for Block WR)
Byte
0
1
0
[64:1]
Byte Name
Parameter length
ID length
Data length
Data
R/W
Block W
Block W
Block R
Block R
Description
Parameter data length, fixed to 1.
The length of manufacturer revision number to read back. Maximum = 8 bytes.
The length of the manufacturer revision number that the ADM1266 returns
Manufacturer revision data
Table 45. Register 0x9B—MFR_REVISION (for Block W)
Byte
0
[64:1]
Byte Name
Data length
Data
R/W
Block W
Block W
Description
The length of manufacturer revision number to write. Maximum = 8 bytes.
Manufacturer’s revision data
Rev. C | Page 43 of 68
�ADM1266
Data Sheet
MFR_LOCATION
The MFR_LOCATION command either sets or reads the manufacturing location of the device. MFR_LOCATION is typically set only
once, at the time of manufacture. The maximum length of the location is 48 bytes.
Table 46. Register 0x9C—MFR_LOCATION (for Block WR)
Byte
0
1
0
[64:1]
Byte Name
Parameter length
ID length
Data length
Data
R/W
Block W
Block W
Block R
Block R
Description
Parameter data length, fixed to 1.
The length of manufacturer location data to read back. Maximum = 48 bytes.
The length of the manufacturer location data that the ADM1266 returns.
Manufacturer location data.
Table 47. Register 0x9C—MFR_LOCATION (for Block W)
Byte
0
[64:1]
Byte Name
Data length
Data
R/W
Block W
Block W
Description
The length of manufacturer location data to write. Maximum = 48 bytes.
Manufacturer location data.
MFR_DATE
The MFR_DATE command either sets or reads the date the device was manufactured. MFR_DATE is typically set only once, at the time
of manufacture. The maximum length of the date is 16 bytes.
Table 48. Register 0x9D—MFR_DATE (for Block WR)
Byte
0
1
0
[64:1]
Byte Name
Parameter length
ID length
Data length
Data
R/W
Block W
Block W
Block R
Block R
Description
Parameter data length, fixed to 1.
The length of manufacturer date to read back. Maximum = 16 bytes.
The length of the manufacturer date that the ADM1266 returns.
Manufacturer date.
Table 49. Register 0x9D—MFR_DATE (for Block W)
Byte
0
[64:1]
Byte Name
Data length
Data
R/W
Block W
Block W
Description
The length of manufacturer date to write. Maximum = 16 bytes.
Manufacturer date.
MFR_SERIAL
The MFR_SERIAL command either sets or reads the manufacturer serial number of the device. MFR_LOCATION is typically set only
once, at the time of manufacture. The maximum length of the serial number is 32 bytes.
Table 50. Register 0x9E—MFR_SERIAL (for Block WR)
Byte
0
1
0
[64:1]
Byte Name
Parameter length
ID length
Data length
Data
R/W
Block W
Block W
Block R
Block R
Description
Parameter data length, fixed to 1.
The length of manufacturer serial data to read back. Maximum = 32 bytes.
The length of the manufacturer serial data that the ADM1266 returns.
Manufacturer serial data.
Table 51. Register 0x9E—MFR_SERIAL (for Block W)
Byte
0
[64:1]
Byte Name
Data length
Data
R/W
Block W
Block W
Description
The length of manufacturer serial data to write. Maximum = 32 bytes.
Manufacturer serial data
Rev. C | Page 44 of 68
�Data Sheet
ADM1266
IC_DEVICE
The IC_DEVICE command returns the ID and device number of the ADM1266. The default values are 0x41, 0x12, and 0x66.
Table 52. Register 0xAD—IC_DEVICE_ID
Byte
0
[3:1]
Byte Name
Data length
Data
R/W
Block R
Block R
Description
Parameter data length, fixed to 3.
Return the IC ID and device number: 0x41, 0x12, and 0x66 in bootloader mode.
Return the IC ID and device number: 0x42, 0x12, and 0x66 in normal mode.
IC_DEVICE_REV
The IC_DEVICE_REV command returns the ADM1266 firmware, bootloader, and chip revision.
Table 53. Register 0xAE—IC_DEVICE_REV in Normal Mode
Byte
0
[3:1]
[6:4]
[8:7]
Byte Name
Data length
Firmware
revision
Bootloader
revision
Chip revision
R/W
Block R
Block R
Description
Parameter data length, fixed to 8.
ADM1266 firmware revision, for example: 0x01, 0x08, 0x07 means Version 1.8.7.
Block R
ADM1266 bootloader revision, for example: 0x00, 0x00, 0x07 means Version 0.0.7.
Block R
ADM1266 chip revision, for example: 41 and 30 are ASCII B and 0, respectively.
Table 54. Register 0xAE—IC_DEVICE_REV in Bootloader Mode
Byte
0
[3:1]
[6:4]
[8:7]
Byte Name
Data length
Bootloader
revision
Reserved
Chip revision
R/W
Block R
Block R
Description
Parameter data length, fixed to 8.
ADM1266 bootloader revision, for example: 0x01, 0x08, 0x07 means Version 1.8.7.
Block R
Block R
Reserved
ADM1266 chip revision, for example: 41 and 30 are ASCII B and 0, respectively.
VOUT_OV_HYST_LIMIT
The VOUT_OV_HYST_LIMIT command either sets or reads the overvoltage hysteresis (in volts) measured at the sense/output pin that
causes an overvoltage fault condition. The exponent N is set using VOUT_MODE[4:0].
Table 55. Register 0xD0—VOUT_OV_HYST_LIMIT
Bits
[15:0]
Bit Name
Mantissa Y
R/W
R/W
Description
Unsigned Mantissa Y used in output voltage related commands in linear data format (V = Y × 2N).
VOUT_UV_HYST_LIMIT
The VOUT_UV_HYST_LIMIT command either sets or reads the undervoltage hysteresis (in volts) measured at the sense/output pin
that causes an undervoltage fault condition. The Exponent N is set using VOUT_MODE[4:0].
Table 56. Register 0xD1—VOUT_UV_HYST_LIMIT
Bits
[15:0]
Bit Name
Mantissa Y
R/W
R/W
Description
Unsigned Mantissa Y used in output voltage related commands in linear data format (V = Y × 2N).
Rev. C | Page 45 of 68
�ADM1266
Data Sheet
Vx_CONFIGURATION
This command either writes or reads the VHx/VPx configuration for the device.
Table 57. Register 0xD2—VH_CONFIGURATION (for Page Command (0x00) Values of 0 to 3)
Bits
[15:13]
Bit Name
VH_RANGE
R/W
R/W
12
[11:8]
Reserved
VH_UV_FILTER
R
R/W
7
6
Reserved
VH_UV_ENABLE
R/W
R/W
[5:2]
VH_OV_FILTER
R/W
Description
VHx input range select.
000 = disconnected.
001 = disconnected.
010 = 6.0 V to 15.0 V.
011 = 3.0 V to 7.5 V.
100 = 1.5 V to 3.75 V.
101 = 0.75 V to 1.875 V.
110 = direct range (0.4 V to 1.0 V).
111 = reserved.
Reserved.
VHx UV glitch filter setting. Pulses smaller than this width are suppressed. Sampling delays may
add up to 400 ns of additional delay.
0000 = reserved.
0001 = reserved.
0010 = 2.0 µs.
0011 = 4.0 µs.
0100 = 5.0 µs.
0101 = 6.0 µs.
0110 = 7.5 µs.
0111 = 8.0 µs.
1000 = 10.0 µs.
1001 = 20.0 µs.
1010 = 40.0 µs.
1011 = 50.0 µs.
1100 = 60.0 µs.
1101 = 75.0 µs.
1110 = 80.0 µs.
1111 = 100.0 µs.
Reserved.
VHx UV comparator enable.
0 = disable UV comparator.
1 = enable UV comparator.
VHx OV glitch filter setting. Pulses smaller than this width are suppressed. Sampling delays may
add up to 400 ns of additional delay.
0000 = reserved.
0001 = reserved.
0010 = 2.0 µs.
0011 = 4.0 µs.
0100 = 5.0 µs.
0101 = 6.0 µs.
0110 = 7.5 µs.
0111 = 8.0 µs.
1000 = 10.0 µs.
1001 = 20.0 µs.
1010 = 40.0 µs.
1011 = 50.0 µs.
1100 = 60.0 µs.
1101 = 75.0 µs.
1110 = 80.0 µs.
1111 = 100.0 µs.
Rev. C | Page 46 of 68
�Data Sheet
Bits
1
0
Bit Name
Reserved
VH_OV_ENABLE
ADM1266
R/W
R/W
R/W
Description
Reserved.
VHx OV comparator enable.
0 = disable OV comparator.
1 = enable OV comparator.
Table 58. Register 0xD2—VP_CONFIGURATION (for Page Command (0x00) Values of 4 to 16)
Bits
[15:13]
Bit Name
VP_RANGE
R/W
R/W
12
VP_DIFF_EN
R/W
[11:8]
VP_UV_FILTER
R/W
7
6
Reserved
VP_UV_ENABLE
R/W
R/W
Description
VPx input range select.
000 = disconnected.
001 = disconnected.
010 = disconnected.
011 = 2.2 V to 5 V.
100 = 1.5 V to 3.75 V.
101 = 0.75 V to 1.875 V.
110 = direct range (0.4 V to 1.0 V).
111 = reserved.
VPx differential mode select.
0 = disable differential voltage mode.
1 = enable differential mode (ignored on even pins).
VPx UV glitch filter setting. Pulses smaller than this width are suppressed. Sampling delays may add
up to 400 ns of additional delay.
0000 = reserved.
0001 = reserved.
0010 = 2.0 µs.
0011 = 4.0 µs.
0100 = 5.0 µs.
0101 = 6.0 µs.
0110 = 7.5 µs.
0111 = 8.0 µs.
1000 = 10.0 µs.
1001 = 20.0 µs.
1010 = 40.0 µs.
1011 = 50.0 µs.
1100 = 60.0 µs.
1101 = 75.0 µs.
1110 = 80.0 µs.
1111 = 100.0 µs.
Reserved.
VPx UV comparator enable.
0 = disable UV comparator.
1 = enable UV comparator.
Rev. C | Page 47 of 68
�ADM1266
Data Sheet
Bits
[5:2]
Bit Name
VP_OV_FILTER
R/W
R/W
1
0
Reserved
VP_OV_ENABLE
R/W
R/W
Description
VPx OV glitch filter setting. Pulses smaller than this width are suppressed. Sampling delays may
add up to 400 ns of additional delay.
0000 = reserved.
0001 = reserved.
0010 = 2.0 µs.
0011 = 4.0 µs.
0100 = 5.0 µs.
0101 = 6.0 µs.
0110 = 7.5 µs.
0111 = 8.0 µs.
1000 = 10.0 µs.
1001 = 20.0 µs.
1010 = 40.0 µs.
1011 = 50.0 µs.
1100 = 60.0 µs.
1101 = 75.0 µs.
1110 = 80.0 µs.
1111 = 100.0 µs.
Reserved
VPx OV comparator enable.
0 = disable OV comparator.
1 = enable OV comparator.
BLACKBOX_CONFIGURATION
The BLACKBOX_CONFIGURATION command either sets or reads the cyclic black box record configuration.
Table 59. Register 0xD3—BLACKBOX_CONFIGURATION
Bits
[15:1]
0
Bit Name
Reserved
CYCLIC_RECORD
R/W
R
R/W
Description
Reserved.
Cyclic record mode.
0 = disabled.
1 = enabled
PDIO_CONFIGURATION
This command either block writes or reads the PDIOx configuration.
Table 60. Register 0xD4—PDIO_CONFIGURATION (for Block WR)
Byte
0
1
Byte Name
Parameter length
PDIO index
parameter
R/W
Block W
Block W
Description
Parameter data length, fixed to 1.
00000 = PDIO1.
00001 = PDIO 2.
00010 = PDIO 3.
00011 = PDIO 4.
00100 = PDIO5.
00101 = PDIO6.
00110 = PDIO7.
00111 = PDIO8.
01000 = PDIO9.
01001 = PDIO10.
01010 = PDIO11.
01011 = PDIO12.
Rev. C | Page 48 of 68
�Data Sheet
ADM1266
Byte
Byte Name
R/W
0
Data length
Block R
[N:1]
Data
Block R
Description
01100 = PDIO13.
01101 = PDIO14.
01110 = PDIO15.
01111 = PDIO16.
Setting the byte to 0xFF means the device reads back data for all PDIOs.
The length of the PDIO configuration data that the ADM1266 returns. Set to 2 when PDIO index
parameter < 16, and 32 when PDIO index parameter is 0xFF.
Configuration data for PDIOx.
Table 61. Register 0xD4—PDIO_CONFIGURATION (for Block W)
Byte
0
1
Byte Name
Data length
Starting index
R/W
Block W
Block W
[33:2]
Data
Block W
Description
Number of bytes of data for this block write. For a write, the data length is from 3 to 33.
00000 = PDIO1.
00001 = PDIO2.
00010 = PDIO3.
00011 = PDIO4.
00100 = PDIO5.
00101 = PDIO6.
00110 = PDIO7.
00111 = PDIO8.
01000 = PDIO9.
01001 = PDIO10.
01010 = PDIO11.
01011 = PDIO12.
01100 = PDIO13.
01101 = PDIO14.
01110 = PDIO15.
01111 = PDIO16.
This value together with data length determine which PDIO is configured. For example; if
starting index is 5 and data length is 7, PDIO6, PDIO7, and PDIO8 are configured.
Data for PDIOx configuration.
Table 62. Two Bytes of Data for Each PDIOx Configuration
Bits
[15:13]
Bit Name
PDIO_PIN_CFG
R/W
R/W
[12:9]
PDIO_GLITCH_FILT
R/W
Description
Operating mode for PDIOx pin.
000 = disabled.
001 = output.
010 = input.
011 = input/output.
100 = disabled.
101 = invalid.
110 = invalid.
111 = invalid.
Input glitch filter setting. Pulses smaller than this width are suppressed.
0000 = 500 ns.
0001 = 1.0 µs.
0010 = 2.0 µs.
0011 = 4.0 µs.
0100 = 5.0 µs.
0101 = 6.0 µs.
0110 = 7.5 µs.
Rev. C | Page 49 of 68
�ADM1266
Data Sheet
Bits
Bit Name
R/W
[8:3]
[2:0]
Reserved
PDIO_OUTPUT_CFG
R/W
R/W
Description
0111 = 8.0 µs.
1000 = 10.0 µs.
1001 = 20.0 µs.
1010 = 40.0 µs.
1011 = 50.0 µs.
1100 = 60.0 µs.
1101 = 75.0 µs.
1110 = 80.0 µs.
1111 = 100.0 µs.
Reserved.
Output configuration. Sets the configuration of the PDIOx output drivers.
000 = 20 kΩ pull-down resistor. The resistor is enabled even during power-up.
001 = 20 kΩ pull-up resistor to AVDD. The resistor is enabled even during power-up.
010 = open source with 20 kΩ pull-down resistor.
011 = open drain with 20 kΩ pull-up resistor to AVDD.
100 = open source (requires external pull-down resistor).
101 = open drain (requires external pull-up resistor).
110 = push/pull output driver.
111 = high-Z.
DAC_CONFIGURATION
This command either block writes or reads the DAC configuration.
Table 63. Register 0xD5—DAC_CONFIGURATION (for Block WR)
Byte
0
1
Byte Name
Parameter length
DAC index
parameter
R/W
Block W
Block W
0
Data length
Block R
[18:1]
Data
Block R
Description
Parameter data length, fixed to 1.
00000 = DAC1.
00001 = DAC2.
00010 = DAC3.
00011 = DAC4.
00100 = DAC5.
00101 = DAC6.
00110 = DAC7.
00111 = DAC8.
01000 = DAC9.
Setting this byte to 0xFF means the device reads back data for all DACs.
The length of the DAC configuration data that ADM1266 returns. Set to 2 when DAC index
parameter < 9, 18 when DAC index parameter is 0xFF.
Data for DAC configuration.
Rev. C | Page 50 of 68
�Data Sheet
ADM1266
Table 64. Register 0xD5—DAC_CONFIGURATION (for Block W)
Byte
0
1
Byte Name
Data length
Starting Index
R/W
Block W
Block W
[19:2]
Data
Block W
Description
Number of bytes of data for this block write. For a write, this value is from 3 to 19.
00000 = DAC1.
00001 = DAC2.
00010 = DAC3.
00011 = DAC4.
00100 = DAC5.
00101 = DAC6.
00110 = DAC7.
00111 = DAC8.
01000 = DAC9.
This value together with data length determine which DAC is configured. For example; if
starting index is 5 and data length is 7, DAC6, DAC7, and DAC8 are configured.
Data for DAC configuration.
Table 65. Two Bytes of Data for Each DAC Configuration
Bits
[15:11]
[10:6]
Bit Name
Reserved
DAC_MAPPING
R/W
R
R/W
5
DAC_CLOSED_LOOP
R/W
[4:2]
[1:0]
Reserved
MARGIN_MODE
R/W
R/W
Description
Reserved.
These bits map the input pin that sets the DAC voltage for closed-loop margining.
00000 = open.
00001 = VH1.
00010 = VH2.
00011 = VH3.
00100 = VH4.
00101 = VP1.
00110 = VP2.
00111 = VP3.
01000 = VP4.
01001 = VP5.
01010 = VP6.
01011 = VP7.
01100 = VP8.
01101 = VP9.
01110 = VP10.
01111 = VP11.
10000 = VP12.
10001 = VP13
This sets the two different closed-loop behaviors.
0 = closed loop is on continuously.
1 = closed loop regulates to the setpoint and stops.
Reserved.
Margin mode.
00 = off.
01 = open loop.
10 = closed loop.
11 = reserved.
Rev. C | Page 51 of 68
�ADM1266
Data Sheet
SEQUENCE_CONFIGURATION
This command either block writes or reads the sequence configuration.
Table 66. Register 0xD6—SEQUENCE_CONFIGURATION (for Block WR)
Byte
0
1
2
3
0
Byte Name
Parameter length
Data length
Offset address (low)
Offset address (high)
Data length
R/W
Block W
Block W
Block W
Block W
Block R
[252:1]
Data
Block R
Description
Parameter data length, fixed to 3.
Data length.
The low 8-bit offset address of total configuration data.
The high 8-bit offset address of total configuration data.
Readback sequence configuration data length, maximum value of N = 252. N must be a
multiple value of 4.
Sequence configuration data.
Table 67. Register 0xD6—SEQUENCE_CONFIGURATION (for Block W)
Byte
0
1
2
[250:3]
Byte Name
Data length
Offset address
(low)
Offset address
(high)
Data
R/W
Block W
Block W
Description
Number of bytes of data for this block write.
The low 8-bit offset address of total configuration data.
Block W
The high 8-bit offset address of total configuration data.
Block W
Data for sequence configuration, maximum value of N = 250. N − 3 + 1 must be a multiple
value of 4.
SYSTEM_CONFIGURATION
This command either block writes or reads the system configuration.
Table 68. Register 0xD7—SYSTEM_CONFIGURATION (for Block WR)
Byte
0
1
2
3
R/W
Block W
Block W
Block W
Block W
Description
Parameter data length, fixed to 3.
Data length.
The low 8-bit offset address of total configuration data.
The high 8-bit offset address of total configuration data.
0
Bit Name
Parameter length
Data length
Offset address (low)
Offset address
(high)
Data length
Block R
[252:1]
Data
Block R
Readback system configuration data length, maximum value of N = 252. N must be a multiple
value of 4.
System configuration data.
Table 69. Register 0xD7—SYSTEM_CONFIGURATION (for Block W)
Byte
0
1
2
[250:3]
Bit Name
Data length
Offset address (low)
Offset address (high)
Data
R/W
Block W
Block W
Block W
Block W
Description
Number of bytes of data for this block write.
The low 8-bit offset address of total configuration data.
The high 8-bit offset address of total configuration data.
Data for system configuration, maximum value of N = 250. N − 3 + 1 must be a multiple value
of 4.
Rev. C | Page 52 of 68
�Data Sheet
ADM1266
GO_COMMAND
This command triggers various functions.
Table 70. Register 0xD8—GO_COMMAND
Bits
[15:5]
4
Bit Name
Reserved
Seamless reset
R/W
R
W
3
2
1
0
SEQUENCE_MODE
Hardware reset
SEQUENCE_RESET
Run/stop
W
W
W
W
Description
Reserved.
Writing 1 to this bit enables seamless reset of the sequence by jumping to the PGOOD state.
Writing 0 to this bit disables seamless reset of the sequence by jumping to State 0.
Writing 1 to this bit enables sequence debug mode. Writing 0 to this bit enables sequence normal mode.
Writing 1 to this bit resets the CPU.
Writing 1 to this bit resets the sequence. Writing 0 to this bit does not reset the sequence.
Writing 1 to this bit stops the sequence. Writing 0 to this bit runs the sequence.
READ_STATE
The READ_STATE command returns the current value of the state bit that the sequencer is executing.
Table 71. Register 0xD9—READ_STATE
Bits
[15:0]
Bit Name
State
R/W
R
Description
Current state number that the sequencer is executing.
VOUT_MARGIN_LOOP
The VOUT_MARGIN_LOOP command either sets or reads the gain (R1/R3), which is used to calculate the VFB (feedback voltage)
according to the DAC output and VOUT. For the relationship of VFB, VOUT, and the output of DAC, see Figure 12.
Table 72. Register 0xDA—VOUT_MARGIN_LOOP
Bits
[15:11]
[10:0]
Bit Name
Exponent N
Mantissa Y
R/W
R/W
R/W
Description
Twos complement Exponent N used in linear data format (X = Y × 2N).
Twos complement Mantissa Y used in linear data format (X = Y × 2N).
MARGIN_CONFIGURATION
The MARGIN_CONFIGURATION command either sets or reads the ramp step in margining.
Table 73. Register 0xDB—MARGIN_CONFIGURATION
Bits
[15:12]
[11:8]
[7:0]
Bit Name
Reserved
RAMP_INTERVAL
RAMP_STEP
R/W
R
R/W
R/W
Description
Reserved.
Ramp interval time, interval: 0.1 ms.
Number of DAC codes to increment for each step.
BREAKPOINTS
This command either block writes or reads the breakpoints for the sequence states.
Table 74. Register 0xDC—BREAKPOINTS (Block WR)
Byte
0
1
0
[128:1]
Byte Name
Parameter
length
Data length
Data length
Data
R/W
Block W
Description
Number of bytes of parameter data, fix to 1.
Block W
Block R
Block R
The length of breakpoints data to read back. Maximum = 128 bytes.
The length of the breakpoints data that the ADM1266 returns.
Bit 0 of Byte 1 sets the breakpoint for State 1, Bit 1 of Byte 1 sets the breakpoint for State 2,
incrementing up to Bit 7 of Byte 128 sets the breakpoint for State 1024. Maximum value of N = 128.
Rev. C | Page 53 of 68
�ADM1266
Data Sheet
Table 75. Register 0xDC—BREAKPOINTS (Block W)
Byte
0
[128:1]
Bit Name
Data length
Data
R/W
Block W
Block W
Description
The length of breakpoints data to write. Maximum = 64 bytes.
Bit 0 of Byte 1 sets the breakpoint for State 1, Bit 1 of Byte 1 sets the breakpoint for State 2,
incrementing up to Bit 7 of Byte 64 sets the breakpoint for State 1024. Maximum value of N = 128.
ICB_CONFIGURATION
This command either writes or reads the IDB configurations.
Table 76. Register 0xDD—ICB_CONFIGURATION (Block R/W)
Byte
0
[8:1]
Bit Name
Data length
Data
R/W
Block R/W
Block R/W
Description
Number of bytes of data for this block read/write, fixed to 8.
Data for ICB configuration.
READ_BLACKBOX
This command reads back the black box record or erases the black box memory.
Table 77. Register 0xDE—READ_BLACKBOX (for Block WR)
Byte
0
1
0
[64:1]
Bit Name
Parameter length
Index
Data length
Data
R/W
Block W
Block W
Block R
Block R
Description
Number of bytes of data for this block write, fixed to 1.
Black box record index.
The length of the black box data that the ADM1266 returns.
Data for one black box record.
Table 78. Register 0xDE—READ_BLACKBOX (for Block W)
Byte
0
[2:1]
Bit Name
Parameter data
length
Parameter
R/W
Block W
Block W
Description
Number of bytes of data for this block write. This byte is fixed to 2 to erase the black box
memory.
To erase, set Byte 1 as 0xFE and Byte 2 as 0x00.
Table 79. Black Box Data Format
Byte
[1:0]
Field
ID
2
Empty
Reserved
Page
JUMP_TYPE
ACTION_INDEX
RULE_INDEX
VHx_OV_STATUS
VHx_UV_STATUS
CURRENT_STATE
LAST_STATE
VP_OV_STATUS
VP_UV_STATUS
GPIO_IN_STATUS
GPIO_OUT_STATUS
PDIO_IN_STATUS
PDIO_OUT_STATUS
3
4
5
[7:6]
[9:8]
[11:10]
[13:12]
[15:14]
[17:16]
[19:18]
[21:20]
Description
Each black box record has a unique ID but that ID is the same for all black box records across multiple
devices.
0 = used, 1 = empty.
Reserved.
Page index that current record is saved in.
The jump (transition from one state to another) was due to sequence action, receipt of jump message.
Black box action index.
Black box action rule index.
Overvoltage status of the VHx pins. Mapping of the VHx pins are shown in Table 80.
Undervoltage status of the VHx pins. Mapping of the VHx pins are shown in Table 80.
The state in which the black box write was triggered.
The state from which the black box write was entered.
Overvoltage status of the VPx pins. Mapping of the VPx pins are shown in Table 81.
Undervoltage status of the VPx pins. Mapping of the VPx pins are shown in Table 81.
Input status of GPIOx pins. Mapping of the GPIOx pins are shown in Table 82.
Output status of GPIOx pins. Mapping of the GPIOx pins are shown in Table 82.
Input status of PDIOx pins. Mapping of the PDIOx pins are shown in Table 83.
Output status of PDIOx pins. Mapping of the PDIOx pins are shown in Table 83.
Rev. C | Page 54 of 68
�Data Sheet
Byte
[23:22]
[31:24]
[62:32]
63
ADM1266
Field
POWERUP_COUNTER
TIME_STAMP
Reserved
CRC
Description
Number of times the device is power cycled (powered on and off).
The time when the black box record was triggered.
Reserved.
Cyclic redundancy check for black box data integrity.
Table 80. VHx_OV_STATUS and VHx_UV_STATUS Mapping
Bit
0
1
2
3
4
5
6
7
Field
VH1_OV
VH2_OV
VH3_OV
VH4_OV
VH1_UV
VH2_UV
VH3_UV
VH4_UV
Description
VH1 OV fault status
VH2 OV fault status
VH3 OV fault status
VH4 OV fault status
VH1 UV fault status
VH2 UV fault status
VH3 UV fault status
VH4 UV fault status
Table 81. VPx_OV_STATUS and VPx_UV_STATUS Mapping
Bit
0
1
2
3
4
5
6
7
8
9
10
11
12
[13:15]
Field
VP1_OV/UV
VP2_OV/UV
VP3_OV/UV
VP4_OV/UV
VP5_OV/UV
VP6_OV/UV
VP7_OV/UV
VP8_OV/UV
VP9_OV/UV
VP10_OV/UV
VP11_OV/UV
VP12_OV/UV
VP13_OV/UV
Reserved
Description
VP1 OV/UV fault status
VP2 OV/UV fault status
VP3 OV/UV fault status
VP4 OV/UV fault status
VP5 OV/UV fault status
VP6 OV/UV fault status
VP7 OV/UV fault status
VP8 OV/UV fault status
VP9 OV/UV fault status
VP10 OV/UV fault status
VP11 OV/UV fault status
VP12 OV/UV fault status
VP13 OV/UV fault status
Reserved
Table 82. GPIO_IN_STATUS and GPIO_OUT_STATUS Mapping
Bit
0
1
2
[3:5]
6
7
8
9
10
11
[12:15]
Field
GPIO1_IN/OUT_STATUS
GPIO2_IN/OUT_STATUS
GPIO3_IN/OUT_STATUS
Reserved
GPIO8_IN/OUT_STATUS
GPIO9_IN/OUT_STATUS
GPIO4_IN/OUT_STATUS
GPIO5_IN/OUT_STATUS
GPIO6_IN/OUT_STATUS
GPIO7_IN/OUT_STATUS
Reserved
Description
GPIO1 input/output status
GPIO2 input/output status
GPIO3 input/output status
Reserved
GPIO8 input/output status
GPIO9 input/output status
GPIO4 input/output status
GPIO5 input/output status
GPIO6 input/output status
GPIO7 input/output status
Reserved
Rev. C | Page 55 of 68
�ADM1266
Data Sheet
Table 83. PDIO_IN_STATUS and PDIO_OUT_STATUS Mapping
Bit
0
1
2
3
4
5
6
7
8
9
10
11
12
13
14
15
Field
PDIO1_IN/OUT_STATUS
PDIO2_IN/OUT_STATUS
PDIO3_IN/OUT_STATUS
PDIO4_IN/OUT_STATUS
PDIO5_IN/OUT_STATUS
PDIO6_IN/OUT_STATUS
PDIO7_IN/OUT_STATUS
PDIO8_IN/OUT_STATUS
PDIO9_IN/OUT_STATUS
PDIO10_IN/OUT_STATUS
PDIO11_IN/OUT_STATUS
PDIO12_IN/OUT_STATUS
PDIO13_IN/OUT_STATUS
PDIO14_IN/OUT_STATUS
PDIO15_IN/OUT_STATUS
PDIO16_IN/OUT_STATUS
Description
PDIO1 input/output status
PDIO2 input/output status
PDIO3 input/output status
PDIO4 input/output status
PDIO5 input/output status
PDIO6 input/output status
PDIO7 input/output status
PDIO8 input/output status
PDIO9 input/output status
PDIO10 input/output status
PDIO11 input/output status
PDIO12 input/output status
PDIO13 input/output status
PDIO14 input/output status
PDIO15 input/output status
PDIO16 input/output status
SET_RTC
This command reads/writes the timestamp from/to the device by the GUI.
Table 84. Register 0xDF—SET_RTC
Byte
0
[7:1]
Bit Name
Data length
Data
R/W
Block R/W
Block R/W
Description
Size of data for this block read/write, fixed to 6.
6-byte timestamp message. Each LSB represents 1/(216) sec if using all 6 bytes. For LSB in 1 sec size, set
Byte 1 and Byte 2 to zero and the rest of the time in Byte[3:7].
LOGIC_CONFIGURATION
This command block reads/writes the logic configuration for the device.
Table 85. Register 0xE0—LOGIC_CONFIGURATION (for Block WR)
Byte
0
1
2
3
0
[252:1]
Bit Name
Parameter length
Data length
Offset address (low)
Offset address (high)
Data length
Data
R/W
Block W
Block W
Block W
Block W
Block R
Block R
Description
Parameter data length, fixed to 3.
Data length.
The low 8-bit offset address of total logic data.
The high 8-bit offset address of total logic data.
Readback logic data length, maximum value of N = 252. N must be a multiple value of 4.
Logic data.
Table 86. Register 0xE0—LOGIC_CONFIGURATION (for Block W)
Byte
0
1
2
[250:3]
Bit Name
Data length
Offset address (low)
Offset address (high)
Data
R/W
Block W
Block W
Block W
Block W
Description
Number of bytes of data for this block write.
The low 8-bit offset address of total logic data.
The high 8-bit offset address of total logic data.
Data for logic data, max value of N = 250. N − 3 + 1 must be a multiple value of 4.
Rev. C | Page 56 of 68
�Data Sheet
ADM1266
GPIO_CONFIGURATION
This command block reads/writes the GPIO configuration.
Table 87. Register 0xE1—GPIO_CONFIGURATION (for Block RW)
Byte
0
1
0
1
2
Byte Name
Parameter length
GPIO index parameter
Data length
Data
Data
R/W
Block W
Block W
Block R
Block R
Block R
Description
Parameter data length, fixed to 1.
GPIO index. Refer to Table 90.
The length of the GPIO configuration data that the ADM1266 returns, fixed to 2.
Data for GPIO configuration.
Reserved.
Table 88. Register 0xE1—GPIO_SYNC_CONFIGURATION (for Block W)
Byte
0
1
2
Bit Name
Data length
Index
Data
R/W
Block W
Block W
Block W
Description
Number of bytes of data for this block write. For a write, its value is fixed to 2.
GPIO_SYNC index. Refer to Table 90.
Data for GPIO configuration.
Table 89. Data for Each GPIO_SYNC Configuration
Bits
[7:4]
4
3
2
[1:0]
Bit Name
Reserved
Out mode
Output enable
Input enable
GPIO functions
R/W
R
R/W
R/W
R/W
R/W
Description
Reserved.
0 is push/pull, 1 is open drain
0 is disable, 1 is enable
0 is disable, 1 is enable
GPIO functions, 00 is high-Z, 11 is GPIO
Table 90 shows the mapping between the internal GPIO index and the external GPIOx pins.
Table 90. GPIO Mapping
External GPIOx_SYNC Pin
GPIO1
GPIO2
GPIO3
GPIO4
GPIO5
GPIO6
GPIO7
GPIO8
GPIO9
SYNC
GPIO Index
0
1
2
8
9
10
11
6
7
5
Rev. C | Page 57 of 68
�ADM1266
Data Sheet
USER_DATA
This command block reads/writes the user data.
Table 91. Register 0xE3—USER_DATA (for Block WR)
Byte
0
1
2
3
0
[N:1]
Bit Name
Parameter length
Data length
Offset address (low)
Offset address (high)
Data length
Data
R/W
Block W
Block W
Block W
Block W
Block R
Block R
Description
Parameter data length, fixed to 3.
Data length.
The low 8-bit offset address of total user data.
The high 8-bit offset address of total user data.
Read back user data length, maximum value of N = 252. N must be a multiple value of 4.
User data.
Table 92. Register 0xE3— USER_DATA (for Block W)
Byte
0
1
2
[N:3]
Bit Name
Data length
Offset address (low)
Offset address (high)
Data
R/W
Block W
Block W
Block W
Block W
Description
Number of bytes of data for this block write.
The low 8-bit offset address of total user data.
The high 8-bit offset address of total user data.
Data for user data, maximum value of N = 250.
POWERUP_COUNTER
This command reads the power-up counter from the device by the GUI.
Table 93. Register 0xE4—POWERUP_COUNTER
Byte
0
[2:1]
Bit Name
Data length
Counter
R/W
Block W
Block W
Description
The length of the power-up counter data that the ADM1266 returns, fixed to 2
Counter value
VOUT_RESISTOR
This command block reads/writes the resistor divider information.
Table 94. Register 0xE5—VOUT_RESISTOR (for Block WR)
Byte
0
Byte Name
Parameter length
1
0
Resistor index
parameter
Data length
R/W
Block
W
Block
W
Block R
[15:1]
Data
Block R
Description
Parameter data length, fixed to 1.
The index of the resistor is set. When the index is 0xFF, it reads back all resistor configurations.
0 = R4, 1 = R5, 2 = R1, 3 = R2, 4 = R3 (see Figure 12).
Readback configuration data length. Set to 3 when resistor index parameter < 5, 15 when
resistor index parameter is 0xFF.
Information for resistor.
Table 95. Register 0xE5—VOUT_RESISTOR (for Block W)
Byte
0
1
[5:2]
Bit Name
Data length
Resistor index parameter
Data
R/W
Block W
Block W
Block W
Description
Number of bytes of data for this block write.
The index of the resistor.
Data for resistor, maximum value of N = 5.
Table 96. Three Bytes of Data for Each Resistor
Bits
[23:16]
15
[14:0]
Bit Name
Exponent
Reserved
Mantissa
R/W
R/W
R/W
R/W
Description
Twos complement Exponent N used in linear data format (X = Y × 2N).
Reserved.
Twos complement Mantissa Y used in linear data format (X = Y × 2N).
Rev. C | Page 58 of 68
�Data Sheet
ADM1266
BLACKBOX_INFORMATION
This command reads the black box record counter and logic index.
Table 97. Register 0xE6—BLACKBOX_INFORMATION
Byte
0
[2:1]
3
4
Byte Name
Data length
Black box ID
Logic index
Record count
R/W
Block R
Block R
Block R
Block R
Description
The length of the black box data that the ADM1266 returns, fixed to 4.
Latest black box ID.
The latest black box record logic index.
The value of black box record count.
ALL_STATUS_VOUT
The ALL_STATUS_VOUT command returns all rails comparator status.
Table 98. Register 0xE7—ALL_STATUS_VOUT
Byte
0
1
2
3
4
5
6
7
8
9
10
11
12
13
14
15
16
17
Bit Name
Data length
STATUS_VH1
STATUS_VH2
STATUS_VH3
STATUS_VH4
STATUS_VP1
STATUS_VP2
STATUS_VP3
STATUS_VP4
STATUS_VP5
STATUS_VP6
STATUS_VP7
STATUS_VP8
STATUS_VP9
STATUS_VP10
STATUS_VP11
STATUS_VP12
STATUS_VP13
R/W
Block R
Block R
Block R
Block R
Block R
Block R
Block R
Block R
Block R
Block R
Block R
Block R
Block R
Block R
Block R
Block R
Block R
Block R
Description
Readback status data length, fixed to 17.
VH1 status VOUT.
VH2 status VOUT.
VH3 status VOUT.
VH4 status VOUT.
VP1 status VOUT.
VP2 status VOUT.
VP3 status VOUT.
VP4 status VOUT.
VP5 status VOUT.
VP6 status VOUT.
VP7 status VOUT.
VP8 status VOUT.
VP9 status VOUT.
VP10 status VOUT.
VP11 status VOUT.
VP12 status VOUT.
VP13 status VOUT.
ALL_READ_VOUT
The ALL_READ_VOUT command returns all the output voltage value (V) in linear data format (V = Y × 2N). Exponent N is set using
VOUT_MODE[4:0].
Table 99. Register 0xE8—ALL_READ_VOUT
Byte
0
[2:1]
[4:3]
[6:5]
[8:7]
[10:9]
[12:11]
[14:13]
[16:15]
[18:17]
[20:19]
[22:21]
Bit Name
Data Length
MANTISSA_VH1
MANTISSA_VH2
MANTISSA_VH3
MANTISSA_VH4
MANTISSA_VP1
MANTISSA_VP2
MANTISSA_VP3
MANTISSA_VP4
Mantissa_VP5
MANTISSA_VP6
MANTISSA_VP7
R/W
Block R
Block R
Block R
Block R
Block R
Block R
Block R
Block R
Block R
Block R
Block R
Block R
Description
Read back data length, fixed to 51.
Mantissa of VH1.
Mantissa of VH2.
Mantissa of VH3.
Mantissa of VH4.
Mantissa of VP1.
Mantissa of VP2.
Mantissa of VP3.
Mantissa of VP4.
Mantissa of VP5.
Mantissa of VP6.
Mantissa of VP7.
Rev. C | Page 59 of 68
�ADM1266
Byte
[24:23]
[26:25]
[28:27]
[30:29]
[32:31]
[34:33]
35
36
37
38
39
40
41
42
43
44
45
46
47
48
49
50
51
Bit Name
MANTISSA_VP8
MANTISSA_VP9
MANTISSA_VP10
MANTISSA_VP11
MANTISSA_VP12
MANTISSA_VP13
VOUT_MODE_VH1
VOUT_MODE_VH2
VOUT_MODE_VH3
VOUT_MODE_VH4
VOUT_MODE_VP1
VOUT_MODE_VP2
VOUT_MODE_VP3
VOUT_MODE_VP4
VOUT_MODE_VP5
VOUT_MODE_VP6
VOUT_MODE_VP7
VOUT_MODE_VP8
VOUT_MODE_VP9
VOUT_MODE_VP10
VOUT_MODE_VP11
VOUT_MODE_VP12
VOUT_MODE_VP13
Data Sheet
R/W
Block R
Block R
Block R
Block R
Block R
Block R
Block R
Block R
Block R
Block R
Block R
Block R
Block R
Block R
Block R
Block R
Block R
Block R
Block R
Block R
Block R
Block R
Block R
Description
Mantissa of VP8.
Mantissa of VP9.
Mantissa of VP10.
Mantissa of VP11.
Mantissa of VP12.
Mantissa of VP13.
VOUT_MODE of VH1.
VOUT_MODE of VH2.
VOUT_MODE of VH3.
VOUT_MODE of VH4.
VOUT_MODE of VP1.
VOUT_MODE of VP2.
VOUT_MODE of VP3.
VOUT_MODE of VP4.
VOUT_MODE of VP5.
VOUT_MODE of VP6.
VOUT_MODE of VP7.
VOUT_MODE of VP8.
VOUT_MODE of VP9.
VOUT_MODE of VP10.
VOUT_MODE of VP11.
VOUT_MODE of VP12.
VOUT_MODE of VP13.
PDIO_STATUS
This command block reads the status of the PDIOs.
Table 100. Register 0xE9—PDIO_STATUS (for Block R)
Byte
0
[2:1]
Byte Name
Data length
PDIO status
R/W
Block R
Block R
Description
Number of bytes of data for this block read, fixed to 2.
Input or output status of all the PDIOs. Refer to Table 101.
Table 101. Two Bytes of Data for PDIO_STATUS
Bits
15
14
13
12
11
10
9
8
7
6
5
4
3
2
1
0
Bit Name
PDIO16_STATUS
PDIO15_STATUS
PDIO14_STATUS
PDIO13_STATUS
PDIO12_STATUS
PDIO11_STATUS
PDIO10_STATUS
PDIO9_STATUS
PDIO8_STATUS
PDIO7_STATUS
PDIO6_STATUS
PDIO5_STATUS
PDIO4_STATUS
PDIO3_STATUS
PDIO2_STATUS
PDIO1_STATUS
R/W
R
R
R
R
R
R
R
R
R
R
R
R
R
R
R
R
Description
PDIO16 pin status.
PDIO15 pin status.
PDIO14 pin status.
PDIO13 pin status.
PDIO12 pin status.
PDIO11 pin status.
PDIO10 pin status.
PDIO9 pin status.
PDIO8 pin status.
PDIO7 pin status.
PDIO6 pin status.
PDIO5 pin status.
PDIO4 pin status.
PDIO3 pin status.
PDIO2 pin status.
PDIO1 pin status.
Rev. C | Page 60 of 68
�Data Sheet
ADM1266
GPIO_STATUS
This command block reads the status of the GPIOs.
Table 102. Register 0xEA—GPIO_STATUS (for Block R)
Byte
0
[2:1]
Byte Name
Data length
GPIO status
R/W
Block R
Block R
Description
Number of bytes of data for this block read, fixed to 2.
Input or output status of all the GPIOs. Refer to Table 103.
Table 103. Two Bytes of Data for GPIO_STATUS
Bits
13
12
11
10
9
8
7
6
5
4
3
2
1
0
Bit Name
Reserved
Reserved
GPIO7_STATUS
GPIO6_STATUS
GPIO5_STATUS
GPIO4_STATUS
GPIO9_STATUS
GPIO8_STATUS
Reserved
Reserved
Reserved
GPIO3_STATUS
GPIO2_STATUS
GPIO1_STATUS
R/W
R
R
R
R
R
R
R
R
R
R
R
R
R
R
Description
Reserved.
Reserved.
GPIO7 pin status.
GPIO6 pin status.
GPIO5 pin status.
GPIO4 pin status.
GPIO9 pin status.
GPIO8 pin status.
Reserved.
Reserved.
Reserved.
GPIO3 pin status.
GPIO2 pin status.
GPIO1 pin status.
DAC_CODE_CONFIGURATION
This command block reads/writes the DAC code in an open-loop margining configuration.
Table 104. Register 0xEB—DAC_CODE_CONFIGURATION (for Block WR)
Byte
0
1
Byte Name
Parameter length
DAC index parameter
R/W
Block W
Block W
2
0
1
[17:2]
Data length
Data length
Code parameter
DAC code
Block W
Block R
Block R
Block R
Description
Parameter data length, fixed to 2.
0000 = DAC1.
0001 = DAC2.
0010 = DAC3.
0011 = DAC4.
0100 = DAC5.
0101 = DAC6.
0110 = DAC7.
0111 = DAC8.
1000 = DAC9.
The length of DAC code configuration data to read back from the ADM1266.
The length of DAC code configuration data the ADM1266 returns.
Refer to Table 106.
DAC code. Maximum = 16 DAC codes, N = 17 maximum.
Rev. C | Page 61 of 68
�ADM1266
Data Sheet
Table 105. Register 0xEB—DAC_CODE_CONFIGURATION (for Block W)
Byte
0
1
Byte Name
Data length
DAC index
R/W
Block W
Block W
2
[18:3]
Code parameter
DAC Code
Block W
Block W
Description
Number of bytes of data to write to the ADM1266.
0000 = DAC1.
0001 = DAC2.
0010 = DAC3.
0011 = DAC4.
0100 = DAC5.
0101 = DAC6.
0110 = DAC7.
0111 = DAC8.
1000 = DAC9.
Refer to Table 106.
DAC code, maximum = 16 DAC codes, N = 18 maximum.
Table 106. One Byte of Data for Code Parameter
Bits
[7:4]
Bit Name
Code index
R/W
R/W
[3:1]
Range
R/W
0
DAC enable
R/W
Description
A maximum of 16 DAC codes can be programmed to the ADM1266. This index selects which
code to load to the DAC.
DAC range.
Minimum Voltage
Maximum Voltage
Bits[3:1]
Midcode Voltage (V) Output (V)
Output (V)
0x00 = 3’b000
0.506
0.202
0.808
0x01 = 3’b001
0.607
0.303
0.909
0x02 = 3’b010
0.809
0.505
1.111
0x03 = 3’b011
1.011
0.707
1.313
0x04 = 3’b100
1.263
0.959
1.565
DAC enable/disable.
RTS_CONFIGURATION
The RTS_CONFIGUARTION command either sets or reads the real time stamp (RTS) configuration.
Table 107. Register 0xEC—RTS_CONFIGURATION
Bits
[15:2]
1
0
Bit Name
Reserved
RTS enable
XTAL enable
R/W
R
R/W
R/W
Description
Reserved.
0 is disable RTS, 1 is enable RTS.
0 is external crystal oscillator disabled, 1 is external crystal oscillator enabled.
Rev. C | Page 62 of 68
�Data Sheet
ADM1266
STATUS_MFR_SPECIFIC_2
The STATUS_MFR_SPECIFIC_2 command returns two bytes data with contents as shown in Table 108.
Table 108. Register 0xED—STATUS_MFR_SPECIFIC_2
Bits
15
Bit Name
BKUP_PASSWORD_CRC_FAULT
R/W
R
14
BKUP_FIRMWARE_CRC_FAULT
R
13
12
BKUP_PROJECT_CRC_FAULT
BKUP_ABCONFIG_CRC_FAULT
R
R
11
10
9
8
7
6
5
4
3
2
1
0
MAIN_PASSWORD_CRC_FAULT
MAIN_FIRMWARE_CRC_FAULT
MAIN_PROJECT_CRC_FAULT
MAIN_ABCONFIG_CRC_FAULT
BKUP_IAP_CRC_FAULT
BKUP_MINI_IAP_CRC_FAULT
MAIN_IAP_CRC_FAULT
MAIN_MINI_IAP_CRC_FAULT
AVDD_UVLO_FAULT
HARD_FAULT
AB_SYNC_FAULT
RUNNING_BACKUP_PROJECT
R
R
R
R
R
R
R
R
R
R
R
R
Description
0 means backup password CRC check passed, 1 means backup password CRC check
failed.
0 means backup firmware CRC check passed, 1 means backup firmware CRC check
failed.
0 means backup project CRC check passed, 1 means backup project CRC check failed.
0 means backup ABConfig CRC check passed, 1 means backup ABConfig CRC check
failed.
0 means main password CRC check passed, 1 means main password CRC check failed.
0 means main firmware CRC check passed, 1 means main firmware CRC check failed.
0 means main project CRC check passed, 1 means main project CRC check failed.
0 means main ABConfig CRC check passed, 1 means main ABConfig CRC check failed.
0 means backup IAP CRC check passed, 1 means the main IAP CRC check failed.
0 means backup mini IAP CRC check passed, 1 = main mini IAP CRC check failed.
0 means main IAP CRC check passed, 1 = main IAP CRC check failed.
0 means main mini IAP CRC check passed, 1 = main mini IAP CRC check failed.
0 means no AVDD UVLO fault, 1 means AVDD UVLO fault occurred.
0 means no hard fault, 1 means hard fault occurred.
0 means sync pass, 1 means sync fail.
0 means main project, 1 means backup project.
WDT_CONFIGURATION
This command is used to set the watch dog timer.
Table 109. Register 0xEE—WDT_CONFIGURATION
Bits
[15:8]
[7:1]
0
Bit Name
Timeout
Reserved
Enable
R/W
R/W
Description
Timeout value in seconds
R/W
0 is watchdog disabled, 1 is watchdog enabled
Rev. C | Page 63 of 68
�ADM1266
Data Sheet
PDIO_OUTPUT_STATE
The following register is only available in Firmware Version 1.15.4 and higher.
This command block is used to drive the output of PDIOs.
Table 110. Register 0xF0—PDIO_OUTPUT_STATE (for Block W)
Byte
0
1
Byte Name
Data length
PDIO index
R/W
Block W
Block W
2
PDIO state
Block W
Description
Number of bytes of data for this block write, fixed to 2.
PDIO index.
00000 = PDIO1.
00001 = PDIO2.
00010 = PDIO3.
00011 = PDIO4.
00100 = PDIO5.
00101 = PDIO6.
00110 = PDIO7.
00111 = PDIO8.
01000 = PDIO9.
01001 = PDIO10.
01010 = PDIO11.
01011 = PDIO12.
01100 = PDIO13.
01101 = PDIO14.
01110 = PDIO15.
01111 = PDIO16.
1 to drive PDIO output state to high and 0 to drive PDIO output state to low.
Table 111. Register 0xF0—PDIO_OUTPUT_STATE (for Block WR)
Byte
0
1
Byte Name
Data length
PDIO index
R/W
Block W
Block W
0
1
Data length
PDIO state
Block R
Block R
Description
Number of bytes of data for this block write, fixed to.
PDIO index.
00000 = PDIO1.
00001 = PDIO2.
00010 = PDIO3.
00011 = PDIO4.
00100 = PDIO5.
00101 = PDIO6.
00110 = PDIO7.
00111 = PDIO8.
01000 = PDIO9.
01001 = PDIO10.
01010 = PDIO11.
01011 = PDIO12.
01100 = PDIO13.
01101 = PDIO14.
01110 = PDIO15.
01111 = PDIO16.
The length of data returned by the ADM1266.
1 means PDIO output state is driven high and 0 means PDIO output state is driven low.
Rev. C | Page 64 of 68
�Data Sheet
ADM1266
GPIO_OUTPUT_STATE
The following register is only available in Firmware version 1.15.4 and higher.
This command block is used to drive the output of GPIOs.
Table 112. Register 0xF1—GPIO_OUTPUT_STATE (for Block W)
Byte
0
1
2
Byte Name
Data length
GPIO index
GPIO state
R/W
Block W
Block W
Block W
Description
Number of bytes of data for this block write, fixed to 2.
GPIO index. Refer to Table 90.
1 to drive GPIO output state to high and 0 to drive GPIO output state to low.
Table 113. Register 0xF1—GPIO_OUTPUT_STATE (for Block WR)
Byte
0
1
0
1
Byte Name
Data length
GPIO index
Data length
GPIO state
R/W
Block W
Block W
Block R
Block R
Description
Number of bytes of data for this block write, fixed to 2.
GPIO index. Refer to Table 90.
The length of data returned by the ADM1266.
1 means GPIO output state is driven high and 0 means GPIO output state is driven low.
REFRESH_CONFIGURATION
This command is used to set refresh configuration and get the refresh status.
Table 114. Register 0xF4—REFRESH_CONFIGURATION (for Block R)
Byte
0
1
Byte Name
Parameter length
Parameter
R/W
Block W
Block W
0
[8:1]
Data length
Data
Block R
Block R
Description
Parameter data length—fixed to 1.
0x00: get auto-refresh interval.
0x01: get auto-refresh enabled/disabled status.
Others: get all status, including refresh enable/disable, autorefresh enable/disable, refresh
times, recalculate CRC error times, autorefresh interval.
Number of bytes of data for this block read (1 to 8).
Parameters:
0x00: get autorefresh interval, Bytes[2:1] are the autorefresh interval.
0x01: get autorefresh enabled/disabled status. If Byte 1 is 0, autorefresh is disabled.
Others: get all status, including refresh enable/disable, autorefresh enable/disable, refresh
times, recalculate CRC error times, autorefresh interval, Bytes[8:1]:
Byte
Byte Name
Description
1
Refresh status
0: refresh is done.
1: refresh is running.
2
Autorefreshing
0: autorefresh is disabled.
1: autorefresh is enabled.
[4:3]
Refresh count
Refresh times.
[6:5]
Recalculate error count Recalculate error times.
[8:7]
Autorefresh interval
Autorefresh interval, unit: day.
Table 115. Register 0xF4—REFRESH_CONFIGURATION (for BLOCK W)
Byte
0
1
Byte Name
Data length
Configuration
R/W
Block W
Block W
[3:2]
Data
Block W
Description
Number of bytes of data for this block write. The range is 2 to 3.
0x00: set autorefresh interval, unit: day, Byte[3:2] is the interval.
0x01: enable/disable autorefresh. If Byte 2 is 0, disable autorefresh.
Data
Rev. C | Page 65 of 68
�ADM1266
Data Sheet
REFRESH_FLASH
This command is used to set refresh configuration.
Table 116. Register 0xF5—REFRESH_FLASH (for Block W)
Byte
[0]
[1]
Byte Name
Data Length
Configuration
R/W
Block W
Block W
Description
Number of bytes of data for this block write (fixed to 1).
0x00: Project(including Reg, Sequence, User, System, Logic, Password, AB config)
0x01: Project + Firmware + IAP
0x02: Project + Firmware + IAP + mini IAP
HITLESS_TIMEOUT
This command is used to read or write the hitless timeout value.
Table 117. Register 0xF6—HITLESS_TIMEOUT
Byte
0
[2:1]
Byte Name
Data length
Timeout value
R/W
Block R/W
Block W
Description
Parameter data length, fixed to 2.
Timeout value; unit: sec.
VAR_VALUE
This command is used to read the variables value of sequence.
Table 118. Register 0xF7—VAR_VALUE
Byte
0
1
0
[N:1]
Byte Name
Data length
Index
Data length
Value
R/W
Block W
Block W
Block R
Block R
Description
Parameter data length; fixed to 1.
Variables index, 0xFF for all values.
Size of data.
Data. If the index is 0 to 3, N = 1. If the index is 0xFF, N = 4.
The following write options are only available for Firmware Version 1.15.4 and higher.
This command is used to write to the variables of sequence.
Table 119. Register 0xF7—VAR_VALUE
Byte
0
1
[N:2]
Byte Name
Data length
Index
Value
R/W
Block W
Block W
Block W
Description
Parameter data length; fixed to 1.
Variables index, 0xFF for all values.
Data. If the index is 0 to 3, N = 2. If the index is 0xFF, N = 5.
MEMORY_CONFIGURATION
This command reads/writes the main/backup memory configuration by the GUI.
Table 120. Register 0xF8—MEMORY_CONFIGURATION
Byte
0
[2:1]
3
Byte Name
Data length
Data
CRC
R/W
Block R/W
Block R/W
Block R/W
Description
Size of data for this block read/write, fixed to 3.
Main/backup memory configuration.
CRC-8 of main/backup memory configuration data.
MEMORY_RECALCULATE_CRC
This command recalculates both the main and backup memory CRC.
Table 121. Register 0xF9—MEMORY_RECALCULATE_CRC
Bits
[15:0]
Bit Name
RECALCULATE_CRC
R/W
W
Description
Write 100 (hexadecimal) to recalculate the CRC of all the sections of the memory
Rev. C | Page 66 of 68
�Data Sheet
ADM1266
SWITCH_MEMORY
This command switches between the configure main memory and configure backup memory.
Table 122. Register 0xFA—SWITCH_MEMORY (for Block W)
Byte
0
1
Bit Name
Data length
Memory index
R/W
Block W
Block W
Description
Number of bytes of data for this block write, fixed to 1.
Memory index. 0 for main memory, 1 for backup memory.
ERASE_MEMORY
This command erases the main memory or backup memory.
Table 123. Register 0xFB—ERASE_MEMORY (for Block W)
Byte
0
1
Bit Name
Data length
Memory index
R/W
Block W
Block W
Description
Number of bytes of data for this block write, fixed to 1.
Memory index. 0 for main memory, 1 for backup memory.
UPDATE_FW
The command updates the firmware.
Table 124. Register 0xFC—UPDATE_FW
Bits
[15:0]
Bit Name
UPDATE_FW
Type
W
Description
Write 100 (hexadecimal) to jump to bootloader and start updating firmware
FW_PASSWORD
This command changes the password, locks/unlocks the device
Table 125. Register 0xFD—FW_PASSWORD (for Block W)
Byte
0
[1:16]
17
Byte Name
Data length
Password
Command
R/W
Block W
Block W
Block W
Description
Number of bytes of data for this block write, fixed to 17.
16-byte password.
Password command (in decimal code).
1 = change password.
2 = unlock device.
3 = lock device.
Rev. C | Page 67 of 68
�ADM1266
Data Sheet
OUTLINE DIMENSIONS
DETAIL A
(JEDEC 95)
0.30
0.25
0.20
P IN 1
IN D IC ATO R AR E A OP TI O N S
(SEE DETAIL A)
49
64
1
48
0.50
BSC
*7.60
7.50 SQ
7.40
EXPOSED
PAD
33
TOP VIEW
0.80
0.75
0.70
SIDE VIEW
PKG-006974
SEATING
PLANE
0.50
0.40
0.30
16
32
17
BOTTOM VIEW
0.36 REF
7.50 REF
0.05 MAX
0.02 NOM
COPLANARITY
0.08
0.20 REF
*COMPLIANT TO JEDEC STANDARDS MO-220-WMMD-4
WITH EXCEPTION TO EXPOSED PAD DIMENSION
02-08-2021-A
PIN 1
INDICATOR
AREA
9.10
9.00 SQ
8.90
Figure 30. 64-Lead Lead Frame Chip Scale Package [LFCSP]
9 mm × 9 mm Body and 0.75 mm Package Height
(CP-64-23)
Dimensions shown in millimeters
ORDERING GUIDE
Model 1
ADM1266ACPZ
ADM1266ACPZ-R7
ADM1266-EVALZ
1
Temperature Range
−40°C to +105°C
−40°C to +105°C
Package Description
64-Lead Lead Frame Chip Scale Package [LFCSP]
64-Lead Lead Frame Chip Scale Package [LFCSP]
Evaluation Board
Z = RoHS Compliant Part.
I2C refers to a communications protocol originally developed by Philips Semiconductors (now NXP Semiconductors).
©2018–2021 Analog Devices, Inc. All rights reserved. Trademarks and
registered trademarks are the property of their respective owners.
D15579-6/21(C)
Rev. C | Page 68 of 68
Package Option
CP-64-23
CP-64-23
�