Board for the AD7705/06 3V / 5V,
a 450Evaluation
µA, 2/3-Channel 16-Bit, Sigma Delta ADC
EVAL-AD7705EB/EVAL-AD7706EB
FEATURES
Full-Featured Evaluation Board for the AD7705/06
On-Board Reference and Digital Buffers
Various Linking Options
PC Software for Control of AD7705/06
On-Board Patchwork Area
evaluation board which allows the user to easily program
the AD7705/06.
Other c omponents on the AD7705/06 Evaluation Board
include an AD780 (a precision 2.5V reference), an AD589
(a 1.23V precision bandgap reference), a 4.9152 MHz crystal
and digital buffers to buffer signals to and from the PC.
INTRODUCTION
OPERATING THE AD7705/06 EVALUATION BOARD
This Technical Note describes the evaluation board for the
AD7705/06, 450 µA, 2/3-Channel
16-Bit, Sigma Delta
ADCs. The AD7705/6 are complete analog front end for
low frequency measurement applications. These 2/3-channel
devices can accept low level input signals directly from a
transducer and produce a serial digital output. They employ
a sigma-delta conversion technique to realize up to 16 bits
of no missing codes performance. The selected input signal
is applied to a proprietary programmable gain front end based
around an analog modulator. The modulator output is
processed by an on-chip digital filter. The first notch of this
digital filter can be programmed via an on-chip control
register allowing adjustment of the filter cutoff and output
update rate. Full data on the AD7705/06 is available in the
AD7705/06 datasheet available from Analog Devices and
should be consulted in conjunction with this Technical Note
when using the evaluation board.
Power Supplies
This evaluation board has two analog power supply inputs:
AV DD and AGND. An external +5V or +3V must be applied
between these inputs which is used to provide the V DD for
the AD7705/06 and the reference.
DGND and DV DD
connections are also available. The DV DD is used to provide
the DV DD for the digital circuitry. DGND and AGND are
connected together at the AD7705/06 GND pin. Therefore,
it is recommended not to connect AGND and DGND
elsewhere in the system.
All power supplies are decoupled to their respective grounds.
DV DD is decoupled using a 10µF tantalum capacitor and
0.1µF ceramic capacitor at the input to the evaluation board.
It is again decoupled using 0.1µF capacitors as close as
possible to each logic device. AV DD is decoupled using a
10µF tantalum capacitor and 0.1µF ceramic capacitor as
close as possible to the AD7705/06 and also at the reference.
The evaluation board interfaces to the parallel port of an
IBM compatible PC.
Software is available with the
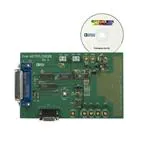
Figure 1: Evaluation Board Setup
DVDD
DGND
AVDD
AGND
VREF-
VREF+
ON-BOARD
REFERENCE
AVDD
AGND
36-WAY
CENTRONICS
CONNECTOR
BUFFERS
9-WAY D-TYPE CONNECTOR
AD7705
ADC
C RY ST AL
Information furnished by Analog Devices is believed to be accurate and
reliable. However, no responsibility is assumed by Analog Devices for
its use; nor for any infringements of patents or other rights of third parties
which may result from its use. No license is granted by implication or
otherwise under any patent or patent rights of Analog Devices.
MCLK IN
AIN2+
AIN1+ AIN1-
AIN2-
One Technology Way; P.O.BOX 9106; Norwood, MA 02062-9106 U.S.A.
Tel: 617/329-4700
Twx: 710/394-6577
Telex: 174059
Cables: ANALOG NORWOOD MASS
Rev. A
�EVAL-AD7705EB/EVAL-AD7706EB
LINK AND SWITCH OPTIONS
There are eight link options which must be set for the required operating setup before using the evaluation board.
functions of these link options are outlined below.
The
Link No. Function
LK1
This option selects the master clock source for the AD7705/06. The master clock is generated by the onboard crystal or from an external source via SKT11. This is a double link and both links must be moved
together for the correct operation of the evaluation board.
With both links in position "A", the external clock option is selected and an external clock applied to SKT11
is routed to the MCLKIN pin of the AD7705/06.
With both links in position "B", the on-board crystal is selected to provide the master clock to the AD7705/
06.
LK2
LK3
This link is used to select the on-board reference.
With this link in position "A", the AD780 is selected as the on-board reference. This provides a 2.5V
which is suitable for the AD7705/06 operating at +5V.
reference
With this link in position "B", the AD589 is selected as the on-board reference. This provides a 1.23V
which is suitable for the AD7705/06 operating at +3V.
reference
This link is used to select the reference source for the REFIN(-) input of the AD7705/06.
With LK3 in position "A", the REFIN(-) pin is connected to SKT10. An external voltage applied to SKT10
can now be used as the REFIN(-) for the AD7705/06.
With LK3 in position"B", the REFIN(-) pin is connected directly to AGND.
LK4
This link is used to select the reference source for the REFIN(+) input of the AD7705/06.
With LK5 in position "A", the REFIN(+) pin is connected to the output of the on-board reference.
With LK5 in position "B", the REFIN(+) pin is connected directly to AV DD .
With LK5 in position "C", the REFIN(+) pin is connected to SKT9. An external voltage applied to SKT9
can now be used as the REFIN(+) for the AD7705/06.
LK5
This link is in series with the AIN1+/(AIN2) input of the AD7705/(06).
With this link in place, an analog input signal applied to SKT3 is routed directly to the AIN1+/(AIN2) pin of
the AD7705/(06).
This link may be removed so that the analog input signal at SKT3 can be connected to the user patchwork
area for signal conditioning before being applied to the AD7705/06.
LK6
This link is in series with the AIN1-/(COMMON) input of the AD7705/(06).
With this link in place, an analog input signal applied to SKT4 is routed directly to the AIN1-(COMMON)
pin of the AD7705/(06).
This link may be removed so that the analog input signal at SKT4 can be connected to the user patchwork
area for signal conditioning before being applied to the AD7705/06.
LK7
This link is in series with the AIN2+/(AIN1) input of the AD7705/(06).
With this link in place, an analog input signal applied to SKT5 is routed directly to the AIN2+/(AIN1) pin of
the AD7705/(06).
This link may be removed so that the analog input signal at SKT5 can be connected to the user patchwork
area for signal conditioning before being applied to the AD7705/06.
LK8
This link is in series with the AIN2-/(AIN3) input of the AD7705/(06).
With this link in place, an analog input signal applied to SKT6 is routed directly to the AIN2-/(AIN3) pin of
the AD7705/(06).
This link may be removed so that the analog input signal at SKT6 can be connected to the user patchwork
area for signal conditioning before being applied to the AD7705/06.
- 2 -
Rev. A
�EVAL-AD7705EB/EVAL-AD7706EB
SET-UP
CONDITIONS
Care should be taken before applying power and signals to the evaluation board to ensure that all link positions are as
per the required operating mode. Table 1 shows the position in which all the links are set when the evaluation board is
sent out.
Table 1: Initial Link and Switch Positions
Link No. Position Function
LK1
B+B
Both links in position "B" to select the on-board crystal as the master clock for the AD7705/06.
LK2
A
This selects +2.5V as the on-board reference.
LK3
A
This connects the REFIN(-) input of the AD7705/06 to AGND.
LK4
A
The on-board reference provides the reference voltage for the REFIN(+) input of the AD7705/06.
LK5
IN
The AIN1+ pin on the AD7705/06 is tied to the analog input sockets SKT3.
LK6
IN
The AIN1- pin on the AD7705/06 is tied to the analog input sockets SKT4.
LK7
IN
The AIN2+ pin on the AD7705/06 is tied to the analog input sockets SKT5.
LK8
IN
The AIN2- pin on the AD7705/06 is tied to the analog input sockets SKT6.
EVALUATION
BOARD
INTERFACING
Interfacing to the evaluation board is via either a 9-way d-type connector, SKT1 or a 36-way centronics connector, SKT2.
The pin-out for the SKT1 connector is shown in Fig. 2 and its pin designations are given in Table 2.
The pin-out for
the SKT2 connector is shown in Fig. 3 and its pin designations are given in Table 3.
SKT2 is used to connect the evaluation board to the parallel (printer) port of a PC. Connection is via a standard printer
cable. SKT1 is used to connect the evaluation to any other system. The evaluation board should be powered up before
a cable is connected to either of these connectors.
1
2
6
3
7
4
8
5
9
Fig. 2: Pin Configuration for the 9-Way D-Type Connector, SKT1.
Table 2.:
SKT1 Pin Description
1
1
SCLK
Serial Clock. The signal on this pin is buffered before being applied to the SCLK pin of the AD7705/06.
2
DRDY
Logic output. This is a buffered version of the signal on the AD7705/06 DRDY pin
Chip Select. The signal on this pin is buffered before being applied to the C S pin on the AD7705/06.
3
CS
4
RESET
Reset Input. Data applied to this pin is buffered before being applied to the AD7705/06 RESET pin.
5
DIN
Serial Data Input. Data applied to this pin is buffered before being applied to the AD7705/06 DIN pin.
6
DGND
Ground reference point for the digital circuitry. Connects to the DGND plane on the Evaluation board.
7
DOUT
Serial Data Output. This is a buffered version of the signal on the AD7705/06 DOUT pin.
8
D VDD
Digital Supply Voltage. If no voltage is applied to the board's DV D D input terminal then the voltage applied
to this pin will supply the DVD D for the digital buffers.
9
NC
Not Connected.
Note
1
An explanation of the AD7705/06 functions mentioned here is given in Table 3 overleaf as part of the SKT2 pin descriptions.
- 3 -
Rev. A
�EVAL-AD7705EB/EVAL-AD7706EB
18
1
36
19
Fig. 3: 36-way Centronics (SKT2) Pin Configuration
Table 3: 36-Way Connector Pin Description
1
NC
No Connect. This pin is not connected on the evaluation board.
2
DIN
Serial Data Input. Data applied to this pin is buffered before being applied to the AD7705/06
DIN pin. Serial Data Input with serial data being written to the input shift register on the part.
Data from this input shift register is transferred to the setup register, clock register or
communications register depending on the register selection bits of the Communications Register.
3
RESET
Reset Input. The signal on this pin is buffered before being applied to the RESET pin of the
AD7705/06. RESET is an active low input which resets the control logic, interface logic, calibration
coefficients, digital filter and analog modulator of the part to power-on status.
4
CS
Chip Select. The signal on this pin is buffered before being applied to the C S pin of the AD7705/
06. C S is an active low Logic Input used to select the AD7705/06. With this input hard-wired
low, the AD7705/06 can operate in its three-wire interface mode with SCLK, DIN and DOUT
used to interface to the device. C S can be used to select the device in systems with more than
one device on the serial bus or as a frame synchronization signal in communicating with the AD7705/
06.
5
SCLK
Serial Clock. The signal on this pin is buffered before being applied to the SCLK pin of the AD7705/
06. An external serial clock is applied to this input to read/write serial data from/to the AD7705/
06. This serial clock can be continuous with all data transmitted in a continuous train of pulses.
Alternatively, it can be non-continuous with the information being transmitted to the AD7705/
06 in smaller batches of data.
6-8
NC
No Connect. These pins are not connected on the evaluation board.
9
D V DD
Digital Supply Voltage. This provides the supply voltage for the buffer chips, U3-U5, which buffer
the signals between the AD7705/06 and SKT1/SKT2.
10
DRDY
Logic output. This is a buffered version of the signal on the AD7705/06 DRDY pin. A logic low
on this output indicates that a new output word is available from the AD7705/06 data register.
The DRDY pin will return high upon completion of a read operation of a full output word. If
no data read has taken place between output updates, the DRDY line will return high for 500 x
CLK IN cycles prior to the next output update. While
DRDY is high, a read operation should
not be attempted to avoid reading from the data register as it is being updated. The DRDY line
will return low again when the update has taken place. DRDY is also used to indicate when the
AD770-55 has completed its on-chip calibration sequence.
11-12
NC
No Connect. These pins are not connected on the evaluation board.
13
DOUT
Serial Data Output. This is a buffered version of the signal on the AD7705/06 DOUT pin. Serial
Data Output with serial data obtained from the output shift register on the AD7705/06. The output
shift register can contain information from the setup register, communications register, clock register
or data register depending on the register selection bits of the Communications Register.
14-18
NC
No Connect. These pins are not connected on the evaluation board.
19-30
DGND
Ground reference point for digital circuitry. Connects to the DGND plane on the evaluation board.
31-36
NC
No Connect. These pins are not connected on the evaluation board.
- 4 -
Rev. A
�EVAL-AD7705EB/EVAL-AD7706EB
SOCKETS
CONNECTORS
There are nine sockets relevant to the operation of the
AD7705/06 on this evaluation board. The functions of these
sockets are outlined in Table 4.
There are two connectors on the AD7705/06 evaluation board
as outlined in Table 5.
Table 5. Connector Functions
Table 4. Socket Functions
Connector Functions
Socket
Function
SKT1
9-way D-Type connector used to interface to other
systems.
SKT2
J1
36-way centronics connector used to interface to
PC via parallel printer port.
PCB Mounting Terminal Block. The Digital
Power Supply to the Evaluation Board is
provided via this Connector if it is not being
supplied via SKT1 or SKT2.
J2
SKT3
Sub-Miniature BNC (SMB) Connector. The analog
input signal for the AIN1+(AIN2) input of the
AD7705/(06) is applied to this socket.
PCB Mounting Terminal Block. The Analog
Power Supply to the Evaluation Board must be
provided via this Connector.
SWITCHES
SKT4
Sub-Miniature BNC (SMB) Connector. The analog
input signal for the AIN1-(COMMON) input of the
AD7705/(06) is applied to this socket.
SKT5
Sub-Miniature BNC (SMB) Connector. The analog
input signal for the AIN2+(AIN1) input of the
AD7705/(06) is applied to this socket.
SKT6
Sub-Miniature BNC (SMB) Connector. The analog
input signal for the AIN2-(AIN3) input of the
AD7705/(06) is applied to this socket.
SKT9
Sub-Miniature BNC (SMB) Connector. The
reference voltage for the REFIN- input of the
AD7705/06 is applied to this socket when the
board is configured for an externally applied
reference voltage.
SKT10
Sub-Miniature BNC (SMB) Connector. The
reference voltage for the REFIN+ input of the
AD7705/06 is applied to this socket when the
board is configured for an externally applied
reference voltage.
SKT11
Sub-Miniature BNC (SMB) Connector. The master
clock signal for the MCLKIN input of the AD7705/
06 is applied to this socket when the board is
configured for an externally applied master
clock.The AD7705/06 can be operated with
internal clock frequencies in the range 500kHz to
5MHz.
There is one switch on the AD7705/06 Evaluation board.
SW1 is a push-button reset switch. Pushing this switch
activates the active low RESET input on the AD7705/06
which resets the control logic, interface logic, calibration
coefficients, digital filter and analog modulator of the part
to power-on status.
- 5 -
Rev. A
�EVAL-AD7705EB/EVAL-AD7706EB
AD7705 SOFTWARE DESCRIPTION
The AD7705/06 evaluation board is shipped with a 3½" disk containing software that can be installed onto a standard
PC to control the AD7705/06.
The software uses the printer port of the PC to communicate with the AD7705/06, so a Centronics printer cable is used
to connect the PC to the evaluation board.
Software Requirements and Installation
The software runs under Windows 3.1 or Windows 95 and typically requires 4Mb of RAM.
To install the software the user should start Windows and use either File Manager (in Windows 3.1) or Windows Explorer
(in Windows 95) to locate the file called SETUP.EXE on the floppy disk. Double clicking on this file will start the installation
procedure. The user is prompted for a destination directory which is "C:\AD7705" by default. Once the directory has
been selected the installation procedure will copy the files into the relevant directories on the hard drive. The installation
program will create a Program Group called "Analog Devices" on the desktop for Windows 3.1 or in the "Start" taskbar
for Windows95. Once the installation procedure is complete the user can double click on the AD7705 icon to start the
program.
Features of the Software
1 . The software will allow the user to write to and read from all the registers of the AD7705.
2. Data can be read from the AD7705 and displayed or stored for later analysis.
3. The data that has been read can be exported to other packages such as Mathcad or Excel for further analysis.
Fig. 4. The Main Screen
- 6 -
Rev. A
�EVAL-AD7705EB/EVAL-AD7706EB
What follows is a description of the various windows that appear while the software is being used. Fig. 4. shows the
main screen that appears once the program has started. The printer port that will be used by the software is shown in
the top left of the screen. There are three possible printer ports that can be handled by the software, LPT1 (standard),
LPT2 and PRN. In the event that the PC has two printer ports the software will always select the one which is set as
default by the PC. The user can change to the other printer port by using the "Select Printer Port" button on the main
screen. A brief description of each of the buttons on the main screen follows:
Program
Read
AD7705
Data
Allows the user to read a number of samples from the AD7705. These samples can be stored for
further analysis or just displayed for reference.
Noise
Analysis
Reset
AD7705
Read
From
Write
To
Select
Allows the user to program the selected register for a specific channel of the AD7705.
Allows the user to perform noise analysis on the data that has been read in.
Allows the user to perform a reset on the AD7705.
File
File
Printer
Allows the user to read in previously stored data for display or analysis.
Allows the user to write the current set of data to a file for later use.
Port
Allows the user to change which printer port the software uses (only valid for PCs with more
than one printer port).
About
Provides information about the version of software being used.
Quit
Ends the program
The Program AD7705 Screen
Fig. 5. The Program AD7705 Screen
- 7 -
Rev. A
�EVAL-AD7705EB/EVAL-AD7706EB
Fig. 5. shows the screen that appears when the Program AD7705 button is selected. This screen allows the user to select
which register is to be programmed. Before selecting any of the buttons on this screen the user should first choose the
channel that is to be used for all the subsequent operations. The state of the Standby bit should also be selected here.
The Setup Register Screen
Fig. 6. shows the Setup Register screen. When the screen is loaded the software will read the current contents from the
Setup Register of the AD7705 and change the option buttons accordingly. The setup register is used to change the operating
mode of the AD7705, change the gain setting, set the part to bipolar or unipolar mode, set the part to buffered or unbuffered
mode and select the state of the FSYNC bit. Every time a change is made the software will write the new conditions to
the AD7705 and read back the setup register for confirmation.
Fig. 6. The Setup Screen
When the user selects a calibration, the software will start the calibration by writing to the AD7705 and then monitor
the DRDY. A falling edge of the DRDY pin will indicate that the calibration has been completed. After a calibration the
AD7705 returns to its normal operating mode and the program updates the screen to indicate this. The default status for
the setup register on power-up is 01 (hex).
The Clock Register Screen
Fig. 7. shows the Clock Register setup screen. The Clock Register is used to control the output update rate of the AD7705.
The CLKDIS bit is used to control the operation of the MCLKOUT pin.
A logic 0 in this bit allows the AD7705 to function in its normal operating mode when a crystal oscillator is used as the
clock source.
A logic 1 disables the MCLKOUT from appearing at the pin. When disabled the MCLKOUT pin is forced low. If the
AD7705 is using a crystal oscillator as the clock then disabling the MCLKOUT will stop the clock and no conversions
will be done by the AD7705. The user should consult the datasheet for more information on the use of the CLKDIS bit.
- 8 -
Rev. A
�EVAL-AD7705EB/EVAL-AD7706EB
The CLKDIV is used to set the internal operating frequency of the AD7705. The user should consult the datasheet for
more information on the use of the CLKDIV bit.
Fig. 7. The Clock Register Screen
The CLK bit is used in conjunction with the Output Update Rate buttons to select the output update rate.
If the AD7705 is being operated with a clock of 4.9152MHz (CLKDIV=1) or 2.4576MHz (CLKDIV=0) then this bit should
be set to a 1 giving a choice of 50Hz, 60Hz, 250Hz or 500Hz as an output update rate.
If the AD7705 is being operated with a clock of 2MHz (CLKDIV=1) or 1MHz (CLKDIV=0) then this bit should be set
to a 0 giving a choice of 20Hz, 25Hz, 100Hz or 200Hz as an output update rate.
The Power-On/Reset status of this register is 05 hex.
Fig. 7. The Calibration Registers Screen
- 9 -
Rev. A
�EVAL-AD7705EB/EVAL-AD7706EB
The Calibration Registers Screen
Fig. 8. shows the Calibration Registers screen. When this screen is displayed the values of the Gain and Offset Registers
are read from the AD7705 and displayed. The user has the ability to change the values of either register if required. the
default value for the fullscale cal register is 5761AB hex and the default value for the zero scale cal register is 1F4000
hex.
The Read Data Screen
Fig. 9. shows the Read Data screen. This is where the user can read a number of samples from the AD7705. The user
has the option of either reading data for analysis or display.
When the Read For Analysis button is selected the software will read the required number of samples from the AD7705
and store them in an array so that they can be graphed or analysed later. It is possible to read upto 5000 samples at any
one time although only 3000 can be displayed on a graph.
Fig. 9. The Read Data Screen
When the Read for Display button is selected the software will read one sample from the AD7705 and display its value
in the Current Code text box. The software will continue to read and display the samples until a key has been pressed.
It is possible to add a delay to the read cycle by checking the Use Delay Value checkbox. If the box is checked the
software will wait the required number of milliseconds between reading samples. It should be noted however that the
accuracy of the time delay can be affected by other programs running under Windows, therefore this method is not suitable
where equidistant sampling is required.
The Noise Analysis Screen
Once data has been read from the AD7705 it is possible to perform some analysis on it. Fig. 10. shows the Noise Analysis
Screen. This screen displays the maximum and minimum codes read from the AD7705 (in decimal and hexadecimal), as
well as the average code, the average voltage and the RMS and Peak-Peak noise values. From this screen it is possible to
display the data on a graph or as a histogram of codes. Figures 11 and 12 show the Graph and Histogram screens.
- 10 -
Rev. A
�EVAL-AD7705EB/EVAL-AD7706EB
Fig. 10. The Noise Analysis Screen
Fig. 11. The Graph Screen
The Graph Screen
This screen displays the data in graph format. A rolling average feature is available by selecting the rolling average
button. By default this is a 5 point rolling average but this can be changed to any integer between 1-99. The list codes
button allows the user to view all the codes and the number of occurences of these codes.
- 11 -
Rev. A
�EVAL-AD7705EB/EVAL-AD7706EB
Fig. 12. The Histogram Screen
- 12 -
Rev. A
�EVAL-AD7705EB/EVAL-AD7706EB
Fig. 13. The Evaluation Board Schematic
- 13 -
Rev. A
�EVAL-AD7705EB/EVAL-AD7706EB
Table 6. Component Listing and Manufacturers
INTEGRATED
CIRCUITS
Component
Location
Vendor
AD7705AN/AD7706AN
U1
Analog Devices
AD780AN
U2
Analog Devices
74HC4050N
U3
Philips
74C08N
U4
Texas
Instruments
74HC244N
U5
Texas
Instruments
AD589LH
U6
Analog Devices
SD103C
D1
ITT
Component
Location
Vendor
10µF ± 20% Tantalum (16 V)
C1 C4 C5 C9
AVX- Kyocera
Mftrs No TAG106MO16
0.1µF Ceramic(X7R ±20%)
C2
Philips
Mftrs No. CW20C 104M
0.01uF NP0
C11 C12 C13 C14
AVX-Kyocera
Mftrs No. SR20X7R
33pF
C16 C17
Philips
Mftrs No. 683 34339
Component
Location
Vendor
Short Circuits
R1 R2 R3 R4
----------
3 kΩ±5% 0.25W Carbon Film
R5
Bourns 3kΩ ±5%
6.8kΩ±5% 0.25W Carbon Film
R6
Bourns 6.8kΩ ±5%
0.25W
10kΩ±5% 0.25W Carbon Film
R7 R8
Bourns 10kΩ ±5%
0.25W
1M Ω±5%
R9
Bourns 1MΩ ±5%
0.25W
Component
Location
Vendor
Pin Headers
Lk1 (4x2 way)
Harwin
Lk2 Lk3 (2x2 way)
Mftrs No. M20-9993606
CAPACITORS
±2% Ceramic
C3 C6 C7 C8 C10 C15
RESISTORS
0.25W Carbon Film
0.25W
LINK OPTIONS
Lk4 (3x2 way)
Lk5,Lk6,Lk7,Lk8 (1x2 way)
Shorting Plugs
Pin Headers
(9 required)
Harwin
Mftrs No. M7571-05
Component
Location
Vendor
Sealed Push Button Switch
SW1
Omron
Mftrs No. B3W1000
SWITCH
- 14 -
Rev. A
�EVAL-AD7705EB/EVAL-AD7706EB
SOCKETS
Component
Location
Vendor
Miniature BNC Connectors
SKT3-SKT6, SKT9 - SKT11
M/A - Com Greenpar
Mftrs No. B65N07G999X99
9-Way D-Type Connector
SKT1
McMurdo
Mftrs No. SDE9PNTD
36 Way Centronics Connector
SKT 2
Fujitsu
Mftrs No. FCN785J036G0
2 Way Terminal Block
J1 J2
Bulgin RIA
Low profile socket
U1 - U5
(82 pins needed)
Harwin
Farnell No. 519-959
Location
Vendor
Xtal 1
IQD
Mftrs No. A127A
CRYSTAL
OSCILLATOR
Component
Identification
4.9152 MHz Oscillator
Fig. 14. The Evaluation Board Component Layout Diagram
- 15 -
Rev. A
�EVAL-AD7705EB/EVAL-AD7706EB
Fig. 15. The Evaluation Board Component Side Artwork.
Fig. 16. The Evaluation Board Solder Side Artwork.
- 16 -
Rev. A
�