EVAL-ADAS1000SDZ User Guide
UG-426
One Technology Way • P.O. Box 9106 • Norwood, MA 02062-9106, U.S.A. • Tel: 781.329.4700 • Fax: 781.461.3113 • www.analog.com
Evaluating the ADAS1000 ECG Front End
for Demonstration and Development
FEATURES
GENERAL DESCRIPTION
Biopotential signals in; digitized signals out
6 electrodes (5 acquisition channels and 1 driven lead)
2 × ADAS1000 (master/slave) for 1 to 12 lead electrode
measurements
AC and dc lead off detection
Pace detection
Optional thoracic impedance measurement
(internal/external)
Selectable reference lead
Lead or electrode data available
Calibration features (DAC and 1 mV square/sinewave)
Low or high speed data output rates
Serial interface SPI®-/QSPI™-/DSP-compatible
The primary function of the EVAL-ADAS1000SDZ
evaluation board is to demonstrate the ADAS1000 integrated
electrocardiogram (ECG) device for medical instrumentation. A
full description of the ADAS1000 is available in the data sheet, and
should be consulted when utilizing this user guide. This evaluation
board is used to evaluate the ADAS1000 and all variants.
CUSTOMER INTERFACING OPTIONS
Direct access to ADAS1000 serial interface (J4)
USB interface via Analog Devices, Inc., Blackfin®-based
SDP-B controller board and GUI
APPLICATIONS
ECG
Patient monitor
Holter monitor
Cardiac defibrillators
PLEASE SEE THE LAST PAGE FOR AN IMPORTANT
WARNING AND LEGAL TERMS AND CONDITIONS.
The evaluation board is ideal for exploring concepts and
adopting the ADAS1000 into advanced medical systems. The
board can be operated as part of an end user’s system via the
ADAS1000 serial peripheral interface (SPI), or as a standalone
evaluation of the ADAS1000 using the support of the Analog
Devices system demonstration platform controller board
(SDP-B), and a standard PC (running Windows® Vista,
Windows 7 32-bit and 64-bit, or Windows 8) to run the Analog
Devices evaluation software.
The SDP-B board, which is a DSP-based controller board is
separate from the evaluation board, is required to run the
Analog Devices evaluation software, and is used for data
transfer from evaluation board to PC via USB interface. It does
not come as part of the evaluation kit and can be ordered
separately (EVAL-SDP-CB1Z). The SDP-B board can be reused
with many other Analog Devices evaluation modules.
For more information, visit the Analog Devices healthcare
home page.
Rev. B | Page 1 of 44
�UG-426
EVAL-ADAS1000SDZ User Guide
TABLE OF CONTENTS
Features .............................................................................................. 1
ADAS1000 Software Operation.................................................... 10
Customer Interfacing Options ........................................................ 1
Quick Operation of ADAS1000 Software ............................... 10
Applications ....................................................................................... 1
Detailed Description of Main Control Panel.......................... 10
General Description ......................................................................... 1
Control of all Registers .............................................................. 12
Revision History ............................................................................... 2
ECG Capture ............................................................................... 14
Conditions Regarding the Use of This Product in Healthcare
Applications................................................................................... 3
ECG Capture with Digital Post Processing............................. 15
Evaluation Kit Contents............................................................... 3
Respiration .................................................................................. 17
Hardware Requirements .............................................................. 3
Pace .............................................................................................. 18
Evalution Board Software ................................................................ 5
Understanding Pace in the ADAS1000 ................................... 19
Installing the Software: Overview .............................................. 5
Write to a File .............................................................................. 20
Installing the Software: Details ................................................... 5
Test Tones .................................................................................... 23
Connecting to the Board ............................................................. 6
Common-Model Level/Wilson Central Terminal ................. 25
Running the Software .................................................................. 6
Detailed Description ...................................................................... 26
Evaluation Board Hardware ............................................................ 7
Overview of Schematics ............................................................ 26
Key Features .................................................................................. 7
Pace Interface (Optional) .......................................................... 26
Connectors .................................................................................... 7
Power............................................................................................ 26
Connecting an ECG Signal ......................................................... 8
Flexible Respiration Feature on Master ADAS1000 .............. 27
RESET Buttons .............................................................................. 8
Troubleshooting.......................................................................... 33
LED................................................................................................. 8
Evaluation Board Schematics........................................................ 35
Leads OFF Control ..................................................................... 16
Jumpers .......................................................................................... 9
REVISION HISTORY
8/2012—Revision 0: Initial Version
11/2018—Rev. A to Rev. B
Changes to General Description Section ...................................... 1
Deleted Clamp Section ............................................................................. 34
Deleted Figure 45; Renumbered Sequentially ..................................... 34
3/2014—Rev. 0 to Rev. A
Changed ADAS1000SDZ to EVAL-ADAS1000 SDZ
Throughout ......................................................................... Universal
Change to Title .................................................................................. 1
Changes to Figure 46 ...................................................................... 35
Changes to Figure 52 ...................................................................... 41
Changes to Figure 53 ...................................................................... 42
Rev. B | Page 2 of 44
�EVAL-ADAS1000SDZ User Guide
UG-426
WALL POWER, BENCH SUPPLY OR BATTERY (J7 OR J9)
4.5V TO 5.5V
CIRCUIT/LINK AREA
FOR ENHANCED
RESPIRATION
GND
ON BOARD REGULATOR AND LDOS
AVDD: 3.3V
IOVDD: 3.3V
INPUT
RC COMPONENT SPACE
FOR CABLE MODEL, FILTER MODEL
ADAS1000
RESET
OPTIONAL
HEADER CONNECTOR
FOR RESPIRATION (EXT)
(J8)
EXT_RESP_RA
EXT_RESP_LA
EXT_RESP_LL
ADAS1000
MASTER
RA, LA, LL, V1, V2, RLD
RLD
ECG1 (LA)
ECG 2 (LL)
ECG 3 (RA)
ECG 4 (V1)
ECG 5 (V2)
ADAS1000 DIRECT
MASTER INTERFACE
FOR FAST
PACE CONNECTOR
(OPTIONAL)
(J6)
CRYSTAL
DB15 CONNECTOR
FOR ECG
(J1)
ADJUSTABLE RLD
GAIN SETTING
COMPONENTS
ECG 6 (V3)
ECG 7 (V4)
ECG 10 (SPARE)
ADAS1000 DIRECT
SPI CONNECTOR
(OPTIONAL)
(J4)
SDP
RESET
SDP CONNECTOR
10810-001
ADAS1000
SLAVE
V3, V4, V5, V6, SPARE
ECG 8 (V5)
ECG 9 (V6)
Figure 1. Functional Block Diagram
CONDITIONS REGARDING THE USE OF THIS
PRODUCT IN HEALTHCARE APPLICATIONS
In addition to the terms found at the end of this document, the
following shall also apply to your use of the board and design:
This evaluation board design is being provided “as is” without any
expressed or implied representations or warranties of any kind and
the use of this board or design shall impose no legal obligation on
Analog Devices, Inc., and its subsidiaries, employees, directors,
officers, servants and agents. In addition, it is understood and
agreed to that the evaluation board or design is not authorized for
use in safety critical healthcare applications (such as life support)
where malfunction or failure of a product can be expected to result
in personal injury or death. This board must not be used for
diagnostic purposes and must not be connected to a human being
or animal. It must not be used with a defibrillator or other equipment that produces high voltages in excess of the supply rails on
the board.
This evaluation board is provided for evaluation and
development purposes only. It is not intended for use or as part
of an end product. Any use of the evaluation board or design in
such applications is at your own risk and you shall fully
indemnify Analog Devices, Inc., its subsidiaries, employees,
directors, officers, servants and agents for all liability and
expenses arising from such unauthorized usage. You are solely
responsible for compliance with all legal and regulatory
requirements connected to such use.
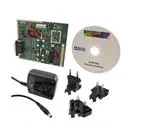
EVALUATION KIT CONTENTS
•
•
•
EVAL-ADAS1000SDZ board
Medical-grade universal ac-to-dc wall adaptor (+5 V)
CD that includes
• Self-installing graphical user interface (GUI) software
that allows users to read/write to ADAS1000 and to
stream data
• Electronic version of the ADAS1000 data sheet
• Electronic version of the EVAL-ADAS1000SDZ
documentation
HARDWARE REQUIREMENTS
•
•
•
Rev. B | Page 3 of 44
Power supply: +5 V (ac-dc adaptor provided)
Patient simulator or similar device
SDP board, a controller board for data transfer to PC. This
can be ordered separately (EVAL-SDP-CB1Z)
�UG-426
EVAL-ADAS1000SDZ User Guide
POWER
CONNECTOR,
5V (J9)
EXTRA LINKS/CIRCUIT RELATED
TO EXTERNAL RESPIRATION
MEASUREMENTS
OPTIONAL BENCH
SUPPLY FOR ADAS
CHIPS (J6)
ADAS1000
EVALUATION BOARD
OPTIONAL BENCH
SUPPLY (5V)
(J7)
5V WALL
ADAPTOR
EXTERNAL RESPIRATION
CONNECTOR (J8)
ON BOARD
DC-DC
REGULATORS
RESET FOR
ADAS CIRCUIT
ELECTRODE CONNECTOR
DB15 (J1)
SDP BOARD
PATIENT CABLE
ADAS1000 MASTER
ELECTRODES LA, RA, LL, V1, V2, RLD
RLD EXT
COMPONENTS
ADAS1000 SLAVE
ELECTRODES V3,
V4, V5, V6 SPARE
ADAS1000 SPI
INTERFACE(J4)
RESET BUTTON
FOR SDP BOARD
Figure 2. ADAS1000 Evaluation Board/SDP Board
Rev. B | Page 4 of 44
USB
CABLE
TO PC
USB
CONNECTOR
10810-002
SPACE FOR
CABLE/ESIS
MODELLING
�EVAL-ADAS1000SDZ User Guide
UG-426
EVALUTION BOARD SOFTWARE
INSTALLING THE SOFTWARE: OVERVIEW
The EVAL-ADAS1000SDZ kit includes self-installing software
on CD.
Install the software prior to connecting the SDP board to the USB
port of the PC. This ensures that the SDP board is recognized
when it connects to the PC.
1.
Start the Windows operating system and insert the CD.
2.
The installation software should launch automatically. If it
does not, run the setup.exe file from the CD.
10810-005
INSTALLING THE SOFTWARE: DETAILS
Proceed through the installation steps allowing the software
and drivers to be placed in the appropriate locations. Connect
the SDP board to the PC only after the software and drivers
have been installed.
Figure 5. License Agreement
10810-006
There are two parts to the software installation procedure. The
first part is installing the software related to the ADAS1000
evaluation board as shown in Figure 3.
10810-003
Figure 6. Monitoring Progress
Now, install the software related to the SDP controller board
(see Figure 7).
10810-004
10810-007
Figure 3.Getting Started with the Software Installation
Figure 4. Destination Directory
Rev. B | Page 5 of 44
Figure 7. SDP Software Install
�UG-426
EVAL-ADAS1000SDZ User Guide
If the SDP board is not connected to the USB port when
the software is launched, a connectivity error is displayed
(see Figure 9). Simply connect the evaluation board to the
USB port of the PC, wait a few seconds, click Rescan, and
follow the instructions that appear.
Plug in the SDP board via the USB cable provided and allow
the new Found Hardware Wizard to run; this detects and loads
drivers for the SDP board. If necessary, check that the drivers
and the board are connected correctly by looking at the Device
Manager of the PC.
10810-008
10810-009
The Device Manager can be found by right clicking on
My Computer > Manage > Device Manager from the list of
System Tools. The SDP board should appear under ADI
Development Tools.
Figure 8. Device Manager
Figure 9. Pop-Up Window Error
2.
When the board is found, click Select.
CONNECTING TO THE BOARD
Follow these steps to power up and start interfacing to the
board using the software:
After installation is completed, plug the EVALADAS1000SDZ into the SDP controller board using J2 of
the ADAS1000 board. Use the plastic screws provided on
the ADAS1000 evaluation board to fix the two boards
securely in place.
2.
Power up the evaluation board as described in the
Evaluation Board Hardware section and the Power
Connections section. D10 and LED1should appear lit.
3.
Plug the SDP board into the PC using the USB cable
included in the box.
4.
When the software detects the evaluation board, proceed
through any dialog boxes that appear in order to finalize
the installation.
10810-010
1.
Figure 10. Hardware Selection
The software connects to the board and displays the following:
RUNNING THE SOFTWARE
1.
Select Start > All Programs > Analog Devices >
ADAS1000 > ADAS1000_Software. To uninstall the
program, select Start > Control Panel > Add or Remove
Programs > ADAS1000_Software.
10810-011
Follow these steps to run the program:
Figure 11. Wait Message
Once the board has been correctly detected, the ADAS1000
panel opens (see Figure 13).
Rev. B | Page 6 of 44
�EVAL-ADAS1000SDZ User Guide
UG-426
EVALUATION BOARD HARDWARE
Table 1. Power Supply Connection (Choose Only One)
KEY FEATURES
•
•
•
•
•
•
•
5 or 10 ECG electrode paths capable of demonstrating
1 lead to 12 leads of ECG data
AC and DC lead off detection
Respiration and pace measurement and display
Calibration features and display
Test tones
Real-time ECG electrode or lead display on PC screen via
Analog Devices ADAS1000 GUI (lead calculation
available).
Recording of ECG data for offline review
Power Connections
AVDD
Supply Range
4.5 V to 5.5 V (may be supplied
from wall adaptor, battery or
bench supply). If applied, this is
the only supply rail required by
the board.
+3 V to +5.5 V
IOVDD
ADCVDD
DVDD
1.65 V to 3.6 V
1.8 V ±5%
1.8 V ±5%
Electrode Connector–J1
This connector provides the primary analog input interface to
which customer proprietary lead sets are connected.
Choose one of the following:
•
Alternative
Supplies (J5)
Parameter
+5 V
CONNECTORS
There are a number of options for supplying power to the
board. The simplest is directly from the J9 dc jack connector
with the wall adapter which is provided as part of the kit.
•
Supply
Requirement
Primary Supply
(J7 or J9)
J9: dc jack–requires 5 V at 250 mA. Note that this provides
power to the SDP board in addition to the ADAS1000
related circuitry.
J7: screw terminal (2 inputs)–requires 5 V at 250 mA.
Provides power to the on-board dc-dc convertors which
supply all circuitry on board and also powers the SDP
board.
•
J5: screw terminal (6 inputs). These inputs are optional
supply inputs for the ADAS1000 devices and the remainder
of the circuitry on the board
• AVDD = 3 V to 5.5 V
• IOVDD = 1.65 V to 3.6 V
• AGND = DGND = 0 V
• ADCVDD and DVDD are optional supplies. They can
be supplied from the ADAS1000 on-chip regulators.
Alternatively, the regulators can be disabled and the
user can drive ADCVDD and DVDD directly via J5. If
ADCVDD and DVDD are driven directly, then the
following supplies are required.
• ADCVDD (optional) = 1.8 V
• DVDD (optional) = 1.8 V
10810-012
Alternatively, choose
Figure 12. J1, DB15 Connector
Connector J1 is a DB15 female connector and mates with a
D-SUB plug. All ADAS1000 electrode connections are made
available here for both master and slave devices in addition
to the Right Leg Drive (RLD_OUT) and Shield Drive
(SHIELD) pins.
Note that every effort was made to supply input protection to
the electrode pins sufficient for the application; however, the
intent was not to offer this module as a true medical solution.
Therefore, no defibrillation pulses or voltages outside the
ADAS1000 operating range should be applied to the input
connector/board.
Rev. B | Page 7 of 44
�UG-426
EVAL-ADAS1000SDZ User Guide
CONNECTING AN ECG SIGNAL
Table 3. SPI Connector, J4
The user needs to connect a signal source to the evaluation
board connector J1 for measurement purposes. Ideally,
this would be a patient simulator. In demonstrations at Analog
Devices, the PS420 patient simulator (from Fluke Biomedical
Division of Fluke Electronics Corporation) is used.
Pin No.
1
2
3
4
5
6, 12, 13, 14
7
8
9
10
11
Note that the board is not designed for direct connection to
patients or animals for testing.
Users should connect the appropriate signal to the ECG
electrode inputs and RLD_OUT electrode.
Table 2. Electrode Connector, J1
Pin No.
1
2
3
4
5
6
7
8
9
Mnemonic
V2
V3
V4
V5
V6
SHIELD
CE
NC
RA
10
11
12
13
LA
LL
V1
Spare
14
15
RLD
NC
Description
Analog input, Master ECG5_V2
Analog input, Slave ECG1_V3
Analog input, Slave ECG2_V4
Analog input, Slave ECG3_V5
Analog input, Slave ECG4_V6
Output of shield driver
Common electrode, Master CM_IN
Not connected
Analog input, right arm, Master
ECG3_RA
Analog input, left arm, Master ECG1_LA
Analog input, left leg, Master ECG2_LL
Analog input, Master ECG4_V1
Analog input, chest electrode or
auxiliary bio-potential input, Slave ECG5
Right leg drive, RLD_OUT
Not connected
SDP Interface Connector, J2
The purpose of this connector is to facilitate interfacing
with the Analog Devices SDP1Z control board which is USB
controlled. This control board is specific to the operation of this
module as a standalone evaluation and learning platform. This
connector is not intended for customer-specific interfacing.
Main ADAS SPI, J4
This connector provides the ADAS1000 digital interface pins so
that the device may be used in standalone mode (without the
SDP control board). The user may use this connecter to
interface to the device in order to develop their own code and
evaluate the ADAS1000 directly.
Note that on the board, the /CS, SDI, and SDO paths for each
device are separate for ultimate flexibility in control of the
devices. When controlled via the SDP board, the /CS line is
shared (LK12 inserted). When using multiple devices, the
SDI and SDO paths can be shared, and each device can be
controlled via its own /CS line, allowing for easy control with
minimum wires.
Mnemonic
PD
RESET
SDI_1
SDI_0
SDO_1
DGND
SDO_0
CS_0
CS_1
SCLK
DRDY
Device
both
both
slave
master
slave
both
master
master
slave
both
master
Description
Power down, active low
Device reset, active low
Serial data input
Serial data input
Serial data output
Digital ground
Serial data output
Chip select master
Chip select slave
Clock input
Data ready, active low
Timing Characteristics
Refer to the ADAS1000 product data sheet for information
regarding the required waveforms and behavior of the SPI
interface pins when preparing to interface directly to the
ADAS1000 SPI interface.
Pace Interface/GPIO Connector, J6
This connector provides the optional secondary interface
available from the master device for the purposes of the
customer-based digital pace detection algorithm. It is a master
interface providing MSCLK, MSDO, and MCS outputs to be
read by a host controller. It provides ECG data captured at
128 kHz data rate.
Pin No.
1
2
Mnemonic
GPIO3
GPIO2/MSDO
3
GPIO1/MSCK
4
GPIO0/MCS
5, 6
DGND
Description
Reconfigurable IO
Reconfigurable IO/master
interface MSDO
Reconfigurable IO/master
interface MSCK
Reconfigurable IO/master
interface MCS
Digital ground
RESET BUTTONS
There are two reset buttons on the board. SDP reset is used for
a reset of the SDP board and ADAS reset is used for reset of
ADAS1000 devices to default/power-on configuration.
LED
There is one LED (D10) on the board, which is lit when the
board is powered from J7 (+5 V connector).
Rev. B | Page 8 of 44
�EVAL-ADAS1000SDZ User Guide
UG-426
JUMPERS
There are a number of jumpers included on this board for flexibility and ease of configuration. These jumpers allow the user to easily
drive the main ADAS1000 SPI interface directly without concern about other SPI-controlled components. On receipt of the board, the
jumpers are in the default state as described in Table 4.
Table 4. Default State of Jumpers
Jumper
Respiration
Jumper
LK1
LK2
LK3
LK4
LK19
LK15
LK16
Power Supply
LK6
LK7
LK8
VREG EN
LK9
LK17
LK18
Shield
LK10
Reset Function
Interface
LK11
LK12
LK13
LK14
Description
External Respiration Measurement. LK1 is used to connect the EXT_RESP_XX paths to
the ECG channels external to the device (requires that LK4 be connected if using the
external paths).
External Respiration Measurement. LK2 is used when using external capacitors for the
respiration circuit; LK1 needs to be closed also (and, optionally, LK4).
External Respiration Measurement. LK3 is used to bring either of the ECG channels (LA
or LL) to the input of the AD8226 in-amp (part of an optional respiration circuit).
External Respiration Measurement. LK4 connects the external respiration paths to the
respiration header or, alternatively, to the ECG paths via LK1.
External Respiration Measurement. Connect (A) when using external respiration circuit
(AD8226 and AD8606). Can be disconnected for all other respiration options.
For External Respiration Using an External Instrumentation Amplifier (Optional Circuit).
The evaluation board uses the AD8226 along with a buffer, AD8606. This arrangement
allows the output of the amplifier to drive the EXT_RESP_RA input. Use with LK16.
For External Respiration Using an External Instrumentation Amplifier (Optional Circuit).
The evaluation board uses the AD8226 along with a buffer, AD8606. This arrangement
allows the output of the amplifier to drive the EXT_RESP_LA input. Use with LK15.
AVDD Path from On-Board LDO (ADP151). Open if powering the board from J5 screw
terminals. Closed if supply board from either wall adaptor input or J7 (5 V) supply input.
AVDD Path to MASTER ADAS1000. Use to measure supply current in AVDD path to
MASTER ADAS1000.
IOVDD Path from On-Board LDO (ADP151). Open if powering the board from J5 screw
terminals. Closed if supply board from either wall adaptor input or J7 (5 V) supply input.
VREG_EN–ADAS1000 On-Chip Regulators (DVDD, ADCVDD). They are enabled when
VREG_EN is high, disabled when low, and may be overdriven. If overdriving, close LK9
and use J5 to supply DVDD and ADCVDD supply rails (1.8 V).
ADCVDD net is shared to both MASTER and SLAVE. This allows an external ADCVDD to
be applied. Each ADAS1000 has its own on-chip regulator for ADCVDD. If both MASTER
and SLAVE are inserted on board and LK9 is open, then LK17 should be open.
Each ADAS1000 has its Own On-Chip Regulator for DVDD. If both MASTER and SLAVE
are inserted on board and LK9 is open, then LK18 should be open (to stop the
regulators trying to fight each other).
Link in Shield Path. The Shield pin is a shared pin with the external respiration drive
for LA. Therefore, when using the SHIELD drive directly, the user can connect LK10 to
Link A. Alternatively, if using external respiration feature, the user can connect the
shield of the patient cable directly to GND by inserting LK10 in Position B.
Link in Reset Path.
When using the SDP board, both MASTER and SLAVE are driven with the same CSB
(LK12 inserted).
If driving the MASTER and SLAVE from J4, open LK12.
When using the SDP board, both MASTER and SLAVE drive different SD0 paths (LK13
open).
When using the SDP board, both MASTER and SLAVE are driven with different SDI paths
(LK14 open).
If driving the MASTER and SLAVE from J4 and the same SDI path, close LK14.
Rev. B | Page 9 of 44
Condition
A, B, C inserted
A, B, C inserted
Inserted (A)
Open
Inserted (A)
Closed
Closed
Closed
Closed
Closed
Open
Open
Open
Inserted (B)
Closed
Closed
Open
Open
�UG-426
EVAL-ADAS1000SDZ User Guide
ADAS1000 SOFTWARE OPERATION
QUICK OPERATION OF ADAS1000 SOFTWARE
1.
2.
3.
Launch the ADAS1000 software. The main panel shown in
Figure 13 opens.
Click Default Settings to power up the ADAS1000,
configuring the device into a known condition.
To start streaming ECG data, go to Stream ECG and a
pop-up window (see Figure 18) opens and the GUI
automatically starts reading ECG data from the board.
DETAILED DESCRIPTION OF MAIN CONTROL
PANEL
the ECGCTL, CMREFCTL, and FRMCTL registers as shown
in Table 5. All other registers remain at their power-on default
settings.
When finished using the software, click QUIT to close the
window.
Table 5. Commands Sent to Master Device by Default
Settings Button
Register
ECGCTL
Word
0xF800BE
CMREFCTL
0xE0000A
FRMCTRL
0x079000
When the software is launched, the main window of the EVALADAS1000SDZ software opens, as shown in Figure 13.
The evaluation board automatically detects if LK12 is inserted,
so it knows if it needs to read from a single device (master,
LK12 = open) or from both devices (master and slave, LK12 =
inserted).
On the main panel, the user can access pop-up windows
which allow access to all register controls, streaming (ECG,
respiration, pace, and lead off), and the write to file window.
The ADAS1000 powers up with channels disabled and in
power-down mode. A number of writes are required to different
registers to start the device up and begin streaming data from
the device.
Within the main window, there is a Default Settings button
which allows quick configuration of the device. This configures
Rev. B | Page 10 of 44
Conditions
All ECG channels enabled.
Single-ended input.
Gain setting, GAIN 0 = 1.4.
VREF buffer enabled.
Low noise/high performance mode.
Convert enabled.
LA, LL, RA are selected to contribute
to VCM.
Reference drive is enabled and
applied to RLD_OUT electrode.
Internal common mode is used and
driven out on CM_OUT.
Shield drive is enabled.
Frame includes: all ECG words, pace
detect, respiration magnitude, leads
off, GPIO, and CRC.
Data format is vector mode.
Every frame is output at frame rate of
2 kHz.
�EVAL-ADAS1000SDZ User Guide
UG-426
CHECKS IF MASTER
AND SLAVE DEVICES
ARE PRESENT
ACCESS ALL
REGISTERS
DEFAULT SETTINGS—WHEN
LAUNCHING SOFTWARE—HIT
THIS BUTTON TO POWER UP
THE ADAS1000 INTO KNOWN
CONDITION
EXIT AND
CLOSE GUI
Figure 13. Main Evaluation Board Control Window
Rev. B | Page 11 of 44
10810-013
THESE BUTTONS
OPEN POP-UP
WINDOWS FOR
EACH FUNCTION
�UG-426
EVAL-ADAS1000SDZ User Guide
CONTROL OF ALL REGISTERS
To delve further into the register control, click Program All RW Reg from the main control panel. This produces a pop-up window
giving access to different tabs for each control register.
When moving back and forth between tabs, note that each time you click on a tab, the device reads the appropriate register and updates
the Read register listing accordingly.
A Write Read Reg writes the data in the write panel and reads back all the registers to confirm the write.
Caution: the write panel may not match the contents of the ADAS1000 registers, so if using this panel to update particular registers,
quickly do a ReSync Write Reg first to ensure that the write and read panels match, and then proceed to make your changes.
Update the register contents with any changes.
Click Default Settings to return the part to the default state.
Save a register setting for reload and reuse later using the Save Reg State and Load Reg State.
When finished with this window, click QUIT to close the window.
SLAVE WRITE CONTROL
UPDATE THE REGISTER WITH
THE WRITE CONTENTS
10810-014
MASTER WRITE CONTROL
Figure 14. Read/Write Control Register Overview
Within the tabs of this window all the individual control registers can be accessed. The ECG control register is shown in Figure 15, giving
access to master and slave control. Note that for certain conditions, the slave device must match the master device configuration. As a
result, the software locks out some of the slave control to ensure that the settings of the master and slave will always match (for example,
gain setting, high performance mode, clock source, and so on).
Rev. B | Page 12 of 44
�UG-426
10810-015
EVAL-ADAS1000SDZ User Guide
Figure 15. ECG Control Register
Rev. B | Page 13 of 44
�UG-426
EVAL-ADAS1000SDZ User Guide
ECG CAPTURE
The ECG Capture tab allows users to view the ECG patterns at the different data rates, in vector or electrode mode.
The tab panel on the right allows quick, easy configuration of the different parameters—filter, data rate, power mode, vector/electrode in
the panel on the right.
1.
Once the appropriate registers are configured to start a capture, proceed to the ECG capture window. The ADAS1000 starts
streaming ECG data. The signal shown in Figure 16 is a 60 bpm signal coming from the Fluke PS420 simulator.
REMOVE
ELECTRODES/LEADS
IF DESIRED
USE LABVIEW FILTER
TO INSERT HPF FOR
DIAGNOSTIC OR
MONITOR BANDWIDTH
EASY ACCESS TO
DIFFERENT CONTROL
PARAMETERS
SELECT MASTER OR
SLAVE DEVICE TO
VIEW ECG
LABVIEW CHART
TOOLS TO
ANALYSE DATA
10810-016
2kHz DATA RATE
Figure 16. ECG Capture Window with Extra Filtering
•
•
•
•
2.
Quick settings allow the user control over the common features, such as data rate, electrode/vector data, gain, and filter
frequency.
This particular display is set up for lead (vector) display.
There is a tab that allows users to apply LabVIEW® filters.
There is also a tab that allows user to view the captured heart rate.
To zoom in on data to view in more detail, the LabVIEW chart tools are available for use. Simply stop streaming and then use the
graph zoom for X or Y to zoom in the chart of interest. Rescaling of the Y-axis can also be done by first right clicking and turning off
the autoscale feature.
Rev. B | Page 14 of 44
�EVAL-ADAS1000SDZ User Guide
UG-426
ECG CAPTURE WITH DIGITAL POST PROCESSING
The ECG capture window allows the user to use a LabVIEW filter (0.05 Hz) to view diagnostic bandwidth in addition to ac coupling the
signal (using LabVIEW VI).
Insert a LabVIEW HPF for ac coupling. (ADAS1000 is a dc coupled design).
Insert a LabVIEW HPF or 0.5 Hz or 0.05 Hz.
10810-017
1.
2.
Figure 17. Different Tabs Providing Differing Controls Within the ECG Capture Window. Controls include: LabVIEW filters,
the test tone feature, and graph control, respectively.
Note that the software also allows users to detect heart rate. This applies to LEAD II (see Figure 18).
When finished with the ECG capture window, click QUIT to close the window.
HEART RATE
DISPLAY
10810-018
3.
4.
Figure 18. ECG Capture Window with Heart Rate Shown
Rev. B | Page 15 of 44
�UG-426
EVAL-ADAS1000SDZ User Guide
LEADS OFF CONTROL
The lead off tab allows the user to control which lead off feature is operating (ac or dc) and programs the current and threshold levels. For
dc lead off, remember the VCM is 1.3 V; therefore the upper threshold should be in excess of 1.3 V to ensure capture of a lead off event.
For ac lead off, the threshold levels are represented in terms of amplitude by multiplying π/2. Note that the levels may need to be adjusted
to find the appropriate levels to detect ac leads amplitude.
Configure the mode of lead off detection (either ac or dc).
Set the current levels.
Program the threshold levels of the detection circuitry (applies to ac lead off).
Write the changes to the register by clicking Update, which is available within the LOFF Threshold Levels tab.
When finished, click QUIT to close the window.
PROGRAM THE APPROPRIATE
CURRENT LEVELS
AC : 0nA TO 100nA
DC : 0nA TO 70nA
PROGRAM THE THRESHOLDS
FOR DETECTION
QUICK SETUP—DC
LEAD OFF
CHOOSE AC
OR DC
10810-019
1.
2.
3.
4.
5.
Figure 19. Leads Off Control and Display Chart
Rev. B | Page 16 of 44
�EVAL-ADAS1000SDZ User Guide
UG-426
RESPIRATION
The Respiration window allows configuration of the respiration feature and display of the respiration rate.
2.
3.
Use Quick Respiration Setup to quickly configure the device. Figure 20 shows the respiration signal capturing a respiration signal
provided by the Fluke PS420.
Configure the settings in the respiration register for many different options. See Figure 20 and see the Flexible Respiration Feature on
Master section for a description.
When finished, click QUIT to close the window.
CONFIGURATION SETTINGS FOR
RESPIRATION MEASUREMENT
QUICK RESPIRATION SETUP—
PRE-CONFIGURES SETTINGS
10810-020
1.
Figure 20. Respiration Magnitude Chart
Rev. B | Page 17 of 44
�UG-426
EVAL-ADAS1000SDZ User Guide
PACE
The Pace register control offers a number of different features. The pace algorithm is three instances of a digital algorithm, therefore it can
run on 3 leads at one time. The algorithm is designed to detect pace widths that range from 100 µs to 2 ms and amplitudes of 400 µV to
1000 mV. For pace capture, the software is streaming data at the chosen data rate. The data rate chosen does not have an effect on the
ability of the pace detection algorithm to detect a pulse since the pace algorithm always processes the 128 kHz frame rate.
4.
5.
Choose which lead each pace algorithm analyses.
Configure the different threshold levels for the desired ranges.
Use Quick Pace Setup to program the pace control and thresholds to default levels, and to start to stream pace data.
When a pace signal is detected, the frame header flags it. The pace algorithm makes a measure of the height and width of the
detected pace and provides that information for readback. There are two ways of returning the width and height information from
the register reads, one from within the frame and another from a direct read of the pace height/width register which is a more
accurate result. Pace Validation Filter 1 and Filter 2 are for noise and MV pulse filtering. The pace width filter rejects signals 2 ms.
If using the 2 kHz data rate, the pace signal may be filtered out by the programmable LPF available in this data rate. Adjust the Low
Pass Filter setting to allow the pace signal to be more visible.
Note there are three pace algorithms and three pace windows to view. Each algorithm has its own threshold register settings.
When finished, click QUIT to close the window.
3 PACE WINDOWS TO VIEW
SCREEN CAPTURE OF PACE ON
PACE 1 LEAD II
PACE LEVELS CONTROL
FILTER
ENABLES
CHOOSE THE
LEADS
FLAGS PACE
DETECTED
HEIGHT
WIDTH
10810-021
1.
2.
3.
Figure 21. Pace Window
Rev. B | Page 18 of 44
�EVAL-ADAS1000SDZ User Guide
UG-426
UNDERSTANDING PACE IN THE ADAS1000
Consult the ADAS1000 data sheet for full details on the pace detection operation. Under Pace Controls, as shown in Figure 21, a user
has access to set up three different instances of pace to analyze the particular leads of interest (choices of LEAD I, II, III, and VF).
The pace algorithm is a state machine that operates on the 128 kHz 16-bit data. When enabled, it works to identify the leading edge and
trailing edge of the pace pulse and can output the width and height of that pulse as detected on the surface of the skin.
The configuration registers are shown in Figure 22.
SET THE DESIRED MINIMUM PACE
AMPLITUDE TO DETECT,
THRESHOLD = N × VREF /GAIN/216
SET THE EDGE THRESHOLD, THE
EDGE TRIGGER/THRESHOLD IS USED
TO FIND A LEADING EDGE
THRESHOLD = N × VREF /GAIN/216
10810-022
SET THE LEVEL THRESHOLD WHICH
IS USED TO FIND THE LEADING
EDGE PEAK
THRESHOLD = N × VREF /GAIN/216
Figure 22. Pace Levels Tab
Rev. B | Page 19 of 44
�UG-426
EVAL-ADAS1000SDZ User Guide
WRITE TO A FILE
A Write to File tab allows storage of a data capture over a period of time. Select either raw (date read back and provided in decimal
format), voltages (software calculates the corresponding voltage of each lead/electrode), or parsed (where parsed breaks out the header
word and the remaining words are provided in decimal format) file for offline processing.
CHOOSE FORMAT
TO SAVE
10810-024
CHOOSE HOW MANY
SECONDS OF CAPTURE
TO SAVE
Figure 23. Write to File Tab
When you click Write to File, a Choose file to write window opens (see Figure 24).
Select the appropriate location and name the file with the name of your choice. Using an extension like .dat or .xls works well here.
The data is formatted tab delimited as shown in Figure 24. This data can be copied into Microsoft® Excel® and processed offline.
CHOOSE THE LOCATION
AND NAME THE FILE
10810-025
1.
2.
Figure 24. Choose the Location and Name the File
Rev. B | Page 20 of 44
�EVAL-ADAS1000SDZ User Guide
UG-426
RAW
10810-026
When you save raw data, this saves data in decimal codes. The information from the header file is shown first (details about lead status,
pace, fault, overflow, and so on) followed by the lead words and any other words that are enabled in the Frame Control register (pace,
respiration, lead off, and so on).
Figure 25. Data Stored in File When Saved as RAW Data
Parsed
10810-027
Saving data as parsed saves the ECG data in decimal codes. The information from the header file is shown first (details about lead status,
pace, fault, overflow, and so on) and parsed out into each individual bit. This is followed by the lead/electrode words and any other words
that are enabled in the Frame Control register (pace, respiration, lead off, and so on).
Figure 26. Data Stored in File When Saved as Parsed Data
Rev. B | Page 21 of 44
�UG-426
EVAL-ADAS1000SDZ User Guide
Voltage
10810-028
Voltage processes the electrode data and provides the equivalent voltage level of each electrode. The header and other words within the
frame are stripped out of this data capture.
Figure 27. Data Stored in File When Saved as Voltage
Rev. B | Page 22 of 44
�EVAL-ADAS1000SDZ User Guide
UG-426
TEST TONES
The ADAS1000 has built-in test tones that can put out a 10 Hz or 150 Hz 1 mV sinewave, in addition to a 1 mV calibration pulse.
1.
Configure the ADAS1000 for electrode mode in the ECGCTL register (see Figure 15) to be able to see these signals correctly. If
the ADAS1000 is configured for vector/lead mode, then the test tone signals are subtracted from each other. Also, in the CMREFCTL
register, none of the electrodes should be configured to contribute to the common-mode signal.
2.
Use the Test Tone tab to configure this data.
10810-029
A 10 Hz sine wave is shown in Figure 28. Applying an offset of 2 mV helps to enable viewing.
Figure 28. Viewing the Internal 10 Hz Sine Wave Test Tone Applied to the Master Device ECG Channels
Rev. B | Page 23 of 44
�UG-426
EVAL-ADAS1000SDZ User Guide
10810-030
Figure 29 shows the test tone signal programmed with a 1 Hz square wave (with an offset of 3 mV to enable viewing). Again, electrode
mode is needed for correct viewing, and none of the electrodes should be configured to contribute to the common-mode signal.
Figure 29. Viewing the Internal 1 Hz Square Wave Test Tone Applied to the Master Device ECG Channels
Rev. B | Page 24 of 44
�EVAL-ADAS1000SDZ User Guide
UG-426
COMMON-MODEL LEVEL/WILSON CENTRAL TERMINAL
Common-Mode Level/Wilson Central Terminal
The ADAS1000 allows flexible configuration of the common-mode signal, in that any of the electrodes can be used to generate the
common-mode level VCM. When no electrodes are selected to contribute to the common mode level, then the VCM = VCM_REF
which is the internal 1.3 V level.
The Wilson central terminal of (RA + LA + LL)/3 can be configured here also as shown in Figure 30.
The VCM can be brought out to the CM_OUT pin.
The VCM level used internally can come from the internal VCM level (as arranged by the selection of electrodes). Alternatively, it
can be sourced externally from the CM_IN pin (for example, if using multiple ADAS1000 devices and wishing to share the VCM
across them–the master device could provide the CM_OUT to the slave devices CM_IN pin, so they are all referenced to the same
common-mode level).
WILSON CENTRAL TERMINAL
CONFIGURATION
ENABLE THE VCM TO
APPEAR ON CM_OUT PIN
SELECT WHERE CM IS
COMING FROM
10810-031
•
•
•
Figure 30. CMREFCTL 0x05 Table
Rev. B | Page 25 of 44
�UG-426
EVAL-ADAS1000SDZ User Guide
DETAILED DESCRIPTION
OVERVIEW OF SCHEMATICS
instruments, and absorbs the dc or ac lead-off currents injected
on the ECG electrodes. The right leg reference signal may also
be redirected onto any of the other electrodes (in absence of
right leg electrode connection). Gold pin connectors are
provided for replacement purposes. Nominal values used here
are RZ = 100 kΩ, CZ = 2 nF, RFB = 3.9 MΩ, and RIN = 39 kΩ.
Refer to Figure 46 for schematics related to the master device.
The master device provides ECG electrodes RA, LA, LL, V1,
V2, and RLD (see Figure 45) while the slave device services
ECG electrodes V3, V4, V5, V6, and a spare channel.
ECG Protection
VREG EN
The ADAS1000 device has standard ESD cells on board. In
addition, SP724 SCR/diode protection arrays are used on the
ECG input paths; however, they are not provided for defib
protection purposes.
VREG_EN = 1 (LK9 open) allows the internal LDO supplies to
power the DVDD and ADCVDD rails. If using the J5 connector
to supply DVDD and ADCVDD rails directly to the part,
VREG_EN = 0 (LK9 closed) disables the on-board regulators.
Optional Component Space on ECG path
If using the J5 connector to supply DVDD and ADCVDD rails
directly to the part, also remove LK17 and LK18.
Optional component space is provided for user-supplied cable
and filter modelling in addition to pull-down resistors to RLD.
Note that these limit the detection of dc leads of function
because, if used, any off electrode would then be sitting at the
RLD level and, thus, may no longer be detectable by the dc
lead off circuit, particular at low current levels).
PACE INTERFACE (OPTIONAL)
An optional pace interface is available via Connector J6. This is
a master interface and provides fast 128 kHz ECG data for
external digital pace algorithm purposes.
Right Leg Drive
POWER
The right leg drive amplifier or reference amplifier is used as
part of a feedback loop to force the patient’s common-mode
voltage close to the ADAS1000 series internal 1.3 V reference
level (VCM_REF). This centers all the electrode inputs relative
to the input span, providing maximum input dynamic range.
It also helps to reject noise and interference from external
sources such as fluorescent lights or other patient-connected
The ADP2503 buck-boost regulator is included to allow for
battery powered operation from 3 × AA (4.5 V) batteries.
ADP151 LDOs provide the AVDD = 3.3 V and IOVDD =3.3 V
rails required. IOVDD = 3.3 V as the SDP board interface
expects 3.3 V input levels (see Figure 48).
EXTERNALLY SUPPLIED COMPONENTS CZ
TO SET RLD LOOP GAIN
2nF
40kΩ
RIN*
RLD_SJ
RZ
100kΩ
RFB*
4MΩ
RLD_OUT
CM_OUT/WCT
10kΩ
SW2
10kΩ
SW3
10kΩ
SW4
10kΩ
SW5
10kΩ
ELECTRODE LL
ELECTRODE RA
ELECTRODE V1
ELECTRODE V2
SW6
CM_IN OR
CM BUFFER OUT
VCM_REF
(1.3V)
–
SW1
ELECTRODE LA
+
10kΩ
RLD_INT_REDIRECT
*EXTERNAL RESISTOR RIN IS OPTIONAL. IF DRIVING RLD FROM
THE ELECTRODE PATHS, THEN THE SERIES RESISTANCE WILL
CONTRIBUTE TO THE RIN IMPEDANCE. WHERE SW1 TO SW5
ARE CLOSED, RIN = 2kΩ. RFB SHOULD BE CHOSEN
ACCORDINGLY FOR DESIRED RLD LOOP GAIN.
10810-100
ADAS1000
Figure 31. Right Leg Drive Configuration on Evaluation Board
Rev. B | Page 26 of 44
�EVAL-ADAS1000SDZ User Guide
UG-426
FLEXIBLE RESPIRATION FEATURE ON MASTER ADAS1000
Respiration measurement is made in the master device. The
respiration path is equipped with much flexibility for evaluation
purpose. Figure 32 and Figure 33 illustrate the different methods
of respiration measurement via different paths.
The control of the respiration function is described in the
ADAS1000 data sheet.
Internal Drive/Measure via the ECG Paths
2.
Configure the RESPCTL register (0x3) as follows:
RESPCAP = 0 (internal).
Choose a relevant lead for measurement (RESPSEL), drive
frequency (RESPFREQ), measurement gain (RESPGAIN),
and so on.
Figure 32. RESPCTL Controls–Respiration Cap
Configuring the Links
Note that the ADAS1000 respiration measurement is only made
on one lead at any one time. However, the choice of lead is
programmable: choose either LEAD I, LEAD II, or LEAD III.
For simplicity, Figure 33 allows the flexibility of programming
the ADAS1000 respiration register to measure on all 3 leads
(again, only 1 lead at any one time). This may not be the
practice in end applications, therefore if a user is only interested
in one particular lead during evaluation of the respiration
function, adjust the links accordingly.
Note that Figure 33 shows RC components which may represent
input filtering or cable model.
ADAS1000
LK4
EXT_RESP_RA
A
EXT_RESP_LL
B
EXT_RESP_LA
EXT_RESP_LA
EXT_RESP_LL
EXT_RESP_RA
C
SHIELD
SHIELD/RESP_DAC_LA
A B C
C B A
LK1
LK2
RESPIRATION PATH
FROM ECG ELECTRODES
LK1, LK2, LK3, LK4, LK19 OPEN
RESP_DAC_LL
RESP_DAC_RA
LA
LA
LL
LL
RA
RA
CABLE
FILTER
Figure 33. Respiration Drive Using Internal Capacitor, Respiration Measurement Using ECG Path
Rev. B | Page 27 of 44
10810-034
1.
10810-033
The primary respiration method uses internal respiration
drive and measure. In some applications, this will require no
external components and uses the standard ECG electrodes.
In the evaluation board, a number of links are used to allow a
user to evaluate different respiration configurations. For this
instance, LK1, LK2, LK3, LK4, and LK19 can be open.
�UG-426
EVAL-ADAS1000SDZ User Guide
Internal Drive/Measure via the ECG/EXT_RESP Paths
Configuring the Links
This configuration allows the user to potentially bypass any
ESIS filtering in the ECG path. Note that the input range of
the EXT_RESP_XX pins must not be exceeded.
Note that the ADAS1000 respiration measurement is only made
on one lead at any one time. In the ext_resp path, the
EXT_RESP_RA is always enabled internally and the user has a
choice of EXT_RESP_LA or EXT_RESP_LL giving options of
LEAD 1 or LEAD III.
For simplicity, Figure 35 allows the flexibility of programming
the ADAS1000 respiration register to measure on these 2 leads
(again, only 1 lead at any one time). This may not be the practice in the end application, therefore if you are only interested
in one particular lead during evaluation of the respiration
function, adjust the links accordingly.
In this example, LK4 and LK1 would be inserted and LK2
would be open. Note that Figure 35 shows RC components
which may represent input filtering or cable model.
Figure 34. RESPCTL Controls–Respiration Lead Select
ADAS1000
LK4
EXT_RESP_LA
A
EXT_RESP_LL
B
EXT_RESP_RA
EXT_RESP_LA
EXT_RESP_LL
EXT_RESP_RA
C
SHIELD
SHIELD/RESP_DAC_LA
C B A
A B C
LK1
LK2
RESPIRATION PATH
FROM ECG ELECTRODES
USING EXT_RESP PATH
LK1, LK4, CLOSED
LK2, LK3, LK19 OPEN
DRIVE/
MEASURE (J1)
RESP_DAC_LL
RESP_DAC_RA
LA
LA
LL
LL
RA
RA
CABLE
FILTER
10810-036
2.
3.
Configure the RESPCTL register (0x3) as follows:
RESPCAP = 0 (internal capacitor),
RESPSEL = 11 (EXT_RESP path selected).
Choose which path to measure on RESPSELEXT.
Choose the appropriate drive frequency (RESPFREQ),
measurement gain (RESPGAIN), and so on.
10810-035
1.
Figure 35. Respiration Drive Using Internal Capacitor, Respiration Measurement Using ECG Paths via the EXT_RESP Path
Rev. B | Page 28 of 44
�EVAL-ADAS1000SDZ User Guide
UG-426
Internal Drive/Measure via the EXT_RESP Path
Configuring the Links
This configuration allows the user to measure directly from the
respiration connector provided on the board (J8).
Note that the ADAS1000 respiration measurement is only made
on one lead at any one time. In the ext_resp path, the
EXT_RESP_RA is always enabled internally and the user has a
choice of EXT_RESP_LA or EXT_RESP_LL giving options of
LEAD 1 or LEAD III.
For simplicity, Figure 37 allows the flexibility of programming
the ADAS1000 respiration register to measure on these 2 leads
(again, only 1 lead at any one time). This may not be the practice in the end application, therefore if you are only interested
in one particular lead during evaluation of the respiration
function, adjust the links accordingly.
In this example, LK4 would be inserted and LK1 and LK2
would be open. Note that Figure 37 shows RC components
which may represent input filtering or cable model.
Figure 36. RESPCTL Controls–Respiration Lead Select
ADAS1000
LK4
EXT_RESP_LA
DRIVE/
MEASURE (J8)
A
EXT_RESP_LL
B
EXT_RESP_RA
EXT_RESP_LA
EXT_RESP_LL
EXT_RESP_RA
C
SHIELD
SHIELD/RESP_DAC_LA
A B C
C B A
LK1
LK2
RESPIRATION PATH
FROM EXT_RESP CONNECTOR
(J8) USING EXT_RESP PATH
LK4, CLOSED
LK1, LK2, LK3, LK19 OPEN
RESP_DAC_LL
RESP_DAC_RA
LA
LA
LL
LL
RA
RA
CABLE
FILTER
Figure 37. Respiration Drive Using Internal Capacitor, Respiration Measurement via EXT_RESP Path
Rev. B | Page 29 of 44
10810-038
2.
3.
Configure the RESPCTL register (0x3) as follows:
RESPCAP = 0 (internal capacitor),
RESPSEL = 11 (EXT_RESP path selected).
Choose which path to measure on RESPSELEXT.
Choose the appropriate drive frequency (RESPFREQ),
measurement gain (RESPGAIN), and so on.
10810-037
1.
�UG-426
EVAL-ADAS1000SDZ User Guide
External Drive/Measure via the ECG Path
This configuration allows the user to drive via external
capacitors provided on the board and measure back through
the ECG path. This mode requires external capacitors in the
RESPDAC_XX paths. Note that when this mode is enabled,
RESPDAC_RA is always enabled.
10810-039
2.
Configure the RESPCTL register (0x3) as follows:
RESPOUT = 0/1 (0 = RESPDAC_LL, 1 = RESPDAC_LA),
RESPCAP = 1 (external capacitor),
RESPSEL = XX (Lead I, II, III).
Choose appropriate drive frequency (RESPFREQ),
measurement gain (RESPGAIN), and so on.
Figure 38. RESPCTL Controls–Respiration Cap
Configuring the Links
Note that the ADAS1000 respiration measurement is only made
on one lead at any one time. However, the choice of lead is
programmable, choose either LEAD I, LEAD II or LEAD III.
For simplicity, the drawing that follows allows the flexibility
of programming the ADAS1000 respiration register to measure
on all 3 leads (again, only 1 lead at any one time). This may
not be the practice in the end application, therefore if you are
only interested in one particular lead during evaluation of the
respiration function, adjust the links accordingly.
In this example, LK4 would be open and LK1 and LK2 would be
inserted.
ADAS1000
LK4
EXT_RESP_LA
A
EXT_RESP_LL
B
EXT_RESP_RA
EXT_RESP_LA
EXT_RESP_LL
EXT_RESP_RA
C
SHIELD
SHIELD/RESP_DAC_LA
C B A
A B C
LK1
LK2
DRIVE
EXTERNAL RESPIRATION DRIVE
USING EXTERNAL CAPACITOR
MEASURE ON ECG PATHS.
RESP_DAC_LL
RESP_DAC_RA
LK1, 2 CLOSED
LK3, 4, 19 OPEN
LA
LA
MEASURE
LL
LL
RA
RA
CABLE
FILTER
Figure 39. Respiration Drive Using External Capacitor, Respiration Measurement Using ECG Paths
Rev. B | Page 30 of 44
10810-040
1.
�EVAL-ADAS1000SDZ User Guide
UG-426
External Drive/Measure via the EXT_RESP Path
This configuration allows the user to drive via external capacitors provided on the board and measure back through the
EXT_RESP path. Note that when this mode is enabled,
RESPDAC_RA is always enabled.
10810-041
2.
Configure the RESPCTL register (0x3) as follows:
RESPOUT = 0/1
(0 = RESPDAC_LL, 1 = RESPDAC_LA),
RESPCAP = 1, (external capacitor),
RESPSEL = 11 (external respiration path),
RESPEXTSEL = 0/1
(0 = EXT_RESP_LL, 1 = EXT_RESP_LA).
Choose the appropriate drive frequency (RESPFREQ),
measurement gain (RESPGAIN), and so on.
Note that the selected RESPDAC_LL or RESPDAC_LA need to
match the selected EXT_RESP_LL/LA selected when measuring
on the external range. The example for register settings in
Figure 41 shows RESPDAC_LA and EXT_RESP_LA selected,
therefore LK2AC, LK4AC and LK1AC need to be inserted.
Figure 40. RESPCTL Controls–Respiration Cap and
Respiration Lead Select
Configuring the Links
Note that the ADAS1000 respiration measurement is only made
on one lead at any one time. In the ext_resp path, the
EXT_RESP_RA is always enabled internally and a user has a
choice of EXT_RESP_LA or EXT_RESP_LL giving options of
LEAD 1 or LEAD III.
For simplicity, Figure 41 allows the flexibility of programming
the ADAS1000 respiration register to measure on these 2
leads (again, only 1 lead at any one time). This may not be
the practice in the end application, therefore if you are only
interested in one particular lead during evaluation of the
respiration function, adjust the links accordingly.
ADAS1000
LK4
EXT_RESP_LA
A
EXT_RESP_LA
MEASURE
EXT_RESP_LL
B
EXT_RESP_RA
EXT_RESP_LL
EXT_RESP_RA
C
SHIELD
SHIELD/RESP_DAC_LA
C B A
A B C
LK1
LK2
DRIVE
EXTERNAL RESPIRATION DRIVE
USING EXTERNAL CAPACITOR
MEASURE ON EXT RESP PATHS.
RESP_DAC_LL
RESP_DAC_RA
LK1, LK2, LK4 CLOSED
LK3, LK19 OPEN
LA
LA
LL
LL
RA
RA
CABLE
FILTER
10810-042
1.
Figure 41. Respiration Drive Using External Capacitor, Respiration Measurement Using ECG Paths via the EXT_RESP Path
Rev. B | Page 31 of 44
�UG-426
EVAL-ADAS1000SDZ User Guide
External Drive/Measure Using External Instrumentation
Amplifier Stage Bypassing Internal ADAS1000
Respiration In-Amp
This configuration allows the user to drive via external capacitors provided on the board and measure back through the
EXT_RESP path.
1.
2.
the gain as desired. The range of gain needs to be limited such
that the input range