UG-061
Evaluation Board User Guide
One Technology Way • P.O. Box 9106 • Norwood, MA 02062-9106, U.S.A. • Tel: 781.329.4700 • Fax: 781.461.3113 • www.analog.com
Evaluation Kit for the Single-Phase Energy Metering IC with 8052 MCU, RTC, and
LCD Driver (ADE71xx/ADE75xx/ADE51xx/ADE55xx Family)
FEATURES
SOFTWARE NEEDED
Full evaluation kit including evaluation board hardware,
evaluation software, and development tools
Supported by IAR development tools for assembly and
C code development
Isolated USB-to-UART communication
LabVIEW evaluation software for evaluation of meter
performance
LabVIEW download tools for user firmware download
Single evaluation board supports
ADE7116/ADE7166/ADE7169/ADE7566/ADE7569 and
ADE5166/ADE5169/ADE5566/ADE5569
EVAL-ADE7169EBZ-2 comes with ADE7169 IC installed
EVAL-ADE5169EBZ-2 comes with ADE5169 IC installed
PC-based evaluation software tests the performance of the
ADE7116/ADE7166/ADE7169/ADE7566/ADE7569 and
ADE5166/ADE5169/ADE5566/ADE5569
GENERAL DESCRIPTION
The EVAL-ADE7169EBZ-2/ADE5169EBZ-2 kit includes an
isolated USB-to-UART converter (ADE8052Z-DWDL1)
for communication and debugging purposes. The ADE7116/
ADE7166/ADE7169/ADE7566/ADE7569/ADE5166/ADE5169/
ADE5566/ADE5569 (hereafter referred to as ADE71xx/ADE75xx/
ADE51xx/ADE55xx) family is supported by the IAR development environment. Evaluation software developed in LabVIEW™
provides the means to evaluate the performance of the ADE71xx/
ADE75xx/ADE51xx/ADE55xx.
DOCUMENTS NEEDED
The evaluation kit includes a CD that provides all of the associated documentation, tools, and drivers to set up and use the
evaluation board for the ADE71xx/ADE75xx/ADE51xx/ADE55xx.
ADE7116/ADE7166/ADE7169/ADE7566/ADE7569 data sheet
ADE5166/ADE5169/ADE5566/ADE5569 data sheet
08600-001
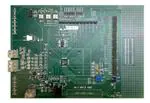
ADE71xx/ADE75xx/ADE51xx/ADE55xx EVALUATION BOARD
Figure 1.
Please see the last page for an important warning and disclaimers.
Rev. 0 | Page 1 of 1
�UG-061
Evaluation Board User Guide
TABLE OF CONTENTS
Features .............................................................................................. 1
HyperTerminal Communication.................................................. 14
Documents Needed .......................................................................... 1
IAR Kickstart Tools ........................................................................ 15
Software Needed ............................................................................... 1
Installing the IAR Kickstart Tools ............................................ 15
General Description ......................................................................... 1
Creating a New IAR Project ...................................................... 16
ADE71xx/ADE75xx/ADE51xx/ADE55xx Evaluation Board ..... 1
Project Options ........................................................................... 17
Revision History ............................................................................... 2
Serial Downloader .......................................................................... 19
Evaluation Kit Contents ................................................................... 3
Debugging Serial Download ..................................................... 19
Quick Start ......................................................................................... 5
Serial Downloader Flash Protection ........................................ 20
Connecting the Evaluation Board .................................................. 6
Evaluation Board Software ............................................................ 21
Power Supplies and Load............................................................. 6
Installing the Evaluation Software ........................................... 21
Communications .......................................................................... 6
Removing the Evaluation Software .......................................... 21
Safety .............................................................................................. 6
Launching the Evaluation Software ......................................... 21
Analog Inputs (P3 and P11) ............................................................ 7
Troubleshooting Launch ........................................................... 22
Current Sense Inputs (P11) ......................................................... 7
Main Menu .................................................................................. 22
Using a CT as the Current Transducer ...................................... 8
Evaluation Board Schematic and Artwork.................................. 26
Using a Shunt Resistor as the Current Transducer .................. 9
PCB Layout—Component Placement ..................................... 27
Jumper Settings ............................................................................... 11
PCB Layout—Component Side ................................................ 28
Installing the Drivers...................................................................... 12
PCB Layout—Solder Side .......................................................... 29
Installing the USB-to-UART Board (ADE8052Z-DWDL1)
Driver ........................................................................................... 12
Ordering Information .................................................................... 30
Finding Assigned COM Port Number..................................... 13
ESD Caution................................................................................ 32
Bill of Materials ........................................................................... 30
Removing the Drivers ................................................................ 13
REVISION HISTORY
1/10—Revision 0: Initial Version
Rev. 0 | Page 2 of �2
�Evaluation Board User Guide
UG-061
EVALUATION KIT CONTENTS
Table 1 lists the contents of the evaluation kit that are shown in Figure 2.
ADE71xx/ADE75xx/ADE51xx/ADE55xx
EVALUATION BOARD
USB-TO-UART CONVERTER
(ADE8052Z-DWDL1)
9V DC
POWER ADAPTER
08600-002
ADE7169 OR ADE5169 EVALUATION KIT CD
Figure 2. Evaluation Kit Components
Table 1. Evaluation Kit Components
Component
EVAL-ADE7169EBZ-2/ADE5169EBZ-2 Board
Evaluation Kit CD
9 V DC Power Adapter
USB-to-UART Connector (ADE8052Z-DWDL1)1
1
Description
A printed circuit board (PCB) includes a 4-pin UART connector, 3-pin emulator
connector, three push-buttons, and a prototype area.
CD containing all associated software and support documentation for the
evaluation kit.
220 V and 110 V ac to 9 V dc power adapter. Two ac adapters are provided, a
standard 2-pin European Type C plug on one side and a US adapter. A power jack
connector is provided on the other side.
USB cable and USB-to-UART PCB. The PCB includes a USB connector at one end and
a 4-pin UART connector at the other end. This PCB provides an isolated connection.
A replacement or additional USB-to-UART connector can be ordered from Analog Devices using Part Number ADE8052Z-DWDL1.
Rev. 0 | Page 3 of 32
�UG-061
Evaluation Board User Guide
The evaluation kit also contains a tool package and associated
software to allow the IC to be evaluated. Table 2 lists these tools
and describes their operation. Many of the evaluation kit tools
can also be found on the Analog Devices, Inc., website by
clicking on the Evaluation Boards/Tools link on any of the
following product pages: ADE7116, ADE7166, ADE7169,
ADE7566, ADE7569, ADE5166, ADE5169, ADE5566, or
ADE5569.
Table 2. Evaluation Kit Tools
Tool
Evaluation Software
Program Type
LabVIEW-based
software
IAR KickStart1
Embedded
Workbench®
(KickStart version)
LabVIEW-based
software
Serial Downloader
USB-to-UART Board
Driver
1
Driver
Description
This LabVIEW-based executable software allows the performance of the ADE71xx/
ADE75xx to be evaluated. See the Evaluation Board Software section for details on the
evaluation software. An additional LabVIEW program is provided to work with the
ADE51xx/ADE55xx energy metering IC.
IAR Embedded Workbench KickStart version featuring IDE, C compiler, simulator, and
debugger (C code size is limited to 4 kB). Download the latest version from the IAR
website.
LabVIEW-based executable software is used to download hexadecimal files directly into
the flash memory of the ADE71xx/ADE75xx/ADE51xx/ADE55xx. See the Serial Downloader
section for details on how to use the serial downloader.
Drivers for the USB-to-UART converter board. See the Installing the Drivers section for
step-by-step instructions on how to install these drivers.
The ADE71xx/ADE75xx/ADE51xx/ADE55xx family can also be used with Keil tools. The evaluation version of these tool can be downloaded free of charge from the Keil
website.
Rev. 0 | Page 4 of ��
�Evaluation Board User Guide
UG-061
QUICK START
guide. When the procedures in Figure 3 have been followed and
the evaluation board is operational, the energy metering IC can
be evaluated using the accompanying LabVIEW evaluation
software.
The flowchart shown in Figure 3 outlines the initial steps to set
up the evaluation board and associated communication circuitry. Step-by-step instructions on how to perform each step in
this flowchart are provided in the following sections of this user
STEP 1: INSTALL THE DRIVERS.
REFER TO THE INSTALLING
THE DRIVERS SECTION.
STEP 2: POWER THE EVALUATION BOARD.
REFER TO THE CONNECTING THE
EVALUATION BOARD SECTION.
STEP 3: RUN THE EVALUATION SOFTWARE.
REFER TO THE EVALUATION BOARD
SOFTWARE SECTION.
08600-003
SET UP
COMPLETE
Figure 3. Quick Start Flow Diagram
Rev. 0 | Page 5 of ��
�UG-061
Evaluation Board User Guide
CONNECTING THE EVALUATION BOARD
Figure 4 shows a picture of the EVAL-ADE7169EBZ-2/
ADE5169EBZ-2 board with the communication and power
ports highlighted.
Installing the Drivers section for full details on the installation
procedure.
POWER SUPPLIES AND LOAD
Exercise caution when connecting current or voltage sensors
directly to the 220 V mains supply because the ground of the
EVAL-ADE7169EBZ-2/ADE5169EBZ-2 may become live, thus
creating the potential for electric shock. It is recommended to
use an isolation transformer when working with the mains for
safety reasons. Note that if an external dc supply is used with an
isolation transformer on the mains, then the ground of the dc
supply must not be connected to earth ground. If this condition
occurs, then the isolation in the isolation transformer is bypassed.
SAFETY
Power can be supplied to the EVAL-ADE7169EBZ-2/
ADE5169EBZ-2 board by using the 9 V dc power adaptor that
is supplied with the evaluation kit. Connect the power jack to
the on-board connector shown in Figure 4. Next, insert the plug
into a 220 V or 110 V mains wall socket to provide power.
Refer to the Analog Inputs (P3 and P11) section for instructions
on how to connect the current and voltage signals to the chip,
and note the safety instructions (see the Safety section).
The mains should not be energized before verifying the connection of the analog inputs is correct (see Figure 5 to Figure 9 in
the Analog Inputs (P3 and P11) section), according to the current
sensor type. In addition, JP4 on the voltage input should be
verified to be open before using the mains connection to prevent
damage to the IC. If connecting the board to external equipment
such as a PC, ensure that the communication channel is isolated
using the USB-to-UART converter. The evaluation board and
communication boards should not be handled when the supply
is connected.
COMMUNICATIONS
Communication with the PC can be achieved using the USB-toUART converter (ADE8052Z-DWDL1). This USB-to-UART
board is isolated and, therefore, safe to connect directly to the
PC even if the ground of the evaluation board is tied to 220 V,
as is the case when a shunt is used as the current sensor.
However, caution must be used (see the Safety section). The
location of these connectors is shown in Figure 4. Connect the
other end of the cable to a USB port on the PC. Prior to using
the USB-to-UART board, the driver must be installed. See the
DC9V
Figure 4. Evaluation Board External Connections
Rev. 0 | Page 6 of ��
08600-004
UART
�Evaluation Board User Guide
UG-061
ANALOG INPUTS (P3 AND P11)
Voltage and current signals are connected at the screw terminal, at
P3 and P11, respectively. All analog input signals are filtered
using the on-board antialias filters before being presented to the
analog inputs of the energy metering IC.
The RC networks are the antialias filters that are required by the
on-chip ADCs. The default corner frequency for these low-pass
filters (LPFs) is selected as 4.8 kHz with a resistor of 1 kΩ and a
capacitor of 33 nF).
CURRENT SENSE INPUTS (P11)
P11 is a three-way connection block that allows the ADE71xx/
ADE75xx/ADE51xx/ADE55xx to be connected to a current
transducer.
Rev. 0 | Page 7 of ��
�UG-061
Evaluation Board User Guide
USING A CT AS THE CURRENT TRANSDUCER
However, this phase error can be corrected by writing to the
phase calibration register (PHCAL[7:0]) in the ADE7169/
ADE5169. The software supplied with the ADE7169/ADE5169
evaluation board allows user adjustment of the phase calibration register. See the Evaluation Board Software section for
more information.
Figure 5 shows how a current transformer (CT) can be used as a
current transducer in a single-phase, 2-wire distribution system.
The CT secondary current is converted to a voltage by using a
burden resistance across the secondary winding outputs. Care
should be taken when using a CT as the current transducer. If
the secondary is left open, that is, no burden is connected, a
large voltage may be present at the secondary outputs. This can
cause an electrical shock hazard and potentially damage
electronic components.
The maximum analog input range and gain for the current and
voltage channels are set via the gain register (see the respective
data sheet). The evaluation software allows the user to configure
the channel range and gain. This means that the maximum
peak differential signal on Channel 1 is 0.5 V (at gain = 1).
When using a CT as the current sensor, the antialias filters
should be enabled by opening Jumper JP19 and Jumper JP1
(see Figure 8).
For an antitamper configuration, measuring both the phase and
neutral currents, two CTs can be used as shown in Figure 6. Other
antitamper current sensor options include one shunt and one
CT, as shown in Figure 7.
Most CTs have an associated phase shift of between 0.1° and 1°
at 50 Hz/60 Hz. This phase shift or phase error can lead to significant energy measurement errors, especially at low power factors.
PHASE
JP19
240V
IPA
IPA
LOAD
P11 1
IP
R4
1kΩ
JP11
R16
51Ω
NEUTRAL
C24
0.033µF
R41
0Ω
ADE7169/
ADE5169
JP1
IN
P11 2
IN
IN
R3
1kΩ
JP14
R17
51Ω
C23
0.033µF
R42
0Ω
JP16
IPB/FP26
IPB
R11
1kΩ
JP13
C26
0.033µF
R43
0Ω
08600-059
P11 3
IPB
Figure 5. CT Sensor Connection to Current Channel
JP19
PHASE
IPA
P11 1
IPA
IP
R4
1kΩ
JP11
R41
0Ω
ADE7169/
ADE5169
JP1
IN
P11 2
IN
IN
R3
1kΩ
JP14
R17
51Ω
NEUTRAL
C23
0.033µF
R42
0Ω
JP16
IPB/FP26
P11 3
IPB
IPB
JP13
R11
1kΩ
C26
0.033µF
Figure 6. Connecting Two CTs to the Current Channels
Rev. 0 | Page 8 of ��
R43
0Ω
08600-062
240V
LOAD
R16
51Ω
C24
0.033µF
�Evaluation Board User Guide
UG-061
USING A SHUNT RESISTOR AS THE CURRENT
TRANSDUCER
Figure 8 shows how the shunt can be connected to the evaluation board. Two sense wires should be soldered to the shunt at
the copper/manganium junctions as shown. These sense wires
should be formed into a twisted pair to reduce the loop area,
which in turn reduces antenna effects. A connection for the
common-mode voltage can be made at the connection point for
the current-carrying conductor.
Figure 8 shows how a shunt resistor can be used to perform
the current-to-voltage conversion required for the ADE71xx/
ADE75xx/ADE51xx/ADE55xx. A shunt is a very cost effective
way to sense current in a 2-wire, single-phase application. Isolation is not typically required in a 2-wire application and the
shunt has advantages over the CT arrangement. For example, a
shunt does not suffer from dc saturation problems and the
phase response of the shunt is linear over a very wide dynamic
range. Although the shunt is predominately resistive, it does
have parasitic reactive elements (inductance) that can become
significant, even at 50 Hz/60 Hz. This means that there can be a
small phase shift associated with the shunt. However, the phase
shift is easily compensated by writing to the phase calibration
register (PHCAL[7:0]) in the ADE71xx/ADE75xx/ADE51xx/
ADE55xx.
For an antitamper configuration, measuring both the phase and
neutral currents, two CTs can be used, as shown in Figure 6. Other
antitamper current sensor options include one shunt and one
CT, shown in Figure 7.
It is not possible to use two shunt resistors as current sensors for
use in an antitamper configuration with the ADE71xx/ADE51xx
products because, with a shunt resistor, the line or the neutral is
used as a ground reference for the ADE71xx/ADE51xx IC.
There is no isolation between the two current channels in the
ADE71xx/ADE51xx, and the line and neutral would be effectively shorted together, which is dangerous.
JP19
IPA
P11 1
PHASE
IPA
IP
PGND
R4
1kΩ
JP11
R16
51Ω
C24
0.033µF
R41
0Ω
ADE7169/
ADE5169
JP1
IN
IN
IN
LOAD
P11 2
240V
R3
1kΩ
JP14
R17
51Ω
NEUTRAL
C23
0.033µF
R42
0Ω
JP16
IPB/FP26
IPB
IPB
R11
1kΩ
JP13
P3-2
C26
0.033µF
R43
0Ω
08600-008
P11 3
VN
Figure 7. Connecting One Shunt and One CT to the Current Channels
JP19
IPA
P11 1
IPA
IP
PHASE
R4
1kΩ
JP11
R16
51Ω
350µΩ
C24
0.033µF
R41
0Ω
ADE7169/
ADE5169
JP1
IN
IN
R3
1kΩ
JP14
R17
51Ω
C23
0.033µF
R42
0Ω
JP16
NEUTRAL
IPB/FP26
P11 3
IPB
IPB
JP13
P3-2
R11
1kΩ
VN
Figure 8. Shunt Resistor Used as Current Transducer
Rev. 0 | Page 9 of ��
C26
0.033µF
R43
0Ω
08600-060
220V
IN
LOAD
P11 2
�UG-061
Evaluation Board User Guide
Voltage Sense Inputs
The voltage input connections on the ADE71xx/ADE75xx/
ADE51xx/ADE55xx evaluation board can be connected directly
to the line voltage source. However, an isolation transformer is
recommended for safety reasons. The line voltage is attenuated
using a simple resistor divider network before it is presented to the
ADE71xx/ADE75xx/ADE51xx/ADE55xx. The voltage channel
is recommended to be used in a single-ended configuration.
Figure 9 shows a typical connection for the line voltage.
The voltage attenuation network is made up of R12, R13, and
R15. The maximum signal level permissible at VP is 0.5 V peak.
The signal range should not exceed ±0.5 V with respect to
AGND for specified operation.
The attenuation network can be easily modified by the user to
accommodate any input signal level. However, the value of R15
(1 kΩ) should not be altered because the phase response of
Channel 2 should match that of Channel 1.
Note that the analog input VN is connected to AGND via the
antialias filter R14/C15. Jumper JP9 should be left open.
JP4
R12
R13
499kΩ 499kΩ
PHASE
P3 1
VP
JP6
R22
1kΩ
JP5
VP
R15
1kΩ
C16
0.033µF
R10
0Ω
VP
ADE7169/
ADE5169
JP9
VN
P3 2
VN
VN
R14
1kΩ
C15
0.033µF
R21
0Ω
08600-063
R25
0Ω
100V RMS TO 250V RMS
NEUTRAL
Figure 9. Typical Line Voltage Connection
Rev. 0 | Page 10 of ��
�Evaluation Board User Guide
UG-061
JUMPER SETTINGS
Table 3. Jumper Settings
Function
P2 UART Power Supply
Selection
LCD Voltage Source Selection
Voltage Channel Input
Current Channel Input
Reference Voltage Source
Selection
1
Jumper Option
Pin 1 and Pin 2 of P13 closed
Pin 2 and Pin 3 of P13 closed
Pin 1 and Pin 2 of P6, P7, P8, and P9 closed
Pin 2 and Pin 3 of P6, P7, P8, P9, and P10
closed
JP4, JP5, JP6 and JP9 open
JP1, JP11, JP13, JP14, JP16, and JP19 open;
R16 and R17 removed
JP1, JP11, JP13, JP14, JP16, and JP19 open;
R16 removed; R17 installed
JP1, JP11, JP13, JP16, and JP19 open; R16 and
R17 installed; JP14 closed
JP17 open
Description
P2 UART power supplied by VDD on the board
P2 UART power supplied by VBAT
LCD voltage source using the resistor divider from VDD
LCD voltage source using internal charge pump
Using the on-board resistor divider network for voltage
attenuation
Using shunt but no second current channel
One shunt and one CT for two current channel inputs1
Two CTs for two current channel inputs1
Using the internal VREF voltage reference for ADC
The second channel current input is only supported by the ADE7169, ADE7166, ADE5166, and ADE5169.
Rev. 0 | Page 11 of ��
�UG-061
Evaluation Board User Guide
INSTALLING THE DRIVERS
The USB-to-UART board connects to the PC via the USB port.
For correct operation, install associated Windows®-based
software drivers prior to use.
5.
The prompt shown in Figure 12 appears, stating that the
hardware did not pass the Windows Logo test.
The drivers can be found on the accompanying CD-ROM as
well as on the Analog Devices energy metering website. Visit
the associated product page and click Evaluation Boards/Tools.
INSTALLING THE USB-TO-UART BOARD
(ADE8052Z-DWDL1) DRIVER
Connect the USB cable to the PC and to the USB-to-UART
board. The following window appears indicating that the
PC has detected the new hardware:
08600-011
1.
Figure 12. Install USB2UART Hardware
Click Continue Anyway.
7.
When the installation is complete, the window shown in
Figure 13 appears.
08600-009
6.
Figure 10. USB2UART Found
Click the Install from a list or specific location
(Advanced) option and then click Next >.
3.
Select Include this location in the search and use the
Browse button to locate the Drivers\USB2UART folder on
the evaluation kit CD.
08600-012
2.
Figure 13. USB-to-UART Installation Complete
8.
Click Finish to complete this process.
Windows then issues a second set of prompts to install the
USB drivers to a COM port.
08600-010
9.
Figure 11. Search for USB2UART Driver
4.
Click Next >.
Rev. 0 | Page 12 of �2
Repeat Step 2 through Step 8 to complete the USB-toUART driver installation.
�Evaluation Board User Guide
UG-061
Install the drivers for the USB-to-UART converter on each USB
port used with the board. After installation, the PC detects the
drivers as a regular communication port. Note that there is no
serial number assigned to either the USB-to-UART board or the
emulator pod and, therefore, several boards can be used on the
same USB port without the need to install the driver. To
determine which COM port number has been assigned to the
connected board, open the Device Manager under Windows
using the following steps:
2.
3.
Click the Start button located at the bottom left-hand
corner of the desktop.
Select Control Panel, then System to open the System
Properties window.
Select the Hardware tab and click Device Manager (see
Figure 14).
Figure 15. Device Manager Window
REMOVING THE DRIVERS
The USB-to-UART drivers can be easily removed using the Add
or Remove Programs feature in the Control Panel. Click the
Start button located at the bottom left-hand corner of the
desktop, select Control Panel, then Add or Remove Programs,
and click the drivers to remove them.
08600-017
1.
If the driver is installed properly, the attached device appears
under Ports (COM & LPT), as shown in Figure 15.
08600-018
FINDING ASSIGNED COM PORT NUMBER
Figure 14. System Properties Window
Rev. 0 | Page 13 of 3�
�UG-061
Evaluation Board User Guide
HYPERTERMINAL COMMUNICATION
The PC HyperTerminal can be used to verify communication
with the UART serial interface and read back the ID string of the
ADE71xx/ADE75xx/ADE51xx/ADE55xx on the evaluation
board. The HyperTerminal is also a useful troubleshooting tool
for verifying successful communication between the EVALADE7169EBZ-2/ADE5169EBZ-2 and the PC.
pressing and releasing the RESET push-button, S3. Then
releasing the SDEN push-button, S2.
9.
The ADE71xx/ADE75xx/ADE51xx/ADE55xx identification string should appear on the HyperTerminal window, as
shown in Figure 16.
Connect the USB-to-UART board to both P2 of the EVALADE7169EBZ-2/ADE5169EBZ-2 and the USB connection on
the PC. Prior to using the USB-to-UART board, install the
associated drivers (see the Installing the USB-to-UART Board
(ADE8052Z-DWDL1) Driver section for details). Apply power
to the evaluation board by using the 9 V dc supply. To establish
communication with the PC HyperTerminal, follow these steps:
08600-019
Click the Start button located at the bottom left-hand
corner of the desktop, then select Programs, then
Accessories, then Communications, and finally
HyperTerminal to launch the HyperTerminal window.
Figure 16. HyperTerminal
The telephone icon (see Figure 22) on the top of the
HyperTerminal window can be used to disconnect the
HyperTerminal connection.
2.
In the Name box, enter a name for the new connection.
3.
Click OK.
4.
In the Connect Using drop-down box, select the COM
port that the USB cable is connected to and click OK.
5.
On the properties window, select 9600 as the baud rate
from the Bits per second drop-down box. The data bits
should be set to 8, the parity set to None and the stop bits
set to one. The flow control should be set to None.
6.
Click Apply.
7.
Click OK and the HyperTerminal window appears.
8.
Place the part in serial download mode to verify
communication by pressing and holding the SDEN pushbutton, S2, while issuing a reset. This is accomplished by
08600-052
1.
Figure 17. Telephone Icon
Following these steps confirms that the ADE71xx/ADE75xx/
ADE51xx/ADE55xx is powered up correctly and that communication has been established between the EVAL-ADE7169EBZ-2/
ADE5169EBZ-2 and the PC via the USB-to-UART serial
interface.
Rev. 0 | Page 14 of ��
�Evaluation Board User Guide
UG-061
IAR KICKSTART TOOLS
INSTALLING THE IAR KICKSTART TOOLS
The IAR Embedded Workbench KickStart version that is
provided in the evaluation kit offers an unlimited assembly
language development environment and a 4 kB compiled output
limited C environment. This environment allows the user to
write, compile, and debug code. Code can be downloaded to the
ADE71xx/ADE75xx/ADE51xx/ADE55xx and then debugged in
circuit. The USB-to-UART allows the user to set breakpoints to
debug their code. Another board, the ADE8052Z-EMUL1, can
be purchased separately which allows the user to emulate code
by stepping through code line by line.
To install the IAR KickStart tools, follow these steps:
1.
Open the EW8051-7.30B-KS-ADI.zip file that is located in
the IAR folder of the evaluation kit CD.
2.
Run the Start.exe. application file located in this folder.
This extracts the KickStart tools.
5.
A series of windows appears with installation options.
Select the Install the IAR Embedded Workbench
KickStart Edition option in each window.
6.
Click Next and then Accept on the agreement window.
7.
Then enter the license number and license key. These can
be found on the CD cover of the evaluation kit. Carefully
enter these on the respective windows and click Next.
8.
Prior to installing, select the location that the KickStart
tools are to be placed. If a location other than the default
destination folder is required, use the Browse button to
navigate to the desired location.
9.
Click Next on the subsequent windows to confirm the
settings and begin the installation. Note that the
installation takes a few minutes to complete.
When the installation has been completed properly, the
window shown in Figure 20 appears.
08600-020
08600-022
The window shown in Figure 18 appears.
Figure 18. IAR KickStart
Figure 20. IAR Setup Complete
10. Click Finish to exit the setup.
Click the Software Installations option.
4.
Click the KickStart Edition option shown in Figure 19.
11. To open the IAR Embedded Workbench, click the Start
button located at the bottom left-hand corner of the
desktop, select Programs, then IAR Systems, and then
IAR Embedded Workbench.
08600-021
3.
Figure 19. IAR Software Installation
Rev. 0 | Page 15 of ��
�UG-061
Evaluation Board User Guide
CREATING A NEW IAR PROJECT
Create a new folder in the location where the new IAR
project is to be placed.
2.
Launch the IAR Embedded Workbench by clicking the Start
button, then select Programs, then IAR Systems, and then
IAR Embedded Workbench. The Embedded Workbench
Startup window shown in Figure 21 appears.
Expand the Device specific project templates folder by
clicking the + symbol next to the folder.
5.
Expand the Analog Devices folder by clicking the +
symbol next to the folder.
A list of Analog Devices products appears (see Figure 23).
08600-025
1.
4.
08600-023
Figure 23. ADE7169 Project
6.
If an assembly language project is required for the
ADE71xx and ADE75xx parts, select the ADE7169Fxx –
assembly project. If a C language project is desired, select
ADE7169Fxx – C project and click the OK button. For the
ADE51xx and ADE55xx parts, select ADE5169Fxx –
assembly project and ADE5169Fxx – C project, respectively.
7.
When prompted, give the project a name and save it in the
desired folder.
IAR copies the template files into the specified folder and
creates a main.c or main.asm file depending on the language selection. Figure 24 shows the template for a new C
language project.
Figure 21. Embedded Workbench Startup
Click the Create new project in current workspace
option.
The Create New Project window (shown in Figure 22)
appears.
08600-024
3.
Figure 22. Create New Project Options
Rev. 0 | Page 16 of ��
�Evaluation Board User Guide
UG-061
Target Selection
08600-028
08600-026
The default project settings of the ADE7169Fxx and ADE5169Fxx
C and assembly templates configure the project to execute in an
ADE7169Fxx or ADE5169Fxx target. If this is not desired, the
simulator can be selected by clicking the Debugger category. In
the Setup tab under the Driver option, select Simulator.
Figure 24. Project Template
Figure 26. Debugger Options
The project template files include the interrupt vector table and
a header file that defines the registers. Two header files exist:
one for the ADE71xx and ADE75xx family and another for the
ADE51xx and ADE55xx family. Develop new code using this
template.
PROJECT OPTIONS
Communication between the EVAL-ADE7169EBZ-2/
ADE5169EBZ-2 evaluation board and the PC can be achieved
using either the USB-to-UART connections, or the emulation
pod. Prior to using either of these tools, the corresponding
drivers must be installed. See the Installing the Drivers section for
more details. The corresponding COM port must then be
selected.
1.
2.
In the Analog Devices category in the project options
window, select the Serial Port tab.
Using the Port drop-down box, select the COM port that
the USB-to-UART has been assigned to (see Figure 27).
See the Finding Assigned COM Port Number section to
determine the COM port that is in use.
Figure 25. Project Options
08600-029
08600-027
When a new project is created using the ADE7169Fxx or
ADE5169Fxx assembly or C template, a set of default project
options are set. These options set up the compiler, assembly,
communication, and debugger. The project options are accessible by right-clicking on the project name at the top of the Files
column on the IAR Embedded Workbench IDE (see Figure 24
under the Workspace section). Figure 25 shows the Options for
node “UserGuideasm” project options window.
Communication
Figure 27. COM Port Selection
Rev. 0 | Page 17 of ��
�UG-061
Evaluation Board User Guide
The project options required for each of the communication
methods are described in the following sections. These options
are also outlined in the readme.txt file included in the project
files. Note that the ADE7169Fxx and ADE5169Fxx template
projects default to using the USB-to-UART board settings for
downloading code to the target.
1.
2.
Under the Output tab, select the Allow C-SPY-specific
extra output file box.
Under the Extra Output tab, in the Output file box,
type the name of the hexadecimal file that is going to be
generated complete with a .hex file type (see Figure 29).
Project Options When Using the USB-to-UART Board
1.
2.
3.
4.
In the Analog Devices category in the project options
window, select the Download tab.
Select the UART debug mode check box.
Select the Ade device protocol check box.
The ADE71xx/ADE75xx/ADE51xx/ADE55xx incorporates
an internal downloaded verification; therefore, ensure that
the verify download button is cleared because the IAR
protocol is not supported.
In the Analog Devices category in the project options window,
select the Download tab. Clear the UART debug mode check box
and select the Ade device protocol box. The ADE71xx/ADE75xx/
ADE51xx/ADE55xx incorporates an internal downloaded
verification; therefore, ensure that the verify download box is
cleared because the IAR protocol is not supported.
Creating a Hexadecimal File
Figure 29. Hexadecimal File Define
After the project has been built, the hexadecimal file can be
found in the project folder in the Debug > Exe subfolder.
Downloading User Firmware
Place the part in serial download mode by pressing and holding
the SDEN push-button, S2, while issuing a reset by pressing and
releasing the RESET push-button, S3. The SDEN push-button
should then be released. When in serial download mode, click
the debug icon shown in Figure 30 located on the toolbar of the
IAR workbench.
08600-032
The user can configure the project options so that IAR generates a hexadecimal file each time the project is built. This
hexadecimal file can then be downloaded to the part using the
serial downloader (see the Serial Downloader section). Select
the Linker category in the project options as shown in Figure 28.
08600-031
Project Options When Using the Emulation Pod
Figure 30. IAR Debug Icon
08600-030
When the download is complete, click the Run icon to start the
code. Alternatively, the RESET push-button, S3, can be pressed
to start the code.
Figure 28. Hexadecimal File Generation
Rev. 0 | Page 18 of ��
�Evaluation Board User Guide
UG-061
SERIAL DOWNLOADER
Prior to using the serial downloader, the evaluation board
should be powered by the 9 V dc supply. Connect the USB-toUART board to the P2 header and the USB connection on the
PC. If using the USB-to-UART board for the first time, install
the USB-to-UART drivers. See the Installing the Drivers section
for details.
Figure 32. Serial Downloader—Complete
Note that the download time varies depending on the size of the
hexadecimal file that is being downloaded.
After the code has been downloaded properly, press the RESET
push-button, S3, to begin the code execution.
DEBUGGING SERIAL DOWNLOAD
If the part cannot be found by the serial downloader, the
message shown in Figure 33 appears.
08600-035
Figure 32 shows the interface for the ADE71xx/ADE75xx
serial downloader. A similar program allows downloading to
the ADE51xx/ADE55xx. To download code to the flash memory, locate the required hexadecimal file using the Browse
button and then place the part in serial download mode. This is
achieved by pressing and holding the SDEN push-button, S2,
while issuing a reset by pressing and releasing the RESET pushbutton, S3. The SDEN push-button, S2, should then be released.
Once in serial download mode, click the Find Device and
Reset button on the serial downloader interface. The message
shown in Figure 32 then displays on the serial downloader
interface.
08600-034
The ADE71xx/ADE75xx and ADE51xx/ADE55xx standalone
serial downloaders can be used to download Intel® hexadecimal
files to the 16 kB of on-chip flash memory. Data transfer takes
places through the UART serial interface. The serial downloaders can also be used to configure read and write protection on
the ADE71xx/ADE75xx and ADE51xx/ADE55xx families of parts.
Note that there are two downloader programs, one targeted at
the ADE71xx/ADE75xx and another for the ADE51xx/ADE55xx.
There are two different software programs because the two families
have different flash protection schemes. The commands used to
initiate the serial download are an extension of the commands
listed in the uC004 Technical Note, Understanding the Serial
Download Protocol, available at www.analog.com.
08600-033
Figure 33. Serial Downloader—Part Not Found
Figure 31. Serial Downloader—Reset
When communication is established, click the Download
button to initiate the download. When the download is
complete, the message shown in Figure 32 appears.
The part cannot be found if the ADE71xx/ADE75xx is not
correctly powered or if the serial downloader cannot communicate with the EVAL-ADE7169EBZ-2/ADE5169EBZ-2. Another
possible cause of this failure is that the ADE71xx/ADE75xx is
not in serial download mode. Ensure that the ADE71xx/ADE75xx
is receiving 3.3 V from the 9 V dc power supply. This can be
verified using an oscilloscope or voltmeter to probe both the
VDD and VINTD test pins. Ensure that the USB-to-UART
board is connected to the P2 header and that the necessary
drivers have been installed (see the Installing the Drivers section).
Use the procedure outlined in the HyperTerminal Communication
section to verify that communication has been established.
Place the part in serial download mode once again by pressing the
push-button sequence described in the Serial Downloader section.
Rev. 0 | Page 19 of ��
�UG-061
Evaluation Board User Guide
SERIAL DOWNLOADER FLASH PROTECTION
Configure the flash protection by using the ADE71xx/ADE75xx
serial downloader interface. Clicking the Flash Protection
button on the serial downloader panel brings up the window
shown in Figure 34. Configure the protection after downloading
the required hexadecimal file to the flash memory but prior to
pressing the RESET button, S3, to begin code execution.
08600-036
From this window, the write/erase and read protection can be
set up for each of the 31 pages of flash. Changes made to the
flash protection should be written to the part using the WRITE
command. Note that when the WRITE button is clicked, the
flash memory is directly modified and, therefore, once a page
has been locked (that is, 0x00 written to the flash location) it
cannot be unlocked (that is, restored to 0xFF) without resetting
the part. To activate the protection, reset the ADE71xx/ADE75xx
by pressing the RESET push-button, S3. Note that for best
practice, do not enable the read or write/erase protection while
debugging or emulating code. A full description of the flash
protection scheme can be found in the respective data sheet.
Figure 34. Serial Downloader Flash Protection
Rev. 0 | Page 20 of ��
�Evaluation Board User Guide
UG-061
EVALUATION BOARD SOFTWARE
Note that when using the evaluation software, a low level
hexadecimal file automatically downloads into the flash
memory of the ADE71xx/ADE75xx/ADE51xx/ADE55xx and
any code previously contained in this memory is erased.
to completely read and write to the internal register of the
ADE71xx/ADE75xx/ADE51xx/ADE55xx.
08600-037
The ADE71xx/ADE75xx/ADE51xx/ADE55xx evaluation kit
contains PC-based evaluation software for testing the performance of the ADE71xx/ADE75xx/ADE51xx/ADE55xx. This
software was developed using LabVIEW software from
National Instruments and it is included on the ADE71xx/
ADE75xx/ADE51xx/ADE55xx evaluation kit CD. It can also be
found on the Analog Devices website, via the product page for the
ADE7116, ADE7166, ADE7169, ADE7566, ADE7569, ADE5166,
ADE5169, ADE5566, or ADE5569 by clicking the Evaluation
Boards/Tools link. When using the evaluation software, attach
the P2 header of the evaluation board to the PC using the USBto-UART board. The USB-to-UART driver must be installed.
See the Installing the Drivers section for details on this procedure.
Supply power to the EVAL-ADE7169EBZ-2/ADE5169EBZ-2
from the 9 V dc supply.
Figure 35. Download Evaluation Program Prompt
A final prompt is given prior to the mass erase of the flash
memory. This prompt is shown in Figure 36. Any code that was
previously stored in the flash memory of the target IC is erased at
this time.
There are two evaluation software executables, one for the
ADE71xx/ADE75xx family and one for the ADE51xx/ADE55xx
family. Both executables can be found on the evaluation kit CD.
Prior to running the evaluation software for the first time, it
should be installed using the setup.exe application located in
the Installer folder. This application launches the setup program
that automatically installs all of the software components, including the uninstall program, and creates the required directories.
To launch the software, click the Start button, select Programs,
then ADE71xxFxx Eval Software, and then ADE71xxFxx_
eval_softare. Alternatively, select ADE51xxFxx Eval Software,
and then ADE51xxFxx_eval_softare for the ADE51xx/ADE55xx
evaluation software.
08600-038
INSTALLING THE EVALUATION SOFTWARE
Figure 36. Erase Flash Memory Prompt
To download the hexadecimal file properly, place the part in
serial download mode when the prompt shown in Figure 37
appears. This is achieved by pressing and holding the SDEN
push-button, S2, while issuing a reset by pressing and releasing
the RESET button, S3. The SDEN push-button, S2, should then
be released.
LAUNCHING THE EVALUATION SOFTWARE
Figure 37. Enter Serial Download Mode
When the download is complete, the prompt shown in Figure 38
appears and the target IC should be reset by pressing the RESET
button, S3.
When launching the ADE71xx/ADE75xx or ADE51xx/ADE55xx
evaluation software, a series of pop-up windows appear in front
of the evaluation software main menu, prompting you to download the evaluation hexadecimal file into the flash memory of the
target IC. Follow these prompts to allow the low level assembly
functions to be downloaded into the flash memory. This low
level code provides the communication protocol for the evaluation software and it is essential to allow the evaluation software
Rev. 0 | Page 21 of ��
08600-040
The ADE71xx/ADE75xx/ADE51xx/ADE55xx evaluation programs are easily removed using the Add or Remove Programs
feature in the Control Panel. Click the Start button and select
Control Panel, then Add or Remove Programs, and select the
ADE71xx or ADE51xx evaluation software. A dialog box
appears. Click OK to start the removal process, and follow the
instructions to finish.
08600-039
REMOVING THE EVALUATION SOFTWARE
Figure 38. Download Complete
�UG-061
Evaluation Board User Guide
A reset is initiated by pressing and releasing the RESET pushbutton, S3. The main menu shown in Figure 42 is then displayed
showing the respective evaluation software options.
TROUBLESHOOTING LAUNCH
Code Previously Installed
If the evaluation software detects a previous connection to the
target IC, the prompt shown in Figure 39 is displayed.
Ensure that the ADE71xx/ADE75xx/ADE51xx/ADE55xx is
receiving 3.3 V from either the 9 V dc power supply or the
220 V line power. If using the 9 V dc power supply, this can be
verified using an oscilloscope or voltmeter to probe both the
VDD and VINTD pins.
Ensure that the USB-to-UART board connects to the P2 header
and the necessary drivers are installed (see the Installing the
Drivers section). To verify communication has been established,
use the procedure outlined in the HyperTerminal Communication
section.
Place the part in serial download mode once again by pressing
the push-button sequence described in the Launching the
Evaluation Software section.
08600-041
MAIN MENU
Figure 39. Code Previously Installed
Figure 42 shows the main menu of the ADE71xx/ADE75xx
evaluation software. The COM port address and the ID string
of the ADE71xx/ADE75xx part detected during the download
process are displayed on this window. The left option box lists
the functional blocks that can be tested using this software.
08600-042
If the code has already been downloaded to the target IC and
the communication port address has not been changed, click
the OK button to proceed to the main menu. If it is possible
that the code may have been erased or the communication port
changed, click NO and the prompt shown in Figure 40 appears.
Figure 40. Redownload Code
08600-044
Click OK and follow the prompts shown in Figure 35 through
Figure 38 to redownload the code.
Download Failure
08600-043
If the download does not complete properly, the prompt shown
in Figure 41 appears.
Figure 41. Download Failed
There are three reasons that a download may fail:
•
•
•
The ADE71xx/ADE75xx/ADE51xx/ADE55xx is not
powered up correctly.
The communication failed.
The part was not in serial download mode.
Figure 42. Main Menu
To issue a reset and redownload the low level hexadecimal code
to the ADE71xx/ADE75xx, the Reset and download EVAL hex
file option should be chosen. Selecting this option causes the series
of prompts described in the Launching the Evaluation Software
section to appear. The Exit option causes the evaluation software to stop running.
Each of the remaining MAIN MENU options, with the exception of the Metering Functions option, causes a new window to
appear in front of the main menu window. Clicking the EXIT
button in the new window brings you back to the main menu
window. Register values are not reset by the program when a
new window opens or closes. Clicking the Metering Functions
option opens a secondary menu with more evaluation options.
These options are described in the Metering Menu section.
Rev. 0 | Page 22 of �2
�Evaluation Board User Guide
UG-061
08600-046
From the MAIN MENU, the real time clock (RTC) can be
configured and evaluated. The RTC window is displayed in
Figure 43.
Figure 44. Power Management Window
The user can view or change the current power configuration
with this option.
08600-045
The LCD window has a series of tabs that can be selected to
configure and view the LCD panel display and the internal
RAM. Figure 45 shows the 3 PHASE tab that depicts the LCD
panel that is used on the ADE71xx/ADE75xx reference board.
When the segments have been set up and written to the LCD
memory by clicking the WRITE button, the LCD panel on the
ADE71xx/ADE75xx reference board should be identical to the
3 PHASE tab on the evaluation software.
Figure 43. Real Time Clock Window
From this window, the RTC can be synchronized to the PC
clock by clicking the SYNC TO PC CLK button. The RTC can
be continually monitored by clicking the READ CONT button,
although it should be noted that the update rate may be limited
by the PC and LabVIEW speed.
08600-047
Clicking Power Management under MAIN MENU allows you
to view the block diagram of the power sources to the ADE71xx/
ADE75xx in the power management window. This window is
shown in Figure 44.
Figure 45. LCD Window
Rev. 0 | Page 23 of ��
�UG-061
Evaluation Board User Guide
Metering Menu
08600-049
Selecting the Metering Functions option under MAIN MENU
opens the secondary metering menu window shown in Figure 46.
08600-048
Figure 47. Active Energy Window
Figure 46. Metering Menu
From this window, many of the energy metering functions can be
evaluated. Clicking each of the options shown under METERING
MENU opens a new window in front of the metering menu
window. Clicking the EXIT button in the new window brings
you back to the metering menu window. From METERING
MENU, you can return to the main menu window by clicking
the BACK to Main Menu option. Opening or closing new
windows does not cause the ADE71xx/ADE75xx registers to reset.
Similar windows are available for the Reactive Energy and
Apparent Energy data paths. From these windows, the data
paths can be configured and reset by writing to the necessary
registers. Changes made on the data path window are not
written to the part until the WRITE CONFIG button is clicked.
The energy data can also be read in either normal mode or line
cycle accumulation mode.
From the active energy, reactive energy, and apparent energy
windows, the calibration frequency output can be configured
using the CF CFG button. Clicking this button opens the
window shown in Figure 48.
The Interrupt Registers window allows you to set up the interrupt masks and view the status bits described in the ADE71xx/
ADE75xx data sheet. The Power Quality Information window
allows you to read the registers associated with the current and
voltage readings, along with monitoring the voltage channel
frequency, zero crossings, and line voltage sag events. The offset
calibration registers can be written to in the Offsets window. In
all windows, any changes made are not written to the part until
the corresponding WRITE button is clicked.
Active, Reactive, and Apparent Energy
08600-050
The Active Energy, Reactive Energy, and Apparent Energy
options allow you to view the data path for each of these measurements. The data path for the active energy data path is shown in
Figure 47.
Figure 48. Calibration Frequency
The two CF outputs can be configured and enabled from this
window. Once again, any changes made in the window are not
written to the part until the WRITE CF REGISTERS button is
clicked.
Rev. 0 | Page 24 of ��
�Evaluation Board User Guide
UG-061
Waveform Sampling
The waveform sampling window allows you to view multiple
waveforms in the signal chain, including the current, voltage,
active, reactive and apparent multiplier outputs, along with the
output of the IRMS LPF. The samples are taken at a speed of
3.2 kSPS. The number of samples is defined by adjusting the
value in the Buffer Length box.
08600-051
The waveform sampling window is accessible from the active
energy, reactive energy, and apparent energy windows and by
selecting the Line Accumulation option under METERING
MENU. Figure 49 shows the waveform sampling window.
Figure 49. Waveform Sampling Window
Rev. 0 | Page 25 of ��
�3
2
1
JP13
NCWP2P
AGND
I PB
IN
I PA
P4
P11
2
1
2
AGND
JP14
NCWP2P
AGND
JP11
NCWP2P
0
R25
VP
VN
1
P3
AGND
AGND
2
NCWP2P
1
JP5
2
1
2
499K
JP6
1K NCWP2P
499K
R22
NCWP2P
R13
R12
1
JP4
AGND
0
DGND
R7
AGND
L1
2
C9
120OHM
1
0.1UF
AGND
2
2
JP1
1K
2
NCWP2P
R11
1
JP16
1K
NCWP2P
R3
1
1K
NCWP2P
R4
1
JP19
AGND
DGND
AGND
2
JP9
MMSZ4678T1
1K
0
0
R43
AGND
AGND
0
IPB/FP26
0
R42
IN
DGND
R21
0
R10
IPA
AGND
R41
AGND
NCWP2P
R14
1
DGND
DGND
PJ-202A
3
2
0.033UF
1
CR5
R19
R18
P1
7.15K
2K
AGND
0.033UF
VN
VP
IPB/FP26
IN
IPA
DGND
VDCIN
VDCIN
C1
C33
GND
R15
10UF
0.1UF
2
3
IN
DGND
OUT
1
ZSR330GTA
2 4
GND
VR1
AGND
VDD1
VN
VP
C7
JP3
C6
1
VINTD VSWOUT
1UF
C17
C12
NCWP2P
U2
10UF
R2
10K
AGND
R24
R5
10K
DGND
NCWP2P
2
JP17
1
AGND
560
DGND
MAX6190AESA
GND
4
OUT 6
2
IN
VSWOUT
0.1UF
DGND
REF
AGND
DGND
VDD
RESETB
0
R6
VINTA
VDD1
VDD1
INT0B
C31
IN
IPA
EA
VN
VP
57
58
49
50
51
52
53
54
55
RESETB56
VP
VN
EA
IP
IN
AGND
I PB/ FP26
RESET
REFI N
VBAT
VI NTA
VDD
VSWOUT
VI NTD
DGND
VDCI N
22
21
20
19
18
17
16
15
14
13
12
11
10
9
8
7
6
5
4
3
2
1
2
1K
TP38
DGND
0
0
VDD1
DUT1
ADE7169
SKTARIES-7728-101-23
BCTRL/INT1/P0.0
P0.1/FP19
P0.2/CF1
P0.3/CF2
P0.4/MOSI/SDATA
P0.5/MISO
P0.6/SCLK/T0
P0.7/SSB/T1
P1.0/RXD
P1.1/TXD
P1.2/FP25
P1.3/T2EX/FP24
P1.4/T2/FP23
P1.5/FP22
P1.6/FP21
P1.7/FP20
P2.0/FP18
P2.1/FP17
P2.2/FP16
SDEN/P2.3
VDD1
DGND
DO-NOT-INSTALL
R49
DO-NOT-INSTALL
R50
DO-NOT-INSTALL
6PF
C21
DO-NOT-INSTALL
6PF
C13
B3S1000
4
BCTRL/INT1/P0.0
S2
R29
1
3
P12
AGND
AGND
63
64
VINTD 62
VSWOUT61
VDD 60
VINTA 59
TSM-122-01-T-SV
DGND
VBAT
REF
IPB/FP26
0.1UF
VDCIN
AGND
C35
DGND
C34
REF
TP1
10UF
AGND
VDD
VDD
AGND
TP_VDD TP_AGND
1
COM3/ FP27
CR7
COM2/ FP28
MMSZ4678T1
C30
4
COM0
CLKOUT
46
VDD1
COM1
BCTRL/ P0. 0
45
1
R16
C16
0.1UF
5
P1. 2/ FP25
SDEN/ P2. 3
44
C2
OPEN
C8
7
P1. 4/ T2/ FP23
P0. 2/ CF1
43
0.1UF
0.1UF
6
P1. 3/ T2EX/ FP24
42
10UF
C28
51
51
R17
3
1
0.1UF
4
2
C10
C20
S1
S3
B3S1000
P1. 5/ FP22
P0. 4/ MOSI / SDATA
10UF
C18
C14
0.1UF
4
2
1K
C24
C23
1K
1UF
C19
3
1
10UF
B3S1000
R53
15
LCDVC
VBAT
1K
C15
0.033UF
Y1
LCDVP2
VBATT
10UF
2
1
2
1
CLKIN CLKOUT
11
P0. 1/ FP19
P0. 7/ T1
2
I NTO
48
P2. 2/ FP16
EA
EA
VSWOUT
VSWOUT
2
R1
1K
DGND
DGND
3
32.768KHZ
P16
2
4
8
6
4
2
1
DGND
DO-NOT-INSTALL
R23
500
CW
DGND
VP2
TSM-103-01-T-SV
3
2
1
P13
1
2
3
4
TSM-104-01-T-SH
P2
VDD1
VUART
VBAT
NCWP3P
3
2
1
P10
NCWP3P
3
2
1
P9
NCWP3P
3
2
1
P8
NCWP3P
3
2
1
P7
NCWP3P
3
2
1
P6
TSM-105-01-T-SH
6
5
4
3
2
1
P5
VDD1
VP2
VP1
0.47UF VP1
C4 VA
0.47UF VA
VUART
DGND
VB
C5 VB
0.47UF
VDD1
DGND
DGND
DGND
VC
C3 VC
3
P1.0/RXD
P1.1/TXD
VSWOUT
P0.7/SSB/T1
P0.6/SCLK/T0
P0.5/MISO
P0.4/MOSI/SDATA
DGND
VSWOUT
P15
10
3
P15
14
12
5
16
15
7
18
17
9
20
19
13
22
21
11
26
28
27
24
30
25
32
23
36
34
38
37
29
40
39
31
42
41
33
44
43
35
48
46
45
50
47
49
TSW-125-08-L-D
DGND
DGND
DGND
DGND
DGND
DGND
JP18
DGND NCWP2P
DGND
C25
2
1
P14
DGND
2
GND
OUT
Y2
640455-3
1VI O
4VDD
VSWOUT
NCWP2P
1
JP15
P16
1
3
6
10
9
8
12
11
7
14
13
5
16
15
P1.3/T2EX/FP24
P1.4/T2/FP23
P1.5/FP22
P1.6/FP21
P1.7/FP20
P0.1/FP19
P2.0/FP18
P2.1/FP17
P2.2/FP16 FP15
FP14
FP13
FP12
FP11
FP10
FP9
FP8
FP7
FP6
FP5
FP4
FP3
FP2
FP1
FP0
DGND
VDD1
DGND5
AGND5
AGND
DGND3
DGND4
AGND4
DGND1
AGND3
DGND2
VB
VA
VP1
AGND1
32
31
30
29
28
27
26
25
24
23
22
21
20
19
18
17
P1.2/FP25
R51
AGND2
FP3
FP4
FP5
FP6
FP7
FP8
FP9
FP10
FP11
FP12
FP13
FP14
FP15
LCDVP1
LCDVA
LCDVB
IPB/FP26
VDD1
DGND
COM3/FP27
COM2/FP28
COM1
0 COM0
SAMTECTSW11008GD- 16PI N
2
1
OPEN
R54
32.7680KHZ
9
P1. 6/ FP21
P0. 5/ MI SO
40
3
CLKI N
8
P0. 3/ CF2
SDEN/P2.3
P0.2/CF1
P0.3/CF2
P02/CF1
47
12 P2.0/FP18
P2. 0/ FP18
P2.1/FP17560
P2.2/FP16
VC
VP2
13
38
RED
C26
0.1UF
COM3/FP27
COM2/FP28
COM1
COM0
P1.2/FP25
P1.3/T2EX/FP24
P1.4/T2/FP23
P1.5/FP22
P1.6/FP21
P1.7/FP20
P0.1/FP19R28
10
P1. 7/ FP20
P0. 6/ SCLK/ T0
39
41
560
0.033UF
R48
14
P1. 0/ Rx D
37
RED
CR1
C27
R46
R8
R9
R20
30.1K
30.1K
30.1K
DO-NOT-INSTALL
2
DO-NOT-INSTALL
P2. 1/ FP17
P1. 1/ Tx D
36
0.1UF
16
FP1
34
FP2
33
FP0
35
P0.4/MOSI/SDATA
P0.5/MISO
P0.6/SCLK/T0
P0.7/SSB/T1
P1.0/RXD
P1.1/TXD
CR2
560
R27
C32
R26
0.1UF
R47
R44
Rev. 0 | Page 26 of ��
DO-NOT-INSTALL
Figure 50.
R45
GREEN
P03/CF2
0.033UF
R52
CR4
DO-NOT-INSTALL
CR3
DO-NOT-INSTALL
RED
C11
UG-061
Evaluation Board User Guide
EVALUATION BOARD SCHEMATIC AND ARTWORK
08600-053
�Evaluation Board User Guide
UG-061
08600-054
PCB LAYOUT—COMPONENT PLACEMENT
Figure 51. Silkscreen
Rev. 0 | Page 27 of ��
�UG-061
Evaluation Board User Guide
08600-055
PCB LAYOUT—COMPONENT SIDE
Figure 52. Layer 1
Rev. 0 | Page 28 of ��
�Evaluation Board User Guide
UG-061
08600-056
PCB LAYOUT—SOLDER SIDE
Figure 53. Layer 2
Rev. 0 | Page 29 of ��
�UG-061
Evaluation Board User Guide
ORDERING INFORMATION
BILL OF MATERIALS
Table 4. Components Listing
Qty.
7
3
2
12
3
2
2
1
1
1
Reference Designator
C1 to C2, C6, C8 to C9, C11, C34
C3 to C5
C7, C10
C12, C14, C17 to C20, C25, C27
to C28, C32 to C33, C35
C13, C21
C15 to 16, C23 to C24, C26
C30 to C31
CR1 to CR3
CR4
CR5, CR7
L1
P1
P2
P3 to P4
P5
P11
P12
P13
P14
P15
P16
R1, R29, R53 to R54
R2, R5
R3 to R 4, R11, R14 to R15, R22
R6 to R7, R10, R21, R25, R41 to
R43, R51
R8 to R9, R20
R12 to R13
R16 to R17
R18
R19
R23
4
6
2
3
1
1
1
1
R24, R26 to R28
R44 to R48, R52
R49 to R50
S1 to S3
U2
VR1
Y1
Y2
2
5
2
3
1
2
1
1
1
2
1
1
1
1
1
1
1
4
2
6
9
Description
Tantalum, 10 µF, 16 V, 20% SMD capacitor
Tantalum, 0.47 µF, 25 V, 20% SMD capacitor
1 µF, 50 V, ceramic 1206 SMD capacitor
0.1 µF, 50 V, ceramic X7R 1206 SMD capacitor
Supplier/Number
Digi-Key: PCT3106CT-ND
Digi-Key: PCS5474TR-ND
AVX 1206YG1052AT2A
Digi-Key: PCC104BCT-ND
6 pF, 50 V, ceramic NP0 0805 SMD capacitor
33,000 pF, 50 V, ceramic X7R 1206 SMD capacitor
Open
Clear greed LED LC gull wing SMD
Clear green LED LC gull wing SMD
Zener diode 1.8 V 500 mW SOD-123
Ferrite bead, 300 mA 150 Ω 1806 SMD
Power jack connector 2.1 × 5.5 mm
Right angle 4-position SMD header 0.100
2-position PCB board connector 5 mm
Right angle 6-position SMD header 0.100
3-position PCB board connector 5 mm
Vertical 22-position SMD header 0.100
Vertical 3-position SMD header 0.100
Right angle 3-position 0.100 tin connector
50-position header, 0.100" double row gold
20-position header, 0.100" double row gold
1.00 kΩ, ¼ W, 1%, 1206 SMD resistor
10.0 kΩ, ¼ W, 1%, 1206 SMD resistor
1 kΩ precision chip resistors, 0.1 W, 0.1%, 10 ppm, 0805 SMD
0 Ω, ¼ W 5% 1206 SMD resistor
DNI
Digi-Key: 311-1177-1-ND
DNI
Digi-Key: L62705CT-ND
Digi-Key: L62705CT-ND
Digi-Key: MMSZ4678T1GOSCT-ND
Digi-Key: 240-1030-1-ND
Digi-Key: CP-202AH-ND
Samtec TSM-104-01-T-SH
WIELAND ELECTRIC 25.161.0253.0
Samtec TSM-106-01-T-SH
WIELAND ELECTRIC 25.161.0353.0
Samtec TSM-122-01-T-SV
Samtec TSM-133-01-T-SV
Digi-Key: A19461-ND
Digi-Key: SAM1041-25-ND
Digi-Key: SAM1037-10-ND
Digi-Key: P1.00KFCT-ND
Digi-Key: P10.0KFCT-ND
TYCO RN73C2A1K0BTG
Digi-Key: P0.0ECT-ND
30.1 kΩ, ¼ W, 1% 1206 SMD resistor
499 kΩ, ¼ W, 1% 1206 SMD resistor
51.1 Ω, ¼ W, 1% 1206 SMD resistor
2.00 kΩ, ¼ W, 1% 1206 SMD resistor
7.15 kΩ, ¼ W, 1% 1206 SMD resistor
Multiturn trimmer potentiometer, 500 Ω, standoffs, vertical
adjust 3/8
560 Ω, 1/8 W, 0.1%, 0805 SMD resistor
1.00 kΩ, 1/8 W, 1%, 0805 SMD resistor
0 Ω, 1/8 W, 5%, 0805 SMD resistor
Tactile switch, 6 mm SMD
IC reference voltage LDO 8-SOIC
3.3 V, 200 mA, SOT-223 voltage regulator
Crystal 32.768 kHz, 6.0 pF SMD
Crystal oscillator 32.768 kHz, 5 ppm ± 23 ppm SMD
Digi-Key: P30.1KFCT-ND
Digi-Key: P499KFCT-ND
Digi-Key: P51.1FTR-ND
Digi-Key: P2.00KFTR-ND
Digi-Key: P7.15KFTR-ND
Digi-Key: 3299W-501LF-ND
Rev. 0 | Page 30 of 3�
Digi-Key: P560ZTR-ND
DNI
DNI
Digi-Key: SW415-ND
Digi-Key: MAX6190AESA+-ND
Digi-Key: ZSR330GCT-ND
Digi-Key: SE2417TR-ND
Digi-Key: SE3618TR-ND
�Evaluation Board User Guide
UG-061
NOTES
Rev. 0 | Page 31 of 3�
�UG-061
Evaluation Board User Guide
NOTES
ESD CAUTION
Evaluation boards are only intended for device evaluation and not for production purposes. Evaluation boards are supplied “as is” and without warranties of any kind, express,
implied, or statutory including, but not limited to, any implied warranty of merchantability or fitness for a particular purpose. No license is granted by implication or otherwise under
any patents or other intellectual property by application or use of evaluation boards. Information furnished by Analog Devices is believed to be accurate and reliable. However, no
responsibility is assumed by Analog Devices for its use, nor for any infringements of patents or other rights of third parties that may result from its use. Analog Devices reserves the
right to change devices or specifications at any time without notice. Trademarks and registered trademarks are the property of their respective owners. Evaluation boards are not
authorized to be used in life support devices or systems.
©2010 Analog Devices, Inc. All rights reserved. Trademarks and
registered trademarks are the property of their respective owners.
UG08600-0-1/10(0)
Rev. 0 | Page 32 of 32
�