Product
Folder
Order
Now
Technical
Documents
Support &
Community
Tools &
Software
ADS124S06, ADS124S08
SBAS660C – AUGUST 2016 – REVISED JUNE 2017
ADS124S0x Low-Power, Low-Noise, Highly Integrated, 6- and 12-Channel,
4-kSPS, 24-Bit, Delta-Sigma ADC with PGA and Voltage Reference
1 Features
3 Description
•
•
•
•
•
The ADS124S06 and ADS124S08 are precision, 24bit, delta-sigma (ΔΣ), analog-to-digital converters
(ADCs) that offer low power consumption and many
integrated features to reduce system cost and
component count in applications measuring smallsignal sensors.
1
•
•
•
•
•
•
•
•
•
•
•
•
Low Power Consumption: As Low as 280 µA
Low-Noise PGA: 19 nVRMS at Gain = 128
Programmable Gain: 1 to 128
Programmable Data Rates: 2.5 SPS to 4 kSPS
Simultaneous 50-Hz and 60-Hz Rejection at
≤ 20 SPS with Low-Latency Digital Filter
Analog Multiplexer with 12 (ADS124S08) or 6
(ADS124S06) Independently Selectable Inputs
Dual-Matched Programmable Current Sources for
Sensor Excitation: 10 µA to 2000 µA
Internal Reference: 2.5 V, 10 ppm/°C (max) Drift
Internal Oscillator: 4.096 MHz, 1.5% Accuracy
Internal Temperature Sensor
Extended Fault Detection Circuits
Self Offset and System Calibration
Four General-Purpose I/Os
SPI-Compatible Interface with Optional CRC
Analog Supply: Unipolar (2.7 V to 5.25 V) or
Bipolar (±2.5 V)
Digital Supply: 2.7 V to 3.6 V
Operating Temperature: –50°C to +125°C
2 Applications
•
•
•
•
Sensor Transducers and Transmitters:
Temperature, Pressure, Strain, Flow
PLC and DCS Analog Input Modules
Temperature Controllers
Climate Chambers, Industrial Ovens
These ADCs feature configurable digital filters that
offer low-latency conversion results and 50-Hz or
60-Hz rejection for noisy industrial environments. A
low-noise, programmable gain amplifier (PGA)
provides gains ranging from 1 to 128 to amplify lowlevel signals for resistive bridge or thermocouple
applications. Additionally, these devices integrate a
low-drift, 2.5-V reference that reduces printed circuit
board (PCB) area. Finally, two programmable
excitation current sources (IDACs) allow for easy and
accurate RTD biasing.
An input multiplexer supports 12 inputs for the
ADS124S08 and six inputs for the ADS124S06 that
can be connected to the ADC in any combination for
design flexibility. In addition, these devices include
features such as sensor burn-out detection, voltage
bias for thermocouples, system monitoring, and four
general-purpose I/Os.
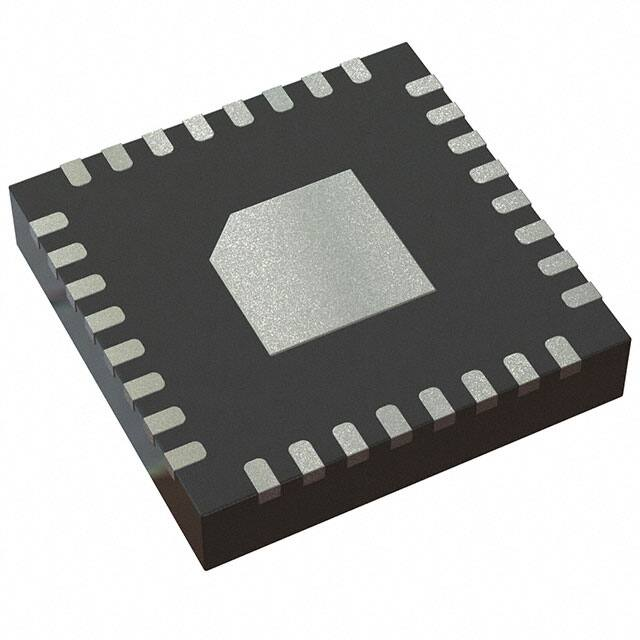
The devices are offered in a leadless VQFN-32 or a
TQFP-32 package.
Device Information
ORDER NUMBER
ADS124S0x
PACKAGE (PIN)
BODY SIZE
TQFP (32)
5.0 mm × 5.0 mm
VQFN (32)
5.0 mm × 5.0 mm
1
An IMPORTANT NOTICE at the end of this data sheet addresses availability, warranty, changes, use in safety-critical applications,
intellectual property matters and other important disclaimers. PRODUCTION DATA.
�ADS124S06, ADS124S08
SBAS660C – AUGUST 2016 – REVISED JUNE 2017
www.ti.com
Functional Block Diagram
AVDD
AVSS-SW
Burnout
Detect
Excitation
Current
Sources
AINCOM
AIN0
REFN0
REFP0
Reference
Mux
Input
Mux
AIN5
PGA
24-Bit û
ADC
AIN6 / REFP1
AIN7 / REFN1
ADS124S06
ADS124S08
AIN9 / GPIO1
Power Supplies
AIN10 / GPIO2
Temperature
Sensor
AIN11 / GPIO3
Burnout
Detect
AVSS
IOVDD
START/SYNC
Configurable
Digital
Filter
Serial
Interface
and
Control
RESET
CS
SCLK
DIN
PGA Rail
Detection
AIN8 / GPIO0
ADS124S08
only
2.5-V
Reference
Reference
Buffers
VBIAS
AIN3
AIN4
DVDD
Reference
Detection
AIN1
AIN2
REFCOM REFOUT
DOUT/DRDY
System-, SelfCalibration
DRDY
4.096-MHz
Oscillator
CLK
DGND
Copyright © 2016, Texas Instruments Incorporated
2
Submit Documentation Feedback
Copyright © 2016–2017, Texas Instruments Incorporated
Product Folder Links: ADS124S06 ADS124S08
�ADS124S06, ADS124S08
www.ti.com
SBAS660C – AUGUST 2016 – REVISED JUNE 2017
Table of Contents
1
2
3
4
5
6
7
Features ..................................................................
Applications ...........................................................
Description .............................................................
Revision History.....................................................
Device Family Comparison Table ........................
Pin Configuration and Functions .........................
Specifications.........................................................
7.1
7.2
7.3
7.4
7.5
7.6
7.7
7.8
1
1
1
3
5
5
7
Absolute Maximum Ratings ..................................... 7
ESD Ratings.............................................................. 7
Recommended Operating Conditions....................... 8
Thermal Information .................................................. 8
Electrical Characteristics........................................... 9
Timing Characteristics............................................. 14
Switching Characteristics ........................................ 14
Typical Characteristics ............................................ 17
8
Parameter Measurement Information ................ 24
9
Detailed Description ............................................ 29
8.1 Noise Performance ................................................. 24
9.1
9.2
9.3
9.4
9.5
9.6
Overview .................................................................
Functional Block Diagram .......................................
Feature Description.................................................
Device Functional Modes........................................
Programming...........................................................
Register Map...........................................................
29
30
31
58
62
72
10 Application and Implementation........................ 86
10.1 Application Information.......................................... 86
10.2 Typical Application ................................................ 91
10.3 Do's and Don'ts ..................................................... 96
11 Power Supply Recommendations ..................... 98
11.1
11.2
11.3
11.4
Power Supplies .....................................................
Power-Supply Sequencing....................................
Power-On Reset....................................................
Power-Supply Decoupling.....................................
98
98
98
98
12 Layout................................................................... 99
12.1 Layout Guidelines ................................................. 99
12.2 Layout Example .................................................. 100
13 Device and Documentation Support ............... 101
13.1
13.2
13.3
13.4
Device Support....................................................
Documentation Support ......................................
Related Links ......................................................
Receiving Notification of Documentation
Updates..................................................................
13.5 Community Resources........................................
13.6 Trademarks .........................................................
13.7 Electrostatic Discharge Caution ..........................
13.8 Glossary ..............................................................
101
101
101
101
101
101
101
102
14 Mechanical, Packaging, and Orderable
Information ......................................................... 102
4 Revision History
NOTE: Page numbers for previous revisions may differ from page numbers in the current version.
Changes from Revision B (November 2016) to Revision C
Page
•
Added note to Pin Configuration and Functions section ........................................................................................................ 5
•
Added TQFP package to test conditions of first row and added second row to Internal Voltage Reference, Accuracy
parameter ............................................................................................................................................................................. 11
•
Changed typical specification of Reference noise parameter from 17.5 µVPP to 9 µVPP ..................................................... 11
•
Changed DRDY trace of START Command Timing Requirements figure........................................................................... 16
•
Changed Typical Characteristics section ............................................................................................................................. 17
•
Changed values in Table 1................................................................................................................................................... 24
•
Changed values in Table 3................................................................................................................................................... 25
•
Added footnote 1 to Table 5 ................................................................................................................................................. 26
•
Changed values in Table 5................................................................................................................................................... 26
•
Added footnote 1 to Table 5 and Table 6 ............................................................................................................................ 26
•
Changed values in Table 7................................................................................................................................................... 27
•
Added last paragraph to PGA Input-Voltage Requirements section .................................................................................... 34
•
Added when the internal reference voltage is enabled to fifth sentence of Internal Reference section .............................. 36
•
Added last paragraph to Low-Latency Filter Frequency Response section ........................................................................ 38
•
Changed footnotes 1 and 3 of Table 13 ............................................................................................................................... 42
•
Added link to ADS1x4S0x design calculator to Sinc3 Filter Frequency Response section.................................................. 43
•
Changed footnotes 1 and 3 of Table 15 .............................................................................................................................. 45
•
Changed footnotes 1 and 3 of Table 18 ............................................................................................................................... 48
•
Changed footnotes 1 and 3 of Table 19 ............................................................................................................................... 49
Copyright © 2016–2017, Texas Instruments Incorporated
Product Folder Links: ADS124S06 ADS124S08
Submit Documentation Feedback
3
�ADS124S06, ADS124S08
SBAS660C – AUGUST 2016 – REVISED JUNE 2017
www.ti.com
Revision History (continued)
•
Changed IDAC routing description in IDAC Block Diagram figure....................................................................................... 50
•
Added last sentence to first paragraph of PGA Output Voltage Rail Monitors section ....................................................... 53
•
Changed third sentence in last paragraph of WREG section for clarity............................................................................... 68
•
Added footnote 1 to GPIO Configuration Register section................................................................................................... 85
•
Changed cross-reference in last paragraph of External Reference and Ratiometric Measurements section to point to
the Typical Application section ............................................................................................................................................. 88
•
Added last sentence to second paragraph of Unused Inputs and Outputs section ............................................................. 89
•
Added Send the RDATA command; to Pseudo Code Example section ............................................................................. 90
•
Changed Internal Reference block text to 2.5-V Reference and deleted connection dot from AVSS-SW pin in 3-Wire
RTD Application figure.......................................................................................................................................................... 91
•
Changed 3-Wire RTD Measurement with Lead-Wire Compensation section title to Register Settings............................... 94
•
Added on all other analog inputs to first sentence of sixth bullet in Do's and Don'ts section .............................................. 96
•
Changed second sentence of Power-Supply Decoupling section for clarity ........................................................................ 98
•
Added Device Support section ........................................................................................................................................... 101
Changes from Revision A (August 2016) to Revision B
•
4
Page
Released to production .......................................................................................................................................................... 1
Submit Documentation Feedback
Copyright © 2016–2017, Texas Instruments Incorporated
Product Folder Links: ADS124S06 ADS124S08
�ADS124S06, ADS124S08
www.ti.com
SBAS660C – AUGUST 2016 – REVISED JUNE 2017
5 Device Family Comparison Table
PRODUCT
RESOLUTION (Bits)
NUMBER OF INPUTS
ADS124S08
24
12 analog inputs
ADS124S06
24
6 analog inputs
ADS114S08
16
12 analog inputs
ADS114S06
16
6 analog inputs
6 Pin Configuration and Functions
RHB Package
32-Pin VQFN
Top View
REFOUT
AIN4
3
22
GPIO0/AIN8
AIN3
4
21
AIN2
5
AIN1
REFN0
AVSS-SW
AVSS
AVDD
NC
28
27
26
25
NC
25
23
REFP0
AVDD
26
2
29
AVSS
27
AIN5
REFN1/AIN7
AVSS-SW
28
REFCOM
30
REFN0
29
24
REFP1/AIN6
REFP0
30
1
31
REFN1/AIN7
31
AINCOM
32
REFP1/AIN6
32
PBS Package
32-Pin TQFP
Top View
REFOUT
22
GPIO0/AIN8
GPIO1/AIN9
AIN3
4
21
GPIO1/AIN9
20
GPIO2/AIN10
AIN2
5
20
GPIO2/AIN10
6
19
GPIO3/AIN11
AIN1
6
19
GPIO3/AIN11
AIN0
7
18
RESET
AIN0
7
18
RESET
START/SYNC
8
17
CLK
START/SYNC
8
17
CLK
16
DVDD
CS
DVDD
15
IOVDD
14
DGND
IOVDD
DRDY
13
DRDY
DGND
12
DOUT/DRDY
DOUT/DRDY
11
Not to scale
SCLK
10
DIN
SCLK
9
9
CS
Pad
DIN
Thermal
16
23
3
15
2
AIN4
14
AIN5
13
REFCOM
12
24
11
1
10
AINCOM
Not to scale
NOTE: The analog input functions (AIN6–AIN11) are not available on pins 19 to 22, 31, and 32 for the ADS124S06.
Copyright © 2016–2017, Texas Instruments Incorporated
Product Folder Links: ADS124S06 ADS124S08
Submit Documentation Feedback
5
�ADS124S06, ADS124S08
SBAS660C – AUGUST 2016 – REVISED JUNE 2017
www.ti.com
Pin Functions
PIN
NO.
DESCRIPTION (1)
NAME
FUNCTION
1
AINCOM
Analog input
Common analog input for single-ended measurements
2
AIN5
Analog input
Analog input 5
3
AIN4
Analog input
Analog input 4
4
AIN3
Analog input
Analog input 3
5
AIN2
Analog input
Analog input 2
6
AIN1
Analog input
Analog input 1
7
AIN0
Analog input
Analog input 0
8
START/SYNC
Digital input
Start conversion
9
CS
Digital input
Chip select; active low
10
DIN
Digital input
Serial data input
11
SCLK
Digital input
Serial clock input
12
DOUT/DRDY
Digital output
Serial data output combined with data ready; active low
13
DRDY
Digital output
Data ready; active low
14
DGND
Digital ground
Digital ground
15
IOVDD
Digital supply
Digital I/O power supply.
In case IOVDD is not tied to DVDD, connect a 100-nF (or larger) capacitor to DGND.
16
DVDD
Digital supply
Digital core power supply. Connect a 100-nF (or larger) capacitor to DGND.
17
CLK
Digital input
External clock input. Connect to DGND to use the internal oscillator.
18
RESET
Digital input
Reset; active low
19
GPIO3/AIN11
Analog input/output
General-purpose I/O (2); analog input 11 (ADS124S08 only)
20
GPIO2/AIN10
Analog input/output
General-purpose I/O (2); analog input 10 (ADS124S08 only)
21
GPIO1/AIN9
Analog input/output
General-purpose I/O (2); analog input 9 (ADS124S08 only)
22
GPIO0/AIN8
Analog input/output
General-purpose I/O (2); analog input 8 (ADS124S08 only)
23
REFOUT
Analog output
Positive voltage reference output.
Connect a 1-µF to 47-µF capacitor to REFCOM if the internal voltage reference is enabled.
24
REFCOM
Analog output
Negative voltage reference output. Connect to AVSS.
25
NC
—
26
AVDD
Analog supply
Positive analog power supply. Connect a 330-nF (or larger) capacitor to AVSS.
27
AVSS
Analog supply
Negative analog power supply
28
AVSS-SW
Analog supply
Negative analog power supply; low-side switch. Connect to AVSS.
29
REFN0
Analog input
Negative external reference input 0
30
REFP0
Analog input
Positive external reference input 0
31
REFN1/AIN7
Analog input
Negative external reference input 1; analog input 7 (ADS124S08 only)
32
REFP1/AIN6
Analog input
Positive external reference input 1; analog input 6 (ADS124S08 only)
Pad
Thermal pad
—
(1)
(2)
6
Leave unconnected or connect to AVSS
RHB package only. Thermal power pad. Connect to AVSS.
See the Unused Inputs and Outputs section for details on how to connect unused pins.
General-purpose inputs and outputs use logic levels based on the analog supply.
Submit Documentation Feedback
Copyright © 2016–2017, Texas Instruments Incorporated
Product Folder Links: ADS124S06 ADS124S08
�ADS124S06, ADS124S08
www.ti.com
SBAS660C – AUGUST 2016 – REVISED JUNE 2017
7 Specifications
7.1 Absolute Maximum Ratings (1)
Power-supply voltage
MIN
MAX
AVDD to AVSS
–0.3
5.5
AVSS to DGND
–2.8
0.3
DVDD to DGND
–0.3
3.9
IOVDD to DGND
UNIT
V
–0.3
5.5
Analog input voltage
AINx, GPIOx, REFPx, REFNx, REFCOM
AVSS – 0.3
AVDD + 0.3
V
Digital input voltage
CS, SCLK, DIN, DOUT/DRDY, DRDY,
START, RESET, CLK
DGND – 0.3
IOVDD + 0.3
V
Continuous, AVSS-SW, REFN0, REFOUT
–100
100
Continuous, all other pins except power-supply pins
–10
10
Input current
Temperature
(1)
Junction, TJ
mA
150
Storage, Tstg
–60
°C
150
Stresses beyond those listed under Absolute Maximum Ratings may cause permanent damage to the device. These are stress ratings
only, which do not imply functional operation of the device at these or any other conditions beyond those indicated under Recommended
Operating Conditions. Exposure to absolute-maximum-rated conditions for extended periods may affect device reliability.
7.2 ESD Ratings
VALUE
V(ESD)
(1)
(2)
Electrostatic discharge
Human-body model (HBM), per ANSI/ESDA/JEDEC JS-001
(1)
Charged-device model (CDM), per JEDEC specification JESD22-C101 (2)
±2500
±1000
UNIT
V
JEDEC document JEP155 states that 500-V HBM allows safe manufacturing with a standard ESD control process.
JEDEC document JEP157 states that 250-V CDM allows safe manufacturing with a standard ESD control process.
Copyright © 2016–2017, Texas Instruments Incorporated
Product Folder Links: ADS124S06 ADS124S08
Submit Documentation Feedback
7
�ADS124S06, ADS124S08
SBAS660C – AUGUST 2016 – REVISED JUNE 2017
www.ti.com
7.3 Recommended Operating Conditions
over operating ambient temperature range (unless otherwise noted)
MIN
NOM
MAX
UNIT
POWER SUPPLY
Analog power supply
AVDD to AVSS
2.7
AVSS to DGND
–2.625
AVDD to DGND
1.5
Digital core power supply
DVDD to DGND
Digital IO power supply
IOVDD to DGND
5.25
0
0.05
V
5.25
2.7
3.6
V
DVDD
5.25
V
ANALOG INPUTS (1)
PGA bypassed
PGA enabled, gain = 1 to 16
Absolute input voltage (2)
V(AINx)
PGA enabled, gain = 32 to 128
VIN
Differential input voltage
VIN = VAINP – VAINN
AVSS – 0.05
AVDD + 0.05
AVSS + 0.15 +
|VINMAX|·(Gain – 1) / 2
AVDD – 0.15 –
|VINMAX|·(Gain –1) / 2
AVSS + 0.15 +
15.5·|VINMAX|
AVDD – 0.15 –
15.5·|VINMAX|
–VREF / Gain
VREF / Gain
V
0.5
AVDD – AVSS
V
V
VOLTAGE REFERENCE INPUTS (3)
VREF
Differential reference input
voltage
V(REFNx)
Absolute negative reference
voltage
Negative reference buffer disabled
AVSS – 0.05
V(REFPx) – 0.5
V
Negative reference buffer enabled
AVSS
V(REFPx) – 0.5
V
V(REFPx)
Absolute positive reference
voltage
Positive reference buffer disabled
V(REFNx) + 0.5
AVDD + 0.05
V
Positive reference buffer enabled
V(REFNx) + 0.5
AVDD
V
VREF = V(REFPx) – V(REFNx)
EXTERNAL CLOCK SOURCE (4)
fCLK
External clock frequency
Duty cycle
2
4.096
4.5
40%
50%
60%
MHz
GENERAL-PURPOSE INPUTS (GPIOs)
Input voltage
AVSS – 0.05
AVDD + 0.05
V
DGND
IOVDD
V
–50
125
°C
DIGITAL INPUTS (Other than GPIOs)
Input voltage
TEMPERATURE RANGE
TA
(1)
(2)
(3)
(4)
Operating ambient temperature
AINP and AINN denote the positive and negative inputs of the PGA. Any of the available analog inputs (AINx) can be selected as either
AINP or AINN by the input multiplexer.
VINMAX denotes the maximum differential input voltage, VIN, that is expected in the application. |VINMAX| can be smaller than VREF / Gain.
REFPx and REFNx denote one of the two available external differential reference input pairs.
An external clock is not required when the internal oscillator is used.
7.4 Thermal Information
ADS124S06, ADS124S08
THERMAL METRIC
(1)
VQFN (RHB)
TQFP (PBS)
32 PINS
32 PINS
UNIT
RθJA
Junction-to-ambient thermal resistance
45.2
75.5
°C/W
RθJC(top)
Junction-to-case (top) thermal resistance
28.3
17.1
°C/W
RθJB
Junction-to-board thermal resistance
15.8
28.5
°C/W
ψJT
Junction-to-top characterization parameter
0.4
0.4
°C/W
ψJB
Junction-to-board characterization parameter
15.7
28.3
°C/W
RθJC(bot)
Junction-to-case (bottom) thermal resistance
2.3
n/a
°C/W
(1)
8
For more information about traditional and new thermal metrics, see the Semiconductor and IC Package Thermal Metrics application
report.
Submit Documentation Feedback
Copyright © 2016–2017, Texas Instruments Incorporated
Product Folder Links: ADS124S06 ADS124S08
�ADS124S06, ADS124S08
www.ti.com
SBAS660C – AUGUST 2016 – REVISED JUNE 2017
7.5 Electrical Characteristics
minimum and maximum specifications apply from TA = –50°C to +125°C; Typical specifications are at TA = 25°C;
all specifications are at AVDD = 2.7 V to 5.25 V, AVSS = 0 V, DVDD = IOVDD = 3.3 V, all gains, internal reference, internal
oscillator, all data rates, and global chop disabled (unless otherwise noted)
PARAMETER
TEST CONDITIONS
MIN
TYP
MAX
UNIT
ANALOG INPUTS
Absolute input current
Absolute input current drift
Differential input current
Differential input current drift
PGA bypassed,
AVSS + 0.1 V ≤ V(AINx) ≤ AVDD – 0.1 V
0.5
nA
PGA enabled, all gains,
V(AINx)MIN ≤ V(AINx) ≤ V(AINx)MAX
–2
0.1
PGA bypassed,
AVSS + 0.1 V ≤ V(AINx) ≤ AVDD – 0.1 V
2
PGA enabled, all gains,
V(AINx)MIN ≤ V(AINx) ≤ V(AINx)MAX
2
PGA bypassed,
VCM = AVDD / 2, –VREF ≤ VIN ≤ VREF
1
2
pA/°C
PGA enabled, all gains,
VCM = AVDD / 2, –VREF / Gain ≤ VIN ≤ VREF / Gain
–1
0.02
PGA bypassed,
VCM = AVDD / 2, –VREF ≤ VIN ≤ VREF
3
PGA enabled, all gains,
VCM = AVDD / 2, –VREF / Gain ≤ VIN ≤ VREF / Gain
1
nA/V
1
nA
pA/°C
PGA
1, 2, 4, 8, 16,
32, 64, 128
Gain settings
Startup time
Enabling the PGA in conversion mode
190
µs
SYSTEM PERFORMANCE
Resolution (no missing codes)
DR
INL
24
Data rate
Integral nonlinearity (best fit)
1
10
PGA enabled, gain = 1 to 8, VCM = AVDD / 2
2
15
PGA enabled, gain = 16 to 128, VCM = AVDD / 2,
TA = –40°C to +85°C
3
15
TA = 25°C, PGA enabled, gain = 1 to 8
–120
20
120
–120 / Gain
20 / Gain
120 / Gain
–15
2
15
TA = 25°C, PGA enabled, gain = 16 to 128
Input offset voltage
TA = 25°C, PGA bypassed, after internal offset
calibration
On the order of noisePP at the
set DR and gain
TA = 25°C, PGA enabled, gain = 1 to 128, after
internal offset calibration
On the order of noisePP at the
set DR and gain
–2
0.2
2
TA = 25°C, PGA enabled, gain = 1 to 128,
global chop enabled
–2
0.2
2
TA = –40°C to +85°C, PGA enabled, gain = 1 to 128
PGA bypassed
–75
10
75
–100
15
100
–75
10
75
PGA enabled, gain = 1 to 8
–200
15
200
PGA enabled, gain = 16 to 128
–150
15
150
PGA bypassed, global chop enabled
–10
2
10
PGA enabled, gain = 1 to 128, global chop enabled
–10
2
10
Copyright © 2016–2017, Texas Instruments Incorporated
Product Folder Links: ADS124S06 ADS124S08
ppmFSR
µV
TA = 25°C, PGA bypassed, global chop enabled
TA = –40°C to +85°C, PGA bypassed
Offset drift
SPS
PGA bypassed, VCM = AVDD / 2
TA = 25°C, PGA bypassed
VIO
Bits
2.5, 5, 10, 16.6,
20, 50, 60, 100,
200, 400, 800,
1000, 2000, 4000
Submit Documentation Feedback
nV/°C
9
�ADS124S06, ADS124S08
SBAS660C – AUGUST 2016 – REVISED JUNE 2017
www.ti.com
Electrical Characteristics (continued)
minimum and maximum specifications apply from TA = –50°C to +125°C; Typical specifications are at TA = 25°C;
all specifications are at AVDD = 2.7 V to 5.25 V, AVSS = 0 V, DVDD = IOVDD = 3.3 V, all gains, internal reference, internal
oscillator, all data rates, and global chop disabled (unless otherwise noted)
PARAMETER
TEST CONDITIONS
MIN
TYP
MAX
TA = 25°C, PGA bypassed
40
120
TA = 25°C, PGA enabled, gain = 1 to 32
40
120
TA = 25°C, PGA enabled, gain = 64 and 128
40
200
TA = –40°C to +85°C, PGA bypassed
0.5
1
TA = –40°C to +85°C, PGA enabled, gain = 1 to 128
0.5
2
PGA bypassed
0.5
1
1
4
UNIT
SYSTEM PERFORMANCE (continued)
Gain error (1)
Gain drift (1)
PGA enabled, gain = 1 to 128
Noise (input-referred)
NMRR
(2)
Normal-mode rejection ratio (3)
PGA enabled, gain = 128, DR = 2.5 SPS,
sinc3 filter
19
fIN = 50 Hz or 60 Hz (±1 Hz), DR = 10 SPS,
sinc3 filter
88
fIN = 50 Hz or 60 Hz (±1 Hz), DR = 10 SPS,
sinc3 filter, external fCLK = 4.096 MHz
102
fIN = 50 Hz or 60 Hz (±1 Hz), DR = 20 SPS,
low-latency filter
79
fIN = 50 Hz or 60 Hz (±1 Hz), DR = 20 SPS,
low-latency filter, external fCLK = 4.096 MHz
95
fIN = 50 Hz (±1 Hz), DR = 50 SPS, sinc3 filter
87
fIN = 50 Hz (±1 Hz), DR = 50 SPS,
sinc3 filter, external fCLK = 4.096 MHz
Common-mode rejection ratio
(1)
(2)
(3)
10
Power-supply rejection ratio
nVRMS
dB
89
fIN = 60 Hz (±1 Hz), DR = 60 SPS,
sinc3 filter, external fCLK = 4.096 MHz
105
At dc
110
120
fCM = 50 Hz or 60 Hz (±1 Hz),
DR = 2.5 SPS to 10 SPS, sinc3 filter
120
130
fCM = 50 Hz or 60 Hz (±1 Hz),
DR = 2.5 SPS, 5 SPS, 10 SPS, 20 SPS, low-latency
filter
115
125
dB
AVDD at dc
PSRR
ppm/°C
101
fIN = 60 Hz (±1 Hz), DR = 60 SPS, sinc3 filter
CMRR
ppm
90
105
AVDD at 50 Hz or 60 Hz
100
115
DVDD at dc
100
115
dB
Excluding error of voltage reference.
See the Noise Performance section for more information.
See the 50-Hz and 60-Hz Line Cycle Rejection section for more information.
Submit Documentation Feedback
Copyright © 2016–2017, Texas Instruments Incorporated
Product Folder Links: ADS124S06 ADS124S08
�ADS124S06, ADS124S08
www.ti.com
SBAS660C – AUGUST 2016 – REVISED JUNE 2017
Electrical Characteristics (continued)
minimum and maximum specifications apply from TA = –50°C to +125°C; Typical specifications are at TA = 25°C;
all specifications are at AVDD = 2.7 V to 5.25 V, AVSS = 0 V, DVDD = IOVDD = 3.3 V, all gains, internal reference, internal
oscillator, all data rates, and global chop disabled (unless otherwise noted)
PARAMETER
TEST CONDITIONS
MIN
TYP
MAX
UNIT
Reference buffers disabled, external VREF = 2.5 V,
REFP1/REFN1 inputs
-6
4
6
µA/V
Reference buffers enabled, external VREF = 2.5 V,
REFP1/REFN1 inputs
–15
5
15
nA
TA = 25°C, TQFP package
–0.05%
±0.01%
0.05%
TA = 25°C, VQFN package
–0.1%
±0.01%
0.1%
VOLTAGE REFERENCE INPUTS
Absolute input current
INTERNAL VOLTAGE REFERENCE
VREF
Output voltage
Accuracy
Temperature drift
Output current
PSRR
2.5
TA = –40°C to +85°C
TA = –50°C to +125°C
2.5
8
3
10
AVDD = 2.7 V to 3.3 V, sink and source
–5
5
AVDD = 3.3 V to 5.25 V, sink and source
–10
10
Short-circuit current limit
Sink and source
70
Power-supply rejection ratio
AVDD at dc
85
Load regulation
V
AVDD = 2.7 V to 3.3 V,
load current = –5 mA to 5 mA
8
AVDD = 3.3 V to 5.25 V,
load current = –10 mA to 10 mA
8
Startup time
1-µF capacitor on REFOUT, 0.001% settling
Capacitive load stability
Capacitor on REFOUT
Reference noise
f = 0.1 Hz to 10 Hz, 1-µF capacitor on REFOUT
100
ppm/°C
mA
mA
dB
µV/mA
5.9
1
ms
47
9
µF
µVPP
INTERNAL OSCILLATOR
fCLK
Frequency
4.096
Accuracy
–1.5%
MHz
1.5%
EXCITATION CURRENT SOURCES (IDACS)
10, 50, 100,
250, 500, 750,
1000, 1500, 2000
Current settings
Compliance voltage (4)
Accuracy (each IDAC)
Current mismatch between
IDACs
Temperature drift (each IDAC)
Temperature drift matching
between IDACs
Startup time
(4)
µA
10 µA to 750 µA, 0.1% deviation
AVSS
AVDD – 0.4
1 mA to 2 mA, 0.1% deviation
AVSS
AVDD – 0.6
TA = 25°C, 10 µA to 100 µA
–5%
±0.7%
TA = 25°C, 250 µA to 2 mA
–3%
±0.5%
3%
TA = 25°C, 10 µA to 100 µA
0.15%
0.8%
TA = 25°C, 250 µA to 750 µA
0.10%
0.6%
TA = 25°C, 1 mA to 2 mA
0.07%
0.4%
10 µA to 750 µA
20
120
1 mA to 2 mA
10
80
10 µA to 100 µA
3
25
250 µA to 2 mA
2
15
With internal reference already settled. From end of
WREG command to current flowing out of pin.
V
5%
22
ppm/°C
ppm/°C
µs
The IDAC current does not change by more than 0.1% from the nominal value when staying within the specified compliance voltage.
Copyright © 2016–2017, Texas Instruments Incorporated
Product Folder Links: ADS124S06 ADS124S08
Submit Documentation Feedback
11
�ADS124S06, ADS124S08
SBAS660C – AUGUST 2016 – REVISED JUNE 2017
www.ti.com
Electrical Characteristics (continued)
minimum and maximum specifications apply from TA = –50°C to +125°C; Typical specifications are at TA = 25°C;
all specifications are at AVDD = 2.7 V to 5.25 V, AVSS = 0 V, DVDD = IOVDD = 3.3 V, all gains, internal reference, internal
oscillator, all data rates, and global chop disabled (unless otherwise noted)
PARAMETER
TEST CONDITIONS
MIN
TYP
MAX
UNIT
BIAS VOLTAGE
VBIAS
Output voltage settings
(AVDD + AVSS) / 2,
(AVDD + AVSS) / 12
V
350
Ω
2.8
ms
0.2, 1, 10
µA
Output impedance
Startup time
Combined capacitive load on all selected analog
inputs CLOAD = 1 µF, 0.1% settling
BURNOUT CURRENT SOURCES (BOCS)
Current settings
Accuracy
0.2 µA, sinking or sourcing
±8%
1 µA, sinking or sourcing
±4%
10 µA, sinking or sourcing
±2%
PGA RAIL DETECTION
Positive rail threshold
Referred to the output of the PGA
AVDD – 0.15
V
Negative rail threshold
Referred to the output of the PGA
AVSS + 0.15
V
Threshold 1
0.3
V
Threshold 2
1/3·(AVDD – AVSS)
REFERENCE DETECTION
Threshold 2 accuracy
–3%
Pull-together resistance
±1%
V
3%
10
MΩ
SUPPLY VOLTAGE MONITORS
Accuracy
(AVDD – AVSS) / 4 monitor
±1%
DVDD / 4 monitor
±1%
TEMPERATURE SENSOR
Output voltage
TA = 25°C
Temperature coefficient
129
mV
403
µV/°C
LOW-SIDE POWER SWITCH
RON
On-resistance
1
Current through switch
3
Ω
75
mA
GENERAL-PURPOSE INPUT/OUTPUTS (GPIOs)
VIL
Logic input level, low
VIH
Logic input level, high
VOL
Logic output level, low
VOH
Logic output level, high
AVSS – 0.05
0.3 AVDD
V
0.7 AVDD
AVDD + 0.05
V
IOL = 1 mA
AVSS
0.2 AVDD
V
IOH = 1 mA
0.8 AVDD
AVDD
V
DIGITAL INPUT/OUTPUTS
VIL
Logic input level, low
VIH
Logic input level, high
VOL
Logic output level, low
VOH
12
DGND
0.3 IOVDD
V
0.7 IOVDD
IOVDD
V
IOL = 1 mA
DGND
0.2 IOVDD
V
Logic output level, high
IOH = 1 mA
0.8 IOVDD
IOVDD
V
Input current
DGND ≤ VDigital Input ≤ IOVDD
–1
1
µA
Submit Documentation Feedback
Copyright © 2016–2017, Texas Instruments Incorporated
Product Folder Links: ADS124S06 ADS124S08
�ADS124S06, ADS124S08
www.ti.com
SBAS660C – AUGUST 2016 – REVISED JUNE 2017
Electrical Characteristics (continued)
minimum and maximum specifications apply from TA = –50°C to +125°C; Typical specifications are at TA = 25°C;
all specifications are at AVDD = 2.7 V to 5.25 V, AVSS = 0 V, DVDD = IOVDD = 3.3 V, all gains, internal reference, internal
oscillator, all data rates, and global chop disabled (unless otherwise noted)
PARAMETER
TEST CONDITIONS
MIN
TYP
MAX
UNIT
ANALOG SUPPLY CURRENT (AVDD = 3.3 V, External Reference, Internal Reference Disabled, Reference Buffers Disabled, IDACs Disabled, VBIAS
Disabled, Flags Disabled, Internal Oscillator, All Data Rates, VIN = 0 V)
Power-down mode
0.1
Standby mode, PGA bypassed
70
Conversion mode, PGA bypassed
IAVDD
Analog supply current
1.5
85
Conversion mode, PGA enabled, gain = 1, 2
120
135
Conversion mode, PGA enabled, gain = 4, 8
140
155
Conversion mode, PGA enabled, gain = 16, 32
165
180
Conversion mode, PGA enabled, gain = 64
200
Conversion mode, PGA enabled, gain = 128
250
µA
ADDITIONAL ANALOG SUPPLY CURRENTS PER FUNCTION (AVDD = 3.3 V)
Internal 2.5-V reference, no external load
IAVDD
Analog supply current
185
280
Positive reference buffer
35
60
Negative reference buffer
25
40
VBIAS buffer, no external load
10
IDAC overhead, 10 µA to 250 µA
20
IDAC overhead, 500 µA to 750 µA
30
IDAC overhead, 1 mA
40
IDAC overhead, 1.5 mA
50
IDAC overhead, 2 mA
65
PGA rail detection and reference detection circuit
10
35
µA
DIGITAL SUPPLY CURRENT (DVDD = IOVDD = 3.3 V, All Data Rates, SPI Not Active)
IDVDD +
IIOVDD
Digital supply current
Power-down mode, internal oscillator
0.1
Standby mode, internal oscillator
185
Conversion mode, internal oscillator
225
Conversion mode, external fCLK = 4.096 MHz
195
300
µA
POWER DISSIPATION (AVDD = DVDD = IOVDD = 3.3 V, Internal Reference Enabled, Reference Buffers Disabled, IDACs Disabled, VBIAS Disabled,
Flags Disabled, Internal Oscillator, All Data Rates, VIN = 0 V, SPI Not Active)
PD
Power dissipation
Conversion mode, PGA enabled, gain = 1
Copyright © 2016–2017, Texas Instruments Incorporated
Product Folder Links: ADS124S06 ADS124S08
1.75
Submit Documentation Feedback
mW
13
�ADS124S06, ADS124S08
SBAS660C – AUGUST 2016 – REVISED JUNE 2017
www.ti.com
7.6 Timing Characteristics
over operating ambient temperature range, DVDD = 2.7 V to 3.6 V, IOVDD = DVDD to 5.25 V, and
DOUT/DRDY load = 20 pF || 100 kΩ to DGND (unless otherwise noted)
MIN
MAX
UNIT (1)
SERIAL INTERFACE
td(CSSC)
Delay time, first SCLK rising edge after CS falling edge
20
ns
td(SCCS)
Delay time, CS rising edge after final SCLK falling edge
20
ns
tw(CSH)
Pulse duration, CS high
30
ns
tc(SC)
SCLK period
100
ns
tw(SCH)
Pulse duration, SCLK high
40
ns
tw(SCL)
Pulse duration, SCLK low
40
ns
tsu(DI)
Setup time, DIN valid before SCLK falling edge
15
ns
th(DI)
Hold time, DIN valid after SCLK falling edge
20
ns
td(CMD)
Delay time, between bytes or commands
0
ns
tw(RSL)
Pulse duration, RESET low
4
tCLK
td(RSSC)
Delay time, first SCLK rising edge after RESET rising edge (or 7th SCLK
falling edge of RESET command)
4096
tCLK
RESET PIN
START/SYNC PIN
tw(STH)
Pulse duration, START/SYNC high
4
tCLK
tw(STL)
Pulse duration, START/SYNC low
4
tCLK
tsu(STDR)
Setup time, START/SYNC falling edge (or 7th SCLK falling edge of STOP
command) before DRDY falling edge to stop further conversions
(continuous conversion mode)
32
tCLK
28
tCLK
4
tCLK
READING CONVERSION DATA WITHOUT RDATA COMMAND
Hold time, SCLK low before DRDY falling edge (2)
th(SCDR)
td(DRSC)
(1)
(2)
Delay time, SCLK rising edge after DRDY falling edge
(2)
tCLK = 1 / fCLK.
Only applicable when reading data without the RDATA command. All commands can be send without any SCLK to DRDY signal timing
restrictions.
7.7 Switching Characteristics
over operating ambient temperature range, DVDD = 2.7 V to 3.6 V, IOVDD = DVDD to 5.25 V, and
DOUT/DRDY load = 20 pF || 100 kΩ to DGND (unless otherwise noted)
PARAMETER
TEST CONDITIONS
MIN
TYP
MAX
UNIT (1)
tp(CSDO)
Propagation delay time, CS falling edge to DOUT
driven
0
25
ns
tp(SCDO)
Propagation delay time, SCLK rising edge to valid
new DOUT
3
30
ns
tp(CSDOZ)
Propagation delay time, CS rising edge to DOUT high
impedance
0
25
ns
tp(STDR)
Propagation delay time, START/SYNC rising edge (or
first SCLK rising edge of any command or data read)
to DRDY rising edge
2
tCLK
tw(DRH)
Pulse duration, DRDY high
tp(GPIO)
Propagation delay time, last SCLK falling edge of
WREG command to GPIOx output valid
24
3
SPI timeout per 8 bit (2)
(1)
(2)
14
215
tCLK
100
ns
tCLK
tCLK = 1 / fCLK
The SPI interface resets when an entire byte is not sent within the specified timeout time.
Submit Documentation Feedback
Copyright © 2016–2017, Texas Instruments Incorporated
Product Folder Links: ADS124S06 ADS124S08
�ADS124S06, ADS124S08
www.ti.com
SBAS660C – AUGUST 2016 – REVISED JUNE 2017
tw(CSH)
CS
ttd(CSSC)t
ttc(SC)t
tw(SCH)
ttd(SCCS)t
SCLK
tsu(DI)
th(DI)
tw(SCL)
DIN
NOTE: Single-byte communication is shown. Actual communication can be multiple bytes.
Figure 1. Serial Interface Timing Requirements
CS
SCLK
tp(CSDO)
DOUT/DRDY
tp(SCDO)
tp(CSDOZ)
Hi-Z
Hi-Z
NOTE: Single-byte communication is shown. Actual communication can be multiple bytes.
Figure 2. Serial Interface Switching Characteristics
tw(RSL)
RESET
td(RSSC)
SCLK
DIN
RESET command
New command
Figure 3. RESET Pin and RESET Command Timing Requirements
tw(STL)
START/SYNC
DRDY
tw(STH)
tp(STDR)
tp(STDR)
tw(DRH)
tsu(STDR)
Figure 4. START/SYNC Pin Timing Requirements
Copyright © 2016–2017, Texas Instruments Incorporated
Product Folder Links: ADS124S06 ADS124S08
Submit Documentation Feedback
15
�ADS124S06, ADS124S08
SBAS660C – AUGUST 2016 – REVISED JUNE 2017
www.ti.com
SCLK
DIN
START command
STOP command
tp(STDR)
DRDY
tp(STDR)
tsu(STDR)
Figure 5. START Command Timing Requirements
th(SCDR)
DRDY
CS
SCLK
td(DRSC)
DOUT/DRDY
Data 1
Data 2
Data 3
Figure 6. Read Data Direct (Without an RDATA Command) Timing Requirements
SCLK
DIN
WREG
WREG GPIODAT
01h
01h
01h
Write two registers
GPIO0 set as output
GPIO0 set high
GPIO0 enabled
GPIO0
tp(GPIO)
Figure 7. GPIO Switching Characteristics
16
Submit Documentation Feedback
Copyright © 2016–2017, Texas Instruments Incorporated
Product Folder Links: ADS124S06 ADS124S08
�ADS124S06, ADS124S08
www.ti.com
SBAS660C – AUGUST 2016 – REVISED JUNE 2017
7.8 Typical Characteristics
at TA = 25°C, AVDD = 3.3 V, AVSS = 0 V, DVDD = IOVDD = 3.3 V, using internal VREF = 2.5 V, internal 4.096-MHz oscillator,
and PGA enabled (unless otherwise noted)
2000
2000
25qC
85qC
125qC
-50qC
1000
Absolute Input Current (pA)
Absolute Input Current (pA)
-50qC
0
-1000
-2000
-3000
-4000
125qC
0
-1000
-2000
-3000
0.5
1
1.5
2
V(AINx) (V)
2.5
3
3.5
0
PGA bypassed, DR = 20 SPS, VIN = 0 V
0.5
1
1.5
2
V(AINx) (V)
2.5
3
3.5
PGA bypassed, DR = 4 kSPS, VIN = 0 V
Figure 8. Absolute Input Current vs Absolute Input Voltage
Figure 9. Absolute Input Current vs Absolute Input Voltage
2000
2000
-50qC
25qC
85qC
125qC
-50qC
25qC
85qC
125qC
1500
Absolute Input Current (pA)
1500
Absolute Input Current (pA)
85qC
-4000
0
1000
500
0
-500
-1000
-1500
1000
500
0
-500
-1000
-1500
-2000
-2000
0
0.5
1
1.5
2
V(AINx) (V)
2.5
3
3.5
0
PGA enabled, gain = 1, DR = 20 SPS, VIN = 0 V
0.5
1
1.5
2
V(AINx) (V)
2.5
3
3.5
PGA enabled, gain = 1, DR = 4 kSPS, VIN = 0 V
Figure 10. Absolute Input Current vs Absolute Input Voltage
Figure 11. Absolute Input Current vs Absolute Input Voltage
2000
2000
-50qC
25qC
85qC
125qC
-50qC
25qC
85qC
125qC
1500
Differential Input Current (pA)
1500
Differential Input Current (pA)
25qC
1000
1000
500
0
-500
-1000
-1500
1000
500
0
-500
-1000
-1500
-2000
-2.5
-2
-1.5
-1
-0.5
0
0.5
VIN (V)
1
1.5
2
2.5
PGA bypassed, DR = 20 SPS, VCM = 1.65 V
Figure 12. Differential Input Current vs Differential Input
Voltage
-2000
-2.5
-2
-1.5
-1
-0.5
0
0.5
VIN (V)
1
1.5
2
2.5
PGA bypassed, DR = 4 kSPS, VCM = 1.65 V
Figure 13. Differential Input Current vs Differential Input
Voltage
Copyright © 2016–2017, Texas Instruments Incorporated
Product Folder Links: ADS124S06 ADS124S08
Submit Documentation Feedback
17
�ADS124S06, ADS124S08
SBAS660C – AUGUST 2016 – REVISED JUNE 2017
www.ti.com
Typical Characteristics (continued)
at TA = 25°C, AVDD = 3.3 V, AVSS = 0 V, DVDD = IOVDD = 3.3 V, using internal VREF = 2.5 V, internal 4.096-MHz oscillator,
and PGA enabled (unless otherwise noted)
200
400
-50qC
25qC
85qC
125qC
-50qC
100
50
0
-50
-100
-150
-200
-2.5
-2
-1.5
-1
-0.5
0
0.5
VIN (V)
1
1.5
2
100
0
-100
-200
-400
-2.5
2.5
-2
-1.5
-1
-0.5
0
0.5
VIN (V)
1
1.5
2
2.5
PGA enabled, DR = 4 kSPS, VCM = 1.65 V
Figure 15. Differential Input Current vs Differential Input
Voltage
3
3
2
2
INL (ppm of FSR)
INL (ppm of FSR)
125qC
-300
Figure 14. Differential Input Current vs Differential Input
Voltage
1
0
-1
1
0
-1
-2
-2
-3
-100 -80
-60
-40
-20
0
20
VIN (% of FSR)
40
60
80
-3
-100
100
-80
-60
-40
-20
0
20
VIN (% of FSR)
40
60
80
100
PGA enabled, gain = 1
PGA bypassed, gain = 1
Figure 17. INL vs Differential Input Voltage
Figure 16. INL vs Differential Input Voltage
16
10
Gain = 1
Gain = 2
Gain = 4
Gain = 8
Gain = 16
Gain = 32
Gain = 64
Gain = 128
14
Gain = 1
Gain = 2
Gain = 4
Gain = 8
Gain = 16
Gain = 32
Gain = 64
Gain = 128
12
Offset Voltage (PV)
INL (ppm of FSR)
85qC
200
PGA enabled, DR = 20 SPS, VCM = 1.65 V
8
25qC
300
Differential Input Current (pA)
Differential Input Current (pA)
150
6
4
10
8
6
4
2
2
0
-50
-25
0
25
50
Temperature (qC)
75
Figure 18. INL vs Temperature
18
Submit Documentation Feedback
100
125
0
-50
-25
0
25
50
Temperature (qC)
75
100
125
Figure 19. Offset Voltage vs Temperature
Copyright © 2016–2017, Texas Instruments Incorporated
Product Folder Links: ADS124S06 ADS124S08
�ADS124S06, ADS124S08
www.ti.com
SBAS660C – AUGUST 2016 – REVISED JUNE 2017
Typical Characteristics (continued)
at TA = 25°C, AVDD = 3.3 V, AVSS = 0 V, DVDD = IOVDD = 3.3 V, using internal VREF = 2.5 V, internal 4.096-MHz oscillator,
and PGA enabled (unless otherwise noted)
100
2.5
Internal Reference Voltage (V)
Gain Error (ppm)
50
0
-50
-100
-150
Gain = 1
Gain = 2
Gain = 4
Gain = 8
-200
-250
-50
-25
Gain = 16
Gain = 32
Gain = 64
Gain = 128
0
25
50
Temperature (qC)
75
100
2.4995
2.499
2.4985
2.498
2.4975
-50
125
-25
0
25
50
Temperature (qC)
75
100
125
28 units, TQFP package
Figure 20. Gain Error vs Temperature
Figure 21. Internal Reference Voltage vs Temperature
2.5002
10
Internal Reference Noise (PV)
Internal Reference Voltage (V)
8
2.5001
2.5
2.4999
2.4998
6
4
2
0
-2
-4
-6
-8
2.4997
2.7
3
3.3
3.6
3.9
4.2
AVDD (V)
4.5
4.8
5.1
-10
5.4
Time (1 s/div)
Figure 23. Internal Reference Voltage Noise
Figure 22. Internal Reference Voltage vs AVDD
4.13
Internal Oscillator Frequency (MHz)
Number of Occurrences
250
200
150
100
4.106
4.104
4.102
4.1
4.098
4.096
4.094
4.092
0
4.09
50
4.12
4.11
4.1
4.09
4.08
4.07
4.06
-50
-25
25
50
Temperature (qC)
75
100
125
28 units
Internal Oscillator Frequency (MHz)
Figure 24. Internal Oscillator Frequency Histogram
0
Figure 25. Internal Oscillator Frequency vs Temperature
Copyright © 2016–2017, Texas Instruments Incorporated
Product Folder Links: ADS124S06 ADS124S08
Submit Documentation Feedback
19
�ADS124S06, ADS124S08
SBAS660C – AUGUST 2016 – REVISED JUNE 2017
www.ti.com
Typical Characteristics (continued)
0
0
-10
-1
IDAC Error (%)
IDAC Error (%)
at TA = 25°C, AVDD = 3.3 V, AVSS = 0 V, DVDD = IOVDD = 3.3 V, using internal VREF = 2.5 V, internal 4.096-MHz oscillator,
and PGA enabled (unless otherwise noted)
-20
-30
10 µA
50 µA
100 µA
250 µA
500 µA
-40
750 µA
1 mA
1.5 mA
2 mA
0.5
1
-3
10 µA
50 µA
100 µA
250 µA
500 µA
-4
-5
2.5
-50
0
-2
1.5
2
2.5
IDAC Output Voltage (V)
3
3.5
2.7
2.8
2.9
3
IDAC Output Voltage (V)
3.1
3.2
Figure 27. IDAC Accuracy vs Compliance Voltage
Figure 26. IDAC Accuracy vs Compliance Voltage
3
0.3
2
10 PA
50 PA
100 PA
250 PA
500 PA
0.25
IDAC Mismatch Error (%)
IDAC Error (%)
2.6
750 µA
1 mA
1.5 mA
2 mA
1
0
-1
10 PA
50 PA
100 PA
250 PA
500 PA
-2
-3
-50
-25
0
25
50
Temperature (qC)
750 PA
1 mA
1.5 mA
2 mA
75
100
0.2
750 PA
1 mA
1.5 mA
2 mA
0.15
0.1
0.05
0
-50
125
-25
0
25
50
Temperature (qC)
75
100
125
IDAC output voltage = 1.65 V
Figure 28. IDAC Accuracy vs Temperature
Figure 29. IDAC Matching vs Temperature
0.501
0.085
AVDD = 2.7 V
AVDD = 5.25 V
(AVDD - AVSS) / 12 Ratio
(AVDD - AVSS) / 2 Ratio
0.5005
0.5
0.4995
0.499
0.4985
0.498
-50
-25
0
25
50
Temperature (qC)
75
100
Figure 30. VBIAS Voltage [(AVDD – AVSS) / 2] vs
Temperature
20
AVDD = 2.7 V
AVDD = 5.25 V
Submit Documentation Feedback
125
0.084
0.083
0.082
0.081
0.08
-50
-25
0
25
50
Temperature (qC)
75
100
125
Figure 31. VBIAS Voltage [(AVDD – AVSS) / 12] vs
Temperature
Copyright © 2016–2017, Texas Instruments Incorporated
Product Folder Links: ADS124S06 ADS124S08
�ADS124S06, ADS124S08
www.ti.com
SBAS660C – AUGUST 2016 – REVISED JUNE 2017
Typical Characteristics (continued)
at TA = 25°C, AVDD = 3.3 V, AVSS = 0 V, DVDD = IOVDD = 3.3 V, using internal VREF = 2.5 V, internal 4.096-MHz oscillator,
and PGA enabled (unless otherwise noted)
0.18
0.18
AVDD = 2.7 V
AVDD = 5.25 V
0.16
0.16
0.15
0.15
0.14
0.13
0.14
0.13
0.12
0.12
0.11
0.11
0.1
-50
-25
0
25
50
Temperature (qC)
75
100
AVDD = 2.7 V
AVDD = 5.25 V
0.17
Voltage (V)
Voltage (V)
0.17
0.1
-50
125
Figure 32. PGA Rail Detection, PGAN_RAILP, PGAP_RAILP
Threshold From AVDD
-25
0
25
50
Temperature (qC)
75
0.335
AVDD = 2.7 V
AVDD = 5.25 V
AVDD = 2.7 V
AVDD = 5.25 V
1/3 ˜ (AVDD - AVSS) Ratio
0.31
Voltage (V)
125
Figure 33. PGA Rail Detection, PGAN_RAILN, PGAP_RAILN
Threshold From AVSS
0.32
0.3
0.29
0.28
0.27
-50
-25
0
25
50
Temperature (qC)
75
100
0.3345
0.334
0.3335
0.333
-50
125
Level 0 = 300 mV
Figure 34. Reference Threshold Voltage, Level 0
0
25
50
Temperature (qC)
75
100
125
Figure 35. Reference Threshold Voltage, Level 1
1.8
AVDD = 2.7 V
AVDD = 3.3 V
AVDD = 5.25 V
1.6
Resistance (:)
160
140
120
100
80
-50
-25
Level 1 = 1/3 · (AVDD – AVSS)
180
Temperature Sensor Voltage (mV)
100
1.4
1.2
1
0.8
-25
0
25
50
Temperature (qC)
75
100
125
Figure 36. Temperature Sensor Voltage vs Temperature
0.6
-50
-25
0
25
50
Temperature (qC)
75
100
125
Figure 37. Low-Side Switch RON vs Temperature
Copyright © 2016–2017, Texas Instruments Incorporated
Product Folder Links: ADS124S06 ADS124S08
Submit Documentation Feedback
21
�ADS124S06, ADS124S08
SBAS660C – AUGUST 2016 – REVISED JUNE 2017
www.ti.com
Typical Characteristics (continued)
at TA = 25°C, AVDD = 3.3 V, AVSS = 0 V, DVDD = IOVDD = 3.3 V, using internal VREF = 2.5 V, internal 4.096-MHz oscillator,
and PGA enabled (unless otherwise noted)
3.3
0.6
3.2
GPIO Pin Output Voltage (V)
GPIO Pin Output Voltage (V)
-50qC
3.1
3
2.9
2.8
-50qC
25qC
85qC
25qC
0.5
0.4
0.3
0.2
0.1
0
0
1
2
3
4
5
Sourcing Current (mA)
6
7
8
0
1
2
AVDD = 3.3 V
0.6
3.2
0.5
Digital Pin Output Voltage (V)
Digital Pin Output Voltage (V)
-50qC
3.1
3
2.9
2.8
25qC
6
7
8
Figure 39. GPIO Pin Output Voltage vs Sinking Current
3.3
-50qC
3
4
5
Sinking Current (mA)
AVDD = 3.3 V
Figure 38. GPIO Pin Output Voltage vs Sourcing Current
85qC
25qC
85qC
125qC
0.4
0.3
0.2
0.1
125qC
0
2.7
0
1
2
3
4
5
Sourcing Current (mA)
6
7
0
8
1
2
DVDD = 3.3 V
3
4
5
Sinking Current (mA)
6
7
8
DVDD = 3.3 V
Figure 40. Digital Pin Output Voltage vs Sourcing Current
Figure 41. Digital Pin Output Voltage vs Sinking Current
400
400
Standby mode
PGA bypassed
Gain = 1
350
Gain = 4
Gain = 16
Gain = 64
Gain = 128
350
300
AVDD Current (PA)
AVDD Current (PA)
125qC
125qC
2.7
250
200
150
150
50
25
50
Temperature (qC)
75
100
125
Standby and conversion mode, external VREF
Figure 42. Analog Supply Current vs Temperature
Submit Documentation Feedback
Gain = 64
Gain = 128
200
50
0
Gain = 4
Gain = 16
250
100
-25
PGA bypassed
Gain = 1
300
100
0
-50
22
85qC
0
2.7
3
3.3
3.6
3.9
4.2
AVDD (V)
4.5
4.8
5.1
5.4
Conversion mode, external VREF
Figure 43. Analog Supply Current vs AVDD
Copyright © 2016–2017, Texas Instruments Incorporated
Product Folder Links: ADS124S06 ADS124S08
�ADS124S06, ADS124S08
www.ti.com
SBAS660C – AUGUST 2016 – REVISED JUNE 2017
Typical Characteristics (continued)
at TA = 25°C, AVDD = 3.3 V, AVSS = 0 V, DVDD = IOVDD = 3.3 V, using internal VREF = 2.5 V, internal 4.096-MHz oscillator,
and PGA enabled (unless otherwise noted)
1
Internal Reference AVDD Current (PA)
260
AVDD Current (PA)
0.8
0.6
0.4
0.2
0
-50
-25
0
25
50
Temperature (qC)
75
100
240
220
200
180
160
140
120
-50
125
-25
0
25
50
Temperature (qC)
75
100
125
Power-down mode
Figure 45. Internal Reference AVDD Current vs Temperature
260
240
240
220
220
DVDD Current (PA)
DVDD Current (PA)
Figure 44. Analog Supply Current vs Temperature
260
200
180
160
140
-25
0
25
50
Temperature (qC)
75
100
180
160
140
Standby mode
Conversion mode
120
-50
200
125
120
2.7
2.8
2.9
Standby and conversion mode
3
3.1
3.2
DVDD (V)
3.3
3.4
3.5
3.6
Conversion mode
Figure 46. Digital Supply Current vs Temperature
Figure 47. Digital Supply Current vs DVDD
5
DVDD Current (PA)
4
3
2
1
0
-50
-25
0
25
50
Temperature (qC)
75
100
125
Power-down mode
Figure 48. Digital Supply Current vs Temperature
Copyright © 2016–2017, Texas Instruments Incorporated
Product Folder Links: ADS124S06 ADS124S08
Submit Documentation Feedback
23
�ADS124S06, ADS124S08
SBAS660C – AUGUST 2016 – REVISED JUNE 2017
www.ti.com
8 Parameter Measurement Information
8.1 Noise Performance
Delta-sigma (ΔΣ) analog-to-digital converters (ADCs) are based on the principle of oversampling. The input
signal of a ΔΣ ADC is sampled at a high frequency (modulator frequency) and subsequently filtered and
decimated in the digital domain to yield a conversion result at the respective output data rate. The ratio between
modulator frequency and output data rate is called the oversampling ratio (OSR). By increasing the OSR, and
thus reducing the output data rate, the noise performance of the ADC can be optimized. In other words, the
input-referred noise drops when reducing the output data rate because more samples of the internal modulator
are averaged to yield one conversion result. Increasing the gain also reduces the input-referred noise, which is
particularly useful when measuring low-level signals.
Table 1 to Table 4 summarize the device noise performance. Table 1 and Table 2 list the ADC measurement
noise using the sinc3 digital filter at different data rates and different PGA settings, and Table 3 and Table 4 list
the ADC measurement noise using the low-latency digital filter. Data are representative of typical noise
performance at TA = 25°C using the internal 2.5-V reference. Data shown are based on 512 consecutive samples
from a single device with inputs internally shorted. Table 1 and Table 3 list the input-referred root mean square
noise in units of μVRMS for the conditions shown. Note that peak-to-peak (µVPP) values are shown in
parentheses. Table 2 and Table 4 list the corresponding data in effective resolution calculated from μVRMS values
using Equation 1. Noise-free resolution is calculated from µVPP values using Equation 2.
The input-referred noise (Table 1 and Table 3) only changes marginally when using an external low-noise
reference, such as the REF5025. To calculate effective resolution and noise-free resolution when using a
reference voltage other than 2.5 V, use Equation 1 and Equation 2:
Effective Resolution = ln[(2 · VREF / Gain) / VRMS-Noise] / ln(2)
Noise-Free Resolution= ln[(2 · VREF / Gain) / VPP-Noise] / ln(2)
(1)
(2)
Table 5 to Table 8 repeat the measurements of Table 1 to Table 4 but use the global chop feature of the device.
The global chop feature averages two measurement of the ADC with the inputs swapped. This feature
significantly reduces the input offset of the device, and reduces noise in the measurement.
Noise performance with the PGA bypassed are identical to the noise performance of the device with gain = 1 in
Table 1 to Table 8.
Table 1. Noise in μVRMS (μVPP) with Sinc3 Filter,
at AVDD = 3.3 V, AVSS = 0 V, PGA Enabled, Global Chop Disabled, and Internal 2.5-V Reference
24
DATA
RATE
(SPS)
GAIN
1
2
4
8
16
32
64
128
2.5
0.32 (1.8)
0.16 (0.89)
0.085 (0.45)
0.049 (0.26)
0.036 (0.20)
0.025 (0.14)
0.020 (0.13)
0.019 (0.11)
5
0.40 (2.4)
0.21 (1.0)
0.11 (0.60)
0.066 (0.37)
0.040 (0.30)
0.033 (0.20)
0.029 (0.18)
0.027 (0.16)
10
0.53 (3.0)
0.29 (1.6)
0.16 (0.89)
0.088 (0.52)
0.061 (0.39)
0.046 (0.25)
0.040 (0.24)
0.036 (0.23)
16.6
0.76 (4.2)
0.36 (2.2)
0.20 (1.2)
0.11 (0.67)
0.077 (0.47)
0.060 (0.35)
0.052 (0.32)
0.046 (0.30)
20
0.81 (4.8)
0.41 (2.4)
0.22 (1.4)
0.12 (0.71)
0.082 (0.48)
0.064 (0.44)
0.056 (0.37)
0.048 (0.30)
50
1.3 (7.2)
0.62 (3.7)
0.33 (1.9)
0.18 (1.2)
0.13 (0.76)
0.11 (0.69)
0.091 (0.54)
0.080 (0.53)
60
1.4 (8.0)
0.70 (4.5)
0.37 (2.4)
0.21 (1.3)
0.12 (0.71)
0.11 (0.87)
0.10 (0.67)
0.089 (0.58)
100
1.8 (9.2)
0.91 (5.8)
0.49 (2.6)
0.27 (1.8)
0.17 (1.1)
0.14 (0.88)
0.12 (0.72)
0.11 (0.52)
200
2.4 (13)
1.2 (7.7)
0.64 (4.0)
0.39 (2.3)
0.26 (1.6)
0.21 (1.3)
0.19 (1.1)
0.15 (0.95)
400
3.6 (19)
1.8 (10)
0.87 (5.0)
0.54 (3.4)
0.34 (2.1)
0.28 (1.7)
0.25 (1.5)
0.22 (1.3)
800
5.0 (29)
2.6 (16)
1.3 (7.8)
0.76 (5.2)
0.49 (2.7)
0.41 (2.5)
0.37 (2.2)
0.34 (2.0)
1000
6.0 (32)
2.9 (17)
1.5 (10)
0.85 (5.2)
0.56 (3.2)
0.42 (2.5)
0.41 (2.3)
0.37 (2.2)
2000
7.8 (45)
4.2 (26)
2.1 (14)
1.2 (6.9)
0.78 (4.5)
0.64 (4.0)
0.57 (3.5)
0.54 (2.8)
4000
15. (95)
7.3 (45)
3.9 (25)
2.0 (11)
1.2 (7.1)
0.87 (5.2)
0.83 (5.1)
0.80 (5.0)
Submit Documentation Feedback
Copyright © 2016–2017, Texas Instruments Incorporated
Product Folder Links: ADS124S06 ADS124S08
�ADS124S06, ADS124S08
www.ti.com
SBAS660C – AUGUST 2016 – REVISED JUNE 2017
Table 2. Effective Resolution from RMS Noise (Noise-Free Resolution from Peak-to-Peak Noise)
with Sinc3 Filter at AVDD = 3.3 V, AVSS = 0 V, PGA Enabled,
Global Chop Disabled, and Internal 2.5-V Reference
DATA
RATE
(SPS)
GAIN
1
2
4
8
16
32
64
128
2.5
23.9 (21.4)
23.9 (21.4)
23.8 (21.4)
23.6 (21.2)
23.0 (20.5)
22.6 (20.2)
21.9 (19.1)
21.0 (18.4)
5
23.6 (21.0)
23.5 (21.2)
23.4 (21.0)
23.2 (20.7)
22.9 (20.0)
22.2 (19.5)
21.4 (18.9)
20.5 (17.6)
10
23.2 (20.7)
23.0 (20.5)
22.9 (20.4)
22.8 (20.2)
22.3 (19.6)
21.7 (19.2)
20.9 (18.4)
20.1 (17.3)
16.6
22.6 (20.2)
22.7 (20.1)
22.6 (20.0)
22.4 (19.8)
22.0 (19.4)
21.3 (18.8)
20.5 (17.9)
19.7 (17.0)
20
22.6 (20.0)
22.5 (20.0)
22.4 (19.8)
22.3 (19.8)
21.9 (19.3)
21.2 (18.4)
20.4 (17.7)
19.6 (17.0)
50
21.9 (19.4)
21.9 (19.4)
21.9 (19.3)
21.7 (19.0)
21.2 (18.6)
20.5 (17.8)
19.7 (17.2)
18.9 (16.2)
60
21.8 (19.2)
21.8 (19.1)
21.7 (19.0)
21.5 (18.8)
21.3 (18.8)
20.4 (17.5)
19.5 (16.8)
18.7 (16.0)
100
21.4 (19.0)
21.4 (18.7)
21.3 (18.9)
21.1 (18.4)
20.8 (18.1)
20.1 (17.4)
19.3 (16.7)
18.4 (16.0)
200
21.0 (18.6)
20.9 (18.3)
20.9 (18.2)
20.6 (18.1)
20.2 (17.6)
19.5 (16.9)
18.6 (16.1)
18.0 (15.3)
400
20.4 (18.0)
20.4 (17.9)
20.5 (17.9)
20.2 (17.5)
19.8 (17.2)
19.1 (16.5)
18.2 (15.7)
17.4 (14.9)
800
19.9 (17.4)
19.9 (17.2)
19.9 (17.3)
19.7 (16.9)
19.3 (16.8)
18.6 (16.0)
17.7 (15.1)
16.8 (14.3)
1000
19.7 (17.2)
19.7 (17.2)
19.6 (16.9)
19.5 (16.9)
19.1 (16.6)
18.5 (16.1)
17.6 (14.9)
16.7 (14.1)
2000
19.3 (16.8)
19.2 (16.6)
19.2 (16.5)
18.9 (16.5)
18.6 (16.1)
17.9 (15.3)
17.1 (14.4)
16.2 (13.8)
4000
18.4 (15.7)
18.4 (15.7)
18.3 (15.6)
18.3 (15.7)
18.0 (15.4)
17.5 (14.9)
16.5 (13.9)
15.6 (12.9)
Table 3. Noise in μVRMS (μVPP) with Low-Latency Filter,
at AVDD = 3.3 V, AVSS = 0 V, PGA Enabled, Global Chop Disabled, and Internal 2.5-V Reference
DATA
RATE
(SPS)
GAIN
1
2
4
8
16
32
64
128
2.5
0.46 (2.7)
0.24 (1.3)
0.12 (0.82)
0.072 (0.41)
0.051 (0.30)
0.041 (0.27)
0.037 (0.20)
0.034 (0.19)
5
0.62 (3.9)
0.33 (1.6)
0.18 (1.1)
0.10 (0.52)
0.064 (0.37)
0.053 (0.31)
0.050 (0.33)
0.046 (0.27)
10
0.94 (6.6)
0.47 (3.0)
0.24 (1.4)
0.14 (0.78)
0.09 (0.52)
0.074 (0.44)
0.065 (0.37)
0.057 (0.35)
16.6
1.3 (8.0)
0.66 (3.9)
0.32 (2.0)
0.18 (1.2)
0.12 (0.69)
0.10 (0.56)
0.086 (0.55)
0.079 (0.52)
20
1.2 (8.0)
0.65 (3.9)
0.34 (1.9)
0.20 (1.2)
0.13 (0.67)
0.10 (0.64)
0.093 (0.54)
0.082 (0.51)
50
2.1 (13)
1.0 (6.6)
0.54 (3.1)
0.30 (1.9)
0.22 (1.3)
0.16 (1.2)
0.15 (0.90)
0.13 (0.84)
60
2.3 (15)
1.2 (7.5)
0.62 (3.7)
0.35 (2.2)
0.22 (1.4)
0.19 (1.1)
0.16 (0.99)
0.15 (0.90)
100
2.8 (18)
1.6 (10)
0.83 (5.1)
0.45 (2.9)
0.30 (1.7)
0.23 (1.3)
0.38 (2.6)
0.20 (1.3)
200
4.6 (28)
2.2 (13)
1.1 (6.9)
0.67 (4.1)
0.42 (2.6)
0.34 (2.0)
0.29 (1.9)
0.28 (1.7)
400
6.1 (31)
3.0 (19)
1.6 (11)
0.92 (5.1)
0.46 (2.6)
0.48 (2.8)
0.42 (2.9)
0.39 (2.3)
800
8.6 (36)
4.3 (27)
2.3 (15)
1.3 (8.0)
0.81 (4.6)
0.66 (4.0)
0.58 (3.8)
0.55 (3.2)
1000
10 (50)
5.0 (29)
2.6 (15)
1.4 (8.9)
0.90 (5.4)
0.79 (5.1)
0.66 (4.3)
0.59 (3.8)
2000
22 (83)
11 (80)
5.5 (32)
2.9 (17)
1.6 (11)
1.1 (6.7)
1.1 (6.7)
1.0 (6.6)
4000
103 (629)
48 (404)
24 (160)
12 (70)
6.4 (39)
3.3 (21)
3.6 (20)
3.1 (19)
Copyright © 2016–2017, Texas Instruments Incorporated
Product Folder Links: ADS124S06 ADS124S08
Submit Documentation Feedback
25
�ADS124S06, ADS124S08
SBAS660C – AUGUST 2016 – REVISED JUNE 2017
www.ti.com
Table 4. Effective Resolution from RMS Noise (Noise-Free Resolution from Peak-to-Peak Noise)
with Low-Latency Filter, at AVDD = 3.3 V, AVSS = 0 V, PGA Enabled,
Global Chop Disabled, and Internal 2.5-V Reference
DATA
RATE
(SPS)
GAIN
1
2
4
8
16
32
64
128
2.5
23.4 (20.8)
23.3 (20.8)
23.3 (20.5)
23.0 (20.5)
22.6 (20.0)
21.9 (19.1)
21.1 (18.6)
20.0 (17.6)
5
22.9 (20.3)
22.8 (20.5)
22.7 (20.1)
22.6 (20.2)
22.2 (19.7)
21.5 (19.0)
20.6 (17.9)
19.7 (17.1)
10
22.3 (19.5)
22.3 (19.7)
22.3 (19.8)
22.1 (19.6)
21.7 (19.2)
21.0 (18.4)
20.2 (17.8)
19.4 (16.7)
16.6
21.9 (19.2)
21.9 (19.3)
21.9 (19.2)
21.7 (19.0)
21.3 (18.8)
20.5 (18.1)
19.8 (17.1)
18.9 (16.2)
20
22.0 (19.2)
21.9 (19.3)
21.8 (19.3)
21.6 (19.0)
21.3 (18.8)
20.5 (17.9)
19.7 (17.2)
18.9 (16.2)
50
21.2 (18.5)
21.2 (18.5)
21.1 (18.6)
21.0 (18.3)
20.5 (17.9)
19.9 (17.0)
19.0 (16.4)
18.2 (15.5)
60
21.0 (18.3)
21.0 (18.4)
21.0 (18.4)
20.8 (18.1)
20.4 (17.7)
19.7 (17.1)
18.9 (16.3)
18.0 (15.4)
100
20.8 (18.1)
20.6 (17.9)
20.5 (17.9)
20.4 (17.7)
20.0 (17.5)
19.4 (16.9)
17.6 (14.9)
17.6 (14.9)
200
20.1 (17.4)
20.1 (17.6)
20.1 (17.5)
19.8 (17.2)
19.5 (16.9)
18.8 (16.2)
18.0 (15.3)
17.1 (14.5)
400
19.6 (17.3)
19.7 (17.0)
19.6 (16.8)
19.4 (16.9)
19.4 (16.9)
18.3 (15.8)
17.5 (14.7)
16.6 (14.0)
800
19.2 (17.1)
19.1 (16.5)
19.0 (16.4)
18.9 (16.3)
18.6 (16.0)
17.9 (15.2)
17.0 (14.3)
16.1 (13.6)
1000
19.0 (16.6)
18.9 (16.4)
18.9 (16.3)
18.7 (16.1)
18.4 (15.8)
17.6 (14.9)
16.8 (14.2)
16.0 (13.3)
2000
17.8 (15.9)
17.8 (14.9)
17.8 (15.3)
17.7 (15.2)
17.5 (14.8)
17.1 (14.5)
16.1 (13.5)
15.2 (12.5)
4000
15.6 (13.0)
15.7 (12.6)
15.7 (12.9)
15.7 (13.1)
15.6 (13.0)
15.5 (12.9)
14.4 (11.9)
13.6 (11.0)
Table 5. Noise in μVRMS (μVPP) with Sinc3 Filter,
at AVDD = 3.3 V, AVSS = 0 V, PGA Enabled, Global Chop Enabled, and Internal 2.5-V Reference
DATA
RATE
(SPS) (1)
1
2
4
8
16
32
64
128
2.5
0.22 (1.2)
0.11 (0.60)
0.063 (0.30)
0.031 (0.19)
0.022 (0.15)
0.017 (0.09)
0.014 (0.08)
0.013 (0.07)
5
0.31 (1.8)
0.15 (0.70)
0.080 (0.52)
0.049 (0.26)
0.032 (0.19)
0.024 (0.15)
0.020 (0.12)
0.019 (0.11)
(1)
26
GAIN
10
0.41 (2.4)
0.21 (1.2)
0.12 (0.60)
0.061 (0.37)
0.042 (0.24)
0.031 (0.20)
0.029 (0.17)
0.027 (0.16)
16.6
0.54 (3.3)
0.28 (1.5)
0.14 (0.80)
0.080 (0.48)
0.052 (0.32)
0.043 (0.26)
0.039 (0.23)
0.034 (0.20)
20
0.60 (3.3)
0.31 (1.8)
0.16 (0.80)
0.090 (0.56)
0.059 (0.34)
0.046 (0.25)
0.043 (0.27)
0.037 (0.19)
50
0.91 (4.8)
0.49 (2.5)
0.23 (1.3)
0.14 (0.90)
0.090 (0.45)
0.070 (0.41)
0.069 (0.36)
0.058 (0.33)
60
1.0 (5.7)
0.51 (3.1)
0.26 (1.5)
0.16 (0.90)
0.10 (0.54)
0.090 (0.45)
0.070 (0.41)
0.067 (0.40)
100
1.2 (6.9)
0.63 (3.7)
0.33 (1.7)
0.19 (1.0)
0.13 (0.70)
0.11 (0.59)
0.089 (0.52)
0.084 (0.49)
200
1.8 (10)
0.90 (4.9)
0.48 (2.8)
0.27 (1.4)
0.19 (1.1)
0.15 (0.80)
0.14 (0.80)
0.12 (0.75)
400
2.5 (14)
1.2 (7.0)
0.60 (3.4)
0.39 (2.4)
0.26 (1.6)
0.20 (1.1)
0.18 (1.0)
0.16 (0.90)
800
3.5 (21)
1.8 (11)
1.0 (5.7)
0.55 (3.2)
0.35 (2.1)
0.29 (1.7)
0.26 (1.4)
0.23 (1.3)
1000
3.9 (23)
2.1 (13)
1.1 (6.0)
0.65 (3.5)
0.39 (2.3)
0.32 (1.9)
0.28 (1.6)
0.26 (1.5)
2000
6.0 (35)
2.8 (16)
1.6 (8.0)
0.90 (5.0)
0.59 (3.5)
0.47 (2.5)
0.39 (2.2)
0.36 (2.1)
4000
10 (63)
5.3 (30)
2.8 (16)
1.4 (9.0)
0.90 (5.0)
0.67 (4.0)
0.58 (3.3)
0.54 (3.2)
3
The actual data conversion period changes with the sinc filter and global chop mode enabled; see Table 19 for details.
Submit Documentation Feedback
Copyright © 2016–2017, Texas Instruments Incorporated
Product Folder Links: ADS124S06 ADS124S08
�ADS124S06, ADS124S08
www.ti.com
SBAS660C – AUGUST 2016 – REVISED JUNE 2017
Table 6. Effective Resolution from RMS Noise (Noise-Free Resolution from Peak-to-Peak Noise)
with Sinc3 Filter at AVDD = 3.3 V, AVSS = 0 V, PGA Enabled,
Global Chop Enabled, and Internal 2.5-V Reference
DATA
RATE
(SPS) (1)
1
2
4
8
16
32
64
128
2.5
24.4 (22.0)
24.5 (22.0)
24.2 (22.0)
24.3 (21.7)
23.7 (21.0)
23.1 (20.7)
22.4 (19.8)
21.5 (19.1)
5
24.0 (21.4)
24.0 (21.7)
23.9 (21.2)
23.6 (21.2)
23.2 (20.7)
22.6 (20.0)
21.9 (19.4)
20.9 (18.5)
10
23.5 (21.0)
23.5 (21.0)
23.3 (21.0)
23.3 (21.0)
22.8 (20.3)
22.2 (19.6)
21.4 (18.9)
20.5 (17.9)
16.6
23.1 (20.5)
23.1 (20.7)
23.1 (20.5)
22.8 (20.5)
22.5 (19.9)
21.8 (19.2)
20.9 (18.4)
20.1 (17.6)
20
23.0 (20.5)
22.9 (20.4)
22.9 (20.5)
22.7 (20.5)
22.3 (19.8)
21.7 (19.2)
20.8 (18.2)
20.0 (17.6)
50
22.4 (20.0)
22.3 (19.9)
22.4 (19.8)
22.1 (19.8)
21.8 (19.4)
21.1 (18.5)
20.1 (17.7)
19.4 (16.8)
(1)
GAIN
60
22.3 (19.8)
22.2 (19.6)
22.2 (19.7)
21.9 (19.7)
21.6 (19.1)
20.8 (18.4)
20.0 (17.5)
19.2 (16.6)
100
22.0 (19.5)
21.9 (19.4)
21.8 (19.5)
21.6 (19.5)
21.2 (18.7)
20.5 (18.0)
19.7 (17.2)
18.8 (16.3)
200
21.4 (18.9)
21.5 (19.0)
21.3 (18.8)
21.1 (18.8)
20.7 (18.1)
20.0 (17.6)
19.1 (16.6)
18.3 (15.7)
400
21.0 (18.5)
20.9 (18.4)
21.0 (18.5)
20.6 (18.5)
20.2 (17.6)
19.6 (17.1)
18.7 (16.1)
17.9 (15.4)
800
20.4 (17.9)
20.4 (17.8)
20.3 (17.7)
20.1 (17.7)
19.8 (17.2)
19.0 (16.5)
18.2 (15.7)
17.4 (14.9)
1000
20.3 (17.7)
20.2 (17.6)
20.1 (17.7)
19.9 (17.7)
19.6 (17.0)
18.9 (16.3)
18.1 (15.6)
17.2 (14.7)
2000
19.7 (17.1)
19.8 (17.2)
19.6 (17.2)
19.4 (17.2)
19.0 (16.5)
18.3 (15.9)
17.6 (15.2)
16.7 (14.2)
4000
19.0 (16.3)
18.9 (16.4)
18.8 (16.2)
18.7 (16.2)
18.4 (15.9)
17.8 (15.3)
17.0 (14.5)
16.1 (13.6)
3
The actual data conversion period changes with the sinc filter and global chop mode enabled; see Table 19 for details.
Table 7. Noise in μVRMS (μVPP) with Low-Latency Filter,
at AVDD = 3.3 V, AVSS = 0 V, PGA Enabled, Global Chop Enabled, and Internal 2.5-V Reference
DATA
RATE
(SPS)
GAIN
1
2
4
8
16
32
64
128
2.5
0.34 (2.1)
0.16 (0.90)
0.09 (0.52)
0.051 (0.26)
0.034 (0.17)
0.027 (0.15)
0.024 (0.14)
0.021 (0.13)
5
0.47 (2.7)
0.22 (1.3)
0.12 (0.60)
0.076 (0.45)
0.038 (0.22)
0.039 (0.23)
0.034 (0.20)
0.029 (0.19)
10
0.63 (3.6)
0.33 (1.8)
0.18 (1.0)
0.10 (0.56)
0.069 (0.37)
0.051 (0.30)
0.045 (0.26)
0.041 (0.25)
16.6
0.90 (4.5)
0.43 (2.5)
0.24 (1.4)
0.14 (0.90)
0.090 (0.50)
0.070 (0.40)
0.065 (0.38)
0.056 (0.35)
20
0.90 (5.1)
0.42 (2.5)
0.23 (1.4)
0.14 (0.90)
0.090 (0.63)
0.070 (0.41)
0.070 (0.39)
0.059 (0.36)
50
1.3 (8.0)
0.80 (4.6)
0.39 (2.5)
0.23 (1.2)
0.14 (0.90)
0.12 (0.70)
0.11 (0.61)
0.090 (0.50)
60
1.7 (10)
0.80 (4.3)
0.42 (2.8)
0.23 (1.4)
0.18 (1.0)
0.13 (0.70)
0.12 (0.69)
0.11 (0.67)
100
2.0 (12)
1.1 (6.0)
0.55 (3.2)
0.34 (1.9)
0.21 (1.3)
0.18 (1.1)
0.16 (0.90)
0.14 (0.80)
200
3.0 (17)
1.5 (8.0)
0.70 (4.1)
0.48 (2.9)
0.28 (1.7)
0.26 (1.4)
0.23 (1.3)
0.19 (1.0)
400
4.3 (22)
2.3 (13)
1.1 (6.0)
0.64 (3.7)
0.44 (2.4)
0.33 (1.9)
0.29 (1.8)
0.28 (1.7)
800
6.2 (25)
3.1 (19)
1.5 (9.0)
0.90 (5.0)
0.62 (3.4)
0.49 (2.8)
0.45 (2.5)
0.40 (2.3)
1000
6.0 (38)
3.3 (19)
1.8 (11)
1.1 (6.3)
0.66 (3.7)
0.52 (2.8)
0.45 (2.7)
0.45 (2.5)
2000
15 (51)
8.0 (50)
4.0 (23)
2.2 (13)
1.2 (7.0)
0.90 (5.2)
0.80 (5.6)
0.70 (3.9)
4000
65 (275)
35 (211)
18 (116)
9.0 (51)
4.4 (24)
2.3 (15)
2.4 (13)
2.2 (12)
Copyright © 2016–2017, Texas Instruments Incorporated
Product Folder Links: ADS124S06 ADS124S08
Submit Documentation Feedback
27
�ADS124S06, ADS124S08
SBAS660C – AUGUST 2016 – REVISED JUNE 2017
www.ti.com
Table 8. Effective Resolution from RMS Noise (Noise-Free Resolution from Peak-to-Peak Noise)
with Low-Latency Filter, at AVDD = 3.3 V, AVSS = 0 V, PGA Enabled,
Global Chop Enabled, and Internal 2.5-V Reference
28
DATA
RATE
(SPS)
GAIN
1
2
4
8
16
32
64
128
2.5
23.8 (21.2)
23.9 (21.4)
23.7 (21.2)
23.5 (21.2)
23.1 (20.8)
22.5 (20.0)
21.7 (19.1)
20.8 (18.2)
5
23.3 (20.8)
23.4 (20.8)
23.3 (21.0)
23.0 (20.4)
23.0 (20.4)
21.9 (19.4)
21.1 (18.6)
20.4 (17.7)
10
22.9 (20.4)
22.9 (20.4)
22.7 (20.3)
22.6 (20.1)
22.1 (19.7)
21.6 (19.9)
20.7 (18.2)
19.9 (17.2)
16.6
22.4 (20.1)
22.5 (19.9)
22.3 (19.8)
22.1 (19.4)
21.8 (19.2)
21.1 (18.6)
20.2 (17.6)
19.4 (16.8)
20
22.4 (19.9)
22.5 (19.9)
22.4 (19.8)
22.1 (19.4)
21.8 (18.9)
21.0 (18.6)
20.1 (17.8)
19.3 (16.7)
50
21.8 (19.3)
21.7 (19.0)
21.6 (19.0)
21.4 (19.0)
21.0 (18.4)
20.4 (17.8)
19.4 (17.0)
18.7 (16.3)
60
21.5 (19.0)
21.6 (19.1)
21.5 (18.8)
21.3 (18.8)
20.8 (18.3)
20.2 (17.7)
19.3 (16.8)
18.5 (15.8)
100
21.2 (18.6)
21.1 (18.6)
21.1 (18.6)
20.8 (18.3)
20.5 (17.9)
19.7 (17.1)
18.9 (16.4)
18.1 (15.6)
200
20.7 (18.2)
20.7 (18.2)
20.7 (18.2)
20.3 (17.7)
20.1 (17.5)
19.2 (16.8)
18.4 (15.9)
17.6 (15.2)
400
20.1 (17.8)
20.1 (17.6)
20.1 (17.6)
19.9 (17.4)
19.4 (17.0)
18.8 (16.4)
18.0 (15.4)
17.1 (14.5)
800
19.6 (17.6)
19.6 (17.0)
19.7 (17.1)
19.4 (16.8)
18.9 (16.5)
18.3 (15.8)
17.4 (14.9)
16.6 (14.0)
1000
19.6 (17.0)
19.5 (17.0)
19.4 (16.8)
19.1 (16.6)
18.9 (16.4)
18.2 (15.8)
17.4 (14.8)
16.4 (13.9)
2000
18.4 (16.6)
18.2 (15.6)
18.2 (15.7)
18.1 (15.6)
18.0 (15.4)
17.4 (14.9)
16.6 (13.8)
15.9 (13.3)
4000
16.2 (14.1)
16.1 (13.5)
16.1 (13.4)
16.1 (13.6)
16.1 (13.7)
16.1 (13.4)
15.0 (12.7)
14.1 (11.5)
Submit Documentation Feedback
Copyright © 2016–2017, Texas Instruments Incorporated
Product Folder Links: ADS124S06 ADS124S08
�ADS124S06, ADS124S08
www.ti.com
SBAS660C – AUGUST 2016 – REVISED JUNE 2017
9 Detailed Description
9.1 Overview
The ADS124S06 and ADS124S08 are precision 24-bit, delta-sigma (ΔΣ) ADCs with an integrated analog front
end (AFE) to simplify precision sensor connections. The ADC provides output data rates from 2.5 SPS to
4000 SPS for flexibility in resolution and data rates over a wide range of applications. The low-noise and low-drift
architecture make these devices suitable for precise measurement of low-voltage sensors, such as load cells and
temperature sensors.
The ADS124S0x incorporate several features that simplify precision sensor measurements. Key integrated
features include:
• Low-noise, CMOS PGA with integrated signal fault detection
• Low-drift, 2.5-V voltage reference
• Two sets of buffered external reference inputs with reference voltage level detection
• Dual, matched, sensor-excitation current sources (IDACs)
• Internal 4.096-MHz oscillator
• Temperature sensor
• Four general-purpose input/output pins (GPIOs)
• A low-resistance switch (when connected to AVSS) can be used to disconnect bridge sensors to reduce
current consumption
As described in the Functional Block Diagram section, these devices provide 13 (ADS124S08) or 7
(ADS124S06) analog inputs that are configurable as either single-ended inputs, differential inputs, or any
combination of the two. Many of the analog inputs have additional features as programmed by the user. The
analog inputs can be programmed to enable the following extended features:
• Two sensor excitation current sources: all analog input pins (and REFP1 and REFN1 on the ADS124S06)
• Sensor biasing voltage (VBIAS): pins AIN0, AIN1, AIN2, AIN3, AIN4, AIN5, AINCOM
• Four GPIO pins: AIN8, AIN9, AIN10, AIN11 (ADS124S08 only, the ADS124S06 has dedicated GPIOs)
• Sensor burn-out current sources: analog input pins selected for ADC input
Following the input multiplexer (MUX), the ADC features a high input-impedance, low-noise, programmable gain
amplifier (PGA), eliminating the need for an external amplifier. The PGA gain is programmable from 1 to 128 in
binary steps. The PGA can be bypassed to allow the input range to extend 50 mV below ground or above
supply. The PGA has output voltage monitors to verify the integrity of the conversion result.
An inherently stable delta-sigma modulator measures the ratio of the input voltage to the reference voltage to
provide the ADC result. The ADC operates with the internal 2.5-V reference, or with up to two external reference
inputs. The external reference inputs can be continuously monitored for low (or missing) voltage. The REFOUT
pin provides the buffered 2.5-V internal voltage reference output that can be used to bias external circuitry.
The digital filter provides two filter modes, sinc3 and low-latency, allowing optimization of settling time and linecycle rejection. The third-order sinc filter offers simultaneous 50-Hz and 60-Hz line-cycle rejection at data rates of
2.5 SPS, 5 SPS, and 10 SPS, 50-Hz rejection at data rates of 16.6 SPS and 50 SPS, and 60-Hz rejection at data
rates of 20 SPS and 60 SPS. The low-latency filter provides settled data with 50-Hz and 60-Hz line-cycle
rejection at data rates of 2.5 SPS, 5 SPS, 10 SPS, and 20 SPS, 50-Hz rejection at data rates of 16.6 SPS and
50 SPS, and 60-Hz rejection at a data rate of 60 SPS.
Two programmable excitation current sources provide bias to resistive sensors [such as resistance temperature
detectors (RTDs) or thermistors]. The ADC integrates several system monitors for read back, such as
temperature sensor and supply monitors. Four GPIO pins are available as either dedicated pins (ADS124S06) or
combined with analog input pins (ADS124S08).
The ADS124S0x system clock is either provided by the internal low-drift, 4.096-MHz oscillator or an external
clock source on the CLK input.
Copyright © 2016–2017, Texas Instruments Incorporated
Product Folder Links: ADS124S06 ADS124S08
Submit Documentation Feedback
29
�ADS124S06, ADS124S08
SBAS660C – AUGUST 2016 – REVISED JUNE 2017
www.ti.com
Overview (continued)
The SPI-compatible serial interface is used to read the conversion data and also to configure and control the
ADC. The serial interface consists of four signals: CS, SCLK, DIN, and DOUT/DRDY. The conversion data are
provided with an optional CRC code for improved data integrity. The dual function DOUT/DRDY output indicates
when conversion data are ready and also provides the data output. The serial interface can be implemented with
as little as three connections by tying CS low. Start ADC conversions with either the START/SYNC pin or with
commands. The ADC can be programmed for a continuous conversion mode or to perform single-shot
conversions.
The AVDD analog supply operates with bipolar supplies from ±1.5 V to ±2.625 V or with a unipolar supply from
2.7 V to 5.25 V. For unipolar-supply operation, use the VBIAS voltage to bias isolated (floating) sensors. The
digital supplies operate with unipolar supplies only. The DVDD digital power supply operates from 2.7 V to 3.6 V
and the IOVDD supply operates from DVDD to 5.25 V.
9.2 Functional Block Diagram
AVDD
AVSS-SW
Burnout
Detect
Excitation
Current
Sources
AINCOM
AIN0
REFN0
REFP0
Reference
Mux
AIN5
Input
Mux
PGA
24-Bit û
ADC
AIN6 / REFP1
AIN7 / REFN1
ADS124S06
ADS124S08
AIN9 / GPIO1
Power Supplies
AIN10 / GPIO2
Configurable
Digital
Filter
Serial
Interface
and
Control
RESET
CS
SCLK
DIN
DOUT/DRDY
System-, SelfCalibration
DRDY
Temperature
Sensor
AIN11 / GPIO3
IOVDD
START/SYNC
PGA Rail
Detection
AIN8 / GPIO0
ADS124S08
only
2.5-V
Reference
Reference
Buffers
VBIAS
AIN3
AIN4
DVDD
Reference
Detection
AIN1
AIN2
REFCOM REFOUT
4.096-MHz
Oscillator
Burnout
Detect
AVSS
CLK
DGND
Copyright © 2016, Texas Instruments Incorporated
30
Submit Documentation Feedback
Copyright © 2016–2017, Texas Instruments Incorporated
Product Folder Links: ADS124S06 ADS124S08
�ADS124S06, ADS124S08
www.ti.com
SBAS660C – AUGUST 2016 – REVISED JUNE 2017
9.3 Feature Description
9.3.1 Multiplexer
The ADS124S0x contains a flexible input multiplexer; see Figure 49. Select any of the six (ADS124S06) or 12
(ADS124S08) analog inputs as the positive or negative input for the PGA using the MUX_P[3:0] and MUX_N[3:0]
bits in the input multiplexer register (02h). In addition, AINCOM can be selected as the positive or negative PGA
input. AINCOM is treated as a regular analog input, as is AINx. Use AINCOM in single-ended measurement
applications as the common input for the other analog inputs.
The multiplexer also routes the excitation current sources to drive resistive sensors (bridges, RTDs, and
thermistors) and can provide bias voltages for unbiased sensors (unbiased thermocouples for example) to analog
input pins.
The ADS124S0x also contain a set of system monitor functions measured through the multiplexer. The inputs
can be shorted together at mid-supply [(AVDD + AVSS) / 2] to measure and calibrate the input offset of the
analog front-end and the ADC. The system monitor also includes a temperature sensor that provides a
measurement of the device temperature. The system monitor can also measure the analog and digital supplies,
measuring [(AVDD – AVSS) / 4] for the analog supply or DVDD / 4 for the digital supply. Finally, the system
monitor contains a set of burn-out current sources that pull the inputs to either supply if the sensor has burned
out and has a high impedance so that the ADC measures a full-scale reading.
The multiplexer implements a break-before-make circuit. When changing the multiplexer channels using the
MUX_P[3:0] and MUX_N[3:0] bits, the device first disconnects the PGA inputs from the analog inputs and
connects them to mid-supply for 2 · tCLK. In the next step, the PGA inputs connect to the selected new analog
input channels. This break-before-make behavior ensures the ADC always starts from a known state and that the
analog inputs are not momentarily shorted together.
Electrostatic discharge (ESD) diodes to AVDD and AVSS protect the inputs. To prevent the ESD diodes from
turning on, the absolute voltage on any input must stay within the range provided by Equation 3:
AVSS – 0.3 V < V(AINx) < AVDD + 0.3 V
(3)
External Schottky clamp diodes or series resistors may be required to limit the input current to safe values (see
the Absolute Maximum Ratings table). Overdriving an unselected input on the device can affect conversions
taking place on other input pins.
Copyright © 2016–2017, Texas Instruments Incorporated
Product Folder Links: ADS124S06 ADS124S08
Submit Documentation Feedback
31
�ADS124S06, ADS124S08
SBAS660C – AUGUST 2016 – REVISED JUNE 2017
www.ti.com
Feature Description (continued)
AVDD
AVDD
IDAC2
IDAC1
(1)
AVSS
AVDD
VBIAS
(AVDD + AVSS) / 2
AINCOM
VBIAS
AVSS
AVDD
AVSS
AVDD
AVSS
AVDD
AVSS
AVDD
AVSS
AVDD
AIN0
VBIAS
AIN1
VBIAS
AVDD
AVDD
AIN2
VBIAS
AIN3
VBIAS
Temperature
Diode
AIN4
(2)
VBIAS
AVSS
AVDD
(AVDD í AVSS) ‡ (5 / 8)
(AVDD í AVSS) ‡ (3 / 8)
AIN5
(3)
AVSS
AVDD
'9'' ‡ (4 / 12)
'9'' ‡ (1 / 12)
AIN6
AVSS
AVDD
AVDD
AIN7
AVSS
AVDD
AVSS
AVDD
Burn-Out Current Source
AIN8
AINP
PGA
To ADC
AINN
AIN9
AVSS
AVDD
Burn-Out Current Source
AIN10
AVSS
AVSS
AVDD
AIN11
ADS124S08 Only
Copyright © 2016, Texas Instruments Incorporated
(1)
AINP and AINN are connected together to (AVDD + AVSS) / 2 for offset measurement.
(2)
Measurement for the analog supply equivalent to (AVDD – AVSS) / 4.
(3)
Measurement for the analog supply equivalent to DVDD / 4.
Figure 49. Analog Input Multiplexer
32
Submit Documentation Feedback
Copyright © 2016–2017, Texas Instruments Incorporated
Product Folder Links: ADS124S06 ADS124S08
�ADS124S06, ADS124S08
www.ti.com
SBAS660C – AUGUST 2016 – REVISED JUNE 2017
Feature Description (continued)
9.3.2 Low-Noise Programmable Gain Amplifier
The ADS124S06 and ADS124S08 feature a low-drift, low-noise, high input impedance programmable gain
amplifier (PGA). Figure 50 shows a simplified diagram of the PGA. The PGA consists of two chopper-stabilized
amplifiers (A1 and A2) and a resistor feedback network that sets the gain of the PGA. The PGA input is equipped
with an electromagnetic interference (EMI) filter and an antialiasing filter on the output.
250
+
AINP
A1
16 pF
RF
320 pF
RG
RF
250
2.5 k
ADC
2.5 k
A2
+
AINN
16 pF
Figure 50. Simplified PGA Diagram
The PGA can be set to gains of 1, 2, 4, 8, 16, 32, 64, or 128 using the GAIN[2:0] bits in the gain setting register
(03h). Gain is changed inside the device using a variable resistor, RG. The differential full-scale input voltage
range (FSR) of the PGA is defined by the gain setting and the reference voltage used, as shown in Equation 4:
FSR = ±VREF / Gain
(4)
Table 9 shows the corresponding full-scale ranges when using the internal 2.5-V reference.
Table 9. PGA Full-Scale Range
GAIN SETTING
FSR
1
±2.5 V
2
±1.25 V
4
±0.625 V
8
±0.313 V
16
±0.156 V
32
±0.078 V
64
±0.039 V
128
±0.020 V
The PGA must be enabled with the PGA_EN[1:0] bits of the gain setting register (03h). Setting these bits to 00
powers down and bypasses the PGA. A setting of 01 enables the PGA. The 10 and 11 settings are reserved and
must not be written to the device.
With the PGA enabled, gains 64 and 128 are established in the digital domain. When the device is set to 64 or
128, the PGA is set to a gain of 32, and additional gain is established with digital scaling. The input-referred
noise does still improve compared to the gain = 32 setting because the PGA is biased with a higher supply
current to reduce noise.
Copyright © 2016–2017, Texas Instruments Incorporated
Product Folder Links: ADS124S06 ADS124S08
Submit Documentation Feedback
33
�ADS124S06, ADS124S08
SBAS660C – AUGUST 2016 – REVISED JUNE 2017
www.ti.com
9.3.2.1 PGA Input-Voltage Requirements
As with many amplifiers, the PGA has an absolute input voltage range requirement that cannot be exceeded.
The maximum and minimum absolute input voltages are limited by the voltage swing capability of the PGA
output. The specified minimum and maximum absolute input voltages (VAINP and VAINN) depend on the PGA gain,
the maximum differential input voltage (VINMAX), and the tolerance of the analog power-supply voltages (AVDD
and AVSS). Use the maximum voltage expected in the application for VINMAX. The absolute positive and negative
input voltages must be within the specified range, as shown in Equation 5:
AVSS + 0.15 V + |VINMAX| · (Gain – 1) / 2 < VAINP, VAINN < AVDD – 0.15 V – |VINMAX| · (Gain – 1) / 2
where
•
•
VAINP, VAINN = absolute input voltage
VINMAX = VAINP – VAINN = maximum differential input voltage
(5)
As mentioned in the previous section, PGA gain settings of 64 and 128 are scaled in the digital domain and are
not implemented with the amplifier. When using the PGA in gains of 64 and 128, set the gain in Equation 5 to 32
to calculate the absolute input voltage range.
The relationship between the PGA input to the PGA output is shown graphically in Figure 51. The PGA output
voltages (VOUTP, VOUTN) depend on the PGA gain and the input voltage magnitudes. For linear operation, the
PGA output voltages must not exceed AVDD – 0.15 V or AVSS + 0.15 V. Note that the diagram depicts a
positive differential input voltage that results in a positive differential output voltage.
PGA Input
PGA Output
AVDD
AVDD ± 0.15 V
VOUTP = VAINP + VIN Â (Gain ± 1) / 2
VAINP
VIN = VAINP ± VAINN
VAINN
VOUTN = VAINN ± VIN Â (Gain ± 1) / 2
AVSS + 0.15 V
AVSS
Figure 51. PGA Input/Output Range
Download the ADS1x4S0x design calculator from www.ti.com. This calculator can be used to determine the input
voltage range of the PGA.
9.3.2.2 PGA Rail Flags
The PGA rail flags (FL_P_RAILP, FL_P_RAILN, FL_N_RAILP, and FL_N_RAILN) in the status register (01h)
indicate if the positive or negative output of the PGA is closer to the analog supply rails than 150 mV. Enable the
PGA output rail detection circuit using the FL_RAIL_EN bit in the excitation current register 1 (06h). A flag going
high indicates that the PGA is operating outside the linear operating or absolute input voltage range. PGA rail
flags are discussed in more detail in the PGA Output Voltage Rail Monitors section.
9.3.2.3 Bypassing the PGA
At a gain of 1, the device can be configured to disable and bypass the low-noise PGA. Disabling the PGA lowers
the overall power consumption and also removes the restrictions of Equation 5 for the input voltage range. If the
PGA is bypassed, the ADC absolute input voltage range extends beyond the AVDD and AVSS power supplies,
allowing input voltages at or below ground. The absolute input voltage range when the PGA is bypassed is
shown in Equation 6:
AVSS – 0.05 V < VAINP, VAINN < AVDD + 0.05 V
34
Submit Documentation Feedback
(6)
Copyright © 2016–2017, Texas Instruments Incorporated
Product Folder Links: ADS124S06 ADS124S08
�ADS124S06, ADS124S08
www.ti.com
SBAS660C – AUGUST 2016 – REVISED JUNE 2017
In order to measure single-ended signals that are referenced to AVSS (AINP = VIN, AINN = AVSS), the PGA must
be bypassed. The PGA is bypassed and powered down by setting the PGA_EN[1:0] bits to 00 in the gain setting
register (03h).
For signal sources with high output impedance, external buffering may still be necessary. Note that active buffers
introduce noise and also introduce offset and gain errors. Consider all of these factors in high-accuracy
applications.
9.3.3 Voltage Reference
The devices require a reference voltage for operation. The ADS124S0x offers an integrated low-drift 2.5-V
reference. For applications that require a different reference voltage value or a ratiometric measurement
approach, the ADS124S08 offers two differential reference input pairs (REFP0, REFN0 and REFP1, REFN1).
The differential reference inputs allow freedom in the reference common-mode voltage. REFP0 and REFN0 are
dedicated reference inputs, whereas REFP1 and REFN1 are shared with inputs AIN6 and AIN7 (respectively) on
the ADS124S08. The specified external reference voltage range is 0.5 V to AVDD. The reference voltage is
shown in Equation 7, where V(REFPx) and V(REFNx) are the absolute positive and absolute negative reference
voltages.
VREF = V(REFPx) – V(REFNx)
(7)
The polarity of the reference voltage internal to the ADC must be positive. The magnitude of the reference
voltage together with the PGA gain establishes the ADC full-scale differential input range as defined by
FSR = ±VREF / Gain.
Figure 52 shows the block diagram of the reference multiplexer. The ADC reference multiplexer selects between
the internal reference and two external references (REF0 and REF1). The reference multiplexer is programmed
with the REFSEL[1:0] bits in the reference control register (05h). By default, the external reference pair REFP0,
REFN0 is selected.
REFP0
REFP1
00
REFSEL[1:0] bits of REF register
00 = REFP0, REFN0
01 = REFP1, REFN1
10 = Internal 2.5-V reference
11 = Reserved
01
10
VREFP
REFOUT
Internal
2.5 V
Reference
1 PF (1)
Reference
Detection
VREFN
REFN0
REFN1
00
01
REFP_BUF bit of REF register
0 = Enabled
1 = Disabled
10
REFCOM
REFCON[1:0] bits of REF register
00 = Internal reference off
01 = Internal reference on;
off in power-down mode
10 = Internal reference always on
11 = Reserved
(1)
ADC
REFN_BUF bit of REF register
0 = Enabled
1 = Disabled
The internal reference requires a minimum 1-µF capacitor connected from REFOUT to REFCOM.
Figure 52. Reference Multiplexer Block Diagram
The ADC also contains an integrated reference voltage monitor. This monitor provides continuous detection of a
low or missing reference during the conversion cycle. The reference monitor flags (FL_REF_L0 and FL_REF_L1)
are set in the STATUS byte and described in the Reference Monitor section.
Copyright © 2016–2017, Texas Instruments Incorporated
Product Folder Links: ADS124S06 ADS124S08
Submit Documentation Feedback
35
�ADS124S06, ADS124S08
SBAS660C – AUGUST 2016 – REVISED JUNE 2017
www.ti.com
9.3.3.1 Internal Reference
The ADC integrates a precision, low-drift, 2.5-V reference. The internal reference is enabled by setting
REFCON[1:0] to 10 (reference is always on) or 01 (reference is on, but powers down in power-down mode) in
the reference control register (05h). By default, the internal voltage reference is powered down. To select the
internal reference for use with the ADC, set the REFSEL[1:0] bits to 10. The REFOUT pin provides a buffered
reference output voltage when the internal reference voltage is enabled. The negative reference output is the
REFCOM pin, as shown in Figure 52. Connect a capacitor in the range of 1 μF to 47 μF between REFOUT and
REFCOM. Larger capacitor values help filter more noise at the expense of a longer reference start-up time.
The capacitor is not required if the internal reference is not used. However, the internal reference must be
powered on if using the IDACs.
The internal reference requires a start-up time that must be accounted for before starting a conversion, as shown
in Table 10.
Table 10. Internal Reference Settling Time
REFOUT CAPACITOR
1 µF
10 µF
47 µF
SETTLING ERROR
SETTLING TIME (ms)
0.01%
4.5
0.001%
5.9
0.01%
4.9
0.001%
6.3
0.01%
5.5
0.001%
7.0
9.3.3.2 External Reference
The ADS124S0x provides two external reference inputs selectable through the reference multiplexer. The
reference inputs are differential with independent positive and negative inputs. REFP0 and REFN0 or REFP1
and REFN1 can be selected as the ADC reference. REFP1 and REFN1 are shared inputs with analog pins AIN6
and AIN7 in the ADS124S08.
Without buffering, the reference input impedance is approximately 250 kΩ. The reference input current can lead
to possible errors from either high reference source impedance or through reference input filtering. To reduce the
input current, use either internal or external reference buffers. In most applications external reference buffering is
not necessary.
Connect a 100-nF bypass capacitor across the external reference input pins. Follow the specified absolute and
differential reference voltage requirements.
9.3.3.3 Reference Buffers
The device has two individually selectable reference input buffers to lower the reference input current. Use the
REFP_BUF and REFN_BUF bits in the reference control register (05h) to enable or disable the positive and
negative reference buffers respectively. Note that these bits are active low. Writing a 1 to REFP_BUF or
REFN_BUF disables the reference buffers.
The reference buffers are recommended to be disabled when the internal reference is selected for
measurements. When the external reference input is at the supply voltage (REFPx at AVDD or REFNx at AVSS),
the reference buffer is recomended to be disabled.
36
Submit Documentation Feedback
Copyright © 2016–2017, Texas Instruments Incorporated
Product Folder Links: ADS124S06 ADS124S08
�ADS124S06, ADS124S08
www.ti.com
SBAS660C – AUGUST 2016 – REVISED JUNE 2017
9.3.4 Clock Source
The ADS124S0x system clock is either provided by the internal low-drift 4.096-MHz oscillator or an external clock
source on the CLK input. Use the CLK bit within the data rate register (04h) to select the internal
4.096-MHz oscillator or an external clock source.
The device defaults to using the internal oscillator. If the device is reset (from either the RESET pin, or the
RESET command), then the clock source returns to using the internal oscillator even if an external clock is
selected.
9.3.5 Delta-Sigma Modulator
A delta-sigma (ΔΣ) modulator is used in the devices to convert the analog input voltage into a pulse code
modulated (PCM) data stream. The modulator runs at a modulator clock frequency of fMOD = fCLK / 16, where fCLK
is either provided by the internal 4.096-MHz oscillator or the external clock source.
9.3.6 Digital Filter
The devices offer digital filter options for both filtering and decimation of the digital data stream coming from the
delta-sigma modulator. The implementation of the digital filter is determined by the data rate and filter mode
setting. Figure 53 shows the digital filter implementation. Choose between a third-order sinc filter (sinc3) and a
low-latency filter (low-latency filter with multiple components) using the FILTER bit in the data rate register (04h).
fCLK = 4.096 MHz
Sinc3 Filter
fCLK / 16
4000, 2000, 1000, 800, 400, 200,
100, 60, 50, 20, 16.6, 10, 5, 2.5 SPS
Sinc3
Filter
fMOD = 256 kHz
Low-Latency Filter
ADC
LL1
Filter
LL2
Filter
1
Sinc
Filter
Sinc1
Filter
20, 10, 5, 2.5 SPS
400, 200, 100, 60, 50, 16.6 SPS
ADC Data
Output
4000, 2000, 1000, 800 SPS
FILTER Bit of
DATARATE Register
0 = Sinc3 Filter
1 = Low-Latency filter
DR[3:0] Bits of
DATARATE Register
0000 = 2.5 SPS
1000 = 200 SPS
1001 = 400 SPS
0001 = 5 SPS
1010 = 800 SPS
0010 = 10 SPS
0011 = 16.6 SPS
1011 = 1000 SPS
0100 = 20 SPS
1100 = 2000 SPS
0101 = 50 SPS
1101 = 4000 SPS
0110 = 60 SPS
1110 = 4000 SPS
0111 = 100 SPS
1111 = Reserved
NOTE: LL filter = low-latency filter.
Figure 53. Digital Filter Architecture
Copyright © 2016–2017, Texas Instruments Incorporated
Product Folder Links: ADS124S06 ADS124S08
Submit Documentation Feedback
37
�ADS124S06, ADS124S08
SBAS660C – AUGUST 2016 – REVISED JUNE 2017
www.ti.com
Regardless of the FILTER type setting, the oversampling ratio is the same for each given data rate, meaning that
the device requires a set number of modulator clocks to output a single ADC conversion data. The output data
rate is selected using the DR[3:0] bits in the data rate register and is shown in Table 11.
Table 11. ADC Data Rates and Digital Filter Oversampling Ratios
(1)
(2)
NOMINAL DATA RATE
(SPS) (1)
DATA RATE REGISTER
DR[3:0]
OVERSAMPLING
RATIO (2)
2.5
0000
102400
5
0001
51200
10
0010
25600
16.6
0011
15360
20
0100
12800
50
0101
5120
60
0110
4264
100
0111
2560
200
1000
1280
400
1001
640
800
1010
320
1000
1011
256
2000
1100
128
4000
1101
64
Valid for the internal oscillator or an external 4.096-MHz clock.
The oversampling ratio is fMOD divided by the data rate; fMOD = fCLK / 16.
9.3.6.1 Low-Latency Filter
The low-latency filter is selected when the FILTER bit is set to 0 in the data rate register (04h). The filter is a
finite impulse response (FIR) filter that provides settled data, given that the analog input signal has settled to the
final value before the conversion is started. The low-latency filter is especially useful when multiple channels
must be scanned in minimal time.
9.3.6.1.1 Low-Latency Filter Frequency Response
The low-latency filter provides many data rate options for rejecting 50-Hz and 60-Hz line cycle noise. At data
rates of 2.5 SPS, 5 SPS, 10 SPS, and 20 SPS, the filter rejects both 50-Hz and 60-Hz line frequencies. At data
rates of 16.6 SPS and 50 SPS, the filter has a notch at 50 Hz. At a 60-SPS data rate, the filter has a notch at
60 Hz.
For detailed frequency response plots showing line cycle noise rejection, download the ADS1x4S0x design
calculator from www.ti.com.
38
Submit Documentation Feedback
Copyright © 2016–2017, Texas Instruments Incorporated
Product Folder Links: ADS124S06 ADS124S08
�ADS124S06, ADS124S08
www.ti.com
SBAS660C – AUGUST 2016 – REVISED JUNE 2017
0
0
-20
-20
Magnitude (dB)
Magnitude (dB)
Figure 54 to Figure 68 show the frequency response of the low-latency filter for different data rates. Table 12
gives the bandwidth of the low-latency filter for each data rate.
-40
-60
-80
-40
-60
-80
-100
-100
-120
-120
0
10
20
30
40
Frequency (Hz)
50
60
0
70
fCLK = 4.096 MHz, low-latency filter
10
20
30
40
Frequency (Hz)
50
60
70
fCLK = 4.096 MHz, low-latency filter
Figure 54. Low-Latency Filter Frequency Response,
Data Rate = 2.5 SPS
Figure 55. Low-Latency Filter Frequency Response,
Data Rate = 5 SPS
0
0
-40
Magnitude (dB)
Magnitude (dB)
-20
-60
-80
-20
-40
-100
-60
-120
0
10
20
30
40
50
60
Frequency (Hz)
70
80
90
0
100
40
60
80
100
Frequency (Hz)
120
140
160
fCLK = 4.096 MHz, low-latency filter
Figure 56. Low-Latency Filter Frequency Response,
Data Rate = 10 SPS
Figure 57. Low-Latency Filter Frequency Response,
Data Rate = 16.6 SPS
0
0
-20
-20
-40
-40
Magnitude (dB)
Magnitude (dB)
fCLK = 4.096 MHz, low-latency filter
20
-60
-80
-100
-60
-80
-100
-120
0
20
40
60
80 100 120
Frequency (Hz)
140
160
180
200
fCLK = 4.096 MHz, low-latency filter
Figure 58. Low-Latency Filter Frequency Response,
Data Rate = 20 SPS
-120
40
45
50
55
60
Frequency (Hz)
65
70
fCLK = 4.096 MHz, low-latency filter
Figure 59. Low-Latency Filter Frequency Response,
Data Rate = 20 SPS, Zoomed to 50 Hz and 60 Hz
Copyright © 2016–2017, Texas Instruments Incorporated
Product Folder Links: ADS124S06 ADS124S08
Submit Documentation Feedback
39
�ADS124S06, ADS124S08
www.ti.com
0
0
-20
-20
Magnitude (dB)
Magnitude (dB)
SBAS660C – AUGUST 2016 – REVISED JUNE 2017
-40
-60
-40
-60
0
50
100
150
200
250
Frequency (Hz)
300
350
400
0
fCLK = 4.096 MHz, low-latency filter
400
0
Magnitude (dB)
Magnitude (dB)
300
Figure 61. Low-Latency Filter Frequency Response,
Data Rate = 60 SPS
0
-20
-40
-20
-40
-60
-60
0
200
400
600
Frequency (Hz)
800
0
1000
400
800
1200
Frequency (Hz)
1600
2000
fCLK = 4.096 MHz, low-latency filter
fCLK = 4.096 MHz, low-latency filter
Figure 63. Low-Latency Filter Frequency Response,
Data Rate = 200 SPS
Figure 62. Low-Latency Filter Frequency Response,
Data Rate = 100 SPS
0
0
-20
-20
Magnitude (dB)
Magnitude (dB)
200
Frequency (Hz)
fCLK = 4.096 MHz, low-latency filter
Figure 60. Low-Latency Filter Frequency Response,
Data Rate = 50 SPS
-40
-60
-40
-60
-80
-80
0
500
1000
1500 2000 2500
Frequency (Hz)
3000
3500
4000
fCLK = 4.096 MHz, low-latency filter
Figure 64. Low-Latency Filter Frequency Response,
Data Rate = 400 SPS
40
100
Submit Documentation Feedback
0
1000
2000
3000 4000 5000
Frequency (Hz)
6000
7000
8000
fCLK = 4.096 MHz, low-latency filter
Figure 65. Low-Latency Filter Frequency Response,
Data Rate = 800 SPS
Copyright © 2016–2017, Texas Instruments Incorporated
Product Folder Links: ADS124S06 ADS124S08
�ADS124S06, ADS124S08
www.ti.com
SBAS660C – AUGUST 2016 – REVISED JUNE 2017
0
0
-20
Magnitude (dB)
Magnitude (dB)
-20
-40
-60
-40
-60
-80
-100
-80
0
2000
4000
6000
Frequency (Hz)
8000
0
10000
4000
8000
12000
Frequency (Hz)
16000
20000
fCLK = 4.096 MHz, low-latency filter
fCLK = 4.096 MHz, low-latency filter
Figure 66. Low-Latency Filter Frequency Response,
Data Rate = 1 kSPS
Figure 67. Low-Latency Filter Frequency Response,
Data Rate = 2 kSPS
0
Magnitude (dB)
-20
-40
-60
-80
-100
0
8000
16000
24000
Frequency (Hz)
32000
40000
fCLK = 4.096 MHz, low-latency filter
Figure 68. Low-Latency Filter Frequency Response,
Data Rate = 4 kSPS
Table 12. Low-Latency Filter Bandwidth
(1)
NOMINAL DATA RATE (SPS) (1)
–3-dB BANDWIDTH (Hz) (1)
2.5
1.1
5
2.2
10
4.7
16.6
7.4
20
13.2
50
22.1
60
26.6
100
44.4
200
89.9
400
190
800
574
1000
718
2000
718
4000
718
Valid for the internal oscillator or an external 4.096-MHz clock. Scales proportional with fCLK.
Copyright © 2016–2017, Texas Instruments Incorporated
Product Folder Links: ADS124S06 ADS124S08
Submit Documentation Feedback
41
�ADS124S06, ADS124S08
SBAS660C – AUGUST 2016 – REVISED JUNE 2017
www.ti.com
The low-latency filter notches and output data rate scale proportionally with the clock frequency. For example, a
notch that appears at 20 Hz when using a 4.096-MHz clock appears at 10 Hz if a 2.048-MHz clock is used. Note
that the internal oscillator can vary over temperature as specified in the Electrical Characteristics table. The data
rate, conversion time, and filter notches consequently vary by the same percentage. Consider using an external
precision clock source if a digital filter notch at a specific frequency with a tighter tolerance is required.
9.3.6.1.2 Data Conversion Time for the Low-Latency Filter
The amount of time required to receive data from the ADC depends on more than just the nominal data rate of
the device. The data period also depends on the mode of operation and other configurations of the device. When
the low-latency filter is enabled, the data settles in one data period. However, a small amount of latency exists to
set up the device, calculate the conversion data from the modulator samples, and other overhead that adds time
to the conversion. For this reason, the first conversion data takes longer than subsequent data conversions.
Table 13 shows the conversion times for the low-latency filter for each ADC data rate and various conversion
modes.
Table 13. Data Conversion Time for the Low-Latency Filter
NOMINAL
DATA RATE (1)
(SPS)
(1)
(2)
(3)
(4)
42
FIRST DATA
FOR CONTINUOUS CONVERSION MODE
OR SINGLE-SHOT CONVERSION MODE (2)
SECOND AND SUBSEQUENT
CONVERSIONS FOR CONTINUOUS
CONVERSION MODE
ms (3)
NUMBER OF
tMOD PERIODS (3)
ms (4)
NUMBER OF
tMOD PERIODS (4)
2.5
406.504
104065
400
102400
5
206.504
52865
200
51200
10
106.504
27265
100
25600
16.6
60.254
15425
60
15360
20
56.504
14465
50
12800
50
20.156
5160
20
5120
60
16.910
4329
16.66
4264
100
10.156
2600
10
2560
200
5.156
1320
5
1280
400
2.656
680
2.5
640
800
1.406
360
1.25
320
1000
1.156
296
1
256
2000
0.656
168
0.5
128
4000
0.406
104
0.25
64
Valid for the internal oscillator or an external 4.096-MHz clock. Scales proportional with fCLK.
Conversions start at the rising edge of the START/SYNC pin or on the seventh SCLK falling edge for a START command.
Time does not include the programmable delay set by the DELAY[2:0] bits in the gain setting register. The default setting is an additional
14 · tMOD, where tMOD = tCLK · 16.
Subsequent readings in continuous conversion mode do not have the programmable delay time.
Submit Documentation Feedback
Copyright © 2016–2017, Texas Instruments Incorporated
Product Folder Links: ADS124S06 ADS124S08
�ADS124S06, ADS124S08
www.ti.com
SBAS660C – AUGUST 2016 – REVISED JUNE 2017
9.3.6.2 Sinc3 Filter
The sinc3 digital filter is selected when the FILTER bit is set to 0 in the data rate register (04h). Compared to the
low-latency filter, the sinc3 filter has improved noise performance but has a three-cycle latency in the data output.
9.3.6.2.1 Sinc3 Filter Frequency Response
The low-pass nature of the sinc3 filter establishes the overall frequency response. The frequency response is
given by Equation 8:
H(f )
HSinc3 (f )
§ 16 Sf ˜ OSR ·
sin ¨
¸
fCLK
©
¹
§ 16 Sf ·
OSR u sin ¨
¸
© fCLK ¹
3
where
•
•
•
f = signal frequency
fCLK = ADC clock frequency
OSR = oversampling ratio
(8)
3
The sinc filter offers simultaneous 50-Hz and 60-Hz line cycle rejection at data rates of 2.5 SPS, 5 SPS, and
10 SPS. The sinc3 filter offers only 50-Hz rejection at data rates of 16.6 SPS and 50 SPS, and only 60-Hz
rejection at data rates of 20 SPS and 60 SPS. The sinc3 digital filter response scales with the data rate and has
notches at multiples of the data rate. Figure 69 shows the sinc3 digital filter frequency response normalized to the
data rate. As an example, Figure 70 shows the frequency response when the data rate is set to 10 SPS, and
Figure 71 illustrates a close-up of the filter rejection of 50-Hz and 60-Hz line frequencies. For more detailed
frequency response plots, download the ADS1x4S0x design calculator from www.ti.com.
0
0
-20
-20
-40
-40
Magnitude (dB)
Magnitude (dB)
Table 14 gives the bandwidth of the sinc3 filter for each data rate.
-60
-80
-100
-60
-80
-100
-120
-120
0
1
2
3
4
5
6
7
Normalized Frequency
8
9
Frequency normalized to data rate, sinc3 filter
Figure 69. Sinc3 Filter Frequency Response,
Normalized to Data Rate
10
0
10
20
30
40
50
60
Frequency (Hz)
70
80
90
100
fCLK = 4.096 MHz, sinc3 filter
Figure 70. Sinc3 Filter Frequency Response,
Data Rate = 10 SPS
Copyright © 2016–2017, Texas Instruments Incorporated
Product Folder Links: ADS124S06 ADS124S08
Submit Documentation Feedback
43
�ADS124S06, ADS124S08
SBAS660C – AUGUST 2016 – REVISED JUNE 2017
www.ti.com
0
Magnitude (dB)
-20
-40
-60
-80
-100
-120
-140
40
45
50
55
60
Frequency (Hz)
65
70
3
fCLK = 4.096 MHz, sinc filter
Figure 71. Sinc3 Filter Frequency Response,
Data Rate = 10 SPS, Zoomed to 50 Hz and 60 Hz
Table 14. Sinc3 Filter –3-dB Bandwidth
(1)
NOMINAL DATA RATE (SPS) (1)
–3-dB BANDWIDTH (Hz) (1)
2.5
0.65
5
1.3
10
2.6
16.6
4.4
20
5.2
50
13.1
60
15.7
100
26.2
200
52.3
400
105
800
209
1000
262
2000
523
4000
1046
Valid for the internal oscillator or an external 4.096-MHz clock. Scales proportional with fCLK.
As mentioned in the previous section, filter notches and output data rate scale proportionally with the clock
frequency and the internal oscillator can change frequency with temperature.
44
Submit Documentation Feedback
Copyright © 2016–2017, Texas Instruments Incorporated
Product Folder Links: ADS124S06 ADS124S08
�ADS124S06, ADS124S08
www.ti.com
SBAS660C – AUGUST 2016 – REVISED JUNE 2017
9.3.6.2.2 Data Conversion Time for the Sinc3 Filter
Similar to the low-latency filter, the sinc3 filter requires different amounts of time to complete a conversion. By
nature, the sinc3 filter normally takes three conversion to settle. In both single-shot conversion mode and
continuous conversion mode, the first two conversions are suppressed so that only settled data are output by the
ADC.
Table 15 shows the conversion times for the sinc3 filter for each ADC data rate and various conversion modes.
Table 15. Data Conversion Time for the Sinc3 Filter
NOMINAL DATA RATE
(SPS)
(1)
(2)
(3)
(4)
(1)
FIRST DATA FOR
CONTINUOUS CONVERSION MODE OR
SINGLE-SHOT CONVERSION MODE (2)
SECOND AND SUBSEQUENT
CONVERSIONS FOR CONTINUOUS
CONVERSION MODE
ms (3)
NUMBER OF
tMOD PERIODS (3)
ms (4)
NUMBER OF
tMOD PERIODS (4)
2.5
1200.254
307265
400
102400
5
600.254
153665
200
51200
10
300.254
76865
100
25600
16.6
180.254
46145
60
15360
20
150.254
38465
50
12800
50
60.254
15425
20
5120
60
50.223
12857
16.66
4264
100
30.254
7745
10
2560
200
15.254
3905
5
1280
400
7.754
1985
2.5
640
800
4.004
1025
1.25
320
1000
3.156
808
1
256
2000
1.656
424
0.5
128
4000
0.906
232
0.25
64
Valid for the internal oscillator or an external 4.096-MHz clock. Scales proportional with fCLK.
Conversions start at the rising edge of the START/SYNC pin or on the seventh SCLK falling edge for a START command.
Time does not include the programmable delay set by the DELAY[2:0] bits in the gain setting register. The default setting is an additional
14 · tMOD, where tMOD = tCLK · 16.
Subsequent readings in continuous conversion mode do not have the programmable delay time.
9.3.6.3 Note on Conversion Time
Each data period consists of time required for the modulator to sample the analog inputs. However, there is
additional time required before the samples become an ADC conversion result. First, there is a programmable
conversion delay (described in the Programmable Conversion Delay section) that is added before the conversion
starts. This delay allows for additional settling time for input filtering on the analog inputs and for the antialiasing
filter after the PGA. The default programmable conversion delay is 14 · tMOD. Also, overhead time is needed to
convert the modulator samples into an ADC conversion result. This overhead time includes any necessary offset
or gain compensation after the digital filter accumulates a data result.
The first conversion when the device is in continuous conversion mode (just as in single-shot conversion mode)
includes the programmable conversion delay, the modulator sampling time, and the overhead time. The second
and subsequent conversions are the normal data period (period as given by the inverse of the data rate).
Copyright © 2016–2017, Texas Instruments Incorporated
Product Folder Links: ADS124S06 ADS124S08
Submit Documentation Feedback
45
�ADS124S06, ADS124S08
SBAS660C – AUGUST 2016 – REVISED JUNE 2017
www.ti.com
Figure 72 shows the time sequence for the ADC in both continuous conversion and single-shot conversion
modes. The sequence is the same regardless of the filter setting. However, when the low-latency filter settles for
each data, the sinc3 filter does not settle until the third data.
Single-shot conversion mode: Low-Latency filter
Conversion
start(1)
Data
ready
Programmable delay
Modulator sampling
x
x
Sampling for
first data
ADC overhead
x
DRDY
Single-shot conversion mode: Sinc3 Filter
Conversion
start(1)
x
Data not
settled
Sampling for
first data.
Data not
settled
Sampling for
second data.
Filter settled
First data ready(2)
Sampling for
third data.
DRDY
x
Continuous conversion mode: Low-Latency or Sinc3 Filter
Conversion
start(1)
x
First
data ready(3)
Second
data ready
Third data
ready
Fourth data
ready
Sampling for
first data.
Sampling for
second data.
x
Sampling for
third data.
Sampling for
fourth data.
Continued
sampling.
Low-Latency Filter
DRDY
Sinc3 Filter
DRDY
(1)
Conversions start at the rising edge of the START/SYNC pin or on the seventh SCLK falling edge for a START
command.
(2)
In sinc3 filter mode, the first two data outputs are suppressed to allow for the measurement data to settle.
(3)
In sinc3 filter mode, there is no overhead time for the first two data, which are not available to be read.
Figure 72. Single-Shot Conversion Mode and Continuous Conversion Mode Sequences
46
Submit Documentation Feedback
Copyright © 2016–2017, Texas Instruments Incorporated
Product Folder Links: ADS124S06 ADS124S08
�ADS124S06, ADS124S08
www.ti.com
SBAS660C – AUGUST 2016 – REVISED JUNE 2017
9.3.6.4 50-Hz and 60-Hz Line Cycle Rejection
If the ADC connection leads are in close proximity to industrial motors and conductors, coupling of 50-Hz and
60-Hz power line frequencies can occur. The coupled noise interferes with the signal voltage, and can lead to
inaccurate or unstable conversions. The digital filter provides enhanced rejection of power-line-coupled noise for
data rates of 60 SPS and less. Program the filter to tradeoff data rate and conversion latency versus the desired
level of line cycle rejection. Table 16 and Table 17 summarize the ADC 50-Hz and 60-Hz line-cycle rejection
based on ±1-Hz and ±2-Hz tolerance of power-line to ADC clock frequency. The best possible power-line
rejection is provided by using an accurate ADC clock.
Table 16. Low-Latency Filter, 50-Hz and 60-Hz Line Cycle Rejection
DATA RATE (SPS) (1)
(1)
LOW-LATENCY DIGITAL FILTER LINE CYCLE REJECTION (dB)
50 Hz ± 1 Hz
60 Hz ± 1 Hz
50 Hz ± 2 Hz
60 Hz ± 2 Hz
2.5
–113.7
–95.4
–97.7
–92.4
5
–111.9
–95.4
–87.6
–81.8
10
–111.5
–95.4
–85.7
–81.0
16.6
–33.8
–20.9
–27.8
–20.8
20
–95.4
–95.4
–75.5
–80.5
50
–33.8
–15.5
–27.6
–15.1
60
–13.4
–35.0
–12.6
–29.0
fCLK = 4.096 MHz.
Table 17. Sinc3 Filter, 50-Hz and 60-Hz Line Cycle Rejection
DATA RATE (SPS) (1)
(1)
SINC3 DIGITAL FILTER LINE CYCLE REJECTION (dB)
50 Hz ± 1 Hz
60 Hz ± 1 Hz
50 Hz ± 2 Hz
60 Hz ± 2 Hz
2.5
–108.7
–113.4
–107.2
–112.1
5
–103.2
–107.8
–90.1
–95.0
10
–101.8
–106.4
–84.6
–89.4
16.6
–101.6
–63.0
–83.4
–62.4
20
–53.5
–106.1
–53.5
–88.0
50
–101.4
–46.7
–82.9
–45.3
60
–40.3
–105.1
–37.8
–87.2
fCLK = 4.096 MHz.
Copyright © 2016–2017, Texas Instruments Incorporated
Product Folder Links: ADS124S06 ADS124S08
Submit Documentation Feedback
47
�ADS124S06, ADS124S08
SBAS660C – AUGUST 2016 – REVISED JUNE 2017
www.ti.com
9.3.6.5 Global Chop Mode
The device uses a very low-drift PGA and modulator in order to provide very low input voltage offset drift.
However, a small amount of offset voltage drift sometimes remains in normal measurement. The ADC
incorporates a global chop option to reduce the offset voltage and offset voltage drift to very low levels. When the
global chop is enabled, the ADC performs two internal conversions to cancel the input offset voltage. The first
conversion is taken with normal input polarity. The ADC reverses the internal input polarity for a second
conversion. The average of the two conversions yields the final corrected result, removing the offset voltage. The
global chop mode is enabled using the G_CHOP bit in the data rate register (04h). Figure 73 shows a block
diagram of the global chop implementation. The combined PGA and ADC internal offset voltage is modeled as
VOFS.
G_CHOP bit of DATARATE register
0 = Global chop off
1 = Global chop on
Chop Switch
VOFS
AIN0
AINP
+ ADC
Input
MUX
ADC
PGA
AINN
Digital
Chop
Filter
Control
Conversion Output
AINCOM
Figure 73. ADC Global Chop Block Diagram
The first conversion result is available after the ADC takes two separate conversions with settled data. When
using the low-latency filter, data settles in a single conversion. When the global chop mode is enabled, the first
conversion result appears after a time period of approximately two conversions. When using the sinc3 filter, data
settles in three conversions. If the global chop mode is enabled, the first conversion result appears after a time
period of approximately six conversions.
In continuous conversion mode with the global chop mode enabled, subsequent conversions complete in half the
time as the first conversion completed. Data for alternating inputs are pipelined so that averaging appears on
each ADC data cycle. Conversion times using the global chop mode are given in Table 18 and Table 19.
Table 18. Data Conversion Time for Global Chop Mode Using the Low-Latency Filter
NOMINAL
DATA RATE (1)
(SPS)
(1)
(2)
(3)
48
FIRST DATA CONVERSION PERIOD
FOR GLOBAL CHOP MODE (2)
SECOND AND SUBSEQUENT CONVERSION
PERIODS FOR GLOBAL CHOP MODE
ms (3)
NUMBER OF
tMOD PERIODS (3)
ms (3)
NUMBER OF
tMOD PERIODS (3)
2.5
813.008
208130
406.504
104065
5
413.008
105730
206.504
52865
10
213.008
54530
106.504
27265
16.66
120.508
30850
60.254
15425
20
113.008
28930
56.504
14465
50
40.313
10320
20.156
5160
60
33.820
8658
16.910
4329
100
20.313
5200
10.156
2600
200
10.313
2640
5.156
1320
400
5.313
1360
2.656
680
800
2.813
720
1.406
360
1000
2.313
592
1.156
296
2000
1.313
336
0.656
168
4000
0.813
208
0.406
104
Valid for the internal oscillator or an external 4.096-MHz clock. Scales proportional with fCLK.
Conversions start at the rising edge of the START/SYNC pin or on the seventh SCLK falling edge for a START command.
Time does not include the programmable delay set by the DELAY[2:0] bits in the gain setting register. Global chop mode requires two
conversions, doubling the additional time. The default setting adds an extra 28 · tMOD (where tMOD = tCLK · 16) to this column.
Submit Documentation Feedback
Copyright © 2016–2017, Texas Instruments Incorporated
Product Folder Links: ADS124S06 ADS124S08
�ADS124S06, ADS124S08
www.ti.com
SBAS660C – AUGUST 2016 – REVISED JUNE 2017
Table 19. Data Conversion Time for Global Chop Mode Using the Sinc3 Filter
FIRST DATA CONVERSION PERIOD
FOR GLOBAL CHOP MODE (2)
NOMINAL
DATA RATE (1)
(SPS)
(1)
(2)
(3)
SECOND AND SUBSEQUENT CONVERSION
PERIODS FOR GLOBAL CHOP MODE
ms (3)
NUMBER OF tMOD
PERIODS (3)
ms (3)
NUMBER OF tMOD
PERIODS (3)
2.5
2400.508
614530
1200.254
307265
5
1200.508
307330
600.254
153665
10
600.508
153730
300.254
76865
16.66
360.508
92290
180.254
46145
20
300.508
76930
150.254
38465
50
120.508
30850
60.254
15425
60
100.445
25714
50.223
12857
100
60.508
15490
30.254
7745
200
30.508
7810
15.254
3905
400
15.508
3970
7.754
1985
800
8.008
2050
4.004
1025
1000
6.313
1616
3.156
808
2000
3.313
848
1.656
424
4000
1.813
464
0.906
232
Valid for the internal oscillator or an external 4.096-MHz clock. Scales proportional with fCLK.
Conversions start at the rising edge of the START/SYNC pin or on the seventh SCLK falling edge for a START command.
Time does not include the programmable delay set by the DELAY[2:0] bits in the gain setting register. Global chop mode requires two
conversions, doubling the additional time. The default setting adds an extra 28 · tMOD (where tMOD = tCLK · 16) to this column.
In global chop mode, sequences are similar to taking consecutive single-shot conversions and swapping the
input on each conversion. Output data are averaged using the last two data read operations by the ADC with the
inputs swapped. Figure 74 shows the time sequence for the ADC using global chop mode.
Global chop enabled, continuous conversion mode: Low-Latency filter
Conversion
start(1)
xx xx
Inputs
Swapped(2)
Sampling for
positive input data
x
First
data ready
Second
data ready
Third
data ready
Sampling for
Sampling for
Sampling for
negative input data
positive input data
negative input data
Averaged for
Averaged for
first data
third data
Averaged for
second data(3)
x
Programmable delay
x
Modulator sampling
ADC overhead
Additional
sampling
x
Global chop enabled, continuous conversion mode: Sinc3 Filter
Conversion
start(1)
Sampling
x
Data not
settled
Data not
settled
Sampling
Inputs
swapped(2)
Sampling for
positive input data
Data not
settled
Data not
settled
Sampling
Sampling
xx
Sampling for
negative input data
x
Averaged for
first data
First
data ready
Second
data ready
Sampling for
positive input data
Continued
sampling
x
Averaged for
second data(3)
(1)
Conversions start at the rising edge of the START/SYNC pin or on the seventh SCLK falling edge for a START
command.
(2)
When the first data are collected, the inputs are swapped.
(3)
Measurements are averaged after the inputs are swapped for each conversion.
Figure 74. Global Chop Enabled Conversion Mode Sequences
Because the digital filter must settle after reversing the inputs, the global chop mode data rate is less than the
nominal data rate, depending on the digital filter and programmed settling delay. However, if the data rate in use
has 50-Hz and 60-Hz frequency response notches, the null frequencies remain unchanged.
Copyright © 2016–2017, Texas Instruments Incorporated
Product Folder Links: ADS124S06 ADS124S08
Submit Documentation Feedback
49
�ADS124S06, ADS124S08
SBAS660C – AUGUST 2016 – REVISED JUNE 2017
www.ti.com
The global chop mode also reduces the ADC noise by a factor of √2 because two conversions are averaged. In
some cases, the programmable conversion delay must be increased, DELAY[2:0] in the gain setting register
(03h), to allow for settling of external components.
9.3.7 Excitation Current Sources (IDACs)
The ADS124S0x incorporates two integrated, matched current sources (IDAC1, IDAC2). The current sources
provide excitation current to resistive temperature devices (RTDs), thermistors, diodes, and other resistive
sensors that require constant current biasing. The current sources are programmable to output values between
10 μA to 2000 μA using the IMAG[3:0] bits in the excitation current register 1 (06h). Each current source can be
connected to any of the analog inputs AINx as well as the REFP1 and REFN1 inputs for the ADS124S06. Both
current sources can also be connected to the same pin. The routing of the IDACs is configured by the
I1MUX[3:0] and I2MUX[3:0] bits in the excitation current register 2 (07h). In three-wire RTD applications, the
matched current sources can be used to cancel errors caused by sensor lead resistance (see the Typical
Application section for more details). Figure 75 details the IDAC connection through the input multiplexer.
I1MUX[3:0] bits of the IDACMUX register.
IDAC routing to AIN8 ± AIN11 is available
only on the ADS124S08.
AIN0
AIN0
0000
AIN1
AIN1
0001
AIN2
AIN2
0010
AIN3
AIN3
0011
AIN4
AIN4
0100
AIN5
0101
AIN6 / REFP1
AIN6/REFP1
0110
AIN7 / REFN1
AIN7/REFN1
0111
AIN5
AIN8
AIN8
1000
ADS124S08 AIN9
Only
AIN10
AIN9
1001
AIN10
1010
AIN11
AIN11
1011
AINCOM
1100
AINCOM
AVDD
IDAC1
MUX
IDAC1
IMAG[3:0] bits of the IDACMAG register.
0000 = Off
0001 = 10 µA
0010 = 50 µA
0011 = 100 µA
0100 = 250 µA
0101 = 500 µA
0110 = 750 µA
0111 = 1000 µA
1000 = 1500 µA
1001 = 2000 µA
No Connection 1101-1111
AIN0
0000
AIN1
0001
AIN2
0010
AIN3
0011
AIN4
0100
AIN5
0101
AIN6/REFP1
0110
AIN7/REFN1
0111
AIN8
1000
AIN9
1001
AIN10
1010
AIN11
1011
AINCOM
1100
AVDD
IDAC2
MUX
IDAC2
No Connection 1101-1111
I2MUX[3:0] bits of the IDACMUX register.
IDAC routing to AIN8 ± AIN11 is available
only on the ADS124S08.
Copyright © 2017, Texas Instruments Incorporated
Figure 75. IDAC Block Diagram
The internal reference must be enabled for IDAC operation. As a current source, the IDAC requires voltage
headroom to the positive supply to operate. This voltage headroom is the compliance voltage. When driving
resistive sensors and biasing resistors, take care not to exceed the compliance voltage of the IDACs, otherwise
the specified accuracy of the IDAC current may not be met. For IDAC compliance voltage specifications, see the
Electrical Characteristics table.
50
Submit Documentation Feedback
Copyright © 2016–2017, Texas Instruments Incorporated
Product Folder Links: ADS124S06 ADS124S08
�ADS124S06, ADS124S08
www.ti.com
SBAS660C – AUGUST 2016 – REVISED JUNE 2017
9.3.8 Bias Voltage Generation
The ADS124S0x provides an internal bias voltage generator, VBIAS, that can be set to two different levels,
(AVDD + AVSS) / 2 and (AVDD + AVSS) / 12 by using the VB_LEVEL bit in the sensor biasing register (08h).
The bias voltage is internally buffered and can be established on the analog inputs AIN0 to AIN5 and AINCOM
using the VB_AINx bits in the sensor biasing register (08h). A typical use case for VBIAS is biasing unbiased
thermocouples to within the common-mode voltage range of the PGA. A block diagram of the VBIAS voltage
generator and connection diagram is shown in Figure 76.
AVDD
AIN0
AIN1
AIN2
INPUT
MUX
AIN3
VB_LEVEL bit of VBIAS register
0 = (AVDD + AVSS) / 2
1 = (AVDD + AVSS) / 12
6R
AIN4
(AVDD + AVSS) / 2
AIN5
AINCOM
5R
(AVDD + AVSS) / 12
R
VB_AINx bits of VBIAS register
0 = VBIAS not connected to AINx
1 = VBIAS connected to AINx
AVSS
Figure 76. VBIAS Block Diagram
The start-up time of the VBIAS voltage depends on the pin load capacitance. The total capacitance includes any
capacitance connected from VBIAS to AVDD, AVSS, and ground. Table 20 lists the VBIAS voltage settling times
for various external load capacitances. Ensure the VBIAS voltage is fully settled before starting a conversion.
Table 20. VBIAS Settling Time
LOAD CAPACITANCE
SETTLING TIME
0.1 µF
280 µs
1 µF
2.8 ms
10 µF
28 ms
Copyright © 2016–2017, Texas Instruments Incorporated
Product Folder Links: ADS124S06 ADS124S08
Submit Documentation Feedback
51
�ADS124S06, ADS124S08
SBAS660C – AUGUST 2016 – REVISED JUNE 2017
www.ti.com
9.3.9 System Monitor
The ADS124S0x provides a set of system monitor functions. These functions measure the device temperature,
analog power supply, digital power supply, or use current sources to detect sensor malfunction. System monitor
functions are enabled through the SYS_MON[2:0] bits of the system control register (09h).
9.3.9.1 Internal Temperature Sensor
On-chip diodes provide temperature-sensing capability. Enable the internal temperature sensor by setting
SYS_MON[2:0] = 010 in the system control register (09h). The temperature sensor outputs a voltage proportional
to the device temperature as specified in the Electrical Characteristics table.
When measuring the internal temperature sensor, the analog inputs are disconnected from the ADC and the
output voltage of the temperature sensor is routed to the ADC for measurement using the selected PGA gain,
data rate, and voltage reference. If enabled, PGA gain must be limited to 4 for the temperature sensor
measurement to remain within the allowed absolute input voltage range of the PGA. As a result of the low device
junction-to-PCB thermal resistance (RθJB), the internal device temperature closely tracks the printed circuit board
(PCB) temperature.
9.3.9.2 Power Supply Monitors
The ADS124S0x provides a means for monitoring both the analog and digital power supply (AVDD and DVDD).
The power-supply voltages are divided by a resistor network to reduce the voltages to within the ADC input
range. The reduced power-supply voltage is routed to the ADC input multiplexer. The analog (VANLMON) and
digital (VDIGMON) power-supply readings are scaled by Equation 9 and Equation 10, respectively:
VANLMON = (AVDD – AVSS) / 4
VDIGMON = (DVDD – DGND) / 4
(9)
(10)
Enable the supply voltage monitors using the SYS_MON[2:0] bits in the system control register (09h). Setting
SYS_MON[2:0] to 011 measures VANLMON, and setting SYS_MON[2:0] to 100 measures VDIGMON.
When the supply voltage monitor is enabled, the analog inputs are disconnected from the ADC and the PGA gain
is set to 1, regardless of the GAIN[2:0] bit values in the gain setting register (03h). Supply voltage monitor
measurements can be done with either the PGA enabled or PGA disabled via the PGA_EN[1:0] register. To
obtain valid power supply monitor readings, the reference voltage must be larger than the power-supply
measurements shown in Equation 9 and Equation 10.
9.3.9.3 Burn-Out Current Sources
To help detect a possible sensor malfunction, the ADS124S0x provides selectable current sources to function as
burn-out current sources (BOCS) using the SYS_MON[2:0] bits in the system control register (09h). Current
sources are set to values of 0.2 µA, 1 µA, and 10 µA with SYS_MON[2:0] settings of 101, 110, and 111,
respectively.
When enabled, one BOCS sources current to the selected positive analog input (AINP) and the other BOCS
sinks current from the selected negative analog input (AINN). With an open-circuit in a burned out sensor, these
BOCSs pull the positive input towards AVDD and the negative input towards AVSS, resulting in a full-scale
reading. A full-scale reading can also indicate that the sensor is overloaded or that the reference voltage is
absent. A near-zero reading can indicate a shorted sensor. Distinguishing a shorted sensor condition from a
normal reading can be difficult, especially if an RC filter is used at the inputs. The voltage drop across the
external filter resistance and the residual resistance of the multiplexer can cause the output to read a value
higher than zero.
The ADC readings of a functional sensor can be corrupted when the burn-out current sources are enabled. The
burn-out current sources are recommended to be disabled when performing the precision measurement, and
only enabling them to test for sensor fault conditions. If the global chop mode is enabled, disable this mode
before making a measurement with the burn-out current sources.
52
Submit Documentation Feedback
Copyright © 2016–2017, Texas Instruments Incorporated
Product Folder Links: ADS124S06 ADS124S08
�ADS124S06, ADS124S08
www.ti.com
SBAS660C – AUGUST 2016 – REVISED JUNE 2017
9.3.10 Status Register
The ADS124S0x has a one-byte status register that contains flags to indicate if a fault condition has occurred.
This byte can be read out from the status register (01h), or can be prepended to each data read as the first byte
when reading data from the ADC. To prepend the STATUS byte to each conversion result, set the SENDSTAT
bit to 1 in the system control register (09h).
The STATUS byte data field and field description are found in Figure 94 and Table 27. The following sections
describe various flagged fault conditions that are indicated in the STATUS byte.
Flags for the PGA output voltage rail monitors and reference monitor are set after each conversion. Reading the
STATUS byte reads the flags latched during the last conversion cycle.
9.3.10.1 POR Flag
After the power supplies are turned on, the ADC remains in reset until DVDD, IOVDD, and the analog power
supply (AVDD – AVSS) voltage exceed the respective power-on reset (POR) voltage thresholds. If a POR event
has occurred, the FL_POR flag (bit 7 of the STATUS byte) is set. This flag indicates that a POR event has
occurred and has not been cleared. This flag is cleared with a user register write to set the bit to 0. The power-on
reset is described further in the Power-On Reset section.
9.3.10.2 RDY Flag
The RDY flag indicates that the device has started up and is ready to receive a configuration change. During a
reset or POR event, the device is resetting the register map and may not be available. The RDY flag is shown
with bit 6 of the STATUS byte.
9.3.10.3 PGA Output Voltage Rail Monitors
The PGA contains an integrated output-voltage monitor. If the level of the PGA output voltage exceeds
AVDD – 0.15 V or drops below AVSS + 0.15 V, a flag is set to indicate that the output has gone beyond the
output range of the PGA. Each PGA output VOUTN and VOUTP can trigger an overvoltage or undervoltage flag,
giving a total of four flags. The PGA output voltage rail monitors are enabled with the FL_REF_EN bit of
excitation current register 1. The PGA output voltage rail monitor block diagram is shown in Figure 77. If the PGA
is bypassed, then the rail monitor is still operational and is sensing the connection at the input of the ADC.
The PGA output voltage rail monitors are:
• FL_P_RAILP (bit 5 of the STATUS byte): VOUTP has exceeded AVDD – 0.15 V
• FL_P_RAILN (bit 4 of the STATUS byte): VOUTP dropped below AVSS + 0.15 V
• FL_N_RAILP (bit 3 of the STATUS byte): VOUTN has exceeded AVDD – 0.15 V
• FL_N_RAILN (bit 2 of the STATUS byte): VOUTN dropped below AVSS + 0.15 V
STATUS byte [5:2]
VOUTP
ADC
PGA
FL_P_RAILP
ADC
VOUTN
AVDD ± 0.15 V
FL_P_RAILN
FL_N_RAILP
FL_N_RAILN
Latch
±
S
Q
+
R
±
S
Q
+
R
Supply Rail
Comparators
±
S
Q
+
R
±
S
Q
+
AVSS + 0.15 V
R
Conversion
Start Reset
Figure 77. PGA Output Voltage Rail Monitors
Copyright © 2016–2017, Texas Instruments Incorporated
Product Folder Links: ADS124S06 ADS124S08
Submit Documentation Feedback
53
�ADS124S06, ADS124S08
SBAS660C – AUGUST 2016 – REVISED JUNE 2017
www.ti.com
Figure 78 shows an example of a PGA output voltage rail monitor overrange event and the respective behavior
of the flags. A fault is latched during a conversion cycle. The flags are updated (set or cleared) only at the end of
a conversion cycle.
(VOUTP)
PGA Positive Output (V)
AVDD - 0.15 V
AVSS + 0.15 V
Flag latched during
conversion cycle
Conversions (DRDY)
FL_P_RAILP bit
FL_P_RAILN bit
Figure 78. PGA Output Voltage Rail Monitor Timing
9.3.10.4 Reference Monitor
The user can select to continuously monitor the ADC reference inputs for a shorted or missing reference voltage.
The reference detection circuit offers two thresholds, the first threshold is 300 mV and the second threshold is
1/3 · (AVDD – AVSS). The reference detection circuit measures the differential reference voltage and sets a flag
latched after each conversion in the STATUS byte if the voltage is below the threshold. A reference voltage less
than 300 mV can indicate a potential short on the reference inputs or, in case of a ratiometric RTD measurement,
a broken wire between the RTD and the reference resistor. A reference voltage between 300 mV and
1/3 · (AVDD – AVSS) can indicate a broken sensor excitation wire in a 3-wire RTD setup.
Additionally, a resistor of 10 MΩ can be connected between the selected REFPx and REFNx inputs. The resistor
can be used to detect a floating reference input. With a floating input, the resistor pulls both reference inputs to
the same potential so that the reference detection circuit can detect this condition. The pull-together reference
resistor is not recommended to be continuously connected to active reference inputs. This resistor lowers the
input impedance of the reference inputs and can contribute gain error to the measurement.
The reference detection circuits must be enabled with the FL_REF_EN[1:0] bits of the reference control register
(05h). The FL_REF_L0 flag (bit 0 of the STATUS byte) indicates if the reference voltage is lower than 0.3 V. The
FL_REF_L1 flag (bit 1 of the STATUS byte) indicates if the reference voltage is lower than
1/3 · (AVDD – AVSS). A diagram of the reference detection circuit is shown in Figure 79. A reference monitor
fault is latched at each conversion cycle and the flags in the status register are updated at the falling edge of
DRDY.
FL_REF_EN[1:0] bits of REF register
00 = Reference monitor off
01 = 0.3 V threshold enabled
10 = 1/3 ‡ (AVDD - AVSS) threshold enabled
11 = 0.3 V threshold and 10-M pull-together enabled
FL_REF_L0 bit of
STATUS register
0 = no alarm
1 = alarm
0.3 V
+
S
Q
±
R
REFPx
FL_REF_L1 bit of
STATUS register
0 = no alarm
1 = alarm
1/3 ‡ (AVDD ± AVSS)
+
+
S
Q
±
10 M
REFNx
±
R
Conversion
Start Reset
Figure 79. Reference Monitor Block Diagram
54
Submit Documentation Feedback
Copyright © 2016–2017, Texas Instruments Incorporated
Product Folder Links: ADS124S06 ADS124S08
�ADS124S06, ADS124S08
www.ti.com
SBAS660C – AUGUST 2016 – REVISED JUNE 2017
9.3.11 General-Purpose Inputs and Outputs (GPIOs)
The ADS124S06 offers four dedicated general-purpose input and output (GPIO) pins, and the ADS124S08 offers
four pins (AIN8 to AIN11) that serve a dual purpose as either analog inputs or GPIOs.
Two registers control the function of the GPIO pins. Use the CON[3:0] bits of the GPIO configuration register
(11h) to configure a pin as a GPIO pin. The upper four bits (DIR[3:0]) of the GPIO data register (10h) configure
the GPIO pin as either an input or an output. The lower four bits (DAT[3:0]) of the GPIO data register contain the
input or output GPIO data. If a GPIO pin is configured as an input, the respective DAT[x] bit reads the status of
the pin; if a GPIO pin is configured as an output, write the output status to the respective DAT[x] bit. For more
information about the use of GPIO pins, see the Configuration Registers section.
Figure 80 shows a diagram of how these functions are combined onto a single pin. Note that when the pin is
configured as a GPIO, the corresponding logic is powered from AVDD and AVSS. When the devices are
operated with bipolar analog supplies, the GPIO outputs bipolar voltages. Care must be taken to not load the
GPIO pins when used as outputs because large currents can cause droop or noise on the analog supplies. GPIO
pins use Schmitt triggered inputs, with hysteresis to make the input more resistance to noise; see the Electrical
Characteristics table for GPIO thresholds.
AVDD
CON[3:0] bits of GPIOCON register
0 = no connect
1 = connect
DAT[3:0] bits of GPIODAT register
0 = VGPIO is low
1 = VGPIO is high
GPIO
1 of 4
AIN8
AIN9
Write
GPIO[0]
0
GPIO[1]
Read
0
1
GPIO[2]
AIN10
GPIO Read Select
GPIO[3]
AIN11
DIR[7:4] bits of GPIODAT register
0 = Output
1 = Input
GPIO logic is powered from
AVDD to AVSS
AVSS
Figure 80. GPIO Block Diagram
For connections of unused GPIO pins, see the Unused Inputs and Outputs section.
9.3.12 Low-Side Power Switch
A low-side power switch with low on-resistance connected between REFN0 and AVSS-SW is integrated in the
devices. This power switch can be used to reduce system power consumption in resistive bridge sensor
applications by powering down the bridge circuit between conversions. When the PSW bit in the excitation
current register 1 (06h) is set to 1, the switch closes. The switch automatically opens when the POWERDOWN
command is issued. The switch is opened by setting the PSW bit to 0. By default, the switch is open. Connect
AVSS-SW to AVSS.
Copyright © 2016–2017, Texas Instruments Incorporated
Product Folder Links: ADS124S06 ADS124S08
Submit Documentation Feedback
55
�ADS124S06, ADS124S08
SBAS660C – AUGUST 2016 – REVISED JUNE 2017
www.ti.com
9.3.13 Cyclic Redundancy Check (CRC)
A cyclic redundancy check (CRC) is enabled by setting the CRC bit to 1 in the system control register (10h).
When CRC mode is enabled, the 8-bit CRC is appended to the conversion result. The CRC is calculated for the
24-bit conversion result and the STATUS byte when enabled.
In CRC mode, the checksum byte is the 8-bit remainder of the bitwise exclusive-OR (XOR) of the data bytes by a
CRC polynomial. For conversion data, use three data bytes. The CRC is based on the CRC-8-ATM (HEC)
polynomial: X8 + X2 + X + 1.
The nine binary coefficients of the polynomial are: 100000111. To calculate the CRC, divide (XOR operation) the
data bytes (excluding the CRC) with the polynomial and compare the calculated CRC values to the ADC CRC
value. If the values do not match, a data transmission error has occurred. In the event of a data transmission
error, read the data again.
The following list shows a general procedure to compute the CRC value:
1. Left-shift the initial 24-bit data value (32-bit data when the STATUS byte is enabled) by 8 bits, with zeros
padded to the right, creating a new 32-bit data value (the starting data value).
2. Align the MSB of the CRC polynomial (100000111) to the left-most, logic-one value of the data.
3. Perform an XOR operation on the data value with the aligned CRC polynomial. The XOR operation creates a
new, shorter-length value. The bits of the data values that are not in alignment with the CRC polynomial drop
down and append to the right of the new XOR result.
4. When the XOR result is less than 100000000, the procedure ends, yielding the 8-bit CRC value. Otherwise,
continue with the XOR operation shown in step 2, using the current data value. The number of loop iterations
depends on the value of the initial data.
9.3.14 Calibration
The ADC incorporates offset and gain calibration commands, as well as user-offset and full-scale (gain)
calibration registers to calibrate the ADC. The ADC calibration registers are 24 bits wide. Use calibration to
correct internal ADC errors or overall system errors. Calibrate by sending calibration commands to the ADC, or
by direct user calibration. In user calibration, the user calculates and writes the correction values to the
calibration registers. The ADC performs self or system-offset calibration, or a system gain calibration. Perform
offset calibration before system gain calibration. After power-on, wait for the power supplies and reference
voltage to fully settle before calibrating.
As shown in Figure 81, the value of the offset calibration register is subtracted from the filter output and then
multiplied by the full-scale register value divided by 400000h. The data are then clipped to a 24-bit value to
provide the final output.
Digital
Filter
ADC
AINP
AINN
ADC
+
Output Data
Clipped to 24 bits
-
Final
Output
1/400000h
OFCAL[2:0] registers
(register addresses = 0Ch, 0Bh, 0Ah)
> 000000h: negative offset
= 000000h: no offset
< 000000h: positive offset
FSCAL[2:0] registers
(register addresses = 0Fh, 0Eh, 0Dh)
< 400000h: Gain > 1
= 400000h: Gain = 1
> 400000h: Gain < 1
Figure 81. ADC Calibration Block Diagram
Calibration commands cannot be used when the device is in standby mode (when the START/SYNC pin is low,
or when the STOP command is issued).
56
Submit Documentation Feedback
Copyright © 2016–2017, Texas Instruments Incorporated
Product Folder Links: ADS124S06 ADS124S08
�ADS124S06, ADS124S08
www.ti.com
SBAS660C – AUGUST 2016 – REVISED JUNE 2017
9.3.14.1 Offset Calibration
The offset calibration word is 24 bits, consisting of three 8-bit registers, as shown in the three registers starting
with offset calibration register 1. The offset value is twos complement format with a maximum positive value
equal to 7FFFFFh, and a maximum negative value equal to 800000h. This value is subtracted from each output
reading as an offset correction. A register value equal to 000000h has no offset correction. If global chop mode is
enabled, the offset calibration register is disabled. Table 21 shows example settings of the offset register.
Table 21. Offset Calibration Register Values
(1)
OFC REGISTER VALUE
OFFSET CALIBRATED OUTPUT CODE (1)
000001h
FFFFFFh
000000h
000000h
FFFFFFh
000001h
Ideal output code with shorted input, excluding ADC noise and offset voltage error.
The user can select how many samples (1, 4, 8, or 16) to average for self or system offset calibration using the
CAL_SAMP[1:0] bits in the system control register (09h). Fewer readings shorten the calibration time but also
provide less accuracy. Averaging more readings takes longer but yields a more accurate calibration result by
reducing the noise level.
Two commands can be used to perform offset calibration. SFOCAL is a self offset calibration that internally sets
the input to mid-scale using the SYS_MON[2:0] = 001 setting and takes a measurement of the offset. SYOCAL is
a system offset calibration where the user must input a null voltage to calibrate the system offset. After either
command is issued, the OFC register is updated.
After an offset calibration is performed, the device starts a new conversion and DRDY falls to indicate a new
conversion has completed.
9.3.14.2 Gain Calibration
The full-scale (gain) calibration word is 24 bits consisting of three 8-bit registers, as shown in the three registers
starting with gain calibration register 1. The gain calibration value is straight binary, normalized to a unity-gain
correction factor at a register value equal to 400000h. Table 22 shows register values for selected gain factors.
Do not exceed the PGA input range limits during gain calibration.
Table 22. Gain Calibration Register Values
FSC REGISTER VALUE
GAIN FACTOR
433333h
1.05
400000h
1.00
3CCCCCh
0.95
All gains of the ADS124S0x are factory trimmed to meet the gain error specified in the Electrical Characteristics
table at TA = 25°C. When the gain drift of the devices over temperature is very low, there is typically no need for
self gain calibration.
The SYGCAL command initiates a system gain calibration, where the user sets the input to full-scale to remove
gain error. After the SYGCAL is issued, the FSC register is updated. As with the offset calibration, the
CAL_SAMP[1:0] bits determine the number of samples used for a gain calibration.
As with an offset calibration, the device starts a new conversion after a gain calibration and DRDY falls to
indicate a new conversion has completed.
Copyright © 2016–2017, Texas Instruments Incorporated
Product Folder Links: ADS124S06 ADS124S08
Submit Documentation Feedback
57
�ADS124S06, ADS124S08
SBAS660C – AUGUST 2016 – REVISED JUNE 2017
www.ti.com
9.4 Device Functional Modes
The device operates in three different modes: power-down mode, standby mode, and conversion mode.
Figure 82 shows a flow chart of the different operating modes and how the device transitions from one mode to
another.
Power-On Reset or
RESET pin high or
RESET command?(1)
Power-down
Mode(2)
Reset device to
default settings
WAKEUP
Command?
No
Yes
Standby
Mode
No
Complete current
conversion(4)
START/SYNC
rising edge or START
Command?
Yes
Yes
Conversion
Mode
No
START/SYNC
pin low or STOP
Command?
Start new
conversion
1 = Single-Shot
conversion mode
Conversion
mode selection(3)
0 = Continuous
conversion mode
(1)
Any reset (power-on, command, or pin), immediately resets the device.
(2)
A POWERDOWN command aborts an ongoing conversion and immediately puts the device into power-down mode.
(3)
The conversion mode is selected with the MODE bit in the data rate register.
(4)
The rising edge of the START/SYNC pin or the START command starts a new conversion without completing the
current conversion.
Figure 82. Operating Flow Chart
9.4.1 Reset
The ADS124S0x is reset in one of three ways:
• Power-on reset
• RESET pin
• RESET command
When a reset occurs, the configuration registers reset to default values and the device enters standby mode. The
device then waits for the rising edge of the START/SYNC pin or a START command to enter conversion mode.
Note that if the device had been using an external clock, the reset sets the device to use the internal oscillator as
a default configuration. See the Timing Characteristics section for reset timing information.
58
Submit Documentation Feedback
Copyright © 2016–2017, Texas Instruments Incorporated
Product Folder Links: ADS124S06 ADS124S08
�ADS124S06, ADS124S08
www.ti.com
SBAS660C – AUGUST 2016 – REVISED JUNE 2017
Device Functional Modes (continued)
9.4.1.1 Power-On Reset
The ADS124S0x incorporates a power-on reset circuit that holds the device in reset until all supplies reach
approximately 1.65 V. The power-on reset also ensures that the device starts operating in a known state in case
a brown-out event occurs, when the supplies have dipped below the minimum operating voltages. When the
device completes a POR sequence, the FL_POR flag in the status register is set high to indicate that a POR has
occurred.
Begin communications with the device 2.2 ms after the power supplies reach minimum operating voltages. The
only exception is polling the status register for the RDY bit. If the user polls the RDY bit, then use an SCLK rate
of half the maximum-specified SCLK rate to get a proper reading when the device is making internal
configurations. This 2.2-ms POR time is required for the internal oscillator to start up and the device to properly
set internal configurations. After the internal configurations are set, the device sets the RDY bit in the device
status register (01h). When this bit is set to 0, user configurations can be programmed into the device. Figure 83
shows the power-on reset timing sequence for the device.
DVDD, IOVDD
VPOR
VPOR
All supplies reach
minimum operating voltage
AVDD - AVSS
Internal
Oscillator Startup
FL_POR bit of
STATUS register is set to 1
Internal
Configuration
Standby
Mode
RDY bit of
STATUS register is set to 0
2.2 ms
If polling for RDY during this period, SCLK
must be less than half maximum rate
Figure 83. Power-On Reset Timing Sequence
9.4.1.2 RESET Pin
Reset the ADC by taking the RESET pin low for a minimum of 4 · tCLK· cycles, and then returning the pin high.
After the rising edge of the RESET pin, a delay time of td(RSSC) is required before sending the first serial interface
command or starting a conversion. See the Timing Characteristics section for reset timing information.
9.4.1.3 Reset by Command
Reset the ADC by using the RESET command (06h or 07h). The command is decoded on the seventh SCLK
falling edge. After sending the RESET command, a delay time of td(RSSC) is required before sending the first serial
interface command or starting a conversion. See the Timing Characteristics section for reset timing information.
9.4.2 Power-Down Mode
Power-down mode is entered by sending the POWERDOWN command. In this mode, all analog and digital
circuitry is powered down for lowest power consumption regardless of the register settings. Only the internal
voltage reference can be configured to stay on during power-down mode in case a faster start-up time is
required. All register values retain the current settings during power-down mode. The configuration registers can
be read and written in power-down mode. A WAKEUP command must be issued in order to exit power-down
mode and to enter standby mode.
When the POWERDOWN command is issued, the device enters power-down mode 2 · tCLK after the seventh
SCLK falling edge of the command. For lowest power consumption (on DVDD and IOVDD), stop the external
clock when in power-down mode. The device does not gate the external clock when in power-down mode.
Selecting the internal oscillator before sending the POWERDOWN command is recommended.
Copyright © 2016–2017, Texas Instruments Incorporated
Product Folder Links: ADS124S06 ADS124S08
Submit Documentation Feedback
59
�ADS124S06, ADS124S08
SBAS660C – AUGUST 2016 – REVISED JUNE 2017
www.ti.com
Device Functional Modes (continued)
To release the device from POWERDOWN, issue the WAKEUP command to enter standby mode. The device
then waits for the rising edge of the START/SYNC pin or a START command to go into conversion mode.
When in power-down mode, the device responds to the RREG, RDATA, and WAKEUP commands. The WREG
and RESET commands can also be sent, but are ignored until a WAKEUP command is sent and the internal
oscillator resumes operation.
9.4.3 Standby Mode
The device powers up in standby mode and automatically enters this mode whenever there is no ongoing
conversion. When the STOP command is sent (or the START/SYNC pin is taken low) in continuous conversion
mode, or when a conversion completes in single-shot conversion mode, the device enters standby mode.
Standby mode offers several different options and features to lower the power consumption:
• The PGA can be powered down by setting PGA_EN[1:0] to 00 in the gain setting register (03h).
• The internal voltage reference can be powered down by setting REFCON[1:0] to 00 in the reference control
register (05h). This setting also turns off the IDACs.
• The digital filter is held in reset state.
• The clock to the modulator and digital core is gated to decrease dynamic switching losses.
If powered down in standby mode, the PGA and internal reference can require extra time to power up. Extra
delay may be required between power up of the PGA or the internal reference, and the start of conversions. In
particular, the reference power up time is dependent on the capacitance between REFOUT and REFCOM.
Calibration commands are not decoded when the device is in standby mode.
9.4.4 Conversion Modes
The ADS124S0x offers two conversion modes: continuous conversion and single-shot conversion mode.
Continuous-conversion mode converts indefinitely until stopped by the user. Single-shot conversion mode
performs one conversion after the START/SYNC pin is taken high or after the START command is sent. Use the
MODE bit in the data rate register (04h) to program the conversion mode. Figure 84 shows how the
START/SYNC pin and the START command are used to control ADC conversions.
(2)
(1)
(2)
DRDY
START/SYNC Pin
SCLK
START
Command
DIN
START (3)
Standby Mode
STOP
Conversion Mode
Standby Mode
(1)
DRDY rises at the first SCLK rising edge or the rising edge of the START/SYNC pin.
(2)
START and STOP commands take effect 2 · tCLK after the seventh SCLK falling edge. The conversion starts 2 · tCLK
after the START/SYNC rising edge.
(3)
To synchronize a conversion, the STOP command must be issued prior to the START command. STOP and START
commands can be issued without a delay between the commands.
Figure 84. Conversion Start and Stop Timing
60
Submit Documentation Feedback
Copyright © 2016–2017, Texas Instruments Incorporated
Product Folder Links: ADS124S06 ADS124S08
�ADS124S06, ADS124S08
www.ti.com
SBAS660C – AUGUST 2016 – REVISED JUNE 2017
Device Functional Modes (continued)
ADC conversions are controlled by the START/SYNC pin or by serial commands. For the device to start
converting in continuous conversion or single-shot conversion mode, a START command must be sent or the
START/SYNC pin must be taken high. If using commands to control conversions, keep the START/SYNC pin low
to avoid possible contentions between the START/SYNC pin and commands.
Conversions can be synchronized to perform a conversion at a particular time. To synchronize the conversion
with the START/SYNC pin, take the pin low. The rising edge of the START/SYNC pin starts a new conversion.
Similarly, a conversion can be synchronized using the START command. If the device is in standby mode, issue
a START command. If the device is in conversion mode, issue a STOP command followed by a START
command. The STOP and START commands can be consecutive. A new conversion starts on the seventh
SCLK falling edge of the START command.
9.4.4.1 Continuous Conversion Mode
The device is configured for continuous conversion mode by setting the MODE bit to 0 in the data rate register
(04h). A START command must be sent or the START/SYNC pin must be taken high for the device to start
converting continuously. When controlling the device with commands, hold the START/SYNC pin low. Taking the
START/SYNC pin low or sending the STOP command stops the device from converting after the currently
ongoing conversion completes, indicated by the falling edge of DRDY. The device enters standby mode
thereafter.
For information on the exact timing of single-shot conversion mode data, see Table 13 and Table 15.
9.4.4.2 Single-Shot Conversion Mode
The device is configured for single-shot conversion mode by setting the MODE bit to 1 in the data rate register
(04h). A START command must be sent or the START/SYNC pin must be taken high for the device to start a
single conversion. After the conversion completes, the device enters standby mode again. To start a new
conversion, the START command must be sent again or the START/SYNC pin must be taken low and then high
again.
When the device uses the sinc3 filter, ADC data requires three conversion cycles to settle. When the sinc3 filter is
enabled, a single-shot conversion suppresses the first two ADC conversions and provides the third conversion as
the output data so that the user receives settled data. Because three conversions are required for settled data,
the conversion time in single-shot conversion mode is approximately three times the normal data period. When
the device uses the low-latency filter, the ADC data settles in a single conversion. In single-shot conversion
mode with the low-latency filter, the data period is closer to the normal data period.
For information on the exact timing of single-shot conversion mode data, see Table 13 and Table 15.
9.4.4.3 Programmable Conversion Delay
When a new conversion is started, the ADC provides a delay before the actual start of the conversion. This timed
delay is provided to allow for the integrated analog anti-alias filter to settle. In some cases more delay is required
to allow for external settling effects. The delay time can be configured to automatically delay the start of a
conversion after a START command is sent, the START/SYNC pin is taken high, or a WREG command is sent
to change any configuration register from address 03h to 07h is issued (as described in the WREG section). The
programmable conversion delay is intended to accommodate the analog settling time on the inputs (for example,
when changing a multiplexer channel). Use the DELAY[2:0] bits in the gain setting register (03h) to program a
delay time ranging from 1 · tMOD to 4096 · tMOD (where tMOD = 16 · tCLK). The default programmable conversion
delay setting is 14 · tMOD.
Copyright © 2016–2017, Texas Instruments Incorporated
Product Folder Links: ADS124S06 ADS124S08
Submit Documentation Feedback
61
�ADS124S06, ADS124S08
SBAS660C – AUGUST 2016 – REVISED JUNE 2017
www.ti.com
9.5 Programming
9.5.1 Serial Interface
The ADC has an SPI-compatible, bidirectional serial interface that is used to read the conversion data as well as
to configure and control the ADC. Only SPI mode 1 (CPOL = 0, CPHA = 1) is supported. The serial interface
consists of five control lines: CS, SCLK, DIN, DOUT/DRDY, and DRDY but can be used with only four or even
three control signals. If the ADS124S08 or ADS124S06 is the only device connected to the SPI bus, then the CS
input can be tied low so that only SCLK, DIN, and DOUT/DRDY are required to communicate with the device.
9.5.1.1 Chip Select (CS)
The CS pin is an active low input that enables the ADC serial interface for communication and is useful when
multiple devices share the same serial bus. CS must be low during the entire data transaction. When CS is high,
the serial interface is reset, SCLK input activity is ignored (blocking input commands), and the DOUT/DRDY
output enters a high-impedance state. ADC conversions are not affected by the state of CS. In situations where
multiple devices are present on the bus, the dedicated DRDY pin can provide an uninterrupted monitor of the
conversion status and is not affected by CS. If the serial bus is not shared with another peripheral, CS can be
tied to DGND to permanently enable the ADC interface and DOUT/DRDY can be used to indicate conversion
status. These changes reduce the serial interface from five I/Os to three I/Os.
9.5.1.2 Serial Clock (SCLK)
The serial interface clock is a noise-filtered, Schmidt-triggered input used to clock data into and out of the ADC.
Input data to the ADC are latched on the falling SCLK edge and output data from the ADC are updated on the
rising SCLK edge. Return SCLK low after the data sequence is complete. Even though the SCLK input has
hysteresis, keep SCLK as clean as possible to prevent unintentional SCLK transitions. Avoid ringing and voltage
overshoot on the SCLK input. Place a series termination resistor at the SCLK drive pin to help reduce ringing.
9.5.1.3 Serial Data Input (DIN)
The serial data input pin (DIN) is used with SCLK to send data (commands and register data) to the device. The
device latches data on DIN on the SCLK falling edge. The device never drives the DIN pin. During data
readback, when no command is intended, keep DIN low.
9.5.1.4 Serial Data Output and Data Ready (DOUT/DRDY)
The DOUT/DRDY pin is a dual-function output. The pin functions as the digital data output and the ADC dataready indication.
First, this pin is used with SCLK to read conversion and register data from the device. Conversion or register
data are shifted out on DOUT/DRDY on the SCLK rising edge. DOUT/DRDY goes to a high-impedance state
when CS is high.
Second, the DOUT/DRDY pin indicates availability of new conversion data. DOUT/DRDY transitions low at the
same time that the DRDY pin goes low to indicate new conversion data are available. Both signals can be used
to detect if new data are ready. However, because DOUT/DRDY is disabled when CS is high, use the dedicated
DRDY pin when monitoring conversions on multiple devices on the SPI bus.
62
Submit Documentation Feedback
Copyright © 2016–2017, Texas Instruments Incorporated
Product Folder Links: ADS124S06 ADS124S08
�ADS124S06, ADS124S08
www.ti.com
SBAS660C – AUGUST 2016 – REVISED JUNE 2017
Programming (continued)
9.5.1.5 Data Ready (DRDY)
The DRDY pin is an output that transitions low to indicate when conversion data are ready for retrieval. Initially,
DRDY is high at power-on. When converting, the state of DRDY depends on whether the conversion data are
retrieved or not. In continuous conversion mode after DRDY goes low, DRDY is driven high on the first SCLK
rising edge. If data are not read, DRDY remains low and then pulses high 24 · tCLK before the next DRDY falling
edge. The data must be retrieved before the next DRDY update, otherwise the data are overwritten by new data
and any previous data are lost. Figure 85 shows the DRDY operation without data retrieval. Figure 86 shows the
DRDY operation with data retrieval after each conversion completes.
DRDY
START/SYNC Pin
SCLK
START
Command
DIN
(1)
START
DRDY returns high with the rising edge of the first SCLK after a data ready indication.
Figure 85. DRDY Operation Without Data Retrieval
DRDY
START/SYNC Pin
SCLK
START
Command
DIN
START (1)
DOUT/DRDY
Conversion
Data 1
(1)
Conversion
Data 2
Conversion
Data 3
DRDY returns high with the rising edge of the first SCLK after a data ready indication.
Figure 86. DRDY Operation With Data Retrieval
9.5.1.6 Timeout
The ADS124S0x offers a serial interface timeout feature that is used to recover communication when a serial
interface transmission is interrupted. This feature is especially useful in applications where CS is permanently
tied low and is not used to frame a communication sequence. The SPI interface resets when no valid 8 bits are
received within 215 · tCLK. The timeout feature is enabled by setting the TIMEOUT bit to 1 in the system control
register (09h).
Copyright © 2016–2017, Texas Instruments Incorporated
Product Folder Links: ADS124S06 ADS124S08
Submit Documentation Feedback
63
�ADS124S06, ADS124S08
SBAS660C – AUGUST 2016 – REVISED JUNE 2017
www.ti.com
Programming (continued)
9.5.2 Data Format
The devices provide 24 bits of data in binary twos complement format. The size of one code (LSB) is calculated
using Equation 11.
1 LSB = (2 · VREF / Gain) / 224 = +FS / 223
(11)
A positive full-scale input [VIN ≥ (+FS – 1 LSB) = (VREF / Gain – 1 LSB)] produces an output code of 7FFFFFh
and a negative full-scale input (VIN ≤ –FS = –VREF / Gain) produces an output code of 800000h. The output clips
at these codes for signals that exceed full-scale.
Table 23 summarizes the ideal output codes for different input signals.
Table 23. Ideal Output Code vs Input Signal
INPUT SIGNAL,
VIN = VAINP – VAINN
23
≥ FS (2
IDEAL OUTPUT CODE (1)
23
– 1) / 2
7FFFFFh
FS / 223
000001h
0
000000h
23
(1)
–FS / 2
FFFFFFh
≤ –FS
800000h
Excludes the effects of noise, INL, offset, and gain errors.
Mapping of the analog input signal to the output codes is shown in Figure 87.
7FFFFFh
000001h
000000h
FFFFFFh
¼
Output Code
¼
7FFFFEh
800001h
800000h
¼
-FS
2
23
FS
¼
-1
-FS
2
0
Input Voltage VIN
23
2
23
FS
2
-1
23
Figure 87. Code Transition Diagram
64
Submit Documentation Feedback
Copyright © 2016–2017, Texas Instruments Incorporated
Product Folder Links: ADS124S06 ADS124S08
�ADS124S06, ADS124S08
www.ti.com
SBAS660C – AUGUST 2016 – REVISED JUNE 2017
9.5.3 Commands
Commands are used to control the ADC, access the configuration registers, and retrieve data. Many of the
commands are stand-alone (that is, single-byte). The register write and register read commands, however, are
multibyte, consisting of two command bytes plus the register data byte or bytes. The commands are listed in
Table 24.
Table 24. Command Definitions
COMMAND
DESCRIPTION
FIRST
COMMAND BYTE
SECOND
COMMAND BYTE
Control Commands
NOP
No operation
0000 0000 (00h)
—
WAKEUP
Wake-up from power-down mode
0000 001x (02h, 03h) (1)
—
POWERDOWN
Enter power-down mode
0000 010x (04h, 05h) (1)
—
(1)
—
RESET
Reset the device
0000 011x (06h, 07h)
START
Start conversions
0000 100x (08h, 09h) (1)
—
STOP
Stop conversions
0000 101x (0Ah, 0Bh) (1)
—
Calibration Commands
SYOCAL
System offset calibration
0001 0110 (16h)
—
SYGCAL
System gain calibration
0001 0111 (17h)
—
SFOCAL
Self offset calibration
0001 1001 (19h)
—
0001 001x (12h / 13h) (1)
—
Read nnnnn registers starting at address rrrrr
001r rrrr (2)
000n nnnn (3)
Write nnnnn registers starting at address rrrrr
(2)
000n nnnn (3)
Data Read Command
RDATA
Read data by command
Register Read and Write Commands
RREG
WREG
(1)
(2)
(3)
010r rrrr
x = don't care.
r rrrr = starting register address.
n nnnn = number of registers to read or write – 1.
Commands can be sent at any time, either during a conversion or when conversions are stopped. However, if
register read or write commands are in progress when conversion data are ready, the ADC blocks loading of
conversion data to the output shift register. The CS input pin can be taken high between commands; or held low
between consecutive commands. CS must stay low for the entire command sequence. Complete the command,
or terminate the command before completion by taking CS high. Only send the commands that are listed in
Table 24.
9.5.3.1 NOP
NOP is a no-operation command. The NOP command is used to clock out data without clocking in a command.
9.5.3.2 WAKEUP
Issue the WAKEUP command to exit power-down mode and to place the device into standby mode.
When running off the external clock, the external clock must be running before sending the WAKEUP command,
otherwise the command is not decoded.
Copyright © 2016–2017, Texas Instruments Incorporated
Product Folder Links: ADS124S06 ADS124S08
Submit Documentation Feedback
65
�ADS124S06, ADS124S08
SBAS660C – AUGUST 2016 – REVISED JUNE 2017
www.ti.com
9.5.3.3 POWERDOWN
Sending the POWERDOWN command aborts a currently ongoing conversion and puts the device into powerdown mode. The device goes into power-down mode 2 · tCLK after the seventh SCLK falling edge of the
command.
For lowest power consumption on DVDD and IOVDD, stop the external clock when in power-down mode. The
device does not gate the external clock. When running off the external clock, provide at a minimum two
additional tCLKs after the POWERDOWN command is issued, otherwise the device does not enter power-down
mode. Because an external clock can be gated for lower power consumption, selecting the internal oscillator
before sending the POWERDOWN command is recommended.
During power-down mode, the only commands that are available are RREG, RDATA, and WAKEUP.
9.5.3.4 RESET
The RESET command resets the digital filter and sets all configuration register values to default settings. A
RESET command also puts the device into standby mode. When in standby mode, the device waits for a rising
edge on the START/SYNC pin or a START command to resume conversions. After sending the RESET
command, a delay time of td(RSSC) is required before sending the first serial interface command or starting a
conversion. See the Timing Characteristics section for reset timing information.
Note that if the device had been using an external clock, the reset sets the device to use the internal oscillator as
a default configuration.
9.5.3.5 START
When the device is configured for continuous conversion mode, issue the START command for the device to
start converting. Every time a conversion completes, the device automatically starts a new conversion until the
STOP command is sent.
In single-shot conversion mode, the START command is used to start a single conversion. After the conversion
completes, the device enters standby mode.
Tie the START/SYNC pin low when the device is controlled through the START and STOP commands. The
START command is not decoded if the START/SYNC pin is high. If the device is already in conversion mode, the
command has no effect.
9.5.3.6 STOP
The STOP command is used in continuous conversion mode to stop the device from converting. The current
conversion is allowed to complete. After DRDY transitions low, the device enters standby mode. The command
has no effect in single-shot conversion mode.
Hold the START/SYNC pin low when the device is controlled through START and STOP commands.
9.5.3.7 SYOCAL
The SYOCAL command initiates a system offset calibration. For a system offset calibration, the inputs must be
externally shorted to a voltage within the input range, ideally near the mid-supply voltage of (AVDD + AVSS) / 2.
The OFC registers are updated when the command completes. Calibration commands must be issued in
conversion mode.
9.5.3.8 SYGCAL
The SYGCAL command initiates the system gain calibration. For a system gain calibration, the input must be
externally set to full-scale. The FSC registers are updated after this operation. Calibration commands must be
issued in conversion mode.
9.5.3.9 SFOCAL
The SFOCAL command initiates a self offset calibration. The device internally shorts the inputs to mid-supply
and performs the calibration. The OFC registers are updated after this operation. Calibration commands must be
issued in conversion mode.
66
Submit Documentation Feedback
Copyright © 2016–2017, Texas Instruments Incorporated
Product Folder Links: ADS124S06 ADS124S08
�ADS124S06, ADS124S08
www.ti.com
SBAS660C – AUGUST 2016 – REVISED JUNE 2017
9.5.3.10 RDATA
The RDATA command is used to read conversion data from the device at any time without concern of data
corruption when the DRDY or DOUT/DRDY signal cannot be monitored. The conversion result is read from a
buffer so that a new data conversion does not corrupt the conversion read.
9.5.3.11 RREG
Use the RREG command to read the device register data. Read the register data one register at a time, or read
a block of register data. The starting register address can be any register in the register map. The RREG
command consists of two bytes. The first byte specifies the starting register address: 001r rrrr, where r rrrr is the
starting register address. The second command byte is the number of registers to read (minus 1): 000n nnnn,
where n nnnn is the number of registers to read minus 1.
After the read command is sent, the ADC responds with one or more register data bytes, most significant bit first.
If the byte count exceeds the last register address, the ADC begins to output zero data. During the register read
operation, any conversion data that becomes available is not loaded to the output shift register to avoid data
contention. However, the conversion data can be retrieved later by the RDATA command. After the register read
command has started, further commands are blocked until one of the following conditions are met:
• The read operation is completed
• The read operation is terminated by taking CS high
• The read operation is terminated by a serial interface timeout
• The ADC is reset by toggling the RESET pin
Figure 88 depicts a two-register read operation example. As shown, the commands required to read data from
two registers starting at register REF (address = 05h) are: command byte 1 = 25h and command byte 2 = 01h.
Keep DIN low after the two command bytes are sent.
(1)
CS
1
9
17
25
SCLK
DOUT/DRDY
DIN
(1)
'21¶7 &$5(
'21¶7 &$5(
0010 0101
REG DATA 1
REG DATA 2
0000 0001
CS can be set high or kept low between commands. If kept low, the command must be completed.
Figure 88. Read Register Sequence
Copyright © 2016–2017, Texas Instruments Incorporated
Product Folder Links: ADS124S06 ADS124S08
Submit Documentation Feedback
67
�ADS124S06, ADS124S08
SBAS660C – AUGUST 2016 – REVISED JUNE 2017
www.ti.com
9.5.3.12 WREG
Use the WREG command to write the device register data. The register data are written one register at a time or
as a block of register data. The starting register address is any register in the register map.
The WREG command consists of two bytes. The first byte specifies the starting register address: 010r rrrr, where
r rrrr is the starting register address The second command byte is the number of registers to write (minus 1):
000n nnnn, where n nnnn is the number of registers to write minus 1. The following byte (or bytes) is the register
data, most significant bit first. If the byte count exceeds the last register address, the ADC ignores the data. After
the register write command has started, further commands are blocked until one of the following conditions are
met:
• The write operation is completed
• The write operation is terminated by taking CS high
• The write operation is terminated by a serial interface timeout
• The ADC is reset by toggling the RESET pin
Figure 89 depicts a two-register write operation example. As shown, the required commands to write data to two
registers starting at register REF (address = 05h) are: command byte 1 = 45h and command byte 2 = 01h.
(1)
CS
1
9
17
25
SCLK
DOUT/DRDY
'21¶7 &$5(
DIN
0100 0101
(1)
'21¶7 &$5(
0000 0001
'21¶7 &$5(
REG DATA 1
'21¶7 &$5(
REG DATA 2
CS can be set high or kept low between commands. If kept low, the command must be completed.
Figure 89. Write Register Sequence
Writing new data to certain configuration registers resets the digital filter and starts a new conversion if a
conversion is in progress. Writing to the following registers triggers a new conversion:
• Channel configuration register (02h)
• Gain setting register (03h)
• Data rate register (04h)
• Reference control register (05h), bits [5:0]
• Excitation current register 1 (06h), bits [3:0]
• Excitation current register 2 (07h)
• System control register (09h), bits [7:5]
When the device is configured with WREG, the first data ready indication occurs after the new conversion
completes with the new configuration settings. The previous conversion data are cleared at restart; therefore
read the previous data before the register write operation. A WREG to the previously mentioned registers only
starts a new conversion if the register data are new (differs from the previous register data) and if a conversion is
in progress. If the device is in standby mode, the device sets the configuration according to the WREG data, but
does not start a conversion until the START/SYNC pin is taken high or a START command is issued.
68
Submit Documentation Feedback
Copyright © 2016–2017, Texas Instruments Incorporated
Product Folder Links: ADS124S06 ADS124S08
�ADS124S06, ADS124S08
www.ti.com
SBAS660C – AUGUST 2016 – REVISED JUNE 2017
9.5.4 Reading Data
ADC data are read by two methods: read data direct or read data by command. The ADC writes new conversion
data to the output shift register and the internal data-holding register. Data are read either from the output shift
register (in direct mode) or read from the data-holding register (in command mode). Reading data from the dataholding register (command mode) does not require synchronizing the start of data readback to DRDY.
9.5.4.1 Read Data Direct
In this method of data retrieval, ADC conversion data are shifted out directly from the output shift register. No
command is necessary. Read data direct requires that no serial activity occur from the falling edge of DRDY to
the readback, or the data are invalid. The serial interface is full duplex in the read data direct mode; meaning that
commands are decoded during the data readback. If no command is intended, keep DIN low during readback. If
an input command is sent during readback, the ADC executes the command, and data corruption can result.
Synchronize the data readback to DRDY or to DOUT/DRDY to make sure the data are read before the next
DRDY update, or the old data are overwritten with new data.
As shown in Figure 90, the ADC data field is 3, 4, or 5 bytes long. The data field consists of an optional STATUS
byte, three bytes of conversion data, and an optional CRC byte. After all bytes are read, the data-byte sequence
(including the STATUS byte and CRC byte, if selected) is repeated when continued SCLKs are sent. The byte
sequence repeats starting with the first byte. In order to help verify error-free communication, read the same data
multiple times in each conversion interval or use the optional CRC byte.
(1)
DRDY
CS
(2)
9
1
25
17
41
33
SCLK
DIN
DOUT/DRDY
HI-Z
STATUS
Data 1
Data 2
Repeat
CRC
Data 3
(3)
Optional (4)
Optional (4)
ADC Data Bytes
SENDSTAT bit of SYS register
0 = Disabled
1 = Enabled
Repeated Data (5)
CRC bit of SYS register
0 = Disabled
1 = Enabled
(1)
DRDY returns high on the first SCLK falling edge.
(2)
CS can be tied low. If CS is low, DOUT/DRDY asserts low at the same time as DRDY.
(3)
Complete data retrieval before new data are ready (28 · tCLK before the next falling edge of DOUT/DRDY and DRDY).
(4)
The STATUS and CRC bytes are optional.
(5)
The byte sequence, including selected optional bytes, repeats by continuing SCLK.
Figure 90. Read Data Direct
Copyright © 2016–2017, Texas Instruments Incorporated
Product Folder Links: ADS124S06 ADS124S08
Submit Documentation Feedback
69
�ADS124S06, ADS124S08
SBAS660C – AUGUST 2016 – REVISED JUNE 2017
www.ti.com
9.5.4.2 Read Data by RDATA Command
When the RDATA command is sent, the data are retrieved from the ADC data-holding register. Read data at any
time without the risk of data corruption because the command method does not require synchronizing to DRDY.
Polling of DRDY to determine when ADC data are ready can still be used.
Figure 91 shows the read data by command sequence. The output data MSB begins on the first SCLK rising
edge after the command. The output data field can be 3, 4, or 5 bytes long. The data field consists of an optional
STATUS byte, three bytes of conversion data, and an optional CRC byte. An RDATA command must be sent for
each read operation. The ADC does not respond to commands until the read operation is complete, or
terminated by taking CS high.
After all bytes are read, the data-byte sequence (including the STATUS byte and CRC byte, if selected) is
repeated by continuing SCLK.
CS
(1)
9
1
25
17
41
33
SCLK
DIN
RDATA
DOUT/DRDY
HI-Z
(2)
'RQ¶W &DUH
STATUS
Data 1
Optional(3)
Data 2
Data 3
ADC Data Bytes
CRC
Optional(3)
CRC bit of SYS register
0 = Disabled
1 = Enabled
SENDSTAT bit of SYS register
0 = Disabled
1 = Enabled
(1)
CS can be tied low. If CS is low, DOUT/DRDY asserts low with!~ !~ DRDY.
(2)
DOUT/DRDY is driven low with DRDY. If a read operation occurs after the DRDY falling edge, then DOUT/DRDY can
be high or low.
(3)
The STATUS and CRC bytes are optional.
Figure 91. Read Data by Command
70
Submit Documentation Feedback
Copyright © 2016–2017, Texas Instruments Incorporated
Product Folder Links: ADS124S06 ADS124S08
�ADS124S06, ADS124S08
www.ti.com
SBAS660C – AUGUST 2016 – REVISED JUNE 2017
9.5.4.3 Sending Commands When Reading Data
The device serial interface is capable of full-duplex operation when reading conversion data and not using the
RDATA command. In full-duplex operation, commands are decoded at the same time that conversion data are
read. Commands can be sent on any 8-bit data boundary during a data read operation. When a RREG or
RDATA command is recognized, the current data read operation is aborted and the conversion data are
corrupted, unless the command is sent when the last byte of the conversion result is retrieved. The device starts
to output the requested data on DOUT/DRDY at the first SCLK rising edge after the command byte. To read data
without interruption, keep DIN low when clocking out data.
A WREG command can be sent without corrupting an ongoing read operation. Sending a WREG command
when reading data minimizes the time between reading the data and setting the device configuration for the next
conversion. Figure 92 shows an example for sending a WREG command to write two configuration registers
when reading conversion data by using read data direct mode. After the command is clocked in, the device
resets the digital filter and starts converting with the new register settings as long as the device is in continuous
conversion mode. The digital filter is reset and conversions are restarted after each data byte is received. In this
example, the digital filter is reset when the first byte is received, decoding the input multiplexer and again when
the PGA is set. The WREG command can be sent on any of the 8-bit boundaries. The example in Figure 92 has
the STATUS and CRC bytes disabled.
DRDY
CS
(1)
9
1
25
17
SCLK
DIN
DOUT/DRDY
0100 0010
0000 0001
0011 0010
0000 1011
WREG at 02h
Two bytes
AINP = AIN3,
AINN = AIN2
PGA enabled,
Gain = 8
Data 1
Data 2
Data 3
HI-Z
Repeat Data 1
ADC Data Bytes (2)
(1)
CS can be tied low. If CS is low, DOUT/DRDY asserts low at the same time as DRDY.
(2)
The output data buffer is cyclical and the original data byte is re-issued when the fourth DIN byte is clocked in.
Figure 92. Issuing a WREG Command When Reading Back ADC Data
9.5.5 Interfacing with Multiple Devices
When connecting multiple devices to a single SPI bus, SCLK, DIN, and DOUT/DRDY can be safely shared by
using a dedicated chip-select (CS) line for each SPI-enabled device. When CS transitions high for the respective
device, DOUT/DRDY enters a tri-state mode. Therefore, DOUT/DRDY cannot be used to indicate when new data
are available if CS is high. Only the dedicated DRDY pin indicates that new data are available because the
DRDY pin is actively driven even when CS is high.
In some cases, the DRDY pin cannot be interfaced to the microcontroller. This scenario can occur if there are
insufficient GPIO channels available on the microcontroller or if the serial interface must be galvanically isolated
and thus the amount of channels must be limited. In order to evaluate when a new conversion of one of the
devices is ready, the microcontroller can periodically drop CS to the respective device and poll the state of the
DOUT/DRDY pin.
When CS goes low, the DOUT/DRDY pin immediately drives either high or low. If the DOUT/DRDY line drives
low, new data are available. If the DOUT/DRDY line drives high, no new data are available. This procedure
requires that DOUT/DRDY is forced high after reading each conversion result and before taking CS high. To
make sure DOUT/DRDY is taken high, send a RREG command to read a register where the least significant bit
is 1.
Copyright © 2016–2017, Texas Instruments Incorporated
Product Folder Links: ADS124S06 ADS124S08
Submit Documentation Feedback
71
�ADS124S06, ADS124S08
SBAS660C – AUGUST 2016 – REVISED JUNE 2017
www.ti.com
Retrieving data using direct read mode requires knowledge of the DRDY falling edge timing to avoid data
corruption. Use the RDATA command so that valid data can be retrieved from the device at any time without
concern of data corruption by a new data ready.
9.6 Register Map
9.6.1 Configuration Registers
The ADS124S0x register map consists of 18, 8-bit registers. These registers are used to configure and control
the device to the desired mode of operation. Access the registers through the serial interface by using the RREG
and WREG register commands. After power-on or reset, the registers default to the initial settings, as shown in
the Default column of Table 25.
Data can be written as a block to multiple registers using a single WREG command. If data are written as a
block, the data of certain registers take effect immediately when data are shifted in. Writing new data to certain
registers results in a restart of conversions that are in progress. The registers that result in a conversion restart
are discussed in the WREG section.
Table 25. Configuration Register Map
ADDR
REGISTER
DEFAULT
00h
ID
xxh
01h
STATUS
80h
02h
INPMUX
01h
03h
PGA
00h
04h
DATARATE
14h
05h
REF
10h
06h
IDACMAG
00h
07h
IDACMUX
FFh
08h
VBIAS
00h
09h
SYS
10h
0Ah
OFCAL0
00h
OFC[7:0]
0Bh
OFCAL1
00h
OFC[15:8]
0Ch
OFCAL2
00h
OFC[23:16]
0Dh
FSCAL0
00h
FSC[7:0]
0Eh
FSCAL1
00h
FSC[15:8]
0Fh
FSCAL2
40h
10h
GPIODAT
00h
11h
GPIOCON
00h
72
BIT 7
BIT 6
BIT 5
BIT 4
BIT 3
BIT 2
RESERVED
FL_POR
RDY
FL_P_RAILP
FL_P_RAILN
FL_N_RAILP
FL_N_RAILN
MUXP[3:0]
CLK
FL_REF_EN[1:0]
FL_RAIL_EN
PSW
VB_LEVEL
VB_AINC
BIT 0
FL_REF_L1
FL_REF_L0
MUXN[3:0]
DELAY[2:0]
G_CHOP
BIT 1
DEV_ID[2:0]
PGA_EN[1:0]
MODE
FILTER
REFP_BUF
REFN_BUF
0
0
VB_AIN5
VB_AIN4
GAIN[2:0]
DR[3:0]
REFSEL[1:0]
REFCON[1:0]
IMAG[3:0]
I2MUX[3:0]
I1MUX[3:0]
SYS_MON[2:0]
VB_AIN3
CAL_SAMP[1:0]
VB_AIN2
VB_AIN1
VB_AIN0
TIMEOUT
CRC
SENDSTAT
FSC[23:16]
DIR[3:0]
0
Submit Documentation Feedback
0
DAT[3:0]
0
0
CON[3:0]
Copyright © 2016–2017, Texas Instruments Incorporated
Product Folder Links: ADS124S06 ADS124S08
�ADS124S06, ADS124S08
www.ti.com
SBAS660C – AUGUST 2016 – REVISED JUNE 2017
9.6.1.1 Device ID Register (address = 00h) [reset = xxh]
Figure 93. Device ID (ID) Register
7
6
5
RESERVED
R-xxh
4
3
2
1
DEV_ID[2:0]
R-xh
0
LEGEND: R = Read only; -n = value after reset; -x = variable
Table 26. Device ID (ID) Register Field Descriptions
Bit
Field
Type
Reset
7:3
RESERVED
R
xxh
Description
Reserved
Values are subject to change without notice
Device identifier
2:0
DEV_ID[2:0]
R
xh
Identifies the model of the device.
000 : ADS124S08 (12 channels, 24 bits)
001 : ADS124S06 (6 channels, 24 bits)
010 : Reserved
011 : Reserved
100 : Reserved
101 : Reserved
110 : Reserved
111 : Reserved
Copyright © 2016–2017, Texas Instruments Incorporated
Product Folder Links: ADS124S06 ADS124S08
Submit Documentation Feedback
73
�ADS124S06, ADS124S08
SBAS660C – AUGUST 2016 – REVISED JUNE 2017
www.ti.com
9.6.1.2 Device Status Register (address = 01h) [reset = 80h]
Figure 94. Device Status (STATUS) Register
7
FL_POR
R/W-1h
6
RDY
R-0h
5
FL_P_RAILP
R-0h
4
FL_P_RAILN
R-0h
3
FL_N_RAILP
R-0h
2
FL_N_RAILN
R-0h
1
FL_REF_L1
R-0h
0
FL_REF_L0
R-0h
LEGEND: R/W = Read/Write; R = Read only; -n = value after reset
Table 27. Device Status (STATUS) Register Field Descriptions
Bit
Field
Type
Reset
Description
POR flag
7
FL_POR
R/W
1h
Indicates a power-on reset (POR) event has occurred.
0 : Register has been cleared and no POR event has occurred.
1 : POR event occurred and has not been cleared. Flag must be cleared by
user register write (default).
Device ready flag
6
RDY
R
0h
Indicates the device has started up and is ready for communication.
0 : ADC ready for communication (default)
1 : ADC not ready
Positive PGA output at positive rail flag (1)
5
FL_P_RAILP
R
0h
Indicates the positive PGA output is within 150 mV of AVDD.
0 : No error (default)
1 : PGA positive output within 150 mV of AVDD
Positive PGA output at negative rail flag (1)
4
FL_P_RAILN
R
0h
Indicates the positive PGA output is within 150 mV of AVSS.
0 : No error (default)
1 : PGA positive output within 150 mV of AVSS
Negative PGA output at positive rail flag (1)
3
FL_N_RAILP
R
0h
Indicates the negative PGA output is within 150 mV of AVDD.
0 : No error (default)
1 : PGA negative output within 150 mV of AVDD
Negative PGA output at negative rail flag (1)
2
FL_N_RAILN
R
0h
Indicates the negative PGA output is within 150 mV of AVSS.
0 : No error (default)
1 : PGA negative output within 150 mV of AVSS
Reference voltage monitor flag, level 1 (2)
1
FL_REF_L1
R
0h
Indicates the external reference voltage is lower than 1/3 of the analog
supply voltage. Can be used to detect an open-excitation lead in a 3-wire
RTD application.
0 : Differential reference voltage ≥ 1/3 · (AVDD – AVSS) (default)
1 : Differential reference voltage < 1/3 · (AVDD – AVSS)
Reference voltage monitor flag, level 0 (2)
0
(1)
(2)
74
FL_REF_L0
R
0h
Indicates the external reference voltage is lower than 0.3 V. Can be used to
indicate a missing or floating external reference voltage.
0 : Differential reference voltage ≥ 0.3 V (default)
1 : Differential reference voltage < 0.3 V
The PGA rail monitors are enabled with the FL_RAIL_EN bit in excitation current register 1 (06h).
The reference monitors are enabled with the FL_REF_EN[1:0] bits of the reference control register (05h).
Submit Documentation Feedback
Copyright © 2016–2017, Texas Instruments Incorporated
Product Folder Links: ADS124S06 ADS124S08
�ADS124S06, ADS124S08
www.ti.com
SBAS660C – AUGUST 2016 – REVISED JUNE 2017
9.6.1.3 Input Multiplexer Register (address = 02h) [reset = 01h]
Figure 95. Input Multiplexer (INPMUX) Register
7
6
5
4
3
MUXP[3:0]
R/W-0h
2
1
0
MUXN[3:0]
R/W-1h
LEGEND: R/W = Read/Write; -n = value after reset
Table 28. Input Multiplexer (INPMUX) Register Field Descriptions
Bit
Field
Type
Reset
Description
Positive ADC input selection
7:4
MUXP[3:0]
R/W
0h
Selects the ADC positive input channel.
0000 : AIN0 (default)
0001 : AIN1
0010 : AIN2
0011 : AIN3
0100 : AIN4
0101 : AIN5
0110 : AIN6 (ADS124S08 only)
0111 : AIN7 (ADS124S08 only)
1000 : AIN8 (ADS124S08 only)
1001 : AIN9 (ADS124S08 only)
1010 : AIN10 (ADS124S08 only)
1011 : AIN11 (ADS124S08 only)
1100 : AINCOM
1101 : Reserved
1110 : Reserved
1111 : Reserved
Negative ADC input selection
3:0
MUXN[3:0]
R/W
1h
Selects the ADC negative input channel.
0000 : AIN0
0001 : AIN1 (default)
0010 : AIN2
0011 : AIN3
0100 : AIN4
0101 : AIN5
0110 : AIN6 (ADS124S08 only)
0111 : AIN7 (ADS124S08 only)
1000 : AIN8 (ADS124S08 only)
1001 : AIN9 (ADS124S08 only)
1010 : AIN10 (ADS124S08 only)
1011 : AIN11 (ADS124S08 only)
1100 : AINCOM
1101 : Reserved
1110 : Reserved
1111 : Reserved
Copyright © 2016–2017, Texas Instruments Incorporated
Product Folder Links: ADS124S06 ADS124S08
Submit Documentation Feedback
75
�ADS124S06, ADS124S08
SBAS660C – AUGUST 2016 – REVISED JUNE 2017
www.ti.com
9.6.1.4 Gain Setting Register (address = 03h) [reset = 00h]
Figure 96. Gain Setting (PGA) Register
7
6
DELAY[2:0]
R/W-0h
5
4
3
2
PGA_EN[1:0]
R/W-0h
1
GAIN[2:0]
R/W-0h
0
LEGEND: R/W = Read/Write; -n = value after reset
Table 29. Gain Setting (PGA) Register Field Descriptions
Bit
Field
Type
Reset
Description
Programmable conversion delay selection
7:5
DELAY[2:0]
R/W
0h
Sets the programmable conversion delay time for the first conversion after a
WREG when a configuration change resets of the digital filter and triggers a
new conversion (1).
000 : 14 · tMOD (default)
001 : 25 · tMOD
010 : 64 · tMOD
011 : 256 · tMOD
100 : 1024 · tMOD
101 : 2048 · tMOD
110 : 4096 · tMOD
111 : 1 · tMOD
PGA enable
4:3
PGA_EN[1:0]
R/W
0h
Enables or bypasses the PGA.
00 : PGA is powered down and bypassed. Enables single-ended
measurements with unipolar supply (Set gain = 1 (2)) (default)
01 : PGA enabled (gain = 1 to 128)
10 : Reserved
11 : Reserved
PGA gain selection
2:0
(1)
(2)
76
GAIN[2:0]
R/W
0h
Configures the PGA gain.
000 : 1 (default)
001 : 2
010 : 4
011 : 8
100 : 16
101 : 32
110 : 64
111 : 128
For details on which bits and registers trigger a new conversion, see the WREG section.
When bypassing the PGA, the user must also set GAIN[2:0] to 000.
Submit Documentation Feedback
Copyright © 2016–2017, Texas Instruments Incorporated
Product Folder Links: ADS124S06 ADS124S08
�ADS124S06, ADS124S08
www.ti.com
SBAS660C – AUGUST 2016 – REVISED JUNE 2017
9.6.1.5 Data Rate Register (address = 04h) [reset = 14h]
Figure 97. Data Rate (DATARATE) Register
7
G_CHOP
R/W-0h
6
CLK
R/W-0h
5
MODE
R/W-0h
4
FILTER
R/W-1h
3
2
1
0
DR[3:0]
R/W-4h
LEGEND: R/W = Read/Write; R = Read only; -n = value after reset
Table 30. Data Rate (DATARATE) Register Field Descriptions
Bit
Field
Type
Reset
Description
Global chop enable
7
G_CHOP
R/W
0h
Enables the global chop function. When enabled, the device automatically
swaps the inputs and takes the average of two consecutive readings to
cancel the offset voltage.
0 : Disabled (default)
1 : Enabled
Clock source selection
6
CLK
R/W
0h
Configures the clock source to use either the internal oscillator or an
external clock.
0 : Internal 4.096-MHz oscillator (default)
1 : External clock
Conversion mode selection
5
MODE
R/W
0h
4
FILTER
R/W
1h
Configures the ADC for either continuous conversion or single-shot
conversion mode.
0 : Continuous conversion mode (default)
1 : Single-shot conversion mode
Digital filter selection
Configures the ADC to use either the sinc3 or the low-latency filter.
0 : Sinc3 filter
1 : Low-latency filter (default)
Data rate selection
3:0
(1)
DR[3:0]
R/W
4h
Configures the output data rate (1).
0000 : 2.5 SPS
0001 : 5 SPS
0010 : 10 SPS
0011 : 16.6 SPS
0100 : 20 SPS (default)
0101 : 50SPS
0110 : 60 SPS
0111 : 100 SPS
1000 : 200 SPS
1001 : 400 SPS
1010 : 800 SPS
1011 : 1000 SPS
1100 : 2000 SPS
1101 : 4000 SPS
1110 : 4000 SPS
1111 : Reserved
Data rates of 60 Hz or less can offer line-cycle rejection; see the 50-Hz and 60-Hz Line Cycle Rejection section for more information.
Copyright © 2016–2017, Texas Instruments Incorporated
Product Folder Links: ADS124S06 ADS124S08
Submit Documentation Feedback
77
�ADS124S06, ADS124S08
SBAS660C – AUGUST 2016 – REVISED JUNE 2017
www.ti.com
9.6.1.6 Reference Control Register (address = 05h) [reset = 10h]
Figure 98. Reference Control (REF) Register
7
6
FL_REF_EN[1:0]
R/W-0h
5
REFP_BUF
R/W-0h
4
REFN_BUF
R/W-1h
3
2
REFSEL[1:0]
R/W-0h
1
0
REFCON[1:0]
R/W-0h
LEGEND: R/W = Read/Write; -n = value after reset
Table 31. Reference Control (REF) Register Field Descriptions
Bit
Field
Type
Reset
Description
Reference monitor configuration
7:6
FL_REF_EN[1:0]
R/W
0h
Enables and configures the reference monitor.
00 : Disabled (default)
01 : FL_REF_L0 monitor enabled, threshold 0.3 V
10 : FL_REF_L0 and FL_REF_L1 monitors enabled, thresholds 0.3 V and
1/3 · (AVDD – AVSS)
11 : FL_REF_L0 monitor and 10-MΩ pull-together enabled, threshold 0.3 V
Positive reference buffer bypass
5
REFP_BUF
R/W
0h
Disables the positive reference buffer. Recommended when V(REFPx) is
close to AVDD.
0 : Enabled (default)
1 : Disabled
Negative reference buffer bypass
4
REFN_BUF
R/W
1h
Disables the negative reference buffer. Recommended when V(REFNx) is
close to AVSS.
0 : Enabled
1 : Disabled (default)
Reference input selection
3:2
REFSEL[1:0]
R/W
0h
Selects the reference input source for the ADC.
00 : REFP0, REFN0 (default)
01 : REFP1, REFN1
10 : Internal 2.5-V reference (1)
11 : Reserved
Internal voltage reference configuration (2)
1:0
(1)
(2)
78
REFCON[1:0]
R/W
0h
Configures the behavior of the internal voltage reference.
00 : Internal reference off (default)
01 : Internal reference on, but powers down in power-down mode
10 : Internal reference is always on, even in power-down mode
11 : Reserved
Disable the reference buffers when the internal reference is selected for measurements.
The internal voltage reference must be turned on to use the IDACs.
Submit Documentation Feedback
Copyright © 2016–2017, Texas Instruments Incorporated
Product Folder Links: ADS124S06 ADS124S08
�ADS124S06, ADS124S08
www.ti.com
SBAS660C – AUGUST 2016 – REVISED JUNE 2017
9.6.1.7 Excitation Current Register 1 (address = 06h) [reset = 00h]
Figure 99. Excitation Current Register 1 (IDACMAG)
7
FL_RAIL_EN
R/W-0h
6
PSW
R/W-0h
5
0
R-0h
4
0
R-0h
3
2
1
0
IMAG[3:0]
R/W-0h
LEGEND: R/W = Read/Write; R = Read only; -n = value after reset
Table 32. Excitation Current Register 1 (IDACMAG) Register Field Descriptions
Bit
Field
Type
Reset
Description
PGA output rail flag enable
7
FL_RAIL_EN
R/W
0h
Enables the PGA output voltage rail monitor circuit.
0 : Disabled (default)
1 : Enabled
Low-side power switch
6
5:4
PSW
R/W
0h
RESERVED
R
0h
Controls the low-side power switch. The low-side power switch opens
automatically in power-down mode.
0 : Open (default)
1 : Closed
Reserved
Always write 0h
IDAC magnitude selection
3:0
IMAG[3:0]
R/W
0h
Selects the value of the excitation current sources. Sets IDAC1 and IDAC2
to the same value.
0000 : Off (default)
0001 : 10 µA
0010 : 50 µA
0011 : 100 µA
0100 : 250 µA
0101 : 500 µA
0110 : 750 µA
0111 : 1000 µA
1000 : 1500 µA
1001 : 2000 µA
1010 - 1111 : Off
Copyright © 2016–2017, Texas Instruments Incorporated
Product Folder Links: ADS124S06 ADS124S08
Submit Documentation Feedback
79
�ADS124S06, ADS124S08
SBAS660C – AUGUST 2016 – REVISED JUNE 2017
www.ti.com
9.6.1.8 Excitation Current Register 2 (address = 07h) [reset = FFh]
Figure 100. Excitation Current Register 2 (IDACMUX)
7
6
5
4
3
2
I2MUX[3:0]
R/W-Fh
1
0
I1MUX[3:0]
R/W-Fh
LEGEND: R/W = Read/Write; -n = value after reset
Table 33. Excitation Current Register 2 (IDACMUX) Register Field Descriptions
Bit
Field
Type
Reset
Description
IDAC2 output channel selection
7:4
I2MUX[3:0]
R/W
Fh
Selects the output channel for IDAC2.
0000 : AIN0
0001 : AIN1
0010 : AIN2
0011 : AIN3
0100 : AIN4
0101 : AIN5
0110 : AIN6 (ADS124S08), REFP1 (ADS124S06)
0111 : AIN7 (ADS124S08), REFN1 (ADS124S06)
1000 : AIN8 (ADS124S08 only)
1001 : AIN9 (ADS124S08 only)
1010 : AIN10 (ADS124S08 only)
1011 : AIN11 (ADS124S08 only)
1100 : AINCOM
1101 - 1111 : Disconnected (default)
IDAC1 output channel selection
3:0
80
I1MUX[3:0]
R/W
Submit Documentation Feedback
Fh
Selects the output channel for IDAC1.
0000 : AIN0
0001 : AIN1
0010 : AIN2
0011 : AIN3
0100 : AIN4
0101 : AIN5
0110 : AIN6 (ADS124S08 only), REFP1 (ADS124S06)
0111 : AIN7 (ADS124S08 only), REFN1 (ADS124S06)
1000 : AIN8 (ADS124S08 only)
1001 : AIN9 (ADS124S08 only)
1010 : AIN10 (ADS124S08 only)
1011 : AIN11 (ADS124S08 only)
1100 : AINCOM
1101 - 1111 : Disconnected (default)
Copyright © 2016–2017, Texas Instruments Incorporated
Product Folder Links: ADS124S06 ADS124S08
�ADS124S06, ADS124S08
www.ti.com
SBAS660C – AUGUST 2016 – REVISED JUNE 2017
9.6.1.9 Sensor Biasing Register (address = 08h) [reset = 00h]
Figure 101. Sensor Biasing (VBIAS) Register
7
VB_LEVEL
R/W-0h
6
VB_AINC
R/W-0h
5
VB_AIN5
R/W-0h
4
VB_AIN4
R/W-0h
3
VB_AIN3
R/W-0h
2
VB_AIN2
R/W-0h
1
VB_AIN1
R/W-0h
0
VB_AIN0
R/W-0h
LEGEND: R/W = Read/Write; -n = value after reset
Table 34. Sensor Biasing (VBIAS) Register Field Descriptions
Bit
Field
Type
Reset
Description
VBIAS level selection
7
VB_LEVEL
R/W
0h
Sets the VBIAS output voltage level. VBIAS is disabled when not connected
to any input.
0 : (AVDD + AVSS) / 2 (default)
1 : (AVDD + AVSS) / 12
AINCOM VBIAS selection (1)
6
VB_AINC
R/W
0h
Enables VBIAS on the AINCOM pin.
0 : VBIAS disconnected from AINCOM (default)
1 : VBIAS connected to AINCOM
AIN5 VBIAS selection (1)
5
VB_AIN5
R/W
0h
Enables VBIAS on the AIN5 pin.
0 : VBIAS disconnected from AIN5 (default)
1 : VBIAS connected to AIN5
AIN4 VBIAS selection (1)
4
VB_AIN4
R/W
0h
Enables VBIAS on the AIN4 pin.
0 : VBIAS disconnected from AIN4 (default)
1 : VBIAS connected to AIN4
AIN3 VBIAS selection (1)
3
VB_AIN3
R/W
0h
Enables VBIAS on the AIN3 pin.
0 : VBIAS disconnected from AIN3 (default)
1 : VBIAS connected to AIN3
AIN2 VBIAS selection (1)
2
VB_AIN2
R/W
0h
Enables VBIAS on the AIN2 pin.
0 : VBIAS disconnected from AIN2 (default)
1 : VBIAS connected to AIN2
AIN1 VBIAS selection (1)
1
VB_AIN1
R/W
0h
Enables VBIAS on the AIN1 pin.
0 : VBIAS disconnected from AIN1 (default)
1 : VBIAS connected to AIN1
AIN0 VBIAS selection (1)
0
(1)
VB_AIN0
R/W
0h
Enables VBIAS on the AIN0 pin.
0 : VBIAS disconnected from AIN0 (default)
1 : VBIAS connected to AIN0
The bias voltage can be selected for multiple analog inputs at the same time.
Copyright © 2016–2017, Texas Instruments Incorporated
Product Folder Links: ADS124S06 ADS124S08
Submit Documentation Feedback
81
�ADS124S06, ADS124S08
SBAS660C – AUGUST 2016 – REVISED JUNE 2017
www.ti.com
9.6.1.10 System Control Register (address = 09h) [reset = 10h]
Figure 102. System Control (SYS) Register
7
6
SYS_MON[2:0]
R/W-0h
5
4
3
CAL_SAMP[1:0]
R/W-2h
2
TIMEOUT
R/W-0h
1
CRC
R/W-0h
0
SENDSTAT
R/W-0h
LEGEND: R/W = Read/Write; -n = value after reset
Table 35. System Control (SYS) Register Field Descriptions
Bit
Field
Type
Reset
Description
System monitor configuration (1)
7:5
SYS_MON[2:0]
R/W
0h
Enables a set of system monitor measurements using the ADC.
000 : Disabled (default)
001 : PGA inputs shorted to (AVDD + AVSS) / 2 and disconnected from
AINx and the multiplexer; gain set by user
010 : Internal temperature sensor measurement; PGA must be enabled
(PGA_EN[1:0] = 01); gain set by user (2)
011 : (AVDD – AVSS) / 4 measurement; gain set to 1 (3)
100 : DVDD / 4 measurement; gain set to 1 (3)
101 : Burn-out current sources enabled, 0.2-µA setting
110 : Burn-out current sources enabled, 1-µA setting
111 : Burn-out current sources enabled, 10-µA setting
Calibration sample size selection
4:3
CAL_SAMP[1:0]
R/W
2h
TIMEOUT
R/W
0h
Configures the number of samples averaged for self and system offset and
system gain calibration.
00 : 1 sample
01 : 4 samples
10 : 8 samples (default)
11 : 16 samples
SPI timeout enable
2
Enables the SPI timeout function.
0 : Disabled (default)
1 : Enabled
CRC enable
1
CRC
R/W
0h
Enables the CRC byte appended to the conversion result. When enabled,
CRC is calculated across the 24-bit conversion result (plus the STATUS
byte if enabled).
0 : Disabled (default)
1 : Enabled
STATUS byte enable
0
(1)
(2)
(3)
82
SENDSTAT
R/W
0h
Enables the STATUS byte prepended to the conversion result.
0 : Disabled (default)
1 : Enabled
With system monitor functions enabled, the AINx multiplexer switches are open for the (AVDD + AVSS) / 2 measurement, the
temperature sensor, and the supply monitors.
When using the internal temperature sensor, gain must be 4 or less to keep the measurement within the PGA input voltage range.
The PGA gain is automatically set to 1 when the supply monitors are enabled, regardless of the setting in GAIN[2:0].
Submit Documentation Feedback
Copyright © 2016–2017, Texas Instruments Incorporated
Product Folder Links: ADS124S06 ADS124S08
�ADS124S06, ADS124S08
www.ti.com
SBAS660C – AUGUST 2016 – REVISED JUNE 2017
9.6.1.11 Offset Calibration Register 1 (address = 0Ah) [reset = 00h]
Figure 103. Offset Calibration Register 1 (OFCAL0)
7
6
5
4
3
2
1
0
OFC[7:0]
R/W-00h
LEGEND: R/W = Read/Write; -n = value after reset
Table 36. Offset Calibration Register 1 (OFCAL0) Register Field Descriptions
Bit
Field
Type
Reset
Description
7:0
OFC[7:0]
R/W
00h
Bits [7:0] of the offset calibration value.
9.6.1.12 Offset Calibration Register 2 (address = 0Bh) [reset = 00h]
Figure 104. Offset Calibration Register 2 (OFCAL1)
7
6
5
4
3
2
1
0
OFC[15:8]
R/W-00h
LEGEND: R/W = Read/Write; -n = value after reset
Table 37. Offset Calibration Register 2 (OFCAL1) Register Field Descriptions
Bit
Field
Type
Reset
Description
7:0
OFC[15:8]
R/W
00h
Bits [15:8] of the offset calibration value.
9.6.1.13 Offset Calibration Register 3 (address = 0Ch) [reset = 00h]
Figure 105. Offset Calibration Register 3 (OFCAL2)
7
6
5
4
3
2
1
0
OFC[23:16]
R/W-00h
LEGEND: R/W = Read/Write; -n = value after reset
Table 38. Offset Calibration Register 3 (OFCAL2) Register Field Descriptions
Bit
Field
Type
Reset
Description
7:0
OFC[23:16]
R/W
00h
Bits [23:16] of the offset calibration value.
Copyright © 2016–2017, Texas Instruments Incorporated
Product Folder Links: ADS124S06 ADS124S08
Submit Documentation Feedback
83
�ADS124S06, ADS124S08
SBAS660C – AUGUST 2016 – REVISED JUNE 2017
www.ti.com
9.6.1.14 Gain Calibration Register 1 (address = 0Dh) [reset = 00h]
Figure 106. Gain Calibration Register 1 (FSCAL0)
7
6
5
4
3
2
1
0
FSC[7:0]
R/W-00h
LEGEND: R/W = Read/Write; -n = value after reset
Table 39. Gain Calibration Register 1 (FSCAL0) Register Field Descriptions
Bit
Field
Type
Reset
Description
7:0
FSC[7:0]
R/W
00h
Bits [7:0] of the gain calibration value.
9.6.1.15 Gain Calibration Register 2 (address = 0Eh) [reset = 00h]
Figure 107. Gain Calibration Register 2 (FSCAL1)
7
6
5
4
3
2
1
0
FSC[15:8]
R/W-00h
LEGEND: R/W = Read/Write; -n = value after reset
Table 40. Gain Calibration Register 2 (FSCAL1) Field Descriptions
Bit
Field
Type
Reset
Description
7:0
FSC[15:8]
R/W
00h
Bits [15:8] of the gain calibration value.
9.6.1.16 Gain Calibration Register 3 (address = 0Fh) [reset = 40h]
Figure 108. Gain Calibration Register 3 (FSCAL2)
7
6
5
4
3
2
1
0
FSC[23:16]
R/W-40h
LEGEND: R/W = Read/Write; -n = value after reset
Table 41. Gain Calibration Register 3 (FSCAL2) Field Descriptions
84
Bit
Field
Type
Reset
Description
7:0
FSC[23:16]
R/W
40h
Bits [23:16] of the gain calibration value.
Submit Documentation Feedback
Copyright © 2016–2017, Texas Instruments Incorporated
Product Folder Links: ADS124S06 ADS124S08
�ADS124S06, ADS124S08
www.ti.com
SBAS660C – AUGUST 2016 – REVISED JUNE 2017
9.6.1.17 GPIO Data Register (address = 10h) [reset = 00h]
Figure 109. GPIO Data (GPIODAT) Register
7
6
5
4
3
2
DIR[3:0]
R/W-0h
1
0
DAT[3:0]
R/W-0h
LEGEND: R/W = Read/Write; -n = value after reset
Table 42. GPIO Data (GPIODAT) Register Field Descriptions
Bit
Field
Type
Reset
Description
GPIO direction
7:4
DIR[3:0]
R/W
Configures the selected GPIO as an input or output.
0 : GPIO[x] configured as output (default)
1 : GPIO[x] configured as input
0h
GPIO data
3:0
DAT[3:0]
R/W
Contains the data of the GPIO inputs or outputs.
0 : GPIO[x] is low (default)
1 : GPIO[x] is high
0h
9.6.1.18 GPIO Configuration Register (address = 11h) [reset = 00h]
Figure 110. GPIO Configuration Register
7
0
R-0h
6
0
R-0h
5
0
R-0h
4
0
R-0h
3
2
1
0
CON[3:0]
R/W-0h
LEGEND: R/W = Read/Write; R = Read only; -n = value after reset
Table 43. GPIO Configuration (GPIOCON) Register Field Descriptions
Bit
Field
Type
Reset
7:4
RESERVED
R
0h
Description
Reserved
Always write 0h
GPIO pin configuration
3:0
(1)
CON[3:0]
R/W
0h
Configures the GPIO[x] pin as an analog input or GPIO. CON[x]
corresponds to the GPIO[x] pin.
0 : GPIO[x] configured as analog input (default) (1)
1 : GPIO[x] configured as GPIO
On the ADS124S06, the GPIO pins default as disabled. Set the CON[3:0] bits to enable the respective GPIO pins.
Copyright © 2016–2017, Texas Instruments Incorporated
Product Folder Links: ADS124S06 ADS124S08
Submit Documentation Feedback
85
�ADS124S06, ADS124S08
SBAS660C – AUGUST 2016 – REVISED JUNE 2017
www.ti.com
10 Application and Implementation
NOTE
Information in the following applications sections is not part of the TI component
specification, and TI does not warrant its accuracy or completeness. TI’s customers are
responsible for determining suitability of components for their purposes. Customers should
validate and test their design implementation to confirm system functionality.
10.1 Application Information
The ADS124S06 and ADS124S08 are precision, 24-bit, ΔΣ ADCs that offer many integrated features to simplify
the measurement of the most common sensor types (including various types of temperature, flow, and bridge
sensors). Primary considerations when designing an application with the ADS124S0x include analog input
filtering, establishing an appropriate reference, and setting the absolute input voltage for the internal PGA.
Connecting and configuring the serial interface appropriately is another concern. These considerations are
discussed in the following sections.
10.1.1 Serial Interface Connections
The principle serial interface connections for the ADS124S0x are shown in Figure 111.
21
20
19
18
CLK
GPIO3/AIN11
22
RESET
GPIO2/AIN10
23
GPIO1/AIN9
24
GPIO0/AIN8
REFOUT
REFCOM
1 PF
17
3.3 V
47
NC
5V
25
DVDD
GPIO
16
47
26
AVDD
IOVDD
15
GPIO/IRQ
0.1 PF
330 nF
47
27
DGND
AVSS
14
MISO
47
28
DRDY
AVSS-SW
13
SCLK
47
REFN0
29
DOUT/DRDY
12
REFP0
30
SCLK
11
MOSI
Microcontroller
with SPI
47
GPIO
47
REFN1/AIN7
REFP1/AIN6
31
DIN
32
CS
10
GPIO
3.3 V
9
DVDD
5
AIN5
AIN4
AIN3
AIN2
6
7
8
0.1 PF
START/SYNC
4
AIN0
3
AIN1
2
AINCOM
DVSS
1
Figure 111. Serial Interface Connections
Most microcontroller SPI peripherals can interface with the ADS124S0x. The interface operates in SPI mode 1
where CPOL = 0 and CPHA = 1. In SPI mode 1, SCLK idles low and data are launched or changed only on
SCLK rising edges; data are latched or read by the master and slave on SCLK falling edges. Details of the SPI
communication protocol employed by the devices are found in the Serial Interface section.
Place 47-Ω resistors in series with all digital input and output pins (CS, SCLK, DIN, DOUT/DRDY, and DRDY).
This resistance smooths sharp transitions, suppresses overshoot, and offers some overvoltage protection. Care
must be taken to meet all SPI timing requirements because the additional resistors interact with the bus
capacitances present on the digital signal lines.
86
Submit Documentation Feedback
Copyright © 2016–2017, Texas Instruments Incorporated
Product Folder Links: ADS124S06 ADS124S08
�ADS124S06, ADS124S08
www.ti.com
SBAS660C – AUGUST 2016 – REVISED JUNE 2017
Application Information (continued)
10.1.2 Analog Input Filtering
Analog input filtering serves two purposes: first, to limit the effect of aliasing during the sampling process and
second, to reduce external noise from being a part of the measurement.
As with any sampled system, aliasing can occur if proper antialias filtering is not in place. Aliasing occurs when
frequency components are present in the input signal that are higher than half the sampling frequency of the
ADC (also known as the Nyquist frequency). These frequency components are folded back and show up in the
actual frequency band of interest below half the sampling frequency. Note that inside a ΔΣ ADC, the input signal
is oversampled at the modulator frequency, fMOD and not at the output data rate. The filter response of the digital
filter repeats at multiples of fMOD, as shown in Figure 112. Signals or noise up to a frequency where the filter
response repeats are attenuated to a certain amount by the digital filter depending on the filter architecture. Any
frequency components present in the input signal around the modulator frequency or multiples thereof are not
attenuated and alias back into the band of interest, unless attenuated by an external analog filter.
Magnitude
Sensor
Signal
Unwanted
Signals
Unwanted
Signals
Output
Data Rate
fMOD/2
fMOD
Frequency
fMOD
Frequency
fMOD
Frequency
Magnitude
Digital Filter
Aliasing of
Unwanted Signals
Output
Data Rate
fMOD/2
Magnitude
External
Antialiasing Filter
Roll-Off
Output
Data Rate
fMOD/2
Figure 112. Effect of Aliasing
Copyright © 2016–2017, Texas Instruments Incorporated
Product Folder Links: ADS124S06 ADS124S08
Submit Documentation Feedback
87
�ADS124S06, ADS124S08
SBAS660C – AUGUST 2016 – REVISED JUNE 2017
www.ti.com
Application Information (continued)
Many sensor signals are inherently band limited; for example, the output of a thermocouple has a limited rate of
change. In this case, the sensor signal does not alias back into the pass band when using a ΔΣ ADC. However,
any noise pick-up along the sensor wiring or the application circuitry can potentially alias into the pass band.
Power line-cycle frequency and harmonics are one common noise source. External noise can also be generated
from electromagnetic interference (EMI) or radio frequency interference (RFI) sources, such as nearby motors
and cellular phones. Another noise source typically exists on the printed circuit board (PCB) itself in the form of
clocks and other digital signals. Analog input filtering helps remove unwanted signals from affecting the
measurement result.
A first-order resistor-capacitor (RC) filter is (in most cases) sufficient to either eliminate aliasing, or to reduce the
effect of aliasing to a level below the noise floor of the sensor. Ideally, any signal beyond fMOD / 2 is attenuated to
a level below the noise floor of the ADC. The digital filter of the ADS124S0x attenuates signals to a certain
degree, as illustrated in the filter response plots in the Digital Filter section. In addition, noise components are
usually smaller in magnitude than the actual sensor signal. Therefore, using a first-order RC filter with a cutoff
frequency set at the output data rate or 10 times higher is generally a good starting point for a system design.
Internal to the device, prior to the PGA inputs, is an EMI filter; see Figure 50. The cutoff frequency of this filter is
approximately 40 MHz and helps reject high-frequency interference.
10.1.3 External Reference and Ratiometric Measurements
The full-scale range of the ADS124S0x is defined by the reference voltage and the PGA gain
(FSR = ±VREF / Gain). An external reference can be used instead of the integrated 2.5-V reference to adapt the
FSR to the specific system needs. An external reference must be used if VIN > 2.5 V. For example, an external
5-V reference and an AVDD = 5 V are required in order to measure a single-ended signal that can swing
between 0 V and 5 V.
The reference inputs of the device also allow the implementation of ratiometric measurements. In a ratiometric
measurement, the same excitation source that is used to excite the sensor is also used to establish the reference
for the ADC. As an example, a simple form of a ratiometric measurement uses the same current source to excite
both the resistive sensor element (such as an RTD) and another resistive reference element that is in series with
the element being measured. The voltage that develops across the reference element is used as the reference
source for the ADC. Because current noise and drift are common to both the sensor measurement and the
reference, these components cancel out in the ADC transfer function. The output code is only a ratio of the
sensor element and the value of the reference resistor. The value of the excitation current source itself is not part
of the ADC transfer function.
The example in the Typical Application section describes a system that uses a ratiometric measurement. One
excitation current source is used to drive a reference resistor and an RTD. The ADC measurement represents a
ratiometric measurement between the RTD value and a known reference resistor value.
10.1.4 Establishing a Proper Input Voltage
The ADS124S0x can be used to measure various types of input signal configurations: single-ended, pseudodifferential, and fully-differential signals (which can be either unipolar or bipolar). However, configuring the device
properly for the respective signal type is important.
Signals where the negative analog input is fixed and referenced to analog ground (VAINN = 0 V) are commonly
called single-ended signals. The input voltage of a single-ended signal consequently varies between 0 V and VIN.
If the PGA is disabled and bypassed, the input voltage of the ADS124S08 can be as low as 50 mV below AVSS
and as large as 50 mV above AVDD. Therefore, set the PGA_EN bits to 10 in the gain setting register (03h) to
measure single-ended signals when a unipolar analog supply is used (AVSS = 0 V). Only a gain of 1 is possible
in this configuration. Measuring a 0-mA to 20-mA or 4-mA to 20-mA signal across a load resistor of 100 Ω
referenced to GND is a typical example. The ADS124S0x can directly measure the signal across the load
resistor using a unipolar supply, the internal 2.5-V reference, and gain = 1 when the PGA is bypassed.
If gain is needed to measure a single-ended signal, the PGA must be enabled. In this case, a bipolar supply is
required for the ADS124S0x to meet the input voltage requirement of the PGA. Signals where the negative
analog input (AINN) is fixed at a voltage other the 0 V are referred to as pseudo-differential signals. The input
voltage of a pseudo-differential signal varies between VAINN and VAINN + VIN.
88
Submit Documentation Feedback
Copyright © 2016–2017, Texas Instruments Incorporated
Product Folder Links: ADS124S06 ADS124S08
�ADS124S06, ADS124S08
www.ti.com
SBAS660C – AUGUST 2016 – REVISED JUNE 2017
Application Information (continued)
Fully-differential signals in contrast are defined as signals having a constant common-mode voltage where the
positive and negative analog inputs swing 180° out-of-phase but have the same amplitude.
The ADS124S0x can measure pseudo-differential and fully-differential signals both with the PGA enabled or
bypassed. However, the PGA must be enabled in order to measure any input with a gain greater than 1. The
input voltage must meet the input and output voltage restrictions of the PGA, as explained in the PGA InputVoltage Requirements section when the PGA is enabled. Setting the input voltage at or near (AVSS + AVDD) / 2
in most cases satisfies the PGA input voltage requirements.
Signals where both the positive and negative inputs are always ≥ 0 V are called unipolar signals. These signals
can in general be measured with the ADS124S0x using a unipolar analog supply (AVSS = 0 V). As mentioned
previously, the PGA must be bypassed in order to measure single-ended, unipolar signals when using a unipolar
supply.
A signal is called bipolar when either the positive or negative input can swing below 0 V. A bipolar analog supply
(such as AVDD = 2.5 V, AVSS = –2.5 V) is required in order to measure bipolar signals with the ADS124S0x. A
typical application task is measuring a single-ended, bipolar, ±10-V signal where AINN is fixed at 0 V and AINP
swings between –10 V and 10 V. The ADS124S0x cannot directly measure this signal because the 10-V signal
exceeds the analog power-supply limits. However, one possible solution is to use a bipolar analog supply (AVDD
= 2.5 V, AVSS = –2.5 V), gain = 1, and a resistor divider in front of the ADS124S0x. The resistor divider must
divide the voltage down to ≤ ±2.5 V to be able to measure the voltage using the internal 2.5-V reference.
10.1.5 Unused Inputs and Outputs
To minimize leakage currents on the analog inputs, leave unused analog and reference inputs floating, or
connect the inputs to mid-supply or to AVDD. Connecting unused analog or reference inputs to AVSS is possible
as well, but can yield higher leakage currents than the previously mentioned options. REFN0 is an exception; this
pin can be accidently shorted to AVSS through the internal low-side switch. Leave the REFN0 pin floating when
not in use or tie the pin to AVSS.
GPIO pins operate on levels based on the analog supply. Do not float GPIO pins that are configured as digital
inputs. Tie unused GPIO pins that are configured as digital inputs to the appropriate levels, AVDD or AVSS,
including when in power-down mode. Tie unused GPIO output pins to AVSS through a pulldown resistor and set
the output to 0 in the GPIO data register. For unused GPIO pins on the ADS124S06, leave the GPIOCON
register set to the default register values and connect these GPIO pins in the same manner as for an unused
analog input.
Do not float unused digital inputs; excessive power-supply leakage current can result. Tie all unused digital
inputs to the appropriate levels, IOVDD or DGND, even when in power-down mode. Connections for unused
digital inputs are listed below.
• Tie the CS pin to DGND if CS is not used
• Tie the CLK pin to DGND if the internal oscillator is used
• Tie the START/SYNC pin to DGND to control conversions by commands
• Tie the RESET pin to IOVDD if the RESET pin is not used
• If the DRDY output is not used, leave the DRDY pin unconnected or tie the DRDY pin to IOVDD using a weak
pullup resistor
Copyright © 2016–2017, Texas Instruments Incorporated
Product Folder Links: ADS124S06 ADS124S08
Submit Documentation Feedback
89
�ADS124S06, ADS124S08
SBAS660C – AUGUST 2016 – REVISED JUNE 2017
www.ti.com
Application Information (continued)
10.1.6 Pseudo Code Example
The following list shows a pseudo code sequence with the required steps to set up the device and the
microcontroller that interfaces to the ADC in order to take subsequent readings from the ADS124S0x in
continuous conversion mode. The dedicated DRDY pin is used to indicate availability of new conversion data.
Power-up so that all supplies reach minimum operating levels;
Delay for a minimum of 2.2 ms to allow power supplies to settle and power-up reset to complete;
Configure the SPI interface of the microcontroller to SPI mode 1 (CPOL = 0, CPHA =1);
If the CS pin is not tied low permanently, configure the microcontroller GPIO connected to CS as an
output;
Configure the microcontroller GPIO connected to the DRDY pin as a falling edge triggered interrupt
input;
Set CS to the device low;
Delay for a minimum of td(CSSC);
Send the RESET command (06h) to make sure the device is properly reset after power-up; //Optional
Delay for a minimum of 4096 · tCLK;
Read the status register using the RREG command to check that the RDY bit is 0; //Optional
Clear the FL_POR flag by writing 00h to the status register; //Optional
Write the respective register configuration with the WREG command;
For verification, read back all configuration registers with the RREG command;
Send the START command (08h) to start converting in continuous conversion mode;
Delay for a minimum of td(SCCS);
Clear CS to high (resets the serial interface);
Loop
{
Wait for DRDY to transition low;
Take CS low;
Delay for a minimum of td(CSSC);
Send the RDATA command;
Send 24 SCLK rising edges to read out conversion data on DOUT/DRDY;
Delay for a minimum of td(SCCS);
Clear CS to high;
}
Take CS low;
Delay for a minimum of td(CSSC);
Send the STOP command (0Ah) to stop conversions and put the device in standby mode;
Delay for a minimum of td(SCCS);
Clear CS to high;
90
Submit Documentation Feedback
Copyright © 2016–2017, Texas Instruments Incorporated
Product Folder Links: ADS124S06 ADS124S08
�ADS124S06, ADS124S08
www.ti.com
SBAS660C – AUGUST 2016 – REVISED JUNE 2017
10.2 Typical Application
Figure 113 shows a fault-protected, filtered, 3-wire RTD application circuit with hardware-based, lead-wire
compensation. Two IDAC current sources provide the lead-wire compensation. One IDAC current source
(IDAC1) provides excitation to the RTD element. The ADC reference voltage (pins AIN6 and AIN7) is derived
from the voltage across resistor RREF sourcing the same IDAC1 current, providing ratiometric cancellation of
current-source drift. The other current source (IDAC2) has the same current setting, providing cancellation of
lead-wire resistance by generating a voltage drop across lead-wire resistance RLEAD2 equal to the voltage drop of
RLEAD1. Because the RRTD voltage is measured differentially at ADC pins AIN1 and AIN2, the voltages across the
lead wire resistance cancel. Resistor RBIAS level-shifts the RTD signal to within the ADC specified input range.
The current sources are provided by two additional pins (AIN5 and AIN3) that connect to the RTD through
blocking diodes. The additional pins are used to route the RTD excitation currents around the input filter
resistors, avoiding the voltage drop otherwise caused by the filter resistors RF1 and RF4. The diodes protect the
ADC inputs in the event of a miswired connection. The input filter resistors limit the input fault currents flowing
into the ADC.
3.3 V
5V
0.1 PF
330 nF
IIDAC1
RF4
AVDD
IDAC1
AIN5
(IDAC1)
AVDD
RF3
ADS124S08
500 A
AIN6
REFOUT
2.5-V
Reference
Reference
Mux
CDIF2
REFCOM
Reference
Detection
Reference
Buffers
3-Wire RTD
RF2
CCM2
AIN1
(AINP)
CDIF1
RRTD
RLEAD2
RF1
Input
Mux
24-Bit
û ADC
PGA
AIN2
Digital
Filter
(AINN)
Serial
Interface
and
Control
CCM1
IIDAC2
AIN3
(IDAC2)
IDAC2
START/SYNC
RESET
CS
DIN
DOUT/DRDY
SCLK
DRDY
PGA Rail
Detection
AVDD
4.096-MHz
Oscillator
500 A
AVSS-SW
RLEAD3
1 PF
AIN7
(REFN1)
CCM3
RLEAD1
IOVDD
CCM4
(REFP1)
RREF
DVDD
AVSS
DGND
CLK
IIDAC1 + IIDAC2
Copyright © 2017, Texas Instruments Incorporated
RBIAS
Figure 113. 3-Wire RTD Application
10.2.1 Design Requirements
Table 44 shows the design requirements of the 3-wire RTD application.
Table 44. Design Requirements
(1)
DESIGN PARAMETER
VALUE
ADC supply voltage
4.75 V (minimum)
RTD sensor type
3-wire Pt100
RTD resistance range
20 Ω to 400 Ω
RTD lead resistance range
0 Ω to 10 Ω
RTD self heating
1 mW
Accuracy (1)
±0.05 Ω
TA = 25°C. After offset and full-scale calibration.
Copyright © 2016–2017, Texas Instruments Incorporated
Product Folder Links: ADS124S06 ADS124S08
Submit Documentation Feedback
91
�ADS124S06, ADS124S08
SBAS660C – AUGUST 2016 – REVISED JUNE 2017
www.ti.com
10.2.2 Detailed Design Procedure
The key considerations in the design of a 3-wire RTD circuit are the accuracy, the lead wire compensation, and
the sensor self-heating. As the design values of Table 45 show, several values of excitation currents are
available. The resolution is expressed in units of noise-free resolution (NFR). Noise-free resolution is resolution
with no code flicker. The selection of excitation currents trades off resolution against sensor self-heating. In
general, measurement resolution improves with increasing excitation current. Increasing the excitation current
beyond 1000 µA results in no further improvement in resolution for this example circuit. The design procedure is
based on a 500-µA excitation current, because this level of current results in very low sensor self-heating
(0.4 mW).
Table 45. RTD Circuit Design Parameters
IIDAC
(µA)
NFR
(bits)
PRTD
(mW)
VRTD
(V)
Gain
(V/V)
VREFMIN (1)
(V)
VREF (2)
(V)
RREF
(kΩ)
VAINNLIM (3)
(V)
VAINPLIM (4)
(V)
RBIAS
(kΩ)
VRTDN (5)
(V)
VRTDP (6)
(V)
VIDAC1 (7)
(V)
50
16.8
0.001
0.02
32
0.64
0.70
18
0.6
4.1
7.10
0.7
0.7
1.9
100
17.8
0.004
0.04
32
1.28
1.41
14.1
0.9
3.8
5.10
1.0
1.1
2.8
250
18.8
0.025
0.10
16
1.60
1.76
7.04
1.1
3.7
2.30
1.2
1.3
3.3
500
19.1
0.100
0.20
8
1.60
1.76
3.52
1.0
3.8
1.10
1.1
1.3
3.4
750
18.9
0.225
0.30
4
1.20
1.32
1.76
0.8
4.0
0.57
0.9
1.2
2.8
1000
19.3
0.400
0.40
4
1.60
1.76
1.76
0.9
3.9
0.50
1.0
1.4
3.5
1500
19.1
0.900
0.60
2
1.20
1.32
0.88
0.6
4.2
0.23
0.7
1.3
3.0
2000
18.3
1.600
0.80
1
0.80
0.90
0.45
0.3
4.5
0.10
0.4
1.2
2.4
(1)
(2)
(3)
(4)
(5)
(6)
(7)
VREFMIN is the minimum reference voltage required by the design.
VREF is the design target reference voltage allowing for 10% overrange.
VAINNLIM is the absolute minimum input voltage required by the ADC.
VAINPLIM is the absolute maximum input voltage required by the ADC.
VRTDN is the design target negative input voltage.
VRTDP is the design target positive input voltage.
VIDAC1 is the design target IDAC1 loop voltage.
Initially, RLEAD1 and RLEAD2 are considered to be 0 Ω. Route the IDAC1 current through the external reference
resistor, RREF. IDAC1 generates the ADC reference voltage, VREF, across the reference resistor. This voltage is
defined by Equation 12:
VREF = IIDAC1 · RREF
(12)
Route the second current (IDAC2) to the second RTD lead.
Program the IDAC value by using the IDACMAG register; however, only the IDAC1 current flows through the
reference resistor and RTD. The IDAC1 current excites the RTD to produce a voltage proportional to the RTD
resistance. The RTD voltage is defined by Equation 13:
VRTD = RRTD · IIDAC1
(13)
The ADC amplifies the RTD signal voltage (VRTD) and measures the resulting voltage against the reference
voltage to produce a proportional digital output code, as shown in Equation 14 through Equation 16.
Code ∝ VRTD · Gain / VREF
Code ∝ (RRTD · IIDAC1) · Gain / (IIDAC1 · RREF)
Code ∝ (RRTD · Gain) / RREF
(14)
(15)
(16)
As shown in Equation 16, the RTD measurement depends on the value of the RTD, the PGA gain, and the
reference resistor RREF, but not on the IDAC1 value. Therefore, the absolute accuracy and temperature drift of
the excitation current does not matter.
The second excitation current (IDAC2) provides a second voltage drop across the second RTD lead resistance,
RLEAD2. The second voltage drop compensates the voltage drop caused by IDAC1 and RLEAD1. The leads of a 3wire RTD typically have the same length; therefore, the lead resistance is typically identical. Taking the lead
resistance into account (RLEADx ≠ 0), the differential voltage (VIN) across ADC inputs AIN8 and AIN9 is shown in
Equation 17:
VIN = IIDAC1 · (RRTD + RLEAD1) – IIDAC2 · RLEAD2
(17)
If RLEAD1 = RLEAD2 and IIDAC1 = IIDAC2, the expression for VIN reduces to Equation 18:
VIN = IIDAC1 · RRTD
92
Submit Documentation Feedback
(18)
Copyright © 2016–2017, Texas Instruments Incorporated
Product Folder Links: ADS124S06 ADS124S08
�ADS124S06, ADS124S08
www.ti.com
SBAS660C – AUGUST 2016 – REVISED JUNE 2017
In other words, the measurement error resulting from the voltage drop across the RTD lead resistance is
compensated as long as the lead resistance values and the IDAC values are matched.
Using Equation 13, the value of RTD resistance (400 Ω, maximum) and the excitation current (500 µA) yields an
RTD voltage of VRTD = 500 µA · 400 Ω = 0.2 V. Use the maximum gain of 8 in order to limit the corresponding
loop voltage of IDAC1. Gain = 8 requires a minimum reference voltage VREFMIN = 0.2 V · 8 = 1.6 V. To provide
margin for the ADC operating range, increase the target reference voltage by 10% (VREF = 1.6 V · 1.1 = 1.76 V).
Calculate the value of the reference resistor, as shown in Equation 19:
RREF = VREF / IIDAC1 = 1.76 V / 500 µA = 3.52 kΩ
(19)
For this example application, 3.5 kΩ is chosen for RREF. For best results, use a precision reference resistor RREF
with a low temperature drift (< 10 ppm/°C). Any change in RREF is reflected in the measurement as a gain error.
The next step in the design is determining the value of the RBIAS resistor, in order to level shift the RTD voltage to
meet the ADC absolute input-voltage specification. The required level-shift voltage is determined by calculating
the minimum absolute voltage (VAINNLIM) as shown in Equation 20:
AVSS + 0.15 + VRTDMAX · (Gain – 1) / 2 ≤ VAINNLIM
where
•
•
•
VRTDMAX = maximum differential RTD voltage = 0.2 V
Gain = 8
AVSS = 0 V
(20)
The result of the equation requires a minimum absolute input voltage (VRTDN) > 0.85 V. Therefore, the RTD
voltage must be level shifted by a minimum of 0.85 V. To meet this requirement, a target level-shift value of 1 V
is chosen to provide extra margin. Calculate the value of RBIAS as shown in Equation 21:
RBIAS= VAINN / (IIDAC1+ IIDAC2) = 1 V / ( 2 · 500 µA) = 1 kΩ
(21)
After the level-shift voltage is determined, verify that the positive RTD voltage (VRTDP) is less than the maximum
absolute input voltage (VAINPLIM), as shown in Equation 22:
VAINPLIM ≤ AVDD – 0.15 – VRTDMAX · (Gain – 1) / 2
where
•
•
•
VRTDMAX = maximum differential RTD voltage = 0.2 V
Gain = 8
AVDD = 4.75 V (minimum)
(22)
Solving Equation 22 results in a required VRTDP of less than 3.9 V. Calculate the VRTDP input voltage by
Equation 23:
VAINP = VRTDN + IIDAC1 · (RRTD + RLEAD1) = 1 V + 500 µA · (400 Ω + 10 Ω) = 1.2 V
(23)
Because 1.2 V is less than the 3.9-V maximum input voltage limit, the absolute positive and negative RTD
voltages are within the ADC specified input range.
The next step in the design is to verify that the IDACs have enough voltage headroom (compliance voltage) to
operate. The loop voltage of the excitation current must be less than the supply voltage minus the specified IDAC
compliance voltage. Calculate the voltage drop developed across each IDAC current path to AVSS. In this circuit,
IDAC1 has the largest voltage drop developed across its current path. The IDAC1 calculation is sufficient to
satisfy IDAC2 because the IDAC2 voltage drop is always less than IDAC1 voltage drop. The sum of voltages in
the IDAC1 loop is shown in Equation 24:
VIDAC1 = [(IIDAC1 + IIDAC2) · (RLEAD3 + RBIAS)] + [IIDAC1 · (RRTD + RLEAD1 + RREF)] + VD
where
•
VD = external blocking diode voltage
(24)
The equation results in a loop voltage of VIDAC1 = 3.0 V. The worst-case current source compliance voltage is:
(AVDD – 0.4 V) = (4.75 V – 0.4 V) = 4.35 V. The VIDAC1 loop voltage is less than the specified current source
compliance voltage (3.0 V < 4.35 V).
Copyright © 2016–2017, Texas Instruments Incorporated
Product Folder Links: ADS124S06 ADS124S08
Submit Documentation Feedback
93
�ADS124S06, ADS124S08
SBAS660C – AUGUST 2016 – REVISED JUNE 2017
www.ti.com
Many applications benefit from using an analog filter at the inputs to remove noise and interference from the
signal. Filter components are placed on the ADC inputs (RF1, RF2, CDIF1, CCM1, and CCM2), as well as on the
reference inputs (RF3, RF4, CDIF2, CCM3, and CCM4). The filters remove both differential and common-mode noise.
The application shows a differential input noise filter formed by RF1, RF2 and CDIF1, with additional differential
mode capacitance provided by the common-mode filter capacitors, CCM1 and CCM2. Calculate the differential
–3-dB cutoff frequency as shown in Equation 25:
fDIF = 1 / [2π · (RF1 + RF2) · (CDIF1 + CCM1|| CCM2)]
(25)
The common-mode noise filter is formed by components RF1, RF2, CCM1, and CCM2. Calculate the common-mode
signal –3-dB cutoff frequency, as shown in Equation 26:
fCM = 1 / (2π · RF1 · CCM1) = 1 / (2π · RF2 · CCM2)
(26)
Mismatches in the common-mode filter components convert common-mode noise into differential noise. To
reduce the effect of mismatch, use a differential mode filter with a corner frequency that is at least 10 times lower
than the common-mode filter corner frequency. The low-frequency differential filter removes the common-mode
converted noise. The filter resistors (RFx) also serve as current-limiting resistors. These resistors limit the current
into the analog inputs (AINx) of the device to safe levels when an overvoltage occurs on the inputs.
Filter resistors lead to an offset voltage error due to the dc input current leakage flowing into and out of the
device. Remove this voltage error by system offset calibration. Resistor values that are too large generate
excess thermal noise and degrade the overall noise performance. The recommended range of the filter resistor
values is 100 Ω to 10 kΩ. The properties of the capacitors are important because the capacitors are connected to
the signal; use high-quality C0G ceramics or film-type capacitors.
For consistent noise performance across the full range of RTD measurements, match the corner frequencies of
the input and reference filter. See the RTD Ratiometric Measurements and Filtering Using the ADS1148 and
ADS1248 Application Report (SBAA201) for detailed information on matching the input and reference filter.
10.2.2.1 Register Settings
The register settings for this design are shown in Table 46.
Table 46. Register Settings
REGISTER
NAME
SETTING
02h
INPMUX
12h
Select AINP = AIN1 and AINN = AIN2
03h
PGA
0Bh
PGA enabled, PGA Gain = 8
04h
DATARATE
14h
Continuous conversion mode, low-latency filter, 20-SPS data rate
05h
REF
06h
Positive and negative reference buffers enabled, REFP1 and
REFN1 reference inputs selected, internal reference always on
06h
IDACMAG
05h
IDAC magnitude set to 500 µA
07h
IDACMUX
35h
IDAC2 set to AIN3, IDAC1 set to AIN5
08h
VBIAS
00h
09h
SYS
0Ah
94
10h
(1)
xxh
0Bh
OFCAL1
xxh
0Ch
OFCAL2
xxh
0Dh
(1)
OFCAL0
FSCAL0
DESCRIPTION
(1)
xxh
0Eh
FSCAL1
0Fh
FSCAL2
xxh
xxh
10h
GPIODAT
00h
11h
GPIOCON
00h
A two-point offset and gain calibration removes errors from the RREF tolerance. The results are used for the OFC and FSC registers.
Submit Documentation Feedback
Copyright © 2016–2017, Texas Instruments Incorporated
Product Folder Links: ADS124S06 ADS124S08
�ADS124S06, ADS124S08
www.ti.com
SBAS660C – AUGUST 2016 – REVISED JUNE 2017
10.2.3 Application Curves
To test the accuracy of the acquisition circuit, a series of calibrated high-precision discrete resistors are used as
an input to the system. Measurements are taken at TA = 25°C. Figure 114 displays the resistance measurement
over an input span from 20 Ω to 400 Ω. Any offset error is generally attributed to the offset of the ADC, and the
gain error can be attributed to the accuracy of the RREF resistor and the ADC. The RREF value is also calibrated
to reduce the gain error contribution.
Precision temperature measurement applications are typically calibrated to remove the effects of gain and offset
errors that generally dominate the total system error. The simplest calibration method is a linear, or two-point
calibration that applies an equal and opposite gain and offset term to cancel the measured system gain and
offset error. In this particular tested application, the gain and offset error was very small, and did not require
additional calibration other than the self offset and gain calibration provided by the device. The resulting
measured resistance error is shown in Figure 115.
The results in Figure 115 are converted to temperature accuracy by dividing the results by the RTD sensitivity (α)
at the measured resistance. Over the full resistance input range, the maximum total measured error is
±0.00929 Ω. Equation 27 uses the measured resistance error and the RTD sensitivity at 0°C to calculate the
measured temperature accuracy.
Error (°C) = Error (Ω) / α@0°C = ±0.00929 Ω / 0.39083 Ω / °C = ±0.024°C
(27)
Figure 116 displays the calculated temperature accuracy of the circuit assuming a linear RTD resistance to
temperature response. This figure does not include any linearity compensation of the RTD.
0.002
8000000
Resistance Error (:)
ADC Output (Code)
0
6000000
4000000
2000000
-0.002
-0.004
-0.006
-0.008
-0.01
0
0
50
100
150
200 250 300
Resistance (:)
350
400
450
Figure 114. ADC Output Code vs Equivalent RTD
Resistance
0
50
100
150
200 250 300
Resistance (:)
350
400
450
Figure 115. Measured Resistance Error vs Equivalent RTD
Resistance
0.005
Temperature Error (qC)
0
-0.005
-0.01
-0.015
-0.02
-0.025
0
50
100
150
200 250 300
Resistance (:)
350
400
450
Figure 116. Equivalent Temperature Error vs Equivalent RTD Resistance
Copyright © 2016–2017, Texas Instruments Incorporated
Product Folder Links: ADS124S06 ADS124S08
Submit Documentation Feedback
95
�ADS124S06, ADS124S08
SBAS660C – AUGUST 2016 – REVISED JUNE 2017
www.ti.com
10.3 Do's and Don'ts
•
•
•
•
•
•
•
•
•
•
96
Do partition the analog, digital, and power-supply circuitry into separate sections on the PCB.
Do use a single ground plane for analog and digital grounds.
Do place the analog components close to the ADC pins using short, direct connections.
Do keep the SCLK pin free of glitches and noise.
Do verify that the analog input voltages are within the specified PGA input voltage range under all input
conditions.
Do float unused analog input pins to minimize input leakage current on all other analog inputs. Connecting
unused pins to AVDD is the next best option.
Do provide current limiting to the analog inputs in case overvoltage faults occur.
Do use a low-dropout linear regulator (LDO) to reduce ripple voltage generated by switch-mode power
supplies. Reducing ripple is especially important for AVDD where the supply noise can affect the
performance.
Don't cross analog and digital signals.
Don't allow the analog and digital power supply voltages to exceed 5.5 V under any condition, including
during power-up and power-down.
Submit Documentation Feedback
Copyright © 2016–2017, Texas Instruments Incorporated
Product Folder Links: ADS124S06 ADS124S08
�ADS124S06, ADS124S08
www.ti.com
SBAS660C – AUGUST 2016 – REVISED JUNE 2017
Do's and Don'ts (continued)
Figure 117 shows the do's and don'ts of the ADC circuit connections.
INCORRECT
CORRECT
5V
5V
AVDD
AVDD
Device
Device
AINP
AINP
24-bit
û ADC
PGA
AINN
AVSS
0V
24-bit
û ADC
PGA
AINN
AVSS
0V
0V
0V
Single-ended input, PGA enabled
Single-ended input, PGA bypassed
CORRECT
CORRECT
2.5 V
5V
AVDD
AVDD
Device
Device
AINP
AINP
24-bit
û ADC
PGA
2.5 V
AINN
PGA
AVSS
-2.5 V
Single-ended input, PGA enabled
Single-ended input, PGA enabled
INCORRECT
AVDD
24-bit
û ADC
AVSS
0V
0V
5V
PGA enabled
AINN
3.3 V
5V
INCORRECT
3.3 V
DVDD
AVDD
PGA
24-bit
û ADC
PGA
24-bit
û ADC
AVSS
DGND
AVSS
DGND
Device
CORRECT
AVDD
3.3 V
DVDD
AGND/DGND isolation
Inductive supply or ground connections
5V
Device
2.5 V
CORRECT
3.3 V
DVDD
AVDD
PGA
24-bit
û ADC
PGA
24-bit
û ADC
AVSS
DGND
AVSS
DGND
Device
Device
DVDD
-2.5 V
Low impedance AGND/DGND connection
Low impedance AGND/DGND connection
Figure 117. Do's and Don'ts Circuit Connections
Copyright © 2016–2017, Texas Instruments Incorporated
Product Folder Links: ADS124S06 ADS124S08
Submit Documentation Feedback
97
�ADS124S06, ADS124S08
SBAS660C – AUGUST 2016 – REVISED JUNE 2017
www.ti.com
11 Power Supply Recommendations
11.1 Power Supplies
The ADS124S0x requires three power supplies: analog (AVDD, AVSS), digital core (DVDD, DGND), and digital
I/O (IOVDD, DGND). The analog power supply can be bipolar (for example, AVDD = 2.5 V, AVSS = –2.5 V) or
unipolar (for example, AVDD = 3.3 V, AVSS = 0 V) and is independent of the digital power supplies. DVDD is
used to power the digital circuits of the devices. IOVDD sets the digital I/O levels (with the exception of the GPIO
levels that are set by the analog supply of AVDD and AVSS). IOVDD must be equal to or larger than DVDD.
11.2 Power-Supply Sequencing
AVDD and DVDD may be powered up in any order. However, IOVDD is recommended to be powered up before
or at the same time as DVDD. If DVDD comes up before IOVDD, a reset of the device using the RESET pin or
the RESET command may be required.
11.3 Power-On Reset
An internal POR is released after all three supplies exceed approximately 1.65 V. Each supply has an individual
POR circuit. A brownout condition on any of the three supplies triggers a reset of the complete device.
11.4 Power-Supply Decoupling
Good power-supply decoupling is important to achieve best performance. AVDD must be decoupled with at least
a 330-nF capacitor to AVSS. DVDD and IOVDD (when not connected to DVDD) must be decoupled with at least
a 0.1-μF capacitor to DGND. Figure 118 and Figure 119 show typical power-supply decoupling examples for
unipolar and bipolar analog supplies, respectively. Place the bypass capacitors as close to the power-supply pins
of the device as possible using low-impedance connections. Use multi-layer ceramic chip capacitors (MLCCs)
that offer low equivalent series resistance (ESR) and inductance (ESL) characteristics for power-supply
decoupling purposes. To reduce inductance on the supply pins, avoid the use of vias for connecting the
capacitors to the supply pins. The use of multiple vias in parallel lowers the overall inductance and is beneficial
for connections to ground planes. Connect analog and digital grounds together as close to the device as
possible.
23
RESET
24
CLK
17
GPIO3/AIN11
18
GPIO2/AIN10
19
GPIO1/AIN9
20
GPIO0/AIN8
RESET
CLK
21
REFOUT
GPIO3/AIN11
22
±2.5 V
REFCOM
GPIO2/AIN10
23
GPIO1/AIN9
24
GPIO0/AIN8
1 PF
REFOUT
REFCOM
1 PF
22
21
20
19
18
17
3.3 V
NC
5V
25
26
AVDD
DVDD
16
IOVDD
15
+2.5 V
0.1 PF
330 nF
REFN0
27
AVSS
28
AVSS-SW
DGND
29
3.3 V
NC
330 nF
14
13
DRDY
12
DOUT/DRDY
±2.5 V
25
DVDD
16
26
AVDD
IOVDD
15
27
AVSS
DGND
14
28
AVSS-SW
0.1 PF
13
DRDY
REFN0
29
12
DOUT/DRDY
REFP0
30
11
SCLK
CS
REFP1/AIN6
32
9
CS
2
3
4
5
6
7
8
Figure 118. Unipolar Analog Power Supply
98
Submit Documentation Feedback
1
AINCOM
1
2
3
4
5
6
7
8
START/SYNC
9
AIN0
32
AIN1
REFP1/AIN6
AIN2
DIN
AIN3
10
AIN4
31
AIN5
REFN1/AIN7
AIN0
DIN
START/SYNC
10
AIN1
31
AIN2
REFN1/AIN7
AIN3
SCLK
AIN4
11
AIN5
30
AINCOM
REFP0
Figure 119. Bipolar Analog Power Supply
Copyright © 2016–2017, Texas Instruments Incorporated
Product Folder Links: ADS124S06 ADS124S08
�ADS124S06, ADS124S08
www.ti.com
SBAS660C – AUGUST 2016 – REVISED JUNE 2017
12 Layout
12.1 Layout Guidelines
Employing best design practices is recommended when laying out a printed-circuit board (PCB) for both analog
and digital components. This recommendation generally means that the layout separates analog components
[such as ADCs, amplifiers, references, digital-to-analog converters (DACs), and analog MUXs] from digital
components [such as microcontrollers, complex programmable logic devices (CPLDs), field-programmable gate
arrays (FPGAs), radio frequency (RF) transceivers, universal serial bus (USB) transceivers, and switching
regulators]. An example of good component placement is shown in Figure 120. Although Figure 120 provides a
good example of component placement, the best placement for each application is unique to the geometries,
components, and PCB fabrication capabilities employed. That is, there is no single layout that is perfect for every
design and careful consideration must always be used when designing with any analog component.
Signal
Conditioning
(RC Filters
and
Amplifiers)
Supply
Generation
Microcontroller
Optional: Split
Ground Cut
Device
Ground Fill or
Ground Plane
Ground Fill or
Ground Plane
Optional: Split
Ground Cut
Ground Fill or
Ground Plane
Interface
Transceiver
Connector
or Antenna
Ground Fill or
Ground Plane
Figure 120. System Component Placement
The following basic recommendations for layout of the ADS124S0x help achieve the best possible performance
of the ADC. A good design can be ruined with a bad circuit layout.
• Separate analog and digital signals. To start, partition the board into analog and digital sections where the
layout permits. Route digital lines away from analog lines. This prevents digital noise from coupling back into
analog signals.
• The ground plane can be split into an analog plane (AGND) and digital plane (DGND), but this (splitting) is
not necessary. Place digital signals over the digital plane, and analog signals over the analog plane. As a
final step in the layout, the split between the analog and digital grounds must be connected to together at the
ADC.
• Fill void areas on signal layers with ground fill.
• Provide good ground return paths. Signal return currents will flow on the path of least impedance. If the
ground plane is cut or has other traces that block the current from flowing right next to the signal trace,
another path must be found to return to the source and complete the circuit. If forced into a larger path, the
chance that the signal radiates increases. Sensitive signals are more susceptible to EMI interference.
• Use bypass capacitors on supplies to reduce high-frequency noise. Do not place vias between bypass
capacitors and the active device. Placing the bypass capacitors on the same layer as close to the active
device yields the best results.
• Consider the resistance and inductance of the routing. Often, traces for the inputs have resistances that react
with the input bias current and cause an added error voltage. Reducing the loop area enclosed by the source
signal and the return current reduces the inductance in the path. Reducing the inductance reduces the EMI
pickup and reduces the high-frequency impedance at the input of the device.
• Watch for parasitic thermocouples in the layout. Dissimilar metals going from each analog input to the sensor
can create a parasitic themocouple that can add an offset to the measurement. Differential inputs must be
matched for both the inputs going to the measurement source.
• Analog inputs with differential connections must have a capacitor placed differentially across the inputs. Best
input combinations for differential measurements use adjacent analog input lines (such as AIN0, AIN1 and
AIN2, AIN3). The differential capacitors must be of high quality. The best ceramic chip capacitors are C0G
(NPO) that have stable properties and low noise characteristics.
Copyright © 2016–2017, Texas Instruments Incorporated
Product Folder Links: ADS124S06 ADS124S08
Submit Documentation Feedback
99
�ADS124S06, ADS124S08
SBAS660C – AUGUST 2016 – REVISED JUNE 2017
www.ti.com
AVSS/SW
Reference
input
REFN0
REFP0
Differential
input or
Reference
input
AIN7
AIN6
12.2 Layout Example
Internal plane connected to GND
(DGND = AVSS)
Via connection to power plane
AIN5
Differential
input
Differential
input
25: NC
27: AVSS
26: AVDD
29: REFN0
28: AVSS/SW
30: REFP0
32: REFP1/
AIN6
31: REFN1/
AIN7
AIN8
AIN4
1: AINCOM
24: REFCOM
2: AIN5
23: REFOUT
3: AIN4
22: GPIO0/
AIN8
4: AIN3
21: GPIO1/
AIN9
5: AIN2
20: GPIO2/
AIN10
6: AIN1
19: GPIO3/
AIN11
7: AIN0
18: RESET
8: START
17: CLK
AIN9
AIN3
Differential
input
AIN10
Differential
input
16: DVDD
15: IOVDD
14: DGND
13: DRDY
11: SCLK
12: DOUT/
DRDY
10: DIN
9: CS
AIN2
AIN11
AIN1
Differential
input
AIN0
RESET
CLK
DRDY
DOUT/DRDY
SCLK
DIN
CS
START
Digital
connections
Figure 121. ADS124S0x Layout Example
100
Submit Documentation Feedback
Copyright © 2016–2017, Texas Instruments Incorporated
Product Folder Links: ADS124S06 ADS124S08
�ADS124S06, ADS124S08
www.ti.com
SBAS660C – AUGUST 2016 – REVISED JUNE 2017
13 Device and Documentation Support
13.1 Device Support
13.1.1 Development Support
ADS1x4S0x Design Calculator
13.2 Documentation Support
13.2.1 Related Documentation
For related documentation see the following:
• REF50xx Low-Noise, Very Low Drift, Precision Voltage Reference
• RTD Ratiometric Measurements and Filtering Using the ADS1148 and ADS1248 Application Report
• 3-Wire RTD Measurement System Reference Design, -200°C to 850°C
13.3 Related Links
The table below lists quick access links. Categories include technical documents, support and community
resources, tools and software, and quick access to order now.
Table 47. Related Links
PARTS
PRODUCT FOLDER
ORDER NOW
TECHNICAL
DOCUMENTS
TOOLS &
SOFTWARE
SUPPORT &
COMMUNITY
ADS124S06
Click here
Click here
Click here
Click here
Click here
ADS124S08
Click here
Click here
Click here
Click here
Click here
13.4 Receiving Notification of Documentation Updates
To receive notification of documentation updates, navigate to the device product folder on ti.com. In the upper
right corner, click on Alert me to register and receive a weekly digest of any product information that has
changed. For change details, review the revision history included in any revised document.
13.5 Community Resources
The following links connect to TI community resources. Linked contents are provided "AS IS" by the respective
contributors. They do not constitute TI specifications and do not necessarily reflect TI's views; see TI's Terms of
Use.
TI E2E™ Online Community TI's Engineer-to-Engineer (E2E) Community. Created to foster collaboration
among engineers. At e2e.ti.com, you can ask questions, share knowledge, explore ideas and help
solve problems with fellow engineers.
Design Support TI's Design Support Quickly find helpful E2E forums along with design support tools and
contact information for technical support.
13.6 Trademarks
E2E is a trademark of Texas Instruments.
All other trademarks are the property of their respective owners.
13.7 Electrostatic Discharge Caution
This integrated circuit can be damaged by ESD. Texas Instruments recommends that all integrated circuits be handled with
appropriate precautions. Failure to observe proper handling and installation procedures can cause damage.
ESD damage can range from subtle performance degradation to complete device failure. Precision integrated circuits may be more
susceptible to damage because very small parametric changes could cause the device not to meet its published specifications.
Copyright © 2016–2017, Texas Instruments Incorporated
Product Folder Links: ADS124S06 ADS124S08
Submit Documentation Feedback
101
�ADS124S06, ADS124S08
SBAS660C – AUGUST 2016 – REVISED JUNE 2017
www.ti.com
13.8 Glossary
SLYZ022 — TI Glossary.
This glossary lists and explains terms, acronyms, and definitions.
14 Mechanical, Packaging, and Orderable Information
The following pages include mechanical packaging and orderable information. This information is the most
current data available for the designated devices. This data is subject to change without notice and revision of
this document. For browser-based versions of this data sheet, refer to the left-hand navigation.
102
Submit Documentation Feedback
Copyright © 2016–2017, Texas Instruments Incorporated
Product Folder Links: ADS124S06 ADS124S08
�PACKAGE OPTION ADDENDUM
www.ti.com
10-Dec-2020
PACKAGING INFORMATION
Orderable Device
Status
(1)
Package Type Package Pins Package
Drawing
Qty
Eco Plan
(2)
Lead finish/
Ball material
MSL Peak Temp
Op Temp (°C)
Device Marking
(3)
(4/5)
(6)
ADS124S06IPBS
ACTIVE
TQFP
PBS
32
250
RoHS & Green
NIPDAU
Level-3-260C-168 HR
-50 to 125
124S06
ADS124S06IPBSR
ACTIVE
TQFP
PBS
32
1000
RoHS & Green
NIPDAU
Level-3-260C-168 HR
-50 to 125
124S06
ADS124S06IRHBR
ACTIVE
VQFN
RHB
32
3000
RoHS & Green
NIPDAU
Level-3-260C-168 HR
-50 to 125
ADS
124S06
ADS124S06IRHBT
ACTIVE
VQFN
RHB
32
250
RoHS & Green
NIPDAU
Level-3-260C-168 HR
-50 to 125
ADS
124S06
ADS124S08IPBS
ACTIVE
TQFP
PBS
32
250
RoHS & Green
NIPDAU
Level-3-260C-168 HR
-50 to 125
124S08
ADS124S08IPBSR
ACTIVE
TQFP
PBS
32
1000
RoHS & Green
NIPDAU
Level-3-260C-168 HR
-50 to 125
124S08
ADS124S08IRHBR
ACTIVE
VQFN
RHB
32
3000
RoHS & Green
NIPDAU
Level-3-260C-168 HR
-50 to 125
ADS
124S08
ADS124S08IRHBT
ACTIVE
VQFN
RHB
32
250
RoHS & Green
NIPDAU
Level-3-260C-168 HR
-50 to 125
ADS
124S08
(1)
The marketing status values are defined as follows:
ACTIVE: Product device recommended for new designs.
LIFEBUY: TI has announced that the device will be discontinued, and a lifetime-buy period is in effect.
NRND: Not recommended for new designs. Device is in production to support existing customers, but TI does not recommend using this part in a new design.
PREVIEW: Device has been announced but is not in production. Samples may or may not be available.
OBSOLETE: TI has discontinued the production of the device.
(2)
RoHS: TI defines "RoHS" to mean semiconductor products that are compliant with the current EU RoHS requirements for all 10 RoHS substances, including the requirement that RoHS substance
do not exceed 0.1% by weight in homogeneous materials. Where designed to be soldered at high temperatures, "RoHS" products are suitable for use in specified lead-free processes. TI may
reference these types of products as "Pb-Free".
RoHS Exempt: TI defines "RoHS Exempt" to mean products that contain lead but are compliant with EU RoHS pursuant to a specific EU RoHS exemption.
Green: TI defines "Green" to mean the content of Chlorine (Cl) and Bromine (Br) based flame retardants meet JS709B low halogen requirements of