www.ti.com
Table of Contents
User’s Guide
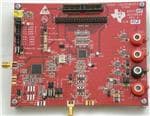
ADS41xx/58B18EVM
Thomas Neu
Table of Contents
1 Overview..................................................................................................................................................................................2
1.1 Purpose..............................................................................................................................................................................2
1.2 EVM Quick-Start Procedure...............................................................................................................................................2
2 Circuit Description..................................................................................................................................................................4
2.1 Schematic Diagram............................................................................................................................................................4
2.2 Circuit Function.................................................................................................................................................................. 4
3 TI ADC SPI Control Interface............................................................................................................................................... 12
3.1 Installing the ADC SPI Interface.......................................................................................................................................12
3.2 Setting Up the EVM for ADC SPI Control........................................................................................................................ 12
3.3 Using the TI ADC SPI Interface Software........................................................................................................................ 13
4 Quick Start Setup..................................................................................................................................................................15
5 Evaluation..............................................................................................................................................................................16
5.1 Register Programming..................................................................................................................................................... 16
5.2 Quick-Test Results........................................................................................................................................................... 17
List of Figures
Figure 2-1. ADS41xx Jumpers.....................................................................................................................................................4
Figure 2-2. ADS41xx/58B18 Surface Jumpers............................................................................................................................5
Figure 2-3. ADS41xx/58B18EVM Power Distribution.................................................................................................................. 6
Figure 2-4. CDCE72010 EEPROM Configuration Block Diagram...............................................................................................9
Figure 3-1. Found New Hardware............................................................................................................................................. 12
Figure 3-2. GUI Main Page........................................................................................................................................................13
Figure 3-3. GUI Advanced Page................................................................................................................................................14
Figure 5-1. TSW1400 GUI Introduction..................................................................................................................................... 16
Figure 5-2. Quick-Setup Test Result..........................................................................................................................................17
List of Tables
Table 1-1. Jumper List................................................................................................................................................................. 2
Table 2-1. EVM Power Supply Jumper Description..................................................................................................................... 6
Table 2-2. EVM Power Supply Options........................................................................................................................................7
Table 2-3. Clock Input Jumper Description.................................................................................................................................. 8
Table 2-4. EVM Clock Input Options............................................................................................................................................8
Table 2-5. Analog Input Jumper Description..............................................................................................................................10
Table 2-6. EVM Analog Input Options........................................................................................................................................10
Trademarks
Mini-Circuits™ is a trademark of Scientific Components Corporation.
Windows™ is a trademark of Microsoft Corporation.
All trademarks are the property of their respective owners.
SLWU067D – NOVEMBER 2009 – REVISED MARCH 2022
Submit Document Feedback
Copyright © 2022 Texas Instruments Incorporated
ADS41xx/58B18EVM
1
�Overview
www.ti.com
1 Overview
This evaluation module (EVM) user's guides give an overview of the EVM and provides a general description of
the features and functions to be considered while using this module.
This EVM user's guide applies to multiple EVMs:
•
ADS41xx family:
– ADS4126, ADS4146, ADS4128, ADS4129, ADS4149, ADS41B29, ADS41B49, ADS58B18
1.1 Purpose
The ADS41xx/58B18 EVM provides a platform for evaluating the analog-to-digital converter (ADC) under
various signal, clock, reference, and power supply conditions. Use this document in combination with the EVM
schematic diagram supplied.
1.2 EVM Quick-Start Procedure
The ADS41xx/58B18EVM provides numerous options for providing clock, input frequency, and power to the
ADC under evaluation. The quick-start procedure describes how to quickly get initial results using the default
configuration of the EVM as it was shipped. The EVM can be put back to default configuration by setting
all jumpers with the default values as described in Table 1-1. The default configuration of the EVM is for
single-ended signals into the analog input and clock input. These signals are converted from single-ended to
differential on-board with the use of transformers. The default configuration for the power supply is to provide a
single 3.3-V supply to the red banana jack J16, PWR_IN. The default configuration for the EVM is to control the
modes of operation by jumper settings for parallel input control pins rather than serial SPI control of the register
space. The other modes of operation of the EVM are described in the latter sections of this document.
CAUTION
Voltage Limits: Exceeding the maximum input voltages can damage EVM components.
Undervoltage can cause improper operation of some or all of the EVM components.
A quick-setup procedure for the default configuration of the ADS41xx/58B18EVM follows:
1. Verify all jumper settings against the schematic jumper list in Table 1-1.
Table 1-1. Jumper List
Jumper
Function
Default Jumper Setting
Interface Circuit Operational Amplifier THS4509 (Bypassed)
R94/95/98/106
AMP+
R94/98
R82/96/97/99
AMP–
R97
JP7
PD
1-2
ADC Circuit
JP12
Parallel
1-2
JP11
SDA
Open
JP9
SEN
1-2
JP15
OE
Open
J2
DFS
7-8
J1
SEN
7-8
Clock Interface Circuit CDCE72010 (Bypassed)
2
R81/107
CLOCK IN
R81
R113/114/115
CLOCK IN, Y0, Y1P SELECT
R115
R108/110
Y1N SELECT
R110
JP1
PWRDWN CDC
1-2
ADS41xx/58B18EVM
SLWU067D – NOVEMBER 2009 – REVISED MARCH 2022
Submit Document Feedback
Copyright © 2022 Texas Instruments Incorporated
�www.ti.com
Overview
Table 1-1. Jumper List (continued)
Jumper
Function
Default Jumper Setting
Power Supply
JP13
1.8VA_IN
1-2
JP14
1.8VD_IN
1-2
JP3
3.3V CDC
1-2
JP17
3.3V input select for LDO or switching
regulator
1-2
JP19
1.8V output select from LDO or switching
regulator
1-2
2. Connect the 3.3-V supply between J16 and J12 (GND). Do not connect a voltage source greater than 3.6 V.
3. Switch on external 3.3-V power supply.
4. Using a function generator with 50-Ω output impedance, generate a 0-V offset, 1.5-Vpp sine-wave clock into
J19. The frequency of the clock must be within the specification for the device speed grade.
5. Use a frequency generator with a 50-Ω output impedance to provide a 0-V offset, –1-dBFS-amplitude
sine-wave signal into J6. This provides a transformer-coupled differential input signal to the ADC.
6. Connect the TSW1400 or suitable logic analyzer to J10 to capture the resulting digital data. If a TSW1400
is being used to capture data, follow the additional alphabetically labeled steps. For more information, see
Section 5.
a. After installing HSDC Pro and connecting the TSW1400 to the USB port, open HSDC Pro.
b. In HSDC Pro, when the Select Board window appears, select the interface board being used and click
OK.
c. In the Select a Device window, select ADC in the drop-down menu.
d. In the main window, under Select ADC, use the drop-down menu to select the device under test.
e. Under Test Selection, select Single Tone to run a single tone FFT test.
f. Change the ADC Output Data Rate and ADC Input Target Frequency to match those of the signal
generator.
g. Press the Capture button to begin capturing data.
SLWU067D – NOVEMBER 2009 – REVISED MARCH 2022
Submit Document Feedback
Copyright © 2022 Texas Instruments Incorporated
ADS41xx/58B18EVM
3
�Circuit Description
www.ti.com
2 Circuit Description
2.1 Schematic Diagram
The schematic diagram for this EVM can be found on the TI Web site in the relevant ADS41xx or ADS41Bxx
product folder. See the schematic or relevant section of this user's guide before changing any jumpers.
2.2 Circuit Function
Selection of various modes of operation of the ADS41xx/58B18EVM is most often controlled by jumpers on
the EVM, either by placing shunts on 0.025-inch square jumper posts or by installation of surface mount 0-Ω
resistors. In general, the use of 0-Ω resistors as jumpers are used in the clock or signal path where signal
integrity is critical and jumper posts are used for static or low-speed control paths. Figure 2-1 shows the relative
location of the jumpers, connectors, and switches used on the ADS41xx/58B18EVM. Figure 2-2 shows the
relative locations of most of the resistors and surface-mount 0-Ω jumper locations used on the EVM. In the
description of the circuit options in the following sections, each operational mode is accompanied by a table
entry that details the jumper or resistor changes that enable that option. Figure 2-1 and Figure 2-2 can assist the
user to quickly identify where these jumpers are located on the EVM.
J9
J12
1
1
1
3.3V
LDO
GND
VS +5V
VSSJ5
J16
DC/DC
J11
JP19
JP14
JP13
1
JP17
J10
LVDS
JP3
J8
LVDS
INJ6
SEN
OFF
THS4509
ON
JP10
1
JP8
CDC PD JP1
SW2
CDC RST JP2
SW3
SDATA
J21
SERIAL
VCXO
OUT
1
JP4
JP12
RESET
JP11
DFS
J2
1
PARALLEL
ON
SNRB (ADS58B18
OFF
CDC CTRL_LE
JP16
J1
1
CDC AUX SEL
SW1
CLKIN
J19
CDC
OUT
J20
ON
VCXO EN
OFF
1
JP7
ADC
1
BIN, LVDS
BIN, CMOS
2's, CMOS
2's, LVDS
SEN
JP9
J13
1
IN+
CDC MODE SEL
USB
CLK EDGE 4
CLK EDGE 3
CLK EDGE 2
CLK EDGE 1
JP18
1
ADC OVR
JP15
1
Figure 2-1. ADS41xx Jumpers
4
ADS41xx/58B18EVM
SLWU067D – NOVEMBER 2009 – REVISED MARCH 2022
Submit Document Feedback
Copyright © 2022 Texas Instruments Incorporated
�www.ti.com
Circuit Description
J9
J11
J12
GND
VS +5V
VSS-
J16
3.3V
J5
R82
J8
INR84
J6
R97
R95
R46 (bottom)
R99
R23
R94
IN+
R114
ADC
R86 (bottom)
R98
R100
LVDS
R101
R24
R106
R93 (bottom)
R96
R38 (bottom)
R66
LVDS
R20
J10
R113
R110
R108
R19 (bottom)
R115
R67 (bottom)
J21
VCXO
OUT
R107
USB
J13
R111
R112
R81
R7 (bottom)
R65 (bottom)
J19
CLKIN
J20 CDC
OUT
Figure 2-2. ADS41xx/58B18 Surface Jumpers
The following sections describe the function of individual circuits. See the relevant data sheet for device
operating characteristics.
2.2.1 Power
Power is supplied to the EVM through banana jacks; from this input power, three different ways are available of
delivering power to the ADC and the other EVM functions . Figure 2-3 shows a simplified representation of the
power options available for the ADS41xx/58B18EVM. The default option is to provide 3.3 V to the red banana
jack J16, and from there the EVM generates 1.8 V for the analog and digital supplies to the ADC. The 1.8-V rails
for the ADC can be generated from the 3.3-V input either through a low-noise dropout regulator (TPS79618),
from a switching regulator (TPS62562) for maximum power efficiency or from an external 1.8-V power supply.
The EVM also generates the proper voltages for optional features of the EVM such as the Clock Generation
circuitry, the USB circuitry, and the CMOS output buffer.
SLWU067D – NOVEMBER 2009 – REVISED MARCH 2022
Submit Document Feedback
Copyright © 2022 Texas Instruments Incorporated
ADS41xx/58B18EVM
5
�Circuit Description
www.ti.com
TPS79618
LDO Regultor to 1.8V
J16
1.8V
3.3V
1
JP17
3.3V
TPS62560
Switching regulator to
1.8V
1
JP19
1
To 1.8VA
JP13
J12
1
To 1.8VD
GND
JP14
J9
JP3
To 3.3V Clock
Generator
To 3.3V Buffer
VSS+
THS4509
J11
VSS-
Figure 2-3. ADS41xx/58B18EVM Power Distribution
Some ADC devices that may be evaluated on the ADS41xx/58B18 platform require a 3.3-V supply for an internal
front-end buffer. For this reason, an isolated 3.3V_BUF supply is on the power section of the schematic.
Power for the optional THS4509 operational amplifier is supplied by banana jacks J9 and J11. If the amplifier
is being evaluated, 5 V is supplied to J9 and J11 is connected to ground. Otherwise, these inputs may be left
unconnected.
The power supply for the default operation of the ADS41xx/58B18EVM has been simplified by requiring only
a single 3.3 V. Table 2-1 displays the general jumper setting information; Table 2-2 displays the various power
option settings. Prior to making any jumper settings, see the schematic located on the TI Web site in the relevant
ADS41xx or ADS41Bxx product folder.
Table 2-1. EVM Power Supply Jumper Description
EVM Banana Jack/
Jumper
6
Description
Jumper setting
J16
Input
3.3-V power supply input
JP3
3.3 V for CDCE72010
Shunt for CDCE72010 operation
JP13
1.8-VA input
1-2 → 1.8 V from LDO/switching regular to 1.8 VA of ADC (default);
2-3 → option for external 1.8-V supply
JP14
1.8-VD input
1-2 → 1.8 V from LDO/switching regular to 1.8 VD of ADC (default);
2-3 → option for external 1.8-V supply
JP17
3.3-V input selection for LDO/switching
regulator
1-2 → 3.3-V input for TPS62562 (default); 2-3 → 3.3-V input for
TPS79618
JP19
1.8-V selection from LDO/switching
regulator
1-2 → 1.8-V output from TPS62562 (default); 2-3 → 1.8-V output
from TPS79618
ADS41xx/58B18EVM
SLWU067D – NOVEMBER 2009 – REVISED MARCH 2022
Submit Document Feedback
Copyright © 2022 Texas Instruments Incorporated
�www.ti.com
Circuit Description
Table 2-2. EVM Power Supply Options
EVM Option
Evaluation Goal
Jumper Changes Required
Voltage on J16
Comments
1
Evaluate ADC
performance using
a switching power
supply (TP62562)
JP13 → 1-2; JP14 → 1-2; JP17 → 1-2;
JP19 → 1-2;
3.3 V
Maximum performance and
efficiency.
2
Evaluate ADC
JP13 → 1-2; JP14 → 1-2; JP17 → 2-3;
performance using
JP19 → 2-3;
a LDO-based
(TPS79618) solution.
3.3 V
Maximum performance.
3
Evaluate ADC
JP13 → 1.8V on 2-3; JP14 → 1.8V on 2-3;
performance using
JP17 → open3; JP19 → open;
an isolated ADC
AVDD and DVDD for
current consumption
measurements
3.3 V
Isolated power supply
for current consumption
measurements
2.2.1.1 Power Supply Option 1
The 1.8-V rails for the ADC are generated by the TPS62562 switching regulator. The TPS62562 is a step-down
(buck) converter with an acceptable input range of up to 5.5 V. However, because other circuits on the EVM are
connected to the 3.3-V input rail, the input voltage to J16 must not exceed 3.6 V or damage to those ICs will
occur. This option complements the very low power consumption of the ADS4xxx/58B18EVM as the TPS62562
provides excellent power efficiency.
2.2.1.2 Power Supply Option 2
Option 2 supplies power to the 1.8-V analog and digital rails of the ADC by using the TPS79618. The
TPS79618 is a low-noise dropout regulator - the 1.5-V dropout voltage (3.3 V to 1.8 V) provides sufficient
headroom for maximum PSRR and ADC performance. However, it comes at the expense of higher system
power consumption.
2.2.1.3 Power Supply Option 3
Option 3 is used to evaluate ADC performance using an isolated AVDD and DVDD power supply for currentconsumption measurements. This option must be used with caution as reversing the power supply or connecting
to the wrong connector can result in damage to the EVM. One common usage of this option is to measure the
separate current consumption of the relative supplies under particular operating conditions. For this option, the
shunts on jumpers JP13 and JP14 are removed and the input power is supplied to the center post of the jumper.
For convenience, a ground post is provided next to the center post for header connections that contain power
and ground on 0.1-inch centers.
2.2.2 Clock Input
The clock can be supplied to the ADC in several ways. The default clocking option is to supply a single-ended
clock directly to the SMA connecter, J19, directly. This clock is converted to differential and AC coupled to
the ADC by transformer coupling. The clock input must be from a clean, low-jitter source and is commonly
filtered external to the board by a narrow bandpass filter. The clock amplitude is commonly set to about 1.5
V peak-to-peak, and the amplitude offset is not an issue due to the AC coupling of the clock input. The clock
source is commonly synchronized with the signal generator of the input frequency to keep the clock and IF
coherent for meaningful FFT analysis.
Alternatively, the clock may be supplied by an onboard VCXO and CDCE72010 clock buffer. The CDCE72010
clock buffer has been factory programmed to output a clock to the ADC that is 1/4 the rate of the onboard VCXO.
While using this clock option, a separate 20-MHz reference clock must be supplied to the CDCE72010 by way
of the clock input SMA connector J19. From the CDCE72010, two clocking options to the ADC are possible. A
differential LVPECL clock output may be connected to the ADC clock input or a single-ended CMOS clock from
the CDCE72010 may be routed to the ADC transformer-coupled clock input through an onboard crystal filter. For
better performance, selecting the CMOS clock through a crystal output is recommended. Prior to making any
jumper settings and resistor changes, see the schematic located on the TI Web site in the relevant ADS41xx or
ADS41Bxx product folder. Table 2-4 displays the various clock option settings. The VCXO and crystal filter do
not come populated on the EVM by default, although the CDCE72010 clock buffer is installed.
SLWU067D – NOVEMBER 2009 – REVISED MARCH 2022
Submit Document Feedback
Copyright © 2022 Texas Instruments Incorporated
ADS41xx/58B18EVM
7
�Circuit Description
www.ti.com
Table 2-3. Clock Input Jumper Description
EVM Jumper
Options
Description
Jumper Setting
JP4
ENABLE VCXO1 TC0-2111
1-2 → VCXO enabled 2-3 → VCXO disabled
J19
SMA connector for clock input
JP1
CDCE72010 power down
1-2 → CDCE72010 is power down; Open → CDCE72010 is on
JP2
CDCE72010 reset
1-2 → Reset , Open → Normal operation. (default)
Clock In or CDC ref. jumper
R81 → J19 supplies clock directly to ADC; R107 → Reference clock for
CDCE72010
R113/114/115
Clock input to +ve terminal of T4 for
ADC clock
R115 → Connects J19 to ADC; R114 → Connects Y0 output of CDCE72010
(This path has crystal filter) to ADC; R113 → Connects Y1P (Differential LVPECL
clock output of CDCE72010) to ADC
R108/110
Clock input to -ve terminal of T4 for
ADC clock
R110→ Connects to ground (Default); R108→ Connects to Y1N (Differential
clock output of CDCE72010) only to be used with Y1P.
Mode select pin for CDCE72010
1-2 → High (default), see data sheet of CDCE72010; 2-3 → Ground
PLLOCK LED
R111 → Connects to D3 diode; R112 → Ground through 10-nF capacitor
Aux_sel pin for CDCE72010
1-2 → High, see data sheet of CDCE72010; 2-3 → Ground (Default)
R81/107
JP8
R111/112
JP10
Table 2-4. EVM Clock Input Options
Evaluation Goal
Jumper and Resistor
Changes Required
Frequency
Input on
J19
CDC Configuration
Description
Comments
1
Evaluate ADC performance
using a sinusoid clock
JP1 → 1-2; JP2 → no
shunt; JP4 → 2-3; Install:
R81, R110, R115
ADC's
Sampling
Frequency
NA
Default
2
Evaluate ADC performance
JP1 → no shunt; JP2
20M for
using a crystal filtered
→ no shunt; JP4 → 1-2;
Divide VCXO frequency by
VCXO@983
LVCMOS clock derived
Install: R107, R110, R114;
4, output on Y0
.04 MHz
from CDCE72010
Remove: R81, R115
3
JP1 → no shunt; JP2
Evaluate ADC performance → no shunt; JP4 → 1-2;
20M for
using a differential LVPECL Install: R107, R108, R114; VCXO@983
clock
Remove: R81, R110,
.04 MHz
R115
EVM
Options
Divide VCXO frequency
by 4, differential LVPECL
Clock output on Y1P and
Y1N
Maximum performance
Not recommended for most
applications
2.2.2.1 Clock Option 1
The Clock Option 1 provides a clock to ADC directly from an external source. For the direct supply of the clock
to the ADC, a single-ended square or sinusoidal clock input must be applied to J19. The clock frequency must
be within the maximum frequency specified for the ADC. The clock input is converted to a differential signal by
a Mini-Circuits™ ADT4-1WT, which has an impedance ratio of 4, implying that voltage applied on J19 is stepped
up by a factor of 2. ADC performance in this case depends on the clock source quality. This option is also the
default configuration on the EVM, when it is shipped from the factory. The test result using this option is shown in
Figure 5-2.
2.2.2.2 Clock Option 2
Option 2 uses the onboard VCXO and CDCE72010 to provide a clock to the ADC. The CDCE72010 is used
in SPI mode which uses the internal EEPROM to configure the CDCE72010. The EEPROM is programmed in
the factory for a divide-by-4 configuration. The EEPROM configuration is shown in Figure 2-4. The clock at J19
is the reference clock for CDCE72010. The VCXO frequency can be calculated as Fvcxo = Fout x 4 (Fout is
the frequency output U0 and U1). The reference clock for CDCE72010 is calculated from Ref Clock = (Fvcxo x
125)/(48 x 128). This is the clock-to-M divider. When VCXO of frequency 983.04 MHz is used, the calculation
results in a reference clock of 20 MHz; the clock output on Y0 pin of CDCE72010 is 245.76 MHz. This clock is
filtered using the crystal filter with center frequency of 245.76 MHz. By default, the VCXO and the crystal filter
are not populated on the EVM, so that the user can populate the components depending on the end application
and sampling rate. This configuration is recommended for applications requiring an onboard clock generation
scheme. The test result using this option is shown in Figure 2-4.
8
ADS41xx/58B18EVM
SLWU067D – NOVEMBER 2009 – REVISED MARCH 2022
Submit Document Feedback
Copyright © 2022 Texas Instruments Incorporated
�www.ti.com
Circuit Description
Loop Filter
Phase
Frequency
Detector
20 MHz
/125
¦OUT =
Charge
160 kHz
3 mA
Pump
Feedback
N divider
/128
¦IN
M
=
P
¦VCO
(FB x N)
£100 MHz
¦VCO £ 1.5 GHz
¦OUT £ 1.5 GHz
¦IN £ 500 MHz
Divider (FB)
/48
(
¦VCO
(
M divider
160 kHz
Output
Divider (P)
U0 (LVCMOS)
VCO
983.04 MHz
/4
U1 (LVPECL)
245.76 MHz
CDCE72010
Figure 2-4. CDCE72010 EEPROM Configuration Block Diagram
2.2.2.3 Clock Option 3
Option 3 is used for a differential LVPECL clock. This configuration eliminates the need for a crystal filter. It
uses the same EEPROM configuration as Option 2, but in this case, the ADC clock pins are connected to
Y1N and Y1P. The jumper setting uses the clock output Y1P and Y1N from CDCE72010, to clock ADC. This
configuration is not recommended for SNR critical applications. Notice that the clock frequency does not change.
The frequency remains the same as in Clock Option 2. The test result using this option is shown in Figure 2-4.
2.2.3 Analog Inputs
The EVM can be configured to use either a transformer-coupled input or a THS4509 amplifier input, both from a
single-ended source. The SMA connector J6 provides the single-ended analog input to the transformer-coupled
input of the ADC. The SMA connector J8 is not installed by default, but can be used to bring a differential input
clock to the transformer-coupled input or to bring a single-ended input to the THS4509 input circuit. To set the
transformer up for one of these options, the EVM must be configured as per the options listed in Table 2-6.
Prior to making any jumper changes, see the schematic located on the TI Web site in the relevant ADS41xx or
ADS41Bxx product folder.
SLWU067D – NOVEMBER 2009 – REVISED MARCH 2022
Submit Document Feedback
Copyright © 2022 Texas Instruments Incorporated
ADS41xx/58B18EVM
9
�Circuit Description
www.ti.com
Table 2-5. Analog Input Jumper Description
EVM Jumper
options
Description
Jumper Setting
J6
Analog input single-ended.
J8
Analog input, can be used with J6 for Not populated
differential input
J9
Power supply +
Apply 5 V
J11
Power Supply -
Ground
R98/106
AMP out+
R106 → Amp out+ is selected as the source of input to ADC; R98 → Use Analog
input from J6 as signal source to ADC
R97/99
AMP out-
R99 → Amp out+ is selected as the source of input to ADC; R97 → Use Analog
input from J6 as signal source to ADC
R82/96
-Input select
R82 → Differential signal input to transformer T1 (remove R84); R96 → negative
input to amplifier
R94/95
+Input select
R94 → single-ended input to transformer T1; R95 → positive input to amplifier
Power down for amplifier THS4509
2-3 → Pulls up the pin (normal operation or amplifier is ON); 1-2 → Grounds the
pin (low-power mode or amplifier is off)
JP7
Table 2-6. EVM Analog Input Options
EVM
Options
Evaluation Goal
Jumper Changes Required
Voltage on J9 and J11 Analog Signal
to ADC
Comments
1
Evaluate ADC
Install: R84, R94, R97, R98; Remove:
performance
R82, R95, R96, R99, R106
using direct input
to ADC.
Do not connect
From J6
2
Evaluate ADC
performance
using input
through
THS4509
J9 → 5V, J11 → GND
Signal from J6 Used if input signal
is amplified by requires amplification.
THS4509
Install: R95, R96, R99, R106; Remove:
R82, R84, R94, R97, R98
Default
2.2.3.1 Analog Input Option 1
Option 1 supplies the transformer-coupled input from J6 to ADC. This configuration is the default on the EVM.
The test result using this option is shown in Figure 5-2. A double-transformer input circuit is used to provide
better differential to single-ended conversion than a single transformer can provide. The transformers used are
both of a 1:1 turns ratio, so termination of the 50-Ω input signal path after the transformers can be two 25-Ω
resistors terminated to the common-mode voltage (VCM) provided by the ADC.
Following the transformer coupling, surface-mount pads are provided for several input circuits. By default,
the input circuit is configured as shown in the ADS4149 data sheet under the recommended input circuit for
high-bandwidth (>100-MHz IF) inputs. However, the recommended low-bandwidth input circuit for the ADS4149
can be easily implemented on the surface-mount pads provided.
2.2.3.2 Analog Input Option 2
Option 2 allows the use of an amplifier to provide input to the ADC. TI has a range of wideband operational
amplifiers such as THS4508/09/11/13/20. On this EVM, THS4509 is used as an example to amplify the input
from J8. The THS4509 is powered up by applying 5 V to J9 and GND to J11. A differential power supply also
may be used to power up the amplifier if common-mode biasing is an issue for DC-coupled applications. See the
THS4509 data sheet (SLOS547). The output of the THS4509 is filtered through a band-pass filter before ADC
input. The band-pass filter can be designed depending on the end application. By default, the band-pass filter
components are not populated as the filter design depends on the end application. The TI schematic provides
an example of a filter that is designed for the frequency band of 10 MHz to 58 MHz. When using the suggested
filter, be sure to consider the proper value for R23 and R24 resistors, as the ADC may impose limits on how
large these resistors may be while the amplifier may impose limits on how low an impedance it can drive. A key
point when designing a filter is to design it for proper load termination. Care must be taken when supplying the
input to the board, and ensure that the source impedance is 50 Ω. Results can vary due to mismatching of the
various source and termination impedances.
10
ADS41xx/58B18EVM
SLWU067D – NOVEMBER 2009 – REVISED MARCH 2022
Submit Document Feedback
Copyright © 2022 Texas Instruments Incorporated
�www.ti.com
Circuit Description
2.2.4 Digital Outputs
The LVDS digital outputs can be accessed through the J10 output connector. A parallel 100-Ω termination
resistor must be placed at the receiver to properly terminate each LVDS data pair. These resistors are required
if the user wants to analyze the signals on an oscilloscope or a logic analyzer. The ADC performance also
can be quickly evaluated using the TSW1400 board along with the High Speed Data Converter Pro software
as explained in the next section. The TSW1400 automatically terminates the LVDS outputs once the TSW1400
is connected to J10. Alternatively, the ADS41xx/58B18 is supplied with a breakout-board to easily connect the
LVDS outputs to a logic analyzer pod. This LVDS breakout-board also properly terminates the LVDS outputs
once the breakout board is connected to J10.
The ADS41xx and most other ADCs that may be evaluated on this EVM also have an option to output the
digitized parallel data in the form of single-ended CMOS. If single-ended CMOS is desired, header post
connector J5 is provided for the CMOS output. In order to use the header J5, a CMOS buffer U7 must be
installed in place of a bank of 0-Ω resistors that by default steer the outputs to the LVDS connector J10.
SLWU067D – NOVEMBER 2009 – REVISED MARCH 2022
Submit Document Feedback
Copyright © 2022 Texas Instruments Incorporated
ADS41xx/58B18EVM
11
�TI ADC SPI Control Interface
www.ti.com
3 TI ADC SPI Control Interface
This section describes the software features accompanying the EVM kit. The ADS41xx EVM control software
provides full control of the SPI interface, allowing users to write to any of the ADC registers found in the ADC
data sheet. For most ADS4149 (and other ADCs evaluated on this EVM) performance evaluations, users do not
need to use the EVM control software to get evaluation results. Users only need to use the ADC SPI control
software when the desired feature is inaccessible because the ADC is in parallel interface mode.
3.1 Installing the ADC SPI Interface
ADC SPI control software can be installed on a personal computer by running the setup.exe file located on the
TI Web site in a zip file in the EVM product folder. This file installs the graphical user interface (GUI) along with
the USB drivers needed to communicate with the USB port that resides on the EVM. The software installation
provides for installation in a default directory, which the user may change to some other directory path if desired.
After the software is installed, insert the USB cable in the EVM to complete the installation. The Found New
Hardware wizard starts and when prompted, users must allow the Windows™ operating system to search for
device drivers by checking "Yes, this time only" as seen in Figure 3-1.
Note
Before plugging in the USB cable for the first time, install the TI ADC SPI software. The software
installs the drivers necessary for USB communication.
Figure 3-1. Found New Hardware
3.2 Setting Up the EVM for ADC SPI Control
Users who want to use the ADC SPI interface must configure three jumpers for proper control of the SPI bus. By
default, the EVM comes with the ADC configured in parallel mode. In order to use the SPI interface to control the
ADC modes of operation, users must:
•
•
•
12
Move jumper JP12 to short positions 2–3, which places the ADC in serial operation mode.
Move jumper JP11 to short positions 2–3, which allows the USB circuit to control SDATA.
Move jumper JP9 to short positions 2–3, which allows the USB circuit to control SEN.
ADS41xx/58B18EVM
SLWU067D – NOVEMBER 2009 – REVISED MARCH 2022
Submit Document Feedback
Copyright © 2022 Texas Instruments Incorporated
�www.ti.com
TI ADC SPI Control Interface
3.3 Using the TI ADC SPI Interface Software
Once the software is installed and the USB cable is connected, three primary modes of operating the software
are available: ADS41xx frequently used registers, SPI register writes, and SPI register writes using a script file .
3.3.1 SPI Register Writes
By default the ADS41xx EVM is configured to allow access of the register space in the ADS41xx using the TI
ADC SPI user interface. The GUI contains a main and an advanced page but most of the programming can be
done on the main tab.
The main page (see Figure 3-2) provides bit switches for easy access of the most frequently used registers. It
also offers the option of directly writing data into registers through the address and data field. Additional features
like clock edge control or offset compensation are located on the advanced page of the GUI (see Figure 3-3).
Current registers being written are displayed on the right side in hexadecimal format as well as in Boolean format
on the bottom (16-bit total – 8-bit address and 8-bit data). The user also has the option to load or save a register
file.
After power up of the EVM, it is recommended to perform a reset of the USB port of the EVM (button on top).
Toggle main and
advanced page
Frequently used
registers for
power and digital
interface
This control enables digital
features like gain, offset
correction and test patterns
Select ADC:
- ADS41xx
- ADS41x2
- ADS41Bxx
- ADS58B18
- ADS58B19
Reset the USB IC
Summary of
current registers
being written
Manual register
write
Indication if there
is USB
communication
failure
Visual
representation of
current registers
being written
Figure 3-2. GUI Main Page
SLWU067D – NOVEMBER 2009 – REVISED MARCH 2022
Submit Document Feedback
Copyright © 2022 Texas Instruments Incorporated
ADS41xx/58B18EVM
13
�TI ADC SPI Control Interface
Change of clock
relationship of
digital interface
www.ti.com
Control of offset correction
(enabled by disabling low
latency mode)
Enable different output data
as well as a custom pattern
Figure 3-3. GUI Advanced Page
14
ADS41xx/58B18EVM
SLWU067D – NOVEMBER 2009 – REVISED MARCH 2022
Submit Document Feedback
Copyright © 2022 Texas Instruments Incorporated
�www.ti.com
Quick Start Setup
4 Quick Start Setup
1. Set up the ADS41xxEVM according the following diagram.
• Two signal generators are used and externally locked through the 10-MHz reference. Furthermore,
bandpass filters on clock and data input are used to minimize spurs and noise created by the signal
generators. Depending on filter attenuation, the clock generator amplitude must be set to 10-13 dBm.
• USB connection of the PC to ADS41xxEVM as well as TSW1400 must be established and if necessary
the USB drivers installed accordingly (see Section 3.2).
• The ADS41xx EVM requires a 3.3V power supply and the TSW1400 a 5V supply.
2. If Serial mode (SPI) is used, ensure that jumpers are set for SPI mode (SCLK, SDATA, SEN).
3. Configure the following SPI registers:
• Reset USB.
• Reset ADC.
• Disable low latency mode (ADS41xx only).
• Enable gain (ADS41xx only).
• Set gain to 1 dB (ADS41xx only).
4. Configure the TSW1400 (see Figure 5-1).
• In HSDC Pro, under the ‘Select ADC’ drop down, select the ADC under test.
• Under Test Selection, select Single Tone to run a single tone FFT test.
• Change the ADC Output Data Rate and ADC Input Target Frequency to match those of the signal
generator.
• Press the Capture button to begin capturing data
• Adjust input signal amplitude until fundamental amplitude reaches ~ –1 dBFS.
5. Measurement is illustrated in Figure 5-2.
SLWU067D – NOVEMBER 2009 – REVISED MARCH 2022
Submit Document Feedback
Copyright © 2022 Texas Instruments Incorporated
ADS41xx/58B18EVM
15
�Evaluation
www.ti.com
5 Evaluation
5.1 Register Programming
Early EVMs (serial number 001 to 050) were assembled with preproduction silicon. To obtain optimum SNR and
SFDR performance at input frequencies above 130 MHz, it is recommended to set the following registers:
Address
Data
x03
x04
xD3
x40
xDB
xD0
This change is addressed in production silicon.
Figure 5-1. TSW1400 GUI Introduction
To start the evaluation with the High Speed Data Converter Pro software, note the following points:
1. Open High Speed Data Converter Pro by going to Start Menu → All Programs → Texas Instruments →
High Speed Data Converter Pro.
2. When prompted to select the capture board, select the TSW1400 whose serial number corresponds to
the serial number on the TSW1400EVM and click OK. This pop-up can also be accessed via Instrument
Options → Connect to the Board when not already connected to a board.
3. When prompted to select a device, select ADC in the drop-down menu.
4. If no firmware is currently loaded, there is a message indicating this. Click on OK.
5. Use the Select ADC drop-down menu at the top left corner to select the device under test.
6. When prompted to update the firmware for the ADC, click Yes and wait for the firmware to download to the
TSW1400. This takes a couple of seconds.
16
ADS41xx/58B18EVM
SLWU067D – NOVEMBER 2009 – REVISED MARCH 2022
Submit Document Feedback
Copyright © 2022 Texas Instruments Incorporated
�www.ti.com
Evaluation
7. Enter the desired output data rate into the ADC Output Data Rate field at the bottom left corner then click
outside this box or press Return on the PC keyboard to update.
8. Click Capture in HSDC Pro to capture data from the ADC.
9. Adjust the input level signal to attain the dBFs of approximately -1.
5.2 Quick-Test Results
The user can make the jumper setting as mentioned in Table 1-1. In this configuration, the EVM uses an external
clock source from J19 and a direct input signal J6 to the ADC. This setup uses Power Option 2 (Table 2-2),
Clock Option 1 (Table 2-4), and Analog Input Option 1 (Table 2-6), which is the default on the EVM. Figure 5-2
shows the ADC performance capture using TSW1400 with the input signal of a 10-MHz frequency and clock
frequency of 245.76 MHz with ADS4149.
Figure 5-2. Quick-Setup Test Result.
SLWU067D – NOVEMBER 2009 – REVISED MARCH 2022
Submit Document Feedback
Copyright © 2022 Texas Instruments Incorporated
ADS41xx/58B18EVM
17
�IMPORTANT NOTICE AND DISCLAIMER
TI PROVIDES TECHNICAL AND RELIABILITY DATA (INCLUDING DATA SHEETS), DESIGN RESOURCES (INCLUDING REFERENCE
DESIGNS), APPLICATION OR OTHER DESIGN ADVICE, WEB TOOLS, SAFETY INFORMATION, AND OTHER RESOURCES “AS IS”
AND WITH ALL FAULTS, AND DISCLAIMS ALL WARRANTIES, EXPRESS AND IMPLIED, INCLUDING WITHOUT LIMITATION ANY
IMPLIED WARRANTIES OF MERCHANTABILITY, FITNESS FOR A PARTICULAR PURPOSE OR NON-INFRINGEMENT OF THIRD
PARTY INTELLECTUAL PROPERTY RIGHTS.
These resources are intended for skilled developers designing with TI products. You are solely responsible for (1) selecting the appropriate
TI products for your application, (2) designing, validating and testing your application, and (3) ensuring your application meets applicable
standards, and any other safety, security, regulatory or other requirements.
These resources are subject to change without notice. TI grants you permission to use these resources only for development of an
application that uses the TI products described in the resource. Other reproduction and display of these resources is prohibited. No license
is granted to any other TI intellectual property right or to any third party intellectual property right. TI disclaims responsibility for, and you
will fully indemnify TI and its representatives against, any claims, damages, costs, losses, and liabilities arising out of your use of these
resources.
TI’s products are provided subject to TI’s Terms of Sale or other applicable terms available either on ti.com or provided in conjunction with
such TI products. TI’s provision of these resources does not expand or otherwise alter TI’s applicable warranties or warranty disclaimers for
TI products.
TI objects to and rejects any additional or different terms you may have proposed. IMPORTANT NOTICE
Mailing Address: Texas Instruments, Post Office Box 655303, Dallas, Texas 75265
Copyright © 2022, Texas Instruments Incorporated
�