AFE4300 Development Guide
User's Guide
Literature Number: SBAU201A
June 2012 – Revised August 2012
�Contents
................................................................................................ 4
...................................................................................... 4
2
Overview ............................................................................................................................ 5
2.1
Introduction ............................................................................................................... 5
2.2
Supported Features ..................................................................................................... 5
3
Software Installation ............................................................................................................ 6
3.1
Minimum Requirements ................................................................................................ 6
3.2
Installing the Software (PC Application) .............................................................................. 6
3.3
Installing the USB Drivers .............................................................................................. 9
4
Using the Software: AFE4300 Device GUI and Control Registers ............................................. 14
4.1
Overview of the Features ............................................................................................. 15
5
AFE4300EVM Hardware ...................................................................................................... 23
5.1
Power Supply ........................................................................................................... 24
5.2
Clock ..................................................................................................................... 24
5.3
Reference ............................................................................................................... 24
5.4
Accessing AFE4300 Digital Signals ................................................................................. 25
5.5
Onboard Key Interface (Reset) ...................................................................................... 25
5.6
Connector Interface .................................................................................................... 25
6
Getting Started .................................................................................................................. 26
6.1
Power Up and Connection Setup .................................................................................... 26
6.2
Weigh-Scale Demonstration Using Onboard Load Cell .......................................................... 27
6.3
BCM Demonstration Using Onboard Impedance Simulate Block ............................................... 29
Appendix A Bill of Materials (BOM) .............................................................................................. 31
Appendix B PCB Layout and Schematics ..................................................................................... 34
B.1
PCB Layout ............................................................................................................ 34
B.2
Schematics ............................................................................................................ 37
Revision History ......................................................................................................................... 38
1
AFE4300EVM-PDK Overview
1.1
2
Important Disclaimer Information
Table of Contents
SBAU201A – June 2012 – Revised August 2012
Submit Documentation Feedback
Copyright © 2012, Texas Instruments Incorporated
�www.ti.com
List of Figures
1
PC Application Installation Screen 1 ..................................................................................... 7
2
PC Application Installation Screen 2 ..................................................................................... 7
3
PC Application Installation Screen 3 ..................................................................................... 8
4
PC Application Installation Screen 4 ..................................................................................... 8
5
PC Application Installation Screen 5 ..................................................................................... 9
6
USB Driver Installation Wizard Screen 1 ................................................................................ 9
7
USB Driver Installation Wizard Screen 2 ............................................................................... 10
8
USB Driver Installation Wizard Screen 3 ............................................................................... 11
9
USB Driver Installation Wizard Screen 4 ............................................................................... 11
10
USB Driver Installation Wizard Screen 5 ............................................................................... 12
11
Device Manager Screen .................................................................................................. 13
12
EVM Not Connected to USB Error Message .......................................................................... 14
13
Product Safety Warnings, Restrictions, and Disclaimers............................................................. 15
14
Device Configuration: Global Settings .................................................................................. 16
15
Device Configuration: Weight Scale Front-End Controls ............................................................. 17
16
Device Configuration: BCM Front-End Controls ....................................................................... 18
17
Device Configuration: ADC Controls .................................................................................... 19
18
Device Configuration: Low Level Configuration ....................................................................... 20
19
ADC Capture and Analysis Tab ......................................................................................... 21
20
Save Tab
21
22
23
24
25
26
27
28
...................................................................................................................
AFE4300EVM Block Diagram ...........................................................................................
Hardware Setup ...........................................................................................................
Weigh-Scale GUI Settings................................................................................................
Weigh-Scale ADC Output Display .......................................................................................
BCM GUI Settings .........................................................................................................
BCM ADC Output Display ................................................................................................
Top Layer Placement .....................................................................................................
Bottom Layer Placement .................................................................................................
SBAU201A – June 2012 – Revised August 2012
Submit Documentation Feedback
List of Figures
Copyright © 2012, Texas Instruments Incorporated
22
23
26
27
28
29
30
35
36
3
�User's Guide
SBAU201A – June 2012 – Revised August 2012
AFE4300 Development Guide
This user's guide describes the characteristics, operation and use of the AFE4300EVM-PDK
demonstration kit. This demonstration kit is an evaluation module for the AFE4300 device. The AFE4300
is an analog-front-end incorporating two separate signal chains; one targeting weight measurement and
the other targeting body composition analysis. The AFE4300EVM-PDK is intended for prototyping and
evaluation. This user's guide includes a complete circuit description, schematic diagram, and bill of
materials (BOM).
The following related documents are available through the Texas Instruments web site at
http://www.ti.com.
Related Documentation
Device
Literature Number
AFE4300
SBAS586
1
AFE4300EVM-PDK Overview
1.1
Important Disclaimer Information
CAUTION
The AFE4300EVM-PDK is intended for feasibility and evaluation testing
only in laboratory and development environments. This product is not for
diagnostic use.
The AFE4300EVM-PDK is to be used only under these conditions:
• The AFE4300EVM-PDK is intended only for electrical evaluation of the features of the AFE4300 device
in a laboratory, simulation, or development environment.
• The AFE4300EVM-PDK is not intended for direct interface with a patient, or patient diagnostics.
• The AFE4300EVM-PDK is intended only for development purposes. It is not intended to be used as all
or part of an end-equipment application.
• The AFE4300EVM-PDK should be used only by qualified engineers and technicians who are familiar
with the risks associated with handling electrical and mechanical components, systems, and
subsystems.
• The user is responsible for the safety of himself, fellow employees and contractors, and coworkers
when using or handling the AFE4300EVM-PDK. Furthermore, the user is fully responsible for the
contact interface between the human body and electronics; consequently, the user is responsible for
preventing electrical hazards such as shock, electrostatic discharge, and electrical overstress of
electric circuit components.
Pentium III, Celeron are registered trademarks of Intel Corporation.
Windows is a registered trademark of Microsoft.
SPI is a trademark of Motorola, Inc.
All other trademarks are the property of their respective owners.
4
AFE4300 Development Guide
SBAU201A – June 2012 – Revised August 2012
Submit Documentation Feedback
Copyright © 2012, Texas Instruments Incorporated
�Overview
www.ti.com
2
Overview
2.1
Introduction
The AFE4300EVM-PDK demonstration kit is intended for evaluating the AFE4300 device, a low-cost,
analog-front-end incorporating two separate signal chains; one targeting weight measurement and the
other targeting body composition analysis. The AFE4300EVM-PDK demonstration kit contains the
following items:
•
•
•
AFE4300EVM printed circuit board (PCB)
MMB3 modular motherboard
USB cable
The digital SPI™ control interface is provided by the MMB3 board that connects to the AFE4300
evaluation board. The purpose of AFE4300EVM-PDK is to expedite evaluation and system development.
The MMB3 board allows the AFE4300EVM to be connected to the computer through an available USB
port. This user guide shows how to use the MMB3 board as part of the AFE4300EVM, but does not
provide technical details about the MMB3 board itself.
Throughout this document, the abbreviation EVM and the term evaluation module are synonymous with
the AFE4300EVM-PDK.
2.2
Supported Features
1.
2.
3.
4.
5.
6.
7.
Support for up to four load-cell inputs.
Support for tetrapolar impedance measurements.
Onboard load-cell simulation block.
Onboard impedance simulation block.
Acquire data at up to 860 samples per second (SPS) in data capture mode.
USB-based power and PC application connectivity.
Analysis tools, including a virtual oscilloscope, histogram, and fast Fourier transform (FFT) on the PC
application.
8. Access the AFE4300 registers through an easy-to-use graphical user interface (GUI) PC-based
application.
SBAU201A – June 2012 – Revised August 2012
Submit Documentation Feedback
AFE4300 Development Guide
Copyright © 2012, Texas Instruments Incorporated
5
�Software Installation
3
Software Installation
3.1
Minimum Requirements
www.ti.com
Before installing the software, verify that your PC meets the minimum requirements outlined in this
section.
3.1.1
Required Setup for AFE4300EVM GUI Software
1.
2.
3.
4.
5.
6.
7.
8.
3.1.2
PC-compatible computer
Pentium III® or Celeron® processor, 866 MHz or equivalent
Minimum 256 MB of RAM (512 MB or greater recommended)
Hard disk drive with at least 200 MB free space
Windows® XP operating system with SP2, or Windows 7 operating system
1280 × 1024 or greater display screen resolution
Mouse or other pointing device
Available USB input
Additional Requirements for Use with Hardware
1. AFE4300EVM-PDK Demonstration Kit
2. USB cable
3.2
Installing the Software (PC Application)
The GUI software to evaluate the AFE4300 device is available at the Texas Instruments web site at
http://www.ti.com
Before installing the software, make sure the AFE4300EVM-PDK is not connected to the PC. If using a
machine with Windows 7, it is recommended to have administrator rights to avoid problems during
installation.
Unzip the installer file to a temporary directory, and then double click setup.exe from the
C:\temp\AFE4300 EVM GUI Installer directory to install the software. Unless otherwise specified during
the installation process, the software installs at C:\Program Files\Texas Instruments\AFE4300 Device GUI.
The installation creates a program menu item (AFE4300 Device GUI under Start → All Programs → Texas
Instruments → AFE4300 Device GUI) to execute the software.
Follow these directions to ensure proper installation of the PC application.
Double click on setup.exe and the screen as shown in Figure 1 appears. Click Next to continue.
6
AFE4300 Development Guide
SBAU201A – June 2012 – Revised August 2012
Submit Documentation Feedback
Copyright © 2012, Texas Instruments Incorporated
�Software Installation
www.ti.com
Figure 1. PC Application Installation Screen 1
Accept the GUI License Agreement, as shown in Figure 2, and click Next to continue.
Figure 2. PC Application Installation Screen 2
SBAU201A – June 2012 – Revised August 2012
Submit Documentation Feedback
AFE4300 Development Guide
Copyright © 2012, Texas Instruments Incorporated
7
�Software Installation
www.ti.com
Accept the NI and IVI license agreements, as shown in Figure 3, and click Next to continue.
Figure 3. PC Application Installation Screen 3
The next screen in the installation process shows the software files that will be installed on your PC, as
shown in Figure 4. Click Next to continue.
Figure 4. PC Application Installation Screen 4
8
AFE4300 Development Guide
SBAU201A – June 2012 – Revised August 2012
Submit Documentation Feedback
Copyright © 2012, Texas Instruments Incorporated
�Software Installation
www.ti.com
The LabVIEW application software is now installed, as shown in Figure 5. Click Next to install the USB
drivers.
Figure 5. PC Application Installation Screen 5
3.3
Installing the USB Drivers
The communication interface between the AFE4300EVM-PDK and PC is through the USB. A one-time
installation of the USB driver is required to enable communication between AFE4300EVM-PDK and PC
application.
The following steps ensure proper installation of the USB drivers. Figure 6 shows a dialog box notification
that the TUSB3410 single driver installation is about to start. Click OK to continue.
Figure 6. USB Driver Installation Wizard Screen 1
SBAU201A – June 2012 – Revised August 2012
Submit Documentation Feedback
AFE4300 Development Guide
Copyright © 2012, Texas Instruments Incorporated
9
�Software Installation
www.ti.com
The InstallShield Wizard prompts about the installation of TUSB3410 on your computer, as shown in
Figure 7. Click Next to continue.
Figure 7. USB Driver Installation Wizard Screen 2
Accept the VCP Driver License Agreement, as shown in Figure 8 and click Next to continue. The progress
of the installation of the USB drivers is shown in Figure 9.
10
AFE4300 Development Guide
SBAU201A – June 2012 – Revised August 2012
Submit Documentation Feedback
Copyright © 2012, Texas Instruments Incorporated
�Software Installation
www.ti.com
Figure 8. USB Driver Installation Wizard Screen 3
Figure 9. USB Driver Installation Wizard Screen 4
SBAU201A – June 2012 – Revised August 2012
Submit Documentation Feedback
AFE4300 Development Guide
Copyright © 2012, Texas Instruments Incorporated
11
�Software Installation
www.ti.com
Click on Finish to complete the installation of the USB drivers on your computer, as shown in Figure 10.
The AFE4300EVM-PDK is now ready to use.
Figure 10. USB Driver Installation Wizard Screen 5
Plug one end of the USB cable to the J1 connector on the MMB3 board, and the other end into the USB
port on the PC.
12
AFE4300 Development Guide
SBAU201A – June 2012 – Revised August 2012
Submit Documentation Feedback
Copyright © 2012, Texas Instruments Incorporated
�Software Installation
www.ti.com
The TUSB3410 device on the MMB3 board is now recognized as the Virtual COM port under the Device
Manager (Start → Control Panel → System → Hardware → Device Manager → Ports (COM & LPT)). An
example COM port is shown in Figure 11.
Figure 11. Device Manager Screen
SBAU201A – June 2012 – Revised August 2012
Submit Documentation Feedback
AFE4300 Development Guide
Copyright © 2012, Texas Instruments Incorporated
13
�Using the Software: AFE4300 Device GUI and Control Registers
4
www.ti.com
Using the Software: AFE4300 Device GUI and Control Registers
From the Start menu, select All programs → Texas Instruments → AFE4300 Device GUI to run the
AFE4300EVM GUI software. Unless the hardware has been disconnected, the user will see messages
that confirm that the connection has been established and the program is waiting in idle mode for user
input.
If the connection to the AFE4300 board is not established, then the program prompts the user to check
the connection between the PC and AFE4300EVM and retry, as shown in Figure 12.
Figure 12. EVM Not Connected to USB Error Message
14
AFE4300 Development Guide
SBAU201A – June 2012 – Revised August 2012
Submit Documentation Feedback
Copyright © 2012, Texas Instruments Incorporated
�Using the Software: AFE4300 Device GUI and Control Registers
www.ti.com
4.1
Overview of the Features
This section provides a quick overview of the various features and functions of the AFE4300 device GUI
software package.
There are four primary tabs:
• Device Configuration: Used to configure all the AFE4300 user registers in a series of related
subtabs.
– Global Settings
– Weight Scale Controls
– BCM Controls
– ADC Controls
– Low Level Configuration
• ADC Capture and Analysis: Used to view and analyze the raw data.
• About: Product safety warnings, restrictions, and disclaimers. (see Figure 13)
• Save: Used to write data samples and analysis results to a file.
Figure 13. Product Safety Warnings, Restrictions, and Disclaimers
SBAU201A – June 2012 – Revised August 2012
Submit Documentation Feedback
AFE4300 Development Guide
Copyright © 2012, Texas Instruments Incorporated
15
�Using the Software: AFE4300 Device GUI and Control Registers
4.1.1
www.ti.com
Device Configuration Tab
The Device Configuration tab is used to configure the AFE4300 device. This tab contains five subtabs:
Global Settings, Weight Scale Controls, BCM Controls, ADC Controls, and Low Level Configuration.
4.1.1.1
Global Settings Subtab
The Global Settings subtab has following features:
1. Reset To EVM Defaults button that is used to reset the device and set up the board to the EVM default
register settings.
2. Enables the user:
(a) To modify the clock frequency provided externally,
(b) To modify the external VREF, and
(c) To turn on the device.
The Global Settings subtab is shown in Figure 14.
Figure 14. Device Configuration: Global Settings
16
AFE4300 Development Guide
SBAU201A – June 2012 – Revised August 2012
Submit Documentation Feedback
Copyright © 2012, Texas Instruments Incorporated
�Using the Software: AFE4300 Device GUI and Control Registers
www.ti.com
4.1.1.2
Weight Scale Controls Subtab
The Weight Scale Controls subtab under the Device Configuration tab is a user-configurable graphical
representation of the weight-scale front-end controls, allowing the user to:
• Turn on and off the weight-scale front-end chain.
• Select the four weight-scale channels.
• Turn on and off the digital-to-analog converter (DAC).
• Set the 6-bit DAC offset.
• Select the gain of the second stage.
The Weight Scale Controls subtab is shown in Figure 15.
Figure 15. Device Configuration: Weight Scale Front-End Controls
SBAU201A – June 2012 – Revised August 2012
Submit Documentation Feedback
AFE4300 Development Guide
Copyright © 2012, Texas Instruments Incorporated
17
�Using the Software: AFE4300 Device GUI and Control Registers
4.1.1.3
www.ti.com
BCM Controls Subtab
The BCM Controls subtab under the Device Configuration tab is a user-configurable graphical
representation of the body composition measurement (BCM) front-end controls. allowing the user to:
• Turn on and off the BCM front-end chain.
• Select the impedance channels to inject the sinusoidal current.
• Select the impedance channels to measure the voltage potential.
• Select the full-wave rectifier or I/Q demodulator.
• Select the code for the direct digital synthesizer (DDS).
The BCM Controls subtab is shown in Figure 16.
Figure 16. Device Configuration: BCM Front-End Controls
18
AFE4300 Development Guide
SBAU201A – June 2012 – Revised August 2012
Submit Documentation Feedback
Copyright © 2012, Texas Instruments Incorporated
�Using the Software: AFE4300 Device GUI and Control Registers
www.ti.com
4.1.1.4
ADC Controls Subtab
The ADC Controls subtab under the Device Configuration tab is a user-configurable graphical
representation of the AFE4300 analog-to-digital converter (ADC) Controls, allowing the user to:
• Turn on and off the ADC.
• Select the gain of the ADC.
• Select the data rate for the decimation filter.
• Select any of the AUX, WS, BCM I, and BCM Q channels.
• Enable battery monitoring.
The ADC Control subtab is shown in Figure 17.
Figure 17. Device Configuration: ADC Controls
SBAU201A – June 2012 – Revised August 2012
Submit Documentation Feedback
AFE4300 Development Guide
Copyright © 2012, Texas Instruments Incorporated
19
�Using the Software: AFE4300 Device GUI and Control Registers
4.1.1.5
www.ti.com
Low Level Configuration Subtab
The Low Level Configuration subtab under the Device Configuration tab is used to directly configure the
various registers of the AFE4300 device. Please refer to the AFE4300 data sheet (SBAS586) for the
register details of the chip.
Figure 18 shows the low-level configuration registers of the AFE4300 device. The register map portion of
this subtab shows the reset values of the registers under the Default column, and the EVM default values
of the registers after the GUI is loaded under the EVM Default column. The LW* column shows the latest
written values of the AFE4300 registers, and the LR* column shows the latest read values of the AFE4300
registers.
Figure 18. Device Configuration: Low Level Configuration
When a selection is made on any of the tabs on the GUI, multiple fields of various registers are modified.
Click on the lower-left corner of the GUI to view the registers that are modified when a selection is made.
NOTE:
20
The AFE4300 device GUI only supports Continuous-Conversion mode. Single-Shot mode is
not supported.
AFE4300 Development Guide
SBAU201A – June 2012 – Revised August 2012
Submit Documentation Feedback
Copyright © 2012, Texas Instruments Incorporated
�Using the Software: AFE4300 Device GUI and Control Registers
www.ti.com
4.1.2
ADC Capture and Analysis
The ADC Capture and Analysis tab consists of various analysis routines and displays. This tab is used to:
• Set the capture mode to finite or continuous.
• Set the number of samples (block size) in Finite Capture mode.
• Set the display to volts or codes
• Acquire the data by clicking on the Capture button.
The captured data can be analyzed in time domain and frequency domain; the data can also be displayed
in a histogram format. The ADC Capture and Analysis tab is shown in Figure 19.
Figure 19. ADC Capture and Analysis Tab
By selecting the Time Domain plot, the data are displayed in time domain format. The units can be
converted from codes to volts using the drop-down window in the top-left corner of the GUI. For the time
domain plot, the mean voltage, root mean square (RMS) voltage, and peak-to-peak voltage are displayed
in the Test Results section, located on the left side of the GUI.
By selecting the FFT plot, the data are displayed in the frequency domain by performing an FFT on the
channel selected. Details of the FFT (including SNR, THD, and so on) are shown in the Test Results
section located in the left side of the GUI.
Selecting the Histogram plot displays the data in a histogram format for the channel selected. The data
are arranged in the total number of histogram bins set within the tab following acquisition. The histogram
analysis (shown in the Test Results section of the GUI) is used to view the mean voltage, root mean
square (RMS) voltage, and peak-to-peak voltage.
Two plot modes can be selected: Single Plot or Double Plot. In Single Plot mode, only one plot (Time,
FFT, or Histogram) can be viewed and analyzed for post processing. In Double Plot mode, any two plots
(Time, FFT or Histogram) can be viewed and analyzed.
SBAU201A – June 2012 – Revised August 2012
Submit Documentation Feedback
AFE4300 Development Guide
Copyright © 2012, Texas Instruments Incorporated
21
�Using the Software: AFE4300 Device GUI and Control Registers
4.1.3
www.ti.com
Save Tab
The Save tab shown in Figure 20 provides provisions to save the analysis or data to a file. By default, the
data are saved to C:\Program Files\Texas Instruments\AFE4300 Device GUI\Log. Use the Directory to
Save Files option to select the folder where data are to be saved. In the pop-up window, navigate to the
folder where the data file is to be saved and select Use Current Folder. Then select Save to File to save
the file.
Figure 20. Save Tab
Table 1. Description for the Controls in Save Tab
Button/Control
FFT Analysis
Description
For saving FFT analysis result. The result is saved in the file Device_"record number"_Analysis.xls.
Histogram Analysis For saving histogram analysis result. The result is saved in the file Device_"record number"_Analysis.xls.
Register Setting
All the current register values are read from the EVM and stored. The result is saved in the file Device_"record
number"_Analysis.xls.
Data - Codes
Acquired data sample values are stored to the file Device_"record number"_Codes.xls.
FFT Data
Acquired data samples FFT values are stored to the file Device_"record number"_FFT.xls.
The record number saves files with the provided number in the file name. User notes can also be added to
the file by typing the notes in the user comments control.
22
AFE4300 Development Guide
SBAU201A – June 2012 – Revised August 2012
Submit Documentation Feedback
Copyright © 2012, Texas Instruments Incorporated
�AFE4300EVM Hardware
www.ti.com
5
AFE4300EVM Hardware
CAUTION
Many of the components on the AFE4300EVM are susceptible to damage by
electrostatic discharge (ESD). Customers are advised to observe proper ESD
handling precautions when unpacking and handling the EVM, including the use
of a grounded wrist strap, bootstraps, or mats at an approved ESD workstation.
Safety glasses should also be worn.
The AFE4300 weight-scale and BCM front-end evaluation board is configured to be used with the MMB3
board, which acts as the data capture card. The key features of the AFE4300 device are:
• Two separate signal chains for weight-scale and BCM analysis.
• Supports up to four load-cell inputs.
• On-chip load-cell 1.7-V excitation voltage for ratiometric measurement.
• Supports up to three tetrapolar complex impedance measurements.
• 16-bit ADC.
• Data rates of 8 SPS to 860 SPS.
• 2-V to 3.6-V digital supply.
• SPI data interface.
The AFE4300EVM is used as a demonstration board for weight-scale and body composition measurement
applications. The EVM provides load-cell terminals to support up to four load-cell inputs for weight-scale
measurements, BCM terminals to support up to three tetrapolar complex impedance measurements. Any
type of single-ended or differential signals can be fed directly to the AFE4300 through the auxiliary (AUX1
and AUX2) inputs. External support circuits, such as an antialiasing network for load-cell terminals, trimpot for setting the gain of the instrumentation amplifier at the weight-scale front-end, instrumentation
amplifiers for the BCM differential terminals, load-cell simulation block, impedance simulation block,
clocks, and external references are provided for testing purposes.
Figure 21 shows the functional block diagram for the AFE4300EVM.
BCM
Voltage Measurment
Terminals
6
BCM
Current Injection
Terminals
Shunt Jumper
(Not Installed)
Protection and
AC-Coupling Block
6
Protection and
AC-Coupling Block
6
Impedance
Simulate
Connector
Impedance
Simulate Block
6
AUX2
MMB3 Digital Connector
AFE4300
Antialiasing
Filter
Load-Cell
Terminals
MMB3 Power Connector
AUX1
Load-Cell
Simulate Block
Figure 21. AFE4300EVM Block Diagram
SBAU201A – June 2012 – Revised August 2012
Submit Documentation Feedback
AFE4300 Development Guide
Copyright © 2012, Texas Instruments Incorporated
23
�AFE4300EVM Hardware
www.ti.com
The AFE4300EVM board is a two-layer circuit board. The board layout is provided in Section B.1, and the
schematics are provided in Section B.2. The bill of materials is provided in Appendix A. The following
sections explain some of the hardware settings possible with the EVM for the evaluating the AFE4300
under various test conditions.
5.1
Power Supply
The AFE4300EVM mounts on the MMB3 data capture card with connectors J101, J102 and J103 on the
AFE4300EVM. The main power supply for the AFE4300EVM is provided by the MMB3 host board through
power connector J102 on the AFE4300EVM. The AFE4300 can operate from +2-V to +3.6-V analog
supply (AVDD/AVSS). The power consumption of the AFE4300EVM is measured by using the J8
connector. The power consumption of the AFE4300 device can be measured by using the J9 connector.
5.2
Clock
The AFE4300 device requires an external 1-MHz clock signal. The AFE4300EVM provides an option to
provide the external 1-MHz clock signal from the MMB3 host board, or through an SMA connector. The
AFE4300EVM-PDK is shipped with the clock signal routed from the MMB3 host board.
5.3
Reference
The AFE4300 has an on-chip internal reference circuit and an on-chip, low-dropout regulator (LDO) that
provides reference voltages to the device. Alternatively, the internal references can be powered down and
references can be applied externally. TP4 is used to measure the reference voltage, VREF. Jumper J54, pin
2 is used to measure VLDO. Table 2 presents the various configurations for the reference voltages.
Table 2. Reference Voltage Configurations
Mode
Weight scale enabled
BCM enabled
Both off (AUX
measurement)
Both on (Invalid Mode)
24
Register 0x10 [6:5]
VLDO Pin
VREF Pin
ADC Reference
00
1.7 V
Floating
1.7 V (from LDO)
11
1.7 V
Floating
External reference
(applied on VREF pin)
00
Floating
1.7 V
External reference
(applied on VLDO pin)
11
Floating
1.7 V
1.7 V (from reference)
00
1.7 V
Floating
1.7 V (from LDO)
11
1.7 V
Floating
External reference
(applied on VREF pin)
—
—
—
—
AFE4300 Development Guide
SBAU201A – June 2012 – Revised August 2012
Submit Documentation Feedback
Copyright © 2012, Texas Instruments Incorporated
�AFE4300EVM Hardware
www.ti.com
5.4
Accessing AFE4300 Digital Signals
The AFE4300 digital signals (including SPI signals and control signals) are available at connector J103.
These signals are used to interface to the MMB0-like data capture board. The pinout for this connector is
given in Table 3.
Table 3. Digital Connector Pinout
Signal
5.5
J103 Pin Number
VREF pin
STE1
1
2
NC
SCLK
3
4
GND
NC
5
6
NC
NC
7
8
RESET_MCU
NC
9
10
GND
SIMO1
11
12
NC
SOMI1
13
14
NC
RDY
15
16
NC
CLK_MCU
17
18
GND
NC
19
20
SDQ
Onboard Key Interface (Reset)
The AFE4300EVM has one switch. When this switch is pressed, a hard reset is issued to the AFE4300
device setting all the registers to the reset state.
5.6
Connector Interface
Table 4 presents the signal description of the connectors provided for the weight-scale load cell, BCM
impedance, and AUX terminals.
Table 4. AFE4300EVM Onboard Connectors
Connector
Signal Description
J56 (1-2)
INP1 / INM1 (Load cell terminal channel 1)
J56 (3-4)
INP2 / INM2 (Load cell terminal channel 2)
J55 (1-2)
INP3 / INM3 (Load cell terminal channel 3)
J55 (3-4)
INP4 / INM4 (Load cell terminal channel 4)
J36 (1-2)
IOUT0 / IOUT1 (Current source output to electrodes)
J38 (1-2)
IOUT2 / IOUT3 (Current source output to electrodes)
J38 (3-4)
IOUT4 / IOUT5 (Current source output to electrodes)
J10 (1-2)
VSENSE0 / VSENSE1 (Input to differential amplifier from electrodes)
J21 (1-2)
VSENSE2 / VSENSE3 (Input to differential amplifier from electrodes)
J21 (2-3)
VSENSE4 / VSENSE5 (Input to differential amplifier from electrodes)
J37 (1-2)
AUX1 / AVSS
J1 (1-2)
AUX2 / AVSS
SBAU201A – June 2012 – Revised August 2012
Submit Documentation Feedback
AFE4300 Development Guide
Copyright © 2012, Texas Instruments Incorporated
25
�Getting Started
www.ti.com
6
Getting Started
6.1
Power Up and Connection Setup
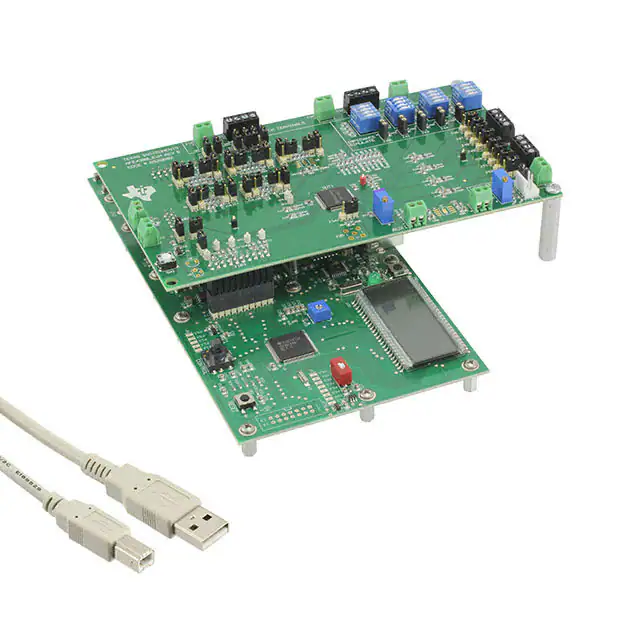
The following steps help to guide you through power up and connection of the EVM. Figure 22 shows the
hardware setup.
1. Connect the USB cable to the J1 connector on the MMB3 board.
2. For weigh-scale setup:
(a) To connect external load cells: use connectors J55 or J56 to connect to any or all of the four
channels: INP[:03] and INM[3:0].
(b) To connect the onboard load cell: place shunts between pins 2 and 3 for J46 through J53 to switch
to the onboard load cell. Note that by default, the shunts are placed between pins 1 and 2 to enable
connection to external load cell terminals.
3. For BCM hardware setup:
(a) Connect current injection electrodes across IOUT[5:0] terminals (J36 and J38).
(b) Connect voltage measurement electrodes across VSENSE[5:0] terminals (J10 and J21).
Figure 22. Hardware Setup
26
AFE4300 Development Guide
SBAU201A – June 2012 – Revised August 2012
Submit Documentation Feedback
Copyright © 2012, Texas Instruments Incorporated
�Getting Started
www.ti.com
6.2
Weigh-Scale Demonstration Using Onboard Load Cell
This section describes using the onboard load cell to set up the weigh-scale function.
6.2.1
Hardware Setup
Place shunts across J52 and J53 (pins INP1 and INM1) to connect channel 1.
6.2.2
Graphical User Interface (GUI) Settings
The following steps set up the weigh-scale function using the GUI. Figure 23 shows the GUI window with
the step numbers highlighted.
1. Click on the Device Configuration tab.
2. Then click on the Weight Scale Control subtab.
3. Select the INP1 and INM1 channel.
4. Click the WS ON? button to enable the weigh-scale function.
Figure 23. Weigh-Scale GUI Settings
SBAU201A – June 2012 – Revised August 2012
Submit Documentation Feedback
AFE4300 Development Guide
Copyright © 2012, Texas Instruments Incorporated
27
�Getting Started
6.2.3
www.ti.com
Weigh-Scale ADC Output Display
This following steps describe how to view the weigh-scale ADC output display, and are highlighted in
Figure 24.
1. Click on the ADC Capture & Analysis tab.
2. Set the Capture Mode to Continuous.
3. Turn on VR2 (refer to attached scematics) to see that the waveform changes in the display window.
Figure 24. Weigh-Scale ADC Output Display
28
AFE4300 Development Guide
SBAU201A – June 2012 – Revised August 2012
Submit Documentation Feedback
Copyright © 2012, Texas Instruments Incorporated
�Getting Started
www.ti.com
6.3
BCM Demonstration Using Onboard Impedance Simulate Block
This section describes how to use the onboard impedance simulate block for body composition
measurement.
6.3.1
Hardware Setup
The following steps describe the hardware setup:
1. For demonstration purposes, place shunts across J11, J12, J22, J23, J24, and J25. Connect wires
across the impedance simulate terminal and either the IOUT[5:0] or VSENSE[5:0] terminals.
2. Switch (SW3) third position is in the ON position, which simulates a 1-kΩ body impedance resistor
between IOUT0 and IOUT1.
6.3.2
GUI Settings
The following steps describe the GUI setup, and are highlighted in Figure 25.
1. Click on the Device Configuration tab.
2. Click on BCM Control subtab.
3. Select the VSENSE1 terminal using the + dial.
4. Select the VSENSE0 terminal using the – dial.
5. Select the IOUT0 terminal for the FB0 dial.
6. Select the IOUT1 terminal for the FB1 dial.
7. Click the BCM ON? button to enable the weight-scale function.
Figure 25. BCM GUI Settings
SBAU201A – June 2012 – Revised August 2012
Submit Documentation Feedback
AFE4300 Development Guide
Copyright © 2012, Texas Instruments Incorporated
29
�Getting Started
6.3.3
www.ti.com
BCM ADC Output Display
This following steps describe how to view the BCM ADC output display, and are highlighted in Figure 26.
1. Click on the ADC Capture & Analysis tab.
2. Set the Capture Mode to Continuous.
3. In the Test Results window, check the value in the Mean (V) row. For a 1-kΩ body-impedance resistor,
the mean volts are approximately 0.69 V.
Figure 26. BCM ADC Output Display
30
AFE4300 Development Guide
SBAU201A – June 2012 – Revised August 2012
Submit Documentation Feedback
Copyright © 2012, Texas Instruments Incorporated
�www.ti.com
Appendix A Bill of Materials (BOM)
The following pages show the bill of materials table, landscaped for readability.
SBAU201A – June 2012 – Revised August 2012
Submit Documentation Feedback
Bill of Materials (BOM)
Copyright © 2012, Texas Instruments Incorporated
31
�Appendix A
www.ti.com
Table 5. Bill of Materials
32
Item
Quantity
1
6
CR1, CR2, CR3, CR4, CR5, CR6
Ref Des
ESD PROTECTION DIODE, DBL ELEMENT, 6A
Description
TI
Manufacturer
TPD1E10B06
Part Number
2
33
C2, C3, C4, C5, C8, C9, C12, C13,
C14, C15, C16, C19, C20, C21, C22,
C23, C31, C33, C42, C43, C44, C45,
C46, C47, C48, C49, C50, C51, C52,
C53, C54, C55, C56
CAPACITOR,SMT,0603,CERAMIC,0.1uF,25V,10%,X7R
AVX
06033C104KAT2A
3
4
C6, C7, C10, C11
UNINSTALLED
UNINSTALLED
06033D104KAT2A(UN)
4
8
C35, C36, C37, C38, C57, C58, C59,
C60
CAPACITOR,SMT,0603,CERAMIC,100pF,50V,5%,C0G(N
P0)
AVX
06035A101JAT2A
5
10
C24, C25, C26, C27, C28, C29, C30,
C39, C40, C41
CAPACITOR,SMT,0603,CERAMIC,1.0uF,16V,10%,X5R
AVX
0603YD105KAT2A
6
1
C1
CAPACITOR,SMT,0603,CERAMIC,10uF,6.3V,20%,X5R
PANASONIC
ECJ-1VB0J106M
7
2
C32, C34
CAPACITOR,SMT,0603,CERAMIC,0.47uF,6.3V,10%,X5R
PANASONIC
ECJ-1VB0J474K
8
2
C17, C18
CAPACITOR,SMT,0603,CERAMIC,4.7uF,6.3V,10%,X5R
MURATA
GRM188R60J475KE19D
AMPHENOL
901-144-8
9
1
J35
SMA COAX STRAIGHT PCB CURRENT P/N IS 901-1448RFX
10
19
J3, J4, J7, J8, J9, J11, J12, J13, J14,
J19, J20, J22, J23, J24, J25, J26, J29,
J30, J31
HEADER,THU,2P,2X1,MALE,DUAL ROW,100LS,100TL
SAMTEC
TSW-101-07-G-D
11
1
J102
HEADER,THU,10P,FEM,2x5,0.1LS,34OH,115TL,VERTIC
AL
SAMTEC
ESW-105-44-L-D
12
2
J101, J103
HEADER,THU,20P,FEM,2x10,0.1LS,VERTICAL,115TL,34
0H
SAMTEC
ESW-110-44-L-D
13
5
J39, J41, J42, J44, J45
HEADER,THU,FEM,0.1LS,2P,1X2,236H,118TL
MILL-MAX
316-93-102-41-006
14
1
J54
4P, VERT, FRICTION LOCK
MOLEX
22-23-2041
TI
OPA2354AIDDA
15
1
U6
250MHz RAIL-TO-RAIL I/O CMOS OPERATIONAL
AMPLIFIERS
16
1
U7
250MHz RAIL-TO-RAIL I/O CMOS OPERATIONAL
AMPLIFIERS
TI
OPA354AIDDA
17
1
U1
SINGLE 2-INPUT POSITIVE-AND GATE
TI
SN74AHC1G08DBV
18
2
U4, U5
250MHz, RAIL-TO-RAIL I/O,CMOS OPERATIONAL
AMPLIFIERS
TI / BURR-BROWN
OPA4354AIPW
19
19
J5, J6, J15, J16, J17, J18, J27, J28,
J32, J33, J34, J46, J47, J48, J49, J50,
J51, J52, J53
INSTALLED JUMPER,THU,3P .100cc,123
ANY
JUMPER,3P .100cc 123
20
22
R5, R7, R13, R14, R18, R22, R26,
R28, R29, R38, R39, R41, R46, R48,
R49, R63, R64, R65, R66, R67, R68,
R82
RESISTOR,SMT,0603,THICK FILM,10M,1%,1/10W
YAGEO
9C06031A1005FKHFT
21
31
R1, R6, R12, R16, R17, R19, R23,
R24, R25, R27, R30, R37, R40, R42,
R43, R44, R45, R47, R50, R54, R60,
R61, R62, R69, R73, R78, R79, R80,
R81, R99, R101
RESISTOR,SMT,0603,0603,1/10W,0 OHM,ZERO OHM
VISHAY
CRCW0603000Z
22
5
R4, R76, R102, R103, R105
RESISTOR,SMT,0603,1%,1/10W,1.00K
VISHAY
CRCW06031001F
Bill of Materials (BOM)
SBAU201A – June 2012 – Revised August 2012
Submit Documentation Feedback
Copyright © 2012, Texas Instruments Incorporated
�Appendix A
www.ti.com
Table 5. Bill of Materials (continued)
Item
Quantity
Ref Des
Description
Manufacturer
Part Number
23
11
R3, R15, R57, R91, R92, R93, R94,
R95, R96, R97, R98
24
2
R58, R86
RESISTOR,SMT,0603,1%,1/10W,100 OHM
VISHAY
CRCW0603100F
25
1
R85
RESISTOR,SMT,0603,1%,1/10W,10 OHM
VISHAY
CRCW060310F
26
1
R77
RESISTOR,SMT,0603,1%,1/10W,1.50K
VISHAY
CRCW06031501F
27
5
R9, R11, R32, R35, R52
RESISTOR,SMT,0603,1%,1/10W,150K
VISHAY
CRCW06031503F
28
2
R71, R88
RESISTOR,SMT,0603,1%,1/10W,499 OHM
VISHAY
CRCW0603499F
29
1
R74
RESISTOR,SMT,0603,1%,1/10W,604 OHM
VISHAY
CRCW0603604F
30
12
R8, R10, R20, R21, R31, R33, R34,
R36, R51, R53, R83, R84
RESISTOR,SMT,0603,1%,1/10W,75.0K
VISHAY
CRCW06037502F
31
2
R56, R75
RESISTOR,SMT,0603,1%,1/10W,750 OHM
VISHAY
CRCW0603750F
32
1
R104
RESISTOR,SMT,0603,1%,1/10W,976 OHM
VISHAY
CRCW0603976F
33
1
R59
RESISTOR,SMT,0603,200 OHM,0.1%,1/10W
PANASONIC
ERA-3YEB201V
34
1
R87
RESISTOR,SMT,0603,5%,1/10W,300
PANASONIC
ERJ-3GSYJ301
35
1
R55
RESISTOR,SMT,0603,50.0 OHM,0.1%,1/8W
VISHAY
FC0603E50R0BTBST1
36
4
SW2, SW3, SW4, SW5
SWITCH, SPST, DIP8
AMP
3-435668-4
37
1
SW1
SWITCH,SMT,4P,SPST-NO,TOP-PUSH,4.3mm HEIGHT
PANASONIC
EVQ-PAD04M
38
8
J1, J2, J10, J36, J37, J40, J43, J57
TERMINAL BLOCK,THU,2 POSITION,137TL,323H
ON-SHORE TECHNOLOGY
ED555/2DS
39
4
J21, J38, J55, J56
TERMINAL BLOCK,THU,4 POSITION,137TL,323H
ON-SHORE TECHNOLOGY
ED555/4DS
40
1
VR1
TRIMPOT,THU,10K,10%,0.5W,100ppm,25T
BOURNS
3296W-1-103
41
1
VR2
TRIMPOT,THU,50 OHM,10%,0.5W,100ppm,25T
BOURNS
3296W-1-500
42
6
R2, R70, R72, R89, R90, R100
UNINSTALLED
UNINSTALLED
CRCW060349R9F(UN)
43
5
U2,U3
DIA_038, PIN_013-020, EXP_146, B125
TYCO
50935
44
1
DUT1
QFP 80 PFC PKG (Customer Supply)
TI
AFE4300
45
2
TP1, TP5
TESTPOINT,THU,MINIATURE,0.1LS,120TL, BLACK
KEYSTONE ELECTRONICS
5001
46
7
RDY,STE,TP2, TP3,SCLK,SIMO,SOMI TESTPOINT,THU,MINIATURE,0.1LS,120TL, WHITE
KEYSTONE ELECTRONICS
5002
47
1
TP4
KEYSTONE ELECTRONICS
5000
RESISTOR,SMT,0603,1%,1/10W,10.0K
VISHAY
CRCW06031002F
TESTPOINT,THU,MINIATURE,0.1LS,120TL, RED
SBAU201A – June 2012 – Revised August 2012
Submit Documentation Feedback
Bill of Materials (BOM)
Copyright © 2012, Texas Instruments Incorporated
33
�www.ti.com
Appendix B PCB Layout and Schematics
B.1
PCB Layout
The following pages show the PCB layout, landscaped for readability.
34
PCB Layout and Schematics
SBAU201A – June 2012 – Revised August 2012
Submit Documentation Feedback
Copyright © 2012, Texas Instruments Incorporated
�PCB Layout
www.ti.com
Figure 27. Top Layer Placement
SBAU201A – June 2012 – Revised August 2012
Submit Documentation Feedback
PCB Layout and Schematics
Copyright © 2012, Texas Instruments Incorporated
35
�PCB Layout
www.ti.com
Figure 28. Bottom Layer Placement
36
PCB Layout and Schematics
SBAU201A – June 2012 – Revised August 2012
Submit Documentation Feedback
Copyright © 2012, Texas Instruments Incorporated
�Schematics
www.ti.com
B.2
Schematics
The schematics are appended to the end of this user's guide.
SBAU201A – June 2012 – Revised August 2012
Submit Documentation Feedback
PCB Layout and Schematics
Copyright © 2012, Texas Instruments Incorporated
37
�������Revision History
www.ti.com
Revision History
Changes from Original (June 2012) to A Revision ......................................................................................................... Page
•
•
•
•
Changed all instances of "MSP430L110EVM" to "MMB3 board." ................................................................. 5
Changed all instances of "USB-to-mini USB cable" to "USB cable." .............................................................. 5
Added Getting Started section ........................................................................................................ 26
Updated BOM ........................................................................................................................... 31
NOTE: Page numbers for previous revisions may differ from page numbers in the current version.
38
Revision History
SBAU201A – June 2012 – Revised August 2012
Submit Documentation Feedback
Copyright © 2012, Texas Instruments Incorporated
�Evaluation Board/Kit Important Notice
Texas Instruments (TI) provides the enclosed product(s) under the following conditions:
This evaluation board/kit is intended for use for ENGINEERING DEVELOPMENT, DEMONSTRATION, OR EVALUATION PURPOSES
ONLY and is not considered by TI to be a finished end-product fit for general consumer use. Persons handling the product(s) must have
electronics training and observe good engineering practice standards. As such, the goods being provided are not intended to be complete
in terms of required design-, marketing-, and/or manufacturing-related protective considerations, including product safety and environmental
measures typically found in end products that incorporate such semiconductor components or circuit boards. This evaluation board/kit does
not fall within the scope of the European Union directives regarding electromagnetic compatibility, restricted substances (RoHS), recycling
(WEEE), FCC, CE or UL, and therefore may not meet the technical requirements of these directives or other related directives.
Should this evaluation board/kit not meet the specifications indicated in the User’s Guide, the board/kit may be returned within 30 days from
the date of delivery for a full refund. THE FOREGOING WARRANTY IS THE EXCLUSIVE WARRANTY MADE BY SELLER TO BUYER
AND IS IN LIEU OF ALL OTHER WARRANTIES, EXPRESSED, IMPLIED, OR STATUTORY, INCLUDING ANY WARRANTY OF
MERCHANTABILITY OR FITNESS FOR ANY PARTICULAR PURPOSE.
The user assumes all responsibility and liability for proper and safe handling of the goods. Further, the user indemnifies TI from all claims
arising from the handling or use of the goods. Due to the open construction of the product, it is the user’s responsibility to take any and all
appropriate precautions with regard to electrostatic discharge.
EXCEPT TO THE EXTENT OF THE INDEMNITY SET FORTH ABOVE, NEITHER PARTY SHALL BE LIABLE TO THE OTHER FOR ANY
INDIRECT, SPECIAL, INCIDENTAL, OR CONSEQUENTIAL DAMAGES.
TI currently deals with a variety of customers for products, and therefore our arrangement with the user is not exclusive.
TI assumes no liability for applications assistance, customer product design, software performance, or infringement of patents or
services described herein.
Please read the User’s Guide and, specifically, the Warnings and Restrictions notice in the User’s Guide prior to handling the product. This
notice contains important safety information about temperatures and voltages. For additional information on TI’s environmental and/or
safety programs, please contact the TI application engineer or visit www.ti.com/esh.
No license is granted under any patent right or other intellectual property right of TI covering or relating to any machine, process, or
combination in which such TI products or services might be or are used.
FCC Warning
This evaluation board/kit is intended for use for ENGINEERING DEVELOPMENT, DEMONSTRATION, OR EVALUATION PURPOSES
ONLY and is not considered by TI to be a finished end-product fit for general consumer use. It generates, uses, and can radiate radio
frequency energy and has not been tested for compliance with the limits of computing devices pursuant to part 15 of FCC rules, which are
designed to provide reasonable protection against radio frequency interference. Operation of this equipment in other environments may
cause interference with radio communications, in which case the user at his own expense will be required to take whatever measures may
be required to correct this interference.
EVM Warnings and Restrictions
It is important to operate this EVM within the input voltage range of 2 V to 3.6 V and the output voltage range of 0 V to 3.6 V .
Exceeding the specified input range may cause unexpected operation and/or irreversible damage to the EVM. If there are questions
concerning the input range, please contact a TI field representative prior to connecting the input power.
Applying loads outside of the specified output range may result in unintended operation and/or possible permanent damage to the EVM.
Please consult the EVM User's Guide prior to connecting any load to the EVM output. If there is uncertainty as to the load specification,
please contact a TI field representative.
During normal operation, some circuit components may have case temperatures greater than +30°C. The EVM is designed to operate
properly with certain components above +30°C as long as the input and output ranges are maintained. These components include but are
not limited to linear regulators, switching transistors, pass transistors, and current sense resistors. These types of devices can be identified
using the EVM schematic located in the EVM User's Guide. When placing measurement probes near these devices during operation,
please be aware that these devices may be very warm to the touch.
Mailing Address: Texas Instruments, Post Office Box 655303, Dallas, Texas 75265
Copyright © 2012, Texas Instruments Incorporated
�IMPORTANT NOTICE
Texas Instruments Incorporated and its subsidiaries (TI) reserve the right to make corrections, enhancements, improvements and other
changes to its semiconductor products and services per JESD46C and to discontinue any product or service per JESD48B. Buyers should
obtain the latest relevant information before placing orders and should verify that such information is current and complete. All
semiconductor products (also referred to herein as “components”) are sold subject to TI’s terms and conditions of sale supplied at the time
of order acknowledgment.
TI warrants performance of its components to the specifications applicable at the time of sale, in accordance with the warranty in TI’s terms
and conditions of sale of semiconductor products. Testing and other quality control techniques are used to the extent TI deems necessary
to support this warranty. Except where mandated by applicable law, testing of all parameters of each component is not necessarily
performed.
TI assumes no liability for applications assistance or the design of Buyers’ products. Buyers are responsible for their products and
applications using TI components. To minimize the risks associated with Buyers’ products and applications, Buyers should provide
adequate design and operating safeguards.
TI does not warrant or represent that any license, either express or implied, is granted under any patent right, copyright, mask work right, or
other intellectual property right relating to any combination, machine, or process in which TI components or services are used. Information
published by TI regarding third-party products or services does not constitute a license to use such products or services or a warranty or
endorsement thereof. Use of such information may require a license from a third party under the patents or other intellectual property of the
third party, or a license from TI under the patents or other intellectual property of TI.
Reproduction of significant portions of TI information in TI data books or data sheets is permissible only if reproduction is without alteration
and is accompanied by all associated warranties, conditions, limitations, and notices. TI is not responsible or liable for such altered
documentation. Information of third parties may be subject to additional restrictions.
Resale of TI components or services with statements different from or beyond the parameters stated by TI for that component or service
voids all express and any implied warranties for the associated TI component or service and is an unfair and deceptive business practice.
TI is not responsible or liable for any such statements.
Buyer acknowledges and agrees that it is solely responsible for compliance with all legal, regulatory and safety-related requirements
concerning its products, and any use of TI components in its applications, notwithstanding any applications-related information or support
that may be provided by TI. Buyer represents and agrees that it has all the necessary expertise to create and implement safeguards which
anticipate dangerous consequences of failures, monitor failures and their consequences, lessen the likelihood of failures that might cause
harm and take appropriate remedial actions. Buyer will fully indemnify TI and its representatives against any damages arising out of the use
of any TI components in safety-critical applications.
In some cases, TI components may be promoted specifically to facilitate safety-related applications. With such components, TI’s goal is to
help enable customers to design and create their own end-product solutions that meet applicable functional safety standards and
requirements. Nonetheless, such components are subject to these terms.
No TI components are authorized for use in FDA Class III (or similar life-critical medical equipment) unless authorized officers of the parties
have executed a special agreement specifically governing such use.
Only those TI components which TI has specifically designated as military grade or “enhanced plastic” are designed and intended for use in
military/aerospace applications or environments. Buyer acknowledges and agrees that any military or aerospace use of TI components
which have not been so designated is solely at the Buyer's risk, and that Buyer is solely responsible for compliance with all legal and
regulatory requirements in connection with such use.
TI has specifically designated certain components which meet ISO/TS16949 requirements, mainly for automotive use. Components which
have not been so designated are neither designed nor intended for automotive use; and TI will not be responsible for any failure of such
components to meet such requirements.
Products
Applications
Audio
www.ti.com/audio
Automotive and Transportation www.ti.com/automotive
Amplifiers
amplifier.ti.com
Communications and Telecom www.ti.com/communications
Data Converters
dataconverter.ti.com
Computers and Peripherals
www.ti.com/computers
DLP® Products
www.dlp.com
Consumer Electronics
www.ti.com/consumer-apps
DSP
dsp.ti.com
Energy and Lighting
www.ti.com/energy
Clocks and Timers
www.ti.com/clocks
Industrial
www.ti.com/industrial
Interface
interface.ti.com
Medical
www.ti.com/medical
Logic
logic.ti.com
Security
www.ti.com/security
Power Mgmt
power.ti.com
Space, Avionics and Defense
www.ti.com/space-avionics-defense
Microcontrollers
microcontroller.ti.com
Video and Imaging
www.ti.com/video
RFID
www.ti-rfid.com
OMAP Mobile Processors
www.ti.com/omap
TI E2E Community
e2e.ti.com
Wireless Connectivity
www.ti.com/wirelessconnectivity
Mailing Address: Texas Instruments, Post Office Box 655303, Dallas, Texas 75265
Copyright © 2012, Texas Instruments Incorporated
�