User's Guide
SLVA344C – July 2009 – Revised July 2019
Laser and Motor Drives
This document is provided as a supplement to the DRV8811 datasheet. It details the hardware
implementation of the DRV8811 customer evaluation module (EVM).
1
2
3
Contents
Introduction ................................................................................................................... 3
1.1
Block Diagram ....................................................................................................... 3
1.2
Power Connectors .................................................................................................. 3
1.3
Test Stakes .......................................................................................................... 3
1.4
Jumpers .............................................................................................................. 4
1.5
Motor Outputs ....................................................................................................... 4
Installing Drivers And Software ............................................................................................ 4
2.1
Installing the FTDI USB Driver .................................................................................... 4
2.2
GUI Software Installation .......................................................................................... 4
2.3
Running the Windows Application Software ................................................................... 15
Windows Application ....................................................................................................... 15
3.1
Menu ................................................................................................................ 17
3.2
DRV8811 GPIO Control Signals ................................................................................ 18
3.3
Updating DAC Output for Current Control (VREF/DECAY) ................................................. 19
3.4
Updating DAC Output for Decay Control (DECAY) ........................................................... 19
3.5
Operating the Stepper Motor .................................................................................... 20
List of Figures
1
VREF SELECT Jumper ..................................................................................................... 4
2
DECAY SELECT Jumper ................................................................................................... 4
3
Setup_DRV8811_EVM.exe................................................................................................. 5
4
Installation Initialization
5
License Agreement .......................................................................................................... 6
6
NI License Agreement
7
Installation Directory Screen ............................................................................................... 7
8
Component Selection
9
10
11
12
13
14
15
16
17
18
19
20
21
.....................................................................................................
......................................................................................................
6
7
....................................................................................................... 8
Configure Proxy .............................................................................................................. 8
Ready to Install .............................................................................................................. 9
Downloading RTE ........................................................................................................... 9
LabVIEW RTE Self Extraction ............................................................................................ 10
LabVIEW RTE Installation Initialization ................................................................................. 10
Installation of LabVIEW RTE in Progress ............................................................................... 11
FTDI Installation Initialization ............................................................................................. 12
Driver Installation Wizard.................................................................................................. 12
License Agreement for FTDI Driver ...................................................................................... 13
Driver Installation Completion ............................................................................................ 14
Installation Complete ...................................................................................................... 14
Readme Window ........................................................................................................... 15
DRV8811EVM-001_R1p0.exe Main Screen ............................................................................ 16
SLVA344C – July 2009 – Revised July 2019
Submit Documentation Feedback
Laser and Motor Drives
Copyright © 2009–2019, Texas Instruments Incorporated
1
�www.ti.com
22
File Menu .................................................................................................................... 17
23
Debug Menu ................................................................................................................ 17
24
Schematic ................................................................................................................... 17
25
Help Menu
26
27
28
29
30
31
32
..................................................................................................................
About Page .................................................................................................................
Signals Frame ..............................................................................................................
Curent Control Frame .....................................................................................................
Current Control Frame.....................................................................................................
Step Rate ...................................................................................................................
Speed Control Frame ......................................................................................................
Step Control Frame ........................................................................................................
18
18
19
19
20
20
21
21
Trademarks
All trademarks are the property of their respective owners.
2
Laser and Motor Drives
SLVA344C – July 2009 – Revised July 2019
Submit Documentation Feedback
Copyright © 2009–2019, Texas Instruments Incorporated
�Introduction
www.ti.com
1
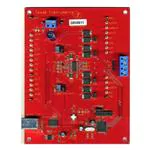
Introduction
The DRV8811EVM-001 customer EVM is the complete solution to evaluating the DRV8811 microstepping
bipolar stepper driver. It houses a USB link to provide easy control from a PC computer, an MSP430
microcontroller that interprets serial commands from the PC and generates control signals to the driver
device, and the DRV8811 device with access to all signals for a complete evaluation.
1.1
Block Diagram
VM Power
DRV8811
USB
1.2
Motor Outputs
Test Stakes
MSP430F1612
Power Connectors
The DRV8811 customer EVM uses a combination of terminal blocks and test clips for the
application/monitoring of power. The only power rail the user must supply is VM for the device’s power
stage. VDD for logic levels is internally generated from the USB connection.
The user must apply VM according to datasheet recommended parameters.
1.3
Test Stakes
Every pin on the device has been brought out to a test stake. A label on the silkscreen identifies each
signal.
SLVA344C – July 2009 – Revised July 2019
Submit Documentation Feedback
Laser and Motor Drives
Copyright © 2009–2019, Texas Instruments Incorporated
3
�Introduction
1.4
www.ti.com
Jumpers
Three pin jumpers can be configured independently from the other two or three pin jumpers. However, two
pin jumpers must either be closed or open. Two pin jumpers (JP2 to JP5) connect the diodes to the motor
outputs and are used under asynchronous rectification (SR = LO).
(a)
INT
INT
POT
VREF SELECT (JP1) Jumper
POT
1.4.1
(b)
Figure 1. VREF SELECT Jumper
To configure the VREF SELECT jumper: Figure 1 (a) selects an analog voltage derived from VDD through
a voltage divider implemented as a potentiometer R4. Figure 1 (b) selects an analog voltage derived from
the MSP430’s digital to analog converter channel 0 (DAC0).
INT
INT
(a)
POT
DECAY SELECT (JP6) Jumper
POT
1.4.2
(b)
Figure 2. DECAY SELECT Jumper
To configure the DECAY SELECT jumper: Figure 2 (a) selects an analog voltage derived from VDD
through a voltage divider implemented as a potentiometer R6. Figure 2 (b) selects an analog voltage
derived from the MSP430’s digital to analog converter channel 1 (DAC1).
1.5
Motor Outputs
There are three ways of connecting the bipolar stepper motor into the DRV8811 EVM: four pin header
(J2), four position terminal block (J3) or test clips. Each connection style offers identical connectivity to the
device’s output terminals. It is recommended, however, to use the header or terminal block, as the test
stakes traces are of low current handling capability.
2
Installing Drivers And Software
2.1
Installing the FTDI USB Driver
Instructions on how to install the FTDI USB driver on a Windows based computer are detailed in the
“USB_Drivers_Install_Readme.pdf” file supplied with the CD inside the USB_Driver folder.
2.2
GUI Software Installation
The following section explains the location of files and the procedure for installing the software correctly.
4
Laser and Motor Drives
SLVA344C – July 2009 – Revised July 2019
Submit Documentation Feedback
Copyright © 2009–2019, Texas Instruments Incorporated
�Installing Drivers And Software
www.ti.com
NOTE: Ensure that no USB connections are made to the EVM until the installation is completed.
The installer will also install LabVIEW RTE 2014 and FTDI Driver, along with the GUI.
2.2.1
System Requirements
•
•
•
2.2.2
Supported OS – Windows 7 (32 Bit, 64 Bit). The window text size should be Smaller-100% (Default)
Recommended RAM - 4 GB or higher
Recommended CPU Operating Speed – 3.3 GHz or higher
Installation Procedure
The following procedure helps you install the DRV8811 GUI
1. Double click on the Setup_DRV8811_EVM.exe as shown in Figure 3.
Figure 3. Setup_DRV8811_EVM.exe
2. The screen shown in Figure 4 appears, indicating installer initialization. Click the Next button.
SLVA344C – July 2009 – Revised July 2019
Submit Documentation Feedback
Laser and Motor Drives
Copyright © 2009–2019, Texas Instruments Incorporated
5
�Installing Drivers And Software
www.ti.com
Figure 4. Installation Initialization
3. In the newly open installation pop-up window, click Next. The license agreement will be displayed.
Please, read through it carefully and enable the "I Accept the Agreement" radio button and press Next.
Figure 5. License Agreement
4. A screen as shown in Figure 6 appears, displaying the license agreement of National Instruments.
Please read through the agreement carefully and enable the “I Accept the License Agreement” radio
button and press the Next button.
6
Laser and Motor Drives
SLVA344C – July 2009 – Revised July 2019
Submit Documentation Feedback
Copyright © 2009–2019, Texas Instruments Incorporated
�Installing Drivers And Software
www.ti.com
Figure 6. NI License Agreement
5. Set the default directory for the GUI Installation and click Next.
Figure 7. Installation Directory Screen
NOTE: It is highly recommended to keep the default values as provided in the installer.
6. A screen as shown in Figure 8 appears. This screen is to select the components to install. Select the
Components to Install and Click Next to continue installation. The LabVIEW RTE component checks
out if the LabVIEW RTE 2014 is already installed on the PC.
SLVA344C – July 2009 – Revised July 2019
Submit Documentation Feedback
Laser and Motor Drives
Copyright © 2009–2019, Texas Instruments Incorporated
7
�Installing Drivers And Software
www.ti.com
Figure 8. Component Selection
7. If LabVIEW RTE is selected as a component to install, a screen appears as shown in Figure 9.
Configure the proxy settings as required. This screen is to download the LabVIEW RTE 2014 from
ni.com, Click Next to continue the installation.
Figure 9. Configure Proxy
8. A screen as shown in Figure 10 appears. Click Next to begin the installation.
8
Laser and Motor Drives
SLVA344C – July 2009 – Revised July 2019
Submit Documentation Feedback
Copyright © 2009–2019, Texas Instruments Incorporated
�Installing Drivers And Software
www.ti.com
Figure 10. Ready to Install
9. If the LabVIEW RTE 2014 is selected as a component to install, LabVIEW RTE downloads and
performs a silent mode installation.
Figure 11. Downloading RTE
10. Once the download completes, LabVIEW begins with the self-extraction as shown in Figure 12.
SLVA344C – July 2009 – Revised July 2019
Submit Documentation Feedback
Laser and Motor Drives
Copyright © 2009–2019, Texas Instruments Incorporated
9
�Installing Drivers And Software
www.ti.com
Figure 12. LabVIEW RTE Self Extraction
11. A Screen appears as shown in Figure 13. It initializes the LabVIEW RTE Installation.
Figure 13. LabVIEW RTE Installation Initialization
12. A display as shown in Figure 14 appears which indicates the progress of LabVIEW RTE installation.
10
Laser and Motor Drives
SLVA344C – July 2009 – Revised July 2019
Submit Documentation Feedback
Copyright © 2009–2019, Texas Instruments Incorporated
�Installing Drivers And Software
www.ti.com
Figure 14. Installation of LabVIEW RTE in Progress
13. Once the LabVIEW RTE 2014 is installed, DRV 8811 EVM GUI component installs.
14. After DRV8811 Installation, FTDI Installation begins. A screen as shown in Figure 15 appears, click
Extract to proceed.
SLVA344C – July 2009 – Revised July 2019
Submit Documentation Feedback
Laser and Motor Drives
Copyright © 2009–2019, Texas Instruments Incorporated
11
�Installing Drivers And Software
www.ti.com
Figure 15. FTDI Installation Initialization
15. A screen as shown in Figure 16 appears, click Next to proceed.
Figure 16. Driver Installation Wizard
12
Laser and Motor Drives
SLVA344C – July 2009 – Revised July 2019
Submit Documentation Feedback
Copyright © 2009–2019, Texas Instruments Incorporated
�Installing Drivers And Software
www.ti.com
16. The License Agreement appears on screen as shown in Figure 17.
17. Read through the License Agreement carefully and enable the “I Accept this Agreement” radio button
and Click on Next.
Figure 17. License Agreement for FTDI Driver
18. Click Finish to complete the Driver Installation.
SLVA344C – July 2009 – Revised July 2019
Submit Documentation Feedback
Laser and Motor Drives
Copyright © 2009–2019, Texas Instruments Incorporated
13
�Installing Drivers And Software
www.ti.com
Figure 18. Driver Installation Completion
19. Figure 19 appears denoting the completion of DRV8811 EVM GUI Installation. Click Finish.
Figure 19. Installation Complete
20. A Readme window as shown in Figure 20 appears displaying the link for LV 2014 RTE.
14
Laser and Motor Drives
SLVA344C – July 2009 – Revised July 2019
Submit Documentation Feedback
Copyright © 2009–2019, Texas Instruments Incorporated
�Installing Drivers And Software
www.ti.com
Figure 20. Readme Window
WARNING
The DRV8811 EVM GUI requires the LabVIEW Run-Time Engine
2014 to be installed before the GUI executes. Please note the
application is not compatible with other versions of LabVIEW
Runtime Engine.
You can download National Instruments LabVIEW Run-Time Engine 2014
from the below link:
LabVIEW Run-Time Engine 2014
NOTE: DRV8811 EVM GUI executable has been built in LabVIEW 2014 (32-bit) version, and it
expects the LabVIEW Run-Time Engine version to be LabVIEW Run-Time Engine (32-bit
version).
2.3
Running the Windows Application Software
To run the application, search for the desktop shortcut of the application or search for the DRV8811EVM
GUI in your Programs or its installation directory.
3
Windows Application
The DRV8811 Windows Application is the software counterpart for the DRV8811 EVM. It is in charge of
connecting to the MSP430 microcontroller via a USB connection which in turn selects the proper logic
state for the DRV8811 control signals.
The graphical user interface (GUI) has been designed to allow for all of the DRV8811 device’s
functionality to be tested without having to intervene with the hardware, except for the proper configuration
of jumpers when needed.
SLVA344C – July 2009 – Revised July 2019
Submit Documentation Feedback
Laser and Motor Drives
Copyright © 2009–2019, Texas Instruments Incorporated
15
�Windows Application
www.ti.com
Figure 21 shows the GUI main screen. It contains menu items to configure and enable/disable the serial
port, frames with GPIO control for the DRV8811 control signals, stepper motor control for start/stop and
speed, and current/decay control through the MSP430 DACs.
Figure 21. DRV8811EVM-001_R1p0.exe Main Screen
16
Laser and Motor Drives
SLVA344C – July 2009 – Revised July 2019
Submit Documentation Feedback
Copyright © 2009–2019, Texas Instruments Incorporated
�Windows Application
www.ti.com
3.1
Menu
•
File - The File menu contains the option Exit as shown in Figure 22 below.
Figure 22. File Menu
•
Debug - The Debug option can be used for the following operations.
Figure 23. Debug Menu
•
•
– Demo - By selecting the Demo in the submenu, the GUI runs in simulation mode, and by
unselecting it, the GUI runs in connected mode.
– Log to File - The log to file submenu is used to log the GUI activities to a log file that is specified.
– Debug log - The Debug log option enables to log all the activities of the user. If that is not selected,
only the high-level operations log.
View - Select View-> Schematics->DRV8811 to view the GUIs schematics
Figure 24. Schematic
SLVA344C – July 2009 – Revised July 2019
Submit Documentation Feedback
Laser and Motor Drives
Copyright © 2009–2019, Texas Instruments Incorporated
17
�Windows Application
•
www.ti.com
Help
– Clicking the About in the Help Menu
Figure 25. Help Menu
– The About Page provides the details like the Name of the GUI, GUI version, Supported OS and
Copyright Information.
Figure 26. About Page
3.2
DRV8811 GPIO Control Signals
Once the application is communicating with the interface board, the control signals can be actuated by
checking or un-checking check boxes on the Signals frame.
18
Laser and Motor Drives
SLVA344C – July 2009 – Revised July 2019
Submit Documentation Feedback
Copyright © 2009–2019, Texas Instruments Incorporated
�Windows Application
www.ti.com
Figure 27. Signals Frame
A checked checkbox translates to a HI level on the respective control signal. A un-checked checkbox
translates to a LO level on the respective control signal.
3.3
Updating DAC Output for Current Control (VREF/DECAY)
If the DRV8811 EVM has been configured to accept VREF analog voltages through the MSP430
microcontroller interface (JP1 is set to INT), then the slider bar on the Current Control frame can be used
to set the VREF voltage.
Figure 28. Curent Control Frame
The MSP430F1612 12-bit DAC channel 0 is connected to the DRV8811 VREF analog input. Changing the
DAC digital value from 0 to 4095, changes the analog voltage at the VREF/DECAY pin from 0 V to 2.5 V
respectively. See Equation 1.
2.5 V
VREF = DAC_VALUE · ¾
4095
(1)
Where VREF is the output voltage and DAC_VALUE is a number from 0 to 4095.
3.4
Updating DAC Output for Decay Control (DECAY)
If the DRV8811 EVM has been configured to accept DECAY analog voltages through the MSP430
microcontroller interface (JP6 is set to INT), then the slider bar on the Current Control frame can be used
to set the DECAY voltage.
SLVA344C – July 2009 – Revised July 2019
Submit Documentation Feedback
Laser and Motor Drives
Copyright © 2009–2019, Texas Instruments Incorporated
19
�Windows Application
www.ti.com
Figure 29. Current Control Frame
The MSP430F1612 12 bit DAC channel 1 is connected to the DRV8811 DECAY analog input. Changing
the DAC digital value from 0 to 4095, changes the analog voltage at the DECAY pin from 0 V to 2.5 V
respectively. See Equation 2.
2.5 V
DECAY = DAC_VALUE · ¾
4095
(2)
Where DECAY is the output voltage and DAC_VALUE is a number from 0 to 4095.
3.5
3.5.1
Operating the Stepper Motor
Turning the Stepper Motor
The Windows Application, in conjunction with the MSP430F1612 microcontroller, utilizes a series of timers
to coordinate the rate of steps sent to the device. Once all the control signals are configured accordingly
(ENABLEn = LO, SLEEPn = HI, RESETn = HI; DIR, USM0 and USM1 can be HI or LO depending on
preferred mode of operation; SRn must be L, if external diodes are not populated), the motor is ready to
be turned.
The DRV8811EVM-001 customer EVM allows for the possibility of coordinating step rates such that
accelerating and decelerating profiles are achieved. Both acceleration and deceleration are controlled by
the same parameters, acceleration rate and time base.
When the motor starts, it always starts at the slowed pulses per second (PPS) speed (62 pulses per
second). The controller will accelerate the motor in order to reach the PPS speed. Acceleration rate is an
8-bit number (0 to 255) that gets added to the current PPS speed and time base is an 8-bit number (0 to
255) that specifies how many milliseconds will elapse from one speed increase to the next. Once the
specified PPS speed has been achieved, the acceleration stops.
Pulses Per Second
Accel Rate
Time
Base
Figure 30. Step Rate
20
Laser and Motor Drives
SLVA344C – July 2009 – Revised July 2019
Submit Documentation Feedback
Copyright © 2009–2019, Texas Instruments Incorporated
�Windows Application
www.ti.com
When the motor is commanded to stop, the inverse of the description above occurs.
The Windows Application frame to control speed, acceleration and deceleration, as well as motor start and
stop, looks as portrayed in Figure 31.
Figure 31. Speed Control Frame
Pressing the Start Steps button, will start the timer and pulses will be generated at the rate specified by
the decimal number at the PPS text box. Once the Start Steps button is pressed it becomes the Stepping
button. Press the Stepping button to stop the stepper motion.
When the motor is stepping, the Update Speed button becomes enabled. Speed can be updated by
modifying the PPS text box and then pressing the Update Speed button. The Update Speed button is
disabled every time the motor is not turning because the stepping has been halted by pressing the
Stepping button.
3.5.2
Step by Step control
The Step Control frame has a series of tools to control the stepping of the motor on a predetermined
number of steps fashion.
The Pulse Step button allows for a single step to be issued. At the same time, the STEP Control check
box allows the control of the STEP signal in the same fashion that other GPIO signals on the Signals
frame could be set and cleared. Checked stands for HI and unchecked for LO. Remember that a STEP
takes place when STEP goes from LO to HI.
Figure 32. Step Control Frame
To move the motor a number of steps and then stop, fill the # of Steps text box with a decimal number
from 0 to 65535 and the motor will move that number of steps at the speed specified on the PPS text box.
No acceleration or deceleration takes place under this function.
SLVA344C – July 2009 – Revised July 2019
Submit Documentation Feedback
Laser and Motor Drives
Copyright © 2009–2019, Texas Instruments Incorporated
21
�IMPORTANT NOTICE AND DISCLAIMER
TI PROVIDES TECHNICAL AND RELIABILITY DATA (INCLUDING DATA SHEETS), DESIGN RESOURCES (INCLUDING REFERENCE
DESIGNS), APPLICATION OR OTHER DESIGN ADVICE, WEB TOOLS, SAFETY INFORMATION, AND OTHER RESOURCES “AS IS”
AND WITH ALL FAULTS, AND DISCLAIMS ALL WARRANTIES, EXPRESS AND IMPLIED, INCLUDING WITHOUT LIMITATION ANY
IMPLIED WARRANTIES OF MERCHANTABILITY, FITNESS FOR A PARTICULAR PURPOSE OR NON-INFRINGEMENT OF THIRD
PARTY INTELLECTUAL PROPERTY RIGHTS.
These resources are intended for skilled developers designing with TI products. You are solely responsible for (1) selecting the appropriate
TI products for your application, (2) designing, validating and testing your application, and (3) ensuring your application meets applicable
standards, and any other safety, security, regulatory or other requirements.
These resources are subject to change without notice. TI grants you permission to use these resources only for development of an
application that uses the TI products described in the resource. Other reproduction and display of these resources is prohibited. No license
is granted to any other TI intellectual property right or to any third party intellectual property right. TI disclaims responsibility for, and you
will fully indemnify TI and its representatives against, any claims, damages, costs, losses, and liabilities arising out of your use of these
resources.
TI’s products are provided subject to TI’s Terms of Sale or other applicable terms available either on ti.com or provided in conjunction with
such TI products. TI’s provision of these resources does not expand or otherwise alter TI’s applicable warranties or warranty disclaimers for
TI products.
TI objects to and rejects any additional or different terms you may have proposed. IMPORTANT NOTICE
Mailing Address: Texas Instruments, Post Office Box 655303, Dallas, Texas 75265
Copyright © 2022, Texas Instruments Incorporated
�