Sample &
Buy
Product
Folder
Support &
Community
Tools &
Software
Technical
Documents
LM3633
SNVS867 – JUNE 2014
LM3633 Complete Lighting Power Solution for Smartphone Handsets
Check for Samples: LM3633
1 Features
3 Description
•
The LM3633 11-bit LED driver provides highperformance backlight dimming for 1, 2, or 3 parallel
high-voltage LED strings while delivering up to 90%
efficiency. The boost converter with integrated 1-A,
40-V MOSFET automatically adjusts to LED forward
voltage to minimize headroom voltage and effectively
improve LED efficiency.
Drives Three Parallel High-Voltage LED Strings
for Display and Keypad Lighting
High-Voltage Strings Capable of up to 40-V
Output Voltage and up to 90% Efficiency
Up to 30-mA per Current Sink (Both Backlight and
Indicator)
11-Bit High-Voltage LED Dimming
PWM Input for Content Adjustable Brightness
Control (CABC)
Integrated 1-A/40-V MOSFET
Adaptive Boost Output to LED Voltages
Six Low-Voltage Current Sinks for Indicator LEDs
Integrated Charge Pump for Improved Efficiency
and VIN Operating Range
Internal Pattern Generation Engine for Each
Indicator LED
Fully Configurable LED Grouping and Control
Four Programmable Overvoltage Protection
Thresholds (16 V, 24 V, 32 V, and 40 V)
Programmable 500-kHz and 1-MHz Switching
Frequency
Overcurrent Protection
Thermal Shutdown Protection
27 mm2 Total Solution Size
1
•
•
•
•
•
•
•
•
•
•
•
•
•
•
•
Power Source for Smart Phone Illumination
Display, Keypad and Indicator Illumination
RGB Indicator Driver
space
Simplified Schematic
L
VIN
An additional feature is a Pulse Width Modulation
(PWM) control input for content adjustable backlight
control, which can be used to control any highvoltage current sink.
The LM3633 is fully programmable via an I2Ccompatible interface. The device operates over a 2.7V to 5.5-V input voltage range and a −40°C to 85°C
temperature range.
Device Information(1)
PART NUMBER
LM3633
2 Applications
•
•
•
The LM3633 is a complete power source for
backlight, keypad, and indicator LEDs in smartphone
handsets. The high-voltage inductive boost converter
provides the power for three parallel LED strings
(HVLED1, HVLED2 and HVLED3). The integrated
charge pump provides the bias for the six low-voltage
indicator LEDs (LVLED1-LVLED6). All low-voltage
current sinks can have a programmable pattern
modulated onto their output current for a wide variety
of blinking patterns.
D1
2.7V to 5.5V
Dual String Efficiency vs VIN
L=22µH, fSW=1MHz
COUT
92%
SW
LM3633
90%
OVP
88%
C+
CP
C-
SDA
SDA
SCL
SCL
HWEN
HVLED1
HVLED2
HVLED3
HWEN
CPOUT
CPOUT
PWM
PWM
LVLED1
LVLED2
LVLED3
EFFICIENCY (%)
IN
BODY SIZE (MAX)
2.04 mm x 1.78 mm
(1) For all available packages, see the orderable addendum at
the end of the datasheet.
VOUT up to 40V
CIN
PACKAGE
DSBGA (20)
86%
84%
82%
80%
3s3p
78%
76%
4s3p
74%
5s3p
72%
6s3p
70%
LVLED4
LVLED5
LVLED6
2.5
3
3.5
4
4.5
5
5.5
VIN (V)
PGND
C002
1
An IMPORTANT NOTICE at the end of this data sheet addresses availability, warranty, changes, use in safety-critical applications,
intellectual property matters and other important disclaimers. PRODUCTION DATA.
�LM3633
SNVS867 – JUNE 2014
www.ti.com
Table of Contents
1
2
3
4
5
6
7
Features ..................................................................
Applications ...........................................................
Description .............................................................
Revision History.....................................................
Pin Configuration and Functions .........................
Specifications.........................................................
1
1
1
2
3
4
6.1
6.2
6.3
6.4
6.5
6.6
6.7
4
4
4
4
5
7
8
Absolute Maximum Ratings .....................................
Handling Ratings ......................................................
Recommended Operating Conditions.......................
Thermal Information ..................................................
Electrical Characteristics...........................................
Timing Requirements ................................................
Typical Characteristics ..............................................
7.4 Device Functional Modes ....................................... 12
7.5 Register Descriptions .............................................. 24
8
Applications and Implementation ...................... 33
8.1 Application Information .......................................... 33
8.2 Typical Application .................................................. 33
8.3 Initialization Set Up ................................................. 45
9 Power Supply Recommendations...................... 48
10 Layout................................................................... 48
10.1 Layout Guidelines (Boost) .................................... 48
10.2 Layout Guidelines (Charge Pump)........................ 51
10.3 Layout Example ................................................... 52
11 Device and Documentation Support ................. 53
11.1
11.2
11.3
11.4
Detailed Description ............................................ 10
7.1 Overview ................................................................ 10
7.2 Functional Block Diagram ...................................... 10
7.3 Feature Description ................................................ 10
Device Support......................................................
Trademarks ...........................................................
Electrostatic Discharge Caution ............................
Glossary ................................................................
53
53
53
53
12 Mechanical, Packaging, and Orderable
Information ........................................................... 53
4 Revision History
2
Date
Revision
Notes
June 2014
*
Initial release
Submit Documentation Feedback
Copyright © 2014, Texas Instruments Incorporated
Product Folder Links: LM3633
�LM3633
www.ti.com
SNVS867 – JUNE 2014
5 Pin Configuration and Functions
DSBGA (YFQ)
20 PINS
Bottom View
Top View
A B C D E
4
4
3
3
2
2
1
1
E D C B A
Pin Functions
PIN
DESCRIPTION
NAME
NUMBER
C−
A1
Integrated charge pump flying capacitor negative pin. Connect a 1-µF ceramic capacitor between C+
and C−.
C+
A2
Integrated charge pump flying capacitor positive pin. Connect a 1-µF ceramic capacitor between C+ and
C−.
CPOUT
A3
Integrated charge pump output pin. Bypass CPOUT to GND with a 1-µF ceramic capacitor.
IN
A4
Input voltage connection. Bypass IN to GND with a minimum 2.2-µF ceramic capacitor.
HVLED1
B1
Input pin to high-voltage current sink 1 (40 V max). The boost converter regulates the minimum of
HVLED1, HVLED2 and HVLED3 to VHR.
SDA
B2
Serial data connection for I2C-Compatible Interface.
OVP
B3
Overvoltage sense input. Connect OVP to the positive pin of the inductive boost output capacitor
(COUT).
GND
B4
Ground
HVLED2
C1
Input pin to high-voltage current sink 2 (40 V max). The boost converter regulates the minimum of
HVLED1, HVLED2 and HVLED3 to VHR.
SCL
C2
Serial clock connection for I2C-Compatible Interface.
PWM
C3
PWM brightness control input for CABC operation. PWM is a high-impedance input and cannot be left
floating.
SW
C4
Drain connection for the internal NFET. Connect SW to the junction of the inductor and the Schottky
diode anode.
HVLED3
D1
Input pin to high-voltage current sink 3 (40 V max). The boost converter regulates the minimum of
HVLED1, HVLED2 and HVLED3 to VHR.
HWEN
D2
Hardware enable input. Drive this pin high to enable the device. Drive this pin low to force the device
into a low power shutdown. HWEN is a high-impedance input and cannot be left floating.
LVLED6
D3
Low-voltage current sink 6
LVLED5
D4
Low-voltage current sink 5
LVLED1
E1
Low-voltage current sink 1
LVLED2
E2
Low-voltage current sink 2
LVLED3
E3
Low-voltage current sink 3
LVLED4
E4
Low-voltage current sink 4
Submit Documentation Feedback
Copyright © 2014, Texas Instruments Incorporated
Product Folder Links: LM3633
3
�LM3633
SNVS867 – JUNE 2014
www.ti.com
6 Specifications
6.1 Absolute Maximum Ratings
over operating free-air temperature range (unless otherwise noted) (1)
MIN
MAX
VIN to GND
−0.3
6
VSW, VOVP, VHVLED1, VHVLED2, VHVLED3 to GND
−0.3
45
VSCL, VSDA, VPWM to GND
−0.3
6
VHWEN, VCPOUT to GND, VC–, VC+
−0.3
6
VLVLED1- VLVLED6, to GND
−0.3
UNIT
V
6
Continuous power dissipation
Internally
Limited
Junction temperature (TJ-MAX)
150
(1)
°C
Stresses beyond those listed under absolute maximum ratings may cause permanent damage to the device. These are stress ratings
only, which do not imply functional operation of the device at these or any other conditions beyond those indicated under recommended
operating conditions. Exposure to absolute–maximum–rated conditions for extended periods may affect device reliability.
6.2 Handling Ratings
MIN
Tstg
(1)
(2)
Electrostatic discharge
UNIT
°C
−65
150
Human body model (HBM), per ANSI/ESDA/JEDEC JS-001, all
pins (1)
−1000
1000
Charged device model (CDM), per JEDEC specification
JESD22-C101, all pins (2)
−250
250
Storage temperature range
V(ESD)
MAX
V
JEDEC document JEP155 states that 500-V HBM allows safe manufacturing with a standard ESD control process.
JEDEC document JEP157 states that 250-V CDM allows safe manufacturing with a standard ESD control process.
6.3 Recommended Operating Conditions
over operating free-air temperature range (unless otherwise noted)
MIN
VIN to GND
VSW, VOVP, VHVLED1, VVHLED2, VVHLED3 to GND, VPWM, VHWEN, VSDA, VSCL
VLVLED1- VLVLED6 to GND
Junction temperature (TJ)
(1)
(2)
(1) (2)
NOM
MAX
2.7
5.5
0
40
0
6
−40
125
UNIT
V
°C
Internal thermal shutdown circuitry protects the device from permanent damage. Thermal shutdown engages at TJ = 140°C (typ.) and
disengages at TJ= 125°C (typ.).
In applications where high power dissipation and/or poor package thermal resistance is present, the maximum ambient temperature may
have to be derated. Maximum ambient temperature (TA-MAX) is dependent on the maximum operating junction temperature (TJ-MAX-OP =
125°C), the maximum power dissipation of the device in the application (PD-MAX), and the junction-to ambient thermal resistance of the
part/package in the application (θJA), as given by the following equation: TA-MAX = TJ-MAX-OP – (θJA × PD-MAX).
6.4 Thermal Information
THERMAL METRIC (1)
RθJA
(1)
4
Thermal resistance junction-to-ambient
DSBGA
(20 PINS)
55.3
UNIT
°C/W
For more information about traditional and new thermal metrics, see the IC Package Thermal Metrics application report, SPRA953.
Submit Documentation Feedback
Copyright © 2014, Texas Instruments Incorporated
Product Folder Links: LM3633
�LM3633
www.ti.com
SNVS867 – JUNE 2014
6.5 Electrical Characteristics
Limits apply over the full operating ambient temperature range (−40°C ≤ TA ≤ 85°C) and VIN = 3.6 V, unless otherwise
specified. (1) (2)
PARAMETER
TEST CONDITIONS
MIN
TYP
MAX
1
5.5
UNIT
SUPPLY VOLTAGE (IN PIN)
ISHDN
Shutdown current
2.7 V ≤ VIN ≤ 5.5 V, HWEN = GND
µA
THERMAL SHUTDOWN
Thermal shutdown
TSD
140
Hysteresis
°C
15
BOOST CONVERTER AND HVLED
IHVLED(1/2/3)
IMATCH_HV
Output current regulation
(HVLED1, HVLED2 or
HVLED3)
HVLED1 to HVLED2 or
HVLED3 matching (3)
Full-scale current = 20.2
mA, PWM off, brightness
code = max, exponential
mapping, auto headroom
off, HVLED1 Bank A,
HVLED2/3 Bank B
Full-scale current = 20.2
mA, PWM off, brightness
code = max, exponential
mapping, auto headroom
off, HVLED1 Bank A,
HVLED2/3 Bank B
PWM off, exponential
mapping, auto headroom
off
HVLED1,2,3 = Bank A,
2.7 V ≤ VIN ≤ 5.5 V
18.38
(–9%)
20.2
22.02
(9%)
TA = 25°C
–3.4%
±2.0%
3.2%
TA = 25°C,
3.0 V ≤ VIN ≤ 4.5 V
–3.6%
TA = 25°C
3.4%
±2.0%
2.7 V ≤ VIN ≤ 5.5 V,
ILED = 20.2 mA
–2.5%
2.5%
TA = 25°C,
ILED = 20.2 mA
–2.0%
1.7%
2.7 V ≤ VIN ≤ 5.5 V
ILED = 500 µA
–8.5%
8.5%
ILED_MIN
Minimum LED current
Full-scale current = 20.2 mA, Exponential Mapping
6.0
VREG_CS
Regulated current sink
headroom voltage
Auto headroom off, TA = 25°C
400
VHR_HV
Minimum current sink
headroom voltage for
HVLED current sinks
ILED = 95% of nominal, fullscale current = 20.2 mA,
auto headroom off
RDSON
NMOS switch on
resistance
ISW = 500 mA, TA = 25°C
ICL_BOOST
NMOS switch current limit
VOVP
Output overvoltage
protection
fSW
Switching frequency
DMAX
Maximum duty cycle
mA
2.7 V ≤ VIN ≤ 5.5 V
µA
285
TA = 25°C
mV
190
Ω
0.3
880
TA = 25°C
1120
1000
ON threshold
OVP select bits = 11
2.7 V ≤ VIN ≤ 5.5 V
TA = 25°C
40
Hysteresis
TA = 25°C
1
38.75
Boost frequency select bit = 2.7 V ≤ VIN ≤ 5.5 V
0
TA = 25°C
450
Boost frequency select bit = 2.7 V ≤ VIN ≤ 5.5 V
1
TA = 25°C
900
mA
41.1
V
550
500
1100
kHz
1000
2.7 V ≤ VIN ≤ 5.5 V
94%
CHARGE PUMP AND LVLED
ILVLED(1/2/3/4/5/6)
(1)
(2)
(3)
Full-scale current = 20.2
Output current regulation
mA, brightness code =
(low-voltage current sinks)
0xFF
2.7 V ≤ VIN ≤ 5.5 V
18.38
20.2
22.02
mA
All voltages are with respect to the potential at the GND pin.
Minimum and Maximum limits are verified by design, test, or statistical analysis. Typical (Typ) numbers are not verified, but do represent
the most likely norm. Unless otherwise specified, conditions for typical specifications are: VIN = 3.6 V and TA = 25°C.
LED current sink matching in the high-voltage current sinks (HVLED1 through HVLED3) is given as the maximum matching value
between any two current sinks, where the matching between any two high voltage current sinks (X and Y) is given as (IHVLEDX ( or
IHVLEDY) - IAVE(X-Y))/(IAVE(X-Y)) x 100. In this test all three HVLED current sinks are assigned to Bank A.
Submit Documentation Feedback
Copyright © 2014, Texas Instruments Incorporated
Product Folder Links: LM3633
5
�LM3633
SNVS867 – JUNE 2014
www.ti.com
Electrical Characteristics (continued)
Limits apply over the full operating ambient temperature range (−40°C ≤ TA ≤ 85°C) and VIN = 3.6 V, unless otherwise
specified.(1)(2)
PARAMETER
TEST CONDITIONS
IMATCH_LV
LVLED current sink
matching (4)
Full-scale current = 20.2
mA
VHR_LV
Minimum current sink
headroom voltage for
LVLED current sinks
ILED = 95% of nominal, fullscale current = 20.2 mA
VGTH
Threshold for gain
transition
VCPOUT
Charge Pump Output
Voltage
ICL_PUMP
Charge pump current limit
ROUT
2.7 V ≤ VIN ≤ 5.5 V
MIN
TYP
−3.1%
MAX
UNIT
2%
125
TA = 25°C
2.7 V ≤ VIN ≤ 5.5 V
80
65
mV
190
TA = 25°C
125
2X Gain
TA = 25°C
4.42
1X Gain, output referred
3 V ≤ VIN ≤ 5.5 V
2X Gain
TA = 25°C
240
Charge pump output
resistance
1X Gain
TA = 25°C
1.1
VHWEN_L
Logic low
2.7 V ≤ VIN ≤ 5.5 V
0
0.4
VHWEN_H
Logic High
2.7 V ≤ VIN ≤ 5.5 V
1.2
VIN
VPWM_L
Input logic low
2.7 V ≤ VIN ≤ 5.5 V
0
400
VPWM_H
Input logic high
2.7 V ≤ VIN ≤ 5.5 V
1.36
VIN
tPWM
Minimum PWM input
pulse
2.7 V ≤ VIN ≤ 5.5 V, PWM Zero Detect Enabled
180
V
350
mA
Ω
HWEN INPUT
V
PWM INPUT
0.75
mV
µs
I2C-COMPATIBLE VOLTAGE SPECIFICATIONS (SCL, SDA)
VIL
Input logic low
2.7 V ≤ VIN ≤ 5.5 V
0
400
VIH
Input logic high
2.7 V ≤ VIN ≤ 5.5 V
1.35
VIN
V
VOL
Output logic low (SDA)
2.7 V ≤ VIN ≤ 5.5 V, ILOAD = 3 mA
400
mV
(4)
6
mV
LED current sink matching in the low-voltage current sinks (LVLED1 through LVLED3 or LVLED4 through LVLED6) is given as the
maximum matching value between any two current sinks, where the matching between any two low voltage current sinks (X and Y) is
given as (ILVLEDX ( or ILVLEDY) - IAVE(X-Y))/(IAVE(X-Y)) x 100. In this test LVLED1-3 current sinks are assigned to Bank C and LVLED4-6 are
assigned to Bank F.
Submit Documentation Feedback
Copyright © 2014, Texas Instruments Incorporated
Product Folder Links: LM3633
�LM3633
www.ti.com
SNVS867 – JUNE 2014
6.6 Timing Requirements
Limits apply over the full operating ambient temperature range (−40°C ≤ TA ≤ 85°C) and VIN = 3.6 V, unless otherwise
specified. (1) (2)
PARAMETER
TEST CONDITIONS
MIN
TYP
MAX
UNIT
I2C-COMPATIBLE TIMING SPECIFICATIONS (SCL, SDA) (3), Figure 1
t1
SCL (Clock Period)
2.7 V ≤ VIN ≤ 5.5 V
2.5
t2
Data In setup time to SCL high
2.7 V ≤ VIN ≤ 5.5 V
100
t3
Data out stable after SCL low
2.7 V ≤ VIN ≤ 5.5 V
0
t4
SDA low setup time to SCL low (Start)
2.7 V ≤ VIN ≤ 5.5 V
100
t5
SDA high hold time after SCL high (Stop)
2.7 V ≤ VIN ≤ 5.5 V
100
µs
ns
INTERNAL POR THRESHOLD AND HWEN TIMING SPECIFICATION
VPOR
POR reset release voltage threshold
tHWEN
First I2C start pulse after HWEN high
VIN ramp time = 100 μs
1.7
2.1
VIN ramp time = 100 μs, TA = 25°C
1.9
POR reset complete, 2.7 V ≤ VIN ≤ 5.5
V
20
POR reset complete, TA = 25°C
(1)
(2)
(3)
V
µs
5
All voltages are with respect to the potential at the GND pin.
Minimum and Maximum limits are verified by design, test, or statistical analysis. Typical (Typ) numbers are not verified, but do represent
the most likely norm. Unless otherwise specified, conditions for typical specifications are: VIN = 3.6 V and TA = 25°C.
SCL and SDA must be glitch-free in order for proper brightness control to be realized.
t1
SCL
t5
t4
SDA_IN
t2
SDA_OUT
t3
2
Figure 1. I C-Compatible Interface Timing
Submit Documentation Feedback
Copyright © 2014, Texas Instruments Incorporated
Product Folder Links: LM3633
7
�LM3633
SNVS867 – JUNE 2014
www.ti.com
6.7 Typical Characteristics
5
0.55
4.5
0.5
Shutdown Current (uA)
4
Rdson (
)
0.45
0.4
0.35
0.3
0.2
-50
-25
0
25
50
75
100
3
2.5
2
1.5
1
VIN=2.7V
VIN=3.6V
VIN=5.5V
0.25
3.5
VIN=2.7V
VIN=3.6V
VIN=5.5V
0.5
0
-50
125
-25
0
Temperature (C)
25
50
75
100
125
Temperature (C)
C001
C001
Figure 2. NMOS RDSON vs Temperature
Figure 3. Shutdown IQ vs Temperature
1040
0.26
1020
0.24
0.22
VHR_HV (V)
OCP (mA)
1000
980
960
940
0.2
0.18
0.16
0.14
VIN=2.7V
VIN=3.6V
VIN=5.5V
920
900
-50
-25
0
25
50
75
100
VIN=2.7V
VIN=3.6V
VIN=5.5V
0.12
0.1
125
-50
-25
0
Temperature (C)
25
50
75
100
125
Temperature (C)
C001
C001
Figure 5. VHR_HV vs Temperature
1000
0.16
900
0.15
800
0.14
VGTH (V)
CP Rout (m
)
Figure 4. Boost OCP vs Temperature
700
600
0.13
0.12
VIN=2.7V
VIN=3.6V
VIN=5.5V
500
400
-50
-25
0
25
50
75
100
0.1
125
-50
Temperature (C)
-25
0
25
50
75
100
125
Temperature (C)
C001
Figure 6. Charge Pump ROUT vs Temperature
8
VIN=2.7V
VIN=3.6V
VIN=5.5V
0.11
C001
Figure 7. Low Voltage LED VGTH vs Temperature
Submit Documentation Feedback
Copyright © 2014, Texas Instruments Incorporated
Product Folder Links: LM3633
�LM3633
www.ti.com
SNVS867 – JUNE 2014
4.44
85
4.435
80
4.43
75
VHR_LV (mV)
VCPOUT (V)
Typical Characteristics (continued)
4.425
4.42
4.415
70
65
VIN=2.7V
VIN=3.6V
VIN=5.5V
60
VIN=2.7V
4.41
55
-50
-25
0
25
50
75
100
125
-50
-25
0
Temperature (C)
25
50
75
100
125
Temperature (C)
C001
C001
Figure 8. Charge Pump 2X Mode VCPOUT vs Temperature
Figure 9. VHR_LV vs Temperature
1.4
1.2
1.2
1
PWM Vil (V)
PWM Vih (V)
1
0.8
0.6
0.8
0.6
0.4
0.4
VIN=2.7V
VIN=3.6V
VIN=5.5V
0.2
0
-50
-25
0
25
50
75
100
VIN=2.7V
VIN=3.6V
VIN=5.5V
0.2
0
125
Temperature (C)
-50
-25
0
25
50
75
100
125
Temperature (C)
C001
Figure 10. PWM VIH vs Temperature
C001
Figure 11. PWM VIL vs Temperature
Submit Documentation Feedback
Copyright © 2014, Texas Instruments Incorporated
Product Folder Links: LM3633
9
�LM3633
SNVS867 – JUNE 2014
www.ti.com
7 Detailed Description
7.1 Overview
The LM3633 provides the power for three high-voltage LED strings and six low-voltage LEDs. The three highvoltage LED strings are powered from an integrated boost converter. The six low-voltage LEDs are powered from
an integrated 2X charge pump. The device is programmable over an I2C-compatible interface. Additional features
include a Pulse Width Modulation (PWM) input for content adjustable brightness control and 6 programmable
pattern generators for RGB and indicator blinking functions on the low-voltage LEDs.
7.2 Functional Block Diagram
SW
IN
Programmable
Overvoltage
Protection (16V, 24V,
32V, 40V)
HWEN
Hardware Enable,
Reference and
Thermal Shutdown
1A Current Limit
Boost
Converter
OVP
Programmable
500kHz/1MHz
Switching
Frequency
LED String
Open/Short
Detection
High-Voltage
Current Sinks
HVLED1
HVLED2
Backlight LED Control
1. 5-bit Full-Scale
Current Select
HVLED3
2. 11-bit brightness
adjustment
GND
3. Linear/Exponential
Mapping
C+
4. LED Current
Ramping
PWM
2X
Charge Pump
Internal Low Pass
Filter
Gain Control
(Automatic, 1X,
2X)
6 x Programmable
Pattern
Generators
SDA
I2C Compatible
Interface
SCL
Indicator LED Control
1. 5-bit Full-Scale
Current Select
2. 8-bit Brightness
Adjustment
3. Linear/Exponential
Mapping
C-
CPOUT
Low Voltage
Current Sinks
LVLED1
LVLED2
LVLED3
LVLED4
LVLED5
LVLED6
4, LED Current
Ramping
7.3 Feature Description
7.3.1 Control Bank Mapping
Control of the LM3633’s current sinks is not done directly, but through the programming of Control Banks. The
current sinks are then assigned to the programmed Control Bank. This allows a wide variety of current control
possibilities where LEDs can be grouped and controlled via specific Control Banks (see Figure 12 and
Figure 17).
10
Submit Documentation Feedback
Copyright © 2014, Texas Instruments Incorporated
Product Folder Links: LM3633
�LM3633
www.ti.com
SNVS867 – JUNE 2014
Feature Description (continued)
7.3.1.1 High-Voltage Control Banks (A and B)
There are 2 high-voltage control banks (A and B). All three high-voltage current sinks can be assigned to either
Control Bank A or Control Bank B. Assigning all three current sinks to the same control bank allows for better
LED current matching. Assigning a current sink to a different control bank allows for independent current sink
programming. The high-voltage control bank mapping is done via bits [2:0] of the HVLED Current Sink Output
Configuration register (see Table 5).
7.3.1.2 Low-Voltage Control Banks (C, D, E, F, G, and H)
There are 6 low-voltage control banks (C, D, E, F, G, and H). LVLED1 to LVLED3 can be assigned to control
bank C or can be assigned to independent control banks (LVLED2 to Control Bank D and LVLED3 to Control
Bank E). LVLED4 to LVLED6 can be assigned to control bank F or can be assigned to independent control
banks (LVLED5 to Control Bank G and LVLED6 to Control Bank H). Assigning low-voltage current sinks to the
same control bank allows for the best matching between LEDs. Assigning low-voltage current sinks to different
control banks allows for each current sink to be programmed with different current levels. When the pattern
generator is disabled the low-voltage ramp up/down times (Start-up/Shutdown and Run-Time) are controlled by
the LVLED Controls C to E and Controls F to H Ramp Time register (see Table 11).
7.3.2 Pattern Generator
The LM3633 contains 6 independently programmable pattern generators for each low-voltage control bank. Each
pattern generator can have its own separate pattern: delays from turnon, high and low-current settings, and
pattern high and low times. There are two sets of rise and fall time control registers. One set is assigned to
Control Banks C to E and the other set is assigned to Control Banks F to H. All other settings are independent
(see Figure 17).
7.3.3 PWM Input
The PWM input which can be assigned to either of the high-voltage control banks. When assigned to a control
bank, the programmed current in the control bank becomes a function of the duty cycle (DPWM) at the PWM input
and the control bank brightness setting. When PWM is disabled, DPWM is equal to one.
7.3.4 HWEN Input
HWEN is the global hardware enable to the LM3633. HWEN must be pulled high to enable the device. HWEN is
a high-impedance input so it cannot be left floating. When HWEN is pulled low, the LM3633 is placed in
shutdown, and all the registers are reset to their default state.
7.3.5 Thermal Shutdown
The LM3633 contains a thermal shutdown protection. In the event the die temperature reaches 140°C (typ), the
boost, charge pump, and current sinks shut down until the die temperature drops to typically 125°C (typ).
Submit Documentation Feedback
Copyright © 2014, Texas Instruments Incorporated
Product Folder Links: LM3633
11
�LM3633
SNVS867 – JUNE 2014
www.ti.com
7.4 Device Functional Modes
7.4.1 High-Voltage LED Control
Usable
Stimulus
Control
Banks
Outputs
(Assigned to Control banks)
Environmental
Stimulus
HVLED1
HVLED1
HVLED2
HVLED2
HVLED3
HVLED3
BANK A
PWM
PWM
Control
Internal Low Pass
Filter
BANK B
SDA
SCL
I2C
Compatible
Interface
High-Voltage LED Assignment
Control Bank Configuration
Boost Converter Configuration
Startup/Shutdown Ramp Configuration
Run-Time Ramp Configuration
Brightness Control
Figure 12. High-Voltage Functional Control Diagram
7.4.1.1 High-Voltage Boost Converter
The high-voltage boost converter provides power for the three high-voltage current sinks (HVLED1, HVLED2 and
HVLED3). The boost circuit operates using a 4.7-µH to 22-µH inductor and a 1-µF output capacitor. The
selectable 500-kHz or 1-MHz switching frequency allows for use of small external components and provides for
high boost-converter efficiency. HVLED1, HVLED2, and HVLED3 feature an adaptive current regulation scheme
where the feedback point (HVLED1, HVLED2, and HVLED3) regulates the LED headroom voltage to VHR_HV.
When there are different voltage requirements in the high-voltage LED strings (string mismatch), the LM3633
regulates the feedback point of the highest voltage string to VHR_HV and drops the excess voltage of the lowervoltage string across the lower string(s) current sink.
7.4.1.2 High-Voltage Current Sinks (HVLED1, HVLED2 and HVLED3)
HVLED1, HVLED2, and HVLED3 control the current in the high-voltage LED strings as configured by Control
Bank A or Control Bank B. Each Control Bank has 5-bit full-scale current programmability and 11-bit brightness
control. High-voltage current sinks are assigned to a control bank through the HVLED Current Sink Output
Configuration register (see Table 5).
7.4.1.3 High-Voltage Current String Biasing
Each high-voltage current string can be powered from the LM3633 boost output (COUT) or from an external
source. The feedback enable bits (HVLED Current Sink Feedback Enables register bits [2:0]) determine where
the high-voltage current string anodes are connected. When set to '1' (default) the high-voltage current sink
inputs are included in the boost feedback loop. This allows the boost converter to adjust its output voltage to
maintain the LED headroom voltage VHR_HV at the current sink input.
When powered from alternate sources the feedback enable bits should be set to '0'. This removes the particular
current sink from the boost feedback loop. In these configurations the application must ensure that the headroom
voltage across the high-voltage current sink is high enough to prevent the current sink from going into dropout
(see the Figure 63 for data on the high-voltage LED current vs VHR_HV).
Setting the HVLED Current Sink Feedback Enables register bits also determines triggering of the shorted highvoltage LED String Fault flag (see Fault Flags/Protection Features section).
12
Submit Documentation Feedback
Copyright © 2014, Texas Instruments Incorporated
Product Folder Links: LM3633
�LM3633
www.ti.com
SNVS867 – JUNE 2014
Device Functional Modes (continued)
7.4.1.4 Boost Switching-Frequency Select
The LM3633 boost converter has two switching frequency settings. The switching frequency setting is controlled
via the Boost Frequency Select bit (bit 0 in the Boost Control register). Operating at the 500-kHz switching
frequency results in better efficiency under lighter load conditions due to the decreased switching losses. In this
mode the inductor must be between 10 µH and 22 µH. Operating at the 1-MHz switching frequency results in
better efficiency under higher load conditions due to in lower conduction losses in the MOSFETs and inductor. In
this mode the inductor can be between 4.7 µH and 22 µH.
7.4.1.5 Automatic Switching Frequency Shift
The LM3633 has an automatic frequency-select mode (bit 3 in the Boost Control register) to optimize the
frequency vs load dependent losses. In Auto-Frequency mode the boost converter switching frequency is
changed based on the high-voltage LED current. The threshold (Control A and Control B brightness code) at
which the frequency switchover occurs is programmable via the Auto-Frequency Threshold register. The AutoFrequency Threshold register contains an 8-bit code which is compared to the 8 MSBs of the brightness code.
When the brightness code is greater than the Auto-Frequency Threshold value the boost converter switching
frequency is 1 MHz. When the brightness code is less than or equal to the Auto-Frequency Threshold register
the boost converter switching frequency is 500 kHz. The default value in the Auto-Frequency Threshold register
is set for the default full-scale current setting (20.2 mA).
Figure 13 shows the LED efficiency improvement (3p5s LED configuration with a 4.7-μH inductor) when the autofrequency feature is enabled. When the LED brightness is less than or equal to 0x6C, the switching frequency is
500 kHz, and it improves the LED efficiency by up to 6%. When the LED brightness is greater than 0x6C, the
switching frequency is 1 MHz, and it improves LED efficiency by up to 2.2%.
Figure 13. Auto-Frequency Boost Efficiency Improvement
Table 1 summarizes the general recommendations for auto-frequency threshold setting vs inductance values and
LED string configurations. These are general recommendations — the optimum auto-frequency threshold setting
should be evaluated for each application
Table 1. Auto-Frequency Threshold Settings
THREE STRING
TWO STRING
INDUCTOR
(µH)
AUTO-FREQUENCY
THRESHOLD
PEAK EFFICIENCY
IMPROVEMENT (%)
PEAK
CONFIGURATION
AUTOFREQUENCY
THRESHOLD
4.7
6C
2.2
3p5s
AC
1.1
2p6s
10
74
1.7
3p4s
B4
1.3
2p5s
22
7C
0.7
3p3s
BC
0.7
2p4s
PEAK EFFICIENCY
IMPROVEMENT(%)
PEAK
CONFIGURATION
Submit Documentation Feedback
Copyright © 2014, Texas Instruments Incorporated
Product Folder Links: LM3633
13
�LM3633
SNVS867 – JUNE 2014
www.ti.com
7.4.1.6 Brightness Register Current Control
The Brightness Register Current Control allows simple user-adjustable current control by writing directly to the
appropriate control bank brightness register. The current for Control Bank A and B is a function of the full-scale
LED current, the 11-bit code in the respective brightness register, and the PWM input duty cycle (if PWM is
enabled). The Control Bank A and B brightness should always be written with LSBs first and MSBs last.
7.4.1.6.1 8-Bit Control (Preferred)
The preferred operating mode is to control the high-voltage LED brightness by setting the Control Bank LSB
register (3 LSBs) to zero, using only the Control Bank MSB register (8 MSBs). In 8-bit control mode the LM3633
controls the 3 LSBs to ramp the high-voltage LED current using all 11 bits.
7.4.1.6.2 11-Bit Control
In this mode of operation, both Control Bank LSB and MSB registers must be written whenever a change in
Brightness is required. The high-voltage LED current does not change until the Control Bank MSB register is
written. If the brightness change affects only the 3 LSBs, the Control Bank MSB register (8 MSBs) must be
rewritten to change the high-voltage LED current.
7.4.1.7 PWM Control
The LM3633 PWM input can be enabled for Control Bank A or B (see Table 21). Once enabled, the LED current
becomes a function of the code in the Control Brightness registers and the PWM input-duty cycle.
The PWM input accepts a logic level voltage and internally filters it to an analog-control voltage. This results in a
linear response of duty cycle to current, where 100% duty cycle corresponds to the programmed brightness code
multiplied by the Full-Scale Current setting.
Analog Domain
PWM Input
LPF
polarity
To Assigned
High Voltage
Current Sinks
Full-Scale
Current
Control
Digital Domain
DAC
Backlight Digital LED Control Block
Full-Scale Current Select
Brightness Setting
Exponential or Linear Mapping
Startup/Shutdown Ramp Generator
Runtime Ramp Generator
Figure 14. PWM Input Architecture
7.4.1.7.1 PWM Input Frequency Range
The usable input frequency range for the PWM input is governed on the low end by the cutoff frequency of the
internal low-pass filter (540 Hz, Q = 0.33) and on the high end by the propagation delays through the internal
logic. For frequencies below 2 kHz the current ripple begins to become a larger portion of the DC LED current.
Additionally, at lower PWM frequencies the boost output voltage ripple increases, causing a non-linear response
from the PWM duty cycle to the average LED current due to the response time of the boost and current-sink
dropout. For the best response of current vs. duty cycle, the PWM input frequency should be kept between 2 kHz
and 100 kHz.
14
Submit Documentation Feedback
Copyright © 2014, Texas Instruments Incorporated
Product Folder Links: LM3633
�LM3633
www.ti.com
SNVS867 – JUNE 2014
7.4.1.7.2 PWM Input Polarity
The PWM Input can be set for active low polarity, where the LED current is a function of the negative duty cycle.
This is set via the PWM Configuration register (see Table 21).
7.4.1.7.3 PWM Zero Detection
The LM3633 incorporates a feature to detect when the PWM input is near zero. When this feature is enabled the
minimum PWM input pulse must be greater than tPWM (see Electrical Characteristics). Bit 3 in the PWM
Configuration register is used to enable or disable PWM zero detection.
7.4.1.8 Start-up/Shutdown Ramp
The high-voltage LED start-up and shutdown ramp times are independently programmable in the Control A and
Control B Start-Up/Shutdown Ramp Time register (see Table 7). There are 16 different start-up and 16 different
shutdown times. The start-up times can be programmed independently from the shutdown times, but each
Control bank is not independently programmable.
The start-up ramp time is the period from when the Control Bank is enabled to when the LED current reaches its
initial set point. The shutdown ramp time is the period from when the Control Bank is disabled to when the LED
current reaches 0.
7.4.1.9 Run-Time Ramp
Current ramping from one brightness level to the next is programmed via the Control A and Control B Run-Time
Transition Time register (see Table 9). There are 16 different ramp-up times and 16 different ramp-down times.
The ramp-up time can be programmed independently from the ramp-down time, but each Control Bank cannot
be independently programmed. For example, programming a ramp-up or ramp-down time is a global setting for
all high-voltage LED Control Banks.
7.4.1.10 High-Voltage Control A/B Ramp Select
The LM3633 provides three options for configuring Control A and Control B ramp times. When the run-time ramp
select bits are set to 00 the control bank uses both the start-up/shutdown and run-time ramp times. When the
run-time ramp select bits are set to 01 the control bank uses the start-up/shutdown ramp times for both
startup/shutdown and run-time. When the run-time ramp select bits are set to 1x the control bank uses a zero
µsec run-time ramp.
7.4.1.11 LED Current Mapping Modes
All control banks can be programmed for either exponential or linear mapping modes (see Figure 19). These
modes determine the transfer characteristic of backlight code to LED current. Independent mapping of Control
Bank A and B is not allowed; both banks use the same mapping mode.
7.4.1.12 Exponential Mapping
In Exponential Mapping Mode the current ramp (either up or down) appears to the human eye as a more uniform
transition than the linear ramp. This is due to the logarithmic response of the eye.
7.4.1.12.1 8-Bit Code Calculation
In 8-bit Exponential Mapping Mode the brightness code-to-backlight current transfer function is given by the
equation:
ILED = ILED_FULLSCALE x 0.85
(44 -
Code + 1
5.8181818
)
x DPWM
(1)
Where ILED_FULLSCALE is the full-scale LED current setting (see Table 13), Code is the 8-bit brightness code in the
Control Brightness MSB register and DPWM is the PWM Duty Cycle.
7.4.1.12.2 11-Bit Code Calculation
In 11-bit Exponential Mapping Mode the brightness code-to-backlight current transfer function is given by the
equation:
Submit Documentation Feedback
Copyright © 2014, Texas Instruments Incorporated
Product Folder Links: LM3633
15
�LM3633
SNVS867 – JUNE 2014
www.ti.com
ILED = ILED_FULLSCALE x 0.85
Code
+1
8
(44 - 5.8181818
)
x DPWM
(2)
Where ILED_FULLSCALE is the full-scale LED current setting (see Table 13), Code is the 11-bit brightness code in
the Control Brightness MSB and LSB registers and DPWMis the PWM Duty Cycle.
7.4.1.13 Linear Mapping
In Linear Mapping Mode the brightness code-to-backlight current has a linear relationship.
7.4.1.13.1 8-Bit Code Calculation
In Linear Mapping Mode the brightness code-to-backlight current has a linear relationship and follows the
equation:
ILED = ILED_FULLSCALE x
1 x Code x D
PWM
255
(3)
Where ILED_FULLSCALE is the full-scale LED current setting, Code is the 8-bit brightness code in the Control
Brightness MSB register and DPWMis the PWM Duty Cycle.
7.4.1.13.2 11-Bit Code Calculation
In Linear Mapping Mode the brightness code-to-backlight current has a linear relationship and follows the
equation:
ILED = ILED_FULLSCALE x
1 x Code x D
PWM
2047
(4)
Where ILED_FULLSCALE is the full-scale LED current setting, Code is the 11-bit brightness code in the Control
Brightness MSB and LSB registers and DPWMis the PWM Duty Cycle.
21.00
21
Exponential
Linear
18.00
15
LED CURRENT (mA)
LED CURRENT (mA)
15.00
12.00
9.00
6.00
12
9
6
3.00
3
0.00
0
2048
1792
1536
1280
1024
768
512
BRIGHTNESS CODE
C001
Figure 15. LED Current Mapping Modes (8-bit)
256
0
256
224
192
160
128
96
64
32
0
BRIGHTNESS CODE
16
Exponential
Linear
18
C001
Figure 16. LED Current Mapping Modes (11-bit)
Submit Documentation Feedback
Copyright © 2014, Texas Instruments Incorporated
Product Folder Links: LM3633
�LM3633
www.ti.com
SNVS867 – JUNE 2014
7.4.2 Low-Voltage LED Control
Pattern
Generator
Control
Banks
Output Assignment
BANK C
LVLED1
LVLED1
BANK D
LVLED2
LVLED2
BANK E
LVLED3
LVLED3
BANK F
LVLED4
LVLED4
BANK G
LVLED5
LVLED5
BANK H
LVLED6
LVLED6
Pattern C
Run-time Ramp
Up/Down
Control
Pattern D
Pattern E
Pattern F
Run-time Ramp
Up/Down
Control
Pattern G
Pattern H
SDA
SCL
I2CCompatible
Interface
Low-Voltage LED Assignment
Control Bank Configuration
Charge Pump Configuration
Run-Time Ramp
Brightness Control
Pattern Control
Figure 17. Low-Voltage LED Functional Control Diagram
7.4.2.1 Integrated Charge Pump
The LM3633 features an integrated (2X/1X) charge pump capable of supplying LVLED1 to LVLED6 current. The
fixed 1-MHz switching frequency allows for use of tiny 1-µF ceramic flying capacitors (CP) and output capacitor
(CPOUT). The charge pump can supply the power for the low-voltage LEDs connected to LVLED1 to LVLED6
and can operate in 4 different modes: disabled, automatic gain, 1X gain, or 2X gain (see Figure 18).
VIN
IN
CPOUT
CIN
Charge
Pump
Control
Register
CPOUT
1X, 2X
Charge Pump
C+
C-
SDA
SDA
4.4V Typ (2X gain)
CP
SDA
SCL
I2CCompatible
Interface
LVLEDx
GND
Figure 18. Integrated Charge Pump
7.4.2.2 Charge Pump Disabled
With the charge pump disabled, the path from IN to CPOUT is high impedance. Additionally, with the charge
pump disabled, the low-voltage current sinks can still be active, thus allowing the low-voltage LEDs to be biased
from external sources (see Low-Voltage LED Biasing section). Disabling the charge pump also has no influence
on the state of the low-voltage current sinks. For instance, if a low-voltage current string is set to have its anode
connected to CPOUT, and the charge pump is disabled, the current sink continues to try to sink current.
Submit Documentation Feedback
Copyright © 2014, Texas Instruments Incorporated
Product Folder Links: LM3633
17
�LM3633
SNVS867 – JUNE 2014
www.ti.com
7.4.2.3 Automatic Gain
In Automatic Gain Mode the charge-pump-gain transition is actively selected to maintain LED current regulation
in the CPOUT-connected, low-voltage current sinks. At higher input voltages the charge pump operates in Pass
Mode (1x gain) allowing the voltage at CPOUT to track the input voltage. As VIN drops, the voltage on the lowvoltage current sink(s) drops also. Once any of the active, CPOUT-connected, low-voltage current sink input
voltages reach VHR_LV (see Electrical Characteristics), the charge pump automatically switches to a gain of 2x
thus preventing dropout (see 2X Gain). Once the charge pump switches over to 2X gain it remains in 2X gain
until the active low-voltage current sinks are turned off (enable bit or brightness code 0), even if the current sink
input voltage goes above the switch over threshold.
7.4.2.4 Automatic Gain (Flying Capacitor Detection)
In Automatic Gain Mode the LM3633 starts up and automatically detects if there is a flying capacitor (CP)
connected between C+ and C−. If there is, Automatic Gain Mode operates normally. If the detection circuitry
does not detect a connected flying capacitor, the LM3633 automatically switches to 1X Gain mode.
7.4.2.5 1X Gain
In 1X Gain Mode the charge pump passes VIN directly through to the output capacitor (CPOUT). There is a
resistive drop between IN and CPOUT in the 1X Gain Mode (typically 1.1 Ω) which should be accounted for
when determining the headroom requirement for the low-voltage current sinks. In forced 1X Gain Mode the
charge pump does not switch; thus, the CP and CPOUT can be omitted from the circuit.
7.4.2.6 2X Gain
In 2X Gain Mode the internal charge pump doubles VIN and post-regulates CPOUT to, typically, 4.4 V. This
allows for biasing LEDs whose forward voltages are greater than the input supply (VIN).
7.4.2.7 Low-Voltage Current Sinks (LVLED1 to LVLED6)
Low-voltage current sinks LVLED1 to LVLED6 each provide the current for a single LED as configured via
Control Banks C to H. Each control bank has 8-bit brightness control and 5-bit full-scale current programmability.
The low-voltage current sinks can be controlled directly through a dedicated brightness register or with different
blinking patterns via the 6 internal pattern generators. Configuration of the low-voltage current sinks is done
through the low-voltage Control Bank C to H (LVLED1, LVLED2, and LVLED3 to Control Bank C to E and
LVLED4, LVLED5, and LVLED6 to Control Bank F to H). (See Table 6.)
7.4.2.8 Low-Voltage LED Biasing
Each low-voltage LED can be powered from the LM3633 charge pump output (CPOUT) or from an external
source. When powered from CPOUT the feedback enable bit (LVLED Current Sink Feedback Enables Register
bits [5:0]) for that particular low-voltage current sink must be set to '1' (default). This allows for the specific lowvoltage current sink to have control over the charge pumps gain control (see Automatic Gain section).
When powered from alternate sources (such as VIN) the feedback enable bit for the particular low-voltage current
sink must be set to '0'. This removes the particular current sink from the charge pump feedback loop. In these
configurations the application must ensure that the headroom voltage across the low-voltage current sink is high
enough to prevent the low-voltage current sinks from going into dropout (see Figure 64 for data on the lowvoltage LED current vs headroom voltage).
The LVLEDX feedback enable bits also determine how the shorted low-voltage LED String fault flag is triggered
(see Fault Flags/Protection Features).
7.4.2.9 Brightness Register Current Control
The LM3633 features brightness register current control for simple user-adjustable current control set by writing
directly to the appropriate Control Bank Brightness Registers. The current for the low-voltage LED Control Bank
C to H is a function of the full-scale LED current and the 8-bit code in the respective brightness register. The
control bank brightness register code represents the percentage of the full-scale LED current. This percentage of
full-scale current is different depending on the selected mapping mode (see Table 12).
18
Submit Documentation Feedback
Copyright © 2014, Texas Instruments Incorporated
Product Folder Links: LM3633
�LM3633
www.ti.com
SNVS867 – JUNE 2014
7.4.2.10 LED Current Mapping Modes
All control banks can be programmed for either exponential or linear mapping modes (see Figure 19). These
modes determine the transfer characteristic of brightness code to LED current. All low-voltage control banks use
the same mapping mode.
7.4.2.11 Exponential Mapping
In Exponential Mapping Mode the current ramp (either up or down) appears to the human eye as a more uniform
transition than the linear ramp. This is due to the logarithmic response of the eye.
In Exponential Mapping Mode the brightness code-to-current transfer function is given by the equation:
ILED = ILED_FULLSCALE x 0.85
(44 -
Code + 1
5.8181818
)
(5)
Where ILED_FULLSCALE is the full-scale LED current setting (see Table 13) and Code is the brightness code in the
brightness register.
7.4.2.12 Linear Mapping
In Linear Mapping Mode the brightness code-to-current has a linear relationship and follows the equation:
ILED = ILED_FULLSCALE x
1 x Code
255
(6)
Where ILED_FULLSCALE is the full-scale LED current setting and Code is the brightness code in the brightness
register.
21.00
Exponential
Linear
18.00
LED CURRENT (mA)
15.00
12.00
9.00
6.00
3.00
0.00
256
224
192
160
128
96
64
32
0
BRIGHTNESS CODE
C001
Figure 19. LED Current Mapping Modes
7.4.2.13 Start-up/Shutdown Ramp
The start-up and shutdown ramp times are independently programmable in the Control C to Control H StartUp/Shutdown Ramp-Time registers (see Table 8). There are 8 different start-up and 8 different shutdown times.
The start-up times can be programmed independently from the shutdown times. The start-up ramp time is from
when the Control Bank is enabled to when the LED current reaches its initial set point. The shutdown ramp time
is from when the Control Bank is disabled to when the LED current reaches 0.
7.4.2.14 Run-Time Ramp
Current ramping from one brightness level to the next is programmed via the Control C to E and Control F to H
Ramp-Time registers (see Table 11). There are 8 different ramp-up times and 8 different ramp-down times. The
ramp-up time can be programmed independently from the ramp-down time, but each Control Bank cannot be
independently programmed. There is one ramp time register which is common to Control Bank C to E and one
ramp time register which is common to Control Bank F to H. This register sets the ramp-up and ramp-down times
for both direct brightness control and pattern generator modes of operation.
Submit Documentation Feedback
Copyright © 2014, Texas Instruments Incorporated
Product Folder Links: LM3633
19
�LM3633
SNVS867 – JUNE 2014
www.ti.com
7.4.3 Low-Voltage LED Pattern Generator
The LM3633 contains 6 programmable pattern generators (one for each low-voltage control bank). Each pattern
generator has the ability to drive a unique programmable pattern. Each pattern generator has its own set of
registers available for pattern programming. The programmable patterns are : delay time, high period, low period,
high brightness, and low brightness (see Figure 20). The ramp-up and ramp-down times are controlled by the
Control C to E and Control F to H Ramp-Time register. (See Table 11.)
tHIGH
IHIGH
ILOW
tDELAY
tRISE
tFALL
tLOW
Figure 20. Pattern Generator Timing
7.4.3.1 Delay Time
The delay time (tDELAY) is the delay from when the pattern is enabled to when the LED current begins ramping up
in the control bank assigned current source(s). The pattern starts when the respective Control Bank Enable
register is written high if the Pattern Generator is enabled. There is one tDELAY register for each pattern generator
(6 total). The selectable times are programmed with the lower 6 bits of the tDELAY registers. The times are split
into 2 groups where codes 0x00 to 0x3C are short durations from 16.384 ms (code 0x00) up to 999.424 ms
(code 0x3C) or 16.384 ms/bit. The higher codes (0x3D to 0x7F) select tDELAY from 1130.496 ms up to 9781.248
ms, or 131.072 ms/bit (see Table 27).
7.4.3.2 Rise Time
The LED current rise time (tRISE) is the time the LED current takes to move from the low-current brightness level
(ILOW) to the high-current brightness level (IHIGH). The rise time of the LED current (tRISE) is set via the Control C
to E and Control F to H Ramp-Time registers. There are 8 available ramp-up time settings (see Table 11). There
is one ramp-time register which is common to Control Bank C to E and one ramp-time register which is common
to Control Bank F to H.
7.4.3.3 Fall Time
The LED current fall time (tFALL) is the time the LED current takes to move from the high-current brightness level
(IHIGH) to the low-current brightness level (ILOW). The fall time of the LED current (tFALL) is set via the Control C to
E and Control F to H Ramp Time registers. There are 8 available ramp-down settings (see Table 11). There is
one ramp-time register which is common to Control Bank C to E and one ramp-time register which is common to
Control Bank F to H.
7.4.3.4 High Period
The LED current high period (tHIGH) is the duration that the LED pattern spends at the high LED current set point
(tHIGH). The tHIGH times are programmed via the Pattern Generator High-Time registers. The programmable times
are broken into 2 groups. The first set (from code 0x00 to 0x3C) increases the tHIGH time in steps of 16.384 ms.
The second set (from code 0x3D to 0x7F) increases the tHIGH time in steps of 131.072 ms (see Table 29).
7.4.3.5 Low Period
The LED current low period (tLOW) is the duration that the LED current spends at the low LED current set point
(ILOW). The tLOW times are programmed via the Pattern Generator Low-Time registers. There are 256 tLOW
settings that are broken into 3 groups of linearly increasing times. The first set (from code 0x00 to 0x3C)
increases the tLOW time in steps of 16.384 ms. The second set (from code 0x3D to 0x7F) increases the tLOW time
in steps of 131.072 ms. The third set (from code 0x80 to 0xFF) increases the tLOW time in steps of 524.288 ms
(see Table 28).
20
Submit Documentation Feedback
Copyright © 2014, Texas Instruments Incorporated
Product Folder Links: LM3633
�LM3633
www.ti.com
SNVS867 – JUNE 2014
7.4.3.6 Low-Level Brightness
The LED current low brightness level (ILOW) is the LED current set point that the pattern rests at during the tLOW
period. This level is set via the Pattern Generator Low-Level Brightness registers (BREGL_C to BREGL_H). The
brightness level has 8 bits of programmability. ILOW is a function of the Control Bank full-scale current setting and
the code in the Pattern Generator Low-Level Brightness registers.
For exponential mapping ILOW is:
(44 -
ILOW = ILED_FULLSCALE x 0.85
BREGL_X + 1
)
5.8181818
(7)
For linear mapping ILOW is:
ILOW = ILED_FULLSCALE x
1 x BREGL_X
255
(8)
BREGL_X is the Pattern Generator Low-Level Brightness Register setting for the specific Control Bank.
7.4.3.7 High-Level Brightness
The LED current high brightness level (IHIGH) is the LED current set point that the pattern rests at during the tHIGH
period. This high-current level is set via the Control Banks Brightness Register (BREGH_C to BREGH_H). The
brightness level has 8 bits of programmability. IHIGH is a function of the Control Bank full-scale current setting and
the code in the Control Banks Brightness Register, prior to the Mapping Mode selected.
For exponential mapping IHIGH is:
IHIGH = ILED_FULLSCALE x 0.85
+1
(44 - BREGH_X
)
5.8181818
(9)
For linear mapping IHIGH is:
IHIGH = ILED_FULLSCALE x
1 x BREGH_X
255
(10)
BREGH_X is the Control Banks Brightness Register setting for the specific Control Bank.
7.4.4 Fault Flags/Protection Features
The LM3633 contains both an LED open-fault and LED short-fault detection. These fault detections are designed
to be used in production-level testing and not during normal operation. For the fault flags to operate they must be
enabled via the LED Fault Enable Register (see Table 35). The Open LED String (HVLED), Shorted LED String
(HVLED), Open LED (LVLED), and Shorted LED (LVLED) sections detail proper procedure for reading back
open and short faults in both the high-voltage LED and low-voltage LED strings.
7.4.4.1 Open LED String (HVLED)
An open LED string is detected when the voltage at the input to any active high-voltage current sink has fallen
below 200 mV, and the boost output voltage has hit the OVP threshold. This test assumes that the HVLED string
being detected for an open is connected to the LM3633 boost output (COUT+) (see Table 31). For an HVLED
string not connected to the LM3633 boost output voltage, but connected to another voltage source, the boost
output does not trigger the OVP flag. In this case an open LED string is not detected.
The procedure for detecting an open fault in the HVLED current sinks (provided they are connected to the boost
output voltage) is:
• Apply power to the LM3633
• Enable Open Fault (Register 0xB4, bit [0] = 1)
• Assign HVLED1, HVLED2 and HVLED3 to Bank A (Register 0x10, Bits [2:0] = (0, 0, 0)
• Set the start-up ramp times to the fastest setting (Register 0x12 = 0x00)
• Set Bank A full-scale current to 20.2 mA (Register 0x20 = 0x13)
• Configure HVLED1, HVLED2, and HVLED3 for LED string anode connected to COUT (Register 0x28, bits[2:0]
= (1,1,1))
Submit Documentation Feedback
Copyright © 2014, Texas Instruments Incorporated
Product Folder Links: LM3633
21
�LM3633
SNVS867 – JUNE 2014
•
•
•
•
•
www.ti.com
Set Bank A brightness to maximum (Register 0x41 = 0xFF)
Enable Bank A (Register 0x2B Bit[0] = 1
Wait 4 ms
Read back bits[2:0] of register 0xB0. Bit [0] = 1 (HVLED1 open). Bit [1] = 1 (HVLED2 open). Bit [2] = 1
(HVLED3 open)
Disable all banks (Register 0x2B = 0x00)
7.4.4.2 Shorted LED String (HVLED)
The LM3633 features an LED short-fault flag indicating one or more of the HVLED strings have experienced a
short. The method for detecting a shorted HVLED strings is if the current sink is enabled and the string voltage
(VOUT - VHVLED1/2/3) falls to below (VIN – 1 V). This test must be performed on one HVLED string at a time.
Performing the test with both current sinks enabled can result in a faulty reading if one of the strings is shorted
and the others are not.
The procedure for detecting a short in an HVLED string is:
• Apply power to the LM3633
• Enable Short Fault (Register 0xB4, bit [1] = 1)
• Enable Feedback on the HVLED Current Sinks (Register 0x28, bits[2:0] = (1,1,1))
• Assign HVLED1 to Bank A (Register 0x10, Bits [2:0] = (1, 1, 0)
• Set the start-up ramp times to the fastest setting (Register 0x12 = 0x00)
• Set Bank A full-scale current to 20.2 mA (Register 0x20 = 0x13)
• Set Bank A brightness to max (Register 0x41 = 0xFF)
• Enable Bank A (Register 0x2B Bit[0] = 1)
• Wait 4 ms
• Read back bits[0] of register 0xB2. 1 = HVLED1 short.
• Disable all banks (Register 0x2B = 0x00)
• Repeat the procedure for the HVLED2 and HVLED3 strings
7.4.4.3 Open LED (LVLED)
The LM3633 features an open-LED-fault flag indicating one or more of the active low-voltage LED strings are
open. An open in a low-voltage LED string is flagged if the voltage at the input to any active low-voltage current
sink goes below VHR_LV (typically 80 mV).
Since the open LED detect is flagged when any active current sink input falls below VHR_LV, certain configurations
can result in falsely triggering an open. These include:
1. LED anode is tied to CPOUT, charge pump is in 1X gain, and VIN drops low enough to bring any active
LVLED current sink below VHR_LV.
2. LED anodeis not tied to CPOUT and VLED_ANODE goes low enough to bring any active LVLED current sink
below VHR_LV.
The following list describes a test procedure that can be used in detecting an open in the LVLED strings:
• Apply power to the LM3633
• Enable Open Fault (Register 0xB4, bit [0] = 1)
• Assign LVLED1, LVLED2, and LVLED3 to Bank C and LVLED4, LVLED5, and LVLED6 to Bank F (Register
0x11 = 0x00)
• Set the start-up ramp times to the fastest setting (Registers 0x14 and 0x17 = 0x00)
• Set Bank C and Bank F full-scale current to 20.2 mA (Registers 0x22 and 0x25 = 0x13)
• Configure all LVLED strings for Anode connected to CPOUT (register 0x29 bits[5:0]=1)
• Force the Charge Pump into 2X gain (Register 0x2A Bits[2:1] = 11). Ensure that CPOUT and CP are in the
circuit and that (VCPOUT is > VFLVLED + VHR_LV)
• Set Bank C and Bank F brightness to max (Registers 0x42 and 0x45 = 0xFF)
• Enable Bank C and Bank F (Register 0x2B Bits[5,2] = 1)
• Wait 4 ms
• Read back bits[5:0] of register 0xB1 (1 indicates an open, and a 0 indicates normal operation (see Table 32))
22
Submit Documentation Feedback
Copyright © 2014, Texas Instruments Incorporated
Product Folder Links: LM3633
�LM3633
www.ti.com
•
SNVS867 – JUNE 2014
Disable all banks (Register 0x2B = 0x00)
7.4.4.4 Shorted LED (LVLED)
The LM3633 features an LED short-fault flag indicating when any active low-voltage LED is shorted (Anode to
Cathode). A short in a low-voltage LED is determined when the LED voltage (VCPOUT - VHR_LV) falls below 1 V.
A
•
•
•
•
•
•
•
•
•
•
•
•
procedure for determining a short in an LVLED string is detailed below:
Apply Power
Enable Short Fault (Register 0xB4, bit [1] = 1)
Assign LVLED1, LVLED2, and LVLED3 to Bank C and LVLED4, LVLED5, and LVLED6 to Bank F (Register
0x11 = 0x00)
Set the start-up ramp times to the fastest setting (Registers 0x14 and 0x17 = 0x00)
Set Bank C and Bank F full-scale current to 20.2 mA (Registers 0x22 and 0x25 = 0x13)
Enable Feedback on the LVLED Current Sinks (Register 0x29 = 0x3F)
Set Charge Pump to 1X gain (Register 0x2A = 0x40)
Set Bank C and Bank F brightness to max (Register 0x42 and 0x45 = 0xFF)
Enable Bank C and Bank F(Register 0x2B Bits[5,2] = 1)
Wait 4 ms
Read bits[5:0] from register 0xB3. A 1 indicates short, and a 0 indicates normal operation (see Table 34).
Disable all banks (Register 0x2B = 0x00)
7.4.4.5 Overvoltage Protection (Inductive Boost)
The overvoltage protection threshold (OVP) on the LM3633 has 4 different programmable options: 16 V, 24 V, 32
V, and 40 V. The OVP protects the device and associated circuitry from high voltages in the event a high-voltage
LED string becomes open. During normal operation, the LM3633 inductive boost converter boosts the output up
so as to maintain VHR at the active, high-voltage (COUT connected) current sink inputs. When a high-voltage
LED string becomes open, the feedback mechanism is broken, and the boost converter over-boosts the output.
When the output voltage reaches the OVP threshold the boost converter stops switching, thus allowing the
output node to discharge. When the output discharges to VOVP minus 1 V, the boost converter begins switching
again. The OVP sense is at the OVP pin, so this pin must be connected directly to the inductive boost output
capacitor positive pin.
For high-voltage current sinks that have the HVLED Current Sink Feedback Enables setting such that the highvoltage current sinks anodes are not connected to COUT (feedback is disabled), the overvoltage sense
mechanism is not in place to protect the input to the high-voltage current sink. In this situation the application
must ensure that the voltage at HVLED1, HVLED2, or HVLED3 does not exceed 40 V.
The default setting for OVP is set at 16 V. For applications that require higher than 16 V at the boost output, the
OVP threshold must be programmed to a higher level after power up.
7.4.4.6 Current Limit (Inductive Boost)
The NMOS switch current limit for the LM3633 inductive boost is set at 1 A (typ). When the current through the
LM3633 NFET switch hits this overcurrent protection threshold (OCP), the device turns the NFET off, and the
inductor’s energy is discharged into the output capacitor. Switching is then resumed at the next cycle. The
current limit protection circuitry can operate continuously each switching cycle. The result is that during highoutput power conditions the device can run continuously in current limit. Under these conditions the LM3633
inductive boost converter stops regulating the headroom voltage across the high-voltage current sinks. This
results in a drop in the LED current.
7.4.4.7 Current Limit (Charge Pump)
The LM3633 charge pump output current limit is set high enough so that the device supports 29.8 mA (maximum
full-scale current) in all LVLED current sinks. (This is typically 29.5 mA x 6 = 179 mA.) For 1X gain the output
current limit is typically 350 mA (VIN = 3.6 V). For 2X gain the current limit is typically 240 mA (output referred),
with a typical limit on the input current of 480 mA. Figure 67 and Figure 68 detail the charge pump current limit vs
VIN at both 1X and 2X gain settings.
Submit Documentation Feedback
Copyright © 2014, Texas Instruments Incorporated
Product Folder Links: LM3633
23
�LM3633
SNVS867 – JUNE 2014
www.ti.com
7.4.5 I2C-Compatible Interface
7.4.5.1 Start and Stop Conditions
The LM3633 is controlled via an I2C-compatible interface. START and STOP conditions classify the beginning
and the end of the I2C session. A START condition is defined as SDA transitioning from HIGH to LOW while SCL
is HIGH. A STOP condition is defined as SDA transitioning from LOW to HIGH while SCL is HIGH. The I2C
master always generates START and STOP conditions. The I2C bus is considered busy after a START condition
and free after a STOP condition. During data transmission the I2C master can generate repeated START
conditions. A START and a repeated START condition are equivalent function-wise. The data on SDA must be
stable during the HIGH period of the clock signal (SCL). In other words, the state of SDA can only be changed
when SCL is LOW.
SDA
SCL
S
P
Start Condition
Stop Condition
Figure 21. Start and Stop Sequences
7.4.5.2 I2C-Compatible Address
The chip address for the LM3633 is 0110110 (36h). After the START condition, the I2C master sends the 7-bit
chip address followed by an eighth read or write bit (R/W). R/W = 0 indicates a WRITE, and R/W = 1 indicates a
READ. The second byte following the chip address selects the register address to which the data is written. The
third byte contains the data for the selected register.
7.4.5.3 Transferring Data
Every byte on the SDA line must be eight bits long, with the most significant bit (MSB) transferred first. Each byte
of data must be followed by an acknowledge bit (ACK). The acknowledge related clock pulse (9th clock pulse) is
generated by the master. The master releases SDA (HIGH) during the 9th clock pulse. The LM3633 pulls down
SDA during the 9th clock pulse signifying an acknowledge. An acknowledge is generated after each byte has
been received.
7.5 Register Descriptions
Table 2 lists the available registers within the LM3633.
Table 2. LM3633 Register Descriptions
Address
Power On Reset
Operation
Revision
Name
0x00
0x00
Dynamic
Software Reset
0x01
0x00
Dynamic
HVLED Current Sink Output Configuration
0x10
0x06
Static
LVLED Current Sink Output Configuration
0x11
0x36
Static
Control A Start-Up/Shutdown Ramp Time
0x12
0x00
Static
Control B Start-Up/Shutdown Ramp Time
0x13
0x00
Static
Control C Start-Up/Shutdown Ramp Time
0x14
0x00
Static
Control D Start-Up/Shutdown Ramp Time
0x15
0x00
Static
Control E Start-Up/Shutdown Ramp Time
0x16
0x00
Static
Control F Start-Up/Shutdown Ramp Time
0x17
0x00
Static
Control G Start-Up/Shutdown Ramp Time
0x18
0x00
Static
Control H Start-Up/Shutdown Ramp Time
0x19
0x00
Static
Control A and Control B Runtime Ramp Time
0x1A
0x00
Static
24
Submit Documentation Feedback
Copyright © 2014, Texas Instruments Incorporated
Product Folder Links: LM3633
�LM3633
www.ti.com
SNVS867 – JUNE 2014
Register Descriptions (continued)
Table 2. LM3633 Register Descriptions (continued)
Name
Address
Power On Reset
Operation
Control A and Control B Runtime Ramp Configuration
0x1B
0x00
Static
Control C to E Runtime Ramp Time
0x1C
0x00
Static
Control F to H Runtime Ramp Time
0x1D
0x00
Static
Reserved
0x1E
0x33
Static
Brightness Configuration
0x1F
0x00
Static (1)
Control A Full-Scale Current Setting
0x20
0x13
Static
Control B Full-Scale Current Setting
0x21
0x13
Static
Control C Full-Scale Current Setting
0x22
0x13
Static
Control D Full-Scale Current Setting
0x23
0x13
Static
Control E Full-Scale Current Setting
0x24
0x13
Static
Control F Full-Scale Current Setting
0x25
0x13
Static
Control G Full-Scale Current Setting
0x26
0x13
Static
Control H Full-Scale Current Setting
0x27
0x13
Static
HVLED Current Sink Feedback Enable
0x28
0x07
Static
LVLED Current Sink Feedback Enable
0x29
0x3F
Static
Charge Pump Control
0x2A
0x00
Dynamic (2)
Control Bank Enables
0x2B
0x00
Dynamic (3)
Pattern Generator Enable
0x2C
0x00
Dynamic
Boost Control
0x2D
0x00
Static
Auto-Frequency Threshold
0x2E
0xCF
Static
PWM Configuration
0x2F
0x04
Dynamic (4)
Reserved
0x30
0x0B
Static
Reserved
0x31
0x00
Static
Control A Brightness LSB
0x40
0x00
Dynamic (5)
Control A Brightness MSB
0x41
0x00
Dynamic
Control B Brightness LSB
0x42
0x00
Dynamic (5)
Control B Brightness MSB
0x43
0x00
Dynamic
Control C Brightness
0x44
0x00
Dynamic
Control D Brightness
0x45
0x00
Dynamic
Control E Brightness
0x46
0x00
Dynamic
Control F Brightness
0x47
0x00
Dynamic
Control G Brightness
0x48
0x00
Dynamic
Control H Brightness
0x49
0x00
Dynamic
Control C Pattern Generator Delay Time
0x50
0x00
Static
Control C Pattern Generator Low Time
0x51
0x00
Static
Control C Pattern Generator High Time
0x52
0x00
Static
Control C Pattern Generator Low-Level Brightness
0x53
0x00
Dynamic
Control D Pattern Generator Delay Time
0x60
0x00
Static
Control D Pattern Generator Low Time
0x61
0x00
Static
Control D Pattern Generator High Time
0x62
0x00
Static
Control D Pattern Generator Low-Level Brightness
0x63
0x00
Dynamic
(1)
(2)
(3)
(4)
(5)
This register requires special handling due to the control of both high-voltage and low-voltage LEDs.
Only the charge pump enable bit is dynamic; the charge pump gain select bits should only be changed when the charge pump is
disabled.
This register requires special handling due to the control of both high-voltage and low-voltage LEDs.
The PWM input should always be in the inactive state when setting the Control Bank PWM Enable bit. The PWM configuration bits
should only be changed when the PWM is disabled for both Control Banks.
The Control Brightness MSB Register must be written for the Control Brightness LSB Register value to take effect.
Submit Documentation Feedback
Copyright © 2014, Texas Instruments Incorporated
Product Folder Links: LM3633
25
�LM3633
SNVS867 – JUNE 2014
www.ti.com
Register Descriptions (continued)
Table 2. LM3633 Register Descriptions (continued)
Address
Power On Reset
Operation
Control E Pattern Generator Delay Time
Name
0x70
0x00
Static
Control E Pattern Generator Low Time
0x71
0x00
Static
Control E Pattern Generator High Time
0x72
0x00
Static
Control E Pattern Generator Low-Level Brightness
0x73
0x00
Dynamic
Control F Pattern Generator Delay Time
0x80
0x00
Static
Control F Pattern Generator Low Time
0x81
0x00
Static
Control F Pattern Generator High Time
0x82
0x00
Static
Control F Pattern Generator Low-Level Brightness
0x83
0x00
Dynamic
Control G Pattern Generator Delay Time
0x90
0x00
Static
Control G Pattern Generator Low Time
0x91
0x00
Static
Control G Pattern Generator High Time
0x92
0x00
Static
Control G Pattern Generator Low-Level Brightness
0x93
0x00
Dynamic
Control H Pattern Generator Delay Time
0xA0
0x00
Static
Control H Pattern Generator Low Time
0xA1
0x00
Static
Control H Pattern Generator High Time
0xA2
0x00
Static
Control H Pattern Generator Low-Level Brightness
0xA3
0x00
Dynamic
HVLED Open Faults
0xB0
0x00
Production Test Only
LVLED Open Faults
0xB1
0x00
Production Test Only
HVLED Short Faults
0xB2
0x00
Production Test Only
LVLED Short Faults
0xB3
0x00
Production Test Only
LED Fault Enable
0xB4
0x00
Production Test Only
Table 3.
Revision (Address 0x00)
Bits [7:4]
Not Used
Bits [3:0]
Silicon Revision
Reserved
xxxx Rev. A Silicon
Table 4. Software Reset (Address 0x01)
Bits [7:1]
Not Used
Bit [0]
Silicon Revision
0 = Normal Operation
1 = Software Reset (self-clearing)
Reserved
Table 5. HVLED Current Sink Output Configuration (Address 0x10)
Bits [7:3]
Not Used
Reserved
Bit [2]
HVLED3 Configuration
Bit [1]
HVLED2 Configuration
0 = Control A
1 = Control B (default)
Bit [0]
HVLED1 Configuration
0 = Control A
1 = Control B (default)
0 = Control A (default)
1 = Control B
Table 6. LVLED Current Sink Output Configuration (Address 0x11)
Bits [7:6]
Not Used
Reserved
26
Bit [5]
LVLED6
Configuration
0 = Control F
1 = Control H
(default)
Bit [4]
LVLED5
Configuration
0 = Control F
1 = Control G
(default)
Bit [3]
Not Used
LVLED4
Bit [2]
LVLED3
Configuration
0 = Control C
1 = Control E
(default)
Submit Documentation Feedback
Bit [1]
LVLED2
Configuration
0 = Control C
1 = Control D
(default)
Bit [0]
Not Used
LVLED1
Copyright © 2014, Texas Instruments Incorporated
Product Folder Links: LM3633
�LM3633
www.ti.com
SNVS867 – JUNE 2014
Table 7. Control A and Control B Start-up/Shutdown Ramp Time (Address 0x12 Through 0x13)
Bits [7:4]
Start-up Ramp
Bits [3:0]
Shutdown Ramp
0000 = 2048 µs (default)
0001 = 262 ms
0010 = 524 ms
0011 = 1.049 s
0100 = 2.097 s
0101 = 4.194 s
0110 = 8.389 s
0111 = 16.78 s
1000 = 33.55 s
1001 = 41.94 s
1010 = 50.33 s
1011 = 58.72 s
1100 = 67.11 s
1101 = 83.88 s
1110 = 100.66 s
1111 = 117.44 s
0000 = 2048 µs (default)
0001 = 262 ms
0010 = 524 ms
0011 = 1.049 s
0100 = 2.097 s
0101 = 4.194 s
0110 = 8.389 s
0111 = 16.78 s
1000 = 33.55 s
1001 = 41.94 s
1010 = 50.33 s
1011 = 58.72 s
1100 = 67.11 s
1101 = 83.88 s
1110 = 100.66 s
1111 = 117.44 s
Table 8. Control C to Control H Start-up/Shutdown Ramp Time (Address 0x14 Through 0x19)
Bit [7]
Not Used
Bits [6:4]
Start-up Transition Time
000 = 2048 µs (default)
001 = 262 ms
010 = 524 ms
011 = 1.049 s
100 = 2.097 s
101 = 4.194 s
110 = 8.389 s
111 = 16.78 s
Reserved
Bit [3]
Not Used
Bits [2:0]
Shutdown Transition Time
Reserved
000 = 2048 µs (default)
001 = 262 ms
010 = 524 ms
011 = 1.049 s
100 = 2.097 s
101 = 4.194 s
110 = 8.389 s
111 = 16.78 s
Table 9. Control A and Control B Run-Time Ramp Time (Address 0x1A)
Bits [7:4]
Transition Time Ramp Up
000 = 2048 µs (default)
001 = 262 ms
010 = 524 ms
011 = 1.049 s
100 = 2.097 s
101 = 4.194 s
110 = 8.389 s
111 = 16.78 s
1000 = 33.55 s
1001 = 41.94 s
1010 = 50.33 s
1011 = 58.72 s
1100 = 67.11 s
1101 = 83.88 s
1110 = 100.66 s
1111 = 117.44 s
Bits [3:0]
Transition Time Ramp Down
000 = 2048 µs (default)
001 = 262 ms
010 = 524 ms
011 = 1.049 s
100 = 2.097 s
101 = 4.194 s
110 = 8.389 s
111 = 16.78 s
1000 = 33.55 s
1001 = 41.94 s
1010 = 50.33 s
1011 = 58.72 s
1100 = 67.11 s
1101 = 83.88 s
1110 = 100.66 s
1111 = 117.44 s
Table 10. Control A and Control B Run-Time Ramp Configuration (Address 0x1B)
Bits [7:4]
Not Used
Reserved
Bits [3:2]
Control B Run-time Ramp Select
Bits [1:0]
Control A Run-time Ramp Select
00 = Controls A and B Runtime Ramp Times
(default)
01 = Control B Start-up and Shutdown Ramp
Times
1x = Ramp disabled
00 = Controls A and B Runtime Ramp Times
(default)
01 = Control A Start-up and Shutdown Ramp
Times
1x = Ramp disabled
Submit Documentation Feedback
Copyright © 2014, Texas Instruments Incorporated
Product Folder Links: LM3633
27
�LM3633
SNVS867 – JUNE 2014
www.ti.com
Table 11. Controls C to E and Controls F to H Ramp Time (Address 0x1C and 0x1D)
Bit [7]
Not Used
Bits [6:4]
Transition Time Ramp Up
000 = 2048 µs (default)
001 = 262 ms
010 = 524 ms
011 = 1.049 s
100 =2.097 s
101 = 4.194 s
110 = 8.389 s
111 = 16.78 s
Reserved
Bit [3]
Not Used
Reserved
Bits [2:0]
Transition Time Ramp Down
000 = 2048 µs (default)
001 = 262 ms
010 = 524 ms
011 = 1.049 s
100 =2.097 s
101 = 4.194 s
110 = 8.389 s
111 = 16.78 s
Table 12. Control A to Control H Brightness Configuration (Address 0x1F)
Bits [7:4]
Not Used
Reserved
Bit [3]
Bit [2]
Control B Dither Disable Control A Dither Disable
Bit [1]
Controls C, D, E, F, G, H
Mapping Mode
0 Enable (default)
1 Disable
0 Exponential (default)
1 Linear
0 Enable (default)
1 Disable
Bit [0]
Control A/B Mapping
Mode
0 Exponential (default)
1 Linear
Table 13. Control A to Control H Full-Scale Current Setting (Address 0x20 Through 0x27)
Bits [7:5]
Not Used
Bits [4:0]
Controls A, B, C, D, E, F, G, H Full-Scale Current Select Bits
Reserved
00000 = 5 mA
10011 = 20.2 mA (default)
11111 = 29.8 mA
(0.8 mA steps, FS = 5 mA + code * 0.8 mA)
Table 14. HVLED Current Sink Feedback Enable (Address 0x28)
Bits [7:3]
Not Used
Reserved
Bit [2]
HVLED3 Feedback Enable
Bit [1]
HVLED2 Feedback Enable
Bit [0]
HVLED1 Feedback Enable
0 = LED anode is NOT CONNECTED
to COUT
1 = LED anode is CONNECTED to
COUT (default)
0 = LED anode is NOT CONNECTED
to COUT
1 = LED anode is CONNECTED to
COUT (default)
0 = LED anode is NOT CONNECTED
to COUT
1 = LED anode is CONNECTED to
COUT (default)
Table 15. LVLED Current Sink Feedback Enable (Address 0x29)
Bits [7:6]
Bit [5]
Bit [4]
Bit [3]
Bit [2]
Bit [1]
Bit [0]
Not
LVLED6 Feedback LVLED5 Feedback LVLED4 Feedback LVLED3 Feedback LVLED2 Feedback LVLED1 Feedback
Used
Enable
Enable
Enable
Enable
Enable
Enable
0 = LED anode is
NOT CONNECTED
to CPOUT
Reserved
1 = LED anode is
CONNECTED to
CPOUT (default)
0 = LED anode is
NOT CONNECTED
to CPOUT
1 = LED anode is
CONNECTED to
CPOUT (default)
0 = LED anode is
NOT CONNECTED
to CPOUT
1 = LED anode is
CONNECTED to
CPOUT (default)
0 = LED anode is
NOT CONNECTED
to CPOUT
1 = LED anode is
CONNECTED to
CPOUT (default)
0 = LED anode is
NOT CONNECTED
to CPOUT
1 = LED anode is
CONNECTED to
CPOUT (default)
0 = LED anode is
NOT CONNECTED
to CPOUT
1 = LED anode is
CONNECTED to
CPOUT (default)
Table 16. Charge Pump Control (Address 0x2A)
Bits [7:3]
Not Used
Bits [2:1]
Gain Select
Bit [0]
Charge Pump Disable
N/A
0X = Automatic gain select (default)
10 = Gain set at 1X
11 = Gain set at 2X
0 = Enable (default)
1 = Disable
28
Submit Documentation Feedback
Copyright © 2014, Texas Instruments Incorporated
Product Folder Links: LM3633
�LM3633
www.ti.com
SNVS867 – JUNE 2014
Table 17. Control Bank Enable (Address 0x2B)
Bit [7]
Control H
Enable
0 = Disable
(default)
1 = Enable
Bit [6]
Control G
Enable
0 = Disable
(default)
1 = Enable
Bit [5]
Control F
Enable
Bit [4]
Control E
Enable
0 = Disable
(default)
1 = Enable
0 = Disable
(default)
1 = Enable
Bit [3]
Control D
Enable
Bit [2]
Control C
Enable
0 = Disable
(default)
1 = Enable
0 = Disable
(default)
1 = Enable
Bit [1]
Control B
Enable
0 = Disable
(default)
1 = Enable
Bit [0]
Control A
Enable
0 = Disable
(default)
1 = Enable
Table 18. Pattern Generator Enable (Address 0x2C)
Bit [7]
Control H Pattern
Generator Enable
Bit [6]
Control G Pattern
Generator Enable
Bit [5]
Control F Pattern
Generator Enable
Bit [4]
Control E Pattern
Generator Enable
Bit [3]
Control D Pattern
Generator Enable
Bit [2]
Control C Pattern
Generator Enable
Bits [1:0]
Not
Used
0 = Disable
(default)
1 = Enable
0 = Disable
(default)
1 = Enable
0 = Disable
(default)
1 = Enable
0 = Disable
(default)
1 = Enable
0 = Disable
(default)
1 = Enable
0 = Disable
(default)
1 = Enable
Reserved
Table 19. Boost Control (Address 0x2D)
Bits [7:5]
Not Used
Reserved
Bit [4]
Auto-Headroom Enable
0 = Disable (default)
1 = Enable
Bit [3]
Auto-Frequency Enable
0 = Disable (default)
1 = Enable
Bits [2:1]
Boost OVP Select
00
01
10
11
= 16
= 24
= 32
= 40
V (default)
V
V
V
Bit [0]
Boost Frequency Select
0 = 500 kHz (default)
1 = 1 MHz
Table 20. Auto-Frequency Threshold (Address 0x2E)
Bits [7:0]
Auto-Frequency Threshold (default = 11001111)
Table 21. PWM Configuration (Address 0x2F)
Bits [7:4]
Not Used
Reserved
Bit [3]
PWM Zero Detection
Enable
0 = Disable
1 = Enable (default)
Bit [2]
PWM Polarity
0 = Active Low
1 = Active High (default)
Bit [1]
Control B PWM Enable
0 = Disable (default)
1 = Enable
Bit [0]
Control A PWM Enable
0 = Disable (default)
1 = Enable
Table 22. Control A Brightness LSB (Address 0x40)
Bits [7:3]
Not Used
Reserved
Bits [2:0]
Control A Brightness [2:0]
Brightness LSB
Table 23. Control A Brightness MSB (Address 0x41)
Bits [7:0]
Control A Brightness [10:3]
Brightness MSB
(LED current ramping does not start until the MSB is written, LSB must always be written before MSB)
Table 24. Control B Brightness LSB (Address 0x42)
Bits [7:3]
Not Used
Reserved
Bits [2:0]
Control B Brightness [2:0]
Brightness LSB
Submit Documentation Feedback
Copyright © 2014, Texas Instruments Incorporated
Product Folder Links: LM3633
29
�LM3633
SNVS867 – JUNE 2014
www.ti.com
Table 25. Control B Brightness MSB (Address 0x43)
Bits [7:0]
Control B Brightness [10:3]
Brightness MSB
(LED current ramping does not start until the MSB is written, LSB must always be written before MSB)
Table 26. Control C to Control H Brightness (Address 0x44 Through 0x49)
Bits [7:0]
Control C-H Brightness [7:0] (BREGH_X)
Brightness Code (refer to High-Level Brightness)
7.5.1 Pattern Generator Registers
tHIGH
IHIGH
ILOW
tDELAY
tRISE
tFALL
tLOW
Figure 22. Pattern Generator Timing
Table 27. Control C to Control H Pattern Generator Delay Time (Address 0x50, 0x60, 0x70, 0x80, 0x90,
0xA0)
Bit [7]
Bits [6:0]
tDELAY times
0x00 = 16.384 ms (16.384 ms/step) (default)
0x01 = 32.768 ms
:
:
0x3B = 983.05 ms
Reserved
0x3C = 999.424 ms
0x3D = 1130.496 ms (131.072 ms/step)
0x3E = 1261.568 ms
:
:
0x7F = 9781.248 ms
Table 28. Control C to Control H Pattern Generator Low Time (Address 0x51, 0x61, 0x71, 0x81, 0x91,
0xA1)
Bits [7:0]
tLOW times
0x00 = 16.384 ms (16.384 ms/step) (default)
0x01 = 32.768 ms
:
:
0x3B = 983.05 ms
0x3C = 999.424 ms
0x3D = 1130.496 ms (131.072 ms/step)
0x3E = 1261.568 ms
:
30
Submit Documentation Feedback
Copyright © 2014, Texas Instruments Incorporated
Product Folder Links: LM3633
�LM3633
www.ti.com
SNVS867 – JUNE 2014
Table 28. Control C to Control H Pattern Generator Low Time (Address 0x51, 0x61, 0x71, 0x81, 0x91,
0xA1) (continued)
Bits [7:0]
:
0x7F = 9781.248 ms
0x80 = 10.305536 s (524.288 ms/step)
:
:
0xFF = 76.890112 s
Table 29. Control C to Control H Pattern Generator High Time (Address 0x52, 0x62, 0x72, 0x82, 0x92,
0xA2)
Bit [7]
Not Used
Bits [6:0]
tHIGH times
0x00 = 16.384 ms (16.384 ms/step) (default)
0x01 = 32.768 ms
:
:
0x3B = 983.05 ms
0x3C = 999.424 ms
0x3D = 1130.496 ms (131.072 ms/step)
0x3E = 1261.568 ms
:
:
0x7F = 9781.248 ms
Table 30. Control C to Control H Pattern Generator Low-Level Brightness (Address 0x53, 0x63, 0x73,
0x83, 0x93, 0xA3)
Bits [7:0]
Controls C to H Low-Level Brightness (BREGL_X)
Brightness Code (refer to Low-Level Brightness)
Table 31. HVLED Open Faults (Address 0xB0)
Bits [7:3]
Not Used
Bit [2]
HVLED3 Open
Bit [1]
HVLED2 Open
Bit [0]
HVLED1 Open
Reserved
0 = Normal Operation
1 = Open
0 = Normal Operation
1 = Open
0 = Normal Operation
1 = Open
Table 32. LVLED Open Faults (Address 0xB1)
Bits [7:6]
Not Used
Bit [5]
LVLED6 Open
Bit [4]
LVLED5 Open
Bit [3]
LVLED4 Open
Bit [2]
LVLED3 Open
Bit [1]
LVLED2 Open
Bit [0]
LVLED1 Open
Reserved
0 = Normal
Operation
1 = Open
0 = Normal
Operation
1 = Open
0 = Normal
Operation
1 = Open
0 = Normal
Operation
1 = Open
0 = Normal
Operation
1 = Open
0 = Normal
Operation
1 = Open
Table 33. HVLED Short Faults (Address 0xB2)
Bits [7:3]
Not Used
Bit [2]
HVLED3 Short
Bit [1]
HVLED2 Short
Bit [0]
HVLED1 Short
Reserved
0 = Normal Operation
1 = Short
0 = Normal Operation
1 = Short
0 = Normal Operation
1 = Short
Submit Documentation Feedback
Copyright © 2014, Texas Instruments Incorporated
Product Folder Links: LM3633
31
�LM3633
SNVS867 – JUNE 2014
www.ti.com
Table 34. LVLED Short Faults (Address 0xB3)
Bits [7:6]
Not Used
Bit [5]
LVLED6 Short
Bit [4]
LVLED5 Short
Bit [3]
LVLED4 Short
Bit [2]
LVLED3 Short
Bit [1]
LHVLED2 Short
Bit [0]
LVLED1 Short
Reserved
0 = Normal
Operation
1 = Short
0 = Normal
Operation
1 = Short
0 = Normal
Operation
1 = Short
0 = Normal
Operation
1 = Short
0 = Normal
Operation
1 = Short
0 = Normal
Operation
1 = Short
Table 35. LED Fault Enable (Address 0xB4)
Bits [7:2]
Not Used
Bit [1]
Short Faults Enable
Bit [0]
Open Faults Enable
Reserved
0 = Disable (default)
1 = Enable
0 = Disable (default)
1 = Enable
32
Submit Documentation Feedback
Copyright © 2014, Texas Instruments Incorporated
Product Folder Links: LM3633
�LM3633
www.ti.com
SNVS867 – JUNE 2014
8 Applications and Implementation
8.1 Application Information
The LM3633 provides a complete high-performance, high-voltage LED and low-voltage-indicator LED lighting
solution for mobile handsets. The LM3633 is highly configurable and can support the high-voltage LED
configurations summarized in Table 36. The LM3633 utilizes internal ramp-time generators to provide smooth 11bit high-voltage LED dimming while requiring only an 8-bit command from the host controller. The LM3633EVM is
available with GUI software to aid understanding of the LM3633 operation.
Table 36. Supported High-Voltage LED Configurations
NUMBER OF HIGH-VOLTAGE LED STRINGS
MAXIMUM NUMBER OF SERIES HIGH-VOLTAGE LEDs
3
6
2
10
1
10
8.2 Typical Application
Figure 23. LM3633 Simplified Schematic
Submit Documentation Feedback
Copyright © 2014, Texas Instruments Incorporated
Product Folder Links: LM3633
33
�LM3633
SNVS867 – JUNE 2014
www.ti.com
Typical Application (continued)
Table 37. Application Circuit Component List
COMPONENT
MANUFACTURER
L
COUT
VALUE
PART NUMBER
SIZE
CURRENT/VOLTAGE RATING
(Resistance)
10 µH
VLF302512MT-100M
2.5mm x 3.0mm x
1.2mm
620 mA/0.25 mΩ
1 µF
C2012X5R1H105
0805
50 V
CIN
2.2 µF
C1005X5R1A225
0402
10 V
CPOUT/CP
1 µF
C1005X5R1A105
0402
10 V
312WBCW(A)
0603
30 mA/3.3 V (typ.)
NSR0240V2T1G
SOD-523
40 V, 250 mA
TDK
WLED
Diode
On-Semi
8.2.1 Design Requirements
Table 38. Design Parameters
DESIGN PARAMETER
EXAMPLE VALUE
Full-scale current setting
20.2 mA
Minimum Input Voltage
3.0 V
LED series/parallel configuration
6s3p
LED maximum forward voltage (Vf)
3.5 V
Efficiency
80
The designer needs to know the following
• Full-scale current setting
• Minimum input voltage
• LED series/parallel configuration
• LED maximum Vf voltage
• LM3633 Efficiency for LED configuration
The full-scale current setting, number of led strings, number of series LEDs, and minimum input voltage are
needed in order to calculate the peak input current. This information guides the designer to make the appropriate
inductor selection for the application.
The LM3633 boost converter output voltage (VOUT) is calculated as follows: number of series LEDs * Vƒ + 0.4V
The LM3633 boost converter output current (IOUT) is calculated as follows: number of parallel LED strings * Fullscale current
The LM3633 peak input current (I IN_PK) is calculated as follows: VOUT * IOUT / Minimum VIN / Efficiency
IIN_PK ! VOUT uIOUT y Minimum VIN y Efficiency
VOUT 21.4 V 6 u 3.5V � 0.4V
IOUT 0.0606 A 0.0202 u 3
IIN_PK ! 0.54A 21.4 V u0.0606 A y3.0V y0.8
(11)
8.2.2 Detailed Design Procedure
8.2.2.1 Boost Converter Maximum Output Power (Boost)
Maximum output power of the LM3633 is governed by two factors: the peak current limit (ICL = 880 mA min), and
the maximum output voltage (VOVP). When the application causes either of these limits to be reached it is
possible that the proper current regulation and matching between LED current strings is not met.
34
Submit Documentation Feedback
Copyright © 2014, Texas Instruments Incorporated
Product Folder Links: LM3633
�LM3633
www.ti.com
SNVS867 – JUNE 2014
8.2.2.1.1 Peak Current Limited
In the case of a peak current limited situation, the NFET switch turns off for the remainder of the switching period
when the inductor current peak hits the LM3633 current limit. If this happens each switching cycle the LM3633
regulates the inductor current peak instead of the headroom across the current sinks. This can result in the
dropout of the boost output connected current sinks, and the LED current dropping below its programmed level.
The peak current in a boost converter is dependent on the value of the inductor, total LED current in the boost
(IOUT), the boost output voltage (VOUT) (which is the highest voltage LED string + VHR ), the input voltage (VIN),
the switching frequency, and the efficiency (Output Power/Input Power). Additionally, the peak current is different
depending on whether the inductor current is continuous during the entire switching period (CCM), or
discontinuous (DCM) where it goes to 0 before the switching period ends. For Continuous Conduction Mode the
peak inductor current is given by:
IOUT x VOUT
IPEAK =
+
VIN x efficiency
VIN
2 x fSW x L
x 1-
VIN x efficiency
VOUT
(12)
For Discontinuous Conduction Mode the peak inductor current is given by:
2 u IOUT
IPEAK =
´
¶ SW
u L u efficiency
u §VOUT - VIN u efficiency·
©
¹
(13)
To determine which mode the circuit is operating in (CCM or DCM) it is necessary to perform a calculation to test
whether the inductor current ripple is less than the anticipated input current (IIN). If ΔIL is less than IIN then the
device operates in CCM. If ΔIL is greater than IIN then the device is operating in DCM.
IOUT u VOUT
VIN u efficiency
>
VIN
´
¶SW
uL
u §1 �
©
VIN u efficiency ·
VOUT
¹
(14)
Typically at currents high enough to reach the LM3633 peak current limit, the device operates in CCM.
The following figures show the output current and voltage derating for a 10-µH and a 22-µH inductor. These plots
take equations (1) and (2) from above and plot VOUT and IOUT with varying VIN, a constant peak current of 880
mA (ICL_MIN), 500-kHz switching frequency, and a constant efficiency of 85%. Using these curves gives a good
design guideline on selecting the correct inductor for a given output power requirement. A 10-µH inductor is
typically a smaller device with lower on resistance, but the peak currents are higher. A 22-µH inductor provides
for lower peak currents, but to match the DC resistance of a 10-µH inductor, a larger-sized device is required.
0.095
0.090
0.085
IOUT (A)
IOUT (A)
0.080
0.075
0.070
0.065
VOUT=22V
VOUT=24V
VOUT=26V
VOUT=30V
VOUT=34V
VOUT=38V
0.060
0.055
0.050
0.045
0.095
0.090
0.085
0.080
0.075
0.070
0.065
0.060
0.055
0.050
0.045
0.040
0.035
0.030
0.025
0.020
5.5
5.3
5.1
4.9
4.7
4.5
4.3
4.1
3.9
3.7
3.5
3.3
3.1
2.9
2.7
5.5
5.3
5.1
4.9
4.7
4.5
4.3
4.1
3.9
3.7
3.5
3.3
3.1
2.9
2.7
VIN (V)
VOUT=22V
VOUT=24V
VOUT=26V
VOUT=30V
VOUT=34V
C052
Figure 24. Maximum Output Power (22 µH)
VIN (V)
C051
Figure 25. Maximum Output Power (10 µH)
Submit Documentation Feedback
Copyright © 2014, Texas Instruments Incorporated
Product Folder Links: LM3633
35
�LM3633
SNVS867 – JUNE 2014
www.ti.com
8.2.2.1.2 Output Voltage Limited
In the case of a output voltage limited situation (VOUT = VOVP), when the boost output voltage hits the LM3633
OVP threshold, the NFET turns off and stays off until the output voltage falls below the hysteresis level (typically
1 V below the OVP threshold). This results in the boost converter regulating the output voltage to the
programmed OVP threshold (16 V, 24 V, 32 V, or 40 V), causing the current sinks to go into dropout. The default
OVP threshold is set at 16 V. For LED strings higher than typically 4 series LEDs, the OVP has to be
programmed higher after power-up or after a HWEN reset.
8.2.2.2 Boost Inductor Selection
The boost circuit operates using a 4.7-μH to 22-μH inductor. The inductor selected must have a saturation
current greater than the peak operating current.
8.2.2.3 Output Capacitor Selection
The LM3633 inductive boost converter requires a 1.0-µF (X5R or X7R) ceramic capacitor to filter the output
voltage. The voltage rating of the capacitor depends on the selected OVP setting. For the 16-V setting a 16-V
capacitor must be used. For the 24-V setting a 25-V capacitor must be used. For the 32-V setting, a 35-V
capacitor must be used. For the 40-V setting a 50-V capacitor must be used. Pay careful attention to the
capacitor tolerance and DC bias response. For proper operation the degradation in capacitance due to tolerance,
DC bias, and temperature, should stay above 0.4 µF. This might require placing two devices in parallel in order
to maintain the required output capacitance over the device operating range, and series LED configuration.
8.2.2.4 Schottky Diode Selection
The Schottky diode must have a reverse breakdown voltage greater than the LM3633 maximum output voltage
(see Overvoltage Protection (Inductive Boost) section). Additionally, the diode must have an average current
rating high enough to handle the LM3633 maximum output current, and at the same time the diode peak current
rating must be high enough to handle the peak inductor current. Schottky diodes are required due to their lower
forward voltage drop (0.3 V to 0.5 V) and their fast recovery time.
8.2.2.5 Input Capacitor Selection
The input capacitor on the LM3633 filters the voltage ripple due to the switching action of the inductive boost and
the capacitive charge-pump doubler. A ceramic capacitor of at least 2.2-µF (X5R or X7R) must be used to filter
the input voltage.
8.2.2.6 Maximum Output Power (Charge Pump)
The maximum output power available from the LM3633 charge pump is determined by the maximum output
voltage available from the charge pump. In 1X gain the charge pump operates in Pass Mode so the voltage at
CPOUT tracks VIN (less the drop across the charge-pump pass switch). In this case the maximum output power
is given as:
POUT_MAX = ILVLED_TOTAL x ( VIN - ILVLED_TOTAL x RCP)
(15)
where RCP is the resistance from VIN to CPOUT and ILVLED_TOTAL is the maximum programmed current in the
LVLED strings.
In 2X gain the voltage at CPOUT (VCPOUT_2X) is regulated to typically 4.4 V. In this case the maximum output
power is given by:
POUT_MAX = ILVLED_TOTAL x VCPOUT_2X
(16)
Both equations assume there is sufficient headroom at the top side of the low-voltage current sinks to ensure the
LED current remains in regulation (VHR_LV) in the electrical table.
8.2.2.7 Charge Pump Flying Capacitor Selection
The charge pump flying capacitor must quickly charge up to the input voltage and then supply the current to the
output every switching cycle (1 MHz). This fast switching action requires a 1.0-µF (X5R or X7R) ceramic
capacitor connected to the C+ and C– pins with a low inductive connection.
36
Submit Documentation Feedback
Copyright © 2014, Texas Instruments Incorporated
Product Folder Links: LM3633
�LM3633
www.ti.com
SNVS867 – JUNE 2014
8.2.2.8 Charge Pump Output Capacitor Selection
The charge pump output capacitor filters the switched charge from the flying capacitor every switching cycle (1
MHz). This fast switching action requires a 1.0-µF (X5R or X7R) ceramic capacitor connected to the CPOUT pin
with a low-inductive connection.
8.2.2.9 Charge Pump Input Capacitor Selection
The input capacitor for the LM3633 charge pump is the same one used for the LM3633 inductive boost converter
(see Input Capacitor Selection).
8.2.3 Application Performance Plots
VIN = 3.6 V, VLED = 3.2 V @ 20 mA, Typical Application Circuit, TA = 25°C, Full-Scale Current = 20.2 mA unless otherwise
specified. Efficiency is VOUT × (IHVLED1 + IHVLED2 + IHVLED3)/(VIN × IIN), matching curves are (ΔILED_MAX/ILED_AVE). See Table 37.
Three String, L=22µH, 500kHz
Three String, L=22µH, 1MHz
92%
90%
90%
88%
88%
86%
86%
EFFICIENCY (%)
EFFICIENCY (%)
92%
84%
82%
80%
78%
76%
84%
82%
80%
78%
76%
74%
74%
72%
72%
70%
70%
2.5
3
3.5
4
4.5
5
5.5
2.5
3
3.5
VIN (V)
4
4.5
5
C002
C002
Top to Bottom: 3x3, 3x4, 3x5, 3x6 (LEDs)
Top to Bottom: 3x3, 3x4, 3x5, 3x6 (LEDs)
Figure 26. Efficiency vs VIN, Three String
Two String, L=22µH, 1MHz
92%
90%
90%
88%
88%
86%
86%
EFFICIENCY (%)
EFFICIENCY (%)
Figure 27. Efficiency vs VIN, Three String
Two String, L=22µH, 500kHz
92%
5.5
VIN (V)
84%
82%
80%
78%
76%
84%
82%
80%
78%
76%
74%
74%
72%
72%
70%
70%
2.5
3
3.5
4
4.5
5
5.5
2.5
VIN (V)
3
3.5
4
4.5
5
5.5
VIN (V)
C002
Top to Bottom: 2x3, 2x4, 2x5, 2x6, 2x7, 2x8, 2x9, 2x10 (LEDs)
C002
Top to Bottom: 2x3, 2x4, 2x5, 2x6, 2x7, 2x8, 2x9, 2x10 (LEDs)
Figure 28. Efficiency vs VIN, Dual String
Figure 29. Efficiency vs VIN, Dual String
Submit Documentation Feedback
Copyright © 2014, Texas Instruments Incorporated
Product Folder Links: LM3633
37
�LM3633
SNVS867 – JUNE 2014
www.ti.com
VIN = 3.6 V, VLED = 3.2 V @ 20 mA, Typical Application Circuit, TA = 25°C, Full-Scale Current = 20.2 mA unless otherwise
specified. Efficiency is VOUT × (IHVLED1 + IHVLED2 + IHVLED3)/(VIN × IIN), matching curves are (ΔILED_MAX/ILED_AVE). See Table 37.
One String, L=22µH, 500kHz
One String, L=22µH, 1MHz
92%
90%
90%
88%
88%
86%
86%
EFFICIENCY (%)
EFFICIENCY (%)
92%
84%
82%
80%
78%
76%
84%
82%
80%
78%
76%
74%
74%
72%
72%
70%
70%
2.5
3
3.5
4
4.5
5
5.5
2.5
3
3.5
VIN (V)
4
4.5
5
C002
Top to Bottom: 1x3, 1x4, 1x5, 1x6, 1x7, 1x8, 1x9, 1x10 (LEDs)
C002
Top to Bottom: 1x3, 1x4, 1x5, 1x6, 1x7, 1x8, 1x9, 1x10 (LEDs)
Figure 30. Efficiency vs VIN, Single String
Three String, L=10µH, 1MHz
90%
88%
88%
86%
86%
84%
84%
EFFICIENCY (%)
EFFICIENCY (%)
Figure 31. Efficiency vs VIN, Single String
Three String, L=10µH, 500kHz
90%
82%
80%
78%
76%
82%
80%
78%
76%
74%
74%
72%
72%
70%
70%
2.5
3
3.5
4
4.5
5
5.5
2.5
3
3.5
VIN (V)
4
4.5
5
C002
C002
Top to Bottom: 3x3, 3x4, 3x5, 3x6 (LEDs)
Figure 32. Efficiency vs VIN, Three String
Two String, L=10µH, 1MHz
90%
88%
88%
86%
86%
84%
84%
EFFICIENCY (%)
EFFICIENCY (%)
Figure 33. Efficiency vs VIN, Three String
Two String, L=10µH, 500kHz
90%
5.5
VIN (V)
Top to Bottom: 3x3, 3x4, 3x5, 3x6 (LEDs)
82%
80%
78%
76%
82%
80%
78%
76%
74%
74%
72%
72%
70%
70%
2.5
3
3.5
4
4.5
5
5.5
2.5
VIN (V)
3
3.5
4
4.5
5
5.5
VIN (V)
C002
Top to Bottom: 2x3, 2x4, 2x5, 2x6, 2x7, 2x8, 2x9, 2x10 (LEDs)
C002
Top to Bottom: 2x3, 2x4, 2x5, 2x6, 2x7, 2x8, 2x9, 2x10 (LEDs)
Figure 34. Efficiency vs VIN, Dual String
38
5.5
VIN (V)
Submit Documentation Feedback
Figure 35. Efficiency vs VIN, Dual String
Copyright © 2014, Texas Instruments Incorporated
Product Folder Links: LM3633
�LM3633
www.ti.com
SNVS867 – JUNE 2014
VIN = 3.6 V, VLED = 3.2 V @ 20 mA, Typical Application Circuit, TA = 25°C, Full-Scale Current = 20.2 mA unless otherwise
specified. Efficiency is VOUT × (IHVLED1 + IHVLED2 + IHVLED3)/(VIN × IIN), matching curves are (ΔILED_MAX/ILED_AVE). See Table 37.
One String, L=10µH, 500kHz
One String, L=10µH, 1MHz
92%
90%
90%
88%
88%
86%
86%
EFFICIENCY (%)
EFFICIENCY (%)
92%
84%
82%
80%
78%
76%
84%
82%
80%
78%
76%
74%
74%
72%
72%
70%
70%
2.5
3
3.5
4
4.5
5
5.5
2.5
3
3.5
VIN (V)
4
4.5
5
C002
Top to Bottom: 1x3, 1x4, 1x5, 1x6, 1x7, 1x8, 1x9, 1x10 (LEDs)
C002
Top to Bottom: 1x3, 1x4, 1x5, 1x6, 1x7, 1x8, 1x9, 1x10 (LEDs)
Figure 36. Efficiency vs VIN, Single String
Figure 37. Efficiency vs VIN, Single String
Three String, L=4.7µH, 500kHz
90%
5.5
VIN (V)
Three String, L=4.7µH, 1MHz
90%
88%
85%
84%
EFFICIENCY (%)
EFFICIENCY (%)
86%
82%
80%
78%
76%
80%
75%
70%
74%
72%
70%
65%
2.5
3
3.5
4
4.5
5
2.5
5.5
3
3.5
VIN (V)
4
4.5
5
C002
C002
Top to Bottom: 3x3, 3x4, 3x5, 3x6 (LEDs)
Top to Bottom: 3x3, 3x4, 3x5, 3x6 (LEDs)
Figure 38. Efficiency vs VIN, Three String
Figure 39. Efficiency vs VIN, Three String
Two String, L=4.7µH, 500kHz
88%
5.5
VIN (V)
Two String, L=4.7µH, 1MHz
90%
86%
85%
82%
EFFICIENCY (%)
EFFICIENCY (%)
84%
80%
78%
76%
74%
72%
80%
75%
70%
65%
70%
68%
60%
2.5
3
3.5
4
4.5
5
2.5
5.5
VIN (V)
3
3.5
4
4.5
5
5.5
VIN (V)
C002
Top to Bottom: 2x3, 2x4, 2x5, 2x6, 2x7, 2x8, 2x9, 2x10 (LEDs)
C002
Top to Bottom: 2x3, 2x4, 2x5, 2x6, 2x7, 2x8, 2x9, 2x10 (LEDs)
Figure 40. Efficiency vs VIN, Dual String
Figure 41. Efficiency vs VIN, Dual String
Submit Documentation Feedback
Copyright © 2014, Texas Instruments Incorporated
Product Folder Links: LM3633
39
�LM3633
SNVS867 – JUNE 2014
www.ti.com
VIN = 3.6 V, VLED = 3.2 V @ 20 mA, Typical Application Circuit, TA = 25°C, Full-Scale Current = 20.2 mA unless otherwise
specified. Efficiency is VOUT × (IHVLED1 + IHVLED2 + IHVLED3)/(VIN × IIN), matching curves are (ΔILED_MAX/ILED_AVE). See Table 37.
One String, L=4.7µH, 500kHz
90%
85%
EFFICIENCY (%)
85%
EFFICIENCY (%)
One String, L=4.7µH, 1MHz
90%
80%
75%
80%
75%
70%
70%
65%
65%
2.5
3
3.5
4
4.5
5
5.5
2.5
3
3.5
VIN (V)
4
4.5
5
C002
Top to Bottom: 1x3, 1x4, 1x5, 1x6, 1x7, 1x8, 1x9, 1x10 (LEDs)
C002
Top to Bottom: 1x3, 1x4, 1x5, 1x6, 1x7, 1x8, 1x9, 1x10 (LEDs)
Figure 42. Efficiency vs VIN, Single String
88%
88%
86%
86%
84%
84%
82%
80%
78%
76%
82%
80%
78%
76%
74%
74%
72%
72%
70%
0.00
Three String, L=22µH, 1MHz
90%
EFFICIENCY (%)
EFFICIENCY (%)
Figure 43. Efficiency vs VIN, Single String
Three String, L=22µH, 500kHz
90%
70%
12.00
24.00
36.00
48.00
60.00
0
12
ILED (mA)
24
36
48
C002
C002
Top to Bottom: 3x3, 3x4, 3x5, 3x6 (LEDs)
Figure 44. Efficiency vs ILED
Two String, L=22µH, 500kHz
Two String, L=22µH, 1MHz
90%
88%
88%
86%
86%
84%
84%
EFFICIENCY (%)
EFFICIENCY (%)
Figure 45. Efficiency vs ILED
82%
80%
78%
76%
82%
80%
78%
76%
74%
74%
72%
72%
70%
70%
0
12
24
36
48
0
ILED (mA)
12
24
36
48
ILED (mA)
C002
Top to Bottom: 2x3, 2x4, 2x5, 2x6, 2x7, 2x8, 2x9, 2x10 (LEDs)
C002
Top to Bottom: 2x3, 2x4, 2x5, 2x6, 2x7, 2x8, 2x9, 2x10 (LEDs)
Figure 46. Efficiency vs ILED
40
60
ILED (mA)
Top to Bottom: 3x3, 3x4, 3x5, 3x6 (LEDs)
90%
5.5
VIN (V)
Figure 47. Efficiency vs ILED
Submit Documentation Feedback
Copyright © 2014, Texas Instruments Incorporated
Product Folder Links: LM3633
�LM3633
www.ti.com
SNVS867 – JUNE 2014
VIN = 3.6 V, VLED = 3.2 V @ 20 mA, Typical Application Circuit, TA = 25°C, Full-Scale Current = 20.2 mA unless otherwise
specified. Efficiency is VOUT × (IHVLED1 + IHVLED2 + IHVLED3)/(VIN × IIN), matching curves are (ΔILED_MAX/ILED_AVE). See Table 37.
Three String, L=10µH, 500kHz
88%
88%
86%
86%
84%
84%
82%
80%
78%
76%
82%
80%
78%
76%
74%
74%
72%
72%
70%
0.00
Three String, L=10µH, 1MHz
90%
EFFICIENCY (%)
EFFICIENCY (%)
90%
70%
12.00
24.00
36.00
48.00
60.00
0
12
24
ILED (mA)
36
48
C002
C002
Top to Bottom: 3x3, 3x4, 3x5, 3x6 (LEDs)
Top to Bottom: 3x3, 3x4, 3x5, 3x6 (LEDs)
Figure 48. Efficiency vs ILED
Two String, L=10µH, 1MHz
90%
88%
88%
86%
86%
84%
84%
EFFICIENCY (%)
EFFICIENCY (%)
Figure 49. Efficiency vs ILED
Two String, L=10µH, 500kHz
90%
82%
80%
78%
76%
82%
80%
78%
76%
74%
74%
72%
72%
70%
70%
0
12
24
36
48
0
12
ILED (mA)
24
36
C002
C002
Top to Bottom: 2x3, 2x4, 2x5, 2x6, 2x7, 2x8, 2x9, 2x10 (LEDs)
Figure 50. Efficiency vs ILED
86%
48
ILED (mA)
Top to Bottom: 2x3, 2x4, 2x5, 2x6, 2x7, 2x8, 2x9, 2x10 (LEDs)
Figure 51. Efficiency vs ILED
Three String, L=4.7µH, 500kHz
Three String, L=4.7µH, 1MHz
86%
84%
84%
82%
EFFICIENCY (%)
EFFICIENCY (%)
60
ILED (mA)
80%
78%
76%
82%
80%
78%
74%
76%
72%
70%
0.00
74%
12.00
24.00
36.00
48.00
0
60.00
ILED (mA)
12
24
36
48
60
ILED (mA)
C002
Top to Bottom: 3x3, 3x4, 3x5, 3x6 (LEDs)
C002
Top to Bottom: 3x3, 3x4, 3x5, 3x6 (LEDs)
Figure 52. Efficiency vs ILED
Figure 53. Efficiency vs ILED
Submit Documentation Feedback
Copyright © 2014, Texas Instruments Incorporated
Product Folder Links: LM3633
41
�LM3633
SNVS867 – JUNE 2014
www.ti.com
VIN = 3.6 V, VLED = 3.2 V @ 20 mA, Typical Application Circuit, TA = 25°C, Full-Scale Current = 20.2 mA unless otherwise
specified. Efficiency is VOUT × (IHVLED1 + IHVLED2 + IHVLED3)/(VIN × IIN), matching curves are (ΔILED_MAX/ILED_AVE). See Table 37.
Two String, L=4.7µH, 500kHz
Two String, L=4.7µH, 1MHz
86%
84%
84%
82%
82%
EFFICIENCY (%)
EFFICIENCY (%)
86%
80%
78%
76%
80%
78%
76%
74%
74%
72%
72%
70%
70%
0
12
24
36
48
0
12
24
ILED (mA)
36
48
ILED (mA)
C002
Top to Bottom: 2x3, 2x4, 2x5, 2x6, 2x7, 2x8, 2x9, 2x10 (LEDs)
C002
Top to Bottom: 2x3, 2x4, 2x5, 2x6, 2x7, 2x8, 2x9, 2x10 (LEDs)
Figure 54. Efficiency vs ILED
Figure 55. Efficiency vs ILED
1.00%
0.60%
-35C
25C
90C
90C
HVLED Matching
0.80%
HVLED Matching
25C
-35C
0.50%
0.60%
0.40%
0.20%
0.40%
0.30%
0.20%
0.10%
0.00%
0.00%
2.5
3
3.5
4
4.5
5
5.5
2.5
3
3.5
VIN (V)
4
4.5
5
5.5
VIN (V)
C001
ILED = 20 mA
C001
ILED = 20 mA
Figure 56. HVLED Matching vs VIN, Temp
Figure 57. LVLED Matching vs VIN, Temp
100.00
20.0%
m12
m23
m31
15.0%
HVLED Matching
LED Current (mA)
10.00
1.00
0.10
25C
10.0%
5.0%
0.0%
-5.0%
-10.0%
0.01
-15.0%
2048
1920
1792
1664
1536
1408
1280
1152
1024
896
768
640
512
384
256
128
0
2048
1920
1792
1664
1536
1408
1280
1152
1024
896
768
640
512
384
256
128
0
11-bit Brightness Code
11-bit Brightness Code
C001
Exponential Mapping
C001
Exponential Mapping
Figure 58. HVLED Current vs Code
42
Submit Documentation Feedback
Figure 59. HVLED Matching vs Code
Copyright © 2014, Texas Instruments Incorporated
Product Folder Links: LM3633
�LM3633
www.ti.com
SNVS867 – JUNE 2014
VIN = 3.6 V, VLED = 3.2 V @ 20 mA, Typical Application Circuit, TA = 25°C, Full-Scale Current = 20.2 mA unless otherwise
specified. Efficiency is VOUT × (IHVLED1 + IHVLED2 + IHVLED3)/(VIN × IIN), matching curves are (ΔILED_MAX/ILED_AVE). See Table 37.
8.0%
20.0%
m12
m23
m31
6.0%
15.0%
2.0%
0.0%
-2.0%
m23
m31
m45
m56
m64
10.0%
LVLED Matching
HVLED Matching
4.0%
m12
5.0%
0.0%
-5.0%
-4.0%
-6.0%
-10.0%
-8.0%
-15.0%
256
240
224
208
192
176
160
144
128
112
96
80
64
48
32
16
0
2048
1920
1792
1664
1536
1408
1280
1152
1024
896
768
640
512
384
256
128
0
8-bit Brightness Code
11-bit Brightness Code
C001
C001
Linear Mapping
Exponential Mapping
Figure 60. HVLED Matching vs Code
Figure 61. LVLED Matching vs Code
25.00
20.0%
15.0%
HVLED Current (mA)
20.00
LVLED Matching
10.0%
5.0%
0.0%
-5.0%
-10.0%
-15.0%
m12
m23
m31
m45
m56
m64
15.00
10.00
5.00
-35C
25C
90C
0.00
0.40
0.35
0.30
0.25
0.20
0.15
0.10
0.05
0.00
256
240
224
208
192
176
160
144
128
112
96
80
64
48
32
16
0
8-bit Brightness Code
VHR_HV (V)
C001
C001
Linear Mapping
Figure 62. LVLED Matching vs Code
Figure 63. HVLED Current vs Current Sink Headroom
Voltage
25.00
1.1
1.08
Peak Current (A)
LVLED Current (mA)
20.00
15.00
10.00
5.00
1.06
1.04
1.02
-35C
25C
90C
0.00
-35C
25C
90C
1
0.98
5.5
5.3
5.1
4.9
4.7
4.5
4.3
4.1
3.9
3.7
3.5
3.3
3.1
2.9
2.7
2.5
0.24
0.22
0.20
0.18
0.16
0.14
0.12
0.10
0.08
0.06
0.04
0.02
0.00
VIN (V)
VHR_LV (V)
C001
Figure 64. LVLED Current vs Current Sink Headroom
Voltage
C001
Figure 65. Closed Loop Current Limit vs VIN
Submit Documentation Feedback
Copyright © 2014, Texas Instruments Incorporated
Product Folder Links: LM3633
43
�LM3633
SNVS867 – JUNE 2014
www.ti.com
VIN = 3.6 V, VLED = 3.2 V @ 20 mA, Typical Application Circuit, TA = 25°C, Full-Scale Current = 20.2 mA unless otherwise
specified. Efficiency is VOUT × (IHVLED1 + IHVLED2 + IHVLED3)/(VIN × IIN), matching curves are (ΔILED_MAX/ILED_AVE). See Table 37.
ILED Ripple Current (% of Full-Scale)
100
240
CP 2x Gain Current (mA)
220
10
1
0.1
90C
25C
-35C
0.01
100
4.5
4.3
4.1
3.9
3.7
PWM Frequency (Hz)
3.5
10000
3.3
8000
25C
90C
-35C
120
3.1
6000
140
2.9
4000
160
2.7
2000
180
2.5
0
200
VIN (V)
C001
C001
50% Duty Cycle
2x Gain
Figure 67. Charge Pump Output Short Circuit Current Limit
vs VIN
350
0.4
300
0.35
Stand-By Current (mA)
CP 1x Gain Current (mA)
Figure 66. LED Current Ripple vs fPWM
250
200
150
0.25
0.2
-35C
25C
90C
100
0.3
90C
25C
-35C
0.15
5.5
5.3
5.1
4.9
4.7
4.5
4.3
4.1
3.9
3.7
3.5
3.3
3.1
2.9
2.7
2.5
5.5
5.3
5.1
4.9
4.7
4.5
4.3
4.1
3.9
3.7
3.5
3.3
3.1
2.9
2.7
2.5
VIN (V)
VIN (V)
C001
1x Gain
C001
Pattern Generator Enabled on LVLED1, LVLED2, LVLED3
Figure 68. Charge Pump Output Short Circuit Current
Limit vs VIN
3x6 LEDs
Figure 70. Start-up Response
44
Figure 69. Idle State Supply Current
D = 30% To 90%
ƒPWM = 10 kHz
Figure 71. Response to Step Change in PWM Input Duty
Cycle
Submit Documentation Feedback
Copyright © 2014, Texas Instruments Incorporated
Product Folder Links: LM3633
�LM3633
www.ti.com
SNVS867 – JUNE 2014
VIN = 3.6 V, VLED = 3.2 V @ 20 mA, Typical Application Circuit, TA = 25°C, Full-Scale Current = 20.2 mA unless otherwise
specified. Efficiency is VOUT × (IHVLED1 + IHVLED2 + IHVLED3)/(VIN × IIN), matching curves are (ΔILED_MAX/ILED_AVE). See Table 37.
Typical Application Circuit
3 x 6 LEDs
Figure 72. Line Step Response
8.3 Initialization Set Up
Table 39 shows the minimum number of register writes required for a two-parallel, seven-series LED
configuration. This example uses the default settings for ramp times (2048 μsec), mapping mode (exponential)
and full-scale current (20.2 mA). In this mode of operation the LM3633 controls the brightness LSBs to ramp
between the 8-bit MSB brightness levels providing 11-bit dimming while requiring only 8-bit commands from the
host controller.
Table 39. Control Bank A, 8-Bit Control, Two-String, Seven Series LED Configuration Example
REGISTER NAME
ADDRESS
DATA
DESCRIPTION
HVLED Current Sink Output
Configuration
0x10
0x04
HVLEDs 1 and 2 assigned to Control Bank A
HVLED Current SInk
Feedback Enables
0x28
0x03
Enable feedback on HVLEDs 1 and 2, disable feedback on
HVLED 3
OVP = 32V, ƒsw = 500 kHz
Boost Control
0x2D
0x04
Control Bank Enabled
0x2B
0x01
Enable Control Bank A
Control A Brightness LSB
0x40
0x00
Control A Brightness LSB written only once
Control A Brightness MSB
0x41
User Value
Control A Brightness MSB updated as required
Table 40 shows the minimum number of register writes required for a two-parallel, six-series LED configuration
with PWM Enabled. This example uses the default settings for ramp times (2048 μsec), mapping mode
(exponential) and full-scale current (20.2 mA). In this mode of operation the host controller must update both the
brightness LSB and MSB registers whenever a brightness change is required.
Table 40. Control Bank A, 11-Bit Control, Two-String, Six Series LED Configuration Example
REGISTER NAME
ADDRESS
DATA
DESCRIPTION
HVLED Current Sink Output
Configuration
0x10
0x04
HVLEDs 1 and 2 assigned to Control Bank A
HVLED Current SInk
Feedback Enables
0x28
0x03
Enable feedback on HVLEDs 1 and 2, disable feedback on
HVLED 3
Submit Documentation Feedback
Copyright © 2014, Texas Instruments Incorporated
Product Folder Links: LM3633
45
�LM3633
SNVS867 – JUNE 2014
www.ti.com
Table 40. Control Bank A, 11-Bit Control, Two-String, Six Series LED Configuration Example (continued)
(1)
REGISTER NAME
ADDRESS
DATA
DESCRIPTION
Boost Control
0x2D
0x03
OVP = 24V, ƒsw = 1 MHz
PWM Configuration
0x2F
0x0D
PWM Zero Detect = Enabled, PWM Polarity = Active HIgh,
Control B PWM = Disabled, Control A PWM = Enabled
Control Bank Enabled
0x2B
0x01
Enable Control Bank A
Control A Brightness LSB
0x40
User Value
Control A Brightness LSB written as required
(NOTE: The Brightness LSB change does not take effect until the
Brightness MSB register is written.)
Control A Brightness MSB
0x41
User Value
Control A Brightness MSB updated as required (1)
Anytime the Brightness LSB is changed the Brightness MSB must be written for the Brightness LSB change to take effect.)
Table 41 shows the minimum number of register writes required for five low-voltage indicator LEDs. This
example uses the default settings for ramp times (2048 μs), mapping mode (exponential) and charge pump and
can be combined with either Table 39 or Table 40 above paying careful attention to the Brightness Configuration
and Control Bank Enable registers (these registers control both high-voltage and low-voltage LEDs). In this mode
of operation the host controller must update both Controls C and F brightness whenever a low-voltage LED
brightness change is required. In this example the indicator LEDs is not synchronized due to the time delay
between configuration of the Control C and Control F brightness settings. If synchronization of the indicator LED
timing is required the user must enable the Control Bank after writing all Control Bank brightness registers.
Table 41. Control Bank A Enable with Control Bank C and Control Bank F Low-Voltage LED
Configuration Example
REGISTER NAME
ADDRESS
DATA
DESCRIPTION
LVLED Current Sink Output
Configuration
0x11
0x20
LVLEDs 1, 2, and 3 assigned to Control Bank C
LVLED 4, 5 assigned to Control Bank F, LVLED 6 assigned to
Control Bank H
Control C Full-Scale Current
Setting
0x22
0x00
Set Full-Scale current to 5 mA
Control F Full-Scale Current
Setting
0x25
0x00
Set Full-Scale current to 5 mA
LVLED Current SInk
Feedback Enables
0x29
0x1F
Enable feedback on LVLEDs 1, 2, 3, 4, 5; LVLED 6 disabled
Enable LVLED Control Banks F and C with HVLED Control Bank
A
(If synchronization of indicator LEDs is required enable Control
Bank after Control Banks C and F Brightness register
configuration)
Control Bank Enable
0x2B
0x25
Control C Brightness
0x44
User Value
Control C Brightness written as required
Control F Brightness
0x47
User Value
Control F Brightness updated as required
Table 42 shows the minimum number of register writes required to configure the pattern generator for all six lowvoltage indicator LEDs. This pattern sequences through all six indicator LEDs using a uniform delay time of
196.608 ms.
Table 42. Low Voltage LED Pattern Generator Configuration Example
REGISTER NAME
ADDRESS
DATA
DESCRIPTION
LVLED Current Sink Output
Configuration
0x11
0x36
All low-voltage LED current sinks assigned to independent Control
Banks
Control C Start-up/Shutdown
Ramp Time
0x14
0x33
Set Start-up and Shutdown Ramp time to 1.049 seconds
Control D Start-up/Shutdown
Ramp Time
0x15
0x33
Set Start-up and Shutdown Ramp time to 1.049 seconds
Control E Start-up/Shutdown
Ramp Time
0x16
0x33
Set Start-up and Shutdown Ramp time to 1.049 seconds
Control F Start-up/Shutdown
Ramp Time
0x17
0x33
Set Start-up and Shutdown Ramp time to 1.049 seconds
46
Submit Documentation Feedback
Copyright © 2014, Texas Instruments Incorporated
Product Folder Links: LM3633
�LM3633
www.ti.com
SNVS867 – JUNE 2014
Table 42. Low Voltage LED Pattern Generator Configuration Example (continued)
REGISTER NAME
ADDRESS
DATA
DESCRIPTION
Control G Start-up/Shutdown
Ramp Time
0x18
0x33
Set Start-up and Shutdown Ramp time to 1.049 seconds
Control H Start-up/Shutdown
Ramp Time
0x19
0x33
Set Start-up and Shutdown Ramp time to 1.049 seconds
Control C//D/E Ramp Time
0x1C
0x33
Set Ramp Up/Down Transition time to 1.049 seconds
Control F/G/H Ramp Time
0x1D
0x33
Set Ramp Up/Down Transition time to 1.049 seconds
Control C Full-Scale Current
Setting
0x22
0x00
Set Full-Scale current to 5 mA
Control D Full-Scale Current
Setting
0x23
0x00
Set Full-Scale current to 5 mA
Control E Full-Scale Current
Setting
0x24
0x00
Set Full-Scale current to 5 mA
Control F Full-Scale Current
Setting
0x25
0x00
Set Full-Scale current to 5 mA
Control G Full-Scale Current
Setting
0x26
0x00
Set Full-Scale current to 5 mA
Control H Full-Scale Current
Setting
0x27
0x00
Set Full-Scale current to 5 mA
Control C Brightness
0x44
0xA5
Control C Brightness
Control D Brightness
0x45
0xA5
Control D Brightness
Control E Brightness
0x46
0xA5
Control E Brightness
Control F Brightness
0x47
0xA5
Control F Brightness
Control G Brightness
0x48
0xA5
Control G Brightness
Control H Brightness
0x49
0xA5
Control H Brightness
Control C Pattern Generator
Delay Time
0x50
0x00
Set Control C Delay time to 16.384 ms
Control D Pattern Generator
Delay Time
0x60
0x0C
Set Control D Delay time to 212.992 ms
Control E Pattern Generator
Delay Time
0x70
0x18
Set Control E Delay time to 409.6 ms
Control F Pattern Generator
Delay Time
0x80
0x24
Set Control F Delay time to 606.208 ms
Control G Pattern Generator
Delay Time
0x90
0x30
Set Control G Delay time to 802.816 ms
Control H Pattern Generator
Delay Time
0xA0
0x3C
Set Control H Delay time to 999.424 ms
Control C Pattern Generator
Low Time
0x51
0x3A
Set Control C Low Time to 950.27 ms
Control D Pattern Generator
Low Time
0x61
0x3A
Set Control D Low Time to 950.27 ms
Control E Pattern Generator
Low Time
0x71
0x3A
Set Control E Low Time to 950.27 ms
Control F Pattern Generator
Low Time
0x81
0x3A
Set Control F Low Time to 950.27 ms
Control G Pattern Generator
Low Time
0x91
0x3A
Set Control G Low Time to 950.27 ms
Control H Pattern Generator
Low Time
0xA1
0x3A
Set Control H Low Time to 950.27 ms
Control C Pattern Generator
High Time
0x52
0x40
Set Control C High Time to 1507.33 ms
Control D Pattern Generator
High Time
0x62
0x40
Set Control D High Time to 1507.33 ms
Control E Pattern Generator
High Time
0x72
0x40
Set Control E High Time to 1507.33 ms
Submit Documentation Feedback
Copyright © 2014, Texas Instruments Incorporated
Product Folder Links: LM3633
47
�LM3633
SNVS867 – JUNE 2014
www.ti.com
Table 42. Low Voltage LED Pattern Generator Configuration Example (continued)
REGISTER NAME
ADDRESS
DATA
DESCRIPTION
Control F Pattern Generator
High Time
0x82
0x40
Set Control F High Time to 1507.33 ms
Control G Pattern Generator
High Time
0x92
0x40
Set Control G High Time to 1507.33 ms
Control H Pattern Generator
High Time
0xA2
0x40
Set Control H High Time to 1507.33 ms
Control C Pattern Generator
Low-Level Brightness
0x53
0x01
Set Control C Low-Level Brightness
Control D Pattern Generator
Low-Level Brightness
0x63
0x01
Set Control D Low-Level Brightness
Control E Pattern Generator
Low-Level Brightness
0x73
0x01
Set Control E Low-Level Brightness
Control F Pattern Generator
Low-Level Brightness
0x83
0x01
Set Control F Low-Level Brightness
Control G Pattern Generator
Low-Level Brightness
0x93
0x01
Set Control G Low-Level Brightness
Control H Pattern Generator
Low-Level Brightness
0xA3
0x01
Set Control H Low-Level Brightness
Pattern Generator Enables
0x2C
0xFC
Enable Control Bank C/D/E/F/G/H Pattern Generators
Control Bank Enables
0x2B
0xFC
Enable Control Banks C/D/E/F/G/H
9 Power Supply Recommendations
The LM3633 is designed to operate from an input supply range of 2.7 V to 5.5 V. This input supply should be
well regulated and provide the peak current required by the High-voltage LED and Low-voltage LED
configurations.
10 Layout
10.1 Layout Guidelines (Boost)
The LM3633 inductive boost converter detects a high switched voltage (up to VOVP) at the SW pin, and a step
current (up to ICL_BOOST) through the Schottky diode and output capacitor each switching cycle. The high
switching voltage can create interference into nearby nodes due to electric field coupling (I = Cdv/dt). The large
step current through the diode and the output capacitor can cause a large voltage spike at the SW pin and the
OVP pin due to parasitic inductance in the step current conducting path (V = Ldi/dt). Board layout guidelines are
geared towards minimizing this electric field coupling and conducted noise. Figure 73 highlights these two noisegenerating components.
48
Submit Documentation Feedback
Copyright © 2014, Texas Instruments Incorporated
Product Folder Links: LM3633
�LM3633
www.ti.com
SNVS867 – JUNE 2014
Layout Guidelines (Boost) (continued)
Voltage Spike
(VSPIKE)
VOUT + VF Schottky
Pulsed voltage at SW
Current through
Schottky and
COUT
IPEAK
Current
through
inductor
IAVE = IIN
Parasitic
Circuit Board
Inductances
Affected Node
due to capacitive coupling
Cp1
L
Lp1
D1
Lp2
2.7V to 5.5V
VIN
LCD Display
Up to 40V
C OUT
SW
IN
10 k:
10 k:
SCL
SDA
Lp3
C IN
SCL
LM3633
OVP
SDA
HVLED1
HVLED2
HVLED3
GND
Figure 73. LM3633 Inductive Boost Converter Showing Pulsed Voltage at SW (High dv/dt) and Current
Through Schottky and COUT (High di/dt)
The following list details the main (layout sensitive) areas of the LM3633 inductive boost converter in order of
decreasing importance:
1. Output Capacitor
– Schottky Cathode to COUT+
– COUT− to GND
2. Schottky Diode
– SW pin to Schottky Anode
– Schottky Cathode to COUT+
3. Inductor
– SW Node PCB capacitance to other traces
4. Input Capacitor
– CIN+ to IN pin
Submit Documentation Feedback
Copyright © 2014, Texas Instruments Incorporated
Product Folder Links: LM3633
49
�LM3633
SNVS867 – JUNE 2014
www.ti.com
Layout Guidelines (Boost) (continued)
10.1.1 Boost Output Capacitor Placement
Because the output capacitor is in the path of the inductor current discharge path it sees a high-current step from
0 to IPEAK each time the switch turns off and the Schottky diode turns on. Any inductance along this series path
from the cathode of the diode through COUT and back into the LM3633 GND pin contributes to voltage spikes
(VSPIKE = LP_ × di/dt) at SW and OUT. These spikes can potentially over-voltage the SW pin, or feed through to
GND. To avoid this, COUT+ must be connected as close as possible to the Cathode of the Schottky diode, and
COUT− must be connected as close as possible to the LM3633 GND bump. The best placement for COUT is on
the same layer as the LM3633 so as to avoid any vias that can add excessive series inductance.
10.1.2 Schottky Diode Placement
In the LM3633 boost circuit the Schottky diode is in the path of the inductor current discharge. As a result the
Schottky diode sees a high-current step from 0 to IPEAK each time the switch turns off and the diode turns on.
Any inductance in series with the diode causes a voltage spike (VSPIKE = LP_ × di/dt) at SW and OUT. This can
potentially over-voltage the SW pin, or feed through to VOUT and through the output capacitor and into GND.
Connecting the anode of the diode as close as possible to the SW pin and the cathode of the diode as close as
possible to COUT+ reduces the inductance (LP_) and minimize these voltage spikes.
10.1.3 Inductor Placement
The node where the inductor connects to the LM3633 SW pin has 2 considerations. First, a large switched
voltage (0 to VOUT + VF_SCHOTTKY) appears on this node every switching cycle. This switched voltage can be
capacitively coupled into nearby nodes. Second, there is a relatively large current (input current) on the traces
connecting the input supply to the inductor and connecting the inductor to the SW pin. Any resistance in this path
can cause voltage drops that can negatively affect efficiency and reduce the input operating voltage range.
To reduce the capacitive coupling of the signal on SW into nearby traces, the SW bump-to-inductor connection
must be minimized in area. This limits the PCB capacitance from SW to other traces. Additionally, highimpedance nodes that are more susceptible to electric field coupling need to be routed away from SW and not
directly adjacent or beneath. This is especially true for traces such as SCL, SDA, HWEN, and PWM. A GND
plane placed directly below SW dramatically reduces the capacitance from SW into nearby traces.
Lastly, limit the trace resistance of the VIN-to-inductor connection and from the inductor-to-SW connection, by
use of short, wide traces.
10.1.4 Boost Input Capacitor Placement
For the LM3633 boost converter, the input capacitor filters the inductor current ripple, and the internal MOSFET
driver currents during turnon of the internal power switch. The driver current requirement can range from 50 mA
at 2.7 V to over 200 mA at 5.5 V with fast durations of approximately 10 ns to 20 ns. This appears as high di/dt
current pulses coming from the input capacitor each time the switch turns on. Close placement of the input
capacitor to the IN pin and to the GND pin is critical since any series inductance between IN and CIN+ or CIN−
and GND can create voltage spikes that could appear on the VIN supply line and in the GND plane.
Close placement of the input bypass capacitor at the input side of the inductor is also critical. The source
impedance (inductance and resistance) from the input supply, along with the input capacitor of the LM3633, form
a series RLC circuit. If the output resistance from the source (RS) is low enough the circuit is underdamped and
has a resonant frequency (typically the case). Depending on the size of LS the resonant frequency could occur
below, close to, or above the LM3633 switching frequency. This can cause the supply current ripple to be:
1. Approximately equal to the inductor current ripple when the resonant frequency occurs well above the
LM3633 switching frequency;
2. Greater than the inductor current ripple when the resonant frequency occurs near the switching frequency; or
3. Less than the inductor current ripple when the resonant frequency occurs well below the switching frequency.
Figure 74 shows the series RLC circuit formed from the output impedance of the supply and the input
capacitor.
The circuit is redrawn for the AC case where the VIN supply is replaced with a short to GND and the LM3633 +
Inductor is replaced with a current source (ΔIL). Equation 1 is the criteria for an underdamped response. Equation
2 is the resonant frequency. Equation 3 is the approximated supply current ripple as a function of LS, RS, and
CIN.
50
Submit Documentation Feedback
Copyright © 2014, Texas Instruments Incorporated
Product Folder Links: LM3633
�LM3633
www.ti.com
SNVS867 – JUNE 2014
Layout Guidelines (Boost) (continued)
As an example, consider a 3.6-V supply with 0.1 Ω of series resistance connected to CIN through 50 nH of
connecting traces. This results in an under-damped input-filter circuit with a resonant frequency of 712 kHz.
Since both the 1-MHz and 500-kHz switching frequency options lie close to the resonant frequency of the input
filter, the supply current ripple is probably larger than the inductor current ripple. In this case, using equation 3,
the supply current ripple can be approximated as 1.68 times the inductor current ripple (using a 500 kHz
switching frequency) and 0.86 times the inductor current ripple using a 1-MHz switching frequency. Increasing
the series inductance (LS) to 500 nH causes the resonant frequency to move to around 225 kHz, and the supply
current ripple to be approximately 0.25 times the inductor current ripple (500-kHz switching frequency) and 0.053
times for a 1-MHz switching frequency.
'IL
ISUPPLY
RS
LS
L
SW
+
IN
VIN Supply
LM3633
-
CIN
ISUPPLY
LS
RS
CIN
'IL
2
1.
RS
1
>
LS x CIN 4 x LS2
2. f RESONANT =
1
2S LS x CIN
3. I SUPPLYRIPP LE | 'IL x
1
2S x 500 kHz x CIN
2
·
§
1
2
¸
RS + ¨¨2S x 500 kHz x LS ¸
2
S
x
500
kHz
x
C
IN ¹
©
Figure 74. Input RLC Network
10.2 Layout Guidelines (Charge Pump)
The charge pump basically has three areas of concern regarding component placement:
1. The flying capacitor (CP)
2. The output capacitor (CPOUT)
3. The input capacitor
10.2.1 Flying Capacitor (CP) Placement
The charge pump flying capacitor must quickly charge up to the input voltage and then supply the current to the
output every switching cycle. Since the charge-pump switching frequency is 1 MHz, the capacitor must be a lowinductance and low-resistive ceramic. Additionally, there must be a low-inductive connection from CP to the
LM3633 flying capacitor pin C+ and C−. This is accomplished by placing CP as close as possible to the LM3633
and on the same layer to avoid vias.
Submit Documentation Feedback
Copyright © 2014, Texas Instruments Incorporated
Product Folder Links: LM3633
51
�LM3633
SNVS867 – JUNE 2014
www.ti.com
Layout Guidelines (Charge Pump) (continued)
10.2.2 Output Capacitor (CPOUT) Placement
The charge pump output capacitor sees the switched charge from the flying capacitor every switching cycle (1
MHz). This fast switching action requires that a low inductive and low resistive capacitor (ceramic) be used and
that CPOUT be connected to the LM3633 CPOUT pin with a low inductive connection. This is done by placing
CPOUT as close as possible to the CPOUT and GND pins of the LM3633 and on the same layer as the LM3633
to avoid vias.
10.2.3 Charge Pump Input Capacitor Placement
The input capacitor for the LM3633 charge pump is the same one used for the LM3633 inductive boost converter
(see Boost Input Capacitor Placement section).
10.3 Layout Example
SCL
SDA
CP
CPOUT
CIN
L
IN
GND
HVLED1
3.9 mm
HVLED2
SW
HVLED3
LVLED1
HWEN
LVLED6
Schottky
COUT
OVP
LVLED2
LVLED3
LVLED4
LVLED5
PWM
6.9 mm
Figure 75. LM3633 Example Layout
52
Submit Documentation Feedback
Copyright © 2014, Texas Instruments Incorporated
Product Folder Links: LM3633
�LM3633
www.ti.com
SNVS867 – JUNE 2014
11 Device and Documentation Support
11.1 Device Support
11.1.1 Third-Party Products Disclaimer
TI'S PUBLICATION OF INFORMATION REGARDING THIRD-PARTY PRODUCTS OR SERVICES DOES NOT
CONSTITUTE AN ENDORSEMENT REGARDING THE SUITABILITY OF SUCH PRODUCTS OR SERVICES
OR A WARRANTY, REPRESENTATION OR ENDORSEMENT OF SUCH PRODUCTS OR SERVICES, EITHER
ALONE OR IN COMBINATION WITH ANY TI PRODUCT OR SERVICE.
11.2 Trademarks
All trademarks are the property of their respective owners.
11.3 Electrostatic Discharge Caution
This integrated circuit can be damaged by ESD. Texas Instruments recommends that all integrated circuits be handled with
appropriate precautions. Failure to observe proper handling and installation procedures can cause damage.
ESD damage can range from subtle performance degradation to complete device failure. Precision integrated circuits may be more
susceptible to damage because very small parametric changes could cause the device not to meet its published specifications.
11.4 Glossary
SLYZ022 — TI Glossary.
This glossary lists and explains terms, acronyms and definitions.
12 Mechanical, Packaging, and Orderable Information
The following pages include mechanical, packaging, and orderable information. This information is the most
current data available for the designated devices. This data is subject to change without notice and revision of
this document. For browser-based versions of this data sheet, refer to the left-hand navigation.
Submit Documentation Feedback
Copyright © 2014, Texas Instruments Incorporated
Product Folder Links: LM3633
53
�PACKAGE OPTION ADDENDUM
www.ti.com
10-Dec-2020
PACKAGING INFORMATION
Orderable Device
Status
(1)
Package Type Package Pins Package
Drawing
Qty
Eco Plan
(2)
Lead finish/
Ball material
MSL Peak Temp
Op Temp (°C)
Device Marking
(3)
(4/5)
(6)
LM3633YFQR
ACTIVE
DSBGA
YFQ
20
3000
RoHS & Green
SNAGCU
Level-1-260C-UNLIM
-40 to 85
633B
(1)
The marketing status values are defined as follows:
ACTIVE: Product device recommended for new designs.
LIFEBUY: TI has announced that the device will be discontinued, and a lifetime-buy period is in effect.
NRND: Not recommended for new designs. Device is in production to support existing customers, but TI does not recommend using this part in a new design.
PREVIEW: Device has been announced but is not in production. Samples may or may not be available.
OBSOLETE: TI has discontinued the production of the device.
(2)
RoHS: TI defines "RoHS" to mean semiconductor products that are compliant with the current EU RoHS requirements for all 10 RoHS substances, including the requirement that RoHS substance
do not exceed 0.1% by weight in homogeneous materials. Where designed to be soldered at high temperatures, "RoHS" products are suitable for use in specified lead-free processes. TI may
reference these types of products as "Pb-Free".
RoHS Exempt: TI defines "RoHS Exempt" to mean products that contain lead but are compliant with EU RoHS pursuant to a specific EU RoHS exemption.
Green: TI defines "Green" to mean the content of Chlorine (Cl) and Bromine (Br) based flame retardants meet JS709B low halogen requirements of
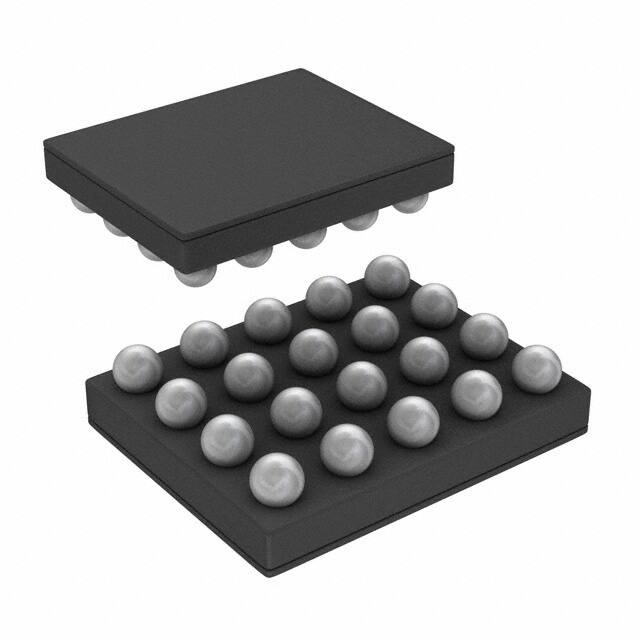


 工商网监
湘ICP备2023018690号
工商网监
湘ICP备2023018690号
