Product
Folder
Order
Now
Support &
Community
Tools &
Software
Technical
Documents
LMK03328
SNAS668D – AUGUST 2015 – REVISED APRIL 2018
LMK03328 Ultra-Low Jitter Clock Generator With Two Independent PLLs, Eight Outputs,
Integrated EEPROM
1 Features
2 Applications
•
•
•
•
•
•
•
•
1
•
•
•
•
Ultra Low Noise, High Performance
– Jitter: 100-fs RMS Typical, FOUT > 100 MHz
– PSNR: –80 dBc, Robust Supply Noise
Immunity
Flexible Device Options
– Up to 8 AC-LVPECL, AC-LVDS, AC-CML,
HCSL or LVCMOS Outputs, or Any
Combination
– Pin Mode, I2C Mode, and EEPROM Mode
– 71-Pin Selectable Pre-Programmed Default
Start-Up Options
Dual Inputs With Automatic or Manual Selection
– Crystal Input: 10 to 52 MHz
– External Input: 1 to 300 MHz
Frequency Margining Options
– Fine Frequency Margining (±50 ppm Typical)
Using Low-Cost Pullable Crystal Reference
– Glitchless Coarse Frequency Margining (%)
Using Output Dividers
Other Features
– Supply: 3.3-V Core, 1.8-V, 2.5-V, 3.3-V Output
Supply
– Industrial Temperature Range (–40ºC to
+85ºC)
– Package: 7-mm × 7-mm 48-WQFN
Switches and Routers
Network and Telecom Line Cards
Servers and Storage Systems
Wireless Base Station
PCIe Gen1, Gen2, Gen3, Gen4
Test and Measurement
Broadcast Infrastructure
3 Description
The LMK03328 device is an ultra-low-noise clock
generator
with
two
fractional-N
frequency
synthesizers with integrated VCOs, flexible clock
distribution
and
fanout,
and
pin-selectable
configuration states stored in on-chip EEPROM. The
device can generate multiple clocks for various multigigabit serial interfaces and digital devices, reduces
BOM cost and board area, and improves reliability by
replacing multiple oscillators and clock distribution
devices. The ultra-low-jitter reduces bit error rate
(BER) in high-speed serial links.
Device Information(1)
PART NUMBER
LMK03328
PACKAGE
WQFN (48)
BODY SIZE (NOM)
7.00 mm × 7.00 mm
(1) For all available packages, see the orderable addendum at
the end of the data sheet.
LMK03328 Simplified Block Diagram
Power
Conditioning
Smart MUX
2
PLL1
Output
Dividers
8
Output
Buffers
8
PLL2
LMK03328
Interface
I2C/ROM/
EEPROM
Ultra-high performance clock generator
1
An IMPORTANT NOTICE at the end of this data sheet addresses availability, warranty, changes, use in safety-critical applications,
intellectual property matters and other important disclaimers. PRODUCTION DATA.
�LMK03328
SNAS668D – AUGUST 2015 – REVISED APRIL 2018
www.ti.com
Table of Contents
1
2
3
4
5
6
7
8
Features ..................................................................
Applications ...........................................................
Description .............................................................
Revision History.....................................................
Description (continued).........................................
Device Comparison Table.....................................
Pin Configuration and Functions .........................
Specifications.........................................................
8.1
8.2
8.3
8.4
8.5
8.6
8.7
Absolute Maximum Ratings ...................................... 7
ESD Ratings.............................................................. 7
Recommended Operating Conditions....................... 7
Thermal Information .................................................. 7
Thermal Information .................................................. 8
Electrical Characteristics - Power Supply ................ 8
Pullable Crystal Characteristics (SECREF_P,
SECREF_N)............................................................. 10
8.8 Non-Pullable Crystal Characteristics (SECREF_P,
SECREF_N)............................................................. 11
8.9 Clock Input Characteristics (PRIREF_P/PRIREF_N,
SECREF_P/SECREF_N)......................................... 11
8.10 VCO Characteristics.............................................. 11
8.11 PLL Characteristics ............................................... 12
8.12 1.8-V LVCMOS Output Characteristics
(OUT[7:0]) ................................................................ 12
8.13 LVCMOS Output Characteristics (STATUS[1:0]... 12
8.14 Open-Drain Output Characteristics
(STATUS[1:0]).......................................................... 13
8.15 AC-LVPECL Output Characteristics ..................... 13
8.16 AC-LVDS Output Characteristics.......................... 13
8.17 AC-CML Output Characteristics............................ 15
8.18 HCSL Output Characteristics................................ 15
8.19 Power-On/Reset Characteristics........................... 15
8.20 2-Level Logic Input Characteristics
(HW_SW_CTRL, PDN, GPIO[5:0]).......................... 16
8.21 3-Level Logic Input Characteristics (REFSEL,
GPIO[3:1]) ................................................................ 16
8.22 Analog Input Characteristics (GPIO[5])................. 16
8.23 I2C-Compatible Interface Characteristics (SDA,
SCL) ......................................................................... 17
8.24 Typical 156.25-MHz, Closed-Loop Output Phase
Noise Characteristics ............................................... 17
8.25 Typical 161.1328125-MHz, Closed-Loop Output
2
Phase Noise Characteristics....................................
8.26 Closed-Loop Output Jitter Characteristics ............
8.27 PCIe Clock Output Jitter .......................................
8.28 Typical Power Supply Noise Rejection
Characteristics .........................................................
8.29 Typical Power Supply Noise Rejection
Characteristics .........................................................
8.30 Typical Closed-Loop Output Spur Characteristics
8.31 Typical Characteristics ..........................................
1
1
1
3
4
4
5
7
9
18
18
19
19
19
20
21
Parameter Measurement Information ................ 25
9.1 Test Configurations ................................................. 25
10 Detailed Description ........................................... 29
10.1
10.2
10.3
10.4
10.5
10.6
10.7
Overview ............................................................... 29
Functional Block Diagram ..................................... 29
Feature Description............................................... 30
Device Functional Modes...................................... 34
Programming......................................................... 52
Register Maps ....................................................... 78
EEPROM Map..................................................... 123
11 Application and Implementation...................... 129
11.1 Application Information........................................ 129
11.2 Typical Applications ............................................ 129
12 Power Supply Recommendations ................... 140
12.1
12.2
12.3
12.4
Device Power Up Sequence ............................... 140
Device Power Up Timing .................................... 141
Power Down........................................................ 142
Power Rail Sequencing, Power Supply Ramp Rate,
and Mixing Supply Domains .................................. 142
12.5 Power Supply Bypassing .................................... 144
13 Layout................................................................. 146
13.1 Layout Guidelines ............................................... 146
13.2 Layout Example .................................................. 146
14 Device and Documentation Support ............... 148
14.1 Receiving Notification of Documentation
Updates..................................................................
14.2 Community Resources........................................
14.3 Trademarks .........................................................
14.4 Electrostatic Discharge Caution ..........................
14.5 Glossary ..............................................................
148
148
148
148
148
15 Mechanical, Packaging, and Orderable
Information ......................................................... 148
Submit Documentation Feedback
Copyright © 2015–2018, Texas Instruments Incorporated
Product Folder Links: LMK03328
�LMK03328
www.ti.com
SNAS668D – AUGUST 2015 – REVISED APRIL 2018
4 Revision History
Changes from Revision C (December 2017) to Revision D
Page
•
Clarified note about VOH (rail-to-rail swing only with VDDO = 1.8 V +/- 5%)........................................................................ 12
•
Changed Slew Rate minimum and maximum from: 2.25 V/ns and 5 V/ns to: 1 V/ns and 4 V/ns, respectively ................. 15
•
Updated REVID to be 0x02 (was 0x01) .............................................................................................................................. 78
•
Added the Support for PCB Temperature up to 105°C subsection.................................................................................... 146
Changes from Revision B (August 2016) to Revision C
Page
•
Added bullets to the Applications section .............................................................................................................................. 1
•
Added a table note to Recommended Operating Conditions explaining the NOM values..................................................... 7
•
Added PCIe Clock Output Jitter table................................................................................................................................... 19
•
Changed Figure 45 text from: Vbb = 1.3 V to: Vbb = 1.8 V ................................................................................................. 37
•
Added tablenotes to Table 10 ............................................................................................................................................. 59
•
Updated PLL2_CTRL1 Register; R72's Icp values to match those found in PLL1_CTRL1 Register; R57 . ..................... 111
•
Changed the first paragraph of the Powering Up From Single Supply Rail section ......................................................... 142
•
Changed the first paragraph of the Powering Up From Split Supply Rails section and Figure 86 .................................... 143
•
Changed the first paragraph and added new content to the Slow Power-Up Supply Ramp section ................................ 143
•
Changed the first paragraph of the Non-Monotonic Power-Up Supply Ramp section ...................................................... 144
Changes from Revision A (January 2016) to Revision B
Page
•
Modified default ROM contents on Input and Status configurations ................................................................................... 64
•
Modified default ROM contents on PLL1 configurations ..................................................................................................... 66
•
Modified default ROM contents on PLL2 configurations ..................................................................................................... 70
Submit Documentation Feedback
Copyright © 2015–2018, Texas Instruments Incorporated
Product Folder Links: LMK03328
3
�LMK03328
SNAS668D – AUGUST 2015 – REVISED APRIL 2018
www.ti.com
5 Description (continued)
For each PLL, a differential/single-ended clock or crystal input can be selected as the PLL reference clock. The
selected PLL reference input can be used to lock the VCO frequency at an integer or fractional multiple of the
reference input frequency. The VCO frequency for the respective PLLs can be tuned between 4.8 GHz and 5.4
GHz. Both PLL/VCOs are equivalent in performance and functionality. Each PLL offers the flexibility to select a
predefined or user-defined loop bandwidth, depending on the needs of the application. Each PLL has a postdivider that can be selected between divide-by 2, 3, 4, 5, 6, 7, or 8.
All the output channels can select the divided-down VCO clock from PLL1 or PLL2 as the source for the output
divider to set the final output frequency. Some output channels can also independently select the reference input
for PLL1 or PLL2 as an alternative source to be bypassed to the corresponding output buffers. The 8-bit output
dividers support a divide range of 1 to 256 (even or odd), output frequencies up to 1 GHz, and output phase
synchronization capability.
All output pairs are ground-referenced CML drivers with programmable swing that can be interfaced to LVDS or
LVPECL or CML receivers with AC coupling. All output pairs can also be independently configured as HCSL
outputs or 2x 1.8-V LVCMOS outputs. The outputs offer lower power at 1.8 V, higher performance and power
supply noise immunity, and lower EMI compared to voltage-referenced driver designs (such as traditional LVDS
and LVPECL drivers). Two additional 3.3-V LVCMOS outputs can be obtained through the STATUS pins. This is
an optional feature in case of a need for 3.3-V LVCMOS outputs and device status signals are not needed.
The device features self start-up from on-chip programmable EEPROM or pre-defined ROM memory, which
offers multiple custom device modes selectable through pin control and can eliminate the need for serial
programming. The device registers and on-chip EEPROM settings are fully programmable via I2C-compatible
serial interface. The device slave address is programmable in EEPROM and LSBs are settable with a 3-state pin.
The device provides two frequency margining options with glitch-free operation to support system design
verification tests (DVT), such as standard compliance and system timing margin testing. Fine frequency
margining (in ppm) can be supported by using a low-cost pullable crystal on the internal crystal oscillator (XO),
and selecting this input as the reference to the PLL synthesizer. The frequency margining range is determined by
the crystal’s trim sensitivity and the on-chip varactor range. XO frequency margining can be controlled through
pin or I2C control for ease-of-use and high flexibility. Coarse frequency margining (in %) is available on any
output channel by changing the output divide value through I2C interface, which synchronously stops and restarts
the output clock to prevent a glitch or runt pulse when the divider is changed.
Internal power conditioning provide excellent power supply noise rejection (PSNR), reducing the cost and
complexity of the power delivery network. The analog and digital core blocks operate from 3.3-V ± 5% supply
and output blocks operate from 1.8-V, 2.5-V, 3.3-V ± 5% supply.
6 Device Comparison Table
Table 1. LVPECL Output Jitter Over Different Integration Bandwidths
4
OUTPUT FREQUENCY (MHz)
INTEGRATION BANDWIDTH
TYPICAL JITTER (ps, rms)
< 100
12 kHz - 5 MHz
0.15
> 100
1 kHz – 5 MHz
12 kHz – 20 MHz
0.1
Submit Documentation Feedback
Copyright © 2015–2018, Texas Instruments Incorporated
Product Folder Links: LMK03328
�LMK03328
www.ti.com
SNAS668D – AUGUST 2015 – REVISED APRIL 2018
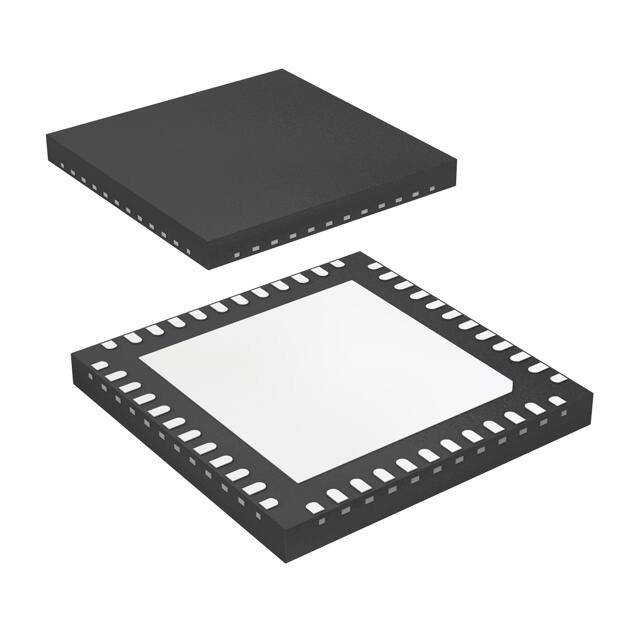
7 Pin Configuration and Functions
OUT7_P
OUT7_N
VDDO_7
OUT6_P
OUT6_N
VDDO_6
OUT5_P
OUT5_N
VDDO_5
OUT4_P
OUT4_N
VDDO_4
48
47
46
45
44
43
42
41
40
39
38
37
RHS Package
48-Pin WQFN
Top View
PRIREF_N
7
30
GPIO2
REFSEL
8
29
LF2
HW_SW_CTRL
9
28
CAP_PLL2
SECREF_P
10
27
VDD_PLL2
SECREF_N 11
26
SCL
GPIO0 12
25
SDA
24
GPIO3
GPIO1
31
23
6
OUT3_P
PRIREF_P
22
GPIO4
OUT3_N
32
21
5
OUT2_N
VDD_IN
20
GPIO5
OUT2_P
33
19
4
VDDO_23
VDD_DIG
18
LF1
VDDO_01
34
17
3
OUT1_P
CAP_DIG
16
CAP_PLL1
OUT1_N
35
15
2
OUT0_N
STATUS1
14
VDD_PLL1
OUT0_P
36
13
1
PDN
STATUS0
Pin Functions
NO.
NAME
TYPE
DESCRIPTION
—
DAP
Ground
Die Attach Pad.
The DAP is an electrical connection and provides a thermal dissipation path. For proper electrical
and thermal performance of the device, a 6x6 via pattern (0.3-mm holes) is recommended to
connect the DAP to PCB ground layers. Refer to Layout Guidelines.
4
VDD_DIG
Analog
3.3-V Power Supply for Digital Control and STATUS outputs.
5
VDD_IN
Analog
3.3-V Power Supply for Input Block.
18
VDDO_01
Analog
1.8-V, 2.5-V, 3.3-V Power Supply for OUT0/OUT1 channel.
19
VDDO_23
Analog
1.8-V, 2.5-V, 3.3-V Power Supply for OUT2/OUT3 channel.
27
VDD_PLL2
Analog
3.3-V Power Supply for PLL2.
36
VDD_PLL1
Analog
3.3-V Power Supply for PLL1.
37
VDDO_4
Analog
1.8-V, 2.5-V, 3.3-V Power Supply for OUT4 channel.
40
VDDO_5
Analog
1.8-V, 2.5-V, 3.3-V Power Supply for OUT5 channel.
43
VDDO_6
Analog
1.8-V, 2.5-V, 3.3-V Power Supply for OUT6 channel.
46
VDDO_7
Analog
1.8-V, 2.5-V, 3.3-V Power Supply for OUT7 channel.
POWER
Submit Documentation Feedback
Copyright © 2015–2018, Texas Instruments Incorporated
Product Folder Links: LMK03328
5
�LMK03328
SNAS668D – AUGUST 2015 – REVISED APRIL 2018
www.ti.com
Pin Functions (continued)
NO.
NAME
TYPE
DESCRIPTION
PRIREF_P,
PRIREF_N
Universal
Primary reference clock.
Accepts a differential or single-ended input. Input pins have AC-coupling capacitors and biasing
internally. For LVCMOS input, the non-driven input pin should be pulled down to ground.
8
REFSEL
LVCMOS
Manual reference input selection for PLL1 and PLL2 (3-state).
Weak pullup resistor.
9
HW_SW_CTR
L
LVCMOS
Selection for Hard Pin Mode (ROM), Soft Pin Mode (EEPROM), or Register Default Mode.
Weak pullup resistor.
SECREF_P,
SECREF_N
Universal
Secondary reference clock.
Accepts a differential or single-ended input or Crystal input. Input pins have AC-coupling
capacitors and biasing internally. For LVCMOS input, external input termination is needed to
attenuate the swing to less than 2.6 V, and the non-driven input pin should be pulled down to
ground.
For crystal input, AT cut fundamental crystal should be used as per defined spec and pullable
crystal should be used for fine margining.
INPUT BLOCK
6, 7
10, 11
SYNTHESIZER BLOCK
3
CAP_DIG
Analog
External Bypass Capacitor for digital blocks. Attach a 10 µF to GND.
28
CAP_PLL2
Analog
External Bypass Capacitor for PLL2. Attach a 10 µF to GND.
29
LF2
Analog
External Loop Filter for PLL2.
34
LF1
Analog
External Loop Filter for PLL1.
35
CAP_PLL1
Analog
External Bypass Capacitor for PLL1. Attach a 10 µF to GND.
OUTPUT BLOCK
14, 15
OUT0_P,
OUT0_N
Universal
Differential/LVCMOS Output Pair 0. Programmable driver with differential or 2x 1.8-V LVCMOS
outputs.
17, 16
OUT1_P,
OUT1_N
Universal
Differential/LVCMOS Output Pair 1. Programmable driver with differential or 2x 1.8-V LVCMOS
outputs.
20, 21
OUT2_P,
OUT2_N
Universal
Differential/LVCMOS Output Pair 2. Programmable driver with differential or 2x 1.8-V LVCMOS
outputs.
23, 22
OUT3_P,
OUT3_N
Universal
Differential/LVCMOS Output Pair 3. Programmable driver with differential or 2x 1.8-V LVCMOS
outputs.
39, 38
OUT4_P,
OUT4_N
Universal
Differential/LVCMOS Output Pair 4. Programmable driver with differential or 2x 1.8-V LVCMOS
outputs.
42, 41
OUT5_P,
OUT5_N
Universal
Differential/LVCMOS Output Pair 5. Programmable driver with differential or 2x 1.8-V LVCMOS
outputs.
45, 44
OUT6_P,
OUT6_N
Universal
Differential/LVCMOS Output Pair 6. Programmable driver with differential or 2x 1.8-V LVCMOS
outputs.
48, 47
OUT7_P,
OUT7_N
Universal
Differential/LVCMOS Output Pair 7. Programmable driver with differential or 2x 1.8-V LVCMOS
outputs.
DIGITAL CONTROL / INTERFACES (1)
1
STATUS0
Universal
Status Output 0 (open-drain, requires external pullup) or 3.3-V LVCMOS output from synth
(push-pull). Status signal selection and output polarity are programmable.
2
STATUS1
Universal
Status Output 1 (open-drain, requires external pullup) or 3.3-V LVCMOS output from synth
(push-pull). Status signal selection and output polarity are programmable.
12
GPIO0
LVCMOS
Multifunction Inputs (2-state).
13
PDN
LVCMOS
Device Power-down (active low). Weak pullup resistor.
33
GPIO5
Universal
Multifunction Input (2-state) or Analog input for frequency margin.
24
GPIO1
LVCMOS
Multifunction Input (3-state or 2-state).
25
SDA
LVCMOS
I2C Serial Data (bidirectional, open-drain). Requires an external pullup resistor to VDD_DIG. I2C
slave address is initialized from on-chip EEPROM.
26
SCL
LVCMOS
I2C Serial Clock (bidirectional, open-drain). Requires an external pullup resistor to VDD_DIG.
30
GPIO2
LVCMOS
Multifunction Input (3-state or 2-state).
31
GPIO3
LVCMOS
Multifunction Input (3-state or 2-state).
32
GPIO4
LVCMOS
Multifunction Input (2-state).
(1)
6
Refer to Device Configuration Control for details on the digital control and interfaces.
Submit Documentation Feedback
Copyright © 2015–2018, Texas Instruments Incorporated
Product Folder Links: LMK03328
�LMK03328
www.ti.com
SNAS668D – AUGUST 2015 – REVISED APRIL 2018
8 Specifications
8.1 Absolute Maximum Ratings
over operating free-air temperature range (unless otherwise noted) (1)
MIN
MAX
UNIT
Supply voltage for Input, Synthesizer, Control, and Output Blocks, VDD_IN, VDD_PLL1, VDD_PLL2,
VDD_DIG, VDDO_x
–0.3
3.6
V
Input voltage for clock and logic inputs, VIN
–0.3
VDD + 0.3
V
Output voltage for clock and logic outputs, VOUT
–0.3
VDD + 0.3
V
150
°C
150
°C
Junction temperature, TJ
Storage temperature, Tstg
(1)
–65
Stresses beyond those listed under Absolute Maximum Ratings may cause permanent damage to the device. These are stress ratings
only, which do not imply functional operation of the device at these or any other conditions beyond those indicated under Recommended
Operating Conditions. Exposure to absolute maximum-rated conditions for extended periods may affect device reliability.
8.2 ESD Ratings
VALUE
V(ESD)
(1)
(2)
Electrostatic discharge
Human-body model (HBM), per ANSI/ESDA/JEDEC JS-001 (1)
±2000
Charged-device model (CDM), per JEDEC specification JESD22-C101 (2)
±500
UNIT
V
JEDEC document JEP155 states that 500 V HBM allows safe manufacturing with a standard ESD control process.
JEDEC document JEP157 states that 250 V CDM allows safe manufacturing with a standard ESD control process.
8.3 Recommended Operating Conditions
over operating free-air temperature range (unless otherwise noted)
VDD_IN,
VDD_PLL1,
VDD_PLL2,
VDD_DIG
Supply Voltage for Input, Analog, Control Blocks
VDDO_x
Supply Voltage for Output Drivers (Differential, LVCMOS). (1)
TA
Ambient Temperature
TJ
Junction Temperature
dVDD/dt
Maximum VDD Power-Up Ramp
WR
EEPROM number of writes
(1)
MIN
NOM
MAX
UNIT
3.135
3.3
3.465
V
1.7
1.8
3.465
1.7
2.5
3.465
1.7
3.3
3.465
–40
25
85
0.1
V
°C
125
°C
100
ms
100
The 3 different NOM values are the 3 typical test voltages throughout the data sheet.
8.4 Thermal Information
LMK03328
(2) (3) (4)
RHA (WQFN)
THERMAL METRIC (1)
UNIT
48 PINS
Airflow (LFM) 0
Airflow (LFM) 200
Airflow (LFM) 400
26.47
16.4
14.62
°C/W
RθJC(top) Junction-to-case (top) thermal resistance
16.57
n/a
n/a
°C/W
RθJB
Junction-to-board thermal resistance
6.84
n/a
n/a
°C/W
ψJT
Junction-to-top characterization parameter
0.23
0.31
0.47
°C/W
RθJA
(1)
(2)
(3)
(4)
Junction-to-ambient thermal resistance
For more information about traditional and new thermal metrics, see the Semiconductor and IC Package Thermal Metrics application
report.
The package thermal resistance is calculated on a 4-layer JEDEC board.
Package DAP connected to PCB GND plane with 16 thermal vias (0.3 mm diameter).
ψJB (junction to board) is used when the main heat flow is from the junction to the GND pad. See Layout for more information on
ensuring good system reliability and quality.
Submit Documentation Feedback
Copyright © 2015–2018, Texas Instruments Incorporated
Product Folder Links: LMK03328
7
�LMK03328
SNAS668D – AUGUST 2015 – REVISED APRIL 2018
www.ti.com
Thermal Information (continued)
LMK03328
(2) (3) (4)
RHA (WQFN)
THERMAL METRIC (1)
UNIT
48 PINS
Airflow (LFM) 0
Airflow (LFM) 200
Airflow (LFM) 400
Junction-to-board characterization parameter
4.02
3.86
3.84
°C/W
RθJC(bot) Junction-to-case (bottom) thermal resistance
1.06
n/a
n/a
°C/W
ψJB
8.5 Thermal Information
LMK03328
THERMAL METRIC (1)
RHA
(WQFN)
CONDITION
UNIT
48 PINS
RθJA
Junction-to-ambient thermal
resistance
10-layer 200 mm × 250 mm board, 36 thermal vias, Airflow = 0
LFM
10
°C/W
ψJB
Junction-to-board characterization
parameter
10-layer 200 mm × 250 mm board, 36 thermal vias, Airflow = 0
LFM
2.8
°C/W
(1)
For more information about traditional and new thermal metrics, see the Semiconductor and IC Package Thermal Metrics application
report.
8.6
Electrical Characteristics - Power Supply
VDD_IN / VDD_PLL1 / VDD_PLL2 / VDD_DIG = 3.3 V ± 5%, VDDO_x = 1.8 V ± 5%, 2.5 V ± 5%, 3.3 V ± 5%, TA = -40°C to
85°C (1) (2)
PARAMETER
Core Current Consumption,
per block
lDD
IDDO
(1)
(2)
8
TEST CONDITIONS
MIN
TYP
Primary input (differential or single-ended) - active
10
Secondary input (differential or single-ended) active
10
Secondary input (XO) - active
11
PLL doubler - active
4
PLL1 block – active
110
PLL2 block – active
110
Control block
88
Output Channel (Mux and Divider only) – active
50
AC-LVDS driver (one pair)
AC-coupled to 100 Ω differential
10
AC-LVPECL driver (one pair), AC-coupled to 100Ω differential
18
AC-CML driver (one pair), AC-coupled to 100-Ω
Output Current Consumption,
differential
per block
HCSL driver (one pair)
50 Ω to GND
16
MAX
UNIT
mA
mA
25
1.8-V LVCMOS driver (two outputs), 100 MHz, 5pF load (2)
10
3.3-V LVCMOS driver on STATUS0, STATUS1,
100 MHz, 5-pF load (2)
21
Refer to Parameter Measurement Information for relevant test conditions.
PTOTAL = PDC + PAC , where: PDC = 3.4 mA typical, PAC = C × V2 × fOUT
Submit Documentation Feedback
Copyright © 2015–2018, Texas Instruments Incorporated
Product Folder Links: LMK03328
�LMK03328
www.ti.com
SNAS668D – AUGUST 2015 – REVISED APRIL 2018
Electrical Characteristics - Power Supply (continued)
VDD_IN / VDD_PLL1 / VDD_PLL2 / VDD_DIG = 3.3 V ± 5%, VDDO_x = 1.8 V ± 5%, 2.5 V ± 5%, 3.3 V ± 5%, TA = -40°C to
85°C(1)(2)
PARAMETER
IDD-IN
IDD-PLL1
IDD-PLL2
IDD-DIG
IDDO_01
IDDO_23
IDDO_4
IDDO_5
IDDO_6
Current consumption, per
supply pin
IDDO_7
IDD-PD
Total Device, LMK03328
TEST CONDITIONS
HW_SW_CTRL = 0 V, GPIO[5:4] = float,
GPIO[3:2] = 0.9 V
Inputs:
- PRI input enabled, set to LVDS mode
- SEC input enabled, set to crystal mode
- Input MUX set to auto select
- Reference clock is 25 MHz
- R dividers set to 1
PLL1:
- M divider = 1
- Doubler enabled
- Icp = 6.4 mA
- Loop bandwidth = 400 kHz
- VCO Frequency = 5.1 GHz
- Feedback divider = 102
- Post divider = 8
PLL2:
- M divider = 1
- Doubler enabled
- Icp = 6.4 mA
- Loop bandwidth = 400 kHz
- VCO Frequency = 5 GHz
- Feedback divider = 100
- Post divider = 8
Outputs:
- OUT[0-1] = 312.5-MHz LVPECL
- OUT[2-3] = 156.25-MHz LVPECL
- OUT[4-5] = 212.5-MHz LVPECL
- OUT[6-7] = 106.25-MHz LVPECL
- STATUS1: Loss of lock PLL1
- STATUS0: Loss of lock PLL2
Power Supplies:
- VDD_IN, VDD_PLLx, VDD_DIG = 3.3 V
- VDDO_xx = 3.3 V
Power Down (PDN = 0)
MIN
TYP
MAX
61
78
mA
144
168
mA
110
130
mA
41
60
mA
92
108
mA
92
108
mA
60
75
mA
60
75
mA
60
75
mA
60
75
mA
30
50
mA
Submit Documentation Feedback
Copyright © 2015–2018, Texas Instruments Incorporated
Product Folder Links: LMK03328
UNIT
9
�LMK03328
SNAS668D – AUGUST 2015 – REVISED APRIL 2018
www.ti.com
8.7 Pullable Crystal Characteristics (SECREF_P, SECREF_N) (1) (2) (3) (4)
VDD_IN / VDD_PLL1 / VDD_PLL2 / VDD_DIG = 3.3 V ± 5%, VDDO_x = 1.8 V ± 5%, 2.5 V ± 5%, 3.3 V ± 5%, TA = –40°C to
85°C
PARAMETER
fXTAL
Crystal Frequency
ESR
Equivalent Series
Resistance
TEST CONDITIONS
MIN
Fundamental Mode
TYP
10
MAX
UNIT
52
MHz
fXTAL = 10 MHz to 16 MHz
60
fXTAL = 16 MHz to 30 MHz
50
fXTAL = 30 MHz to 52 MHz
30
Ω
CL
Load Capacitance
C0
Shunt Capacitance
C0/C1
Shunt capacitance to
motional capacitance ratio
PXTAL
Crystal Max Drive Level
CXO
On-Chip XO Input
Capacitance at SECREF_P
and SECREF_N
Trim
Trim Sensitivity
Con-chip-5p-
On-chip tunable capacitor
variation over VT across
crystal load of 5 pF
Frequency accuracy of crystal over temperature,
aging and initial accuracy ≤ ±25 ppm.
450
fF
On-chip tunable capacitor
variation over VT across
crystal load of 12 pF
Frequency accuracy of crystal over temperature,
aging and initial accuracy ≤ ±25 ppm.
1.5
pF
Pulling range
C0/C1 < 250
load
Con-chip-12pload
fPR
(1)
(2)
(3)
(4)
10
Recommended Crystal specifications
9
pF
2.1
pF
220
Single-ended, each pin referenced to GND
14
CL = 9 pF, fXTAL = 50 MHz
25
CL = 9 pF, fXTAL = 25 MHz
35
±50
250
300
µW
24
pF
ppm/pF
ppm
Parameter is specified by characterization and is not tested in production.
The crystal pullability ratio is considered in the case where the XO frequency margining option is enabled. The actual pull range
depends on the crystal pullability, as well as on-chip capacitance (Con-chip), device crystal oscillator input capacitance (CXO), PCB stray
capacitance (CPCB), and any installed on-board tuning capacitance (CTUNE). Trim Sensitivity or Pullability (ppm/pF), TS = C1 × 1e6 / [2 ×
(C0 + CL)2]. If the total external capacitance is less than the crystal CL, the crystal will oscillate at a higher frequency than the nominal
crystal frequency. If the total external capacitance is higher than CL, the crystal will oscillate at a lower frequency than nominal.
Using a crystal with higher ESR can degrade output phase noise and may impact crystal start-up.
Verified with crystals specified for a load capacitance of CL = 9 pF. PCB stray capacitance was measured to be 1 pF. Crystals tested:
19.2-MHz TXC (Part Number: 7M19272001), 19.44-MHz TXC (Part Number: 7M19472001), 25-MHz TXC (Part Number: 7M25072001),
38.88-MHz TXC (Part Number: 7M38872001), 49.152-MHz TXC (Part Number: 7M49172001), 50-MHz TXC (Part Number:
7M50072001).
Submit Documentation Feedback
Copyright © 2015–2018, Texas Instruments Incorporated
Product Folder Links: LMK03328
�LMK03328
www.ti.com
SNAS668D – AUGUST 2015 – REVISED APRIL 2018
8.8 Non-Pullable Crystal Characteristics (SECREF_P, SECREF_N) (1) (2) (3)
VDD_IN / VDD_PLL1 / VDD_PLL2 / VDD_DIG = 3.3 V ± 5%, VDDO_x = 1.8 V ± 5%, 2.5 V ± 5%, 3.3 V ± 5%, TA = –40°C to
85°C
PARAMETER
TEST CONDITIONS
MIN
Fundamental Mode
TYP
UNIT
52
MHz
Crystal Frequency
fXTAL = 10 MHz to 16 MHz
60
ESR
Equivalent Series Resistance fXTAL = 16 MHz to 30 MHz
50
fXTAL = 30 MHz to 52 MHz
30
PXTAL
Crystal Max Drive Level
CXO
On-Chip XO Input
Capacitance at Xi and Xo
Single-ended, each pin referenced to GND
Con-chip-5p-
On-chip tunable capacitor
variation over VT across
crystal load of 5 pF
On-chip tunable capacitor
variation over VT across
crystal load of 12 pF
load
Con-chip-12pload
(1)
(2)
(3)
10
MAX
fXTAL
Ω
300
µW
24
pF
Frequency accuracy of crystal over temperature,
aging and initial accuracy ≤ ±25 ppm.
450
fF
Frequency accuracy of crystal over temperature,
aging and initial accuracy ≤ ±25 ppm.
1.5
pF
14
Parameter is specified by characterization and is not tested in production.
Using a crystal with higher ESR can degrade XO phase noise and may impact crystal start-up.
Verified with crystals specified for a load capacitance of CL = 9 pF. PCB stray capacitance was measured to be 1 pF. Crystal tested: 25MHz TXC (Part Number: 7M25072001).
8.9 Clock Input Characteristics (PRIREF_P/PRIREF_N, SECREF_P/SECREF_N) (1)
VDD_IN / VDD_PLL1 / VDD_PLL2 / VDD_DIG = 3.3 V ± 5%, VDDO_x = 1.8 V ± 5%, 2.5 V ± 5%, 3.3 V ± 5%, TA = –40°C to
85°C
PARAMETER
fCLK
TEST CONDITIONS
MIN
Input Frequency Range
MAX
UNIT
1
TYP
300
MHz
(2)
LVCMOS input high voltage
PRI_REF
1.4
VDD_IN
V
VIH (2)
LVCMOS input high voltage
SEC_REF
1.4
2.6
V
VIL (2)
LVCMOS input low voltage
0
0.5
V
VID,DIFF,PP
Input Voltage Swing,
Differential peak-peak
0.2
2
V
VICM
Input Common Mode Voltage Differential input
0.1
2
dV/dt (3)
Input Edge Slew Rate (20%
to 80%)
0.5
IDC (3)
Input Clock Duty Cycle
IIN
Input Leakage Current
CIN
Input Capacitance
VIH
(1)
(2)
(3)
Differential input (where VCLK – VnCLK = |VID| × 2)
Differential input, peak-peak
Single-ended input, non-driven input tied to GND
V
V/ns
0.5
V/ns
40%
60%
–100
100
Single-ended, each pin
µA
2
pF
Refer to Parameter Measurement Information for relevant test conditions.
Slew rate detect circuitry should be used when VIH < 1.7 V and VIL > 0.2 V. VIH/VIL detect circuitry should be used when VIH < 1.5 V
and VIL > 0.4 V. Refer to REFDETCTL Register; R25 for relevant register information.
Ensured by characterization.
8.10 VCO Characteristics
VDD_IN / VDD_PLL1 / VDD_PLL2 / VDD_DIG = 3.3 V ± 5%, VDDO_x = 1.8 V ± 5%, 2.5 V ± 5%, 3.3 V ± 5%, TA = –40°C to
85°C
PARAMETER
fVCO
Frequency Range
KVCO
VCO Gain
TEST CONDITIONS
MIN
TYP
4.8
MAX
5.4
55
UNIT
GHz
MHz/V
Submit Documentation Feedback
Copyright © 2015–2018, Texas Instruments Incorporated
Product Folder Links: LMK03328
11
�LMK03328
SNAS668D – AUGUST 2015 – REVISED APRIL 2018
www.ti.com
8.11 PLL Characteristics
VDD_IN / VDD_PLL1 / VDD_PLL2 / VDD_DIG = 3.3 V ± 5%, VDDO_x = 1.8 V ± 5%, 2.5 V ± 5%, 3.3 V ± 5%, TA = –40°C to
85°C
PARAMETER
fPD
TEST CONDITIONS
Phase Detector Frequency
PLL Figure of Merit
PN10kHz
PLL 1/f noise at 10 kHz
offset normalized to 1
GHz (2)
ICP-HIZ
Charge Pump Leakage in
Hi-Z Mode
TYP
1
(1)
PN1Hz
(1)
(2)
MIN
Icp = 6.4 mA, 25 MHz fPD
MAX
UNIT
150
MHz
–231
dBc/Hz
–136
dBc/Hz
55
nA
PLL Flat Phase Noise = PN1 Hz + 20 × log(N) + 10 × log(fPD), with wide loop bandwidth and away from1/f noise region.
Phase Noise normalized to 1 GHz. PLL 1/f Phase Noise = PN10 kHz + 20 × log(fOUT/1 GHz) – 10 × log(offset/10 kHz)
8.12 1.8-V LVCMOS Output Characteristics (OUT[7:0]) (1)
VDD_IN / VDD_PLL1 / VDD_PLL2 / VDD_DIG = 3.3 V ± 5%, VDDO_x = 1.8 V ± 5%, 2.5 V ± 5%, 3.3 V ± 5%, TA = –40°C to
85°C, outputs loaded with 2 pF to GND
PARAMETER
TEST CONDITIONS
MIN
TYP
UNIT
200
MHz
Output Frequency
VOH (2)
Output High Voltage
IOH = 1 mA
VOL
Output Low Voltage
IOL = 1 mA
IOH
Output High Current
21
mA
IOL
Output Low Current
–21
mA
tR/tF
Output Rise/Fall Time
20% to 80%
tSKEW (3)
Output-to-output skew
same divide value
100
ps
tSKEW (3)
Output-to-output skew
LVCMOS-to-differential; same divide value
1.5
ns
tPROP-
IN-to-OUT Propagation
Delay
PLL Bypass
PN-Floor
Output Phase Noise Floor
(fOFFSET > 10 MHz)
66.66 MHz
ODC (3)
Output Duty Cycle
ROUT
Output Impedance
CMOS
(1)
(2)
(3)
1
MAX
fOUT
1.35
V
0.35
250
ps
1
ns
–155
45%
V
dBc/Hz
55%
50
Ω
Refer to Parameter Measurement Information for relevant test conditions.
The 1.8-V LVCMOS driver supports rail-to-rail output swing only when powered from VDDO = 1.8 V +/- 5% (recommended VDDO for
use with LVCMOS output format). VOH level is NOT rail-to-rail for VDDO = 2.5 V or 3.3 V due to the dropout voltage of the output
channel’s internal LDO regulator.
Ensured by characterization.
8.13 LVCMOS Output Characteristics (STATUS[1:0] (1)
VDD_IN / VDD_PLL1 / VDD_PLL2 / VDD_DIG = 3.3 V ± 5%, VDD_O = 1.8 V ± 5%, 2.5 V ± 5%, 3.3 V ± 5%, TA = –40°C to
85°C, outputs loaded with 2 pF to GND
PARAMETER
TEST CONDITIONS
MIN
TYP
UNIT
200
MHz
fOUT
Output Frequency
VOH
Output High Voltage
IOH = 1 mA
VOL
Output Low Voltage
IOL = 1 mA
IOH
Output High Current
33
mA
IOL
Output Low Current
–33
mA
tR/tF (2)
Output Rise/Fall Time
20% to 80%, R49[3-2], R49[1:0] = 0x2
2.1
ns
20% to 80%, R49[3-2], R49[1-0] = 0x0
0.35
ns
PN-Floor
Output Phase Noise Floor
(fOFFSET > 10 MHz)
66.66 MHz
–148
dBc/Hz
(1)
(2)
12
3.75
MAX
2.5
V
0.6
V
Refer to Parameter Measurement Information for relevant test conditions.
Ensured by characterization.
Submit Documentation Feedback
Copyright © 2015–2018, Texas Instruments Incorporated
Product Folder Links: LMK03328
�LMK03328
www.ti.com
SNAS668D – AUGUST 2015 – REVISED APRIL 2018
LVCMOS Output Characteristics (STATUS[1:0](1) (continued)
VDD_IN / VDD_PLL1 / VDD_PLL2 / VDD_DIG = 3.3 V ± 5%, VDD_O = 1.8 V ± 5%, 2.5 V ± 5%, 3.3 V ± 5%, TA = –40°C to
85°C, outputs loaded with 2 pF to GND
PARAMETER
ODC (2)
Output Duty Cycle
ROUT
Output Impedance
TEST CONDITIONS
MIN
TYP
45%
MAX
UNIT
55%
50
Ω
8.14 Open-Drain Output Characteristics (STATUS[1:0])
VDD_IN / VDD_PLL1 / VDD_PLL2 / VDD_DIG = 3.3 V ± 5%, VDDO_x = 1.8 V ± 5%, 2.5 V ± 5%, 3.3 V ± 5%, TA = –40°C to
85°C
PARAMETER
VOL
TEST CONDITIONS
MIN
TYP
Output Low Voltage
MAX
UNIT
0.6
V
8.15 AC-LVPECL Output Characteristics (1)
VDD_IN / VDD_PLL1 / VDD_PLL2 / VDD_DIG = 3.3 V ± 5%, VDDO_x = 1.8 V ± 5%, 2.5 V ± 5%, 3.3 V ± 5%, TA = –40°C to
85°C, output pair AC-coupled to 100-Ω differential load
PARAMETER
TEST CONDITIONS
MIN
TYP
fOUT
Output Frequency (2)
VOD
Output Voltage Swing
VOUT-PP
Differential Output Peak-toPeak Swing
VOS
Output Common Mode
tSKEW (3)
Output-to-output skew
tPROP-DIFF
IN-to-OUT Propagation Delay PLL Bypass
400
tR/tF (3)
Output Rise/Fall Time
175
1
500
800
ODC
(1)
(2)
(3)
(3)
Output Phase Noise Floor
(fOFFSET > 10 MHz)
UNIT
1000
MHz
1000
mV
2×
|VOD|
300
LVPECL-to-LVPECL; same divide value
20% to 80%, < 300 MHz
±100 mV around center point, > 300 MHz
PN-Floor
MAX
156.25 MHz
V
700
mV
60
ps
ps
300
ps
200
ps
-164
Output Duty Cycle
45%
dBc/Hz
55%
Refer to Parameter Measurement Information for relevant test conditions.
An output frequency over fOUT max spec is possible, but output swing may be less than VOD min spec.
Ensured by characterization.
8.16 AC-LVDS Output Characteristics (1)
VDD_IN / VDD_PLL1 / VDD_PLL2 / VDD_DIG = 3.3 V ± 5%, VDDO_x = 1.8 V ± 5%, 2.5 V ± 5%, 3.3 V ± 5%, TA = –40°C to
85°C, output pair AC-coupled to 100-Ω differential load
PARAMETER
TEST CONDITIONS
MIN
TYP
fOUT
Output Frequency (2)
VOD
Output Voltage Swing
VOUT-PP
Differential Output Peak-toPeak Swing
VOS
Output Common Mode
tSKEW (2)
Output-to-output skew
LVDS-to-LVDS; same divide value
tPROP-DIFF
IN-to-OUT Propagation
Delay
PLL Bypass
400
tR/tF (3)
Output Rise/Fall Time
20% to 80%, < 300 MHz
200
1
250
400
PN-Floor
(1)
(2)
(3)
UNIT
800
MHz
450
mV
2 × |VOD|
150
±100 mV around center point, > 300 MHz
Output Phase Noise Floor
(fOFFSET > 10 MHz)
MAX
156.25 MHz
–160
V
350
mV
60
ps
ps
300
ps
200
ps
dBc/Hz
Refer to Parameter Measurement Information for relevant test conditions.
An output frequency over fOUT max spec is possible, but output swing may be less than VOD min spec.
Ensured by characterization.
Submit Documentation Feedback
Copyright © 2015–2018, Texas Instruments Incorporated
Product Folder Links: LMK03328
13
�LMK03328
SNAS668D – AUGUST 2015 – REVISED APRIL 2018
www.ti.com
AC-LVDS Output Characteristics(1) (continued)
VDD_IN / VDD_PLL1 / VDD_PLL2 / VDD_DIG = 3.3 V ± 5%, VDDO_x = 1.8 V ± 5%, 2.5 V ± 5%, 3.3 V ± 5%, TA = –40°C to
85°C, output pair AC-coupled to 100-Ω differential load
PARAMETER
ODC (3)
14
TEST CONDITIONS
Output Duty Cycle
MIN
45%
Submit Documentation Feedback
TYP
MAX
UNIT
55%
Copyright © 2015–2018, Texas Instruments Incorporated
Product Folder Links: LMK03328
�LMK03328
www.ti.com
SNAS668D – AUGUST 2015 – REVISED APRIL 2018
8.17 AC-CML Output Characteristics (1)
VDD_IN / VDD_PLL1 / VDD_PLL2 / VDD_DIG = 3.3 V ± 5%, VDDO_x = 1.8 V ± 5%, 2.5 V ± 5%, 3.3 V ± 5%, TA = –40°C to
85°C, output pair AC-coupled to 100-Ω differential load
PARAMETER
TEST CONDITIONS
fOUT
Output Frequency (2)
VOD
Output Voltage Swing
VSS
Differential Output Peak-toPeak Swing
VOS
tSKEW
TYP
1
400
600
250
Output-to-output skew
CML-to-CML; same divide value
tPROP-DIFF
IN-to-OUT Propagation Delay
PLL Bypass
400
tR/tF (3)
Output Rise/Fall Time
20% to 80%, < 300 MHz
190
PN-Floor
Output Phase Noise Floor
(fOFFSET > 10 MHz)
ODC (3)
Output Duty Cycle
±100 mV around center point, > 300 MHz
(1)
(2)
(3)
MAX
UNIT
1000
MHz
800
mV
2×
|VOD|
Output Common Mode
(3)
MIN
156.25 MHz
V
550
mV
60
ps
ps
300
ps
200
ps
–160
45%
dBc/Hz
55%
Refer to Parameter Measurement Information for relevant test conditions.
An output frequency over fOUT max spec is possible, but output swing may be less than VOD min spec.
Ensured by characterization.
8.18 HCSL Output Characteristics (1)
VDD_IN / VDD_PLL1 / VDD_PLL2 / VDD_DIG = 3.3 V ± 5%, VDDO_x = 1.8 V ± 5%, 2.5 V ± 5%, 3.3 V ± 5%, TA = –40°C to
85°C, outputs with 50 Ω || 2 pF to GND.
PARAMETER
MAX
UNIT
1
400
MHz
Output High Voltage (2)
660
850
mV
Output Low Voltage (2)
–150
150
mV
250
550
mV
0
140
fOUT
Output Frequency
VOH
VOL
VCROSS
Absolute Crossing Voltage
VCROSS-
Variation of VCROSS (3)
TEST CONDITIONS
(3)
MIN
TYP
mV
DELTA
tSKEW (4)
Output-to-output skew
same divide value
tPROP-DIFF
IN-to-OUT Propagation Delay
PLL Bypass
dV/dt (4)
Slew Rate (2)
PN-Floor
Output Phase Noise Floor
(fOFFSET > 10 MHz)
ODC
(1)
(2)
(3)
(4)
(4)
100
ps
400
1
100 MHz
ps
4
–158
Output Duty Cycle
45%
V/ns
dBc/Hz
55%
Refer to Parameter Measurement Information for relevant test conditions.
Measured from -150 mV to +150 mV on the differential waveform (OUT minus nOUT) with the 300 mVpp measurement window
centered on the differential zero crossing.
Ensured by design.
Ensured by characterization.
8.19 Power-On/Reset Characteristics
VDD_IN / VDD_PLL1 / VDD_PLL2 / VDD_DIG = 3.3 V ± 5%, VDDO_x = 1.8 V ± 5%, 2.5 V ± 5%, 3.3 V ± 5%, TA = –40°C to
85°C
PARAMETER
VTHRESH
Threshold Voltage
VDROOP
Allowable Voltage Droop
tSTART-XTAL
Start-Up Time with 25-MHz
XTAL
tSTART-CLK
Start-Up Time with 25-MHz
Clock Input
TEST CONDITIONS
MIN
MAX
UNIT
2.95
V
0.1
V
Measured from time of supply reaching 3.135 V to
time of output toggling
10
ms
Measured from time of supply reaching 3.135 V to
time of output toggling
10
ms
2.72
TYP
Submit Documentation Feedback
Copyright © 2015–2018, Texas Instruments Incorporated
Product Folder Links: LMK03328
15
�LMK03328
SNAS668D – AUGUST 2015 – REVISED APRIL 2018
www.ti.com
8.20 2-Level Logic Input Characteristics (HW_SW_CTRL, PDN, GPIO[5:0])
VDD_IN / VDD_PLL1 / VDD_PLL2 / VDD_DIG = 3.3 V ± 5%, VDDO_x = 1.8 V ± 5%, 2.5 V ± 5%, 3.3 V ± 5%, TA = –40°C to
85°C
PARAMETER
TEST CONDITIONS
MIN
VIH
Input High Voltage
VIL
Input Low Voltage
IIH
Input High Current
VIH = VDD_DIG
–40
IIL
Input Low Current
VIL = GND
–40
CIN
Input Capacitance
TYP
MAX
1.2
UNIT
V
0.6
V
40
µA
40
µA
2
pF
8.21 3-Level Logic Input Characteristics (REFSEL, GPIO[3:1])
VDD_IN / VDD_PLL1 / VDD_PLL2 / VDD_DIG = 3.3 V ± 5%, VDDO_x = 1.8 V ± 5%, 2.5 V ± 5%, 3.3 V ± 5%, TA = –40°C to
85°C
PARAMETER
TEST CONDITIONS
MIN
TYP
MAX
1.4
UNIT
VIH
Input High Voltage
VIM
Input Mid Voltage
V
VIL
Input Low Voltage
0.4
V
IIH
Input High Current
VIH = VDD_DIG
–40
40
µA
IIL
Input Low Current
VIL = GND
–40
40
µA
CIN
Input Capacitance
0.9
V
2
pF
8.22 Analog Input Characteristics (GPIO[5])
VDD_IN / VDD_PLL1 / VDD_PLL2 / VDD_DIG = 3.3 V ± 5%, VDDO_x = 1.8 V ± 5%, 2.5 V ± 5%, 3.3 V ± 5%, TA = –40°C to
85°C, pulldown resistor on GPIO[5] to GND as specified below, HW_SW_CTRL = 0
PARAMETER
Vctrl
VIN_XOOF
FSET_STEP
tDELAY
16
TEST CONDITIONS
MIN
Control voltage range
Input Voltage for XO
Frequency Offset Step
Selection on GPIO[5]
TYP
0
MAX
VDD_DIG
UNIT
V
50 Ω to GND: Selects on-chip capacitive load set
by R88 and R89
50
mV
2.32 kΩ to GND: Selects on-chip capacitive load
set by R90 and R91
200
mV
5.62 kΩ to GND: Selects on-chip capacitive load
set by R92 and R93
400
mV
10.5 kΩ to GND: Selects on-chip capacitive load
set by R94 and R95
600
mV
18.7 kΩ to GND: Selects on-chip capacitive load
set by R96 and R97
800
mV
34.8 kΩ to GND: Selects on-chip capacitive load
set by R98 and R99
1000
mV
84.5 kΩ to GND: Selects on-chip capacitive load
set by R100 and R101
1200
mV
Left floating: Selects on-chip capacitive load set
by R102 and R103
1400
mV
100
ms
Delay between voltage
changes on GPIO[5] pin
Submit Documentation Feedback
Copyright © 2015–2018, Texas Instruments Incorporated
Product Folder Links: LMK03328
�LMK03328
www.ti.com
SNAS668D – AUGUST 2015 – REVISED APRIL 2018
8.23 I2C-Compatible Interface Characteristics (SDA, SCL) (1) (2)
VDD_IN / VDD_PLL1 / VDD_PLL2 / VDD_DIG = 3.3 V ± 5%, VDDO_x = 1.8 V ± 5%, 2.5 V ± 5%, 3.3 V ± 5%, TA = –40°C to
85°C
PARAMETER
TEST CONDITIONS
MIN
TYP
MAX
UNIT
VIH
Input High Voltage
VIL
Input Low Voltage
IIH
Input Leakage
CIN
Input Capacitance
COUT
Input Capacitance
VOL
Output Low Voltage
fSCL
I2C Clock Rate
tSU_STA
START Condition Setup Time
SCL high before SDA low
0.6
µs
tH_STA
START Condition Hold Time
SCL low after SDA low
0.6
µs
tPH_STA
SCL Pulse Width High
0.6
µs
tPL_STA
SCL Pulse Width Low
1.3
µs
tH_SDA
SDA Hold Time
tSU_SDA
SDA Setup Time
tR_IN / tF_IN
SCL/SDA Input Rise and Fall
Time
tF_OUT
SDA Output Fall Time
tSU_STOP
STOP Condition Setup Time
0.6
µs
tBUS
Bus Free Time between STOP
and START
1.3
µs
(1)
(2)
1.2
V
–40
0.6
V
40
µA
2
pF
400
IOL = 3 mA
100
SDA valid after SCL low
0
pF
0.6
V
400
kHz
0.9
µs
115
ns
300
CBUS = 10 pF to 400 pF
ns
250
ns
Total capacitive load for each bus line ≤ 400 pF.
Ensured by design.
8.24 Typical 156.25-MHz, Closed-Loop Output Phase Noise Characteristics (1) (2)
VDD_IN / VDD_PLL1 / VDD_PLL2 / VDD_DIG = 3.3 V, VDDO_x = 1.8 V, 2.5 V, 3.3 V, TA = 25°C, Reference Input = 50 MHz,
PFD = 100 MHz, Integer-N PLL bandwidth = 400 kHz, VCO Frequency = 5 GHz, Post Divider = 8, Output Divider = 4, Output
Type = AC-LVPECL/AC-LVDS/AC-CML/HCSL/LVCMOS
PARAMETER
OUTPUT TYPE
UNIT
phn10k
Phase noise at 10-kHz
offset
–143
–142
–142
–141
–139
dBc/Hz
phn50k
Phase noise at 50-kHz
offset
–143.5
–143
–143
–142
–141
dBc/Hz
phn100k
Phase noise at 100-kHz
offset
–144
–144
–144
–144
–143
dBc/Hz
phn500k
Phase noise at 500-kHz
offset
–146
–146
–146
–146
–145
dBc/Hz
phn1M
Phase noise at 1-MHz
offset
–149.5
–149
–149
–149
–149
dBc/Hz
phn5M
Phase noise at 5-MHz
offset
–160.5
–160
–160
–159
–158
dBc/Hz
phn20M
Phase noise at 20-MHz
offset
–164.5
–164
–164
–161
–159
dBc/Hz
RJ
Random Jitter integrated
from 10-kHz to 20-MHz
offsets
96
99
99
107
119
fs, RMS
(1)
(2)
Refer to Parameter Measurement Information for relevant test conditions.
Jitter specifications apply for differential output formats with low-jitter differential input clock or crystal input. Phase jitter measured with
Agilent E5052 signal source analyzer using a differential-to-single-ended converter (balun or buffer).
Submit Documentation Feedback
Copyright © 2015–2018, Texas Instruments Incorporated
Product Folder Links: LMK03328
17
�LMK03328
SNAS668D – AUGUST 2015 – REVISED APRIL 2018
www.ti.com
8.25 Typical 161.1328125-MHz, Closed-Loop Output Phase Noise Characteristics (1) (2)
VDD_IN / VDD_PLL1 / VDD_PLL2 / VDD_DIG = 3.3 V, VDDO_x = 1.8 V, 2.5 V, 3.3 V, TA = 25°C, Reference Input = 50 MHz,
PFD = 100 MHz, Fractional-N PLL bandwidth = 400 kHz, VCO Frequency = 5.15625 GHz, Post Divider = 8, Output Divider =
4, Output Type = AC-LVPECL/AC-LVDS/AC-CML/HCSL/LVCMOS
PARAMETER
OUTPUT TYPE
UNIT
phn10k
Phase noise at 10-kHz
offset
–136
–136
–136
–135
–135
dBc/Hz
phn50k
Phase noise at 50-kHz
offset
–139
–139
–139
–139
–139
dBc/Hz
phn100k
Phase noise at 100-kHz
offset
–140
–140
–140
–140
–140
dBc/Hz
phn500k
Phase noise at 500-kHz
offset
–142
–142
–142
–142
–142
dBc/Hz
phn1M
Phase noise at 1-MHz
offset
–150
–150
–150
–149
–149
dBc/Hz
phn5M
Phase noise at 5-MHz
offset
–160.5
–160
–160
–159
–158
dBc/Hz
phn20M
Phase noise at 20-MHz
offset
–164.5
–164
–164
–161
–159
dBc/Hz
RJ
Random Jitter integrated
from 10-kHz to 20-MHz
offsets
120
122
122
130
136
fs, RMS
(1)
(2)
Refer to Parameter Measurement Information for relevant test conditions.
Jitter specifications apply for differential output formats with low-jitter differential input clock or crystal input. Phase jitter measured with
Agilent E5052 signal source analyzer using a differential-to-single-ended converter (balun or buffer).
8.26 Closed-Loop Output Jitter Characteristics
VDD_IN / VDD_PLL1 / VDD_PLL2 / VDD_DIG= 3.3 V ± 5%, VDDO_x = 1.8 V ± 5%, 2.5 V ± 5%, 3.3 V ± 5%, TA = –40°C to
85°C, Integer-N PLL with 4.8-GHz, 4.9152-GHz, 4.97664-GHz, 5-GHz or 5.1-GHz VCO, 400 kHz PLL bandwidth and doubler
enabled or disabled, Fractional-N PLL with 4.8-GHz, 4.9152-GHz, 4.944-GHz, 4.97664-GHz, 5-GHz, 5.15-GHz or 5.15625GHz VCO, 400-kHz bandwidth and doubler enabled or disabled, 1.8-V or 3.3-V LVCMOS output load of 2 pF to GND, ACLVPECL/AC-LVDS/CML output pair AC-coupled to 100-Ω differential load, HCSL outputs with 50 Ω || 2 pF to GND. (1) (2) (3) (4)
TYP
MAX
UNIT
RJ
RMS Phase Jitter
(12 kHz – 20 MHz)
(1 kHz – 5 MHz)
PARAMETER
19.2-MHz, 25-MHz, 27-MHz, 38.88-MHz
crystal, Integer-N PLL1 or PLL2, fOUT≥ 100
MHz, all differential output types
120
200
fs, RMS
RJ
RMS Phase Jitter
(12 kHz – 20 MHz)
(1 kHz – 5 MHz)
19.2-MHz, 25-MHz, 27-MHz, 38.88-MHz
crystal, Fractional-N PLL1 or PLL2, fOUT ≥
100 MHz, all differential output types
200
350
fs, RMS
RJ
RMS Phase Jitter
(12 kHz – 20 MHz)
(1 kHz – 5 MHz)
50-MHz crystal, Integer-N PLL1 or PLL2,
fOUT = 156.25 MHz, all differential output
types
100
150
fs, RMS
RJ
RMS Phase Jitter
(12 kHz – 20 MHz)
(1 kHz – 5 MHz)
50-MHz crystal, Fractional-N PLL1 or
PLL2, fOUT = 155.52 MHz, all differential
output types
140
210
fs, RMS
RJ
RMS Phase Jitter
(12 kHz – 20 MHz)
(12 kHz – 5 MHz)
fOUT ≥ 10 MHz, 1.8-V or 3.3-V LVCMOS
output, Integer-N or Fractional-N PLL1 or
PLL2
800
fs, RMS
(1)
(2)
(3)
(4)
18
TEST CONDITIONS
MIN
Phase jitter measured with Agilent E5052 source signal analyzer using a differential-to single-ended converter (balun or buffer) for
differential outputs.
Verified with crystals specified for a load capacitance of CL = 9 pF. PCB stray capacitance was measured to be 1 pF. Crystals tested:
19.44 MHz TXC (Part Number: 7M19472001), 25 MHz TXC (Part Number: 7M25072001), 38.88 MHz TXC (Part Number: 7M38872001).
Refer to Parameter Measurement Information for relevant test conditions.
For output frequency < 40 MHz, integration band for RMS phase jitter is 12 kHz – 5 MHz.
Submit Documentation Feedback
Copyright © 2015–2018, Texas Instruments Incorporated
Product Folder Links: LMK03328
�LMK03328
www.ti.com
SNAS668D – AUGUST 2015 – REVISED APRIL 2018
8.27 PCIe Clock Output Jitter
VDD_IN / VDD_PLL1 / VDD_PLL2 / VDD_DIG = 3.3 V, VDDO_x = 1.8 V, 2.5 V, 3.3 V, TA = 25°C, Reference Input = 25-MHz
crystal, OUT = 100-MHz HCSL
TYP
PCle Spec
RJGEN3
PCIe Gen 3 Common Clock
PARAMETER
PCIe Gen 3 transfer function applied (1)
25
1000
fs RMS
RJGEN4
PCIe Gen 4 Common Clock
PCIe Gen 4 transfer function applied (1)
25
500
fs RMS
(1)
TEST CONDITIONS
UNIT
Excludes oscilloscope sampling noise
8.28 Typical Power Supply Noise Rejection Characteristics (1)
VDD_IN / VDD_PLL1 / VDD_PLL2 / VDD_DIG = 3.3 V, VDDO_x = 3.3 V, TA = 25°C, Reference Input = 50 MHz, PFD = 100
MHz, PLL bandwidth = 400 kHz, VCO Frequency = 5 GHz, Post Divider = 8, Output Divider = 4, AC-LVPECL/AC-LVDS/CML
output pair AC-coupled to 100-Ω differential load, HCSL outputs with 50 Ω || 2 pF to GND, sinusoidal noise injected in either
of the following supply nodes: VDD_IN, VDD_PLL, VDD_DIG or VDDO_x.
PARAMETER
50 mV RIPPLE ON SUPPLY TYPE
UNIT
PSNR50k
50-kHz spur on 156.25-MHz
output
–86
–87
–87
–110
–103
dBc
PSNR100k
100-kHz spur on 156.25MHz output
–85
–86
–86
–110
–98
dBc
PSNR500k
500-kHz spur on 156.25MHz output
–87
–89
–89
–110
–97
dBc
PSNR1M
1-MHz spur on 156.25-MHz
output
–91
–92
–92
–110
–94
dBc
(1)
Refer to Parameter Measurement Information for relevant test conditions.
8.29 Typical Power Supply Noise Rejection Characteristics (1)
VDD_IN / VDD_PLL1 / VDD_PLL2 / VDD_DIG= 3.3 V, VDDO_x = 1.8 V, TA = 25°C, Reference Input = 50 MHz, PFD = 100
MHz, PLL bandwidth = 400 kHz, VCO Frequency = 5 GHz, Post Divider = 8, Output Divider = 4, AC-LVPECL/AC-LVDS/CML
output pair AC-coupled to 100-Ω differential load, HCSL outputs with 50 Ω || 2 pF to GND, sinusoidal noise injected in
VDDO_x.
PARAMETER
50 mV RIPPLE ON SUPPLY TYPE
UNIT
PSNR50k
50-kHz spur on 156.25-MHz
output
n/a
n/a
n/a
n/a
–93
dBc
PSNR100k
100-kHz spur on 156.25MHz output
n/a
n/a
n/a
n/a
–88
dBc
PSNR500k
500-kHz spur on 156.25MHz output
n/a
n/a
n/a
n/a
–78
dBc
PSNR1M
1-MHz spur on 156.25-MHz
output
n/a
n/a
n/a
n/a
–74
dBc
(1)
Refer to Parameter Measurement Information for relevant test conditions.
Submit Documentation Feedback
Copyright © 2015–2018, Texas Instruments Incorporated
Product Folder Links: LMK03328
19
�LMK03328
SNAS668D – AUGUST 2015 – REVISED APRIL 2018
www.ti.com
8.30 Typical Closed-Loop Output Spur Characteristics (1)
VDD_IN / VDD_PLL1 / VDD_PLL2 / VDD_DIG= 3.3V, VDDO_x = 1.8 V, 2.5 V, 3.3 V, TA = –40°C to 85°C, 50-MHz reference
input, 156.25-MHz or 125-MHz output with VCO Frequency = 5 GHz, Integer-N PLL, PLL Bandwidth = 400 kHz, Post Divider
= 8, Output Divider = 4 or 5, 161.1328125-MHz output with VCO Frequency = 5.15625 GHz, Fractional-N PLL, PLL
Bandwidth = 400 kHz, Post Divider = 8, Output Divider = 4, LVCMOS output load of 2 pF to GND, AC-LVPECL/AC-LVDS/ACCML output pair AC-coupled to 100-Ω differential load, HCSL outputs with 50 Ω || 2 pF to GND
PARAMETER
CONDITION
OUTPUT TYPE
UNIT
PSPUR-PFD
PFD/Reference Clock
Spurs
156.25 ± 78.125 MHz
–77
–74
–76
–73
–75
dBc
PSPUR-PFD
PFD/Reference Clock
Spurs
161.1328125 ±
80.56640625 MHz
–80
–77
–79
–77
–82
dBc
PSPUR-
Largest Fractional PLL
Spurs
161.1328125 ±
80.56640625 MHz
–74
–73
–76
–73
–74
dBc
PSPUR-OUT
fVICTIM = 156.25 MHz
Output Channel-toOUT4, fAGGR = 125
channel Isolation (PLL1
MHz OUT5, ACoperational)
LVPECL aggressor
–73
–70
–70
–67
–74
dBc
PSPUR-OUT
fVICTIM = 156.25 MHz
Output Channel-toOUT4, fAGGR = 125
channel Isolation (PLL1
MHz OUT5, AC-LVDS
operational)
aggressor
–76
–74
–75
–71
–79
dBc
PSPUR-OUT
fVICTIM = 156.25 MHz
Output Channel-toOUT4, fAGGR = 125
channel Isolation (PLL1
MHz OUT5, HCSL
operational)
aggressor
–78
–74
–75
–72
–77
dBc
PSPUR-OUT
fVICTIM = 156.25 MHz
Output Channel-toOUT4, fAGGR = 125
channel Isolation (PLL1
MHz OUT5, LVCMOS
operational)
aggressor
–72
–70
–71
–66
–73
dBc
PSPUR-OUT
Output Channel-tochannel Isolation (Both
PLLs operational)
fVICTIM = 161.1328125
MHz OUT4, fAGGR =
156.25 MHz OUT5, ACLVPECL aggressor
–69
–65
–67
–63
–73
dBc
PSPUR-OUT
Output Channel-tochannel Isolation (Both
PLLs operational)
fVICTIM = 161.1328125
MHz OUT4, fAGGR =
156.25 MHz OUT5, ACLVDS aggressor
–73
–71
–72
–69
–82
dBc
PSPUR-OUT
Output Channel-tochannel Isolation (Both
PLLs operational)
fVICTIM = 161.1328125
MHz OUT4, fAGGR =
156.25 MHz OUT5,
HCSL aggressor
–79
–75
–76
–69
–75
dBc
PSPUR-OUT
Output Channel-tochannel Isolation (Both
PLLs operational)
fVICTIM = 161.1328125
MHz OUT4, fAGGR =
156.25 MHz OUT5,
LVCMOS aggressor
–71
–69
–69
65
–74
dBc
FRAC
(1)
20
Refer to Parameter Measurement Information for relevant test conditions.
Submit Documentation Feedback
Copyright © 2015–2018, Texas Instruments Incorporated
Product Folder Links: LMK03328
�LMK03328
www.ti.com
SNAS668D – AUGUST 2015 – REVISED APRIL 2018
±228.5
±110
±229.0
±120
Phase Noise (dBc/Hz)
PLL Figure of Merit (dBc/Hz)
8.31 Typical Characteristics
±229.5
±230.0
±230.5
±231.0
±150
±170
0
1
2
3
4
5
Input Slew Rate (V/ns)
6
100
1000
±120
±120
Phase Noise (dBc/Hz)
±110
±140
±150
100000
1000000 10000000
D004
Figure 2. Closed-Loop Phase Noise of AC-LVPECL Outputs
at 156.25 MHz With PLL Bandwidth at 1 MHz, Integer N PLL,
50-MHz Crystal Input, 5-GHz VCO Frequency, Post Divider =
8, Output Divider = 4
±110
±130
10000
Offset Frequency (Hz)
D003
Figure 1. PLL Figure of Merit (FOM) vs Slew Rate
Phase Noise (dBc/Hz)
±140
±160
±231.5
±160
±130
±140
±150
±160
±170
±170
100
1000
10000
100000
1000000 10000000
Offset Frequency (Hz)
100
1000
±120
±120
Phase Noise (dBc/Hz)
±110
±140
±150
±160
100000
1000000 10000000
D006
Figure 4. Closed-Loop Phase Noise of AC-CML Outputs at
156.25 MHz With PLL Bandwidth at 1 MHz, Integer N PLL,
50-MHz Crystal Input, 5-GHz VCO Frequency, Post Divider =
8, Output Divider = 4
±110
±130
10000
Offset Frequency (Hz)
D005
Figure 3. Closed-Loop Phase Noise of AC-LVDS Outputs at
156.25 MHz With PLL Bandwidth at 1 MHz, Integer N PLL,
50-MHz Crystal Input, 5-GHz VCO Frequency, Post Divider =
8, Output Divider = 4
Phase Noise (dBc/Hz)
±130
±130
±140
±150
±160
±170
±170
100
1000
10000
100000
1000000 10000000
Offset Frequency (Hz)
100
Figure 5. Closed-Loop Phase Noise of HCSL Outputs at
156.25 MHz With PLL Bandwidth at 1 MHz, Integer N PLL,
50-MHz Crystal Input, 5-GHz VCO Frequency, Post Divider =
8, Output Divider = 4
1000
10000
100000
1000000 10000000
Offset Frequency (Hz)
D007
D008
Figure 6. Closed-Loop Phase Noise of AC-LVPECL Outputs
at 161.1328125 MHz With PLL Bandwidth at 400 kHz,
Fractional N PLL, 50-MHz Crystal Input, 5.15625-GHz VCO
Frequency, Post Divider = 8, Output Divider = 4
Submit Documentation Feedback
Copyright © 2015–2018, Texas Instruments Incorporated
Product Folder Links: LMK03328
21
�LMK03328
SNAS668D – AUGUST 2015 – REVISED APRIL 2018
www.ti.com
±110
±110
±120
±120
Phase Noise (dBc/Hz)
Phase Noise (dBc/Hz)
Typical Characteristics (continued)
±130
±140
±150
±160
±130
±140
±150
±160
±170
±170
100
1000
10000
100000
1000000 10000000
Offset Frequency (Hz)
100
1000
Figure 7. Closed-Loop Phase Noise of AC-LVDS Outputs at
161.1328125 MHz With PLL Bandwidth at 400 kHz, Fractional
N PLL, 50-MHz Crystal Input, 5-GHz VCO Frequency, Post
Divider = 8, Output Divider = 4
10000
100000
1000000 10000000
Offset Frequency (Hz)
D009
D010
Figure 8. Closed-Loop Phase Noise of AC-CML Outputs at
161.1328125 MHz With PLL Bandwidth at 400 kHz, Fractional
N PLL, 50-MHz Crystal Input, 5-GHz VCO Frequency, Post
Divider = 8, Output Divider = 4
10
±110
0
-10
Amplitude (dBm)
Phase Noise (dBc/Hz)
±120
±130
±140
±150
-20
-30
-40
-50
-60
-70
±160
-80
±170
100
1000
10000
100000
-90
78.125
1000000 10000000
Offset Frequency (Hz)
Figure 9. Closed-Loop Phase Noise of HCSL Outputs at
161.1328125 MHz With PLL Bandwidth at 400 kHz, Fractional
N PLL, 50-MHz Crystal Input, 5-GHz VCO Frequency, Post
Divider = 8, Output Divider = 4
0
0
-10
-10
-20
-20
Amplitude (dBm)
Amplitude (dBm)
203.125
234.375
D012
10
-30
-40
-50
-60
-30
-40
-50
-60
-70
-70
-80
-80
109.375
140.625
171.875
Frequency (MHz)
203.125
234.375
-90
78.125
D013
Figure 11. 156.25 ± 78.125-MHz AC-LVDS Output Spectrum
With PLL Bandwidth at 1 MHz, Integer N PLL, 50-MHz
Crystal Input, 5-GHz VCO Frequency, Post Divider = 8,
Output Divider = 4
22
140.625
171.875
Frequency (MHz)
Figure 10. 156.25 ± 78.125-MHz AC-LVPECL Output
Spectrum With PLL Bandwidth at 1 MHz, Integer N PLL, 50MHz Crystal Input, 5-GHz VCO Frequency, Post Divider = 8,
Output Divider = 4
10
-90
78.125
109.375
D011
109.375
140.625
171.875
Frequency (MHz)
203.125
234.375
D014
Figure 12. 156.25 ± 78.125-MHz AC-CML Output Spectrum
With PLL Bandwidth at 1 MHz, Integer N PLL, 50-MHz
Crystal Input, 5-GHz VCO Frequency, Post Divider = 8,
Output Divider = 4
Submit Documentation Feedback
Copyright © 2015–2018, Texas Instruments Incorporated
Product Folder Links: LMK03328
�LMK03328
www.ti.com
SNAS668D – AUGUST 2015 – REVISED APRIL 2018
Typical Characteristics (continued)
10
0
0
-10
-10
-20
-20
Amplitude (dBm)
Amplitude (dBm)
10
-30
-40
-50
-60
-30
-40
-50
-60
-70
-70
-80
-80
-90
78.125
-90
109.375
140.625
171.875
Frequency (MHz)
203.125
-100
80
234.375
Figure 13. 156.25 ± 78.125-MHz HCSL Output Spectrum With
PLL Bandwidth at 1 MHz, Integer N PLL, 50-MHz Crystal
Input, 5-GHz VCO Frequency, Post Divider = 8, Output
Divider = 4
120
140
160
180
Frequency (MHz)
200
220
240
D016
Figure 14. 161.1328125 ± 80.56640625-MHz AC-LVPECL
Output Spectrum With PLL Bandwidth at 400 kHz, Fractional
N PLL, 50-MHz Crystal Input, 5.15625-GHz VCO Frequency,
Post Divider = 8, Output Divider = 4
10
10
0
0
-10
-10
-20
-20
Amplitude (dBm)
Amplitude (dBm)
100
D015
-30
-40
-50
-60
-30
-40
-50
-60
-70
-70
-80
-80
-90
-90
-100
80
-100
80
100
120
140
160
180
Frequency (MHz)
200
220
240
100
120
D017
Figure 15. 161.1328125 ± 80.56640625-MHz AC-LVDS Output
Spectrum With PLL Bandwidth at 400 kHz, Fractional N PLL,
50-MHz Crystal Input, 5.15625-GHz VCO Frequency, Post
Divider = 8, Output Divider = 4
140
160
180
Frequency (MHz)
200
220
240
D018
Figure 16. 161.1328125 ± 80.56640625-MHz AC-CML Output
Spectrum With PLL Bandwidth at 400 kHz, Fractional N PLL,
50-MHz Crystal Input, 5.15625-GHz VCO Frequency, Post
Divider = 8, Output Divider = 4
10
1.7
Output Differential Swing (Vp-p)
0
-10
Amplitude (dBm)
-20
-30
-40
-50
-60
-70
-80
1.6
1.5
1.4
1.3
1.2
-90
-100
80
1.1
100
120
140
160
180
Frequency (MHz)
200
220
240
0
D019
Figure 17. 161.1328125 ± 80.56640625-MHz HCSL Output
Spectrum With PLL Bandwidth at 400 kHz, Fractional N PLL,
50-MHz Crystal Input, 5.15625-GHz VCO Frequency, Post
Divider = 8, Output Divider = 4
200
400
600
Output Frequency (MHz)
800
1000
D020
Figure 18. AC-LVPECL Differential Output Swing vs
Frequency
Submit Documentation Feedback
Copyright © 2015–2018, Texas Instruments Incorporated
Product Folder Links: LMK03328
23
�LMK03328
SNAS668D – AUGUST 2015 – REVISED APRIL 2018
www.ti.com
Typical Characteristics (continued)
1.3
Output Differential Swing (Vp-p)
Output Differential Swing (Vp-p)
0.9
0.8
0.7
0.6
0.5
1.2
1.15
1.1
1.05
1
0.95
0.9
0
200
400
600
Output Frequency (MHz)
800
1000
0
200
D021
Figure 19. AC-LVDS Differential Output Swing vs Frequency
1.5
2
1.45
1.9
1.4
1.35
400
600
Output Frequency (MHz)
800
1000
D022
Figure 20. AC-CML Differential Output Swing vs Frequency
Output Swing (V)
Output Differential Swing (Vp-p)
1.25
1.8
1.7
1.3
1.6
0
100
200
300
Output Frequency (MHz)
400
0
D023
Figure 21. HCSL Differential Output Swing vs Frequency
50
100
150
Output Frequency (MHz)
200
D024
Figure 22. 1.8-V LVCMOS (on OUT[7:0]) Output Swing vs
Frequency
3.5
Output Swing (V)
3.4
3.3
3.2
3.1
3
2.9
0
50
100
150
Output Frequency (MHz)
200
D025
Figure 23. 3.3-V LVCMOS (on STATUS[1:0]) Output Swing vs Frequency
24
Submit Documentation Feedback
Copyright © 2015–2018, Texas Instruments Incorporated
Product Folder Links: LMK03328
�LMK03328
www.ti.com
SNAS668D – AUGUST 2015 – REVISED APRIL 2018
9 Parameter Measurement Information
9.1 Test Configurations
This section describes the characterization test setup of each block in the LMK03328.
High impedance probe
LVCMOS
LMK03328
Oscilloscope
2 pF
Figure 24. LVCMOS Output DC Configuration During Device Test
Phase Noise/
Spectrum
Analyzer
LVCMOS
LMK61E0M
Figure 25. LVCMOS Output AC Configuration During Device Test
High impedance differential probe
AC-LVPECL,
AC-LVDS,
AC-CML
LMK03328
Oscilloscope
Figure 26. AC-LVPECL, AC-LVDS, AC-CML Output DC Configuration During Device Test
High impedance differential probe
HCSL
LMK03328
Oscilloscope
HCSL
50
50
Figure 27. HCSL Output DC Configuration During Device Test
AC-LVPECL, AC-LVDS, AC-CML
Diff-to-SE
Balun/Buffer
LMK03328
Phase Noise/
Spectrum
Analyzer
AC-LVPECL, AC-LVDS, AC-CML
Figure 28. AC-LVPECL, AC-LVDS, AC-CML Output AC Configuration During Device Test
Submit Documentation Feedback
Copyright © 2015–2018, Texas Instruments Incorporated
Product Folder Links: LMK03328
25
�LMK03328
SNAS668D – AUGUST 2015 – REVISED APRIL 2018
www.ti.com
Test Configurations (continued)
HCSL
LMK03328
50
Phase Noise/
Spectrum
Analyzer
Balun
HCSL
50
Figure 29. HCSL Output AC Configuration During Device Test
Signal
Generator
PRI_REF
LVCMOS
LMK03328
Offset = VDD_IN/2
Figure 30. LVCMOS Primary Input DC Configuration During Device Test
Signal
Generator
LVCMOS
125
SEC_REF
LMK03328
Offset = VDD_IN/2
375
Figure 31. LVCMOS Secondary Input DC Configuration During Device Test
Signal
Generator
LVDS
LMK03328
100
Figure 32. LVDS Input DC Configuration During Device Test
Signal
Generator
LMK03328
LVPECL
50
50
VDD_IN - 2
Figure 33. LVPECL Input DC Configuration During Device Test
26
Submit Documentation Feedback
Copyright © 2015–2018, Texas Instruments Incorporated
Product Folder Links: LMK03328
�LMK03328
www.ti.com
SNAS668D – AUGUST 2015 – REVISED APRIL 2018
Test Configurations (continued)
50
Signal
Generator
HCSL
LMK03328
50
Figure 34. HCSL Input DC Configuration During Device Test
Signal
Generator
LMK03328
Differential
100
Figure 35. Differential Input AC Configuration During Device Test
Crystal
LMK03328
Figure 36. Crystal Reference Input Configuration During Device Test
Sine wave
Modulator
Power Supply
Signal
Generator
LMK03328
Reference
Input
Device Output
Balun
Phase Noise/
Spectrum
Analyzer
Figure 37. PSNR Test Setup
Submit Documentation Feedback
Copyright © 2015–2018, Texas Instruments Incorporated
Product Folder Links: LMK03328
27
�LMK03328
SNAS668D – AUGUST 2015 – REVISED APRIL 2018
www.ti.com
Test Configurations (continued)
OUTx_P
VOD
OUTx_N
80%
VOUT,DIFF,PP = 2 x VOD
0V
20%
tR
tF
Figure 38. Differential Output Voltage and Rise/Fall Time
80%
VOUT,SE
OUT_REFx/2
20%
tR
tF
Figure 39. Single-Ended Output Voltage and Rise/Fall Time
OUTx_P
Differential, PLL1/2
OUTx_N
tSK,DIFF,INT
OUTx_P
Differential, PLL1/2
OUTx_N
tSK,SE-DIFF,INT
OUTx_P/N
Single Ended, PLL1/2
tSK,SE,INT
Single Ended, PLL1/2
OUTx_P/N
Figure 40. Differential and Single-Ended Output Skew
28
Submit Documentation Feedback
Copyright © 2015–2018, Texas Instruments Incorporated
Product Folder Links: LMK03328
�LMK03328
www.ti.com
SNAS668D – AUGUST 2015 – REVISED APRIL 2018
10 Detailed Description
10.1 Overview
The LMK03328 generates eight outputs with less than 0.2-ps rms maximum random jitter in integer PLL mode
and less than 0.35-ps rms maximum random jitter in fractional PLL mode with a crystal input or a clean external
reference input.
10.2 Functional Block Diagram
VCC (x4)
3.3 V
C2
VCCO (x6)
1.8 / 2.5 / 3.3 V
C2
LF1
LF2
Power Conditioning
Outputs
SYNC
Inputs
REFSEL
x1, x2
R Div
3-b
0
1
M Div
5-b
0
N Div
1
™û fractional
XO
OUT1
/2, /3, /4
/5, /6, /7, /8
¥
VCO: 4.8G Hz ~ 5.4G Hz
SECREF
OUT0
Integer Div
8-b
OUT2
Integer Div
8-b
OUT3
x1, x2
MARGIN
PLL2
0
M Div
5-b
R Div
3-b
/2, /3, /4,
/5, /6, /7, /8
¥
VCO: 4.8 GHz ~ 5.4 GHz
N Div
1
0
1
Integer Div
8-b
0
1
2
OUT4
Integer Div
8-b
0
1
2
OUT5
Integer Div
8-b
0
1
2
OUT6
Integer Div
8-b
0
1
2
OUT7
™û fractional
0
1
Control
Registers
EEPROM
SDA od
/4, /5
/4, /5
Integer Div
/6 - /256
Integer Div
/6 - /256
SYNC
0
1
AC-LVDS, AC-LVPECL, CML, HCSL or 1.8 V LVCMOS
PLL1
PRIREF
SCL od
Device Control
and Status
PDN
GPIO[5:0] 3
STATUS1
3 = 3-level input
od = open-drain
STATUS0
CAP (x3)
3.3-V LVCMOS
Copyright © 2016, Texas Instruments Incorporated
NOTE
Input and Control blocks are compatible with 1.8-V, 2.5-V, 3.3-V I/O voltage levels.
Submit Documentation Feedback
Copyright © 2015–2018, Texas Instruments Incorporated
Product Folder Links: LMK03328
29
�LMK03328
SNAS668D – AUGUST 2015 – REVISED APRIL 2018
www.ti.com
10.3 Feature Description
10.3.1 Device Block-Level Description
The LMK03328 includes two on-chip fractional PLLs with integrated VCOs and each VCO supports a frequency
range of 4.8 GHz to 5.4 GHz. Each PLL block consists of a input selection MUX, a phase frequency detector
(PFD), charge pump, on-chip passive loop filter that only needs an external capacitor to ground, a feedback
divider that can support both integer and fractional values and a delta sigma engine for spur suppression in
fractional PLL mode. The universal inputs support single-ended and differential clocks in the frequencies of 1
MHz to 300 MHz and the secondary input additionally supports crystals in the frequencies of 10 MHz to 52 MHz.
When the PLLs operate with the crystal as their reference, the output frequencies can be margined based on
changing the on-chip capacitor loading on each leg of the crystal. Completing the device is the combination of
integer output dividers and universal output buffers. The PLLs are powered by on-chip low dropout (LDO), linear
voltage regulators and the regulated supply network is partitioned such that the sensitive analog supplies are
running from separate LDOs than the digital supplies which use their own LDO. The LDOs provide isolation of
the isolation of the PLL from any noise in the external power supply rail with a PSNR of better than –70 dBc at
50-kHz to 1-MHz ripple frequencies at 1.8-V output supplies and better than –80 dBc at 50-kHz to 1-MHz ripple
frequencies at > 2.5-V output supplies. The regulator capacitor pins should each be connected to ground by 10µF capacitors to ensure stability.
10.3.2 Device Configuration Control
Figure 41 illustrates the relationships between device states, the configuration pins, device initialization and
configuration, and device operational modes. In hard pin configuration mode, the state of the configuration pins
determines the configuration of the device as selected from all device states programmed in the on-chip ROM. In
soft pin configuration mode, the state of the configuration pins determines the initialized state of the device as
programmed in the on-chip EEPROM. In either mode, the host can update any device configuration after the
device enables the host interface and the host writes a sequence that updates the device registers. Once the
device configuration is set, the host can also write to the on-chip EEPROM for a new set of power-up defaults
based on the configuration pin settings in the soft pin configuration mode. A system may transition a device from
hard pin mode to soft pin mode by changing the state of the HW_SW_CTRL pin and then triggering a device
power cycling through the PDN pin. In reset mode, the device disables the outputs so that unwanted sporadic
activity associated with device initialization does not appear on the device outputs. Table 2 lists the functionality
of the GPIO[5:0] pins during hard pin and soft pin modes.
30
Submit Documentation Feedback
Copyright © 2015–2018, Texas Instruments Incorporated
Product Folder Links: LMK03328
�LMK03328
www.ti.com
SNAS668D – AUGUST 2015 – REVISED APRIL 2018
Feature Description (continued)
Power-on Internal Reset Pulse
or PDN Pin
0
1
Sample HW_SW_CTRL
GPIO[5] is multi-state; GPIO[4]
and GPIO[0] are 2-state;
GPIO[3:1] are 3-state
GPIO[5:0] are 2-state
Hard pin mode
I2C is still enabled, LSB of I2C
address is 00
Soft pin mode
I2C enabled.
Sample GPIO[5:0] for selecting 1 of 64
pre-defined ROM settings
Sample GPIO1
Sample
GPIO[3:2]
GPIO1
determines 1 of 3
2
I C Addresses
GPIO[3:2] selects PLL and output types/divider/source
for up to 6 EEPROM configurations. Leaving the pins
floating bypasses EEPROM loading and register defaults
are loaded. GPIO[5] selects one of eight crystal
frequency margining offset settings and GPIO[4]
enables/disables crystal frequency margining control.
Save desired
configuration
into the
corresponding
EEPROM page
User can operate from EEPROM loaded configurations or reprogram
the device register via I2C
Figure 41. LMK03328 Simplified Programming Flow
Table 2. GPIO Pin Mapping for Hard Pin Mode and Soft Pin Mode
PIN NAME
GPIO0
GPIO1
HARD PIN MODE
SOFT PIN MODE
FUNCTION
STATE
FUNCTION
STATE
ROM page select for hard pin
mode
2
Output synchronization (active low)
2
2
2
I C slave address LSB select
3
GPIO2
2
3
GPIO3
2
EEPROM page select for soft pin mode
or register default mode
GPIO4
2
Frequency margining enable
2
GPIO5
2
Frequency margining offset select
8
3
10.3.2.1 Hard Pin Mode (HW_SW_CTRL = 1)
In this mode, the GPIO[5:0] pins allow hardware pin configuration of the PLL synthesizer, its input clock selection
and output frequency and type selection. I2C is still enabled and the LSB of device address is set to 0x0. The
GPIO pins are 2-state and are sampled and latched at POR and the combination selects one of 64 page settings
that are predefined in on-chip ROM. In this mode, automatic output divider and PLL post divider synchronization
is performed on power-up or upon toggling PDN. Table 15, Table 16, Table 17, Table 18 and Table 19 show the
pre-defined ROM configurations according to the GPIO[5:0] pin settings.
Submit Documentation Feedback
Copyright © 2015–2018, Texas Instruments Incorporated
Product Folder Links: LMK03328
31
�LMK03328
SNAS668D – AUGUST 2015 – REVISED APRIL 2018
www.ti.com
Following are the blocks that are configured by the GPIO[5:0] pins.
10.3.2.1.1 PLL Blocks
Sets the PLL synthesizer frequency and loop bandwidth by configuring registers related to the PLL dividers, input
frequency doubler, and PLL power down.
10.3.2.1.2 Output Buffer Auto Mute
When an output MUX's selected source is invalid (for example, the PLL is unlocked or selected reference input is
not present), the individual output mute controls will determine output mute state per the ROM default settings
(CH_x_MUTE=0x1, CHx_MUTE_LVL=0x3):
1. In differential mode, the positive output node is driven to the internal regulator output voltage rail (when AC
coupled to load) and the negative output node is driven to the GND rail.
2. In LVCMOS mode, assuming there is a DC connection to the receiver, the output in a mute condition is
forced LOW.
10.3.2.1.3 Input Block
The input block sets the input type for primary and secondary inputs, selects input MUX type for each PLL and
selects R divider values for primary input to each input MUX.
10.3.2.1.4 Channel Mux
The channel mux controls the channel mux selection for each channel.
10.3.2.1.5 Output Divider
The output divider sets the 8-bit output divide value for each channel (/1 to /256)
10.3.2.1.6 Output Driver Format
The output driver format selects the output format for each driver pair, or disable channel.
10.3.2.1.7 Status MUX, Divider and Slew Rate
These blocks select the status pins as either 3.3-V LVCMOS PLL clock outputs or status outputs. When
configured as LVCMOS clock outputs, these blocks select divider values and rise or fall time settings.
10.3.2.2 Soft Pin Programming Mode (HW_SW_CTRL = 0)
In this mode, I2C is enabled and GPIO[3:2] are purposed as 3-state pins (tied to VDD_DIG, GND or VIM) and are
used to select one of 6 EEPROM pages and one register default setting (2 of 9 states are invalid). GPIO[0] is
also purposed as a 2-state output synchronization (active-low SYNCN) function, GPIO[1] is now purposed as a
3-state I2C address function to change last 2 bits of I2C address (ADD; 0x0 is GND, 0x1 is VIM, and 0x3 is
VDD_DIG). GPIO[5] is purposed as a multi-state input for the MARGIN function and GPIO[4] is purposed as an
input that enables or disables hardware margining. The GPIO pins are sampled and latched at POR.
NOTE
No software reset or power cycling should occur during EEPROM programming or else it
will be corrupted. Refer to Programming for more details on the EEPROM programming.
GPIO[3:2] allows hardware pin configuration for the PLL synthesizers, their respective input clock selection
modes, the crystal input frequency margining option, all output channel blocks, comprised of channel muxes,
dividers, and output drivers. The GPIO inputs[3:2] are sampled and latched at power-on reset (POR), and select
one of 6 EEPROM pages which are custom-programmable. When GPIO[3:2] are left floating, EEPROM is not
used and the hardware register default settings are loaded. Table 10, Table 11, Table 12, Table 13, and
Table 14 show the predefined EEPROM configurations according to the GPIO[3:2] pin settings.
Below is a brief overview of each block’s register settings configured by the GPIO[3:2] pin modes.
32
Submit Documentation Feedback
Copyright © 2015–2018, Texas Instruments Incorporated
Product Folder Links: LMK03328
�LMK03328
www.ti.com
SNAS668D – AUGUST 2015 – REVISED APRIL 2018
10.3.2.2.1 Device Config Space
An 8-b for unique identifier programmed to EEPROM that can be used to distinguish between each EEPROM
page.
10.3.2.2.2 PLL Blocks
The PLL blocks set the PLL synthesizer frequency and loop bandwidth by configuring registers related to the PLL
dividers, input frequency doubler, and PLL power down.
10.3.2.2.3 Output Buffer Auto Mute
When an output MUX's selected source is invalid (for example, the PLL is unlocked or selected reference input is
not present), the individual output mute controls will determine output mute state per the EEPROM default
settings (CH_x_MUTE=0x1, CHx_MUTE_LVL=0x3):
1. In differential mode, the positive output node is driven to the internal regulator output voltage rail (when AC
coupled to load) and the negative output node is driven to the GND rail.
2. In LVCMOS mode, assuming a DC connection to the receiver, the output in a mute condition is forced LOW.
10.3.2.2.4 Input Block
The input block sets the input type for primary and secondary inputs, selects input MUX type for each PLL and
selects R divider values for primary input to each input MUX.
10.3.2.2.5 Channel Mux
The channel mux controls the channel mux selection for each channel.
10.3.2.2.6 Output Divider
The output dividers set the 8-bit output divide value for each channel (/1 to /256)
10.3.2.2.7 Output Driver Format
The output driver format selects the output format for each driver pair, or disable channel.
10.3.2.2.8 Status MUX, Divider and Slew Rate
These blocks select the status pins as either 3.3-V LVCMOS PLL clock outputs or status outputs. When
configured as LVCMOS clock outputs, these blocks select divider values and rise or fall time settings.
10.3.2.3 Register File Reference Convention
Figure 42 shows the method that this document employs to refer to an individual register bit or a grouping of
register bits. If a drawing or text references an individual bit the format is to specify the register number first and
the bit number second. The LMK03328 contains 124 registers that are 8 bits wide. The register addresses and
the bit positions both begin with the number zero (0). A period separates the register address and bit address.
The first bit in the register file is address ‘R0.0’ meaning that it is located in Register 0 and is bit position 0. The
last bit in the register file is address ‘R31.7’ referring to the 8th bit of register address 31 (the 32nd register in the
device). Figure 42 lists specific bit positions as a number contained within a box. A box with the register address
encloses the group of boxes that represent the bits relevant to the specific device circuitry in context.
Reg5
Register Number (s)
5
4
Bit Number (s)
3
2
R5.2
Figure 42. LMK03328 Register Reference Format
Submit Documentation Feedback
Copyright © 2015–2018, Texas Instruments Incorporated
Product Folder Links: LMK03328
33
�LMK03328
SNAS668D – AUGUST 2015 – REVISED APRIL 2018
www.ti.com
10.4 Device Functional Modes
The 2 PLLs in LMK03328 can be configured to accommodate various input and output frequencies either through
I2C programming interface or in the absence of programming, the PLL can be configured by the ROM page,
EEPROM page, or register default settings selected through the control pins. The PLLs can be configured by
setting each’s Smart Input MUX, Reference Divider, PLL Loop Filter, Feedback Divider, Prescaler Divider, and
Output Dividers.
For each PLL to operate in closed-loop mode, the following condition in Equation 1 has to be met when using
primary input or secondary input for the reference clock (FREF).
FVCO = (FREF/R) × D × [(INT + NUM/DEN)/M]
where
•
•
•
•
•
•
•
•
FVCO: PLL/VCO Frequency
FREF: Frequency of selected reference input clock
D: PLL input frequency doubler, 1=Disabled, 2=Enabled
INT: PLL feedback divider integer value (12 bits, 1 to 4095)
NUM: PLL feedback divider fractional numerator value (22 bits, 0 to 4194303)
DEN: PLL feedback divider fractional denominator value (22 bits, 1 to 4194303)
R: Primary reference divider value (3 bits, 1 to 8); R = 1 for secondary reference
M: PLL reference input divider value (5 bits, 1 to 32)
(1)
The output frequency is related to the PLL/VCO frequency or the reference input frequency (based on the output
MUX selection) as given in Equation 2 and Equation 3.
FOUT = FREF when reference input clock selected by OUTMUX
FOUT = FVCO / (P × OUTDIV) when PLL is selected by OUTMUX
(2)
where
•
•
OUTDIV: Output divider value (8 bits, 1 to 256)
P: PLL post-divider value (2, 3, 4, 5, 6, 7, 8)
(3)
10.4.1 Smart Input MUX
Each PLL has a dedicated Smart Input MUX. The input selection mode per PLL can be configured using the 3state REFSEL pin or programmed through I2C. The Smart Input MUX supports auto switching and manual
switching using control pin (or through register). The Smart Input MUX is designed such that glitches created
during switching in both auto and manual modes are suppressed at the MUX output.
In the automatic mode, the frequencies of both primary (PRIREF) and secondary (SECREF) input clocks have to
be within 2000 ppm. The phase of the input clocks can be any. To minimize phase jump at the output, TI
recommends set very low PLL loop bandwidth, set R29.7 = 1, and R51.7 = 1; the outputs that are not muted
should have its respective mute bypass bit in R20 and R21 be set to 0x0 to ensure that these outputs are
available during an input switchover event. In the case that the primary reference is detected to be unavailable,
the input MUX automatically switches from the primary reference to the secondary reference. When primary
reference is detected to be available again, the input MUX switches back to the primary reference. When both
primary and secondary references are detected as unavailable, the input MUX waits on secondary reference until
either the primary or the secondary reference is detected as available again. In the case where both the primary
and secondary reference inputs are detected as unavailable, LOS is active and the PLL outputs are automatically
disabled. The timing diagram of an auto switch at the input MUX is shown in Figure 43.
PRI_REF
1
SEC_REF
1
2
3
4
2
Internal
Reference Clock
Figure 43. Smart Input MUX Auto Switch Mode Timing Diagram
34
Submit Documentation Feedback
Copyright © 2015–2018, Texas Instruments Incorporated
Product Folder Links: LMK03328
�LMK03328
www.ti.com
SNAS668D – AUGUST 2015 – REVISED APRIL 2018
Device Functional Modes (continued)
R50[3-0] are the register bits that control the smart input MUX for PLL2 and PLL1, respectively, and can be
programmed through I2C. Table 3 shows the input clock selection options for both PLLs that are supported
through I2C programming and REFSEL pin.
Table 3. Input Clock Selection Through I2C Programming or REFSEL Pin
R50.3 / R50.1
R50.2 / R50.0
REFSEL
MODE
0
0
X
Automatic
PLL REFERENCE
0
1
0
Manual
PLL1 selects primary, PLL2 select secondary
0
1
VIM
Manual
PLL1 prefers primary, PLL2 selects secondary
0
1
1
Automatic
1
0
X
Manual
PLL1 and/or PLL2 selects primary
1
1
X
Manual
PLL1 and/or PLL2 selects secondary
PLL1 and/or PLL2 prefers primary
PLL1 and PLL2 prefers primary
For those applications that require device start-up from a crystal on the secondary input, do a one-time only
switchover to the primary input once available and, when auto switch on the PLLs’ smart MUXes are enabled,
R51.2 can be set to 0 which automatically disables the secondary crystal input path after switchover to the
primary input is complete. This removes coupling between the primary and secondary inputs and prevents input
crosstalk components from appearing at the outputs. However, if the auto switch between primary and secondary
is desired at any point of normal device operation, R51.2 should be set to 1, PLL should be set to a very low loop
bandwidth, and R20, R21, and R22 should be set to 0x0 to ensure minimal phase hit once PLLs are relocked
after switchover to either primary or secondary inputs. Figure 44 shows flowchart of events triggered when R51.2
is set to 1 or 0.
Submit Documentation Feedback
Copyright © 2015–2018, Texas Instruments Incorporated
Product Folder Links: LMK03328
35
�LMK03328
SNAS668D – AUGUST 2015 – REVISED APRIL 2018
www.ti.com
no
,V 3//¶V 60$5708; VHW WR
Auto Select?
yes
R51.2
0
1
Single auto-switch event
Multiple auto-switch event
Startup from XTAL (SECREF)
Startup from XTAL (SECREF)
PLL locked to SECREF
PLL locked to SECREF
no
no
Is PRIREF
Valid?
Is PRIREF
Valid?
SECREF turned on
Auto switch to SECREF
PLL unlocked momentarily
(~ ms) and large phase hit
yes
yes
Auto switch to PRIREF
SECREF turned off
Auto switch to PRIREF
SECREF left on
Auto switch to SECREF
Minimal phase hit during
auto switch
no
no
yes
PLL locked to PRIREF
No impact to phase noise/spurs from freq
difference between PRIREF and SECREF
since SECREF is turned off
yes
PLL locked to PRIREF
Onus on customer to minimize freq
difference between PRIREF and SECREF
Otherwise phase noise/spur impact
Is PRIREF
Valid?
Is PRIREF
Valid?
Figure 44. Flowchart Describing Events When R51.2 is Set to 0 or 1
36
Submit Documentation Feedback
Copyright © 2015–2018, Texas Instruments Incorporated
Product Folder Links: LMK03328
�LMK03328
www.ti.com
SNAS668D – AUGUST 2015 – REVISED APRIL 2018
10.4.2 Universal Input Buffer (PRI_REF, SEC_REF)
The primary reference can support differential or single-ended clocks. The secondary reference can support
differential or single-ended clocks or crystal. The differential input buffers on both primary and secondary support
internal 50 Ω to ground or 100-Ω termination between P and N followed by on-chip AC-coupling capacitors to
internal self-biased circuitry. Internal biasing is offered before the on-chip AC-coupling capacitors when the clock
inputs are AC coupled externally, and this is enabled by setting R29.0 = 1 (for primary reference) or R29.1 = 1
(for secondary reference). When the clock inputs are DC coupled, the internal biasing before the on-chip ACcoupling capacitors is disabled by settings R29.0 = 0 (for primary reference) or R29.1 = 0 (for secondary
reference). Figure 45 shows the differential input buffer termination options implemented on both primary and
secondary and the switches (SWLVDS, SWHCSL, SWAC) are controlled by R29[5-0]. Table 4 shows the primary
and secondary buffer configuration matrix for LVPECL, CML, LVDS, HCSL, and LVCMOS inputs.
LMK03328
Differential Input Control
7 pF
PRIREF_P /
SECREF_P
SWHCSL
R29.4,
R29.5
50
50
SWLVDS
R29.2,
R29.3
SWAC
R29.0,
R29.1
Vbb = 1.8 V
(weak bias)
PRI_REF / SEC_REF
SWAC
R29.0,
R29.1
50
PRIREF_N /
SECREF_N
SWHCSL
R29.4,
R29.5
7 pF
50
R29
5
4
3
2
1
0
Figure 45. Differential Input Buffer Termination Options on Primary and Secondary Reference
Submit Documentation Feedback
Copyright © 2015–2018, Texas Instruments Incorporated
Product Folder Links: LMK03328
37
�LMK03328
SNAS668D – AUGUST 2015 – REVISED APRIL 2018
www.ti.com
Table 4. Input Buffer Configuration Matrix on Primary and/or Secondary Reference (1)
(1)
R50.5 /
R50.7
R50.4 /
R50.6
R29.4 /
R29.5
R29.2 /
R29.3
R29.0 /
R29.1
MODE
EXTERNAL
COUPLING
TERMINATION
BIASING
0
1
0
1
1
HCSL
AC
Internal
Internal
0
1
0
1
1
LVDS
AC
Internal
Internal
0
1
0
1
1
LVPECL
AC
Internal
Internal
0
1
0
1
1
CML
AC
Internal
Internal
0
1
1
0
0
HCSL
DC
Internal
External
0
1
0
1
0
LVDS
DC
Internal
External
0
1
0
0
0
LVPECL
DC
External
External
0
1
0
0
0
CML
DC
External
External
0
0
0
0
0
LVCMOS
DC
N/A
N/A
When termination is set to External, internal on-chip termination of LMK03328 should be disabled.
The following figures show recommendations for interfacing LMK03328’s primary or secondary inputs with
LVCMOS, LVPECL, LVDS, CML, and HCSL drivers, respectively.
NOTE
The secondary reference accepts up to 2.6-V maximum swing when LVCMOS input
option is selected.
RS
3.3-V LVCMOS
Driver
PRI_REF
LVCMOS
LMK03328
Figure 46. Interfacing LMK03328 Primary Input With 3.3-V LVCMOS Signal
3.3-V LVCMOS
Driver
RS
125
LVCMOS
SEC_REF
LMK03328
375
Figure 47. Interfacing LMK03328 Secondary Input With 3.3-V LVCMOS Signal
LVPECL
Driver
LMK03328
LVPECL
50
50
VDDO - 2
Figure 48. DC-Coupling LMK03328 Inputs With LVPECL Signal
LVDS Driver
LVDS
LMK03328
100
Figure 49. DC-Coupling LMK03328 Inputs With LVDS Signal
38
Submit Documentation Feedback
Copyright © 2015–2018, Texas Instruments Incorporated
Product Folder Links: LMK03328
�LMK03328
www.ti.com
SNAS668D – AUGUST 2015 – REVISED APRIL 2018
CML
Driver
LMK03328
CML
Figure 50. DC-Coupling LMK03328 Inputs With CML Signal
50
HCSL
Driver
LMK03328
HCSL
50
Figure 51. DC-Coupling LMK03328 Inputs With HCSL Signal
LVPECL Driver
LMK03328
LVPECL
100
RPD
RPD
Figure 52. AC-Coupling LMK03328 Inputs With LVPECL Signal
LVDS Driver
LMK03328
LVDS
100
Figure 53. AC-Coupling LMK03328 Inputs With LVDS Signal
CML
Driver
CML
LMK03328
100
Figure 54. AC-Coupling LMK03328 Inputs With CML Signal
50
HCSL
Driver
HCSL
LMK03328
100
50
Figure 55. AC-Coupling LMK03328 Inputs With HCSL Signal
Submit Documentation Feedback
Copyright © 2015–2018, Texas Instruments Incorporated
Product Folder Links: LMK03328
39
�LMK03328
SNAS668D – AUGUST 2015 – REVISED APRIL 2018
www.ti.com
10.4.3 Crystal Input Interface (SEC_REF)
The LMK03328 implements an input crystal oscillator circuitry, known as the Pierce oscillator and is shown in
Figure 56. It is enabled when R50.7, R50.6, and R29.1 are set to 1, 0, and 1, respectively. The crystal oscillator
circuitry includes programmable on-chip capacitances on each leg of the crystal and a damping resistor intended
to minimize overdriven condition of the crystal. The recommended oscillation mode of operation for the input
crystal is fundamental mode and the recommended type of circuit for the crystal is parallel resonance with low or
high pullability. When the secondary reference is set to crystal input, a crystal must be populated and connected
to the SECREF_P and SECREF_N pins.
A crystal’s load capacitance refers to all capacitances in the oscillator feedback loop. It is equal to the amount of
capacitance seen between the terminals of the crystal in the circuit. For parallel resonant mode circuits, the
correct load capacitance is necessary to ensure the oscillation of the crystal within the expected parameters. The
LMK03328 has been characterized with 9-pF parallel resonant crystals with maximum motional resistance of 30
Ω and maximum drive level of 300 µW.
The normalized frequency error of the crystal, due to load capacitance mismatch, can be calculated as
Equation 4:
CS
CS
'¦
¦
2(CL,R C0 ) 2(CL,A C0 )
where
•
•
•
•
•
•
CS is the motional capacitance of the crystal
C0 is the shunt capacitance of the crystal
CL,R is the rated load capacitance for the crystal
CL,A is the actual load capacitance in the implemented PCB for the crystal
Δƒ is the frequency error of the crystal
ƒ is the rated frequency of the crystal.
(4)
The first 3 parameters can be obtained from the crystal vendor.
40
Submit Documentation Feedback
Copyright © 2015–2018, Texas Instruments Incorporated
Product Folder Links: LMK03328
�LMK03328
www.ti.com
SNAS668D – AUGUST 2015 – REVISED APRIL 2018
SECREF_P
SECREF_N
LMK03328
Crystal Input Control
500
Con-chip
Con-chip
R50
7
6
R29
R86
R87
R90
R91
R92
R93
R94
R95
R96
R97
R98
R99
R100
R101
R102
R103
R104
R105
R106
1
Figure 56. Crystal Input Interface on Secondary Reference
If reducing frequency error of the crystal is of utmost importance, a crystal with low pullability should be used. If
frequency margining or frequency spiking is desired, a crystal with high pullability should be used to ensure that
the desired frequency offset is added to the nominal oscillation frequency. A total of ±50-ppm pulling range is
obtained with a crystal whose ratio of shunt capacitance to motional capacitance (C0/C1) is no more than 250.
The programmable capacitors on LMK03328 can be tuned from 14 pF to 24 pF in steps of 14 fF using either an
analog voltage on GPIO5 in soft pin mode or through I2C in soft pin or hard pin mode. When using crystals with
low pullability, the preferred method is to program R86.3 = 1, R86.2 = 0, and program the appropriate binary
code to R104 and R105, in this exact order, that sets the required on-chip load capacitance for least frequency
error. GPIO4 pin should be tied to VDD and GPIO5 pin should be floating when device is operating in soft pin
mode. Table 4 shows the binary code for on-chip load capacitance on each leg of crystal.
When using crystals with high pullability, the same method as above can be repeated for setting a fixed
frequency offset to the nominal oscillation frequency according to Equation 4. In case of a closed-loop system
where the crystal frequency can be dynamically changed based on a control signal, the LMK03328 should
operate in soft pin mode, the R86.3 should be programmed to 0, and the R86.2 should be programmed to 1. The
GPIO5 pin is now configured as an 8-level input with a full scale range of 0 V to 1.8 V, and every 200 mV
corresponds to a frequency change according to Equation 4. There are three possibilities to enable margining
feature with GPIO5:
• Programming R86.3 = 0 and R86.2 = 1. In this case, status of GPIO4 pin is ignored.
• When R86.3 = 0 and R86.2 = 0 is programmed, GPIO4 should be tied to GND. Tying GPIO4 to VDD disables
GPIO5 for margining purposes and R94 and R95 determine the on-chip load capacitance for the crystal. If
any frequency offset is desired at the output, the appropriate binary code should be programmed to R94 and
R95.
• When R86.3 = 1 and R86.2 = 0 is programmed, GPIO4 should be tied to GND. Tying GPIO4 to VDD disables
GPIO5 for margining purposes and R104 and R105 determine the on-chip load capacitance for the crystal. If
any frequency offset is desired at the output, the appropriate binary code should be programmed to R104 and
R105.
Submit Documentation Feedback
Copyright © 2015–2018, Texas Instruments Incorporated
Product Folder Links: LMK03328
41
�LMK03328
SNAS668D – AUGUST 2015 – REVISED APRIL 2018
www.ti.com
There are two possibilities to drive the GPIO5 pin:
• The first method is to achieve the desired voltage between 0 V to 1.8 V according to Analog Input
Characteristics (GPIO[5]). The pulldown resistor value sets the voltage on GPIO[5] pin that falls within one of
eight settings whose pre-programmed on-chip crystal load capacitances are set by R88, R89, R90, R91, R92,
R93, R94, R95, R96, R97, R98, R99, R100, R101, R102, and R103.
• The second method is using a low-pass filtered PWM signal to drive the 8-level GPIO5 pin as shown in
Figure 57. The PWM signal could be generated from the frequency difference between a highly stable TCXO
and the output of LMK03328 that is provided as a feedback into the GPIO5 pin and used to adjust the on-chip
load capacitance on the crystal input to reduce frequency errors from the crystal. This is a quick alternative
that produces a frequency error at the LMK03328's output and could be acceptable to any application when
compared to a full-characterization with a chosen crystal to understand the exact load pulling required to
minimize frequency error at the LMK03328's output. More details on frequency margining are provided in
Application and Implementation.
SECREF_P
SECREF_N
LMK03328
Crystal Input Control
500
GPIO5
PWM
Con-chip
DSP
Con-chip
Low Pass
Filter
Figure 57. Crystal Load Capacitance Compensation Using PWM Signal
The incremental load capacitance for each step should be programmed to R88, R89, R90, R91, R92, R93, R94,
R95, R96, R97, R98, R99, R100, R101, R102, and R103 according to the chosen crystal's trim sensitivity
specifications. The least significant bit programmed to any of the XO offset register corresponds to a load
capacitance delta of about 0.02 pF on the crystal input pins.
Good layout practices are fundamental to the correct operation and reliability of the oscillator. It is critical to
locate the crystal components very close to the SECREF_P and SECREF_N pins to minimize routing distances.
Long traces in the oscillator circuit are a very common source of problems. Don’t route other signals across the
oscillator circuit, and make sure power and high-frequency traces are routed as far away as possible to avoid
crosstalk and noise coupling. If drive level of the crystal should be reduced, a damping resistor (less than 500 Ω)
should be accommodated in the layout between the crystal leg and SECREF_P pin. Vias in the oscillator circuit
are recommended primarily for connections to the ground plane. Don’t share ground connections; instead, make
a separate connection to ground for each component that requires grounding. If possible, place multiple vias in
parallel for each connection to the ground plane. The layout must be designed to minimize stray capacitance
across the crystal to less than 2 pF total under all circumstances to ensure proper crystal oscillation.
42
Submit Documentation Feedback
Copyright © 2015–2018, Texas Instruments Incorporated
Product Folder Links: LMK03328
�LMK03328
www.ti.com
SNAS668D – AUGUST 2015 – REVISED APRIL 2018
10.4.4 Reference Doubler
The primary and secondary references each have a frequency doubler that can be enabled by programming
R57.4 = 1 for the primary reference and R72.4 = 1 for the secondary reference. Enabling the doubler allows a
higher comparison frequency for the PLL and would result in a 3-dB reduction in the in-band phase noise of the
LMK03328’s outputs. However, enabling the doubler poses the requirement of less than 0.5% duty cycle
distortion of its reference input to minimize high spurious signals in the LMK03328’s outputs. If the reference
input duty cycle is requirement is not met, each PLL's higher order loop filter components (R3 and C3) can be
used to suppress the reference input spurs.
10.4.5 Reference Divider (R)
The reference (R) divider is a continuous 3-b counter that is present on the primary reference before the smart
input MUX of each PLL. The output of the R divider sets the input frequency for the smart input MUX and the
auto switch capability of the smart input MUX can then be employed as long as the secondary input frequency is
no more than 2000 ppm different from the output of the R divider, which is programmed in R52 for PLL1 and R54
for PLL2.
10.4.6 Input Divider (M)
The input (M) divider is a continuous 5-b counter that is present after the smart input MUX of each PLL. The
output of the M divider sets the PFD frequency to the PLL and should be in the range of 1 MHz to 150 MHz. The
M divider is programmed in R53 for PLL1 and R55 for PLL2.
10.4.7 Feedback Divider (N)
The N divider of each PLL includes fractional compensation and can achieve any fractional denominator (DEN)
from 1 to 4,194,303. The integer portion, INT, is the whole part of the N divider value and the fractional portion,
NUM / DEN, is the remaining fraction. N, NUM, and DEN are programmed in R58, R59, R60, R61, R62, R63,
R64, and R65 for PLL1 and in R73, R74, R75, R76, R77, R78, R79, and R80 for PLL2. The total programmed N
divider value, N, is determined by: N = INT + NUM / DEN. The output of the N divider sets the PFD frequency to
the PLL and should be in the range of 1 MHz to 150 MHz.
10.4.8 Phase Frequency Detector (PFD)
The PFD of each PLL takes inputs from the input divider output and the feedback divider output and produces an
output that is dependent on the phase and frequency difference between the two inputs. The allowable range of
frequencies at the inputs of the PFD is from 1 MHz to 150 MHz.
10.4.9 Charge Pump
Each PLL has charge pump slices of 0.4 mA, 0.8 mA, 1.6 mA, or 6.4 mA. These slices can be selected in the
following combinations to vary the charge pump current from 0.4 mA to 6.4 mA by programming R57[3-0] for
PLL1 and R72[3-0] for PLL2.
10.4.10 Loop Filter
Each PLL supports programmable loop bandwidth from 200 Hz to 1 MHz. The loop filter components, R2, C1,
R3, C3, can be configured by programming R67, R68, R69, and R70, respectively, for PLL1 and R82, R83, R84,
and R85, respectively, for PLL2. C2 for each PLL is an external component that is added on the LF1 or LF2 pins.
When PLL1 and/or PLL2 are configured in the fractional mode, R69.0 and/or R84.0 should be set to 1,
respectively, and R118[2-0] and/or R132[2-0] should each be set to 0x7, respectively. When PLL1 and/or PLL2
are configured in the integer mode, R69.0 and/or R84.0 should be set to 0, respectively, and R118[2-0] and/or
R132[2-0] should each be set to 0x3 for second-order (NOTE: R69 and R84 should each be set to 0x0) or 0x7
for third-order, respectively. When the PLL1 and/or PLL2's loop bandwidth is desired to be set to 200 Hz, R120.0
and/or R134.0 should be set to 0, respectively. Figure 58 shows the loop filter structure of either PLL.
It is important to set the PLL to best possible bandwidth to minimize output jitter. A high bandwidth (≥ 100 kHz)
provides best input signal tracking and is therefore desired with a clean input reference (clock generator mode).
A low bandwidth (≤ 1 kHz) is desired if the input signal quality is unknown (jitter cleaner mode). TI provides the
WEBENCH Clock Architect that makes it easy to select the right loop filter components.
Submit Documentation Feedback
Copyright © 2015–2018, Texas Instruments Incorporated
Product Folder Links: LMK03328
43
�LMK03328
SNAS668D – AUGUST 2015 – REVISED APRIL 2018
www.ti.com
C2
LF1 /
LF2
LMK03328
R2
R3
From PFD /
Charge Pump
>>
>>
C3
C1
Loop Filter Control
R67
R68
R69
R70
R82
R83
R84
R85
Figure 58. Loop Filter Structure of PLL1 and PLL2
10.4.11 VCO Calibration
The LMK03328’s PLLs each include an LC VCO that is designed using high-Q monolithic inductors to oscillate
between 4.8 GHz and 5.4 GHz and has low phase noise characteristics. Each VCO must be calibrated to ensure
that the clock outputs deliver optimal phase noise performance. Fundamentally, a VCO calibration establishes an
optimal operating point within the tuning range of the VCO. While transparent to the user, the LMK03328 and the
host system perform the following steps comprising a VCO calibration sequence:
1. Normal Operation - When the LMK03328 is in normal (operational) mode, the state of the power down pin
(PDN) is high.
2. Entering the reset state - If the user wishes to initialize the selected pin mode default settings (from ROM,
EEPROM, or register default) and initiate a VCO calibration sequence, then the host system must place the
device in reset through the PDN pin, or through software reset (R12.7) through I2C, or by removing and
restoring device power. Pulling the PDN pin low low or setting R12.7 = 0 places the device in the reset state.
3. Exiting the reset state – The device calibrates the VCO either by exiting the device reset state or through
the device reset command initiated through the host interface. Exiting the reset state occurs automatically
after power is applied and/or the system restores the state of the PDN or R12.7 from the low to high state.
Exiting the reset state using the PDN pin causes the selected pin mode defaults to be loaded or reloaded
into the device register bank. Invoking software reset via R12.7 does not re-initialize the registers; rather, the
device retains settings related to the current clock frequency plan. Using this method allows for a VCO
calibration for a frequency plan other than the default state (i.e. the device calibrates the VCO based on the
settings current register settings). The nominal state of this bit is high. Writing this bit to a low state and then
returning it to the high state invokes a device reset without restoring the pin mode.
4. Device stabilization – After exiting the reset state as described in Step 3, the device monitors internal
voltages and starts a reset timer. Only after internal voltages are at the correct level and the reset time has
expired will the device initiate a VCO calibration. This ensures that the device power supplies and reference
inputs have stabilized prior to calibrating the VCO.
5. VCO Calibration - The LMK03328 calibrates the VCO. During the calibration routine, the device mutes
output channels configured with their respective auto-mute control enabled, so that they generate no
spurious clock signals. After a successful calibration routine, the PLL will lock the VCO to the selected
reference input.
44
Submit Documentation Feedback
Copyright © 2015–2018, Texas Instruments Incorporated
Product Folder Links: LMK03328
�LMK03328
www.ti.com
SNAS668D – AUGUST 2015 – REVISED APRIL 2018
10.4.12 Fractional Circuitry
The delta sigma modulator is a key component of the fractional circuitry and is involved in noise shaping for
better phase noise and spurs in the band of interest. The order of the delta sigma modulator is selectable from
integer mode to third order and can be programmed in R66[1-0] for PLL1 and in R81[1-0] for PLL2. There are
also several dithering modes that are also programmed in R66[3-2] for PLL1 and in R81[3-2] for PLL2.
10.4.12.1 Programmable Dithering Levels
If used appropriately, dithering may be used to reduce sub-fractional spurs, but if used inappropriately, it can
actually create spurs and increase phase noise. Table 5 provides guidelines for the use of dithering based on the
fractional denominator, after the fraction is reduced to lowest terms.
Table 5. Dithering Recommendations
RECOMMENDATION
COMMENTS
Fractional Numerator = 0
FRACTION
Disable Dithering
This is often the worst case for spurs, and can actually be turned into
the best case by disabling dithering. Performance is then similar to
integer mode.
Equivalent Denominator < 20
Disable Dithering
These fractions are not well randomized and dithering will likely
create phase noise and spurs.
Equivalent denominator is not
divisible by 2 or 3
Disable Dithering
There will be no sub-fractional spurs, so dithering is likely not to be
very effective.
Equivalent denominator > 200
and is divisible by 2 or 3
Consider Dithering
Dithering may help reduce the sub-fractional spurs, but understand it
may degrade the PLL phase noise.
10.4.12.2 Programmable Delta Sigma Modulator Order
The programmable fractional modulator order gives the opportunity to better optimize phase noise and spurs.
Theoretically, higher order modulators push out phase noise to farther offsets, as described in Table 6.
Table 6. Delta Sigma Modulator Order Recommendations
ORDER
APPLICATIONS
Integer Mode (Order = 0)
If the fractional numerator is zero, it is best to run the PLL in integer mode to minimize phase
noise and spurs.
First Order Modulator
When the equivalent fractional denominator is 6 or less, the first order modulator theoretically
has lower phase noise and spurs, so it always makes sense in these situations. When the
fractional denoninator is between 6 and about 20, consider using the first order modulator
because the spurs might be far enough outside the loop bandwidth that they will be filtered.
The first order modulator also does not create any sub-fractional spurs or phase noise.
Second and Third Order Modulator
The choice between 2nd and 3rd order modulator tends to be a little more application
specific. If the fractional denominator is not divisible by 3, then the second and third order
modulators will have spurs in the same offsets, so the third is generally better for spurs.
However, if stronger levels of dithering is used, the third order modulator will create more
close-in phase noise than the second order modulator.
Submit Documentation Feedback
Copyright © 2015–2018, Texas Instruments Incorporated
Product Folder Links: LMK03328
45
�LMK03328
SNAS668D – AUGUST 2015 – REVISED APRIL 2018
www.ti.com
Figure 59 and Figure 60 give an idea of the theoretical impact of the delta sigma modulator order on the shaping
of the phase noise and spurs. In terms of phase noise, this is what one would theoretically expect if strong
dithering was used for a well-randomized fraction. Dithering can be set to different levels or even disabled and
the noise can be eliminated. In terms of spurs, they can change based on fraction, but they will theoretically
pushed out to higher phase detector frequencies. However, one must be aware that these are just
THEORETICAL graphs and for offsets that are less than 5% of the phase detector frequency, other factors can
impact the noise and spurs. In Figure 59, the curves all cross at 1/6th of the phase detector frequency and that
this transfer function peaks at half of the phase detector frequency, which is assumed to be well outside the loop
bandwidth. Figure 60 shows the impact of the phase detector frequency on the modulator noise.
-50
Theoretical Gain for Noise and Spurs (dB)
-60
-70
-80
-90
-100
-110
-120
-130
-140
1st Order Modulator
2nd Order Modulator
3rd Order Modulator
-150
1x10⁶ 2x10⁶
5x10⁶ 1x10⁷ 2x10⁷
Offset (Hz)
5x10⁷ 1x10⁸ 2x10⁸
Figure 59. Theoretical Delta Sigma Noise Shaping for a 100-MHz Phase Detector Frequency
-50
Theoretical Gain for Noise and Spurs (dB)
-60
-70
-80
-90
-100
-110
-120
-130
Fpd=10MHz
Fpd=100 MHz
Fpd=200 MHz
-140
-150
1x10⁶ 2x10⁶
5x10⁶ 1x10⁷ 2x10⁷
Offset (Hz)
5x10⁷ 1x10⁸ 2x10⁸
Figure 60. Theoretical Delta Sigma Noise Shaping for 3rd Order Modulator
10.4.13 Post Divider
Each PLL has a post divider that supports divide-by 2, 3, 4, 5, 6, 7, and 8 from the VCO frequency and
distributed to the output section by programming R56[4-2] for PLL1 and R71[4-2] for PLL2.
46
Submit Documentation Feedback
Copyright © 2015–2018, Texas Instruments Incorporated
Product Folder Links: LMK03328
�LMK03328
www.ti.com
SNAS668D – AUGUST 2015 – REVISED APRIL 2018
10.4.14 High-Speed Output MUX
The output section is made up of six high-speed output MUX’s. The first two MUX’s are able to each select
between the divided PLL1 and PLL2 clocks by programming R31.7 and R34.7. One MUX distributes to outputs 0,
1 and the other MUX distributes to outputs 2 and 3. The remaining four output MUX’s are able to each select
between primary reference, secondary reference or the divided PLL1 or PLL2 clocks by programming R37[7-6],
R39[7-6], R41[7-6], and R43[7-6]. Each of the four MUX’s distributes individually to outputs 4, 5, 6, and 7. When
reference doubler is enabled and any output MUX selects that reference input, the output frequency will be the
same as the reference frequency (non-doubled) but the output phase could be the same or complementary of the
reference input.
10.4.15 High-Speed Output Divider
There are six high-speed output dividers and each supports divide values of 1 to 256. Outputs 0 and 1 share an
output divider, as well as outputs 2 and 3. Outputs 4, 5, 6, and 7 have their own individual output dividers. The
divide values are programmed in R33, R36, R38, R40, R42, and R44. These output dividers also support coarse
frequency margining for all output divide values greater than 8 and can be enabled on any output channel by
setting the appropriate bit in R24 to a 1. In such a use case, a dynamic change in the output divider value
through I2C ensures that there are no glitches at the output irrespective of when the change is initiated.
Depending on the VCO frequency and output divide values, as low as a 5% change can be initiated in the output
frequency. An example case of coarse frequency margining on an output is shown in Figure 61.
VCO Clock
Output 1
(output divider = 12)
Output 2
(original divider = 12
new devider = 13)
Delay from auto sync after new
divider (no glitch)
USER ACTION:
Output 2 divider change from
divide-by-12 to divide-by-13
Output 3
(original divider = 12
new divider = 13)
Delay from auto sync after new
divider (no glitch and completes
active pulse before change)
USER ACTION:
Output 3 divider change from divideby-12 to divide-by-13
Figure 61. Simplified Diagram for Coarse Frequency Margining
10.4.16 High-Speed Clock Outputs
Each output can be configured as AC-LVPECL, AC-LVDS, AC-CML, HCSL or LVCMOS by programming R31,
R32, R34, R35, R37, R39, R41, and R43. Each output has the option to be muted or not, in case the source from
which it is derived becomes invalid, by programming R22. An invalid source could be a primary or secondary
reference that is no longer present or any PLL that is unlocked. When outputs are to be muted, R20 and R21
should each be programmed to 0xFF. Outputs 0 and 1 share an output supply (VDDO_01), as well as outputs 2
Submit Documentation Feedback
Copyright © 2015–2018, Texas Instruments Incorporated
Product Folder Links: LMK03328
47
�LMK03328
SNAS668D – AUGUST 2015 – REVISED APRIL 2018
www.ti.com
and 3 (VDDO_23). Outputs 4, 5, 6, and 7 have individual output supplies (VDDO_4, VDDO_5, VDDO_6,
VDDO_7). Each output supply can be independently set to 1.8 V, 2.5 V, or 3.3 V. When a particular output is
desired to be disabled, the bits [5:0] in the corresponding output control register (R31, R32, R34, R35, R37, R39,
R41, or R43) should be set to 0x00. If any of outputs 4, 5, 6, and 7 and their output dividers are disabled; their
corresponding supplies can be connected to GND.
The AC-LVDS, AC-CML, and AC-LVPECL output structure is given in Figure 62 where the tail currents can be
programmed to either 4 mA, 6 mA, or 8 mA to generate output voltage swings that are compatible with LVDS,
CML, or LVPECL, respectively. Because this output structure is GND referenced, the output supplies can be
operated from 1.8 V, 2.5 V, or 3.3 V, and offer lower power dissipation compared to traditional LVDS, CML, or
LVPECL structures without any impact on jitter performance or other AC or DC specifications. Interfacing to
LVDS, CML or LVPECL receivers are done with just an external AC-coupling capacitor for each output. No
source termination is needed since the on-chip termination is automatically enabled when selecting AC-LVDS,
AC-CML, or AC-LVPECL for good impedance matching to 50-Ω interconnects.
1.8 V, 2.5 V, 3.3 V
LDO
4 mA
P
P
N
N
I1
Output Current can be programmed
to 4 mA, 6 mA, or 8 mA
(I1 + I2)
IN
OUT
INb
0, 2, 4 mA
P
P
N
N
I2
OUTb
Figure 62. Structure of AC-LVDS, AC-CML, and AC-LVPECL Output Stage
The HCSL output structure is open-drain and can be direct coupled or AC coupled to HCSL receivers with
appropriate termination scheme. This output structure supports either on-chip 50-Ω termination or off-chip 50-Ω
termination. The on-chip 50-Ω termination is provided primarily for convenience when driving short traces. In the
case of driving long traces possibly through a connector, the on-chip termination should be disabled and a 50 Ω
to GND termination at the receiver should be implemented. The output supplies can be operated from 1.8 V, 2.5
V, or 3.3 V without any impact on jitter performance or other AC or DC specifications.
The LVCMOS outputs on each side (P and N) can be configured individually to be complementary or in-phase or
can be turned off (high output impedance). The LVCMOS outputs are always at 1.8-V logic level irrespective of
the output supply. In case 3.3-V LVCMOS outputs are required, STATUS1 and/or STATUS0 can be configured
as 3.3-V LVCMOS outputs.
48
Submit Documentation Feedback
Copyright © 2015–2018, Texas Instruments Incorporated
Product Folder Links: LMK03328
�LMK03328
www.ti.com
SNAS668D – AUGUST 2015 – REVISED APRIL 2018
Figure 63 through Figure 68 show recommendations for interfacing between LMK03328’s high-speed clock
outputs and LVCMOS, LVPECL, LVDS, CML, and HCSL receivers, respectively.
NOTE
If 1.8-V LVCMOS signal from the high-speed clock outputs are desired to be interfaced
with a 3.3-V LVCMOS receiver, a level shifter like LSF0101 should be used to convert the
1.8-V LVCMOS signal to a 3.3-V LVCMOS signal.
LVCMOS
1.8-V LVCMOS
Receiver
LMK03328
Figure 63. Interfacing LMK03328’s 1.8-V LVCMOS Output With 1.8-V LVCMOS Receiver
VrefA = 1.8 V
VrefB = 3.3 V
LVCMOS
LMK03328
3.3-V LVCMOS
Receiver
LSF0101
Figure 64. Interfacing LMK03328’s 1.8-V LVCMOS Output With 3.3-V LVCMOS Receiver
LMK03328
LVPECL
Receiver
AC-LVPECL
50
50
VDD_IN - 2
Figure 65. Interfacing LMK03328’s AC-LVPECL Output With LVPECL Receiver
LMK03328
AC-LVDS
100
LVDS
Receiver
Figure 66. Interfacing LMK03328’s AC-LVDS Output With LVDS Receiver
50
LMK03328
AC-CML
CML
Receiver
50
Figure 67. Interfacing LMK03328’s AC-CML Output With CML Receiver
Submit Documentation Feedback
Copyright © 2015–2018, Texas Instruments Incorporated
Product Folder Links: LMK03328
49
�LMK03328
SNAS668D – AUGUST 2015 – REVISED APRIL 2018
www.ti.com
33
LMK03328
(optional)
HCSL
Receiver
HCSL
33
(optional)
50
50
Figure 68. Interfacing LMK03328’s Output With HCSL Receiver
10.4.17 Output Synchronization
All output dividers and PLL post dividers can be synchronized using the active-low SYNCN signal. This signal
can come from the GPIO0 pin (in soft pin mode only) or from R12.6. The most common way to execute the
output synchronization is to toggle the GPIO0 pin. When R56.1 and/or R71.1 are set to 1, to enable
synchronization of outputs that are derived from PLL1 and/or PLL2, and GPIO0 pin is asserted (VGPIO0 ≤ VIL), the
corresponding output driver(s) are muted and divider is reset.
NOTE
Output-to-output skew specification can only be assured when PLL post divider is greater
than 2 and after an output synchronization event.
The latency to reset VCO divider is a sum of:
• 2 to 3 negative edge of output clock cycles of the largest divided value + “x” nano seconds of asynchronous
delay + 2 to 3 VCO clock cycle.
• If SYNCN happens after rising but before negative edge, sync delay is less 3 clock cycle and closer to 2 clock
cycle.
• The latency is deterministic and its variation is no more than 1 VCO clock cycle and an example scenario is
illustrated in Figure 62.
Table 7. Output Channel Synchronization
GPIO0 / R12.6
OUTPUT DIVIDER AND DRIVER STATE
0
Output driver(s) is tri stated and divider is reset
1
Normal output driver/divider operation as configured
Minimum SYNCN pulse width = 3 negative clock edge of slowest output clock cycle + “x” nano second of prop
delay + 3 VCO clock cycle. The synchronization feature is particularly helpful in systems with multiple LMK03328
devices. If SYNCN is released simultaneously for all devices, the total remaining output delay variation is ±1
VCO clock cycles for all devices configured to identical output mux settings. Output enable and disable events
are synchronous to minimize glitch and runt pulses. In Soft Pin Mode, the SYNCN control can also be used to
disable any outputs to prevent output clocks from being distributed to down stream devices, such as DSPs or
FPGAs, until they are configured and ready to accept the incoming clock.
50
Submit Documentation Feedback
Copyright © 2015–2018, Texas Instruments Incorporated
Product Folder Links: LMK03328
�LMK03328
www.ti.com
SNAS668D – AUGUST 2015 – REVISED APRIL 2018
PLL Clock or
Reference Clock
1
2
3
4
5
6
7
8
9
10
11
12
One post-divider clock cycle
uncertainty, of when the
output turns on for one
device in one particular
configuration
GPIO0 or
R12.6
OUT0
Possibility (A)
Output Low
OUT0
Possibility (B)
Output Low
Figure 69. SYNCN to Output Delay Variation
10.4.18 Status Outputs
The device vitals such as input signal quality, smart mux input selection, PLL1 and PLL2 loss of lock can be
monitored by reading device registers or by monitoring the status pins, STATUS1 and STATUS0. R27 and R28
allow customizing which of the vitals are mapped out to these two pins. Table 7 lists the events that can be
mapped to each status pin and which can also be read in the register space. The polarity of the events mapped
to the status pins can be selected by programming R15.
A logic-high interrupt output (INTR) can also be selected on either status pins to indicate interrupt status from
any of the device vitals listed in R16. To use this feature, R17.0 should be set to 1, R14[4:2] must be set to 0x7,
and R14.0 must be set to 1. The interrupts listed in R16 can be combined in an AND or OR functionality by
programming R17.1. If interrupts stemming from particular device vitals are to be ignored, the appropriate bits in
R14 should be programmed as needed. The contents of R16 can be read back at any time irrespective of
whether the INTR function is chosen in either status pins as long as R17.0 = 1 and the contents of R16 are selfcleared once the readback is complete. There also exists a real-time interrupt register, R13, which indicate
interrupt status from the device vitals irrespective of the state of R17.0. The contents of R13 can be also read
back at any time and are self-cleared once the readback is complete.
10.4.18.1 Loss of Reference
The primary and secondary references can be monitored for their input signal quality and appropriate register
bits and status outputs, if enabled, are flagged if a loss of signal event is encountered. For differential inputs, a
loss of signal event occurs when the differential input swing is lower than the threshold as programmed in R25[32] for secondary reference and in R25[1-0] for primary reference. For LVCMOS inputs, a loss of signal event can
be triggered based on either a minimum threshold, programmed in R25[3-2] for secondary reference and in
R25[1-0] for primary reference, or a minimum slew rate of 0.3 V/ns, rising edge or falling edge or both being
monitored based on selections programmed in R25[7-6] for secondary reference and in R25[5-4] for primary
reference.
10.4.18.2 Loss of Lock
Each PLL’s loss of lock detection circuit is a digital circuit that detects any frequency error, even a single cycle
slip. The PLL unlock is detected when a certain number of cycle slips have been exceeded, at which point the
counter is reset. If the loss of lock is intended to toggle a system reset, an RC filter on the status output, which is
programmed to indicate loss of lock, is recommended to avoid rare cycle slips from triggering an entire system
reset.
Submit Documentation Feedback
Copyright © 2015–2018, Texas Instruments Incorporated
Product Folder Links: LMK03328
51
�LMK03328
SNAS668D – AUGUST 2015 – REVISED APRIL 2018
www.ti.com
Table 8. Device Vitals Selection Matrix for STATUS[1:0]
NUMBER
SIGNAL
0
PRIREF Loss of Signal (LOS)
1
SECREF Loss of Signal (LOS)
2
PLL1 Loss of Lock (LOL)
3
PLL1 R Divider, divided by 2 (when R Divider is not bypassed)
4
PLL1 N Divider, divided by 2
5
PLL2 Loss of Lock (LOL)
6
PLL2 R Divider, divided by 2 (when R Divider is not bypassed)
7
PLL2 N Divider, divided by 2
8
PLL1 VCO Calibration Active (CAL)
9
PLL2 VCO Calibration Active (CAL)
10
Interrupt (INTR)
11
PLL1 M Divider, divided by 2 (when M Divider is not bypassed)
12
PLL2 M Divider, divided by 2 (when M Divider is not bypassed)
13
EEPROM Active
14
PLL1 Secondary to Primary Switch in Automatic Mode
15
PLL2 Secondary to Primary Switch in Automatic Mode
When the status pins are programmed as 3.3-V LVCMOS PLL clock outputs with fast output rise or fall time
setting, they support up to 200-MHz operation and each output can independently be programmed to different
frequencies. Each output has the option to be muted or not, in case the PLL from which it is derived loses lock,
by programming R23 and when muted, the output is held at a static state depending on the programmed output
type or polarity in a loss-of-lock event. To reduce coupling onto the high-speed outputs, the output rise or fall
time can be modified in R49 to support slower slew rates.
NOTE
When either status pin is set as a 3.3-V LVCMOS output, there is fairly significant mixing
of these output frequencies into the high speed outputs, especially outputs 4, 5, 6, and 7.
If 3.3-V LVCMOS outputs are desired, take proper care during frequency planning with the
LMK03328 to ensure that the outputs, required with low jitter, are selected from either
output 0, 1, 2, or 3. For best jitter performance, it is recommended to use both status pins
to generate complementary 3.3-V LVCMOS outputs at any time.
10.5 Programming
The host (DSP, Microcontroller, FPGA, and so forth) configures and monitors the LMK03328 through the I2C
port. The host reads and writes to a collection of control and status bits called the register map. The device
blocks can be controlled and monitored through a specific grouping of bits located within the register file. The
host controls and monitors certain device-wide critical parameters directly through register control and status bits.
In the absence of the host, the LMK03328 can be configured to operate in pin-mode either from its on-chip ROM
or EEPROM depending on the state of HW_SW_CTRL pin. The EEPROM or ROM arrays are automatically
copied to the device registers upon power up. The user has the flexibility to re-write the contents of EEPROM
from the SRAM up to a 100 times but the contents of ROM cannot be rewritten.
Within the device registers, there are certain bits that have read or write access. Other bits are read-only (an
attempt to write to a read only bit will not change the state of the bit). Certain device registers and bits are
reserved meaning that they must not be changed from their default reset state. Figure 70 shows interface and
control blocks within LMK03328 and the arrows refer to read access from and write access to the different
embedded memories (ROM, EEPROM, and SRAM).
52
Submit Documentation Feedback
Copyright © 2015–2018, Texas Instruments Incorporated
Product Folder Links: LMK03328
�LMK03328
www.ti.com
SNAS668D – AUGUST 2015 – REVISED APRIL 2018
Programming (continued)
ROM (hard pin mode)
1 of 64 images
Reg89
7
Reg88
7
Reg87
7
Reg86
7
Reg3
7
Reg2
7
Reg1
7
Reg 0
7
6
5
4
3
2
1
0
6
5
4
3
2
1
0
6
5
4
3
2
1
0
6
5
4
3
2
1
0
6
5
4
3
2
1
0
6
5
4
3
2
1
0
6
5
4
3
2
1
0
6
5
4
3
2
1
0
STATUS0
STATUS1
Device Registers
PDN
Control/
Status Pins
Reg200
7
Reg199
7
Reg29
7
Reg28
7
GPIO5
GPIO4
GPIO3
GPIO2
Device
Control
And
Status
Reg3
7
Reg2
7
Reg1
7
Reg 0
7
GPIO1
GPIO0
I2C
Port
SCL
6
5
4
3
2
1
0
6
5
4
3
2
1
0
6
5
4
3
2
1
0
6
5
4
3
2
1
0
6
5
4
3
2
1
0
6
5
4
3
2
1
0
6
5
4
3
2
1
0
6
5
4
3
2
1
0
Device
Hardware
SDA
HW_SW_CTRL
Reg89
7
Reg88
7
Reg87
7
Reg86
7
Reg3
7
Reg2
7
Reg1
7
Reg 0
7
6
5
4
3
2
1
0
6
5
4
3
2
1
0
6
5
4
3
2
1
0
6
5
4
3
2
1
0
6
5
4
3
2
1
0
6
5
4
3
2
1
0
6
5
4
3
2
1
0
6
5
4
3
2
1
0
Reg89
7
Reg88
7
Reg87
7
Reg86
7
Reg3
7
Reg2
7
Reg1
7
Reg 0
7
6
5
4
3
2
1
0
6
5
4
3
2
1
0
6
5
4
3
2
1
0
6
5
4
3
2
1
0
6
5
4
3
2
1
0
6
5
4
3
2
1
0
6
5
4
3
2
1
0
6
5
4
3
2
1
0
EEPROM (soft pin mode)
1 of 6 images
SRAM (soft pin mode)
1 of 6 images
Figure 70. LMK03328 Interface and Control Block
Submit Documentation Feedback
Copyright © 2015–2018, Texas Instruments Incorporated
Product Folder Links: LMK03328
53
�LMK03328
SNAS668D – AUGUST 2015 – REVISED APRIL 2018
www.ti.com
Programming (continued)
10.5.1 I2C Serial Interface
The I2C port on the LMK03328 works as a slave device and supports both the 100-kHz standard mode and 400kHz fast mode operations. Fast mode imposes a glitch tolerance requirement on the control signals. Therefore,
the input receivers ignore pulses of less than 50-ns duration. The I2C timing is given in I2C-Compatible Interface
Characteristics (SDA, SCL) (1) (2). The timing diagram is given in Figure 71.
STOP
START
ACK
tW(SCLL)
tW(SCLH)
STOP
tf(SM)
tr(SM)
~
~
VIH(SM)
SCL
VIL(SM)
~
~
th(START)
tr(SM)
tSU(SDATA)
th(SDATA)
tSU(START)
tSU(STOP)
tf(SM)
tBUS
~
~
~
~
VIH(SM)
SDA
VIL(SM)
~
~
Figure 71. I2C Timing Diagram
In an I2C bus system, the LMK03328 acts as a slave device and is connected to the serial bus (data bus SDA
and clock bus SCL). These are accessed through a 7-bit slave address transmitted as part of an I2C packet. Only
the device with a matching slave address responds to subsequent I2C commands. In soft pin mode, the
LMK03328 allows up to three unique slave devices to occupy the I2C bus based on the pin strapping of GPIO1
(tied to VDD_DIG, GND, or VIM). The device slave address is 10101xx (the two LSBs are determined by the
GPIO1 pin).
NOTE
The PDN pin of LMK03328 should be high before any I2C communication on the bus. The
first I2C transaction after power cycling LMK03328 should be ignored.
During the data transfer through the I2C interface, one clock pulse is generated for each data bit transferred. The
data on the SDA line must be stable during the high period of the clock. The high or low state of the data line can
change only when the clock signal on the SCL line is low. The start data transfer condition is characterized by a
high-to-low transition on the SDA line while SCL is high. The stop data transfer condition is characterized by a
low-to-high transition on the SDA line while SCL is high. The start and stop conditions are always initiated by the
master. Every byte on the SDA line must be eight bits long. Each byte must be followed by an acknowledge bit
and bytes are sent MSB first. The I2C register structure of the LMK03328 is shown in Figure 72.
I2C PROTOCOL
7
1
8
8
W/R
REGISTER ADDRESS
DATA BYTE
A6 A5 A4 A3 A2 A1 A0
I2C ADDRESS
Figure 72. I2C Register Structure
(1)
(2)
54
Total capacitive load for each bus line ≤ 400 pF.
Ensured by design.
Submit Documentation Feedback
Copyright © 2015–2018, Texas Instruments Incorporated
Product Folder Links: LMK03328
�LMK03328
www.ti.com
SNAS668D – AUGUST 2015 – REVISED APRIL 2018
Programming (continued)
The acknowledge bit (A) or non-acknowledge bit (A’) is the 9th bit attached to any 8-bit data byte and is always
generated by the receiver to inform the transmitter that the byte has been received (when A = 0) or not (when A’
= 0). A = 0 is done by pulling the SDA line low during the 9th clock pulse and A’ = 0 is done by leaving the SDA
line high during the 9th clock pulse.
The I2C master initiates the data transfer by asserting a start condition which initiates a response from all slave
devices connected to the serial bus. Based on the 8-bit address byte sent by the master over the SDA line
(consisting of the 7-bit slave address (MSB first) and an R/W’ bit), the device whose address corresponds to the
transmitted address responds by sending an acknowledge bit. All other devices on the bus remain idle while the
selected device waits for data transfer with the master.
After the data transfer has occurred, stop conditions are established. In write mode, the master asserts a stop
condition to end data transfer during the 10th clock pulse following the acknowledge bit for the last data byte
from the slave. In read mode, the master receives the last data byte from the slave but does not pull SDA low
during the 9th clock pulse. This is known as a non-acknowledge bit. By receiving the non-acknowledge bit, the
slave knows the data transfer is finished and enters the idle mode. The master then takes the data line low
during the low period before the 10th clock pulse, and high during the 10th clock pulse to assert a stop condition.
A generic transaction is shown in Figure 73.
1
S
7
Slave Address
1
R/W
MSB
LSB
S
Start Condition
Sr
Repeated Start Condition
1
A
8
Data Byte
MSB
1
A
1
P
LSB
R/W 1 = Read (Rd) from slave; 0 = Write (Wr) to slave
A
Acknowledge (ACK = 0 and NACK = 1)
P
Stop Condition
Master to Slave Transmission
Slave to Master Transmission
Figure 73. Generic Programming Sequence
The LMK03328 I2C interface supports Block Register Write/Read, Read/Write SRAM, and Read/Write EEPROM
operations. For Block Register Write/Read operations, the I2C master can individually access addressed
registers that are made of an 8-bit data byte. The offset of the indexed register is encoded in the register
address, as described in Table 9. To change the most significant 5 bits of the I2C slave address from its default
value, the EEPROM byte 11 can be rewritten with the desired value and R10 provides a read-back of the new
slave address.
Table 9. I2C Slave Address
OPERATING
MODE
R10.7
R10.6
R10.5
R10.4
R10.3
Hard pin
1
0
1
0
1
Soft pin
1
0
1
0
1
R10.2
R10.1
0
0
Controlled by GPIO1 state.
GPIO1
R10[2-1]
0
0x0
VIM
0x1
1
0x3
Submit Documentation Feedback
Copyright © 2015–2018, Texas Instruments Incorporated
Product Folder Links: LMK03328
55
�LMK03328
SNAS668D – AUGUST 2015 – REVISED APRIL 2018
www.ti.com
10.5.2 Block Register Write
The I2C Block Register Write transaction is illustrated in Figure 74 and consists of the following sequence:
1. Master issues a Start Condition.
2. Master writes the 7-bit Slave Address following by a Write bit.
3. Master writes the 8-bit Register address as the CommandCode of the programming sequence.
4. Master writes one or more data bytes each of which should be acknowledged by the slave. The slave
increments the internal register address after each byte.
5. Master issues a Stop Condition to terminate the transaction.
1
S
7
Slave Address
8
Data Byte 0
1
Wr
1
A
1
A
...
8
CommandCode
1
A
8
Data Byte N-1
1
A
1
P
Figure 74. Block Register Write Programming Sequence
10.5.3 Block Register Read
The I2C Block Register Read transaction is illustrated in Figure 75 and consists of the following sequence:
1. Master issues a Start Condition.
2. Master writes the 7-bit Slave Address followed by a Write bit.
3. Master writes the 8-bit Register address as the CommandCode of the programming sequence.
4. Master issues a Repeated Start Condition.
5. Master writes the 7-bit Slave Address following by a Read bit.
6. Slave returns one or more data bytes as long as the Master continues to acknowledge them. The slave
increments the internal register address after each byte.
7. Master issues a Stop Condition to terminate the transaction.
1
S
7
Slave Address
8
Data Byte 0
1
Wr
1
A
1
A
8
CommandCode
1
A
...
1
Sr
7
Slave Address
8
Data Byte N-1
1
Rd
1
A
1
A
1
P
Figure 75. Block Register Read Programming Sequence
10.5.4 Write SRAM
The on-chip SRAM is a volatile, shadow memory array used to temporarily store register data, and is intended
only for programming the non Volatile EEPROM array with one or more device start-up configuration settings
(pages). The SRAM has the identical data format as the EEPROM map. The register configuration data can be
transferred to the SRAM array through special memory access registers in the register map.
The SRAM is made up of a base memory array and 6 pages of identical memory arrays. To successfully
program the SRAM, the complete base array and at least one page should be written.
The following details the programming sequence to transfer the device registers into the appropriate SRAM
page:
1. Program the device registers to match a desired setting.
2. Write R145[3:0] with a valid SRAM page (0 to 5) to commit the current register data.
3. Write a 1 to R137.6. This ensures that the device registers are copied to the desired SRAM page.
4. If another device setting is desired to be written to a different SRAM page, repeat steps 1-3 and select an
unused SRAM page.
56
Submit Documentation Feedback
Copyright © 2015–2018, Texas Instruments Incorporated
Product Folder Links: LMK03328
�LMK03328
www.ti.com
SNAS668D – AUGUST 2015 – REVISED APRIL 2018
The SRAM can also be written with particular values according to the following programming sequence:
1. Write the most significant 8th bit of the SRAM address in R139.0 and write the least significant 8 bits in
R140.
2. Write the desired data byte in R142 in the same I2C transaction and this data byte will be written to the
address specified in the step above. Any additional access that is part of the same transaction will cause the
SRAM address to be incremented and a write will take place to the next SRAM address. Access to SRAM
will terminate at the end of current I2C transaction.
3. Steps 1 and 2 need to be followed to change EEPROM bytes 11 and 12. Byte 11 denotes the I2C slave
address of LMK03328 and Byte 12 denotes an 8-b user space that can be used as a device identifier among
multiple LMK03328 instances with different EEPROM images.
NOTE
It is possible to increment SRAM address incorrectly when 2 successive accesses are
made to R140.
10.5.5 Write EEPROM
The on-chip EEPROM is a non-volatile memory array used to permanently store register data for one or more
device start-up configuration settings (pages), which can be selected to initialize registers upon power-up or
POR. There are a total of 6 independent EEPROM pages of which each page is selected by the 3-level
GPIO[3:2] pins, and each page is comprised of bits shown in the EEPROM Map. The transfer must first happen
to the corresponding SRAM page and then to the EEPROM page. During “EEPROM write”, R137.2 is a 1 and
the EEPROM contents cannot be accessed. The following details the programming sequence to transfer the
entire contents of SRAM to EEPROM:
1. Make sure the "Write SRAM" procedure (Write SRAM) was done to commit the register settings to the SRAM
page(s) with start-up configurations intended for programming to the EEPROM array.
2. Write 0xEA to R144. This provides basic protection from inadvertent programming of EEPROM.
3. Write a 1 to R137.0. This programs the entire SRAM contents to EEPROM. Once completed, the contents in
R136 will increment by 1. R136 contains the total number of EEPROM programming cycles that are
successfully completed.
4. Write 0x00 to R144 to protect against inadvertent programming of EEPROM.
5. If an EEPROM write is unsuccessful, a readback of R137.5 will result in a 1. In this case, the device will not
function correctly and will be locked up. To unlock the device for correct operation, a new EEPROM write
sequence should be initiated and successfully completed.
10.5.6 Read SRAM
The contents of the SRAM can be read out, one word at a time, starting with that of the requested address. The
following details the programming sequence for an SRAM read by address:
1. Write the most significant 9th bit of the SRAM address in R139.0 and write the least significant 8 bits of the
SRAM address in R140.
2. The SRAM data located at the address specified in the step above can be obtained by reading R142 in the
same I2C transaction. Any additional access that is part of the same transaction will cause the SRAM
address to be incremented and a read will take place of the next SRAM address. Access to SRAM will
terminate at the end of current I2C transaction.
NOTE
It is possible to increment SRAM address incorrectly when 2 successive accesses are
made to R140.
Submit Documentation Feedback
Copyright © 2015–2018, Texas Instruments Incorporated
Product Folder Links: LMK03328
57
�LMK03328
SNAS668D – AUGUST 2015 – REVISED APRIL 2018
www.ti.com
10.5.7 Read EEPROM
The contents of the EEPROM can be read out, one word at a time, starting with that of the requested address.
The following details the programming sequence for an EEPROM read by address:
1. Write the most significant 9th bit of the EEPROM address in R139.0 and write the least significant 8 bits of
the EEPROM address in R140.
2. The EEPROM data located at the address specified in the step above can be obtained by reading R141 in
the same I2C transaction. Any additional access that is part of the same transaction will cause the EEPROM
address to be incremented and a read will take place of the next EEPROM address. Access to EEPROM will
terminate at the end of current I2C transaction.
NOTE
It is possible to increment EEPROM address incorrectly when 2 successive accesses are
made to R140.
10.5.8 Read ROM
The contents of the ROM can be read out, one word at a time, starting with that of the requested address. The
following details the programming sequence of a ROM read by address:
1. Write the most significant 11th, 10th, 9th, and 8th bit of the ROM address in R139[3-0] and write the least
significant 8 bits of the ROM address in R140.
2. The ROM data located at the address specified in the step above can be obtained by reading R143 in the
same I2C transaction. Any additional access that is part of the same transaction will cause the ROM address
to be incremented and a read will take place of the next ROM address. Access to ROM will terminate at the
end of current I2C transaction.
58
Submit Documentation Feedback
Copyright © 2015–2018, Texas Instruments Incorporated
Product Folder Links: LMK03328
�LMK03328
www.ti.com
SNAS668D – AUGUST 2015 – REVISED APRIL 2018
10.5.9 Default Device Configurations in EEPROM and ROM
Table 10 through Table 14 show the device default configurations stored in the on-chip EEPROM. Table 15 through Table 19. show the device default
configurations stored in the on-chip ROM.
Table 10. Default EEPROM Contents (HW_SW_CTRL = "0") – Input and Status Configuration (1) (2)
PRI TYPE
PRI
DOUBLER
SEC
INPUT
(MHz)
SEC TYPE
XO INT
LOAD (pF)
SEC
DOUBLER
STATUS1
MUX
STATUS0
MUX
STATUS1
PREDIV
STATUS1
DIV
STATUS1
FREQ
(MHz)
STATUS1
RISE /
FALL
TIME (ns)
25
LVDS
Enabled
25
XTAL
9
Enabled
LOL1
LOL2
n/a
n/a
n/a
n/a
25
LVCMOS
Enabled
25
XTAL
9
Enabled
LOL1
LOL2
n/a
n/a
n/a
n/a
01
25
LVCMOS
Enabled
25
XTAL
9
Enabled
LOL1
LOL2
n/a
n/a
n/a
n/a
10
25
LVCMOS
Enabled
25
XTAL
9
Enabled
LOL1
LOR_
PRI
n/a
n/a
n/a
n/a
11
25
LVCMOS
Enabled
25
XTAL
9
Enabled
LOL1
LOL2
n/a
n/a
n/a
n/a
GPIO[3:2]
PRI
INPUT
(MHz)
VIM, VIM
00
(1)
(2)
100-Ω internal termination enabled (if applicable)
Internal AC biasing enabled (if applicable)
Submit Documentation Feedback
Copyright © 2015–2018, Texas Instruments Incorporated
Product Folder Links: LMK03328
59
�LMK03328
SNAS668D – AUGUST 2015 – REVISED APRIL 2018
www.ti.com
Table 11. Default EEPROM Contents (HW_SW_CTRL = "0") – PLL1 Configuration (1)
GPIO[3:2]
PLL1
INPUT
MUX (2)
PLL1
INPUT
(MHz)
VIM, VIM
REFSEL
50
00
REFSEL
01
(1)
(2)
60
PLL1 R
DIV
PLL1 M
DIV
PLL1 N
DIV
PLL1 N
DIV INT
PLL1 N
DIV NUM
PLL1 N
DIV DEN
PLL1
FRAC
ORDER
PLL1
FRAC
DITHER
PLL1 VCO
(MHz)
PLL1 P
DIV
Clock Gen
Integer
1
1
102
102
0
1
n/a
Disabled
5100
8
50
Clock Gen
Integer
1
1
96
96
0
1
n/a
Disabled
4800
4
REFSEL
50
Clock Gen
Integer
1
1
100
100
0
1
n/a
Disabled
5000
8
10
REFSEL
50
Clock Gen
Integer
1
1
100
100
0
1
n/a
Disabled
5000
8
11
REFSEL
50
Clock Gen
Integer
1
1
100
100
0
1
n/a
Disabled
5000
8
PLL1 TYPE
When PLL1 is set as an integer-based clock generator, external loop filter component, C2, should be 3.3 nF and loop bandwidth is around 400 kHz. When PLL1 is set as a fractionalbased clock generator, external loop filter component, C2, should be 33 nF and loop bandwidth is around 400 kHz.
Refer to Table 3 when entry is REFSEL.
Submit Documentation Feedback
Copyright © 2015–2018, Texas Instruments Incorporated
Product Folder Links: LMK03328
�LMK03328
www.ti.com
SNAS668D – AUGUST 2015 – REVISED APRIL 2018
Table 12. Default EEPROM Contents (HW_SW_CTRL = "0") – PLL2 Configuration (1)
GPIO[3:2]
PLL2
INPUT
MUX (2)
PLL2
INPUT
(MHz)
VIM, VIM
REFSEL
50
00
REFSEL
01
(1)
(2)
PLL2 R
DIV
PLL2 M
DIV
PLL2 N
DIV
PLL2 N
DIV INT
PLL2 N
DIV NUM
PLL2 N
DIV DEN
PLL2
FRAC
ORDER
PLL2
FRAC
DITHER
PLL2 VCO
(MHz)
PLL2 P
DIV
Clock Gen
Integer
1
1
100
100
0
1
n/a
Disabled
5000
8
50
Clock Gen
Integer
1
1
100
100
0
1
n/a
Disabled
5000
8
REFSEL
50
Clock Gen
Integer
1
1
96
96
0
1
n/a
Disabled
4800
8
10
REFSEL
50
Disabled
1
1
1
1
0
1
n/a
n/a
n/a
8
11
REFSEL
50
Clock Gen
Integer
1
1
96
96
0
1
n/a
Disabled
4800
8
PLL2 TYPE
When PLL2 is set as an integer-based clock generator, external loop filter component, C2, should be 3.3 nF and loop bandwidth is around 400 kHz. When PLL2 is set as a fractionalbased clock generator, external loop filter component, C2, should be 33 nF and loop bandwidth is around 400 kHz.
Refer to Table 3 when entry is REFSEL.
Submit Documentation Feedback
Copyright © 2015–2018, Texas Instruments Incorporated
Product Folder Links: LMK03328
61
�LMK03328
SNAS668D – AUGUST 2015 – REVISED APRIL 2018
www.ti.com
Table 13. Default EEPROM Contents (HW_SW_CTRL = "0") – Outputs [0-3] Configuration
62
GPIO[3:2]
OUT0-1
DIVIDER
OUT0-1 FREQ
(MHz)
OUT0-1 MUX
SELECT
OUT0 TYPE
OUT1 TYPE
OUT2-3
DIVIDER
OUT2-3 FREQ
(MHz)
OUT2-3 MUX
SELECT
OUT2 TYPE
OUT3 TYPE
VIM, VIM
00
2
312.5
PLL2
LVPECL
LVPECL
4
156.25
PLL2
LVPECL
LVPECL
4
156.25
PLL2
LVPECL
LVPECL
5
125
PLL2
LVPECL
LVPECL
01
16
156.25
PLL1
LVPECL
LVPECL
25
100
PLL2
LVPECL
LVPECL
10
16
156.25
PLL1
LVPECL
LVPECL
16
156.25
PLL1
LVPECL
LVPECL
11
4
156.25
PLL1
LVPECL
LVPECL
4
156.25
PLL1
LVPECL
LVPECL
Submit Documentation Feedback
Copyright © 2015–2018, Texas Instruments Incorporated
Product Folder Links: LMK03328
�LMK03328
www.ti.com
SNAS668D – AUGUST 2015 – REVISED APRIL 2018
Table 14. Default EEPROM Contents (HW_SW_CTRL = "0") – Outputs [4-7] Configuration
OUT4
DIV
OUT4
FREQ
(MHz)
OUT4
MUX
SELECT
OUT4
TYPE
VIM, VIM
3
212.5
PLL1
00
48
25
PLL1
01
50
50
10
16
156.25
11
6
100
GPIO
[3:2]
OUT5
DIV
OUT5
FREQ
(MHz)
OUT5
MUX
SELECT
OUT5
TYPE
OUT6
DIV
OUT6
FREQ
(MHz)
OUT6
MUX
SELECT
OUT6
TYPE
LVPECL
3
212.5
PLL1
LVPECL
6
106.25
PLL1
LVPECL
LVPECL
12
100
PLL1
LVPECL
1
n/a
n/a
Disable
PLL2
LVPECL
20
125
PLL1
LVPECL
25
100
PLL2
LVCMOS
PLL1
LVPECL
16
156.25
PLL1
LVPECL
16
156.25
PLL1
LVPECL
PLL2
LVPECL
24
25
PLL2
LVPECL
24
25
PLL2
LVPECL
OUT7
FREQ
(MHz)
OUT7
MUX
SELECT
6
106.25
PLL1
LVPECL
18
66.6666
PLL1
LVCMOS
100
25
PLL2
LVCMOS
16
156.25
PLL1
LVPECL
6
100
PLL2
LVPECL
OUT7
DIV
OUT7
TYPE
Submit Documentation Feedback
Copyright © 2015–2018, Texas Instruments Incorporated
Product Folder Links: LMK03328
63
�LMK03328
SNAS668D – AUGUST 2015 – REVISED APRIL 2018
www.ti.com
Table 15. Default ROM Contents (HW_SW_CTRL = "1") - Input and Status Configuration
GPIO[5:0]
(decimal)
PRI INPUT
(MHz)
PRI TYPE
PRI
DOUBLER
SEC
INPUT
(MHz)
SEC TYPE
XO INT
LOAD (pF)
SEC
DOUBLER
STATUS1
MUX
STATUS0
MUX
STATUS1
PREDIV
STATUS1
DIV
STATUS1
FREQ
(MHz)
STATUS1
RISE / FALL
TIME (ns)
0
25
LVCMOS
Enabled
25
XTAL
9
Enabled
LOL1
LOR_PRI
n/a
n/a
n/a
n/a
1
25
LVCMOS
Enabled
25
XTAL
9
Enabled
LOL1
LOR_PRI
n/a
n/a
n/a
n/a
2
25
LVCMOS
Enabled
25
XTAL
9
Enabled
LOL1
LOR_PRI
n/a
n/a
n/a
n/a
3
25
LVCMOS
Enabled
25
XTAL
9
Enabled
LOL1
LOR_PRI
n/a
n/a
n/a
n/a
4
25
LVCMOS
Enabled
25
XTAL
9
Enabled
LOL1
LOL2
n/a
n/a
n/a
n/a
5
25
LVCMOS
Enabled
25
XTAL
9
Enabled
LOL1
LOL2
n/a
n/a
n/a
n/a
6
25
LVCMOS
Enabled
25
XTAL
9
Enabled
LOL1
LOL2
n/a
n/a
n/a
n/a
7
25
LVCMOS
Enabled
25
XTAL
9
Enabled
LOL1
LOR_PRI
n/a
n/a
n/a
n/a
8
25
LVCMOS
Enabled
25
XTAL
9
Enabled
PLL1
LOL1
5
15
66.6666
2.1
64
9
19.2
LVCMOS
Enabled
19.2
LVCMOS
n/a
Enabled
LOL1
LOL2
n/a
n/a
n/a
n/a
10
25
LVCMOS
Enabled
25
XTAL
9
Enabled
LOL1
LOL2
n/a
n/a
n/a
n/a
11
38.88
LVCMOS
Enabled
38.88
XTAL
9
Enabled
LOL1
LOL2
n/a
n/a
n/a
n/a
12
25
LVCMOS
Enabled
25
XTAL
9
Enabled
LOL1
LOL2
n/a
n/a
n/a
n/a
13
25
LVCMOS
Enabled
25
XTAL
9
Enabled
PLL1
LOL1
5
15
66.6666
2.1
14
25
LVCMOS
Enabled
25
XTAL
9
Enabled
PLL1
LOL1
5
15
66.6666
2.1
15
25
LVCMOS
Enabled
25
XTAL
9
Enabled
PLL1
LOL1
5
15
66.6666
LVCMOS
16
25
LVCMOS
Enabled
25
XTAL
9
Enabled
LOL1
LOL2
n/a
n/a
n/a
n/a
17
38.88
LVCMOS
Enabled
38.88
LVCMOS
n/a
Enabled
LOL1
LOR_PRI
n/a
n/a
n/a
n/a
18
25
LVCMOS
Enabled
25
XTAL
9
Enabled
LOL1
LOL2
n/a
n/a
n/a
n/a
19
25
LVCMOS
Enabled
25
XTAL
9
Enabled
LOL1
LOL2
n/a
n/a
n/a
n/a
20
25
LVCMOS
Enabled
25
XTAL
9
Enabled
LOL1
LOR_PRI
n/a
n/a
n/a
n/a
21
25
LVCMOS
Enabled
25
XTAL
9
Enabled
PLL1
LOL1
5
15
66.6666
2.1
22
25
LVCMOS
Enabled
25
XTAL
9
Enabled
PLL1
LOL1
5
15
66.6666
2.1
23
25
LVCMOS
Enabled
25
XTAL
9
Enabled
LOL1
LOL2
n/a
n/a
n/a
n/a
24
25
LVCMOS
Enabled
25
XTAL
9
Enabled
LOL1
LOL2
n/a
n/a
n/a
n/a
25
25
LVCMOS
Enabled
25
XTAL
9
Enabled
LOL1
LOL2
n/a
n/a
n/a
n/a
26
25
LVCMOS
Enabled
25
XTAL
9
Enabled
LOL1
LOR_PRI
n/a
n/a
n/a
n/a
27
25
LVCMOS
Enabled
25
XTAL
9
Enabled
LOL1
LOL2
n/a
n/a
n/a
n/a
28
25
LVCMOS
Enabled
25
XTAL
9
Enabled
LOL1
LOR_PRI
n/a
n/a
n/a
n/a
29
25
LVCMOS
Enabled
25
XTAL
9
Enabled
LOL1
LOR_PRI
n/a
n/a
n/a
n/a
30
25
LVCMOS
Enabled
25
XTAL
9
Enabled
LOL1
LOL2
n/a
n/a
n/a
n/a
31
25
LVCMOS
Enabled
25
XTAL
9
Enabled
LOL1
LOL2
n/a
n/a
n/a
n/a
Submit Documentation Feedback
Copyright © 2015–2018, Texas Instruments Incorporated
Product Folder Links: LMK03328
�LMK03328
www.ti.com
SNAS668D – AUGUST 2015 – REVISED APRIL 2018
Table 15. Default ROM Contents (HW_SW_CTRL = "1") - Input and Status Configuration (continued)
GPIO[5:0]
(decimal)
PRI INPUT
(MHz)
PRI TYPE
PRI
DOUBLER
SEC
INPUT
(MHz)
SEC TYPE
XO INT
LOAD (pF)
SEC
DOUBLER
STATUS1
MUX
STATUS0
MUX
STATUS1
PREDIV
STATUS1
DIV
STATUS1
FREQ
(MHz)
STATUS1
RISE / FALL
TIME (ns)
32
25
LVCMOS
Enabled
25
XTAL
9
Enabled
LOL1
LOL2
n/a
n/a
n/a
n/a
33
25
LVCMOS
Enabled
25
XTAL
9
Enabled
LOL1
LOL2
n/a
n/a
n/a
n/a
34
25
LVCMOS
Enabled
25
XTAL
9
Enabled
LOL1
LOL2
n/a
n/a
n/a
n/a
35
25
LVCMOS
Enabled
25
XTAL
9
Enabled
PLL1
LOL1
5
15
66.6666
2.1
36
38.88
LVCMOS
Enabled
38.88
LVCMOS
n/a
Enabled
PLL1
LOL1
5
15
66.6666
2.1
37
19.2
LVCMOS
Enabled
19.2
LVCMOS
n/a
Enabled
PLL1
LOL1
5
15
66.6666
2.1
38
25
LVCMOS
Enabled
25
LVCMOS
n/a
Enabled
LOL1
LOL2
n/a
n/a
n/a
n/a
39
25
LVCMOS
Enabled
25
LVCMOS
n/a
Enabled
LOL1
LOL2
n/a
n/a
n/a
n/a
40
40.96
LVCMOS
Enabled
40.96
LVCMOS
n/a
Enabled
LOL1
LOL2
n/a
n/a
n/a
n/a
41
25
LVCMOS
Enabled
25
LVCMOS
n/a
Enabled
LOL1
LOL2
n/a
n/a
n/a
n/a
42
40.96
LVCMOS
Enabled
40.96
LVCMOS
n/a
Enabled
LOL1
LOL2
n/a
n/a
n/a
n/a
43
25
LVCMOS
Enabled
25
LVCMOS
n/a
Enabled
LOL1
LOL2
n/a
n/a
n/a
n/a
44
40.96
LVCMOS
Enabled
40.96
LVCMOS
n/a
Enabled
LOL1
LOL2
n/a
n/a
n/a
n/a
45
27
LVCMOS
Enabled
27
LVCMOS
n/a
Enabled
LOL1
LOL2
n/a
n/a
n/a
n/a
46
27
LVCMOS
Enabled
27
LVCMOS
n/a
Enabled
LOL1
LOL2
n/a
n/a
n/a
n/a
47
25
LVCMOS
Enabled
25
XTAL
9
Enabled
PLL1
LOL1
5
15
66.6666
2.1
48
38.88
LVCMOS
Enabled
38.88
XTAL
9
Enabled
PLL1
LOL1
5
15
66.6666
2.1
49
25
LVCMOS
Enabled
25
XTAL
9
Enabled
LOL1
LOL2
n/a
n/a
n/a
n/a
50
25
LVCMOS
Enabled
25
XTAL
9
Enabled
LOL1
LOL2
n/a
n/a
n/a
n/a
51
112
LVCMOS
Disabled
38.88
LVCMOS
n/a
Enabled
LOL1
LOL2
n/a
n/a
n/a
n/a
52
112
LVCMOS
Disabled
38.88
LVCMOS
n/a
Enabled
LOL1
LOL2
n/a
n/a
n/a
n/a
53
25
LVCMOS
Enabled
25
XTAL
9
Enabled
LOL1
LOL2
n/a
n/a
n/a
n/a
54
38.88
LVCMOS
Enabled
38.88
XTAL
9
Enabled
LOL1
LOL2
n/a
n/a
n/a
n/a
55
38.88
LVCMOS
Enabled
38.88
LVCMOS
n/a
Enabled
LOL1
LOR_PRI
n/a
n/a
n/a
n/a
56
25
LVCMOS
Enabled
25
XTAL
9
Enabled
LOL1
LOL2
n/a
n/a
n/a
n/a
57
25
LVCMOS
Enabled
25
XTAL
9
Enabled
LOL1
LOL2
n/a
n/a
n/a
n/a
58
25
LVCMOS
Enabled
25
XTAL
9
Enabled
LOL1
LOL2
n/a
n/a
n/a
n/a
59
25
LVCMOS
Enabled
25
XTAL
9
Enabled
LOL1
LOL2
n/a
n/a
n/a
n/a
60
25
LVCMOS
Enabled
25
XTAL
9
Enabled
LOL1
LOL2
n/a
n/a
n/a
n/a
61
25
LVCMOS
Enabled
25
XTAL
9
Enabled
LOL1
LOR_PRI
n/a
n/a
n/a
n/a
62
25
LVCMOS
Enabled
25
XTAL
9
Enabled
LOL1
LOL2
n/a
n/a
n/a
n/a
63
38.88
LVCMOS
Enabled
38.88
XTAL
9
Enabled
LOL1
LOL2
n/a
n/a
n/a
n/a
Submit Documentation Feedback
Copyright © 2015–2018, Texas Instruments Incorporated
Product Folder Links: LMK03328
65
�LMK03328
SNAS668D – AUGUST 2015 – REVISED APRIL 2018
www.ti.com
Table 16. Default ROM Contents (HW_SW_CTRL = "1") - PLL1 Configuration (1)
GPIO[5:0]
(decimal)
PLL1
INPUT
MUX (2)
PLL1
INPUT
(MHz)
PLL1 TYPE
PLL1 R
DIV
PLL1 M
DIV
PLL1 N DIV
PLL1 N
DIV INT
PLL1 N
DIV NUM
PLL1 N
DIV DEN
PLL1
FRAC
ORDER
PLL1
FRAC
DITHER
PLL1 VCO
(MHz)
PLL1 P
DIV
0
REFSEL
50
Clock Gen
Integer
1
1
100
100
0
1
n/a
Disabled
5000
8
1
REFSEL
50
Clock Gen
Integer
1
1
100
100
0
1
n/a
Disabled
5000
8
2
REFSEL
50
Clock Gen
Integer
1
1
100
100
0
1
n/a
Disabled
5000
8
3
REFSEL
50
Clock Gen
Integer
1
1
100
100
0
1
n/a
Disabled
5000
5
4
REFSEL
50
Clock Gen
Integer
1
1
100
100
0
1
n/a
Disabled
5000
8
5
REFSEL
50
Clock Gen
Integer
1
1
100
100
0
1
n/a
Disabled
5000
8
6
REFSEL
50
Clock Gen
Integer
1
1
100
100
0
1
n/a
Disabled
5000
8
7
REFSEL
50
Clock Gen
Integer
1
1
100
100
0
1
n/a
Disabled
5000
5
8
REFSEL
50
Clock Gen
Integer
1
1
100
100
0
1
n/a
Disabled
5000
8
9
REFSEL
38.4
Clock Gen
Fractional
1
1
128
128
0
1
n/a
Disabled
4915.2
8
10
REFSEL
50
Clock Gen
Integer
1
1
96
96
0
1
n/a
Disabled
4800
8
11
REFSEL
77.76
Clock Gen
Fractional
1
1
64.30041165
64
1173483
3906250
Third
Enabled
5000
2
12
REFSEL
50
Clock Gen
Integer
1
1
100
100
0
1
n/a
Disabled
5000
8
13
REFSEL
50
Clock Gen
Integer
1
1
100
100
0
1
n/a
Disabled
5000
8
14
REFSEL
50
Clock Gen
Integer
1
1
100
100
0
1
n/a
Disabled
5000
8
15
REFSEL
50
Clock Gen
Integer
1
1
100
100
0
1
n/a
Disabled
5000
8
16
REFSEL
50
Clock Gen
Integer
1
1
96
96
0
1
n/a
Disabled
4800
8
17
REFSEL
77.76
Clock Gen
Integer
1
1
64
64
0
1
n/a
Disabled
4976.64
8
(1)
(2)
66
When PLL1 is set as an integer-based clock generator, external loop filter component, C2, should be 3.3nF and loop bandwidth is around 400kHz. When PLL1 is set as a fractional-based
clock generator, external loop filter component, C2, should be 33nF and loop bandwidth is around 400kHz.
Refer to Table 3 when entry is REFSEL.
Submit Documentation Feedback
Copyright © 2015–2018, Texas Instruments Incorporated
Product Folder Links: LMK03328
�LMK03328
www.ti.com
SNAS668D – AUGUST 2015 – REVISED APRIL 2018
Table 16. Default ROM Contents (HW_SW_CTRL = "1") - PLL1 Configuration(1) (continued)
GPIO[5:0]
(decimal)
PLL1
INPUT
MUX (2)
PLL1
INPUT
(MHz)
PLL1 TYPE
PLL1 R
DIV
PLL1 M
DIV
PLL1 N DIV
PLL1 N
DIV INT
PLL1 N
DIV NUM
PLL1 N
DIV DEN
PLL1
FRAC
ORDER
PLL1
FRAC
DITHER
PLL1 VCO
(MHz)
PLL1 P
DIV
18
REFSEL
50
Clock Gen
Integer
1
1
100
100
0
1
n/a
Disabled
5000
4
19
REFSEL
50
Clock Gen
Integer
1
1
96
96
0
1
n/a
Disabled
4800
6
20
REFSEL
50
Clock Gen
Integer
1
1
96
96
0
1
n/a
Disabled
4800
6
21
REFSEL
50
Clock Gen
Integer
1
1
100
100
0
1
n/a
Disabled
5000
8
22
REFSEL
50
Clock Gen
Integer
1
1
100
100
0
1
n/a
Disabled
5000
8
23
REFSEL
50
Clock Gen
Integer
1
1
96
96
0
1
n/a
Disabled
4800
6
24
REFSEL
50
Clock Gen
Integer
1
1
100
100
0
1
n/a
Disabled
5000
8
25
REFSEL
50
Clock Gen
Integer
1
1
96
96
0
1
n/a
Disabled
4800
6
26
REFSEL
50
Clock Gen
Integer
1
1
96
96
0
1
n/a
Disabled
4800
6
27
REFSEL
50
Clock Gen
Integer
1
1
100
100
0
1
n/a
Disabled
5000
8
28
REFSEL
50
Clock Gen
Integer
1
1
100
100
0
1
n/a
Disabled
5000
8
29
REFSEL
50
Clock Gen
Integer
1
1
100
100
0
1
n/a
Disabled
5000
8
30
REFSEL
50
Clock Gen
Integer
1
1
96
96
0
1
n/a
Disabled
4800
6
31
REFSEL
50
Clock Gen
Integer
1
1
100
100
0
1
n/a
Disabled
5000
8
32
REFSEL
50
Clock Gen
Integer
1
1
100
100
0
1
n/a
Disabled
5000
8
33
REFSEL
50
Clock Gen
Integer
1
1
96
96
0
1
n/a
Disabled
4800
8
34
REFSEL
50
Clock Gen
Integer
1
1
100
100
0
1
n/a
Disabled
5000
8
35
REFSEL
50
Clock Gen
Integer
1
1
100
100
0
1
n/a
Disabled
5000
8
36
REFSEL
77.76
Clock Gen
Fractional
1
1
64.30041165
64
1173483
3906250
Third
Enabled
5000
8
Submit Documentation Feedback
Copyright © 2015–2018, Texas Instruments Incorporated
Product Folder Links: LMK03328
67
�LMK03328
SNAS668D – AUGUST 2015 – REVISED APRIL 2018
www.ti.com
Table 16. Default ROM Contents (HW_SW_CTRL = "1") - PLL1 Configuration(1) (continued)
GPIO[5:0]
(decimal)
PLL1
INPUT
MUX (2)
PLL1
INPUT
(MHz)
PLL1 TYPE
PLL1 R
DIV
PLL1 M
DIV
PLL1 N DIV
PLL1 N
DIV INT
PLL1 N
DIV NUM
PLL1 N
DIV DEN
PLL1
FRAC
ORDER
PLL1
FRAC
DITHER
PLL1 VCO
(MHz)
PLL1 P
DIV
37
REFSEL
38.4
Clock Gen
Fractional
1
1
130.2083333
130
781250
3750000
Third
Enabled
5000
8
38
REFSEL
50
Clock Gen
Integer
1
1
100
100
0
1
n/a
Disabled
5000
8
39
REFSEL
50
Clock Gen
Integer
1
1
96
96
0
1
n/a
Disabled
4800
4
40
REFSEL
81.92
Clock Gen
Fractional
1
1
61.03515625
61
55296
1572864
Third
Enabled
5000
4
41
REFSEL
50
Clock Gen
Integer
1
1
100
100
0
1
n/a
Disabled
5000
8
42
REFSEL
81.92
Clock Gen
Fractional
1
1
61.03515625
61
55296
1572864
Third
Enabled
5000
8
43
REFSEL
50
Clock Gen
Integer
1
1
100
100
0
1
n/a
Disabled
5000
8
44
REFSEL
81.92
Clock Gen
Fractional
1
1
61.03515625
61
55296
1572864
Third
Enabled
5000
8
45
REFSEL
54
Clock Gen
Fractional
1
1
92.5925926
92
2370371
4000001
Third
Enabled
5000
5
46
REFSEL
54
Clock Gen
Fractional
1
1
92.16
92
640000
4000000
Third
Enabled
4976.64
8
47
REFSEL
50
Clock Gen
Integer
1
1
100
100
0
1
n/a
Disabled
5000
8
48
REFSEL
77.76
Clock Gen
Fractional
1
1
64.30041165
64
1173483
3906250
Third
Enabled
5000
2
49
REFSEL
50
Clock Gen
Integer
1
1
100
100
0
1
n/a
Disabled
5000
2
50
REFSEL
50
Clock Gen
Integer
1
1
100
100
0
1
n/a
Disabled
5000
8
51
SEC
77.76
Clock Gen
Fractional
1
1
64.30041165
64
1173483
3906250
Third
Enabled
5000
8
52
SEC
77.76
Clock Gen
Fractional
1
1
64.30041165
64
1173483
3906250
Third
Enabled
5000
8
53
REFSEL
50
Clock Gen
Integer
1
1
100
100
0
1
n/a
Disabled
5000
5
54
REFSEL
77.76
Clock Gen
Fractional
1
1
64.30041165
64
1173483
3906250
Third
Enabled
5000
2
55
REFSEL
77.76
Clock Gen
Fractional
1
1
64.30041165
64
1173483
3906250
Third
Enabled
5000
8
68
Submit Documentation Feedback
Copyright © 2015–2018, Texas Instruments Incorporated
Product Folder Links: LMK03328
�LMK03328
www.ti.com
SNAS668D – AUGUST 2015 – REVISED APRIL 2018
Table 16. Default ROM Contents (HW_SW_CTRL = "1") - PLL1 Configuration(1) (continued)
GPIO[5:0]
(decimal)
PLL1
INPUT
MUX (2)
PLL1
INPUT
(MHz)
PLL1 TYPE
PLL1 R
DIV
PLL1 M
DIV
PLL1 N DIV
PLL1 N
DIV INT
PLL1 N
DIV NUM
PLL1 N
DIV DEN
PLL1
FRAC
ORDER
PLL1
FRAC
DITHER
PLL1 VCO
(MHz)
PLL1 P
DIV
56
REFSEL
50
Clock Gen
Integer
1
1
96
96
0
1
n/a
Disabled
4800
6
57
REFSEL
50
Clock Gen
Integer
1
1
96
96
0
1
n/a
Disabled
4800
6
58
REFSEL
50
Clock Gen
Integer
1
1
100
100
0
1
n/a
Disabled
5000
8
59
REFSEL
50
Clock Gen
Integer
1
1
100
100
0
1
n/a
Disabled
5000
8
60
REFSEL
50
Clock Gen
Integer
1
1
100
100
0
1
n/a
Disabled
5000
8
61
REFSEL
50
Clock Gen
Integer
1
1
100
100
0
1
n/a
Disabled
5000
8
62
REFSEL
50
Clock Gen
Integer
1
1
100
100
0
1
n/a
Disabled
5000
8
63
REFSEL
77.76
Clock Gen
Fractional
1
1
64.30041165
64
1173483
3906250
Third
Enabled
5000
2
Submit Documentation Feedback
Copyright © 2015–2018, Texas Instruments Incorporated
Product Folder Links: LMK03328
69
�LMK03328
SNAS668D – AUGUST 2015 – REVISED APRIL 2018
www.ti.com
Table 17. Default ROM Contents (HW_SW_CTRL = "1") – PLL2 Configuration (1)
GPIO[5:0]
(decimal)
PLL2
INPUT
MUX (2)
PLL2
INPUT
(MHz)
PLL2 TYPE
PLL2 R
DIV
PLL2 M
DIV
PLL2 N DIV
PLL2 N
DIV INT
PLL2 N
DIV NUM
PLL2 N
DIV DEN
PLL2
FRAC
ORDER
PLL2
FRAC
DITHER
PLL2 VCO
(MHz)
PLL2 P
DIV
0
REFSEL
50
Disabled
1
1
1
1
0
1
n/a
n/a
n/a
8
1
REFSEL
50
Disabled
1
1
1
1
0
1
n/a
n/a
n/a
8
2
REFSEL
50
Disabled
1
1
1
1
0
1
n/a
n/a
n/a
8
3
REFSEL
50
Disabled
1
1
1
1
0
1
n/a
n/a
n/a
8
1
1
96
96
0
1
n/a
Disabled
4800
6
(1)
(2)
70
4
REFSEL
50
Clock Gen
Integer
5
REFSEL
50
Clock Gen
Integer
1
1
96
96
0
1
n/a
Disabled
4800
6
6
REFSEL
50
Clock Gen
Integer
1
1
96
96
0
1
n/a
Disabled
4800
6
7
REFSEL
50
Disabled
1
1
1
1
0
1
n/a
n/a
n/a
8
1
1
96
96
0
1
n/a
Disabled
4800
6
8
REFSEL
50
Clock Gen
Integer
9
REFSEL
38.4
Clock Gen
Fractional
1
1
130.2083333
130
781250
3750000
Third
Enabled
5000
4
10
REFSEL
50
Clock Gen
Integer
1
1
100
100
0
1
n/a
Disabled
5000
8
11
REFSEL
77.76
Clock Gen
Integer
1
1
64
64
0
1
n/a
Disabled
4976.64
8
12
REFSEL
50
Clock Gen
Integer
1
1
96
96
0
1
n/a
Disabled
4800
6
13
REFSEL
50
Clock Gen
Integer
1
1
96
96
0
1
n/a
Disabled
4800
6
14
REFSEL
50
Clock Gen
Integer
1
1
96
96
0
1
n/a
Disabled
4800
6
15
REFSEL
50
Clock Gen
Integer
1
1
96
96
0
1
n/a
Disabled
4800
6
16
REFSEL
50
Clock Gen
Integer
1
1
100
100
0
1
n/a
Disabled
5000
8
17
REFSEL
77.76
Disabled
1
1
1
1
0
1
n/a
n/a
n/a
8
1
1
96
96
0
1
n/a
Disabled
4800
6
1
1
100
100
0
1
n/a
Disabled
5000
8
18
REFSEL
50
Clock Gen
Integer
19
REFSEL
50
Clock Gen
Integer
When PLL2 is set as an integer-based clock generator, external loop filter component, C2, should be 3.3nF and loop bandwidth is around 400kHz. When PLL2 is set as a fractional-based
clock generator, external loop filter component, C2, should be 33nF and loop bandwidth is around 400kHz.
Refer to Table 3 when entry is REFSEL.
Submit Documentation Feedback
Copyright © 2015–2018, Texas Instruments Incorporated
Product Folder Links: LMK03328
�LMK03328
www.ti.com
SNAS668D – AUGUST 2015 – REVISED APRIL 2018
Table 17. Default ROM Contents (HW_SW_CTRL = "1") – PLL2 Configuration(1) (continued)
GPIO[5:0]
(decimal)
PLL2
INPUT
MUX (2)
PLL2
INPUT
(MHz)
PLL2 TYPE
PLL2 R
DIV
PLL2 M
DIV
PLL2 N DIV
PLL2 N
DIV INT
PLL2 N
DIV NUM
PLL2 N
DIV DEN
PLL2
FRAC
ORDER
PLL2
FRAC
DITHER
PLL2 VCO
(MHz)
PLL2 P
DIV
20
REFSEL
50
Disabled
1
1
1
1
0
1
n/a
n/a
n/a
8
21
REFSEL
50
Clock Gen
Integer
1
1
96
96
0
1
n/a
Disabled
4800
6
22
REFSEL
50
Clock Gen
Integer
1
1
96
96
0
1
n/a
Disabled
4800
6
23
REFSEL
50
Clock Gen
Integer
1
1
100
100
0
1
n/a
Disabled
5000
8
24
REFSEL
50
Clock Gen
Integer
1
1
96
96
0
1
n/a
Disabled
4800
6
25
REFSEL
50
Clock Gen
Integer
1
1
100
100
0
1
n/a
Disabled
5000
8
26
REFSEL
50
Disabled
1
1
1
1
0
1
n/a
n/a
n/a
8
27
REFSEL
50
Clock Gen
Integer
1
1
96
96
0
1
n/a
Disabled
4800
6
28
REFSEL
50
Disabled
1
1
1
1
0
1
n/a
n/a
n/a
8
29
REFSEL
50
Disabled
1
1
1
1
0
1
n/a
n/a
n/a
8
30
REFSEL
50
Clock Gen
Integer
1
1
100
100
0
1
n/a
Disabled
5000
8
31
REFSEL
50
Clock Gen
Integer
1
1
96
96
0
1
n/a
Disabled
4800
6
32
REFSEL
50
Clock Gen
Integer
1
1
96
96
0
1
n/a
Disabled
4800
6
33
REFSEL
50
Clock Gen
Integer
1
1
100
100
0
1
n/a
Disabled
5000
8
34
REFSEL
50
Clock Gen
Integer
1
1
96
96
0
1
n/a
Disabled
4800
6
35
REFSEL
50
Clock Gen
Integer
1
1
96
96
0
1
n/a
Disabled
4800
6
36
REFSEL
77.76
Clock Gen
Fractional
1
1
61.728395
61
2913580
4000000
Third
Enabled
4800
6
37
REFSEL
38.4
Clock Gen
Integer
1
1
125
125
0
1
n/a
Disabled
4800
6
38
REFSEL
50
Disabled
1
1
1
1
0
1
n/a
n/a
n/a
8
1
1
100
100
0
1
n/a
Disabled
5000
4
1
1
58.59375
58
2375000
4000000
Third
Enabled
4800
4
39
REFSEL
50
Clock Gen
Integer
40
REFSEL
81.92
Clock Gen
Fractional
Submit Documentation Feedback
Copyright © 2015–2018, Texas Instruments Incorporated
Product Folder Links: LMK03328
71
�LMK03328
SNAS668D – AUGUST 2015 – REVISED APRIL 2018
www.ti.com
Table 17. Default ROM Contents (HW_SW_CTRL = "1") – PLL2 Configuration(1) (continued)
GPIO[5:0]
(decimal)
PLL2
INPUT
MUX (2)
PLL2
INPUT
(MHz)
PLL2 TYPE
PLL2 R
DIV
PLL2 M
DIV
PLL2 N DIV
PLL2 N
DIV INT
PLL2 N
DIV NUM
PLL2 N
DIV DEN
PLL2
FRAC
ORDER
PLL2
FRAC
DITHER
PLL2 VCO
(MHz)
PLL2 P
DIV
41
REFSEL
50
Clock Gen
Integer
1
1
96
96
0
1
n/a
Disabled
4800
6
42
REFSEL
81.92
Clock Gen
Fractional
1
1
58.59375
58
2375000
4000000
Third
Enabled
4800
6
43
REFSEL
50
Clock Gen
Integer
1
1
96
96
0
1
n/a
Disabled
4800
6
44
REFSEL
81.92
Clock Gen
Fractional
1
1
58.59375
58
2375000
4000000
Third
Enabled
4800
6
45
REFSEL
54
Clock Gen
Integer
1
1
99
99
0
1
n/a
Disabled
5346
6
46
REFSEL
54
Clock Gen
Integer
1
1
99
99
0
1
n/a
Disabled
5346
6
47
REFSEL
50
Clock Gen
Integer
1
1
96
96
0
1
n/a
Disabled
4800
6
48
REFSEL
77.76
Clock Gen
Integer
1
1
64
64
0
1
n/a
Disabled
4976.64
8
49
REFSEL
50
Clock Gen
Fractional
1
1
99.5328
99
2131200
4000000
Third
Enabled
4976.64
8
50
REFSEL
50
Clock Gen
Integer
1
1
96
96
0
1
n/a
Disabled
4800
6
51
PRI
112
Clock Gen
Fractional
1
1
45.98214286
45
3604480
3670016
Third
Enabled
5150
5
52
PRI
112
Clock Gen
Fractional
1
1
44.14285714
44
524288
3670016
Third
Enabled
4944
4
53
REFSEL
50
Clock Gen
Fractional
1
1
98.304
98
1216000
4000000
Third
Enabled
4915.2
8
54
REFSEL
77.76
Clock Gen
Integer
1
1
64
64
0
1
n/a
Disabled
4976.64
8
55
REFSEL
77.76
Disabled
1
1
1
1
0
1
n/a
n/a
n/a
8
1
1
100
100
0
1
n/a
Disabled
5000
8
72
56
REFSEL
50
Clock Gen
Integer
57
REFSEL
50
Clock Gen
Integer
1
1
100
100
0
1
n/a
Disabled
5000
8
58
REFSEL
50
Clock Gen
Integer
1
1
96
96
0
1
n/a
Disabled
4800
6
59
REFSEL
50
Clock Gen
Integer
1
1
96
96
0
1
n/a
Disabled
4800
6
Submit Documentation Feedback
Copyright © 2015–2018, Texas Instruments Incorporated
Product Folder Links: LMK03328
�LMK03328
www.ti.com
SNAS668D – AUGUST 2015 – REVISED APRIL 2018
Table 17. Default ROM Contents (HW_SW_CTRL = "1") – PLL2 Configuration(1) (continued)
GPIO[5:0]
(decimal)
PLL2
INPUT
MUX (2)
PLL2
INPUT
(MHz)
PLL2 TYPE
PLL2 R
DIV
PLL2 M
DIV
PLL2 N DIV
PLL2 N
DIV INT
PLL2 N
DIV NUM
PLL2 N
DIV DEN
PLL2
FRAC
ORDER
PLL2
FRAC
DITHER
PLL2 VCO
(MHz)
PLL2 P
DIV
60
REFSEL
50
Clock Gen
Integer
1
1
96
96
0
1
n/a
Disabled
4800
6
61
REFSEL
50
Disabled
1
1
1
1
0
1
n/a
n/a
n/a
8
1
1
96
96
0
1
n/a
Disabled
4800
6
1
1
68.8607595
68
1721519
2000000
Third
Enabled
5354.6127
8
62
REFSEL
50
Clock Gen
Integer
63
REFSEL
77.76
Clock Gen
Fractional
Submit Documentation Feedback
Copyright © 2015–2018, Texas Instruments Incorporated
Product Folder Links: LMK03328
73
�LMK03328
SNAS668D – AUGUST 2015 – REVISED APRIL 2018
www.ti.com
Table 18. Default ROM Contents (HW_SW_CTRL = "1") - Outputs [0-3] Configuration
74
GPIO[5:0]
(decimal)
OUT0-1
DIVIDER
OUT0-1 FREQ
(MHz)
OUT0-1 MUX
SELECT
OUT0 TYPE
OUT1 TYPE
OUT2-3
DIVIDER
OUT2-3 FREQ
(MHz)
OUT2-3 MUX
SELECT
OUT2 TYPE
OUT3 TYPE
0
1
25
25
PLL1
LVCMOS
LVCMOS
25
25
PLL1
LVCMOS
LVCMOS
4
156.25
PLL1
LVPECL
LVPECL
25
25
PLL1
LVPECL
LVPECL
2
4
156.25
PLL1
CML
CML
4
156.25
PLL1
LVPECL
LVPECL
3
10
100
PLL1
LVPECL
LVPECL
10
100
PLL1
LVPECL
LVPECL
4
16
156.25
PLL1
LVPECL
LVPECL
25
100
PLL2
HCSL
HCSL
5
16
156.25
PLL1
LVPECL
CML
25
100
PLL2
LVPECL
CML
6
16
156.25
PLL1
LVPECL
CML
25
100
PLL2
LVPECL
CML
7
25
100
PLL1
LVPECL
LVPECL
25
100
PLL1
CML
CML
8
16
156.25
PLL1
LVPECL
Disable
25
100
PLL2
LVPECL
LVPECL
9
5
122.88
PLL1
LVPECL
LVPECL
5
122.88
PLL1
LVDS
LVDS
10
4
156.25
PLL2
LVPECL
Disable
6
100
PLL1
CML
CML
11
16
155.52
PLL2
HCSL
HCSL
16
38.88
PLL2
HCSL
Disable
12
20
125
PLL1
LVPECL
LVPECL
100
25
PLL2
LVPECL
LVPECL
13
16
156.25
PLL1
LVDS
LVDS
20
125
PLL1
LVDS
LVDS
14
16
156.25
PLL1
LVPECL
LVPECL
25
100
PLL2
LVPECL
CML
15
20
125
PLL1
LVPECL
LVPECL
100
25
PLL2
LVPECL
LVPECL
16
4
156.25
PLL2
LVPECL
CML
5
125
PLL2
CML
CML
17
1
622.08
PLL1
LVPECL
Disable
4
155.52
PLL1
LVPECL
LVPECL
18
25
100
PLL2
CML
CML
20
125
PLL1
CML
CML
19
4
156.25
PLL2
LVPECL
LVPECL
5
125
PLL2
LVPECL
LVPECL
20
12
100
PLL1
LVPECL
LVPECL
12
100
PLL1
LVPECL
LVPECL
21
16
156.25
PLL1
LVDS
LVDS
25
100
PLL2
LVDS
LVDS
22
16
156.25
PLL1
LVPECL
LVPECL
20
125
PLL1
LVPECL
LVPECL
23
4
156.25
PLL2
LVDS
LVDS
12
100
PLL1
HCSL
HCSL
24
20
125
PLL1
LVDS
LVDS
25
100
PLL2
LVDS
LVDS
25
4
156.25
PLL2
LVPECL
LVPECL
12
100
PLL1
LVPECL
LVPECL
26
12
100
PLL1
LVDS
LVDS
12
100
PLL1
LVDS
LVDS
27
16
156.25
PLL1
LVPECL
LVPECL
25
100
PLL2
LVPECL
LVPECL
28
16
156.25
PLL1
LVPECL
LVPECL
16
156.25
PLL1
LVPECL
LVPECL
29
16
156.25
PLL1
LVPECL
LVPECL
16
156.25
PLL1
LVPECL
LVPECL
30
4
156.25
PLL2
LVPECL
LVPECL
5
125
PLL2
LVPECL
LVPECL
31
16
156.25
PLL1
LVPECL
CML
25
100
PLL2
LVPECL
CML
32
16
156.25
PLL1
LVPECL
CML
20
125
PLL1
LVPECL
CML
Submit Documentation Feedback
Copyright © 2015–2018, Texas Instruments Incorporated
Product Folder Links: LMK03328
�LMK03328
www.ti.com
SNAS668D – AUGUST 2015 – REVISED APRIL 2018
Table 18. Default ROM Contents (HW_SW_CTRL = "1") - Outputs [0-3] Configuration (continued)
GPIO[5:0]
(decimal)
OUT0-1
DIVIDER
OUT0-1 FREQ
(MHz)
OUT0-1 MUX
SELECT
OUT0 TYPE
OUT1 TYPE
OUT2-3
DIVIDER
OUT2-3 FREQ
(MHz)
OUT2-3 MUX
SELECT
OUT2 TYPE
OUT3 TYPE
33
5
125
PLL2
LVPECL
LVPECL
34
20
125
PLL1
LVPECL
LVPECL
24
25
PLL1
LVPECL
LVPECL
25
100
PLL2
LVPECL
LVPECL
35
16
156.25
PLL1
LVPECL
36
16
156.25
PLL1
LVPECL
LVPECL
25
100
PLL2
LVPECL
LVPECL
LVPECL
25
100
PLL2
LVPECL
37
16
156.25
PLL1
LVPECL
LVPECL
LVPECL
25
100
PLL2
LVPECL
LVPECL
38
100
25
39
24
50
PLL1
LVCMOS
LVCMOS
100
25
PLL1
LVCMOS
LVCMOS
PLL1
LVDS
LVDS
12
100
PLL1
LVPECL
40
24
LVPECL
50
PLL2
LVDS
LVDS
12
100
PLL2
LVPECL
41
50
LVPECL
50
PLL2
LVDS
LVDS
25
100
PLL2
LVPECL
LVPECL
42
43
50
50
PLL2
LVDS
LVDS
25
100
PLL2
LVPECL
LVPECL
16
156.25
PLL1
LVPECL
LVPECL
25
100
PLL2
LVPECL
LVPECL
44
16
156.25
PLL1
LVPECL
LVPECL
25
100
PLL2
LVPECL
LVPECL
45
25
100
PLL1
LVPECL
LVPECL
6
148.5
PLL2
CML
CML
46
6
148.5
PLL2
LVPECL
LVPECL
1
n/a
n/a
Disable
Disable
47
16
156.25
PLL1
LVPECL
LVPECL
16
156.25
PLL1
LVPECL
LVPECL
48
4
155.52
PLL2
LVPECL
Disable
8
77.76
PLL2
LVCMOS
LVCMOS
49
4
155.52
PLL2
LVPECL
LVPECL
20
125
PLL1
LVPECL
LVPECL
50
16
156.25
PLL1
LVPECL
LVPECL
20
125
PLL1
LVPECL
LVPECL
51
2
515
PLL2
LVPECL
LVPECL
5
125
PLL1
LVPECL
Disable
52
5
125
PLL1
LVPECL
Disable
3
412
PLL2
LVPECL
Disable
53
40
25
PLL1
LVCMOS
Disable
1
n/a
n/a
Disable
Disable
54
4
155.52
PLL2
LVPECL
LVPECL
16
156.25
PLL1
LVPECL
LVPECL
55
25
25
PLL1
LVCMOS
LVCMOS
25
25
PLL1
LVCMOS
LVCMOS
56
4
156.25
PLL2
LVPECL
LVPECL
12
100
PLL1
LVPECL
LVPECL
57
4
156.25
PLL2
CML
CML
4
156.25
PLL2
CML
CML
58
16
156.25
PLL1
LVPECL
LVPECL
16
156.25
PLL1
LVPECL
LVPECL
59
16
156.25
PLL1
LVPECL
LVPECL
16
156.25
PLL1
LVPECL
LVPECL
60
16
156.25
PLL1
LVPECL
LVPECL
16
156.25
PLL1
LVPECL
LVPECL
61
16
156.25
PLL1
LVPECL
LVPECL
16
156.25
PLL1
LVPECL
LVPECL
62
16
156.25
PLL1
LVPECL
LVPECL
25
100
PLL2
LVPECL
LVPECL
63
4
167.3316456
PLL2
LVPECL
LVPECL
4
167.3316456
PLL2
LVPECL
LVPECL
Submit Documentation Feedback
Copyright © 2015–2018, Texas Instruments Incorporated
Product Folder Links: LMK03328
75
�LMK03328
SNAS668D – AUGUST 2015 – REVISED APRIL 2018
www.ti.com
Table 19. Default ROM Contents (HW_SW_CTRL = "1") - Outputs [4-7] Configuration
GPIO
OUT4
[5:0]
DIV
(decimal)
76
OUT4
FREQ
(MHz)
OUT4
MUX
SEL
OUT4
TYPE
OUT5
DIV
OUT5
FREQ
(MHz)
OUT5
MUX
SEL
OUT5
TYPE
OUT6 OUT6 FREQ
DIV
(MHz)
OUT6
MUX
SEL
OUT6
TYPE
OUT7
DIV
OUT7
FREQ
(MHz)
OUT7
MUX
SEL
OUT7 TYPE
0
25
25
PLL1
LVCMOS
25
25
PLL1
LVCMOS
25
25
PLL1
LVCMOS
25
25
PLL1
LVCMOS
1
4
156.25
PLL1
LVDS
1
n/a
n/a
Disable
5
125
PLL1
LVCMOS
5
125
PLL1
LVCMOS
2
5
125
PLL1
LVCMOS
5
125
PLL1
LVCMOS
5
125
PLL1
LVCMOS
25
25
PLL1
LVCMOS
3
8
125
PLL1
LVCMOS
8
125
PLL1
LVCMOS
8
125
PLL1
LVCMOS
40
25
PLL1
LVCMOS
4
25
100
PLL2
HCSL
25
100
PLL2
HCSL
100
25
PLL2
LVPECL
100
25
PLL2
LVPECL
5
25
100
PLL2
HCSL
25
100
PLL2
LVCMOS
20
125
PLL1
LVCMOS
50
50
PLL2
LVCMOS
6
25
100
PLL2
HCSL
20
125
PLL1
HCSL
20
125
PLL1
LVCMOS
25
100
PLL2
LVCMOS
7
25
100
PLL1
LVCMOS
20
125
PLL1
LVCMOS
100
25
PLL1
LVCMOS
100
25
PLL1
LVCMOS
8
25
100
PLL2
HCSL
25
100
PLL2
HCSL
1
n/a
n/a
Disable
100
25
PLL2
LVCMOS
9
5
122.88
PLL1
LVDS
8
156.25
PLL2
LVDS
10
125
PLL2
LVDS
125
10
PLL2
LVCMOS
10
5
125
PLL2
LVDS
6
100
PLL1
HCSL
6
100
PLL1
LVCMOS
25
24
PLL1
LVCMOS
11
16
156.25
PLL1
HCSL
20
125
PLL1
HCSL
25
100
PLL1
HCSL
100
25
PLL1
LVCMOS
12
16
156.25
PLL1
LVDS
1
n/a
n/a
Disable
25
100
PLL2
HCSL
25
100
PLL2
LVCMOS
13
1
n/a
n/a
Disable
25
100
PLL2
HCSL
1
n/a
n/a
Disable
100
25
PLL2
LVCMOS
14
1
n/a
n/a
Disable
100
25
PLL2
LVDS
100
25
PLL2
LVCMOS
25
100
PLL2
LVCMOS
15
25
100
PLL2
HCSL
1
n/a
n/a
Disable
25
100
PLL2
LVCMOS
100
25
PLL2
LVCMOS
16
6
100
PLL1
HCSL
12
50
PLL1
LVCMOS
24
25
PLL1
LVCMOS
50
12
PLL1
LVCMOS
17
4
155.52
PLL1
LVDS
4
155.52
PLL1
LVDS
8
77.76
PLL1
LVDS
8
77.76
PLL1
LVDS
18
20
125
PLL1
LVCMOS
25
100
PLL2
LVCMOS
100
25
PLL2
LVCMOS
30
83.3333
PLL1
LVCMOS
19
48
25
PLL1
LVPECL
12
100
PLL1
LVPECL
1
n/a
n/a
Disable
18
66.6666
PLL1
LVCMOS
20
1
n/a
n/a
Disable
48
25
PLL1
LVCMOS
1
n/a
n/a
Disable
18
66.6666
PLL1
LVCMOS
21
25
100
PLL2
LVDS
1
n/a
n/a
Disable
1
n/a
n/a
Disable
100
25
PLL2
LVCMOS
22
25
100
PLL2
LVPECL
1
n/a
n/a
Disable
1
n/a
n/a
Disable
100
25
PLL2
LVCMOS
23
48
25
PLL1
LVDS
48
25
PLL1
LVDS
18
66.6666
PLL1
LVCMOS
9
133.3333
PLL1
LVDS
24
25
100
PLL2
LVDS
25
100
PLL2
LVCMOS
100
25
PLL2
LVDS
100
25
PLL2
LVCMOS
25
12
100
PLL1
HCSL
1
n/a
n/a
Disable
18
66.6666
PLL1
LVCMOS
48
25
PLL1
LVCMOS
26
9
133.3333
PLL1
LVDS
48
25
PLL1
LVDS
48
25
PLL1
LVCMOS
18
66.6666
PLL1
LVCMOS
27
50
50
PLL2
LVPECL
20
125
PLL1
LVPECL
25
100
PLL2
LVCMOS
100
25
PLL2
LVCMOS
28
16
156.25
PLL1
LVPECL
16
156.25
PLL1
LVPECL
16
156.25
PLL1
LVPECL
100
25
PLL1
LVCMOS
29
100
25
PLL1
LVCMOS
100
25
PLL1
LVCMOS
16
156.25
PLL1
LVPECL
100
25
PLL1
LVCMOS
30
9
133.33
PLL1
LVDS
12
100
PLL1
HCSL
12
100
PLL1
HCSL
48
25
PLL1
LVCMOS
31
25
100
PLL2
HCSL
25
100
PLL2
HCSL
100
25
PLL2
LVDS
100
25
PLL2
HCSL
Submit Documentation Feedback
Copyright © 2015–2018, Texas Instruments Incorporated
Product Folder Links: LMK03328
�LMK03328
www.ti.com
SNAS668D – AUGUST 2015 – REVISED APRIL 2018
Table 19. Default ROM Contents (HW_SW_CTRL = "1") - Outputs [4-7] Configuration (continued)
GPIO
OUT4
[5:0]
DIV
(decimal)
OUT4
FREQ
(MHz)
OUT4
MUX
SEL
OUT4
TYPE
OUT5
DIV
OUT5
FREQ
(MHz)
OUT5
MUX
SEL
OUT5
TYPE
25
100
PLL2
HCSL
100
25
PLL2
LVDS
33
4
156.25
PLL2
LVDS
1
n/a
n/a
34
16
156.25
PLL1
LVDS
1
n/a
n/a
35
1
n/a
n/a
Disable
1
n/a
36
1
n/a
n/a
Disable
1
n/a
37
1
n/a
n/a
Disable
1
n/a
38
100
25
PLL1
LVCMOS
100
25
39
8
156.25
PLL2
LVPECL
10
125
40
8
156.25
PLL1
LVPECL
10
41
16
156.25
PLL1
LVPECL
8
42
16
156.25
PLL1
LVPECL
8
43
8
312.5
PLL1
LVPECL
44
8
312.5
PLL1
LVPECL
45
25
100
PLL1
46
16
38.88
PLL1
47
20
125
48
20
125
49
25
50
51
32
OUT6 OUT6 FREQ
DIV
(MHz)
OUT6
MUX
SEL
OUT6
TYPE
OUT7
DIV
OUT7
FREQ
(MHz)
OUT7
MUX
SEL
OUT7 TYPE
LVCMOS
75
33.3333
PLL2
LVCMOS
50
50
PLL2
Disable
6
100
PLL1
LVDS
50
12
PLL1
LVCMOS
Disable
100
25
PLL2
LVCMOS
100
25
PLL2
LVCMOS
n/a
Disable
100
25
PLL2
LVCMOS
100
25
PLL2
LVCMOS
n/a
Disable
100
25
PLL2
LVCMOS
100
25
PLL2
LVCMOS
n/a
Disable
100
25
PLL2
LVCMOS
100
25
PLL2
LVCMOS
PLL1
LVCMOS
100
25
PLL1
LVCMOS
100
25
PLL1
LVCMOS
PLL2
LVPECL
9
133.3333
PLL1
LVDS
50
24
PLL1
LVCMOS
125
PLL1
LVPECL
9
133.3333
PLL2
LVDS
50
24
PLL2
LVCMOS
312.5
PLL1
LVPECL
20
125
PLL1
LVPECL
25
100
PLL2
LVCMOS
312.5
PLL1
LVPECL
20
125
PLL1
LVPECL
25
100
PLL2
LVCMOS
25
100
PLL2
LVCMOS
50
50
PLL2
LVCMOS
100
25
PLL2
LVCMOS
25
100
PLL2
LVCMOS
50
50
PLL2
LVCMOS
100
25
PLL2
LVCMOS
LVPECL
33
27
PLL2
LVCMOS
100
25
PLL1
LVCMOS
100
25
PLL1
LVCMOS
LVCMOS
16
38.88
PLL1
LVCMOS
12
74.25
PLL2
LVCMOS
33
27
PLL2
LVCMOS
PLL1
HCSL
25
100
PLL2
HCSL
1
n/a
n/a
Disable
100
25
PLL2
LVCMOS
PLL1
LVPECL
16
156.25
PLL1
LVPECL
25
100
PLL1
LVPECL
8
77.76
PLL2
LVDS
100
PLL1
LVPECL
25
100
PLL1
LVPECL
16
156.25
PLL1
LVPECL
100
25
PLL1
LVCMOS
25
100
PLL2
LVPECL
25
100
PLL2
LVPECL
25
100
PLL2
LVPECL
100
25
PLL2
LVCMOS
1
n/a
n/a
Disable
25
25
PLL1
LVCMOS
1
n/a
n/a
Disable
10
103
PLL2
LVCMOS
52
4
309
PLL2
LVPECL
1
n/a
n/a
Disable
25
25
PLL1
LVCMOS
12
103
PLL2
LVCMOS
53
15
66.6666
PLL1
LVCMOS
1
n/a
n/a
Disable
1
n/a
n/a
Disable
15
40.96
PLL2
LVCMOS
54
16
156.25
PLL1
LVPECL
20
125
PLL1
LVPECL
25
100
PLL1
LVPECL
100
25
PLL1
LVCMOS
55
25
25
PLL1
LVCMOS
25
25
PLL1
LVCMOS
25
25
PLL1
LVCMOS
25
25
PLL1
LVCMOS
56
12
100
PLL1
LVPECL
48
25
PLL1
LVPECL
1
n/a
n/a
Disable
18
66.6666
PLL1
LVCMOS
57
12
100
PLL1
CML
48
25
PLL1
LVPECL
24
50
PLL1
LVPECL
18
66.6666
PLL1
LVCMOS
58
25
100
PLL2
LVPECL
100
25
PLL2
LVPECL
100
25
PLL2
LVPECL
25
100
PLL2
LVCMOS
59
25
100
PLL2
LVPECL
100
25
PLL2
LVPECL
100
25
PLL2
LVCMOS
25
100
PLL2
LVCMOS
60
25
100
PLL2
LVPECL
100
25
PLL2
LVPECL
100
25
PLL2
LVPECL
25
100
PLL2
LVPECL
61
16
156.25
PLL1
LVPECL
16
156.25
PLL1
LVPECL
16
156.25
PLL1
LVPECL
16
156.25
PLL1
LVPECL
62
16
156.25
PLL1
LVPECL
100
25
PLL2
LVPECL
100
25
PLL2
LVCMOS
25
100
PLL2
LVCMOS
63
16
156.25
PLL1
LVPECL
16
156.25
PLL1
LVPECL
20
125
PLL1
LVDS
25
100
PLL1
HCSL
Submit Documentation Feedback
Copyright © 2015–2018, Texas Instruments Incorporated
Product Folder Links: LMK03328
77
�LMK03328
SNAS668D – AUGUST 2015 – REVISED APRIL 2018
www.ti.com
10.6 Register Maps
The register map is shown in the table below. The registers occupy a single unified address space and all registers are accessible at any time. A total of
123 registers are present in the LMK03328.
Name
Addr
Reset
Bit7
VNDRID_BY1
0
0x10
VNDRID[15:8]
VNDRID_BY0
1
0x0B
VNDRID[7:0]
PRODID
2
0x32
PRODID[7:0]
REVID
3
0x02
REVID[7:0]
PARTID
4
0x01
PRTID[7:0]
PINMODE_SW
8
0x00
HW_SW_CTRL_ GPIO32_SW_MODE[2:0]
MODE
PINMODE_HW
9
0x00
GPIO_HW_MODE[5:0]
SLAVEADR
10
0x54
SLAVEADR_GPIO1_SW[7:1]
EEREV
11
0x00
EEREV[7:0]
DEV_CTL
12
0xD9
RESETN_SW
SYNCN_SW
RESERVED
SYNC_AUTO
SYNC_MUTE
AONAFTER
LOCK
PLLSTRTMODE
AUTOSTRT
INT_LIVE
13
0x00
LOL1
LOS1
CAL1
LOL2
LOS2
CAL2
SECTOPRI1
SECTOPRI2
INT_MASK
14
0x00
LOL1_MASK
LOS1_MASK
CAL1_MASK
LOL2_MASK
LOS2_MASK
CAL2_MASK
SECTOPRI1_
MASK
SECTOPRI2_
MASK
INT_FLAG_POL
15
0x00
LOL1_POL
LOS1_POL
CAL1_POL
LOL2_POL
LOS2_POL
CAL2_POL
SECTOPRI1_
POL
SECTOPRI2_
POL
INT_FLAG
16
0x00
LOL1_INTR
LOS1_INTR
CAL1_INTR
LOL2_INTR
LOS2_INTR
CAL2_INTR
SECTOPRI1_
INTR
SECTOPRI2_
INTR
INTCTL
17
0x00
RESERVED
INT_AND_OR
INT_EN
OSCCTL2
18
0x00
RISE_VALID_
SEC
FALL_VALID_
SEC
RISE_VALID_
PRI
FALL_VALID_
PRI
RESERVED
STATCTL
19
0x00
RESERVED
STAT1_SHOOT_ STAT0_SHOOT_ RESERVED
THRU_LIMIT
THRU_LIMIT
STAT1_OPEND
STAT0_OPEND
MUTELVL1
20
0x55
CH3_MUTE_LVL[1:0]
CH2_MUTE_LVL[1:0]
CH1_MUTE_LVL[1:0]
CH0_MUTE_LVL[1:0]
MUTELVL2
21
0x55
CH7_MUTE_LVL[1:0]
CH6_MUTE_LVL[1:0]
CH5_MUTE_LVL[1:0]
CH4_MUTE_LVL[1:0]
OUT_MUTE
22
0xFF
CH_7_MUTE
CH_5_MUTE
CH_3_MUTE
CH_1_MUTE
CH_0_MUTE
STATUS_MUTE
23
0x02
RESERVED
STATUS1_
MUTE
STATUS0_
MUTE
DYN_DLY
24
0x00
RESERVED
DIV_7_DYN_
DLY
DIV_23_DYN_
DLY
DIV_01_DYN_
DLY
REFDETCTL
25
0x55
DETECT_MODE_SEC[1:0]
DETECT_MODE_PRI[1:0]
STAT0_INT
27
0x58
STAT0_SEL[3:0]
STAT0_POL
RESERVED
STAT1
28
0x28
STAT1_SEL[3:0]
STAT1_POL
RESERVED
78
Bit6
CH_6_MUTE
Bit5
Bit4
Bit3
Bit2
Bit1
Bit0
RESERVED
RESERVED
RESERVED
CH_4_MUTE
DIV_6_DYN_
DLY
Submit Documentation Feedback
DIV_5_DYN_
DLY
CH_2_MUTE
DIV_4_DYN_
DLY
LVL_SEL_SEC[1:0]
LVL_SEL_PRI[1:0]
Copyright © 2015–2018, Texas Instruments Incorporated
Product Folder Links: LMK03328
�LMK03328
www.ti.com
SNAS668D – AUGUST 2015 – REVISED APRIL 2018
Register Maps (continued)
Name
Addr
Reset
Bit7
Bit6
Bit5
Bit4
Bit3
OSCCTL1
29
0x06
DETECT_BYP
RESERVED
TERM2GND_
SEC
TERM2GND_
PRI
DIFFTERM_SEC DIFFTERM_PRI
AC_MODE_SEC AC_MODE_PRI
PWDN
30
0x00
RESERVED
CMOSCHPWDN
CH7PWDN
CH6PWDN
CH5PWDN
CH23PWDN
OUTCTL_0
31
0xB0
CH_0_1_MUX
OUT_0_SEL[1:0]
OUT_0_MODE1[1:0]
OUT_0_MODE2[1:0]
RESERVED
OUTCTL_1
32
0x30
RESERVED
OUT_1_SEL[1:0]
OUT_1_MODE1[1:0]
OUT_1_MODE2[1:0]
RESERVED
OUTDIV_0_1
33
0x01
OUT_0_1_DIV[7:0]
OUTCTL_2
34
0xB0
CH_2_3_MUX
OUT_2_SEL[1:0]
OUT_2_MODE1[1:0]
OUT_2_MODE2[1:0]
RESERVED
OUTCTL_3
35
0x30
RESERVED
OUT_3_SEL[1:0]
OUT_3_MODE1[1:0]
OUT_3_MODE2[1:0]
RESERVED
OUTDIV_2_3
36
0x03
OUT_2_3_DIV[7:0]
OUTCTL_4
37
0x18
CH_4_MUX[1:0]
OUTDIV_4
38
0x02
OUT_4_DIV[7:0]
OUTCTL_5
39
0x18
CH_5_MUX[1:0]
OUTDIV_5
40
0x02
OUT_5_DIV[7:0]
OUTCTL_6
41
0x18
CH_6_MUX[1:0]
OUTDIV_6
42
0x05
OUT_6_DIV[7:0]
OUTCTL_7
43
0x18
CH_7_MUX[1:0]
OUTDIV_7
44
0x05
OUT_7_DIV[7:0]
CMOSDIVCTRL
45
0x0A
PLL2CMOSPREDIV[1:0]
CMOSDIV0
46
0x00
CMOSDIV0[7:0]
CMOSDIV1
47
0x00
CMOSDIV1[7:0]
STATUS_SLEW
49
0x00
RESERVED
IPCLKSEL
50
0x95
SECBUFSEL[1:0]
IPCLKCTL
51
0x03
CLKMUX_
BYPASS
PLL1_RDIV
52
0x00
RESERVED
PLL1_MDIV
53
0x00
RESERVED
PLL2_RDIV
54
0x00
RESERVED
PLL2_MDIV
55
0x00
RESERVED
PLL2MDIV[4:0]
PLL1_CTRL0
56
0x1E
RESERVED
PLL1_P[2:0]
PLL1_CTRL1
57
0x18
RESERVED
PRI_D
PLL1_NDIV_BY1 58
0x00
RESERVED
PLL1_NDIV_BY0 59
0x66
PLL1_NDIV[7:0]
PLL1_
FRACNUM_BY2
0x00
RESERVED
60
Bit2
Bit1
CH4PWDN
Bit0
CH01PWDN
OUT_4_SEL[1:0]
OUT_4_MODE1[1:0]
OUT_4_MODE2[1:0]
OUT_5_SEL[1:0]
OUT_5_MODE1[1:0]
OUT_5_MODE2[1:0]
OUT_6_SEL[1:0]
OUT_6_MODE1[1:0]
OUT_6_MODE2[1:0]
OUT_7_SEL[1:0]
OUT_7_MODE1[1:0]
OUT_7_MODE2[1:0]
PLL1CMOSPREDIV[1:0]
STATUS1MUX[1:0]
STATUS0MUX[1:0]
STATUS1SLEW[1:0]
STATUS0SLEW[1:0]
INSEL_PLL2[1:0]
INSEL_PLL1[1:0]
PRIBUFSEL[1:0]
RESERVED
SECONSWITCH
SECBUFGAIN
PRIBUFGAIN
PLL1RDIV[2:0]
PLL1MDIV[4:0]
PLL2RDIV[2:0]
PLL1_SYNC_EN PLL1_PDN
PLL1_CP[3:0]
PLL1_NDIV[11:8]
PLL1_NUM[21:16]
Submit Documentation Feedback
Copyright © 2015–2018, Texas Instruments Incorporated
Product Folder Links: LMK03328
79
�LMK03328
SNAS668D – AUGUST 2015 – REVISED APRIL 2018
www.ti.com
Register Maps (continued)
Name
Addr
Reset
Bit7
PLL1_
FRACNUM_BY1
61
0x00
PLL1_NUM[15:8]
PLL1_
FRACNUM_BY0
62
0x00
PLL1_NUM[7:0]
PLL1_
FRACDEN_BY2
63
0x00
RESERVED
PLL1_
FRACDEN_BY1
64
0x00
PLL1_DEN[15:8]
PLL1_
FRACDEN_BY0
65
0x00
PLL1_DEN[7:0]
PLL1_
MASHCTRL
66
0x0C
RESERVED
PLL1_LF_R2
67
0x24
RESERVED
PLL1_LF_C1
68
0x00
RESERVED
PLL1_LF_R3
69
0x00
RESERVED
PLL1_LF_C3
70
0x00
RESERVED
PLL2_CTRL0
71
0x1E
RESERVED
PLL2_P[2:0]
PLL2_CTRL1
72
0x18
RESERVED
SEC_D
PLL2_NDIV_BY1 73
0x00
RESERVED
PLL2_NDIV_BY0 74
0x64
PLL2_NDIV[7:0]
PLL2_
FRACNUM_BY2
75
0x00
RESERVED
PLL2_
FRACNUM_BY1
76
0x00
PLL2_NUM[15:8]
PLL2_
FRACNUM_BY0
77
0x00
PLL2_NUM[7:0]
PLL2_
FRACDEN_BY2
78
0x00
RESERVED
PLL2_
FRACDEN_BY1
79
0x00
PLL2_DEN[15:8]
PLL2_
FRACDEN_BY0
80
0x00
PLL2_DEN[7:0]
PLL2_
MASHCTRL
81
0x0C
RESERVED
PLL2_LF_R2
82
0x24
RESERVED
PLL2_LF_C1
83
0x00
RESERVED
80
Bit6
Bit5
Bit4
Bit3
Bit2
Bit1
Bit0
PLL1_DEN[21:16]
PLL1_DTHRMODE[1:0]
PLL1_ORDER[1:0]
PLL1_LF_R2[5:0]
PLL1_LF_C1[2:0]
PLL1_LF_R3[5:0]
PLL1_LF_INT_F
RAC
PLL1_LF_C3[2:0]
PLL2_SYNC_EN PLL2_PDN
PLL2_CP[3:0]
PLL2_NDIV[11:8]
PLL2_NUM[21:16]
PLL2_DEN[21:16]
PLL2_DTHRMODE[1:0]
PLL2_ORDER[1:0]
PLL2_LF_R2[5:0]
PLL2_LF_C1[2:0]
Submit Documentation Feedback
Copyright © 2015–2018, Texas Instruments Incorporated
Product Folder Links: LMK03328
�LMK03328
www.ti.com
SNAS668D – AUGUST 2015 – REVISED APRIL 2018
Register Maps (continued)
Name
Addr
Reset
Bit7
Bit6
PLL2_LF_R3
84
0x00
RESERVED
PLL2_LF_R3[5:0]
PLL2_LF_C3
85
0x00
RESERVED
XO_MARGINING 86
0x00
RESERVED
XO_OFFSET_
GPIO5_STEP_1
_BY1
88
0x00
RESERVED
XO_OFFSET_
GPIO5_STEP_1
_BY0
89
0xDE
XOOFFSET_STEP1[7:0]
XO_OFFSET_
GPIO5_STEP_2
_BY1
90
0x01
RESERVED
XO_OFFSET_
GPIO5_STEP_2
_BY0
91
0x18
XOOFFSET_STEP2[7:0]
XO_OFFSET_
GPIO5_STEP_3
_BY1
92
0x01
RESERVED
XO_OFFSET_
GPIO5_STEP_3
_BY0
93
0x4B
XOOFFSET_STEP3[7:0]
XO_OFFSET_
GPIO5_STEP_4
_BY1
94
0x01
RESERVED
XO_OFFSET_
GPIO5_STEP_4
_BY0
95
0x86
XOOFFSET_STEP4[7:0]
XO_OFFSET_
GPIO5_STEP_5
_BY1
96
0x01
RESERVED
XO_OFFSET_
GPIO5_STEP_5
_BY0
97
0xBE
XOOFFSET_STEP5[7:0]
XO_OFFSET_
GPIO5_STEP_6
_BY1
98
0x01
RESERVED
XO_OFFSET_
GPIO5_STEP_6
_BY0
99
0xFE
XOOFFSET_STEP6[7:0]
Bit5
Bit4
Bit3
Bit2
Bit1
Bit0
PLL2_LF_INT_F
RAC
PLL2_LF_C3[2:0]
MARGIN_DIG_STEP[2:0]
MARGIN_OPTION[1:0]
RESERVED
RESERVED
XOOFFSET_STEP1[9:8]
XOOFFSET_STEP2[9:8]
XOOFFSET_STEP3[9:8]
XOOFFSET_STEP4[9:8]
XOOFFSET_STEP5[9:8]
XOOFFSET_STEP6[9:8]
Submit Documentation Feedback
Copyright © 2015–2018, Texas Instruments Incorporated
Product Folder Links: LMK03328
81
�LMK03328
SNAS668D – AUGUST 2015 – REVISED APRIL 2018
www.ti.com
Register Maps (continued)
Name
Addr
Reset
Bit7
XO_OFFSET_
GPIO5_STEP_7
_BY1
100
0x02
RESERVED
XO_OFFSET_
GPIO5_STEP_7
_BY0
101
0x47
XOOFFSET_STEP7[7:0]
XO_OFFSET_
GPIO5_STEP_8
_BY1
102
0x02
RESERVED
XO_OFFSET_
GPIO5_STEP_8
_BY0
103
0x9E
XOOFFSET_STEP8[7:0]
XO_OFFSET_
SW_BY1
104
0x00
RESERVED
XO_OFFSET_
SW_BY0
105
0x00
XOOFFSET_SW[7:0]
PLL1_CTRL2
117
0x00
PLL1_STRETCH RESERVED
PLL1_CTRL3
118
0x03
RESERVED
PLL1_
CALCTRL0
119
0x01
RESERVED
PLL1_
CALCTRL1
120
0x00
RESERVED
PLL2_CTRL2
131
0x00
PLL2_STRETCH RESERVED
PLL2_CTRL3
132
0x03
RESERVED
PLL2_
CALCTRL0
133
0x01
RESERVED
PLL2_
CALCTRL1
134
0x00
RESERVED
NVMSCRC
135
0x00
NVMSCRC[7:0]
NVMCNT
136
0x00
NVMCNT[7:0]
NVMCTL
137
0x10
RESERVED
NVMLCRC
138
0x00
NVMLCRC[7:0]
MEMADR_BY1
139
0x00
RESERVED
MEMADR_BY0
140
0x00
MEMADR[7:0]
NVMDAT
141
0x00
NVMDAT[7:0]
RAMDAT
142
0x00
RAMDAT[7:0]
ROMDAT
143
0x00
ROMDAT[7:0]
NVMUNLK
144
0x00
NVMUNLK[7:0]
82
Bit6
Bit5
Bit4
Bit3
Bit2
Bit1
Bit0
XOOFFSET_STEP7[9:8]
XOOFFSET_STEP8[9:8]
XOOFFSET_SW[9:8]
PLL1_ENABLE_C3[2:0]
PLL1_CLSDWAIT[1:0]
PLL1_VCOWAIT[1:0]
PLL1_LOOPBW
PLL2_ENABLE_C3[2:0]
PLL2_CLSDWAIT[1:0]
PLL2_VCOWAIT[1:0]
PLL2_LOOPBW
REGCOMMIT
NVMCRCERR
NVMAUTOCRC
NVMCOMMIT
NVMBUSY
RESERVED
NVMPROG
MEMADR[11:8]
Submit Documentation Feedback
Copyright © 2015–2018, Texas Instruments Incorporated
Product Folder Links: LMK03328
�LMK03328
www.ti.com
SNAS668D – AUGUST 2015 – REVISED APRIL 2018
Register Maps (continued)
Name
Addr
Reset
Bit7
REGCOMMIT_
PAGE
145
0x00
RESERVED
Bit6
XOCAPCTRL_
BY1
199
0x00
RESERVED
XOCAPCTRL_
BY0
200
0x00
XO_CAP_CTRL[7:0]
Bit5
Bit4
Bit3
Bit2
Bit1
Bit0
REGCOMMIT_PG[3:0]
XO_CAP_CTRL[9:8]
Submit Documentation Feedback
Copyright © 2015–2018, Texas Instruments Incorporated
Product Folder Links: LMK03328
83
�LMK03328
SNAS668D – AUGUST 2015 – REVISED APRIL 2018
www.ti.com
10.6.1 VNDRID_BY1 Register; R0
The VNDRID_BY1 and VNDRID_BY0 registers are used to store the unique 16-bit Vendor Identification number
assigned to I2C vendors.
Bit # Field
[7:0] VNDRID[15:8]
Type Reset
R
0x10
EEPROM
N
Description
Vendor Identification Number Byte 1. The Vendor Identification Number is a
unique 16-bit identification number assigned to I2C vendors.
10.6.2 VNDRID_BY0 Register; R1
The VNDRID_BY0 register is described in the following table.
Bit # Field
[7:0] VNDRID[7:0]
Type Reset
R
0x0B
EEPROM
N
Description
Vendor Identification Number Byte 0.
10.6.3 PRODID Register; R2
The PRODID register is used to identify the LMK03328 device.
Bit # Field
[7:0] PRODID[7:0]
Type Reset
R
0x32
EEPROM
N
Description
Product Identification Number. The Product Identification Number is a unique 8bit identification number used to identify the LMK03328.
10.6.4 REVID Register; R3
The REVID register is used to identify the LMK03328 mask revision.
Bit # Field
[7:0] REVID[7:0]
Type Reset
R
0x02
EEPROM
N
Description
Device Revision Number. The Device Revision Number is used to identify the
LMK03328 die revision
10.6.5 PARTID Register; R4
Each LMK03328 device can be identified by a unique 8-bit number stored in the PARTID register. This register is
always initialized from on-chip EEPROM.
Bit # Field
[7:0] PRTID[7:0]
84
Type Reset
R
0x01
EEPROM
Y
Description
Part Identification Number. The Part Identification Number is a unique 8-bit number
which is used to serialize individual LMK03328 devices. The Part Identification
Number is factory programmed and cannot be modified by the user.
Submit Documentation Feedback
Copyright © 2015–2018, Texas Instruments Incorporated
Product Folder Links: LMK03328
�LMK03328
www.ti.com
SNAS668D – AUGUST 2015 – REVISED APRIL 2018
10.6.6 PINMODE_SW Register; R8
The PINMODE_SW register records the device configuration setting. The configuration setting is registered when
the reset is deasserted.
Bit # Field
Type Reset
[7]
HW_SW_CTRL_M R
0
ODE
EEPROM
N
[6:4]
GPIO32_SW_MO
DE[2:0]
R
0x0
N
[3:0]
RESERVED
-
-
N
Description
HW_SW_CTRL Pin Configuration. The HW_SW_CTRL_MODE field reflects the
values sampled on the HW_SW_CTRL pin on the most recent device reset.
HW_SW_CTRL_MOD HW_SW_CTRL
E
0
Soft Pin Mode
1
Hard Pin Mode
GPIO32_SW Pin Configuration Mode. The GPIO_SW_MODE field reflects the
values sampled on the GPIO[3:2] pins when HW_SW_CTRL is 0 on the most
recent device reset. When HW_SW_CTRL is 1 this field reads back 0x0.
GPIO_SW_MODE
GPIO[3]
GPIO[2]
0 (0x0)
0
0
1 (0x1)
0
Z
2 (0x2)
0
1
3 (0x3)
1
0
4 (0x4)
1
Z
5 (0x5)
1
1
Reserved.
10.6.7 PINMODE_HW Register; R9
The PINMODE_HW register records the device configuration setting. The configuration setting is registered when
the reset is deasserted.
Bit # Field
Type Reset
[7:2] GPIO_HW_MODE[ R
0x00
5:0]
EEPROM
N
[1:0]
N
RESERVED
-
-
Description
GPIO_HW[5:0] Pin Configuration Mode. The GPIO_HW_MODE field reflects the
values sampled on pins GPIO[5:0] when HW_SW_CTRL is 1 on the most recent
device reset. When HW_SW_CTRL is 0 this field reads back 0x0.
GPIO_HW_MODE
GPIO[5:0]
0 (0x00)
0 (0x00)
1 (0x01)
1 (0x01)
2 (0x02)
2 (0x02)
..
..
..
..
61 (0x3D)
61 (0x3D)
62 (0x3E)
62 (0x3E)
63 (0x3F)
63 (0x3F)
Reserved.
10.6.8 SLAVEADR Register; R10
The SLAVEADR register reflects the 7-bit I2C Slave Address value initialized from on-chip EEPROM.
Bit # Field
[7:1] SLAVEADR_GPI
O1_SW[7:1]
Type Reset
R
0x54
EEPROM
Y
[0]
-
N
RESERVED
-
Description
I2C Slave Address. This field holds the 7-bit Slave Address used to identify this
device during I2C transactions. When HW_SW_CTRL is 0 the two least significant
bits of the address can be configured using GPIO[1] as shown. When
HW_SW_CTRL is 1 then the two least significant bits are 00.
SLAVEADR_GPIO1_SW[2:1]
GPIO[1]
0 (0x0)
0
1 (0x1)
VIM
3 (0x3)
1
Reserved.
Submit Documentation Feedback
Copyright © 2015–2018, Texas Instruments Incorporated
Product Folder Links: LMK03328
85
�LMK03328
SNAS668D – AUGUST 2015 – REVISED APRIL 2018
www.ti.com
10.6.9 EEREV Register; R11
The EEREV register provides EEPROM/ROM image revision record and is initialized from EEPROM or ROM.
Bit # Field
[7:0] EEREV[7:0]
Type Reset
R
0x00
EEPROM
Y
Description
EEPROM Image Revision ID. EEPROM Image Revision is automatically retrieved
from EEPROM and stored in the EEREV register after a reset or after a EEPROM
commit operation.
10.6.10 DEV_CTL Register; R12
The DEV_CTL register holds the control functions described in the following table.
Bit # Field
[7]
RESETN_SW
Type Reset
RW 1
EEPROM
N
[6]
SYNCN_SW
RW
1
N
[5]
[4]
RESERVED
SYNC_AUTO
RW
1
N
Y
[3]
SYNC_MUTE
RW
1
Y
[2]
AONAFTERLOC
K
RW
0
Y
[1]
PLLSTRTMODE
RW
0
Y
[0]
AUTOSTRT
RW
1
Y
Description
Software Reset ALL functions (active low). Writing a 0 will cause the device to return
to its power-up state apart from the I2C registers and the configuration controller. The
configuration controller is excluded to prevent a re-transfer of EEPROM data to onchip registers.
Software SYNC Assertion (active low). Writing a 0 to this bit is equivalent to
asserting the GPIO0 pin.
Reserved.
Automatic Synchronization at startup. When SYNC_AUTO is 1 at device startup a
synchronization sequence is initiated automatically after PLL lock has been
achieved.
Synchronization Mute Control. The SYNC_MUTE field determines whether or not the
output drivers are muted during a Synchronization event.
SYNC_MUTE
SYNC Mute Behaviour
0
Do not mute any outputs during SYNC
1
Mute all outputs during SYNC
Always On Clock behaviour after Lock. If AONAFTERLOCK is 0 then the system
clock is switched from the Always On Clock to the VCO Clock after lock and the
Always On Clock oscillator is disabled. If AONAFTERLOCK is 1 then the Always on
Clock will remain as the digital system clock regardless of the PLL Lock state.
PLL Startup Mode. If PLLSTRTMODE is 1 then the calibration sequence for both
PLL's is run independently. At startup this means PLL1 and PLL2 will be calibrated in
parallel. Additionally if PLL2 is subject to a Software Reset or Powerdown cycle then
PLL2 re-calibration will restart regardless of the state of PLL1. If PLLSTRTMODE is
0 then PLL2 is only calibrated after PLL1 has acheived lock or PLL1 is powered
down.
Autostart. If AUTOSTRT is set to 1 the device will automatically attempt to achieve
lock and enable outputs after a device reset. A device reset can be triggered by the
power-on reset, RESETn pin or by writing to the RESETN_SW bit. If AUTOSTRT is
0 then the device will halt after the configuration phase, a subsequent write to set the
AUTOSTRT bit to 1 will trigger the PLL Lock sequence.
10.6.11 INT_LIVE Register; R13
The INT_LIVE register reflects the current status of the interrupt sources, regardless of the state of the INT_EN
bit.
Bit # Field
[7]
LOL1
[6]
LOS1
Type Reset
R
0
R
0
EEPROM
N
N
[5]
[4]
[3]
CAL1
LOL2
LOS2
R
R
R
0
0
0
N
N
N
[2]
[1]
[0]
CAL2
SECTOPRI1
SECTOPRI2
R
R
R
0
0
0
N
N
N
86
Description
Loss of lock on PLL1.
Loss of input signal to PLL1. If input signal to PLL1 is lost and as a result PLL1 is
unlocked, LOS1 will take precedence over LOL1 and only LOS1 will be set to 1.
VCO calibration active on PLL1.
Loss of lock on PLL2.
Loss of input signal to PLL2. If input signal to PLL2 is lost and as a result PLL2 is
unlocked, LOS2 will take precedence over LOL2 and only LOS2 will be set to 1.
VCO calibration active on PLL2.
Switch from secondary reference to primary reference in automatic mode for PLL1.
Switch from secondary reference to primary reference in automatic mode for PLL2.
Submit Documentation Feedback
Copyright © 2015–2018, Texas Instruments Incorporated
Product Folder Links: LMK03328
�LMK03328
www.ti.com
SNAS668D – AUGUST 2015 – REVISED APRIL 2018
10.6.12 INT_MASK Register; R14
The INT_MASK register allows masking of the interrupt sources.
Bit # Field
[7]
LOL1_MASK
Type Reset
RW 0
EEPROM
Y
[6]
LOS1_MASK
RW
0
Y
[5]
CAL1_MASK
RW
0
Y
[4]
LOL2_MASK
RW
0
Y
[3]
LOS2_MASK
RW
0
Y
[2]
CAL2_MASK
RW
0
Y
[1]
SECTOPRI1_MA
SK
RW
0
Y
[0]
SECTOPRI2_MA
SK
RW
0
Y
Description
Mask loss of lock on PLL1. When LOL1_MASK is 1 then the LOL1 interrupt source
is masked and will not cause the interrupt signal to be activated.
Mask loss of input signal to PLL1. When LOS1_MASK is 1 then the LOS1 interrupt
source is masked and will not cause the interrupt signal to be activated.
Mask VCO calibration active on PLL1. When CAL1_MASK is 1 then the CAL1
interrupt source is masked and will not cause the interrupt signal to be activated.
Mask loss of lock on PLL2. When LOL2_MASK is 1 then the LOL2 interrupt source
is masked and will not cause the interrupt signal to be activated.
Mask loss of input signal PLL2. When LOS2_MASK is 1 then the LOS2 interrupt
source is masked and will not cause the interrupt signal to be activated.
Mask VCO calibration active on PLL2. When CAL2_MASK is 1 then the CAL2
interrupt source is masked and will not cause the interrupt signal to be activated.
Mask switch from secondary reference to primary reference for PLL1. When
SECTOPRI1_MASK is 1 then the SECTOPRI1 interrupt source is masked and will
not cause the interrupt signal to be activated.
Mask switch from secondary reference to primary reference for PLL2. When
SECTOPRI2_MASK is 1 then the SECTOPRI2 interrupt source is masked and will
not cause the interrupt signal to be activated.
10.6.13 INT_FLAG_POL Register; R15
The INT_FLAG_POL register controls the signal polarity that sets the Interrupt Flags.
Bit # Field
[7]
LOL1_POL
Type Reset EEPROM
RW 0
Y
[6]
LOS1_POL
RW
0
Y
[5]
CAL1_POL
RW
0
Y
[4]
LOL2_POL
RW
0
Y
[3]
LOS2_POL
RW
0
Y
[2]
CAL2_POL
RW
0
Y
[1]
SECTOPRI1_PO RW
L
0
Y
[0]
SECTOPRI2_PO RW
L
0
Y
Description
LOL1 Flag Polarity. When LOL1_POL is 1 then a rising edge on LOL1 will set the
LOL1_INTR bit of the INTERRUPT_FLAG register. When LOL1_POL is 0 then a
falling edge on LOL1 will set the LOL1_INTR bit.
LOS1 Flag Polarity. When LOS1_POL is 1 then a rising edge on LOS1 will set the
LOS1_INTR bit of the INTERRUPT_FLAG register. When LOS1_POL is 0 then a
falling edge on LOS1 will set the LOS1_INTR bit.
CAL1 Flag Polarity. When CAL1_POL is 1 then a rising edge on CAL1 will set the
CAL1_INTR bit of the INTERRUPT_FLAG register. When CAL1_POL is 0 then a
falling edge on CAL1 will set the CAL1_INTR bit.
LOL2 Flag Polarity. When LOL2_POL is 1 then a rising edge on LOL2 will set the
LOL2_INTR bit of the INTERRUPT_FLAG register. When LOL2_POL is 0 then a
falling edge on LOL2 will set the LOL2_INTR bit.
LOS2 Flag Polarity. When LOS2_POL is 1 then a rising edge on LOS2 will set the
LOS2_INTR bit of the INTERRUPT_FLAG register. When LOS2_POL is 0 then a
falling edge on LOS2 will set the LOS2_INTR bit.
CAL2 Flag Polarity. When CAL2_POL is 1 then a rising edge on CAL2 will set the
CAL2_INTR bit of the INTERRUPT_FLAG register. When CAL2_POL is 0 then a
falling edge on CAL2 will set the CAL2_INTR bit.
SECTOPRI1 Flag Polarity. When SECTOPRI1_POL is 1 then a rising edge on
SECTOPRI1 will set the SECTOPRI1_INTR bit of the INTERRUPT_FLAG register.
When SECTOPRI1_POL is 0 then a falling edge on SECTOPRI1 will set the
SECTOPRI1_INTR bit.
SECTOPRI2 Flag Polarity. When SECTOPRI2_POL is 1 then a rising edge on
SECTOPRI2 will set the SECTOPRI2_INTR bit of the INTERRUPT_FLAG register.
When SECTOPRI2_POL is 0 then a falling edge on SECTOPRI2 will set the
SECTOPRI2_INTR bit.
Submit Documentation Feedback
Copyright © 2015–2018, Texas Instruments Incorporated
Product Folder Links: LMK03328
87
�LMK03328
SNAS668D – AUGUST 2015 – REVISED APRIL 2018
www.ti.com
10.6.14 INT_FLAG Register; R16
The INT_FLAG register records rising or falling edges on the interrupt sources. The polarity is controlled by the
INT_FLAG_POL register. This register is only updated if the INT_EN register bit is set to 1.
Bit # Field
[7]
LOL1_INTR
Type Reset
R
0
EEPROM
N
[6]
LOS1_INTR
R
0
N
[5]
CAL1_INTR
R
0
N
[4]
LOL2_INTR
R
0
N
[3]
LOS2_INTR
R
0
N
[2]
CAL2_INTR
R
0
N
[1]
SECTOPRI1_IN R
TR
0
N
[0]
SECTOPRI2_IN R
TR
0
N
Description
LOL1 Interrupt. The LOL1_INTR bit is set when an edge of the correct polarity is
detected on the LOL1 interrupt source. The LOL1_INTR bit is cleared by writing a 0.
LOS1 Interrupt. The LOS1_INTR bit is set when an edge of the correct polarity is
detected on the LOS1 interrupt source. The LOS1_INTR bit is cleared by writing a 0.
CAL1 Interrupt. The CAL1_INTR bit is set when an edge of the correct polarity is
detected on the CAL1 interrupt source. The CAL1_INTR bit is cleared by writing a 0.
LOL2 Interrupt. The LOL2_INTR bit is set when an edge of the correct polarity is
detected on the LOL2 interrupt source. The LOL2_INTR bit is cleared by writing a 0.
LOS2 Interrupt. The LOS2_INTR bit is set when an edge of the correct polarity is
detected on the LOS2 interrupt source. The LOS2_INTR bit is cleared by writing a 0.
CAL2 Interrupt. The CAL2_INTR bit is set when an edge of the correct polarity is
detected on the CAL2 interrupt source. The CAL2_INTR bit is cleared by writing a 0.
SECTOPRI1 Interrupt. The SECT2PRI1_INTR bit is set when an edge of the correct
polarity is detected on the SECTOPRI1 interrupt source. The SECTOPRI1_INTR bit is
cleared by writing a 0.
SECTOPRI2 Interrupt. The SECTOPRI2_INTR bit is set when an edge of the correct
polarity is detected on the SECTOPRI2 interrupt source. The SECTOPRI2_INTR bit is
cleared by writing a 0.
10.6.15 INTCTL Register; R17
The INTCTL register allows configuration of the Interrupt operation.
Bit # Field
[7:2] RESERVED
[1]
INT_AND_OR
Type Reset
RW
0
EEPROM
N
Y
[0]
RW
Y
INT_EN
0
Description
Reserved.
Interrupt AND/OR Combination. If INT_AND_OR is 1 then the interrupts are
combined in an AND structure. In which case ALL un mAsked interrupt flags must be
active to generate the interrupt. If INT_AND_OR is 0 then the interrupts are
combined in an OR structure, in which case any unmasked interrupt flags can
generate the interrupt
INT_AND_OR
Interrupt Function
0
OR
1
AND
Interrupt Enable. If INT_EN is 1 then the interrupt circuit is enabled, if INT_EN is 0
the interrupt circuit is disabled. When INT_EN is 0, interrupts cannot be signalled on
the STATUS pins and the INT_FLAG registers will not be updated, however the
INT_LIVE register will still reflect the current state of the internal interrupt signals.
10.6.16 OSCCTL2 Register; R18
The OSCCTL2 register provides access to input reference status signals
Bit # Field
[7]
RISE_VALID_S
EC
[6]
FALL_VALID_S
EC
[5]
RISE_VALID_P
RI
[4]
FALL_VALID_P
RI
[3:0] RESERVED
88
Type Reset
R
0
EEPROM
N
Description
Secondary Input Rising Valid Indicator from Slew Rate Detector.
R
0
N
Secondary Input Falling Valid Indicator from Slew Rate Detector.
R
0
N
Primary Input Rising Valid Indicator from Slew Rate Detector.
R
0
N
Primary Input Falling Valid Indicator from Slew Rate Detector.
-
-
N
Reserved.
Submit Documentation Feedback
Copyright © 2015–2018, Texas Instruments Incorporated
Product Folder Links: LMK03328
�LMK03328
www.ti.com
SNAS668D – AUGUST 2015 – REVISED APRIL 2018
10.6.17 STATCTL Register; R19
The STATCTL register provides to STATUS0/1 output driver control signals.
Bit # Field
Type Reset
[7:6] RESERVED
[5]
STAT1_SHOOT_ RW 0
THRU_LIMIT
EEPROM
N
Y
[4]
STAT0_SHOOT_ RW
THRU_LIMIT
0
Y
[3:2]
[1]
RESERVED
STAT1_OPEND
RW
RW
0x0
0
Y
Y
[0]
STAT0_OPEND
RW
0
Y
Description
Reserved.
STATUS1 Output Shoot Through Current Limit. When
STAT1_SHOOT_THRU_LIMIT is 1 then the transient current spikes are minimized,
the performance of the STATUS1 output is degraded in this mode.
STATUS0 Output Shoot Through Current Limit. When
STAT0_SHOOT_THRU_LIMIT is 1 then the transient current spikes are minimized,
the performance of the STATUS0 output is degraded in this mode.
Reserved.
STATUS1 Open Drain Enable. When STAT1_OPEND is 1 the STATUS1 output is
configured as an open drain output driver.
STATUS0 Open Drain Enable. When STAT0_OPEND is 1 the STATUS0 output is
configured as an open drain output driver.
10.6.18 MUTELVL1 Register; R20
The MUTELVL1 register determines the Output Driver during mute for output drivers 0 to 3.
Bit # Field
[7:6] CH3_MUTE_LVL
[1:0]
Type Reset
RW 0x1
EEPROM
Y
[5:4]
RW
Y
CH2_MUTE_LVL
[1:0]
0x1
Description
Channel 3 Output Driver Mute Level. CH3_MUTE_LVL determines the configuration
of the CH3 Output Driver during mute as shown in the following table and is
recommended to be set to 0x3. CH3_MUTE_LVL does not determine whether the
CH3 driver is muted or not, instead this is determined by the CH_3_MUTE register
bit.
CH3_MUTE_LVL
DIFF MODE
CMOS MODE
0 (0x0)
CH3 Mute Bypass
CH3 Mute Bypass
1 (0x1)
Powerdown, output goes to Out_P Normal Operation,
Vcm
Out_N Force Output Low
2 (0x2)
Force output High
Out_P Force Output Low,
Out_N Normal Operation
3 (0x3)
Force the positive output
Out_P Force Output Low,
node to the internal
Out_N Force Output Low
regulator output voltage rail
(when AC coupled to load)
and the negative output
node to the GND rail
Channel 2 Output Driver Mute Level. CH2_MUTE_LVL determines the configuration
of the CH2 Output Driver during mute as shown in the following table and is
recommended to be set to 0x3. CH2_MUTE_LVL does not determine whether the
CH2 driver is muted or not, instead this is determined by the CH_2_MUTE register
bit.
CH2_MUTE_LVL
DIFF MODE
CMOS MODE
0 (0x0)
CH2 Mute Bypass
CH2 Mute Bypass
1 (0x1)
Powerdown, output goes to Out_P Normal Operation,
Vcm
Out_N Force Output Low
2 (0x2)
Force output High
Out_P Force Output Low,
Out_N Normal Operation
3 (0x3)
Force the positive output
Out_P Force Output Low,
node to the internal
Out_N Force Output Low
regulator output voltage rail
(when AC coupled to load)
and the negative output
node to the GND rail
Submit Documentation Feedback
Copyright © 2015–2018, Texas Instruments Incorporated
Product Folder Links: LMK03328
89
�LMK03328
SNAS668D – AUGUST 2015 – REVISED APRIL 2018
Bit # Field
[3:2] CH1_MUTE_LVL
[1:0]
Type Reset
RW 0x1
EEPROM
Y
[1:0]
RW
Y
CH0_MUTE_LVL
[1:0]
0x1
www.ti.com
Description
Channel 1 Output Driver Mute Level. CH1_MUTE_LVL determines the configuration
of the CH1 Output Driver during mute as shown in the following table and is
recommended to be set to 0x3. CH1_MUTE_LVL does not determine whether the
CH1 driver is muted or not, instead this is determined by the CH_1_MUTE register
bit.
CH1_MUTE_LVL
DIFF MODE
CMOS MODE
0 (0x0)
CH1 Mute Bypass
CH1 Mute Bypass
1 (0x1)
Powerdown, output goes to Out_P Normal Operation,
Vcm
Out_N Force Output Low
2 (0x2)
Force output High
Out_P Force Output Low,
Out_N Normal Operation
3 (0x3)
Force the positive output
Out_P Force Output Low,
node to the internal
Out_N Force Output Low
regulator output voltage rail
(when AC coupled to load)
and the negative output
node to the GND rail
Channel 0 Output Driver Mute Level. CH0_MUTE_LVL determines the configuration
of the CH0 Output Driver during mute as shown in the following table and is
recommended to be set to 0x3. CH0_MUTE_LVL does not determine whether the
CH0 driver is muted or not, instead this is determined by the CH_0_MUTE register
bit.
CH0_MUTE_LVL
DIFF MODE
CMOS MODE
0 (0x0)
CH0 Mute Bypass
CH0 Mute Bypass
1 (0x1)
Powerdown, output goes to Out_P Normal Operation,
Vcm
Out_N Force Output Low
2 (0x2)
Force output High
Out_P Force Output Low,
Out_N Normal Operation
3 (0x3)
Force the positive output
Out_P Force Output Low,
node to the internal
Out_N Force Output Low
regulator output voltage rail
(when AC coupled to load)
and the negative output
node to the GND rail
10.6.19 MUTELVL2 Register; R21
The MUTELVL2 register determines the Output Driver during mute for output drivers 4 to 7.
Bit # Field
[7:6] CH7_MUTE_LV
L[1:0]
90
Type Reset
RW 0x1
EEPROM
Y
Description
Channel 7 Output Driver Mute Level. CH7_MUTE_LVL determines the configuration
of the CH7 Output Driver during mute as shown in the following table and is
recommended to be set to 0x3. CH7_MUTE_LVL does not determine whether the
CH7 driver is muted or not, instead this is determined by the CH_7_MUTE register
bit.
CH7_MUTE_LVL
DIFF MODE
CMOS MODE
0 (0x0)
CH7 Mute Bypass
CH7 Mute Bypass
1 (0x1)
Powerdown, output goes to Out_P Normal Operation,
Vcm
Out_N Force Output Low
2 (0x2)
Force output High
Out_P Force Output Low,
Out_N Normal Operation
3 (0x3)
Force the positive output
Out_P Force Output Low,
node to the internal
Out_N Force Output Low
regulator output voltage rail
(when AC coupled to load)
and the negative output
node to the GND rail
Submit Documentation Feedback
Copyright © 2015–2018, Texas Instruments Incorporated
Product Folder Links: LMK03328
�LMK03328
www.ti.com
SNAS668D – AUGUST 2015 – REVISED APRIL 2018
Bit # Field
[5:4] CH6_MUTE_LV
L[1:0]
Type Reset
RW 0x1
EEPROM
Y
[3:2]
CH5_MUTE_LV
L[1:0]
RW
0x1
Y
[1:0]
CH4_MUTE_LV
L[1:0]
RW
0x1
Y
Description
Channel 6 Output Driver Mute Level. CH6_MUTE_LVL determines the configuration
of the CH6 Output Driver during mute as shown in the following table and is
recommended to be set to 0x3. CH6_MUTE_LVL does not determine whether the
CH6 driver is muted or not, instead this is determined by the CH_6_MUTE register
bit.
CH6_MUTE_LVL
DIFF MODE
CMOS MODE
0 (0x0)
CH6 Mute Bypass
CH6 Mute Bypass
1 (0x1)
Powerdown, output goes to Out_P Normal Operation,
Vcm
Out_N Force Input Low
2 (0x2)
Force output High
Out_P Force Output Low,
Out_N Normal Operation
3 (0x3)
Force the positive output
Out_P Force Output Low,
node to the internal
Out_N Force Output Low
regulator output voltage rail
(when AC coupled to load)
and the negative output
node to the GND rail
Channel 5 Output Driver Mute Level. CH5_MUTE_LVL determines the configuration
of the CH5 Output Driver during mute as shown in the following table and is
recommended to be set to 0x3. CH5_MUTE_LVL does not determine whether the
CH5 driver is muted or not, instead this is determined by the CH_5_MUTE register
bit.
CH5_MUTE_LVL
DIFF MODE
CMOS MODE
0 (0x0)
CH5 Mute Bypass
CH5 Mute Bypass
1 (0x1)
Powerdown, output goes to Out_P Normal Operation,
Vcm
Out_N Force Output Low
2 (0x2)
Force output High
Out_P Force Output Low,
Out_N Normal Operation
3 (0x3)
Force the positive output
Out_P Force Output Low,
node to the internal
Out_N Force Output Low
regulator output voltage rail
(when AC coupled to load)
and the negative output
node to the GND rail
Channel 4 Output Driver Mute Level. CH4_MUTE_LVL determines the configuration
of the CH4 Output Driver during mute as shown in the following table and is
recommended to be set to 0x3. CH4_MUTE_LVL does not determine whether the
CH4 driver is muted or not, instead this is determined by the CH_4_MUTE register
bit.
CH4_MUTE_LVL
DIFF MODE
CMOS MODE
0 (0x0)
CH4 Mute Bypass
CH4 Mute Bypass
1 (0x1)
Powerdown, output goes to Out_P Normal Operation,
Vcm
Out_N Force Output Low
2 (0x2)
Force output High
Out_P Force Output Low,
Out_N Normal Operation
3 (0x3)
Force the positive output
Out_P Force Output Low,
node to the internal
Out_N Force Output Low
regulator output voltage rail
(when AC coupled to load)
and the negative output
node to the GND rail
Submit Documentation Feedback
Copyright © 2015–2018, Texas Instruments Incorporated
Product Folder Links: LMK03328
91
�LMK03328
SNAS668D – AUGUST 2015 – REVISED APRIL 2018
www.ti.com
10.6.20 OUT_MUTE Register; R22
Output Channel Mute Control
Bit # Field
[7]
CH_7_MUTE
Type Reset
RW 1
EEPROM
Y
[6]
CH_6_MUTE
RW
1
Y
[5]
CH_5_MUTE
RW
1
Y
[4]
CH_4_MUTE
RW
1
Y
[3]
CH_3_MUTE
RW
1
Y
[2]
CH_2_MUTE
RW
1
Y
[1]
CH_1_MUTE
RW
1
Y
[0]
CH_0_MUTE
RW
1
Y
Description
Channel 7 Mute Control. When CH_7_MUTE is set to 1 Output Channel 7 is
automatically disabled when the selected clock source is invalid. When
CH_7_MUTE_7 is 0 Channel 7 will continue to operate regardless of the state of the
selected clock source.
Channel 6 Mute Control. When CH_6_MUTE is set to 1 Output Channel 6 is
automatically disabled when the selected clock source is invalid. When
CH_6_MUTE_6 is 0 Channel 6 will continue to operate regardless of the state of the
selected clock source.
Channel 5 Mute Control. When CH_5_MUTE is set to 1 Output Channel 5 is
automatically disabled when the selected clock source is invalid. When
CH_5_MUTE_5 is 0 Channel 5 will continue to operate regardless of the state of the
selected clock source.
Channel 4 Mute Control. When CH_4_MUTE is set to 1 Output Channel 4 is
automatically disabled when the selected clock source is invalid. When
CH_4_MUTE_4 is 0 Channel 4 will continue to operate regardless of the state of the
selected clock source.
Channel 3 Mute Control. When CH_3_MUTE is set to 1 Output Channel 3 is
automatically disabled when the selected clock source is invalid. When CH_3_MUTE
is 0 Channel 3 will continue to operate regardless of the state of the selected clock
source.
Channel 2 Mute Control. When CH_2_MUTE is set to 1 Output Channel 2 is
automatically disabled when the selected clock source is invalid. When CH_2_MUTE
is 0 Channel 2 will continue to operate regardless of the state of the selected clock
source.
Channel 1 Mute Control. When CH_1_MUTE is set to 1 Output Channel 1 is
automatically disabled when the selected clock source is invalid. When CH_1_MUTE
is 0 Channel 1 will continue to operate regardless of the state of the selected clock
source.
Channel 0 Mute Control. When CH_0_MUTE is set to 1 Output Channel 0 is
automatically disabled when the selected clock source is invalid. When CH_0_MUTE
is 0 Channel 0 will continue to operate regardless of the state of the selected clock
source.
10.6.21 STATUS_MUTE Register; R23
Status CMOS Output Mute Control
Bit # Field
Type Reset EEPROM
[7:2] RESERVED
N
[1]
STATUS1_MUTE RW 1
Y
[0]
92
STATUS0_MUTE RW
0
Y
Description
Reserved.
STATUS 1 Mute Control. When the STATUS1 output is configuted to provide a
CMOS Clock and the STATUS1_MUTE bit is set to 1 then the STATUS1 Output is
automatically disabled when the selected clock source is invalid. When
STATUS1_MUTE is 0 the STATUS1 Output will continue to operate regardless of the
state of the selected clock source. If the STATUS1 output is not configured to provide
a Clock then it will continue to operate regardless of the STATUS1_MUTE bit value.
STATUS 0 Mute Control. When the STATUS0 output is configuted to provide a
CMOS Clock and the STATUS0_MUTE bit is set to 1 then the STATUS0 Output is
automatically disabled when the selected clock source is invalid. When
STATUS0_MUTE is 0 the STATUS0 Output will continue to operate regardless of the
state of the selected clock source. If the STATUS0 output is not configured to provide
a Clock then it will continue to operate regardless of the STATUS0_MUTE bit value.
Submit Documentation Feedback
Copyright © 2015–2018, Texas Instruments Incorporated
Product Folder Links: LMK03328
�LMK03328
www.ti.com
SNAS668D – AUGUST 2015 – REVISED APRIL 2018
10.6.22 DYN_DLY Register; R24
Output Divider Dynamic Delay Control
Bit # Field
[7:6] RESERVED
[5]
DIV_7_DYN_DL
Y
[4]
DIV_6_DYN_DL
Y
[3]
DIV_5_DYN_DL
Y
[2]
DIV_4_DYN_DL
Y
[1]
DIV_23_DYN_D
LY
[0]
DIV_01_DYN_D
LY
Type Reset
RW 0
EEPROM
N
Y
RW
0
Y
RW
0
Y
RW
0
Y
RW
0
Y
RW
0
Y
Description
Reserved.
Channel 7 Divider Dynamic Delay Control. Enables coarse frequency margining for
divide value > 8
Channel 6 Divider Dynamic Delay Control. Enables coarse frequency margining for
divide value > 8
Channel 5 Divider Dynamic Delay Control. Enables coarse frequency margining for
divide value > 8
Channel 4 Divider Dynamic Delay Control. Enables coarse frequency margining for
divide value > 8
Channel 23 Divider Dynamic Delay Control. Enables coarse frequency margining for
divide value > 8
Channel 01 Divider Dynamic Delay Control. Enables coarse frequency margining for
divide value > 8
10.6.23 REFDETCTL Register; R25
The REFDETCTL register provides control over input reference clock detect features.
Bit # Field
[7:6] DETECT_MOD
E_SEC[1:0]
Type Reset
RW 0x1
EEPROM
Y
[5:4]
DETECT_MOD
E_PRI[1:0]
RW
0x1
Y
[3:2]
LVL_SEL_SEC[
1:0]
RW
0x1
Y
Description
Secondary Input Energy Detector Mode Control. The DETECT_MODE_SEC field
determines the method for Energy Detection on a single-ended signal on the
Secondary Input as follows. When rising and/or falling slew rate detector is enabled,
the reference input should meet the following conditions for correct operation: VIH <
1.7 V and VIL > 0.2 V. When VIH/VIL level detector is enabled, the reference input
should meet the following conditions for correct operation: VIH < 1.5 V and VIL > 0.4 V.
DETECT_MODE_SEC
Energy Detection Method
0 (0x0)
Rising Slew Rate Detector
1 (0x1)
Rising and Falling Slew Rate Detector
2 (0x2)
Falling Slew Rate Detector
3 (0x3)
VIH/VIL Level Detector
Primary Input Energy Detector Mode Control. The DETECT_MODE_PRI field
determines the method for Energy Detection on a single-ended signal on the Primary
Input as follows. When rising and/or falling slew rate detector is enabled, the reference
input should meet the following conditions for correct operation: VIH < 1.7 V and VIL >
0.2 V. When VIH/VIL level detector is enabled, the reference input should meet the
following conditions for correct operation: VIH < 1.5 V and VIL > 0.4 V.
DETECT_MODE_PRI
Energy Detection Method
0 (0x0)
Rising Slew Rate Detector
1 (0x1)
Rising and Falling Slew Rate Detector
2 (0x2)
Falling Slew Rate Detector
3 (0x3)
VIH/VIL Level Detector
Secondary Input Comparator Level Selection. The LVL_SEL_SEC fields determines
the levels on a differential signal for the Secondary Input Energy Detection block as
follows.
LVL_SEL_SEC
Comparator Levels
0 (0x0)
200 mV Differential
1 (0x1)
300 mV Differential
2 (0x2)
400 mV Differential
3 (0x3)
RESERVED
Submit Documentation Feedback
Copyright © 2015–2018, Texas Instruments Incorporated
Product Folder Links: LMK03328
93
�LMK03328
SNAS668D – AUGUST 2015 – REVISED APRIL 2018
Bit # Field
Type Reset
[1:0] LVL_SEL_PRI[1 RW 0x1
:0]
EEPROM
Y
www.ti.com
Description
Primary Input Comparator Level Selection. The LVL_SEL_PRI field determines the
levels on a differential signal for the Primary Input Energy Detection block as follows.
LVL_SEL_PRI
Comparator Levels
0 (0x0)
200 mV Differential
1 (0x1)
300 mV Differential
2 (0x2)
400 mV Differential
3 (0x3)
RESERVED
10.6.24 STAT0_INT Register; R27
The STAT0_INT register provides control of the STATUS0 output and Interrupt configuration. The STATUS0 pin
is also used for test and diagnostic functions. The test configuration registers override the STAT0_INT register.
Bit # Field
Type Reset
[7:4] STAT0_SEL[3:0 RW 0x5
]
EEPROM
Y
[3]
STAT0_POL
RW
1
Y
[2:0]
RESERVED
-
-
N
94
Description
STATUS0 Indicator Signal Select.
STAT0CFG
0 (0x0)
1 (0x1)
2 (0x2)
3 (0x3)
STATUS0 Information
PRIREF Loss of Signal (LOS)
SECREF Loss of Signal (LOS)
PLL1 Loss of Lock (LOL)
PLL1 R Divider, divided by 2 (when R Divider is
not bypassed)
4 (0x4)
PLL1 N Divider, divided by 2
5 (0x5)
PLL2 Loss of Lock (LOL)
6 (0x6)
PLL2 R Divider, divided by 2 (when R Divider is
not bypassed)
7 (0x7)
PLL2 N Divider, divided by 2
8 (0x8)
PLL1 VCO Calibration Active (CAL)
9 (0x9)
PLL2 VCO Calibration Active (CAL)
10 (0xA)
Interrupt (INTR). Derived from INT_FLAG register
bits.
11 (0xB)
PLL1 M Divider, divided by 2 (when M Divider is
not bypassed)
12 (0xC)
PLL2 M Divider, divided by 2 (when M Divider is
not bypassed)
13 (0xD)
EEPROM Active
14 (0xE)
PLL1 Secondary to Primary Switch in Automatic
Mode
15 (0xF)
PLL2 Secondary to Primary Switch in Automatic
Mode
The polarity of STATUS0 is set by the STAT0POL bit.
STATUS0 Output Polarity. The STAT0_POL bit defines the polarity of information
presented on the STATUS0 output. If STAT0_POL is set to 1 then STATUS0 is active
high, if STAT0_POL is 0 then STATUS0 is active low.
Reserved.
Submit Documentation Feedback
Copyright © 2015–2018, Texas Instruments Incorporated
Product Folder Links: LMK03328
�LMK03328
www.ti.com
SNAS668D – AUGUST 2015 – REVISED APRIL 2018
10.6.25 STAT1 Register; R28
The STAT1_INT register provides control of the STATUS1 output. The STATUS1 pin is also used for test and
diagnostic functions. The test configuration registers override the STAT0 register.
Bit # Field
Type
[7:4] STAT1_SEL[3:0 RW
]
Reset
0x2
EEPROM
Y
[3]
STAT1_POL
RW
1
Y
[2:0]
RESERVED
-
-
N
Description
STATUS1 Indicator Signal Select. The STAT1_SEL field determines what
information is presented on the STATUS1 output as follows.
STAT1CFG
STATUS1 Information
0 (0x0)
PRIREF Loss of Signal (LOS)
1 (0x1)
SECREF Loss of Signal (LOS)
2 (0x2)
PLL1 Loss of Lock (LOL)
3 (0x3)
PLL1 R Divider, divided by 2 (when R Divider is not
bypassed)
4 (0x4)
PLL1 N Divider, divided by 2
5 (0x5)
PLL2 Loss of Lock (LOL)
6 (0x6)
PLL2 R Divider, divided by 2 (when R Divider is not
bypassed)
7 (0x7)
PLL2 N Divider, divided by 2
8 (0x8)
PLL1 VCO Calibration Active (CAL)
9 (0x9)
PLL2 VCO Calibration Active (CAL)
10 (0xA)
Interrupt (INTR)
11 (0xB)
PLL1 M Divider, divided by 2 (when M Divider is not
bypassed)
12 (0xC)
PLL2 M Divider, divided by 2 (when M Divider is not
bypassed)
13 (0xD)
EEPROM Active
14 (0xE)
PLL1 Secondary to Primary Switch in Automatic Mode
15 (0xF)
PLL2 Secondary to Primary Switch in Automatic Mode
The polarity of STATUS1 is set by the STAT1POL bit.
STATUS1 Output Polarity. The STAT1_POL bit defines the polarity of information
presented on the STATUS1 output. If STAT1_POL is set to 1 then STATUS1 is
active high, if STAT1_POL is 0 then STATUS1 is active low.
Reserved.
10.6.26 OSCCTL1 Register; R29
The OSCCTL1 register provides control over input reference clock features.
Bit # Field
[7]
DETECT_BYP
Type Reset
RW 0
EEPROM
Y
[6]
[5]
RESERVED
TERM2GND_S
EC
RW
0
N
Y
[4]
TERM2GND_P
RI
RW
0
Y
[3]
DIFFTERM_SE RW
C
DIFFTERM_PRI RW
0
Y
1
Y
[1]
AC_MODE_SE
C
RW
1
Y
[0]
AC_MODE_PRI RW
0
Y
[2]
Description
Signal Detector Bypass. When DETECT_BYP is 1 the output of the Signal Detector's,
both Primary and Secondary are ingored and the inputs are always considered to be
valid by the PLL control state machines. The DETECT_BYP bit has no effect on the
Interrupt register or STATUS output's.
Reserved.
Differential Termination to GND Control for Secondary Input. When TERM2GND_SEC
is 1 an internal 50ohm termination to GND is selected on the Secondary input in
differential mode.
Differential Termination to GND Control for Primary Input. When TERM2GND_PRI is 1
an internal 50ohm termination to GND is selected on the Primary input in differential
mode.
Differential Termination Control for Secondary Input. When DIFFTERM_SEC is 1 an
internal 100ohm termination is selected on the Secondary input in differential mode.
Differential Termination Control for Primary Input. When DIFFTERM_PRI is 1 an
internal 100ohm termination is selected on the Primary input in differential mode.
AC Coupling Mode for Secondary Input. When AC_MODE_SEC is 1, this enables the
internal input biasing to support an externally AC coupled input signal on the SECREF
inputs. When AC_MODE_SEC is 0, the internal input bias is not used.
AC Coupling Mode for Primary Input. When AC_MODE_PRI is 1, this enables the
internal input biasing to support an externally AC coupled input signal on the PRIREF
inputs. When AC_MODE_PRI is 0, the internal input bias is not used.
Submit Documentation Feedback
Copyright © 2015–2018, Texas Instruments Incorporated
Product Folder Links: LMK03328
95
�LMK03328
SNAS668D – AUGUST 2015 – REVISED APRIL 2018
www.ti.com
10.6.27 PWDN Register; R30
The PWDN register is described in the following table.
Bit # Field
[7]
RESERVED
[6]
CMOSCHPWD
N
[5]
CH7PWDN
Type Reset
RW 0
EEPROM
N
Y
Description
Reserved.
CMOS Output Channel Powerdown.
RW
0
Y
[4]
CH6PWDN
RW
0
Y
[3]
CH5PWDN
RW
0
Y
[2]
CH4PWDN
RW
0
Y
[1]
CH23PWDN
RW
0
Y
[0]
CH01PWDN
RW
0
Y
Output Channel 7 Powerdown. When CH7PWDN is 1, the MUX and divider of channel
7 will be disabled. To shut down entire output path (output MUX, divider and buffer),
R43[5:4] should be set to 0x0 irrespective of R30.5.
Output Channel 6 Powerdown. When CH6PWDN is 1, the MUX and divider of channel
6 will be disabled. To shut down entire output path (output MUX, divider and buffer),
R41[5:4] should be set to 0x0 irrespective of R30.4.
Output Channel 5 Powerdown. When CH5PWDN is 1, the MUX and divider of channel
5 will be disabled. To shut down entire output path (output MUX, divider and buffer),
R39[5:4] should be set to 0x0 irrespective of R30.3.
Output Channel 4 Powerdown. When CH4PWDN is 1, the MUX and divider of channel
4 will be disabled. To shut down entire output path (output MUX, divider and buffer),
R37[5:4] should be set to 0x0 irrespective of R30.2.
Output Channel 23 Powerdown. When CH23PWDN is 1, the MUX and divider of
channels 2 and 3 will be disabled. To shut down entire output paths (output MUX,
divider and buffers), R35[6:5] and R34[6:5] should be set to 0x0 irrespective of R30.1.
Output Channel 01 Powerdown. When CH01PWDN is 1, the MUX and divider of
channels 0 and 1 will be disabled. To shut down entire output paths (output MUX,
divider and buffers), R32[6:5] and R31[6:5] should be set to 0x0 irrespective of R30.0.
10.6.28 OUTCTL_0 Register; R31
The OUTCTL_0 register provides control over Output 0.
Bit # Field
[7]
CH_0_1_MUX
Type Reset
RW 1
EEPROM
Y
[6:5]
OUT_0_SEL[1:0 RW
]
0x1
Y
[4:3]
OUT_0_MODE1 RW
[1:0]
0x2
Y
[2:1]
OUT_0_MODE2 RW
[1:0]
0x0
Y
[0]
RESERVED
-
N
96
-
Description
Channel's 0 and 1 Clock Source Mux Control.
CH_0_1_MUX
CH0/CH1 Clock Source
0
PLL1
1
PLL2
Channel 0 Output Driver Format Select. The OUT_0_SEL field controls the Channel 0
Output Driver as shown below.
OUT_0_SEL
OUTPUT OPERATION
0 (0x0)
Disabled
1 (0x1)
AC-LVDS/AC-CML/ACLVPECL
2 (0x2)
HCSL
3 (0x3)
LVCMOS
Channel 0 Output Driver Mode1 Select.
OUT_0_MODE1 Diff-Mode, Itail
CMOS-Mode, Out_P
0 (0x0)
4 mA (AC-LVDS)
Powerdown, tristate
1 (0x1)
6 mA (AC-CML)
Powerdown, low
2 (0x2)
8 mA (AC-LVPECL)
Powerup, negative polarity
3 (0x3)
16 mA (HCSL) or 8 mA (ACPowerup, positive polarity
LVPECL)
Channel 0 Output Driver Mode2 Select.
OUT_0_MODE2 Diff-Mode, Rload in HCSL mode CMOS=Mode, Out_N
0 (0x0)
Tristate
Powerdown, tristate
1 (0x1)
50 Ω
Powerdown, low
2 (0x2)
100 Ω
Powerup, negative polarity
3 (0x3)
200 Ω
Powerup, positive polarity
Reserved.
Submit Documentation Feedback
Copyright © 2015–2018, Texas Instruments Incorporated
Product Folder Links: LMK03328
�LMK03328
www.ti.com
SNAS668D – AUGUST 2015 – REVISED APRIL 2018
10.6.29 OUTCTL_1 Register; R32
The OUTCTL_1 register provides control over Output 1.
Bit # Field
Type Reset
[7]
RESERVED
[6:5] OUT_1_SEL[1:0 RW 0x1
]
EEPROM
N
Y
[4:3]
OUT_1_MODE1 RW
[1:0]
0x2
Y
[2:1]
OUT_1_MODE2 RW
[1:0]
0x0
Y
[0]
RESERVED
-
N
-
Description
Reserved.
Channel 1 Output Driver Format Select. The OUT_1_SEL field controls the Channel 1
Output Driver as shown below.
OUT_1_SEL
OUTPUT OPERATION
0 (0x0)
Disabled
1 (0x1)
AC-LVDS/AC-CML/AC-LVPECL
2 (0x2)
HCSL
3 (0x3)
LVCMOS
Channel 1 Output Driver Mode1 Select.
OUT_1_MODE1 Diff-Mode, Itail
CMOS-Mode, Out_P
0 (0x0)
4 mA (AC-LVDS)
Powerdown, tristate
1 (0x1)
6 mA (AC-CML)
Powerdown, low
2 (0x2)
8 mA (AC-LVPECL)
Powerup, negative polarity
3 (0x3)
16 mA (HCSL) or 8 mA
Powerup, positive polarity
(AC-LVPECL)
Channel 1 Output Driver Mode2 Select.
OUT_1_MODE2 Diff-Mode, Rload in HCSL CMOS=Mode, Out_N
mode
0 (0x0)
Tristate
Powerdown, tristate
1 (0x1)
50 Ω
Powerdown, low
2 (0x2)
100 Ω
Powerup, negative polarity
3 (0x3)
200 Ω
Powerup, positive polarity
Reserved.
10.6.30 OUTDIV_0_1 Register; R33
Channel [1:0] Output Divider
Bit # Field
Type Reset
[7:0] OUT_0_1_DIV RW 0x01
[7:0]
EEPROM
Y
Description
Channel's 0 and 1 Output Divider. The Channel 0 and 1 Divider, OUT_0_1_DIV, is a 8bit divider. The valid values for OUT_0_1_DIV range from 1 to 256 as shown below.
OUT_0_1_DIV
DIVIDE RATIO
0 (0x00)
1
1 (0x01)
2
2 (0x02)
3
...
255 (0xFF)
256
10.6.31 OUTCTL_2 Register; R34
The OUTCTL_2 register provides control over Output 2.
Bit # Field
[7]
CH_2_3_MUX
Type Reset
RW 1
EEPROM
Y
Description
Channel's 2 and 3 Clock Source Mux Control.
CH_2_3_MUX
0
1
CH2/CH3 Clock Source
PLL1
PLL2
Submit Documentation Feedback
Copyright © 2015–2018, Texas Instruments Incorporated
Product Folder Links: LMK03328
97
�LMK03328
SNAS668D – AUGUST 2015 – REVISED APRIL 2018
Bit # Field
Type Reset
[6:5] OUT_2_SEL[1: RW 0x1
0]
EEPROM
Y
[4:3]
OUT_2_MODE RW
1[1:0]
0x2
Y
[2:1]
OUT_2_MODE RW
2[1:0]
0x0
Y
[0]
RESERVED
-
N
-
www.ti.com
Description
Channel 2 Output Driver Format Select. The OUT_2_SEL field controls the Channel 2
Output Driver as shown below.
OUT_2_SEL
OUTPUT OPERATION
0 (0x0)
Disabled
1 (0x1)
AC-LVDS/AC-CML/ACLVPECL
2 (0x2)
HCSL
3 (0x3)
LVCMOS
Channel 2 Output Driver Mode1 Select.
OUT_2_MODE1
Diff-Mode, Itail
CMOS-Mode, Out_P
0 (0x0)
4 mA (AC-LVDS)
Powerdown, tristate
1 (0x1)
6 mA (AC-CML)
Powerdown, low
2 (0x2)
8 mA (AC-LVPECL)
Powerup, negative polarity
3 (0x3)
16 mA (HCSL) or 8 mA (ACPowerup, positive polarity
LVPECL)
Channel 2 Output Driver Mode2 Select.
OUT_2_MODE2
Diff-Mode, Rload in HCSL mode CMOS=Mode, Out_N
0 (0x0)
Tristate
Powerdown, tristate
1 (0x1)
50 Ω
Powerdown, low
2 (0x2)
100 Ω
Powerup, negative polarity
3 (0x3)
200 Ω
Powerup, positive polarity
Reserved.
10.6.32 OUTCTL_3 Register; R35
The OUTCTL_3 register provides control over Output 3.
Bit # Field
Type Reset
[7]
RESERVED
[6:5] OUT_3_SEL[1 RW 0x1
:0]
EEPROM
N
Y
[4:3]
OUT_3_MOD
E1[1:0]
RW
0x2
Y
[2:1]
OUT_3_MOD
E2[1:0]
RW
0x0
Y
[0]
RESERVED
-
-
N
98
Description
Reserved.
Channel 3 Output Driver Format Select. The OUT_3_SEL field controls the Channel 3
Output Driver as shown below.
OUT_3_SEL
OUTPUT OPERATION
0 (0x0)
Disabled
1 (0x1)
AC-LVDS/AC-CML/AC-LVPECL
2 (0x2)
HCSL
3 (0x3)
LVCMOS
Channel 3 Output Driver Mode1 Select.
OUT_3_MODE1
Diff-Mode, Itail
CMOS-Mode, Out_P
0 (0x0)
4 mA (AC-LVDS)
Powerdown, tristate
1 (0x1)
6 mA (AC-CML)
Powerdown, low
2 (0x2)
8 mA (AC-LVPECL)
Powerup, negative polarity
3 (0x3)
16 mA (HCSL) or 8 mA
Powerup, positive polarity
(AC-LVPECL)
Channel 3 Output Driver Mode2 Select.
OUT_3_MODE2
Diff-Mode, Rload in HCSL
CMOS=Mode, Out_N
mode
0 (0x0)
Tristate
Powerdown, tristate
1 (0x1)
50 Ω
Powerdown, low
2 (0x2)
100 Ω
Powerup, negative polarity
3 (0x3)
200 Ω
Powerup, positive polarity
Reserved.
Submit Documentation Feedback
Copyright © 2015–2018, Texas Instruments Incorporated
Product Folder Links: LMK03328
�LMK03328
www.ti.com
SNAS668D – AUGUST 2015 – REVISED APRIL 2018
10.6.33 OUTDIV_2_3 Register; R36
Channel [3:2] Output Divider
Bit # Field
Type Reset
[7:0] OUT_2_3_DIV RW 0x03
[7:0]
EEPROM
Y
Description
Channel's 2 and 3 Output Divider. The Channel 2 and 3 Divider, OUT_2_3_DIV, is a 8bit divider. The valid values for OUT_2_3_DIV range from 1 to 256 as shown below.
OUT_2_3_DIV
DIVIDE RATIO
0 (0x00)
1
1 (0x01)
2
2 (0x02)
3
...
255 (0xFF)
256
10.6.34 OUTCTL_4 Register; R37
The OUTCTL_4 register provides control over Output 4
Bit # Field
[7:6] CH_4_MUX[1:
0]
Type Reset
RW 0x0
EEPROM
Y
[5:4]
OUT_4_SEL[1: RW
0]
0x1
Y
[3:2]
OUT_4_MODE RW
1[1:0]
0x2
Y
[1:0]
OUT_4_MODE RW
2[1:0]
0x0
Y
Description
Channel 4 Clock Source Mux Control.
CH_4_MUX
CH4 Clock Source
0 (0x0)
PLL1
1 (0x1)
PLL2
2 (0x2)
PRIMARY REFERENCE
3 (0x3)
SECONDARY REFERENCE
When the doubler is enabled the Primary and Secondary Reference options will reflect
the frequency doubled reference. If the Primary or Secondary Reference options are
selected the output divider is by-passed.
Channel 4 Output Driver Format Select. The OUT_4_SEL field controls the Channel 4
Output Driver as shown below.
OUT_1_SEL
OUTPUT OPERATION
0 (0x0)
Disabled
1 (0x1)
AC-LVDS/AC-CML/AC-LVPECL
2 (0x2)
HCSL
3 (0x3)
LVCMOS
Channel 4 Output Driver Mode1 Select.
OUT_4_MODE1
Diff-Mode, Itail
CMOS-Mode, Out_P
0 (0x0)
4 mA (AC-LVDS)
Powerdown, tristate
1 (0x1)
6 mA (AC-CML)
Powerdown, low
2 (0x2)
8 mA (AC-LVPECL)
Powerup, negative polarity
3 (0x3)
16 mA (HCSL) or 8 mA Powerup, positive polarity
(AC-LVPECL)
Channel 4 Output Driver Mode2 Select.
OUT_4_MODE2
Diff-Mode, Rload in
CMOS=Mode, Out_N
HCSL mode
0 (0x0)
Tristate
Powerdown, tristate
1 (0x1)
50 Ω
Powerdown, low
2 (0x2)
100 Ω
Powerup, negative polarity
3 (0x3)
200 Ω
Powerup, positive polarity
Submit Documentation Feedback
Copyright © 2015–2018, Texas Instruments Incorporated
Product Folder Links: LMK03328
99
�LMK03328
SNAS668D – AUGUST 2015 – REVISED APRIL 2018
www.ti.com
10.6.35 OUTDIV_4 Register; R38
Channel 4 Output Divider
Bit # Field
Type Reset
[7:0] OUT_4_DIV[7: RW 0x02
0]
EEPROM
Y
Description
Channel 4 Output Divider. The Channel 4 Divider, OUT_4_DIV, is a 8-bit divider. The
valid values for OUT_4_DIV range from 1 to 256 as shown below. The divider only
operates on Channel 4 when the clock source is PLL or PLL2.
OUT_4_DIV
DIVIDE RATIO
0 (0x00)
1
1 (0x01)
2
2 (0x02)
3
...
255 (0xFF)
256
10.6.36 OUTCTL_5 Register; R39
The OUTCTL_5 register provides control over Output 5.
Bit # Field
[7:6] CH_5_MUX[
1:0]
Type Reset
RW 0x0
EEPROM
Y
[5:4]
OUT_5_SEL[ RW
1:0]
0x1
Y
[3:2]
OUT_5_MO
DE1[1:0]
RW
0x2
Y
[1:0]
OUT_5_MO
DE2[1:0]
RW
0x0
Y
100
Description
Channel 5 Clock Source Mux Control.
CH_5_MUX
CH5 Clock Source
0 (0x0)
PLL1
1 (0x1)
PLL2
2 (0x2)
PRIMARY REFERENCE
3 (0x3)
SECONDARY REFERENCE
When the doubler is enabled the Primary and Secondary Reference options will reflect
the frequency doubled reference. If the Primary or Secondary Reference options are
selected the output divider is by-passed.
Channel 5 Output Driver Format Select. The OUT_5_SEL field controls the Channel 5
Output Driver as shown below.
OUT_1_SEL
OUTPUT OPERATION
0 (0x0)
Disabled
1 (0x1)
AC-LVDS/AC-CML/ACLVPECL
2 (0x2)
HCSL
3 (0x3)
LVCMOS
Channel 5 Output Driver Mode1 Select.
OUT_5_MODE1
Diff-Mode, Itail
CMOS-Mode, Out_P
0 (0x0)
4 mA (AC-LVDS)
Powerdown, tristate
1 (0x1)
6 mA (AC-CML)
Powerdown, low
2 (0x2)
8 mA (AC-LVPECL)
Powerup, negative polarity
3 (0x3)
16 mA (HCSL) or 8 mA
Powerup, positive polarity
(AC-LVPECL)
Channel 5 Output Driver Mode2 Select.
OUT_5_MODE2
Diff-Mode, Rload in HCSL
CMOS=Mode, Out_N
mode
0 (0x0)
Tristate
Powerdown, tristate
1 (0x1)
50 Ω
Powerdown, low
2 (0x2)
100 Ω
Powerup, negative polarity
3 (0x3)
200 Ω
Powerup, positive polarity
Submit Documentation Feedback
Copyright © 2015–2018, Texas Instruments Incorporated
Product Folder Links: LMK03328
�LMK03328
www.ti.com
SNAS668D – AUGUST 2015 – REVISED APRIL 2018
10.6.37 OUTDIV_5 Register; R40
Channel 5 Output Divider
Bit # Field
[7:0] OUT_5_DIV[
7:0]
Type Reset
RW 0x02
EEPROM
Y
Description
Channel 5 Output Divider. The Channel 5 Divider, OUT_5_DIV, is a 8-bit divider. The
valid values for OUT_5_DIV range from 1 to 256 as shown below. The divider only
operates on Channel 5 when the clock source is PLL or PLL2.
OUT_5_DIV
DIVIDE RATIO
0 (0x00)
1
1 (0x01)
2
2 (0x02)
3
...
255 (0xFF)
256
10.6.38 OUTCTL_6 Register; R41
The OUTCTL_6 register provides control over Output 6.
Bit # Field
[7:6] CH_6_MUX[
1:0]
Type Reset
RW 0x0
EEPROM
Y
[5:4]
OUT_6_SEL[ RW
1:0]
0x1
Y
[3:2]
OUT_6_MO
DE1[1:0]
RW
0x2
Y
[1:0]
OUT_6_MO
DE2[1:0]
RW
0x0
Y
Description
Channel 6 Clock Source Mux Control.
CH_6_MUX
CH6 Clock Source
0 (0x0)
PLL1
1 (0x1)
PLL2
2 (0x2)
PRIMARY REFERENCE
3 (0x3)
SECONDARY REFERENCE
When the doubler is enabled the Primary and Secondary Reference options will reflect
the frequency doubled reference. If the Primary or Secondary Reference options are
selected the output divider is by-passed.
Channel 6 Output Driver Format Select. The OUT_6_SEL field controls the Channel 6
Output Driver as shown below.
OUT_1_SEL
OUTPUT OPERATION
0 (0x0)
Disabled
1 (0x1)
AC-LVDS/AC-CML/ACLVPECL
2 (0x2)
HCSL
3 (0x3)
LVCMOS
Channel 6 Output Driver Mode1 Select.
OUT_6_MODE1
Diff-Mode, Itail
CMOS-Mode, Out_P
0 (0x0)
4 mA (AC-LVDS)
Powerdown, tristate
1 (0x1)
6 mA (AC-CML)
Powerdown, low
2 (0x2)
8 mA (AC-LVPECL)
Powerup, negative polarity
3 (0x3)
16 mA (HCSL) or 8 mA
Powerup, positive polarity
(AC-LVPECL)
Channel 6 Output Driver Mode2 Select.
OUT_6_MODE2
Diff-Mode, Rload in HCSL
CMOS=Mode, Out_N
mode
0 (0x0)
Tristate
Powerdown, tristate
1 (0x1)
50 Ω
Powerdown, low
2 (0x2)
100 Ω
Powerup, negative polarity
3 (0x3)
200 Ω
Powerup, positive polarity
Submit Documentation Feedback
Copyright © 2015–2018, Texas Instruments Incorporated
Product Folder Links: LMK03328
101
�LMK03328
SNAS668D – AUGUST 2015 – REVISED APRIL 2018
www.ti.com
10.6.39 OUTDIV_6 Register; R42
Channel 6 Output Divider
Bit # Field
[7:0] OUT_6_DIV[
7:0]
Type Reset
RW 0x05
EEPROM
Y
Description
Channel 6 Output Divider. The Channel 6 Divider, OUT_6_DIV, is a 8-bit divider. The
valid values for OUT_6_DIV range from 1 to 256 as shown below. The divider only
operates on Channel 6 when the clock source is PLL or PLL2.
OUT_6_DIV
DIVIDE RATIO
0 (0x00)
1
1 (0x01)
2
2 (0x02)
3
...
255 (0xFF)
256
10.6.40 OUTCTL_7 Register; R43
The OUTCTL_7 register provides control over Output 7.
Bit # Field
Type
[7:6] CH_7_MUX RW
[1:0]
Reset
0x0
EEPROM
Y
[5:4]
OUT_7_SE
L[1:0]
RW
0x1
Y
[3:2]
OUT_7_MO RW
DE1[1:0]
0x2
Y
[1:0]
OUT_7_MO RW
DE2[1:0]
0x0
Y
102
Description
Channel 7 Clock Source Mux Control.
CH_7_MUX
CH7 Clock Source
0 (0x0)
PLL1
1 (0x1)
PLL2
2 (0x2)
PRIMARY REFERENCE
3 (0x3)
SECONDARY REFERENCE
When the doubler is enabled the Primary and Secondary Reference options will reflect
the frequency doubled reference. If the Primary or Secondary Reference options are
selected the output divider is by-passed.
Channel 7 Output Driver Format Select. The OUT_7_SEL field controls the Channel 7
Output Driver as shown below.
OUT_1_SEL
OUTPUT OPERATION
0 (0x0)
Disabled
1 (0x1)
AC-LVDS/AC-CML/ACLVPECL
2 (0x2)
HCSL
3 (0x3)
LVCMOS
Channel 7 Output Driver Mode1 Select.
OUT_7_MODE1
Diff-Mode, Itail
CMOS-Mode, Out_P
0 (0x0)
4 mA (AC-LVDS)
Powerdown, tristate
1 (0x1)
6 mA (AC-CML)
Powerdown, low
2 (0x2)
8 mA (AC-LVPECL)
Powerup, negative polarity
3 (0x3)
16 mA (HCSL) or 8 mA (ACPowerup, positive polarity
LVPECL)
Channel 7 Output Driver Mode2 Select.
OUT_7_MODE2
Diff-Mode, Rload in HCSL
CMOS=Mode, Out_N
mode
0 (0x0)
Tristate
Powerdown, tristate
1 (0x1)
50 Ω
Powerdown, low
2 (0x2)
100 Ω
Powerup, negative polarity
3 (0x3)
200 Ω
Powerup, positive polarity
Submit Documentation Feedback
Copyright © 2015–2018, Texas Instruments Incorporated
Product Folder Links: LMK03328
�LMK03328
www.ti.com
SNAS668D – AUGUST 2015 – REVISED APRIL 2018
10.6.41 OUTDIV_7 Register; R44
Channel 7 Output Divider
Bit # Field
Type
[7:0] OUT_7_DIV RW
[7:0]
Reset
0x05
EEPROM
Y
Description
Channel 7 Output Divider. The Channel 7 Divider, OUT_7_DIV, is a 8-bit divider. The
valid values for OUT_7_DIV range from 1 to 256 as shown below. The divider only
operates on Channel 7 when the clock source is PLL or PLL2.
OUT_7_DIV
DIVIDE RATIO
0 (0x00)
1
1 (0x01)
2
2 (0x02)
3
...
255 (0xFF)
256
10.6.42 CMOSDIVCTRL Register; R45
CMOS Output Divider Control. The CMOS Clock Outputs provided on STATUS0 and STATUS1 can come from
either CMOS Divider0 or CMOS Divider1. Additionally the clock source routed to the CMOS Dividers can come
from either the PLL1 LVCMOS Pre-Divider or the PLL2 LVCMOS Pre-Divider.
Bit # Field
Type
[7:6] PLL2CMOS RW
PREDIV[1:0
]
Reset
0x0
EEPROM
Y
[5:4]
PLL1CMOS RW
PREDIV[1:0
]
0x0
Y
[3:2]
STATUS1M RW
UX[1:0]
0x2
Y
[1:0]
STATUS0M RW
UX[1:0]
0x2
Y
Description
PLL2 LVCMOS Pre-Divider Selection. The PLL2CMOSPREDIV field selects the divider
value for the PLL2 pre-divider that drives the CMOS Dividers.
PLL2CMOSPREDIV
Divider Value
0 (0x0)
Disabled
1 (0x1)
4
2 (0x2)
5
3 (0x3)
Reserved
PLL1 LVCMOS Pre-Divider Selection. The PLL1CMOSPREDIV field selects the divider
value for the PLL1 pre-divider that drives the CMOS Dividers.
PLL1CMOSPREDIV
Divider Value
0 (0x0)
Disabled
1 (0x1)
4
2 (0x2)
5
3 (0x3)
Reserved
STATUS1 Mux Selection. The STATUS1MUX field controls the signal source for the
STATUS1 Pin as described below.
STATUS1MUX
STATUS1 OPERATION
0 (0x0)
LVCMOS Clock, from STATUS0 Divider
1 (0x1)
LVCMOS Clock, from STATUS1 Divider
2 (0x2)
Normal Status Operation
3 (0x3)
STATUS1 Disabled
STATUS0 Mux Selection. The STATUS0MUX field controls the signal source for the
STATUS0 Pin as described below.
STATUS0MUX
STATUS0 OPERATION
0 (0x0)
LVCMOS Clock, from STATUS0 Divider
1 (0x1)
LVCMOS Clock, from STATUS1 Divider
2 (0x2)
Normal Status Operation
3 (0x3)
STATUS0 Disabled
Submit Documentation Feedback
Copyright © 2015–2018, Texas Instruments Incorporated
Product Folder Links: LMK03328
103
�LMK03328
SNAS668D – AUGUST 2015 – REVISED APRIL 2018
www.ti.com
10.6.43 CMOSDIV0 Register; R46
CMOS Output Divider 0
Bit # Field
[7:0] CMOSDIV0
[7:0]
Type
RW
Reset
0x00
EEPROM
Y
Description
CMOS Output Divider 0. The CMOS Divider0, CMOSDIV0, is a 8-bit divider that divides
the clock source from the PLL1 LVCMOS Pre-Divider output. The valid values for
CMOSDIV0 range from 1 to 256 as shown below.
CMOSDIV0
DIVIDE RATIO
0 (0x00)
Disabled
1 (0x01), 2 (0x02), 3 (0x03), 4 (0x04), 5 6
(0x05)
6 (0x06)
7
7 (0x07)
8
...
255 (0xFF)
256
Whenever CMOS Divider0 is disabled, by setting CMOSDIV0 to 0, a Software reset
should be issued, by setting SWRCMOSCH to 1, after the divider is programmed to a
nonzero value.
10.6.44 CMOSDIV1 Register; R47
CMOS Output Divider 1
Bit # Field
[7:0] CMOSDIV1
[7:0]
Type
RW
Reset
0x0
EEPROM
Y
Description
CMOS Output Divider 1. The CMOS Divider1, CMOSDIV1, is a 8-bit divider that divides
the clock source from the PLL2 LVCMOS Pre-Divider output. The valid values for
CMOSDIV1 range from 1 to 256 as shown below.
CMOSDIV1
DIVIDE RATIO
0 (0x00)
Disabled
1 (0x01), 2 (0x02), 3 (0x03), 4 (0x04), 5 6
(0x05)
6 (0x06)
7
7 (0x07)
8
...
255 (0xFF)
256
Whenever CMOS Divider1 is disabled, by setting CMOSDIV1 to 0, a Software reset
should be issued, by setting SWRCMOSCH to 1, after the divider is programmed to a
nonzero value.
10.6.45 STATUS_SLEW Register; R49
Status CMOS Output Slew Control
Bit # Field
[7:4] RESERVED
[3:2] STATUS1SL
EW[1:0]
Type Reset
RW 0x0
EEPROM
N
Y
[1:0]
RW
Y
104
STATUS0SL
EW[1:0]
0x0
Description
Reserved.
STATUS1 Slew Control. The STATUS1SLEW field controls the slew rate of the
STATUS1 output as shown below.
STATUS1SLEW
STATUS1 Rise/Fall Time
0 (0x0)
Fast (0.35 ns)
1 (0x1)
RESERVED
2 (0x2)
Slow (2.1 ns)
3 (0x3)
RESERVED
STATUS0 Slew Control. The STATUS0SLEW field controls the slew rate of the
STATUS0 output as shown below.
STATUS0SLEW
STATUS0 Rise/Fall Time
0 (0x0)
Fast (0.35 ns)
1 (0x1)
RESERVED
2 (0x2)
Slow (2.1 ns)
3 (0x3)
RESERVED
Submit Documentation Feedback
Copyright © 2015–2018, Texas Instruments Incorporated
Product Folder Links: LMK03328
�LMK03328
www.ti.com
SNAS668D – AUGUST 2015 – REVISED APRIL 2018
10.6.46 IPCLKSEL Register; R50
Input Clock Select
Bit # Field
Type Reset
[7:6] SECBUFSEL RW 0x2
[1:0]
EEPROM
Y
Description
Secondary Input Buffer Selection. SECBUFSEL configures the Secondary Input Buffer
as follows.
SECBUFSEL
Mode
0 (0x0)
Single-ended Input
1 (0x1)
Differential Input
2 (0x2)
Crystal Input
3 (0x3)
Disabled
[5:4]
PRIBUFSEL[
1:0]
RW
0x1
Y
Primary Input Buffer Selection. PRIBUFSEL configures the Primary Input Buffer as
follows.
PRIBUFSEL
Mode
0 (0x0)
Single-ended Input
1 (0x1)
Differential Input
2 (0x2)
Disabled
3 (0x3)
Disabled
[3:2]
INSEL_PLL2[ RW
1:0]
0x1
Y
Reference Input Selection for PLL2. INSEL_PLL2 Determines the input select for PLL2
as follows.
INSEL_PLL2
Input Mode
0 (0x0)
Automatic, Primary is preferred.
1 (0x1)
Determined by external pin, REFSEL.
2 (0x2)
Primary Input Selected.
3 (0x3)
Secondary Input Selected.
When INSEL_PLL2 is equal to b01 the REFSEL pin determines the reference clock
source for PLL2 as follows.
REFSEL
PLL2 Reference Clock
0
PLL2 Reference is Secondary Input
VIM
PLL2 Reference is Secondary Input
1
PLL2 Input MUX is set to Automatic Mode
[1:0]
INSEL_PLL1[ RW
1:0]
0x1
Y
Reference Input Selection for PLL1. INSEL_PLL1 Determines the input select for PLL1
as follows.
INSEL_PLL1
Input Mode
0 (0x0)
Automatic, Primary is preferred.
1 (0x1)
Determined by external pin, REFSEL.
2 (0x2)
Primary Input Selected.
3 (0x3)
Secondary Input Selected.
When INSEL_PLL1 is equal to b01 the REFSEL pin determines the reference clock
source for PLL1 as follows.
REFSEL
PLL1 Reference Clock
0
PLL1 Reference is Primary input
VIM
PLL1 Input MUX is set to Automatic Mode
1
PLL1 Input MUX is set to Automatic Mode
Submit Documentation Feedback
Copyright © 2015–2018, Texas Instruments Incorporated
Product Folder Links: LMK03328
105
�LMK03328
SNAS668D – AUGUST 2015 – REVISED APRIL 2018
www.ti.com
10.6.47 IPCLKCTL Register; R51
Input Clock Control
Bit # Field
Type Reset
[7]
CLKMUX_BY RW 0
PASS
EEPROM
Y
[6:3]
[2]
RESERVED RW
SECONSWIT RW
CH
0x0
0
Y
Y
[1]
SECBUFGAI
N
RW
1
Y
[0]
PRIBUFGAI
N
RW
1
Y
Description
Clock Mux Bypass. Controls whether the glitch-less clock mux on the the Primary and
Secondary Reference paths is enabled. When CLKMUX_BYPASS is 1 then the clock
mux is by-passed.
Reserved.
Secondary Crystal Input Buffer On after Switch. Determines whether the Secondary
Crystal Input Buffer remains on after a switch back to the Primary Input. If
SECONSWITCH is 0 then the Secomdary Crystal Input Buffer is disabled after a switch
back to the Primary input. If SECONSWITCH is 1 then the Secondary Crystal Input
Buffer remains active after a switch back to the Primary input.
Secondary Input Buffer Gain.
SECBUFGAIN
GAIN
0
Minimum
1
Maximum
Primary Input Buffer Gain.
PRIBUFGAIN
GAIN
0
Minimum
1
Maximum
10.6.48 PLL1_RDIV Register; R52
R Divider for PLL1
Bit # Field
[7:3] RESERVED
[2:0] PLL1RDIV[2:
0]
Type Reset
RW 0x0
EEPROM
N
Y
Description
Reserved.
PLL1 R Divider. PLL1 R Divider ratio is set by PLL1RDIV.
PLL1RDIV
PLL1 R-Divider Value
0 (0x0)
Bypass
1 (0x1)
2
...
...
7 (0x7)
8
10.6.49 PLL1_MDIV Register; R53
M Divider for PLL1
Bit # Field
Type Reset
[7:5] RESERVED [4:0] PLL1MDIV[4: RW 0x00
0]
106
EEPROM
N
Y
Description
Reserved.
PLL1 M Divider. PLL1 M Divider ratio is set by PLL1MDIV.
PLL1MDIV
PLL1 M-Divider Value
0 (0x00)
Bypass
1 (0x01)
2
...
...
31 (0x1F)
32
Submit Documentation Feedback
Copyright © 2015–2018, Texas Instruments Incorporated
Product Folder Links: LMK03328
�LMK03328
www.ti.com
SNAS668D – AUGUST 2015 – REVISED APRIL 2018
10.6.50 PLL2_RDIV Register; R54
R Divider for PLL2
Bit # Field
[7:3] RESERVED
[2:0] PLL2RDIV[2:
0]
Type Reset
RW 0x0
EEPROM
N
Y
Description
Reserved.
PLL2 R Divider. PLL2 R Divider ratio is set by PLL2RDIV.
PLL2RDIV
PLL2 R-Divider Value
0 (0x0)
Bypass
1 (0x1)
2
...
...
7 (0x7)
8
10.6.51 PLL2_MDIV Register; R55
M Divider for PLL2
Bit # Field
Type Reset
[7:5] RESERVED [4:0] PLL2MDIV[4: RW 0x00
0]
EEPROM
N
Y
Description
Reserved.
PLL2 M Divider. PLL2 M Divider ratio is set by PLL2MDIV.
PLL2MDIV
PLL2 M-Divider Value
0 (0x00)
Bypass
1 (0x01)
2
...
...
31 (0x1F)
32
10.6.52 PLL1_CTRL0 Register; R56
The PLL1_CTRL0 register provides control of PLL1. The PLL1_CTRL0 register fields are described in the
following table.
Bit # Field
Type Reset
[7:5] RESERVED [4:2] PLL1_P[2:0] RW 0x7
EEPROM
N
Y
[1]
[0]
PLL1_SYN
C_EN
PLL1_PDN
RW
1
Y
RW
0
Y
Description
Reserved.
PLL1 Post-Divider. The PLL1_P field selects the PLL1 post-divider value as follows.
PLL1_P
Post Divider Value
0 (0x0)
2
1 (0x1)
2
2 (0x2)
3
3 (0x3)
4
4 (0x4)
5
5 (0x5)
6
6 (0x6)
7
7 (0x7)
8
PLL1 SYNC Enable. If PLL1_SYNC_EN is 1 then a SYNC event will cause all channels
which use PLL1 as a clock source to be re-synchronized.
PLL1 Powerdown. The PLL1_PDN bit determines whether PLL1 is automatically enabled
and calibrated after a hardware reset. If the PLL1_PDN bit is set to 1 during normal
operation then PLL1 is disabled and the calibration circuit is reset. When PLL1_PDN is
then cleared to 0 PLL is re-enabled and the calibration sequence is automatically
restarted.
PLL1_PDN
PLL1 STATE
0
PLL1 Enabled
1
PLL1 Disabled
Submit Documentation Feedback
Copyright © 2015–2018, Texas Instruments Incorporated
Product Folder Links: LMK03328
107
�LMK03328
SNAS668D – AUGUST 2015 – REVISED APRIL 2018
www.ti.com
10.6.53 PLL1_CTRL1 Register; R57
The PLL1_CTRL1 register provides control of PLL1. The PLL1_CTRL1 register fields are described in the
following table.
Bit # Field
[7:6] RESERVE
D
[5]
RESERVE
D
[4]
PRI_D
[3:0]
Type Reset
-
EEPROM
N
Description
Reserved.
RW
0
Y
Reserved.
RW
1
Y
0x8
Y
Primary Reference Doubler Enable. If PRI_D is 1 the Primary Input Frequency Doubler is
enabled.
PLL1 Charge Pump Gain. The PLL1_CP sets the chargepump current as follows.
PLL1_CP
Icp (mA)
1 (0x1)
0.4
2 (0x2)
0.8
3 (0x3)
1.2
4 (0x4)
1.6
5 (0x5)
2.0
6 (0x6)
2.4
7 (0x7)
2.8
8 (0x8)
6.4
PLL1_CP[3: RW
0]
10.6.54 PLL1_NDIV_BY1 Register; R58
The 12-bit N integer divider value for PLL1 is set by the PLL1_NDIV_BY1 and PLL1_NDIV_BY0 registers.
Bit # Field
Type Reset
[7:4] RESERVE D
[3:0] PLL1_NDI RW 0x0
V[11:8]
EEPROM
N
Description
Reserved.
Y
PLL1 N Divider Byte 1. PLL1 Integer N Divider bits 11 to 8.
PLL1_NDIV
DIVIDER RATIO
0 (0x000)
1
1 (0x001)
1
...
...
4095 (0xFFF)
4095
10.6.55 PLL1_NDIV_BY0 Register; R59
The PLL1_NDIV_BY0 register is described in the following table.
Bit # Field
Type Reset
[7:0]
RW
PLL1_NDIV[7:
0]
0x66
EEPRO
M
Y
Description
PLL1 N Divider Byte 0. PLL1 Integer N Divider bits 7 to 0.
10.6.56 PLL1_FRACNUM_BY2 Register; R60
The Fractional Divider Numerator value for
PLL1_FRACNUM_BY1 and PLL1_FRACNUM_BY0.
Bit # Field
[7:6]
[5:0]
108
Type Reset
RESERVED PLL1_NUM[2 RW
1:16]
0x00
EEPRO
M
N
Y
PLL1
is
set
by
registers
PLL1_FRACNUM_BY2,
Description
Reserved.
PLL1 Fractional Divider Numerator Byte 2. Bits 21 to 16.
Submit Documentation Feedback
Copyright © 2015–2018, Texas Instruments Incorporated
Product Folder Links: LMK03328
�LMK03328
www.ti.com
SNAS668D – AUGUST 2015 – REVISED APRIL 2018
10.6.57 PLL1_FRACNUM_BY1 Register; R61
The PLL1_FRACNUM_BY1 register is described in the following table.
Bit # Field
Type Reset
[7:0] PLL1_NUM[1 RW 0x00
5:8]
EEPROM
Y
Description
PLL1 Fractional Divider Numerator Byte 1. Bits 15 to 8.
10.6.58 PLL1_FRACNUM_BY0 Register; R62
The PLL1_FRACNUM_BY0 register is described in the following table.
Bit # Field
Type Reset
[7:0] PLL1_NUM[7 RW 0x00
:0]
EEPROM
Y
Description
PLL1 Fractional Divider Numerator Byte 0. Bits 7 to 0.
10.6.59 PLL_FRACDEN_BY2 Register; R63
The Fractional Divider Denominator value for
PLL1_FRACDEN_BY1 and PLL1_FRACDEN_BY0.
Bit # Field
[7:6] RESERVED
[5:0] PLL1_DEN[2
1:16]
Type Reset
RW 0x00
EEPROM
N
Y
PLL1
is
set
by
registers
PLL1_FRACDEN_BY2,
Description
Reserved.
PLL1 Fractional Divider Denominator Byte 2. Bits 21 to 16.
10.6.60 PLL1_FRACDEN_BY1 Register; R64
The PLL1_FRACDEN_BY1 register is described in the following table.
Bit # Field
[7:0] PLL1_DEN[
15:8]
Type Reset
RW 0x00
EEPROM
Y
Description
PLL1 Fractional Divider Denominator Byte 1. Bits 15 to 8.
10.6.61 PLL1_FRACDEN_BY0 Register; R65
The PLL1_FRACDEN_BY0 register is described in the following table.
Bit # Field
Type Reset
[7:0] PLL1_DEN[ RW 0x00
7:0]
EEPROM
Y
Description
PLL1 Fractional Divider Denominator Byte 0. Bits 7 to 0.
10.6.62 PLL1_MASHCTRL Register; R66
The PLL1_MASHCTRL register provides control of the fractional divider for PLL1.
Bit # Field
Type Reset
[7:4] RESERVE D
[3:2] PLL1_DT RW 0x3
HRMODE[
1:0]
EEPROM
N
Description
Reserved.
Y
[1:0]
Y
Mash Engine dither mode control.
DITHERMODE
0 (0x0)
1 (0x1)
2 (0x2)
3 (0x3)
Mash Engine Order.
ORDER
0 (0x0)
1 (0x1)
2 (0x2)
3 (0x3)
PLL1_OR
DER[1:0]
RW
0x0
Dither Configuration
Weak
Medium
Strong
Dither Disabled
Order Configuration
Integer Mode Divider
1st order
2nd order
3rd order
Submit Documentation Feedback
Copyright © 2015–2018, Texas Instruments Incorporated
Product Folder Links: LMK03328
109
�LMK03328
SNAS668D – AUGUST 2015 – REVISED APRIL 2018
www.ti.com
10.6.63 PLL1_LF_R2 Register; R67
The PLL1_LF_R2 register controls the value of the PLL1 Loop Filter R2.
Bit # Field
Type Reset
[7:6] RESERVED [5:0] PLL1_LF_R RW 0x24
2[5:0]
EEPROM
N
Y
Description
Reserved.
PLL1 Loop Filter R2. NOTE: Table below lists commonly used R2 values but more
selections are available.
PLL1_LF_R2[5:0]
R2 (Ω)
1 (0x01)
236
2 (0x02)
336
4 (0x04)
536
8 (0x08)
735
32 (0x20)
1636
48 (0x30)
2418
10.6.64 PLL1_LF_C1 Register; R68
The PLL1_LF_C1 register controls the value of the PLL1 Loop Filter C1.
Bit # Field
Type Reset
[7:3] RESERVE D
[2:0] PLL1_LF_ RW 0x0
C1[2:0]
EEPROM
N
Description
Reserved.
Y
PLL1 Loop Filter C1. The value in pF is given by 5 + 50 * PLL_LF_C1 (in binary).
10.6.65 PLL1_LF_R3 Register; R69
The PLL1_LF_R3 register controls the value of the PLL1 Loop Filter R3.
Bit # Field
Type Reset
[7]
RESERVE D
[6:1] PLL1_LF_ RW 0x00
R3[5:0]
EEPROM
N
Description
Reserved.
Y
[0]
Y
PLL1 Loop Filter R3. NOTE: Table below lists commonly used R3 values but more
selections are available.
PLL1_LF_R3[5:0]
R3 (Ω)
0 (0x00)
18
2 (0x02)
318
4 (0x04)
518
8 (0x08)
717
16 (0x10)
854
32 (0x20)
1654
64 (0x40)
3254
PLL1 Loop Filter Setting. Set to 0 for integer PLL and to 1 for fractional PLL.
PLL1_LF_I RW
NT_FRAC
0
10.6.66 PLL1_LF_C3 Register; R70
The PLL1_LF_C3 register controls the value of the PLL1 Loop Filter C3.
Bit # Field
Type Reset
[7:3] RESERVE D
[2:0] PLL1_LF_ RW 0x0
C3[2:0]
110
EEPROM
N
Description
Reserved.
Y
PLL1 Loop Filter C3. The value in pF is given by 5 * PLL_LF_C3 (in binary).
Submit Documentation Feedback
Copyright © 2015–2018, Texas Instruments Incorporated
Product Folder Links: LMK03328
�LMK03328
www.ti.com
SNAS668D – AUGUST 2015 – REVISED APRIL 2018
10.6.67 PLL2_CTRL0 Register; R71
The PLL2_CTRL0 register provides control of PLL2. The PLL2_CTRL0 register fields are described in the
following table.
Bit # Field
Type Reset
[7:5] RESERV ED
[4:2] PLL2_P[ RW
0x7
2:0]
EEPROM
N
Description
Reserved.
Y
[1]
1
Y
0
Y
PLL2 Post-Divider. The PLL2_P field selects the PLL2 post-divider value as follows.
PLL2_P
Post Divider Value
0 (0x0)
2
1 (0x1)
2
2 (0x2)
3
3 (0x3)
4
4 (0x4)
5
5 (0x5)
6
6 (0x6)
7
7 (0x7)
8
PLL2 SYNC Enable. If PLL2_SYNC_EN is 1 then a SYNC event will cause all channels
which use PLL2 has a clock source to be re synchronized.
PLL2 Powerdown. The PLL2_PDN bit determines whether PLL2 is automatically enabled
and calibrated after a hardware reset. If the PLL2_PDN bit is set to 1 during normal
operation then PLL2 is disabled and the calibration circuit is reset. When PLL2_PDN is
then cleared to 0 PLL2 is re-enabled and the calibration sequence is automatically
restarted.
PLL2_PDN
PLL2-state
0
PLL2 Enabled
1
PLL2 Disabled
[0]
PLL2_SY RW
NC_EN
PLL2_PD RW
N
10.6.68 PLL2_CTRL1 Register; R72
The PLL2_CTRL1 register provides control of PLL2. The PLL2_CTRL1 register fields are described in the
following table.
Bit # Field
[7:6] RESERV
ED
[5]
RESERV
ED
[4]
SEC_D
Type Reset
-
EEPROM
N
Description
Reserved.
RW
0
Y
Reserved.
RW
1
Y
[3:0]
RW
0x8
Y
Secondary Reference Doubler Enable. If SEC_D is 1 the Secondary Input Frequency
Doubler is enabled.
PLL2 Charge Pump Gain. The PLL2_CP sets the charge pump current as follows.
PLL2_CP
Icp (mA)
1 (0x1)
0.4
2 (0x2)
0.8
3 (0x3)
1.2
4 (0x4)
1.6
5 (0x5)
2.0
6 (0x6)
2.4
7 (0x7)
2.8
8 (0x8)
6.4
PLL2_C
P[3:0]
Submit Documentation Feedback
Copyright © 2015–2018, Texas Instruments Incorporated
Product Folder Links: LMK03328
111
�LMK03328
SNAS668D – AUGUST 2015 – REVISED APRIL 2018
www.ti.com
10.6.69 PLL2_NDIV_BY1 Register; R73
The 12-bit N integer divider value for PLL2 is set by the PLL2_NDIV_BY1 and PLL2_NDIV_BY0 registers.
Bit # Field
Type
[7:4] RESER VED
[3:0] PLL2_N RW
DIV[11:
8]
Reset
-
EEPROM
N
Description
Reserved.
0x0
Y
PLL2 N Divider Byte 1. PLL2 Integer
PLL2_NDIV
0 (0x000)
1 (0x001)
...
4095 (0xFFF)
N Divider bits 11 to 8.
DIVIDER RATIO
1
1
...
4095
10.6.70 PLL2_NDIV_BY0 Register; R74
The PLL2_NDIV_BY0 register is described in the following table.
Bit # Field
Type
[7:0] PLL2_N RW
DIV[7:0]
Reset
0x64
EEPROM
Y
Description
PLL2 N Divider Byte 0. PLL2 Integer N Divider bits 7 to 0.
10.6.71 PLL2_FRACNUM_BY2 Register; R75
The Fractional Divider Numerator value for
PLL2_FRACNUM_BY1 and PLL2_FRACNUM_BY0.
Bit # Field
Type Reset
[7:6] RESER VED
[5:0] PLL2_N RW
0x00
UM[21:
16]
PLL2
is
set
by
registers
EEPROM
N
Description
Reserved.
Y
PLL2 Fractional Divider Numerator Byte 2. Bits 21 to 16.
PLL2_FRACNUM_BY2,
10.6.72 PLL2_FRACNUM_BY1 Register; R76
The PLL2_FRACNUM_BY1 register is described in the following table.
Bit # Field
Type Reset
[7:0] PLL2_N RW
0x00
UM[15:
8]
EEPROM
Y
Description
PLL2 Fractional Divider Numerator Byte 1. Bits 15 to 8.
10.6.73 PLL2_FRACNUM_BY0 Register; R77
The PLL2_FRACNUM_BY0 register is described in the following table.
Bit # Field
Type Reset
[7:0] PLL2_N RW 0x00
UM[7:0]
EEPROM
Y
Description
PLL2 Fractional Divider Numerator Byte 0. Bits 7 to 0.
10.6.74 PLL2_FRACDEN_BY2 Register; R78
The Fractional Divider Denominator value for
PLL2_FRACDEN_BY1 and PLL2_FRACDEN_BY0.
Bit # Field
Type Reset
[7:6] RESER VED
[5:0] PLL2_D RW 0x00
EN[21:1
6]
112
PLL2
is
set
by
registers
EEPROM
N
Description
Reserved.
Y
PLL2 Fractional Divider Denominator Byte 2. Bits 21 to 16.
Submit Documentation Feedback
PLL2_FRACDEN_BY2,
Copyright © 2015–2018, Texas Instruments Incorporated
Product Folder Links: LMK03328
�LMK03328
www.ti.com
SNAS668D – AUGUST 2015 – REVISED APRIL 2018
10.6.75 PLL2_FRACDEN_BY1 Register; R79
The PLL2_FRACDEN_BY1 register is described in the following table.
Bit # Field Type Reset
[7:0] PLL2_ RW
0x00
DEN[1
5:8]
EEPROM
Y
Description
PLL2 Fractional Divider Denominator Byte 1. Bits 15 to 8.
10.6.76 PLL2_FRACDEN_BY0 Register; R80
The PLL2_FRACDEN_BY0 register is described in the following table.
Bit #
[7:0]
Field Type
PLL2_ RW
DEN[7
:0]
Reset
0x00
EEPROM
Y
Description
PLL2 Fractional Divider Denominator Byte 0. Bits 7 to 0.
10.6.77 PLL2_MASHCTRL Register; R81
The PLL2_MASHCTRL register provides control of the fractional divider for PLL2.
Bit #
[7:4]
[3:2]
[1:0]
Field Type
RESE RVED
PLL2_ RW
DTHR
MODE
[1:0]
Reset
-
EEPROM
N
Description
Reserved.
0x3
Y
PLL2_ RW
ORDE
R[1:0]
0x0
Mash Engine dither mode control.
DITHERMODE
0 (0x0)
1 (0x1)
2 (0x2)
3 (0x3)
Mash Engine Order.
ORDER
0 (0x0)
1 (0x1)
2 (0x2)
3 (0x3)
Y
Dither Configuration
Weak
Medium
Strong
Dither Disabled
Order Configuration
Integer Mode Divider
1st order
2nd order
3rd order
10.6.78 PLL2_LF_R2 Register; R82
The PLL2_LF_R2 register controls the value of the PLL2 Loop Filter R2.
Bit #
[7:6]
[5:0]
Field Type
RESE RVED
PLL2_ RW
LF_R
2[5:0]
Reset
-
EEPROM
N
Description
Reserved.
0x24
Y
PLL2 Loop Filter R2. NOTE: Table below lists commonly used R2 values but more
selections are available.
PLL2_LF_R2[5:0]
R2 (Ω)
1 (0x01)
236
2 (0x02)
336
4 (0x04)
536
8 (0x08)
735
32 (0x20)
1636
48 (0x30)
2418
Submit Documentation Feedback
Copyright © 2015–2018, Texas Instruments Incorporated
Product Folder Links: LMK03328
113
�LMK03328
SNAS668D – AUGUST 2015 – REVISED APRIL 2018
www.ti.com
10.6.79 PLL2_LF_C1 Register; R83
The PLL2_LF_C1 register controls the value of the PLL2 Loop Filter C1.
Bit #
[7:3]
[2:0]
Field Type
RESE RVED
PLL2_ RW
LF_C
1[2:0]
Reset
-
EEPROM
N
Description
Reserved.
0x0
Y
PLL2 Loop Filter C1. The value in pF is given by 5 + 50 * PLL2_LF_C1 (in binary).
10.6.80 PLL2_LF_R3 Register; R84
The PLL2_LF_R3 register controls the value of the PLL2 Loop Filter R3.
Bit # Field Type Reset
[7]
RES ERV
ED
[6:1] PLL2 RW
0x00
_LF_
R3[5:
0]
EEPROM
N
Description
Reserved.
Y
[0]
Y
PLL2 Loop Filter R3. NOTE: Table below lists commonly used R3 values but more selections
are available.
PLL1_LF_R3[5:0]
R3 (Ω)
0 (0x00)
18
2 (0x02)
318
4 (0x04)
518
8 (0x08)
717
16 (0x10)
854
32 (0x20)
1654
64 (0x40)
3254
PLL2 Loop Filter Setting. Set to 0 for integer PLL and to 1 for fractional PLL.
PLL2 RW
_LF_
INT_
FRA
C
0
10.6.81 PLL2_LF_C3 Register; R85
The PLL2_LF_C3 register controls the value of the PLL2 Loop Filter C3.
Bit #
[7:3]
[2:0]
114
Field Type
RESE RVED
PLL2_ RW
LF_C
3[2:0]
Reset
-
EEPROM
N
Description
Reserved.
0x0
Y
PLL2 Loop Filter C3. The value in pF is given by 5 * PLL2_LF_C3 (in binary).
Submit Documentation Feedback
Copyright © 2015–2018, Texas Instruments Incorporated
Product Folder Links: LMK03328
�LMK03328
www.ti.com
SNAS668D – AUGUST 2015 – REVISED APRIL 2018
10.6.82 XO_MARGINING Register; R86
Margin Control
Bit # Field
Type Reset
[7]
RESERV ED
[6:4] MARGIN R
0x0
_DIG_ST
EP[2:0]
EEPROM
N
Description
Reserved.
N
[3:2]
MARGIN
_OPTIO
N[1:0]
Y
[1:0]
RESERV ED
Margin Digital Step. MARGIN_DIG_STEP allows the current level of the margin selection pin
(GPIO[5]) to be read.
MARGIN_DIG_STEP
Value
0 (0x0)
STEP1
1 (0x1)
STEP2
2 (0x2)
STEP3
3 (0x3)
STEP4. (Nominal loading for zero frequency offset
4 (0x4)
STEP5
5 (0x5)
STEP6
6 (0x6)
STEP7
7 (0x7)
STEP8
Margin Option Select. The MARGIN_OPTION field defines the operation of the Frequency
Margining as follows.
MARGIN_OPTIONS
MARGIN Mode
0 (0x0)
Margining Enabled when GPIO4 pin is low. GPIO5 pin
selects the frequency offset setting (STEP1 to STEP8).
When GPIO4 pin is high, STEP4 offset value is selected
to use the nominal crystal loading.
1 (0x1)
Margining Enabled. GPIO5 pin selects the frequency
offset setting (STEP1 to STEP8). GPIO4 pin state is
ignored.
2 (0x2)
Margining Enabled. Frequency offset is controlled by
XOOFFSET_SW register bits (R104 and R105).
N
Reserved.
RW
0x0
-
10.6.83 XO_OFFSET_GPIO5_STEP_1_BY1 Register; R88
XO Margining Step 1 Offset Value (bits 9-8)
Bit # Field
Type Reset
[7:2] RESERVED
[1:0] XOOFFSET_ST RW 0x0
EP1[9:8]
EEPROM
N
Y
Description
Reserved.
XO Margining Step 1 Offset Value.
10.6.84 XO_OFFSET_GPIO5_STEP_1_BY0 Register; R89
XO Margining Step 1 Offset Value (bits 7-0)
Bit # Field
Type Reset
[7:0] XOOFFSET_ST RW 0xDE
EP1[7:0]
EEPROM
Y
Description
XO Margining Step 1 Offset Value.
10.6.85 XO_OFFSET_GPIO5_STEP_2_BY1 Register; R90
XO Margining Step 1 Offset Value (bits 9-8)
Bit # Field
Type Reset
[7:2] RESERVED
[1:0] XOOFFSET_ST RW 0x1
EP2[9:8]
EEPROM
N
Y
Description
Reserved.
XO Margining Step 2 Offset Value.
Submit Documentation Feedback
Copyright © 2015–2018, Texas Instruments Incorporated
Product Folder Links: LMK03328
115
�LMK03328
SNAS668D – AUGUST 2015 – REVISED APRIL 2018
www.ti.com
10.6.86 XO_OFFSET_GPIO5_STEP_2_BY0 Register; R91
XO Margining Step 2 Offset Value (bits 7-0)
Bit # Field
Type Reset
[7:0] XOOFFSET_ST RW 0x18
EP2[7:0]
EEPROM
Y
Description
XO Margining Step 2 Offset Value.
10.6.87 XO_OFFSET_GPIO5_STEP_3_BY1 Register; R92
XO Margining Step 3 Offset Value (bits 9-8)
Bit # Field
[7:2] RESERVED
[1:0] XOOFFSET_ST
EP3[9:8]
Type Reset
RW
0x1
EEPROM
N
Y
Description
Reserved.
XO Margining Step 3 Offset Value.
10.6.88 XO_OFFSET_GPIO5_STEP_3_BY0 Register; R93
XO Margining Step 3 Offset Value (bits 7-0)
Bit # Field
Type Reset
[7:0] XOOFFSET_ST RW 0x4B
EP3[7:0]
EEPROM
Y
Description
XO Margining Step 3 Offset Value.
10.6.89 XO_OFFSET_GPIO5_STEP_4_BY1 Register; R94
XO Margining Step 4 Offset Value (bits 9-8)
Bit # Field
Type Reset
[7:2] RESERVED
[1:0] XOOFFSET_ST RW 0x1
EP4[9:8]
EEPROM
N
Y
Description
Reserved.
XO Margining Step 4 Offset Value.
10.6.90 XO_OFFSET_GPIO5_STEP_4_BY0 Register; R95
XO Margining Step 4 Offset Value (bits 7-0)
Bit # Field
[7:0] XOOFFSET_ST
EP4[7:0]
Type Reset
RW
0x86
EEPROM
Y
Description
XO Margining Step 4 Offset Value.
10.6.91 XO_OFFSET_GPIO5_STEP_5_BY1 Register; R96
XO Margining Step 5 Offset Value (bits 9-8)
Bit # Field
Type Reset
[7:2] RESERVED
[1:0] XOOFFSET_ST RW 0x1
EP5[9:8]
EEPROM
N
Y
Description
Reserved.
XO Margining Step 5 Offset Value.
10.6.92 XO_OFFSET_GPIO5_STEP_5_BY0 Register; R97
XO Margining Step 5 Offset Value (bits 7-0)
Bit # Field
Type Reset
[7:0] XOOFFSET_ST RW 0xBE
EP5[7:0]
116
EEPROM
Y
Description
XO Margining Step 5 Offset Value.
Submit Documentation Feedback
Copyright © 2015–2018, Texas Instruments Incorporated
Product Folder Links: LMK03328
�LMK03328
www.ti.com
SNAS668D – AUGUST 2015 – REVISED APRIL 2018
10.6.93 XO_OFFSET_GPIO5_STEP_6_BY1 Register; R98
XO Margining Step 6 Offset Value (bits 9-8)
Bit # Field
[7:2] RESERVED
[1:0] XOOFFSET_ST
EP6[9:8]
Type Reset
RW
0x1
EEPROM
N
Y
Description
Reserved.
XO Margining Step 6 Offset Value.
10.6.94 XO_OFFSET_GPIO5_STEP_6_BY0 Register; R99
XO Margining Step 6 Offset Value (bits 7-0)
Bit # Field
[7:0] XOOFFSET_ST
EP6[7:0]
Type Reset
RW
0xFE
EEPROM
Y
Description
XO Margining Step 6 Offset Value.
10.6.95 XO_OFFSET_GPIO5_STEP_7_BY1 Register; R100
XO Margining Step 7 Offset Value (bits 9-8)
Bit # Field
[7:2] RESERVED
[1:0] XOOFFSET_ST
EP7[9:8]
Type Reset
RW
0x2
EEPROM
N
Y
Description
Reserved.
XO Margining Step 7 Offset Value.
10.6.96 XO_OFFSET_GPIO5_STEP_7_BY0 Register; R101
XO Margining Step 7 Offset Value (bits 7-0)
Bit # Field
[7:0] XOOFFSET_ST
EP7[7:0]
Type Reset
RW
0x47
EEPROM
Y
Description
XO Margining Step 7 Offset Value.
10.6.97 XO_OFFSET_GPIO5_STEP_8_BY1 Register; R102
XO Margining Step 8 Offset Value (bits 9-8)
Bit # Field
Type
[7:2] RESERVED
[1:0] XOOFFSET_ST RW
EP8[9:8]
Reset
0x2
EEPROM
N
Y
Description
Reserved.
XO Margining Step 8 Offset Value.
10.6.98 XO_OFFSET_GPIO5_STEP_8_BY0 Register; R103
XO Margining Step 8 Offset Value (bits 7-0)
Bit # Field
Type
[7:0] XOOFFSET_ST RW
EP8[7:0]
Reset
0x9E
EEPROM
Y
Description
XO Margining Step 8 Offset Value.
10.6.99 XO_OFFSET_SW_BY1 Register; R104
Software Controlled XO Margining Offset Value (bits 9-8).
Bit # Field
[7:2] RESERVED
[1:0] XOOFFSET_S
W[9:8]
Type Reset
RW 0x0
EEPROM
N
Y
Description
Reserved.
XO Margining Software Controlled Offset Value.
Submit Documentation Feedback
Copyright © 2015–2018, Texas Instruments Incorporated
Product Folder Links: LMK03328
117
�LMK03328
SNAS668D – AUGUST 2015 – REVISED APRIL 2018
www.ti.com
10.6.100 XO_OFFSET_SW_BY0 Register; R105
Software Controlled XO Margining Offset Value (bits 7-0).
Bit # Field
[7:0] XOOFFSET_S
W[7:0]
Type Reset
RW 0x00
EEPROM
Y
Description
XO Margining Software Controlled Offset Value.
10.6.101 PLL1_CTRL2 Register; R117
The PLL1_CTRL2 register provides control of PLL1. The PLL1_CTRL2 register fields are described in the
following table.
Bit # Field
Type Reset
[7]
PLL1_STRET RW 0
CH
EEPROM
Y
[6:0]
N
RESERVED
-
-
Description
Stretch PFD minimum pump width in fractional mode. A value of 0 is recommended for
Integer-N PLL and sets the phase detector pulse width to 200 ps. A value of 1 is
recommended for Fractional-N PLL and stretches the pulse width to roughly 600 ps.
Reserved.
10.6.102 PLL1_CTRL3 Register; R118
The PLL1_CTRL3 register provides control of PLL1. The PLL1_CTRL3 register fields are described in the
following table.
Bit # Field
Type Reset
[7:3] RESERVED
[2:0] PLL1_ENABL RW
0x3
E_C3[2:0]
EEPROM Description
N
Reserved.
Y
PLL1 Loop Filter Settings.
PLL1_ENABLE_C3[2:0]
0 (0x0), 1 (0x1), 2 (0x2)
3 (0x3)
4 (0x4), 5 (0x5), 6 (0x6)
7 (0x7)
MODE
RESERVED
2nd Order Loop Filter Recommended Setting
for Integer PLL Mode.
RESERVED
3rd Order Loop Filter Recommended Setting
for Fractional PLL Mode.
10.6.103 PLL1_CALCTRL0 Register; R119
The PLL1_CALCTRL0 register is described in the following table.
Bit # Field
[7:4] RESERVED
[3:2] PLL1_CLSD
WAIT[1:0]
Type Reset
RW
0x0
[1:0]
RW
118
PLL1_VCOW
AIT[1:0]
0x1
EEPROM Description
N
Reserved.
Y
Closed Loop Wait Period. The CLSDWAIT field sets the closed loop wait period, in
periods of the always on clock as follows. Use 0x1 for clock generator mode (> 10 kHz
loop bandwidth) and 0x3 for jitter cleaner mode (< 1 kHz loop bandwidth).
CLSDWAIT
Analog closed loop VCO stabilization time
0 (0x0)
30 µs
1 (0x1)
300 µs
2 (0x2)
30 ms
3 (0x3)
300 ms
Y
VCO Wait Period. Use 0x1 for all modes.
VCOWAIT
VCO stabilization time
0 (0x0)
20 µs
1 (0x1)
400 µs
2 (0x2)
8 ms
3 (0x3)
200 ms
Submit Documentation Feedback
Copyright © 2015–2018, Texas Instruments Incorporated
Product Folder Links: LMK03328
�LMK03328
www.ti.com
SNAS668D – AUGUST 2015 – REVISED APRIL 2018
10.6.104 PLL1_CALCTRL1 Register; R120
The PLL1_CALCTRL1 register is described in the following table.
Bit # Field
[7:1] RESERVED
[0]
PLL1_LOOP
BW
Type Reset
RW 0
EEPROM
N
Y
Description
Reserved.
PLL1 Loop bandwidth Control. When PLL1_LOOPBW is 1 the loop bandwidth of PLL1 is
reduced to 200 Hz (jitter cleaner mode). When PLL1_LOOPBW is 0 the loop bandwidth
of PLL1 is set to its normal range (clock generator mode). NOTE: Proper PLL1 settings
must be used (PFD, charge pump, loop filter) with setting the desired value for
PLL1_LOOPBW.
10.6.105 PLL2_CTRL2 Register; R131
The PLL2_CTRL2 register provides control of PLL2. The PLL2_CTRL2 register fields are described in the
following table.
Bit # Field
Type Reset
[7]
PLL2_STRET RW 0
CH
EEPROM
Y
[6:0]
N
RESERVED
-
-
Description
Stretch PFD minimum pump width in fractional mode. A value of 0 is recommended for
Integer-N PLL and sets the phase detector pulse width to 200 ps. A value of 1 is
recommended for Fractional-N PLL and stretches the pulse width to roughly 600 ps.
Reserved.
10.6.106 PLL2_CTRL3 Register; R132
The PLL2_CTRL3 register provides control of PLL2. The PLL2_CTRL3 register fields are described in the
following table.
Bit # Field
[7:3] RESERVED
[2:0] PLL2_ENAB
LE_C3[2:0]
Type Reset
RW 0x3
EEPROM
N
Y
Description
Reserved.
PLL2 Loop Filter Settings.
PLL2_ENABLE_C3[2:0]
0 (0x0), 1 (0x1), 2 (0x2)
3 (0x3)
4 (0x4), 5 (0x5), 6 (0x6)
7 (0x7)
MODE
RESERVED
2nd Order Loop Filter Recommended Setting
for Integer PLL Mode.
RESERVED
3rd Order Loop Filter Recommended Setting
for Fractional PLL Mode.
10.6.107 PLL2_CALCTRL0 Register; R133
The PLL2_CALCTRL0 register is described in the following table.
Bit # Field
[7:4] RESERVED
[3:2] PLL2_CLSD
WAIT[1:0]
[1:0]
Type Reset
RW 0x0
PLL2_VCOW RW
AIT[1:0]
0x1
EEPROM
N
Y
Y
Description
Reserved.
Closed Loop Wait Period. The CLSDWAIT field sets the closed loop wait period, in
periods of the always on clock as follows. Use 0x1 for clock generator mode (> 10 kHz
loop bandwidth) and 0x3 for jitter cleaner mode (< 1 kHz loop bandwidth).
CLSDWAIT
Anlog closed loop VCO stabilization time
0 (0x0)
30 µs
1 (0x1)
300 µs
2 (0x2)
30 ms
3 (0x3)
300 ms
VCO Wait Period. Use 0x1 for all modes.
VCOWAIT
VCO stabilization time
0 (0x0)
20 µs
1 (0x1)
400 µs
2 (0x2)
8 ms
3 (0x3)
200 ms
Submit Documentation Feedback
Copyright © 2015–2018, Texas Instruments Incorporated
Product Folder Links: LMK03328
119
�LMK03328
SNAS668D – AUGUST 2015 – REVISED APRIL 2018
www.ti.com
10.6.108 PLL2_CALCTRL1 Register; R134
The PLL2_CALCTRL1 register is described in the following table.
Bit # Field
[7:1] RESERVED
[0]
PLL2_LOOP
BW
Type Reset
RW 0
EEPROM
N
Y
Description
Reserved.
PLL2 Loop bandwidth Control. When PLL2_LOOPBW is 1 the loop bandwidth of PLL2 is
reduced to 200 Hz (jitter cleaner mode). When PLL2_LOOPBW is 0 the loop bandwidth
of PLL2 is set to its normal range (clock generator mode). NOTE: Proper PLL settings
must be used (PFD, charge pump, loop filter) with setting the desired value for
PLL2_LOOPBW.
10.6.109 NVMCNT Register; R136
The NVMCNT register is intended to reflect the number of on-chip EEPROM Erase/Program cycles that have
taken place in EEPROM. The count is automatically incremented by hardware and stored in EEPROM.
Bit # Field
Type Reset
[7:0] NVMCNT[7:0 R
0x00
]
EEPROM
Y
Description
EEPROM Program Count. The NVMCNT increments automatically after every EEPROM
Erase/Program Cycle. The NVMCNT value is retreived automatically after reset, after a
EEPROM Commit operation or after a Erase/Program cycle. The NVMCNT register will
increment until it reaches its maximum value of 255 after which no further increments will
take place.
10.6.110 NVMCTL Register; R137
The NVMCTL register allows control of the on-chip EEPROM Memories.
Bit # Field
Type Reset
[7]
RESERVED [6]
REGCOMMI RWS 0
T
C
[5]
NVMCRCE
RR
NVMAUTO
CRC
NVMCOMM
IT
R
0
RW
1
[2]
NVMBUSY
R
[1]
RESERVED RWS 0
C
NVMPROG RWS 0
C
[4]
[3]
[0]
RWS 0
C
0
EEPROM Description
N
Reserved.
N
REG Commit to SRAM Array. The REGCOMMIT bit is used to initiate a transfer from the
on-chip registers back to the corresponding location in the SRAM Array. The REGCOMMIT
bit is automatically cleared to 0 when the transfer is complete. The particular page of
SRAM used as the destination for the transfer is selected by the REGCOMMIT_PAGE
register.
N
EEPROM CRC Error Indication. The NVMCRCERR bit is set to 1 if a CRC Error has been
detected when reading back from on-chip EEPROM during device configuration.
N
EEPROM Automatic CRC. When NVMAUTOCRC is 1 then the EEPROM Stored CRC byte
is automatically calculated whenever an EEPROM program takes place.
N
EEPROM Commit to Registers. The NVMCOMMIT bit is used to initiate a transfer of the
on-chip EEPROM contents to internal registers. The transfer happens automatically after
reset or when NVMCOMMIT is set to 1. The NVMCOMMIT bit is automatically cleared to 0.
The I2C registers cannot be read while a Commit operation is taking place. The
NVMCOMMIT operation can only carried out when the Always On Clock is active. The
Always On Clock can be kept running after lock by setting the AONAFTERLOCK bit.
N
EEPROM Program Busy Indication. The NVMBUSY bit is 1 during an on-chip EEPROM
Erase/Program cycle. While NVMBUSY is 1 the on-chip EEPROM cannot be accessed.
N
Reserved.
N
EEPROM Program Start. The NVMPROG bit is used to begin an on-chip EEPROM
Erase/Program cycle. The Erase/Program cycle is only initiated if the immediately
preceding I2C transaction was a write to the NVMUNLK register with the appropriate code.
The NVMPROG bit is automatically cleared to 0. The EEPROM Erase/Program operation
takes around 230 ms.
10.6.111 NVMLCRC Register; R138
The NVMLCRC register holds the Live CRC byte that has been calculated while reading on-chip EEPROM.
Bit # Field
[7:0] NVMLCRC[
7:0]
120
Type Reset
R
0x00
EEPROM Description
N
EEPROM Live CRC.
Submit Documentation Feedback
Copyright © 2015–2018, Texas Instruments Incorporated
Product Folder Links: LMK03328
�LMK03328
www.ti.com
SNAS668D – AUGUST 2015 – REVISED APRIL 2018
10.6.112 MEMADR_BY1 Register; R139
The MEMADR_BY1 register holds the MSB of the starting address for on-chip SRAM or EEPROM access.
Bit # Field
Type Reset
[7:4] RESERVED [3:0] MEMADR[1 RW
0x0
1:8]
EEPROM Description
N
Reserved.
N
Memory Address. The MEMADR value determines the starting address for access to the
on-chip memories. The on-chip memories and the corresponding address ranges are listed
below. The data from the selected address is then accessed using one of the data
registers listed below.
MEMORY
MEMADR Range
Data Register
EEPROM EEPROMMEMADR[8:0]
NVMDAT
Array
EEPROM SRAMMEMADR[8:0]
RAMDAT
Array
ROM-Array
MEMADR[11:0]
ROMDAT
10.6.113 MEMADR_BY0 Register; R140
The MEMADR_BY0 register holds the lower 8-bits of the starting address for on-chip SRAM or EEPROM access.
Bit # Field
Type Reset
[7:0] MEMADR[7: RW
0x00
0]
EEPROM Description
N
Memory Address.
10.6.114 NVMDAT Register; R141
The NVMDAT register returns the on-chip EEPROM contents from the starting address specified by the
MEMADR register.
Bit # Field
[7:0] NVMDAT[7:
0]
Type Reset
R
0x00
EEPROM Description
N
EEPROM Read Data. The first time an I2C read transaction accesses the NVMDAT
register address, either because it was explicitly targeted or because the address was
auto-incremented, the read transaction will return the EEPROM data located at the
address specified by the MEMADR register. Any additional read's which are part of the
same transaction will cause the EEPROM address to be incremented and the next
EEPROM data byte will be returned. The I2C address will no longer be auto-incremented,
i.e the I2C address will be locked to the NVMDAT register after the first access. Access to
the NVMDAT register will terminate at the end of the current I2C transaction.
10.6.115 RAMDAT Register; R142
The RAMDAT register provides read and write access to the SRAM that forms part of the on-chip EEPROM
module.
Bit #
[7:0]
Field
Type
RAMDAT[7: RW
0]
Reset EEPROM
0x00
N
Description
RAM Read/Write Data. The first time an I2C read or write transaction accesses the
RAMDAT register address, either because it was explicitly targeted or because the
address was auto-incremented, a read transaction will return the RAM data located at
the address specified by the MEMADR register and a write transaction will cause the
current I2C data to be written to the address specified by the MEMADR register. Any
additional accesses which are part of the same transaction will cause the RAM address
to be incremented and a read or write access will take place to the next SRAM address.
The I2C address will no longer be auto-incremented, i.e the I2C address will be locked to
the RAMDAT register after the first access. Access to the RAMDAT register will
terminate at the end of the current I2Cs transaction.
Submit Documentation Feedback
Copyright © 2015–2018, Texas Instruments Incorporated
Product Folder Links: LMK03328
121
�LMK03328
SNAS668D – AUGUST 2015 – REVISED APRIL 2018
www.ti.com
10.6.116 ROMDAT Register; R143
The romdat register provides read to the on-chip ROM module.
Bit #
[7:0]
Field
ROMDAT[7
:0]
Type
R
Reset EEPROM
0x00
N
Description
ROM Read Data. The first time an I2C read or write transaction accesses the romdat
register address, either because it was explicitly targeted or because the address was
auto-incremented, a read transaction will return the ROM data located at the address
specified by the MEMADR register. Any additional accesses which are part of the same
transaction will cause the ROM address to be incremented and a read access will take
place to the next ROM address. The I2C address will no longer be auto-incremented, i.e
the I2C address will be locked to the romdat register after the first access. Access to the
ROMDAT register will terminate at the end of the current I2C transaction.
10.6.117 NVMUNLK Register; R144
The NVMUNLK register provides a rudimentary level of protection to prevent inadvertent programming of the onchip EEPROM.
Bit #
[7:0]
Field
NVMUNLK[
7:0]
Type
RW
Reset EEPROM
0x00
N
Description
EEPROM Prog Unlock. The NVMUNLK register must be written immediately prior to
setting the NVMPROG bit of register NVMCTL, otherwise the Erase/Program cycle will
not be triggered. During the EEPROM Erase/Program cycle, no I2C packets can be sent
to other devices sharing the I2C bus with LMK03328 and any violations would invalidate
the Erase/Program cycle. NVMUNLK must be written with a value of 0xEA.
10.6.118 REGCOMMIT_PAGE Register; R145
The REGCOMMIT_PAGE register determines the region of the EEPROM/SRAM array that is populated by the
REGCOMMIT operation.
Bit #
[7:4]
[3:0]
Field
Type
RESERVE D
REGCOMM RW
IT_PG[3:0]
Reset EEPROM
N
Description
Reserved.
0x0
Register Commit Page (1 of 6 available pages that can be selected by the GPIO[3:2]
pins for default powerup state. NOTE: Valid page values are 0 to 5. Do not use other
values.)
N
10.6.119 XOCAPCTRL_BY1 Register; R199
The XOCAPCTRL_BY1 and XOCAPCTRL_BY0 registers allow read-back of the XOCAPCTRL value that
displays the on-chip load capacitance selected for the crystal.
Bit #
[7:2]
[1:0]
Field
Type
RESERVE D
XO_CAP_ R
CTRL[9:8]
Reset
-
EEPROM
N
Description
Reserved.
0x0
N
XO CAP CTRL register.
10.6.120 XOCAPCTRL_BY0 Register; R200
The XOCAPCTRL_BY1 and XOCAPCTRL_BY0 registers allow read-back of the XOCAPCTRL value that
displays the on-chip load capacitance selected for the crystal.
Bit #
[7:0]
122
Field
Type Reset
XO_CAP_C R
0x00
TRL[7:0]
EEPROM
N
Description
XO CAP CTRL register.
Submit Documentation Feedback
Copyright © 2015–2018, Texas Instruments Incorporated
Product Folder Links: LMK03328
�LMK03328
www.ti.com
SNAS668D – AUGUST 2015 – REVISED APRIL 2018
10.7 EEPROM Map
The EEPROM map is shown in the table below. There are 6 EEPROM pages and the common EEPROM bits are shown first. Any bit that is labeled as
"RESERVED" should be written with a 0.
Byte #
Bit7
Bit6
Bit5
Bit4
Bit3
Bit2
Bit1
Bit0
0
RESERVED
RESERVED
RESERVED
RESERVED
RESERVED
RESERVED
RESERVED
1
1
RESERVED
RESERVED
RESERVED
RESERVED
RESERVED
RESERVED
RESERVED
RESERVED
2
RESERVED
RESERVED
RESERVED
RESERVED
RESERVED
RESERVED
RESERVED
RESERVED
3
RESERVED
RESERVED
RESERVED
RESERVED
RESERVED
RESERVED
RESERVED
RESERVED
4
NVMSCRC[7]
NVMSCRC[6]
NVMSCRC[5]
NVMSCRC[4]
NVMSCRC[3]
NVMSCRC[2]
NVMSCRC[1]
NVMSCRC[0]
5
NVMCNT[7]
NVMCNT[6]
NVMCNT[5]
NVMCNT[4]
NVMCNT[3]
NVMCNT[2]
NVMCNT[1]
NVMCNT[0]
6
RESERVED
1
1
1
1
RESERVED
1
1
7
1
1
RESERVED
1
1
1
1
RESERVED
8
1
1
1
1
RESERVED
1
1
1
9
1
RESERVED
1
1
1
1
RESERVED
1
10
1
1
1
RESERVED
1
1
1
1
11
SLAVEADR_GPIO
1_SW[7]
SLAVEADR_GPIO1_ SLAVEADR_GPIO1_ SLAVEADR_GPIO1_ SLAVEADR_GPIO1_ RESERVED
SW[6]
SW[5]
SW[4]
SW[3]
RESERVED
RESERVED
12
EEREV[7]
EEREV[6]
EEREV[5]
EEREV[4]
EEREV[3]
EEREV[2]
EEREV[1]
EEREV[0]
13
SYNC_AUTO
SYNC_MUTE
AONAFTERLOCK
PLLSTRTMODE
AUTOSTRT
LOL1_MASK
LOS1_MASK
CAL1_MASK
14
LOL2_MASK
LOS2_MASK
CAL2_MASK
SECTOPRI1_MASK
SECTOPRI2_MASK
LOL1_POL
LOS1_POL
CAL1_POL
15
LOL2_POL
LOS2_POL
CAL2_POL
SECTOPRI1_POL
SECTOPRI2_POL
INT_AND_OR
INT_EN
STAT1_SHOOT_T
HRU_LIMIT
16
STAT0_SHOOT_T
HRU_LIMIT
STAT1_HIZ
STAT0_HIZ
STAT1_OPEND
STAT0_OPEND
CH3_MUTE_LVL[1]
CH3_MUTE_LVL[0]
CH2_MUTE_LVL[1
]
17
CH2_MUTE_LVL[0 CH1_MUTE_LVL[1]
]
CH1_MUTE_LVL[0]
CH0_MUTE_LVL[1]
CH0_MUTE_LVL[0]
CH7_MUTE_LVL[1]
CH7_MUTE_LVL[0]
CH6_MUTE_LVL[1
]
18
CH6_MUTE_LVL[0 CH5_MUTE_LVL[1]
]
CH5_MUTE_LVL[0]
CH4_MUTE_LVL[1]
CH4_MUTE_LVL[0]
CH_7_MUTE
CH_6_MUTE
CH_5_MUTE
19
CH_4_MUTE
CH_3_MUTE
CH_2_MUTE
CH_1_MUTE
CH_0_MUTE
STATUS1_MUTE
STATUS0_MUTE
DIV_7_DYN_DLY
20
DIV_6_DYN_DLY
DIV_5_DYN_DLY
DIV_4_DYN_DLY
DIV_23_DYN_DLY
DIV_01_DYN_DLY
DETECT_MODE_SE DETECT_MODE_SE DETECT_MODE_
C[1]
C[0]
PRI[1]
21
DETECT_MODE_
PRI[0]
LVL_SEL_SEC[1]
LVL_SEL_SEC[0]
LVL_SEL_PRI[1]
LVL_SEL_PRI[0]
RESERVED
22
RESERVED
RESERVED
RESERVED
XOOFFSET_STEP1[ XOOFFSET_STEP1[ XOOFFSET_STEP1[ XOOFFSET_STEP1[ XOOFFSET_STEP
9]
8]
7]
6]
1[5]
23
XOOFFSET_STEP XOOFFSET_STEP1[ XOOFFSET_STEP1[ XOOFFSET_STEP1[ XOOFFSET_STEP1[ XOOFFSET_STEP2[ XOOFFSET_STEP2[ XOOFFSET_STEP
1[4]
3]
2]
1]
0]
9]
8]
2[7]
RESERVED
RESERVED
Submit Documentation Feedback
Copyright © 2015–2018, Texas Instruments Incorporated
Product Folder Links: LMK03328
123
�LMK03328
SNAS668D – AUGUST 2015 – REVISED APRIL 2018
www.ti.com
EEPROM Map (continued)
Byte #
Bit7
24
XOOFFSET_STEP XOOFFSET_STEP2[ XOOFFSET_STEP2[ XOOFFSET_STEP2[ XOOFFSET_STEP2[ XOOFFSET_STEP2[ XOOFFSET_STEP2[ XOOFFSET_STEP
2[6]
5]
4]
3]
2]
1]
0]
3[9]
Bit6
Bit5
Bit4
Bit3
Bit2
Bit1
Bit0
25
XOOFFSET_STEP XOOFFSET_STEP3[ XOOFFSET_STEP3[ XOOFFSET_STEP3[ XOOFFSET_STEP3[ XOOFFSET_STEP3[ XOOFFSET_STEP3[ XOOFFSET_STEP
3[8]
7]
6]
5]
4]
3]
2]
3[1]
26
XOOFFSET_STEP XOOFFSET_STEP5[ XOOFFSET_STEP5[ XOOFFSET_STEP5[ XOOFFSET_STEP5[ XOOFFSET_STEP5[ XOOFFSET_STEP5[ XOOFFSET_STEP
3[0]
9]
8]
7]
6]
5]
4]
5[3]
27
XOOFFSET_STEP XOOFFSET_STEP5[ XOOFFSET_STEP5[ XOOFFSET_STEP6[ XOOFFSET_STEP6[ XOOFFSET_STEP6[ XOOFFSET_STEP6[ XOOFFSET_STEP
5[2]
1]
0]
9]
8]
7]
6]
6[5]
28
XOOFFSET_STEP XOOFFSET_STEP6[ XOOFFSET_STEP6[ XOOFFSET_STEP6[ XOOFFSET_STEP6[ XOOFFSET_STEP7[ XOOFFSET_STEP7[ XOOFFSET_STEP
6[4]
3]
2]
1]
0]
9]
8]
7[7]
29
XOOFFSET_STEP XOOFFSET_STEP7[ XOOFFSET_STEP7[ XOOFFSET_STEP7[ XOOFFSET_STEP7[ XOOFFSET_STEP7[ XOOFFSET_STEP7[ XOOFFSET_STEP
7[6]
5]
4]
3]
2]
1]
0]
8[9]
30
XOOFFSET_STEP XOOFFSET_STEP8[ XOOFFSET_STEP8[ XOOFFSET_STEP8[ XOOFFSET_STEP8[ XOOFFSET_STEP8[ XOOFFSET_STEP8[ XOOFFSET_STEP
8[8]
7]
6]
5]
4]
3]
2]
8[1]
31
XOOFFSET_STEP XOOFFSET_SW[9]
8[0]
XOOFFSET_SW[8]
XOOFFSET_SW[7]
XOOFFSET_SW[6]
XOOFFSET_SW[5]
XOOFFSET_SW[4]
XOOFFSET_SW[3
]
32
XOOFFSET_SW[2
]
XOOFFSET_SW[1]
XOOFFSET_SW[0]
RESERVED
RESERVED
1
RESERVED
1
33
1
RESERVED
RESERVED
RESERVED
RESERVED
RESERVED
RESERVED
1
34
1
RESERVED
RESERVED
1
1
RESERVED
RESERVED
RESERVED
35
RESERVED
RESERVED
RESERVED
1
1
RESERVED
RESERVED
1
36
RESERVED
1
RESERVED
1
RESERVED
RESERVED
1
RESERVED
37
RESERVED
RESERVED
RESERVED
RESERVED
RESERVED
RESERVED
RESERVED
RESERVED
38
RESERVED
RESERVED
RESERVED
RESERVED
RESERVED
RESERVED
RESERVED
RESERVED
EEPROM_PAGE=0, 1, 2, 3, 4, 5
39, 90,
CH_0_1_MUX
141, 192,
243, 294
OUT_0_SEL[1]
OUT_0_SEL[0]
OUT_0_MODE1[1]
OUT_0_MODE1[0]
OUT_0_MODE2[1]
OUT_0_MODE2[0]
OUT_1_SEL[1]
40, 91,
OUT_1_SEL[0]
142, 193,
244, 295
OUT_1_MODE1[1]
OUT_1_MODE1[0]
OUT_1_MODE2[1]
OUT_1_MODE2[0]
OUT_0_1_DIV[7]
OUT_0_1_DIV[6]
OUT_0_1_DIV[5]
41, 92,
OUT_0_1_DIV[4]
143, 194,
245, 296
OUT_0_1_DIV[3]
OUT_0_1_DIV[2]
OUT_0_1_DIV[1]
OUT_0_1_DIV[0]
CH_2_3_MUX
OUT_2_SEL[1]
OUT_2_SEL[0]
OUT_2_MODE2[1]
OUT_2_MODE2[0]
OUT_3_SEL[1]
OUT_3_SEL[0]
OUT_3_MODE1[1]
OUT_3_MODE1[0]
42, 93,
OUT_2_MODE1[1] OUT_2_MODE1[0]
144, 195,
246, 297
124
Submit Documentation Feedback
Copyright © 2015–2018, Texas Instruments Incorporated
Product Folder Links: LMK03328
�LMK03328
www.ti.com
SNAS668D – AUGUST 2015 – REVISED APRIL 2018
EEPROM Map (continued)
Byte #
Bit5
Bit4
Bit3
Bit2
Bit1
Bit0
43, 94,
OUT_3_MODE2[1] OUT_3_MODE2[0]
145, 196,
247, 298
Bit7
Bit6
OUT_2_3_DIV[7]
OUT_2_3_DIV[6]
OUT_2_3_DIV[5]
OUT_2_3_DIV[4]
OUT_2_3_DIV[3]
OUT_2_3_DIV[2]
44, 95,
OUT_2_3_DIV[1]
146, 197,
248, 299
CH_4_MUX[1]
CH_4_MUX[0]
OUT_4_SEL[1]
OUT_4_SEL[0]
OUT_4_MODE1[1]
OUT_4_MODE1[0]
45, 96,
OUT_4_MODE2[1] OUT_4_MODE2[0]
147, 198,
249, 300
OUT_4_DIV[7]
OUT_4_DIV[6]
OUT_4_DIV[5]
OUT_4_DIV[4]
OUT_4_DIV[3]
OUT_4_DIV[2]
46, 97,
OUT_4_DIV[1]
148, 199,
250, 301
CH_5_MUX[1]
CH_5_MUX[0]
OUT_5_SEL[1]
OUT_5_SEL[0]
OUT_5_MODE1[1]
OUT_5_MODE1[0]
47, 98,
OUT_5_MODE2[1] OUT_5_MODE2[0]
149, 200,
251, 302
OUT_5_DIV[7]
OUT_5_DIV[6]
OUT_5_DIV[5]
OUT_5_DIV[4]
OUT_5_DIV[3]
OUT_5_DIV[2]
48, 99,
OUT_5_DIV[1]
150, 201,
252, 303
CH_6_MUX[1]
CH_6_MUX[0]
OUT_6_SEL[1]
OUT_6_SEL[0]
OUT_6_MODE1[1]
OUT_6_MODE1[0]
49, 100, OUT_6_MODE2[1] OUT_6_MODE2[0]
151, 202,
253, 304
OUT_6_DIV[7]
OUT_6_DIV[6]
OUT_6_DIV[5]
OUT_6_DIV[4]
OUT_6_DIV[3]
OUT_6_DIV[2]
50, 101, OUT_6_DIV[1]
152, 203,
254, 305
CH_7_MUX[1]
CH_7_MUX[0]
OUT_7_SEL[1]
OUT_7_SEL[0]
OUT_7_MODE1[1]
OUT_7_MODE1[0]
51, 102, OUT_7_MODE2[1] OUT_7_MODE2[0]
153, 204,
255, 306
OUT_7_DIV[7]
OUT_7_DIV[6]
OUT_7_DIV[5]
OUT_7_DIV[4]
OUT_7_DIV[3]
OUT_7_DIV[2]
52, 103, OUT_7_DIV[1]
154, 205,
256, 307
OUT_7_DIV[0]
PLL2CMOSPREDIV[ PLL2CMOSPREDIV[ PLL1CMOSPREDIV[ PLL1CMOSPREDIV[ STATUS1MUX[1]
1]
0]
1]
0]
STATUS1MUX[0]
53, 104, STATUS0MUX[1]
155, 206,
257, 308
STATUS0MUX[0]
CMOSDIV0[7]
CMOSDIV0[6]
CMOSDIV0[5]
CMOSDIV0[4]
CMOSDIV0[3]
CMOSDIV0[2]
54, 105, CMOSDIV0[1]
156, 207,
258, 309
CMOSDIV0[0]
CMOSDIV1[7]
CMOSDIV1[6]
CMOSDIV1[5]
CMOSDIV1[4]
CMOSDIV1[3]
CMOSDIV1[2]
55, 106, CMOSDIV1[1]
157, 208,
259, 310
CMOSDIV1[0]
CH_7_PREDRVR
CH_6_PREDRVR
CH_5_PREDRVR
CH_4_PREDRVR
CH_3_PREDRVR
CH_2_PREDRVR
56, 107, CH_1_PREDRVR
158, 209,
260, 311
CH_0_PREDRVR
STATUS1SLEW[1]
STATUS1SLEW[0]
STATUS0SLEW[1]
STATUS0SLEW[0]
SECBUFSEL[1]
SECBUFSEL[0]
OUT_2_3_DIV[0]
OUT_4_DIV[0]
OUT_5_DIV[0]
OUT_6_DIV[0]
Submit Documentation Feedback
Copyright © 2015–2018, Texas Instruments Incorporated
Product Folder Links: LMK03328
125
�LMK03328
SNAS668D – AUGUST 2015 – REVISED APRIL 2018
www.ti.com
EEPROM Map (continued)
Byte #
Bit6
Bit5
Bit4
Bit3
Bit2
Bit1
Bit0
57, 108, PRIBUFSEL[1]
159, 210,
261, 312
PRIBUFSEL[0]
INSEL_PLL2[1]
INSEL_PLL2[0]
INSEL_PLL1[1]
INSEL_PLL1[0]
CLKMUX_BYPASS
XO_DLYCTRL[3]
58, 109, XO_DLYCTRL[2]
160, 211,
262, 313
XO_DLYCTRL[1]
XO_DLYCTRL[0]
SECBUFGAIN
PRIBUFGAIN
PLL1RDIV[2]
PLL1RDIV[1]
PLL1RDIV[0]
59, 110, PLL1MDIV[4]
161, 212,
263, 314
PLL1MDIV[3]
PLL1MDIV[2]
PLL1MDIV[1]
PLL1MDIV[0]
PLL2RDIV[2]
PLL2RDIV[1]
PLL2RDIV[0]
60, 111, PLL2MDIV[4]
162, 213,
264, 315
PLL2MDIV[3]
PLL2MDIV[2]
PLL2MDIV[1]
PLL2MDIV[0]
PLL1_P[2]
PLL1_P[1]
PLL1_P[0]
61, 112, PLL1_SYNC_EN
163, 214,
265, 316
PLL1_PDN
PLL1_VM_BYP
PRI_D
PLL1_CP[3]
PLL1_CP[2]
PLL1_CP[1]
PLL1_CP[0]
62, 113, PLL1_NDIV[11]
164, 215,
266, 317
PLL1_NDIV[10]
PLL1_NDIV[9]
PLL1_NDIV[8]
PLL1_NDIV[7]
PLL1_NDIV[6]
PLL1_NDIV[5]
PLL1_NDIV[4]
63, 114, PLL1_NDIV[3]
165, 216,
267, 318
PLL1_NDIV[2]
PLL1_NDIV[1]
PLL1_NDIV[0]
PLL1_NUM[21]
PLL1_NUM[20]
PLL1_NUM[19]
PLL1_NUM[18]
64, 115, PLL1_NUM[17]
166, 217,
268, 319
PLL1_NUM[16]
PLL1_NUM[15]
PLL1_NUM[14]
PLL1_NUM[13]
PLL1_NUM[12]
PLL1_NUM[11]
PLL1_NUM[10]
65, 116, PLL1_NUM[9]
167, 218,
269, 320
PLL1_NUM[8]
PLL1_NUM[7]
PLL1_NUM[6]
PLL1_NUM[5]
PLL1_NUM[4]
PLL1_NUM[3]
PLL1_NUM[2]
66, 117, PLL1_NUM[1]
168, 219,
270, 321
PLL1_NUM[0]
PLL1_DEN[21]
PLL1_DEN[20]
PLL1_DEN[19]
PLL1_DEN[18]
PLL1_DEN[17]
PLL1_DEN[16]
67, 118, PLL1_DEN[15]
169, 220,
271, 322
PLL1_DEN[14]
PLL1_DEN[13]
PLL1_DEN[12]
PLL1_DEN[11]
PLL1_DEN[10]
PLL1_DEN[9]
PLL1_DEN[8]
68, 119, PLL1_DEN[7]
170, 221,
272, 323
PLL1_DEN[6]
PLL1_DEN[5]
PLL1_DEN[4]
PLL1_DEN[3]
PLL1_DEN[2]
PLL1_DEN[1]
PLL1_DEN[0]
69, 120, PLL1_DTHRMOD
171, 222, E[1]
273, 324
PLL1_DTHRMODE[0 PLL1_ORDER[1]
]
PLL1_ORDER[0]
PLL1_LF_R2[5]
PLL1_LF_R2[4]
PLL1_LF_R2[3]
PLL1_LF_R2[2]
70, 121, PLL1_LF_R2[1]
172, 223,
274, 325
PLL1_LF_R2[0]
PLL1_LF_C1[1]
PLL1_LF_C1[0]
PLL1_LF_R3[6]
PLL1_LF_R3[5]
PLL1_LF_R3[4]
126
Bit7
PLL1_LF_C1[2]
Submit Documentation Feedback
Copyright © 2015–2018, Texas Instruments Incorporated
Product Folder Links: LMK03328
�LMK03328
www.ti.com
SNAS668D – AUGUST 2015 – REVISED APRIL 2018
EEPROM Map (continued)
Byte #
Bit6
Bit5
Bit4
Bit3
Bit2
Bit1
Bit0
71, 122, PLL1_LF_R3[3]
173, 224,
275, 326
Bit7
PLL1_LF_R3[2]
PLL1_LF_R3[1]
PLL1_LF_R3[0]
PLL1_LF_C3[2]
PLL1_LF_C3[1]
PLL1_LF_C3[0]
PLL2_P[2]
72, 123, PLL2_P[1]
174, 225,
276, 327
PLL2_P[0]
PLL2_SYNC_EN
PLL2_PDN
RESERVED
SEC_D
PLL2_CP[3]
PLL2_CP[2]
73, 124, PLL2_CP[1]
175, 226,
277, 328
PLL2_CP[0]
PLL2_NDIV[11]
PLL2_NDIV[10]
PLL2_NDIV[9]
PLL2_NDIV[8]
PLL2_NDIV[7]
PLL2_NDIV[6]
74, 125, PLL2_NDIV[5]
176, 227,
278, 329
PLL2_NDIV[4]
PLL2_NDIV[3]
PLL2_NDIV[2]
PLL2_NDIV[1]
PLL2_NDIV[0]
PLL2_NUM[21]
PLL2_NUM[20]
75, 126, PLL2_NUM[19]
177, 228,
279, 330
PLL2_NUM[18]
PLL2_NUM[17]
PLL2_NUM[16]
PLL2_NUM[15]
PLL2_NUM[14]
PLL2_NUM[13]
PLL2_NUM[12]
76, 127, PLL2_NUM[11]
178, 229,
280, 331
PLL2_NUM[10]
PLL2_NUM[9]
PLL2_NUM[8]
PLL2_NUM[7]
PLL2_NUM[6]
PLL2_NUM[5]
PLL2_NUM[4]
77, 128, PLL2_NUM[3]
179, 230,
281, 332
PLL2_NUM[2]
PLL2_NUM[1]
PLL2_NUM[0]
PLL2_DEN[21]
PLL2_DEN[20]
PLL2_DEN[19]
PLL2_DEN[18]
78, 129, PLL2_DEN[17]
180, 231,
282, 333
PLL2_DEN[16]
PLL2_DEN[15]
PLL2_DEN[14]
PLL2_DEN[13]
PLL2_DEN[12]
PLL2_DEN[11]
PLL2_DEN[10]
79, 130, PLL2_DEN[9]
181, 232,
283, 334
PLL2_DEN[8]
PLL2_DEN[7]
PLL2_DEN[6]
PLL2_DEN[5]
PLL2_DEN[4]
PLL2_DEN[3]
PLL2_DEN[2]
80, 131, PLL2_DEN[1]
182, 233,
284, 335
PLL2_DEN[0]
PLL2_DTHRMODE[1 PLL2_DTHRMODE[0 PLL2_ORDER[1]
]
]
PLL2_ORDER[0]
PLL2_LF_R2[5]
PLL2_LF_R2[4]
81, 132, PLL2_LF_R2[3]
183, 234,
285, 336
PLL2_LF_R2[2]
PLL2_LF_R2[1]
PLL2_LF_R2[0]
PLL2_LF_C1[2]
PLL2_LF_C1[1]
PLL2_LF_C1[0]
PLL2_LF_R3[6]
82, 133, PLL2_LF_R3[5]
184, 235,
286, 337
PLL2_LF_R3[4]
PLL2_LF_R3[3]
PLL2_LF_R3[2]
PLL2_LF_R3[1]
PLL2_LF_R3[0]
PLL2_LF_C3[2]
PLL2_LF_C3[1]
83, 134, PLL2_LF_C3[0]
185, 236,
287, 338
MARGIN_OPTION[1] MARGIN_OPTION[0] STAT0_SEL[3]
STAT0_SEL[2]
STAT0_SEL[1]
STAT0_SEL[0]
STAT0_POL
84, 135, STAT1_SEL[3]
186, 237,
288, 339
STAT1_SEL[2]
STAT1_POL
DETECT_BYP
TERM2GND_SEC
TERM2GND_PRI
STAT1_SEL[1]
STAT1_SEL[0]
Submit Documentation Feedback
Copyright © 2015–2018, Texas Instruments Incorporated
Product Folder Links: LMK03328
127
�LMK03328
SNAS668D – AUGUST 2015 – REVISED APRIL 2018
www.ti.com
EEPROM Map (continued)
Byte #
Bit6
Bit5
Bit4
Bit3
Bit2
Bit1
Bit0
85, 136, DIFFTERM_SEC
187, 238,
289, 340
Bit7
DIFFTERM_PRI
AC_MODE_SEC
AC_MODE_PRI
CMOSCHPWDN
CH7PWDN
CH6PWDN
CH5PWDN
86, 137, CH4PWDN
188, 239,
290, 341
CH23PWDN
CH01PWDN
PLL1_STRETCH
PLL1_ENABLE_C3[2 PLL1_ENABLE_C3[1 PLL1_ENABLE_C3[0 PLL1_CLSDWAIT[
]
]
]
1]
87, 138, PLL1_CLSDWAIT[
189, 240, 0]
291, 342
PLL1_VCOWAIT[1]
PLL1_VCOWAIT[0]
PLL1_LOOPBW
PLL2_STRETCH
PLL2_ENABLE_C3[2 PLL2_ENABLE_C3[1 PLL2_ENABLE_C
]
]
3[0]
88, 139, PLL2_CLSDWAIT[
190, 241, 1]
292, 343
PLL2_CLSDWAIT[0]
PLL2_VCOWAIT[1]
PLL2_VCOWAIT[0]
PLL2_LOOPBW
XOOFFSET_STEP4[ XOOFFSET_STEP4[ XOOFFSET_STEP
9]
8]
4[7]
89, 140, XOOFFSET_STEP XOOFFSET_STEP4[ XOOFFSET_STEP4[ XOOFFSET_STEP4[ XOOFFSET_STEP4[ XOOFFSET_STEP4[ XOOFFSET_STEP4[ SECONSWITCH
191, 242, 4[6]
5]
4]
3]
2]
1]
0]
293, 344
128
Submit Documentation Feedback
Copyright © 2015–2018, Texas Instruments Incorporated
Product Folder Links: LMK03328
�LMK03328
www.ti.com
SNAS668D – AUGUST 2015 – REVISED APRIL 2018
11 Application and Implementation
NOTE
Information in the following applications sections is not part of the TI component
specification, and TI does not warrant its accuracy or completeness. TI’s customers are
responsible for determining suitability of components for their purposes. Customers should
validate and test their design implementation to confirm system functionality.
11.1 Application Information
The LMK03328 is an ultra-low jitter clock generator that can be used to provide reference clocks for high-speed
serial links resulting in improved system performance. The LMK03328 also supports a variety of features that
aids the hardware designer during system debug and validation phase.
11.2 Typical Applications
11.2.1 Application Block Diagram Examples
25 MHz (buffered)
CPLD
Low-jitter PHY
ref clocks
PLL 1
5 GHz
25-MHz
crystal
Osc
CLK
Dist.
10G
PHY
125 MHz
1G
PHY
100 MHz
133 MHz
PLL 2
4.8 GHz
Up to ±50 ppm
frequency
margining with
pullable crystal
156.25 MHz
66 MHz
PCIe
DDR
CPU/
NPU
Non-PHY clocks for CPU/
Memory with freq. margining
(±3% step size)
Figure 76. 10-Gb Ethernet Switch/Router Line Card
PLL 1
5 GHz
25-MHz
crystal
Osc
Up to ±50 ppm
frequency
margining with
pullable crystal
PLL 2 (Frac)
5.15625 GHz
156.25 MHz (4x)
10G
PHY
644.53125 MHz (4x)
10G
BASE-R
CLK
Dist.
Figure 77. Ethernet Switch With Frac-N PLL for 10GBASE-R (LAN)
Submit Documentation Feedback
Copyright © 2015–2018, Texas Instruments Incorporated
Product Folder Links: LMK03328
129
�LMK03328
SNAS668D – AUGUST 2015 – REVISED APRIL 2018
www.ti.com
Typical Applications (continued)
Low-jitter PHY
ref clocks
STM64
4x 155.52 MHz
PLL 1
4.97664 GHz
19.44-MHz
Backplane
From DPLL
CLK
Dist.
4x 167.331625 MHz
PLL 2 (Frac)
5.354612 GHz
OTU2
Low-jitter PHY
ref clocks
Figure 78. Optical Transport Network Line Card With FEC (255/237)
Asynchronous
clock domain
156.25 / 312.5 MHz
Up to ±50 ppm
frequency
margining with
pullable crystal
125 MHz
100 MHz
25-MHz
crystal
Osc
30.72-MHz
input clock
From DPLL
PLL 1
5 GHz
SRIO
DSP/
CPU
DDR
CLK
Dist.
PLL 2
4.9152 GHz
100 MHz
61.44 MHz
PCIe
FPGA/
BBP
122.88 / 153.6 MHz
CPRI
Synchronous
clock domain
Figure 79. Wireless Baseband Processing Unit
130
Submit Documentation Feedback
Copyright © 2015–2018, Texas Instruments Incorporated
Product Folder Links: LMK03328
�LMK03328
www.ti.com
SNAS668D – AUGUST 2015 – REVISED APRIL 2018
Typical Applications (continued)
33 MHz
CPU
CPU clock with freq.
margining (±1.5%
step size)
PLL 1
5 GHz
25-MHz
crystal
Osc
CLK
Dist.
PLL 2 (Frac)
5.3125 GHz
Up to ±50 ppm
frequency
margining with
pullable crystal
Low-jitter PHY ref
clocks
156.25 MHz
10G
PHY
125 MHz
1G
PHY
100 MHz
PCIe
106.25 MHz
8G
FC
132.8125 MHz
16G
FC
Low-jitter PHY
ref clocks
Figure 80. Storage Area Network With Fibre Channel Over Ethernet (FCoE)
33 MHz
CPU clock with
freq. margining
(±1.5% step size)
PLL 1 (Frac)
5 GHz
19.44-MHz
Backplane
From DPLL
CLK
Dist.
PLL 2
5.28768 GHz
CPU
Low-jitter PHY
ref clocks
156.25 MHz
10G
PHY
125 MHz
1G
PHY
100 MHz
PCIe
155.52 MHz
STM64
Low-jitter PHY
ref clocks
Figure 81. Carrier Ethernet Line Card
11.2.2 Jitter Considerations in Serdes Systems
Jitter-sensitive applications such as 10-Gbps or 100-Gbps Ethernet, deploy a serial link using a Serializer in the
transmit section (TX) and a De serializer in the receive section (RX). These SERDES blocks are typically
embedded in an ASIC or FPGA. Estimating the clock jitter impact on the link budget requires understanding of
the TX PLL bandwidth and the RX CDR bandwidth.
As can be seen in Figure 82, the pass band region between the TX low pass cutoff and RX high pass cutoff
frequencies is the range over which the reference clock jitter adds without any attenuation to the jitter budget of
the link. Outside of these frequencies, the SERDES link will attenuate the reference clock jitter with a 20 dB/dec
or even steeper roll-off. Modern ASIC or FPGA designs have some flexibility on deciding the optimal RX CDR
bandwidth and TX PLL bandwidth. These bandwidths are typically set based on what is achievable in the ASIC
or FPGA process node, without increasing design complexity, and on any jitter tolerance or wander specification
that needs to be met, as related to the RX CDR bandwidth.
The overall allowable jitter in a serial link is dictated by IEEE or other relevant standards. For example,
IEEE802.3ba states that the maximum transmit jitter (peak-peak) for 10-Gbps Ethernet should be no more than
0.28 × UI and this equates to a 27.1516 ps, p-p for the overall allowable transmit jitter.
Submit Documentation Feedback
Copyright © 2015–2018, Texas Instruments Incorporated
Product Folder Links: LMK03328
131
�LMK03328
SNAS668D – AUGUST 2015 – REVISED APRIL 2018
www.ti.com
Typical Applications (continued)
The jitter contributing elements are made up of the reference clock, generated potentially from a device like
LMK03328, the transmit medium, transmit driver and so forth. Only a portion of the overall allowable transmit
jitter is allocated to the reference clock, typically 20% or lower. Therefore, the allowable reference clock jitter for
a 20% clock jitter budget is 5.43 ps, p-p.
Jitter in a reference clock is made up of deterministic jitter (arising from spurious signals due to supply noise or
mixing from other outputs or from the reference input) and random jitter (usually due to thermal noise and other
uncorrelated noise sources). A typical clock tree in a serial link system consists of clock generators and fanout
buffers. The allowable reference clock jitter of 5.43 ps, p-p is needed at the output of the fanout buffer. Modern
fanout buffers have low additive random jitter (less than 100 fs, rms) with no substantial contribution to the
deterministic jitter. Therefore, the clock generator and fanout buffer contribute to the random jitter while the
primary contributor to the deterministic jitter is the clock generator. Rule of thumb, for modern clock generators, is
to allocate 25% of allowable reference clock jitter to the deterministic jitter and 75% to the random jitter. This
amounts to an allowable deterministic jitter of 1.36 ps, p-p and an allowable random jitter of 4.07 ps, p-p. For
serial link systems that need to meet a BER of 10–12, the allowable random jitter in root-mean square is 0.29 ps,
rms. This is calculated by dividing the p-p jitter by 14 for a BER of 10–12. Accounting for random jitter from the
fanout buffer, the random jitter needed from the clock generator is 0.27 ps, rms. This is calculated by the rootmean square subtraction from the desired jitter at the fanout buffer's output assuming 100 fs, rms of additive jitter
from the fanout buffer.
With careful frequency planning techniques, like spur optimization (covered in the Spur Mitigation Techniques
section) and on-chip LDOs to suppress supply noise, the LMK03328 is able to generate clock outputs with
deterministic jitter that is below 1 ps, p-p and random jitter that is below 0.2 ps, rms. This gives the serial link
system with additional margin on the allowable transmit jitter resulting in a BER better than 10–12.
132
Submit Documentation Feedback
Copyright © 2015–2018, Texas Instruments Incorporated
Product Folder Links: LMK03328
�LMK03328
www.ti.com
SNAS668D – AUGUST 2015 – REVISED APRIL 2018
Typical Applications (continued)
TX
Parallel
Data
RX
Serializer
Parallel
Data
Sampler
Serialized clock/data
Recovered
Clock
TX PLL
CDR
Deserializer
Ref Clk
HRXCDR(f)
F1 = TX_PLL_BWmax
Jitter Transfer (on clock)
HRXCDR(f)
Jitter Tolerance (on data)
HTXPLL(f)
Jitter Transfer (on clock)
F2 = RX_CDR_BWmin
F2 = RX_CDR_BWmin
H(f)
Jitter Tolerance (on data)
F2
SoC trend:
Increase stop band
Less % of jitter budget
H(f)
Jitter Transfer (on clock)
F2
F1
SoC trend:
Decrease stop band
Improved LO design
Figure 82. Dependence of Clock Jitter in Serial Links
Submit Documentation Feedback
Copyright © 2015–2018, Texas Instruments Incorporated
Product Folder Links: LMK03328
133
�LMK03328
SNAS668D – AUGUST 2015 – REVISED APRIL 2018
www.ti.com
Typical Applications (continued)
11.2.3 Frequency Margining
11.2.3.1 Fine Frequency Margining
IEEE802.3 dictates that Ethernet frames stay compliant to the standard specifications when clocked with a
reference clock that is within ±100 ppm of its nominal frequency. In the worst case, an RX node with its local
reference clock at –100 ppm from its nominal frequency should be able to work seamlessly with a TX node that
has its own local reference clock at +100 ppm from its nominal frequency. Without any clock compensation on
the RX node, the read pointer will severely lag behind the write pointer and cause FIFO overflow errors. On the
contrary, when the RX node’s local clock operates at +100 ppm from its nominal frequency and the TX node’s
local clock operates at –100 ppm from its nominal frequency, FIFO underflow errors occur without any clock
compensation.
To prevent such overflow and underflow errors from occurring, modern ASICs and FGPAs include a clock
compensation scheme that introduces elastic buffers. Such a system, shown in Figure 82, is validated thoroughly
during the validation phase by interfacing slower nodes with faster ones and ensuring compliance to IEEE802.3.
The LMK03328 provides the ability to fine tune the frequency of its outputs based on changing its on-chip load
capacitance when operated with a crystal input. This fine tuning can be done through I2C or through the GPIO5
pin as described in Crystal Input Interface (SEC_REF). A total of ±50-ppm frequency tuning is achievable when
using pullable crystals whose C0/C1 ratio is less than 250. The change in load capacitance is implemented in a
manner such that the LMK03328’s outputs undergo a smooth monotic change in frequency.
TX
RX
Serializer
Post Processing
w/ clock
compensation
Sampler
Serialized clock/data
Parallel
Data
Recovered
Clock
Parallel
Data
+/- 100 ppm
TX PLL
CDR
Ref Clk
+/- 100 ppm
Ref Clk
Deserializer
Elastic Buffer
(clock compensation)
FIFO
circular
Latency
Write
Pointer
Read
Pointer
Figure 83. System Implementation With Clock Compensation for Standards Compliance
11.2.3.2 Coarse Frequency Margining
Certain systems require the processors to be tested at clock frequencies that are slower or faster by 5% or 10%.
The LMK03328 offers the ability to change its output dividers for the desired change from its nominal output
frequency without resulting in any glitches (as explained in High-Speed Output Divider).
134
Submit Documentation Feedback
Copyright © 2015–2018, Texas Instruments Incorporated
Product Folder Links: LMK03328
�LMK03328
www.ti.com
SNAS668D – AUGUST 2015 – REVISED APRIL 2018
Typical Applications (continued)
11.2.4 Design Requirements
Consider a typical wired communications application, like a top-of-rack switch, which needs to clock high data
rate 10-Gbps or 100-Gbps Ethernet PHYs and other macros like PCI Express, DDR, and CPLD. For such
asynchronous systems, the reference input can be a crystal. In such systems, the clocks are expected to be
available upon power up without the need for any device-level programming. An example of clock input and
output requirements is:
• Clock Input:
– 25-MHz crystal
• Clock Outputs:
– 2x 156.25-MHz clock for uplink 10.3125 Gbps, LVPECL
– 2x 125-MHz clock for downlink 3.125 Gbps, LVPECL
– 2x 100-MHz clock for PCI Express, HCSL
– 1x 133.3333-MHz clock for DDR, LVDS
– 2x 66.6667-MHz clock for CPLD, 1.8-V LVCMOS
The section below describes the detailed design procedure to generate the required output frequencies for the
above scenario using LMK03328.
11.2.4.1 Detailed Design Procedure
Design of all aspects of the LMK03328 is quite involved and software support is available to assist in part
selection, part programming, loop filter design, and phase noise simulation. This design procedure will give a
quick outline of the process.
1. Device Selection
– The first step to calculate the specified VCO frequency given required output frequencies. The device
must be able to produce the VCO frequency that can be divided down to the required output frequencies.
– The WEBENCH Clock Architect Tool from TI will aid in the selection of the right device that meets the
customer's output frequencies and format requirements.
2. Device Configuration
– There are many device configurations to achieve the desired output frequencies from a device. However
there are some optimizations and trade-offs to be considered.
– The WEBENCH Clock Architect Tool attempts to maximize the phase detector frequency, use smallest
dividers, and maximizes PLL charge pump current.
– The software attempts to use fewer frequency domains where each domain corresponds to an individual
PLL.
NOTE
The LMK03328 incorporates 2 PLLs and can support two frequency domains.
– These guidelines below may be followed when configuring PLL related dividers or other related registers:
– For lowest possible in-band PLL flat noise, maximize phase detector frequency to minimize N divide
value.
– For lowest possible in-band PLL flat noise, maximize charge pump current. The highest value charge
pump currents often have similar performance due to diminishing returns.
– To reduce loop filter component sizes, increase N value and/or reduce charge pump current.
– To minimize cross coupling between the VCOs of each PLL, it is best to keep large enough frequency
separation between them. For most application use cases, there are 2 or more VCO frequencies that
can result in the same output frequencies by changing the output divider, PLL post divider and PLL N
divider.
– For fractional divider values, keep the denominator at highest value possible to minimize spurs. It is
also best to use higher order modulator wherever possible for the same reason.
– As a rule of thumb, keeping the phase detector frequency approximately between 10 × PLL loop
bandwidth and 100 × PLL loop bandwidth. A phase detector frequency less than 5 × PLL bandwidth
Submit Documentation Feedback
Copyright © 2015–2018, Texas Instruments Incorporated
Product Folder Links: LMK03328
135
�LMK03328
SNAS668D – AUGUST 2015 – REVISED APRIL 2018
www.ti.com
Typical Applications (continued)
may be unstable and a phase detector frequency > 100 × loop bandwidth may experience increased
lock time due to cycle slipping.
3. PLL Loop Filter Design
– TI recommends using the WEBENCH Clock Architect Tool to design your loop filter.
– Optimal loop filter design and simulation can be achieved when custom reference phase noise profiles
are loaded into the software tool.
– While designing the loop filter, adjusting the charge pump current or N value can help with loop filter
component selection. Lower charge pump currents and larger N values result in smaller component
values but may increase impacts of leakage and reduce PLL phase noise performance.
– For a more detailed understanding of loop filter design can be found in Dean Banerjee's PLL
Performance, Simulation, and Design (www.ti.com/tool/pll_book).
4. Clock Output Assignment
– At the time of writing this data sheet, the design software does not take into account frequency
assignment to specific outputs except to ensure that the output frequencies can be achieved. It is best to
consider proximity of the clock outputs to each other and other PLL circuitry when choosing final clock
output locations. Here are some guidelines to help achieve optimal performance when assigning outputs
to specific clock output pins.
– Group common frequencies together.
– PLL charge pump circuitry can cause crosstalk at the charge pump frequency. Place outputs sharing
charge pump frequency or lower priority outputs not sensitive to charge pump frequency spurs
together.
– Keep frequency separation between VCOs as high as possible for minimum cross coupling.
– For minimizing cross coupling between the PLLs, consider routing PLL2 to any of outputs 0, 1, 2, or 3
and routing PLL1 to any of outputs 4, 5, 6, or 7.
– Clock output MUXes can create a path for noise coupling. Factor in frequencies which may have
some bleedthrough from non selected mux inputs.
– If possible, use outputs 0, 1, 2, or 3 since they don’t have MUX in the clock path and have limited
opportunity for cross coupled noise.
5. Device Programming
– The EVM programming software tool CodeLoader can be used to program the device with the desired
configuration.
11.2.4.1.1 Device Selection
Use the WEBENCH Clock Architect Tool. Enter the required frequencies and formats into the tool. To use this
device, find a solution using the LMK03328.
11.2.4.1.1.1 Calculation Using LCM
In this example, the LCM (156.25 MHz, 125 MHz) = 625 MHz and the LCM (100 MHz, 133.33 MHz, 66.66 MHz)
= 400 MHz. It can be deduced that both PLLs must be used to generate the required output frequencies. Valid
VCO frequencies for LMK03328 are 5 GHz (625 × 8) and 4.8 GHz (400 × 12).
11.2.4.1.2 Device Configuration
For this example, when using the WEBENCH Clock Architect Tool, the reference would have been manually
entered as 25 MHz according to input frequency requirements. Enter the desired output frequencies and click on
'Generate Solutions'. Select LMK03328 from the solution list.
From the simulation page of the WEBENCH Clock Architect Tool, it can be seen that to maximize phase detector
frequencies, PLL1 and PLL2 R and M dividers are set to 1, doublers are enabled and N1 divider is set to 200
and N2 divider is set to 192. This results in a VCO1 frequency of 5 GHz and VCO2 frequency of 4.8 GHz. The
tool also tries to select maximum possible value for the PLL post dividers and for this example, the post divider
for each PLL is set to 8. At this point the design meets all input and output frequency requirements and it is
possible to design a loop filter for system and simulate performance on the clock outputs. However, consider also
the following:
136
Submit Documentation Feedback
Copyright © 2015–2018, Texas Instruments Incorporated
Product Folder Links: LMK03328
�LMK03328
www.ti.com
SNAS668D – AUGUST 2015 – REVISED APRIL 2018
Typical Applications (continued)
•
At the time of release of this data sheet, the WEBENCH Clock Architect Tool doesn't assign outputs
strategically for minimizing cross-coupled spurs and jitter.
11.2.4.1.3 PLL Loop Filter Design
The WEBENCH Clock Architect Tool allows loading a custom phase noise plot for reference inputs. For
improved accuracy in simulation and optimum loop filter design, be sure to load these custom noise profiles.
After loading a phase noise plot, user should recalculate the recommended loop filter design. The WEBENCH
Clock Architect Tool will return solutions with high reference or phase detector frequencies by default. In the
WEBENCH Clock Architect Tool the user may increase the reference divider to reduce the frequency if desired.
The next section will discuss PLL loop filter design specific to this example using default phase noise profiles.
NOTE
The WEBENCH Clock Architect Tool provides optimal loop filters upon selecting a solution
from the solution list to simulate for the first time. Anytime PLL related inputs change, like
input phase noise, charge pump current, divider values, and so forth, it is best to use the
tool to recalculate the optimal loop filter component values.
11.2.4.1.3.1 PLL Loop Filter Design
In the WEBENCH Clock Architect Tool simulator, click on the PLL1 or PLL2 loop filter design button, then press
recommend design. For each PLL's loop filter, maximum phase detector frequency and maximum charge pump
current are typically used. The tool recommends a loop filter that is designed to minimize jitter. The integrated
loop filters’ components are minimized with this recommendation as to allow maximum flexibility in achieving
wide loop bandwidths for low PLL noise. With the recommended loop filter calculated, this loop filter is ready to
be simulated.
Each PLL loop filter’s bode plot can additionally be viewed and adjustments can be made to the integrated
components. The effective loop bandwidth and phase margin with the updated values is then calculated. The
integrated loop filter components are good to use when attempting to eliminate certain spurs. The recommended
procedure is to increase C3 capacitance, then R3 resistance. Large R3 resistance can result in degraded VCO
phase noise performance.
11.2.4.1.4 PLL and Clock Output Assignment
At this time the WEBENCH Clock Architect Tool does not assign output frequencies to specific output ports on
the device with the intention to minimize cross-coupled spurs and jitter. The user may wish to make some
educated re-assignment of outputs when using the EVM programming tool to configure the device registers
appropriately.
In an effort to optimize device configuration for best jitter performance, consider the following guidelines:
• Because the clock outputs, intended to be used to clock high-data rates, are required with the lowest possible
jitter, it is best to assign 156.25 MHz to outputs 0 and 1 and assign 125 MHz to outputs 2 and 3.
• To minimize cross coupling between PLLs, select PLL2 VCO to operate at 5 GHz and PLL1 VCO to operate
4.8 GHz.
• Coupling between outputs at different frequencies appear as spurs at offsets that is at the frequency
difference between the outputs and its harmonics. Typical SerDes reference clocks need to have low
integrated jitter up to an offset of 20 MHz and thus, to minimize cross coupling between output 3 and output
4, it is best to assign 100 MHz to outputs 4 and 5.
• The 133.3333 MHz can then be assigned to output 6.
• The 1.8-V LVCMOS clock at 66.6667 MHz is assigned to output 7 and it is best to select complementary
LVCMOS operation. This helps to minimize coupling from this output channel to other outputs.
Submit Documentation Feedback
Copyright © 2015–2018, Texas Instruments Incorporated
Product Folder Links: LMK03328
137
�LMK03328
SNAS668D – AUGUST 2015 – REVISED APRIL 2018
www.ti.com
Typical Applications (continued)
11.2.5 Spur Mitigation Techniques
The LMK03328 offers several programmable features for optimizing fractional spurs. To get the best out of these
features, it makes sense to understand the different kinds of spurs as well as their behaviors, causes, and
remedies. Although optimizing spurs may involve some trial and error, there are ways to make this process more
systematic.
11.2.5.1 Phase Detector Spurs
The phase detector spur occurs at an offset from the carrier equal to the phase detector frequency, fPD. To
minimize this spur, a lower phase detector frequency should be considered. In some cases where the loop
bandwidth is very wide relative to the phase detector frequency, some benefit might be gained from using a
narrower loop bandwidth or adding poles to the loop filter by using R3 and C3 if previously unused, but otherwise
the loop filter has minimal impact. Bypassing at the supply pins and board layout can also have an impact on this
spur, especially at higher phase detector frequencies.
11.2.5.2 Integer Boundary Fractional Spurs
This spur occurs at an offset equal to the difference between the VCO frequency and the closest integer channel
for the VCO. For instance, if the phase detector frequency is 100 MHz and the VCO frequency is 5003 MHz,
then the integer boundary spur would be at 3-MHz offset. This spur can be either PLL or VCO dominated. If it is
PLL dominated, decreasing the loop bandwidth and some of the programmable fractional words may impact this
spur. If the spur is VCO dominated, then reducing the loop filter will not help, but rather reducing the phase
detector and having good slew rate and signal integrity at the selected reference input will help.
11.2.5.3 Primary Fractional Spurs
These spurs occur at multiples of fPD/DEN and are not integer boundary spurs. For instance, if the phase
detector frequency is 100 MHz and the fraction is 3/100, the primary fractional spurs would be at 1 MHz, 2 MHz,
4 MHz, 5 MHz, 6 MHz, and so forth. These are impacted by the loop filter bandwidth and modulator order. If a
small frequency error is acceptable, then a larger equivalent fraction may improve these spurs. This larger
unequivalent fraction pushes the fractional spur energy to much lower frequencies where they do not significantly
impact the system performance.
11.2.5.4 Sub-Fractional Spurs
These spurs appear at a fraction of fPD/DEN and depend on modulator order. With the first order modulator, there
are no sub-fractional spurs. The second order modulator can produce 1/2 sub-fractional spurs if the denominator
is even. A third order modulator can produce sub-fractional spurs at 1/2, 1/3, or 1/6 of the offset, depending if it is
divisible by 2 or 3. For instance, if the phase detector frequency is 100 MHz and the fraction is 3/100, no subfractional spurs for a first order modulator or sub-fractional spurs at multiples of 1.5 MHz for a second or third
order modulator would be expected. Aside from strategically choosing the fractional denominator and using a
lower order modulator, another tactic to eliminate these spurs is to use dithering and express the fraction in
larger equivalent terms. Since dithering also adds phase noise, its level needs to be managed to achieve
acceptable phase noise and spurious performance.
Table 20 gives a summary of the spurs discussed so far and techniques to mitigate them.
138
Submit Documentation Feedback
Copyright © 2015–2018, Texas Instruments Incorporated
Product Folder Links: LMK03328
�LMK03328
www.ti.com
SNAS668D – AUGUST 2015 – REVISED APRIL 2018
Typical Applications (continued)
Table 20. Spurs and Mitigation Techniques
SPUR TYPE
OFFSET
Phase Detector
fPD
Integer Boundary
fVCO mod fPD
WAYS TO REDUCE
TRADE-OFFS
Reduce Phase Detector
Frequency.
Although reducing the phase
detector frequency does improve
this spur, it also degrades phase
noise.
Methods for PLL Dominated
Spurs
-Avoid the worst case VCO
frequencies if possible.
-Ensure good slew rate and
signal integrity at reference input.
-Reduce loop bandwidth or add
more filter poles to suppress out
of band spurs.
Reducing the loop bandwidth
may degrade the total integrated
noise if the bandwidth is too
narrow.
Methods for VCO Dominated
Reducing the phase detector
Spurs
may degrade the phase noise.
-Avoid the worst case VCO
frequencies if possible.
-Reduce Phase Detector
Frequency.
-Ensure good slew rate and
signal integrity at reference input.
Primary Fractional
fPD/DEN
Sub-Fractional
fPD/DEN/k k=2,3, or 6
-Decrease Loop Bandwidth.
-Change Modulator Order.
use Larger Unequivalent
Fractions.
Decreasing the loop bandwidth
may degrade in-band phase
noise. Also, larger unequivalent
fractions don’t always reduce
spurs.
use Dithering.
use Larger Equivalent Fractions.
use Larger Unequivalent
Fractions.
-Reduce Modulator Order.
-Eliminate factors of 2 or 3 in
denominator.
Dithering and larger fractions
may increase phase noise.
Submit Documentation Feedback
Copyright © 2015–2018, Texas Instruments Incorporated
Product Folder Links: LMK03328
139
�LMK03328
SNAS668D – AUGUST 2015 – REVISED APRIL 2018
www.ti.com
12 Power Supply Recommendations
12.1 Device Power Up Sequence
Figure 84 shows the power up sequence of the LMK03328 in both the hard pin mode and soft pin mode. In the
event of device power up from ROM or EEPROM, TI recommends locking one of the PLLs before the other (for
cases where both PLLs are used to generate the required output frequencies) to avoid any injection locking
issues in case both VCOs operate in close vicinity.
Power on
Reset
tnot
PDN = 1?
(all outputs are disabled)
HW_SW_CTRL
1
0
Hard Pin Mode
(activate I2C IF)
Soft Pin Mode
(activate I2C IF)
Latch GPIO[5:0] to select 1 of 64
device settings from ROM codes
Latch GPIO[3:2] to select 1 of 6
device settings from EEPROM
Registers programmable via I2C.
Latch GPIO1 for LSB of I2C
address.
Enter pin mode specified by
GPIO
Configure all device settings
wait for selected reference input
signal (PRI/SEC) to become valid
wait for selected reference input
signal (PRI/SEC) to become valid
Disable outputs
Calibrate PLL1/VCO and PLL2/VCO
Auto-synchronize outputs
Mute outputs till PLL locks and
outputs are synchronized
Enable outputs
Clear R12.6, R56.1, R71.1
(default enabled)
Disable outputs
Calibrate VCO
Auto-synchronize outputs
Mute outputs till PLL locks and
outputs are synchronized
Enable outputs
Normal device operation in Hard
Pin Mode. Host can reprogram
device via I2C.
tnot
yes
GPIO0 pin or
R12.6 = 1?
PDN = 1?
yes
Synchronize outputs while
outputs are muted
Enable all outputs
Clear R12.6, R56.1, R71.1
no
Normal device operation in Soft
Pin Mode. Host can reprogram
device via I2C and can be written
to on-chip EEPROM.
yes
Disable
all
outputs
no
GPIO0 pin or
R12.6 = 1?
yes
PDN = 1?
no
Disable
all
outputs
Figure 84. Flow Chart for Device Power Up and Configuration
140
Submit Documentation Feedback
Copyright © 2015–2018, Texas Instruments Incorporated
Product Folder Links: LMK03328
�LMK03328
www.ti.com
SNAS668D – AUGUST 2015 – REVISED APRIL 2018
12.2 Device Power Up Timing
Before the outputs are enabled after power up, the LMK03328 goes through the initialization routine given in
Table 21.
Table 21. LMK03328 Power Up Initialization Routine
PARAMETER
TPWR
TXO
TCAL-PLL1
DEFINITION
DURATION
COMMENTS
Step 1: Power up ramp
Depends on customer
supply ramp time
The POR monitor holds the device in powerdown/reset until the VDD supply voltage reaches 2.72
V (min) to 2.95 V (max) and VDDO_01 reaches 1.7 V
(min).
Step 2: XO startup (if
crystal is used)
Depends on XTAL. Could
be several ms; For TXC
25-MHz typical XTAL
start-up time measures
100 µs.
This step assumes PDN=1. The XTAL start-up time is
the time it takes for the XTAL to oscillate with sufficient
amplitude. The LMK03328 has a built-in amplitude
detection circuit, and halts the PLL lock sequence until
the XTAL stage has sufficient swing.
Step 3: Closed loop
Programmable cycles of
calibration period for PLL1 internal 10-MHz oscillator.
This counter is needed for the PLL1 loop to stabilize.
The duration can range from 30 µs to 300 ms.
Recommended duration for PLL1 as clock generator
(loop bandwidth > 10 kHz) is 300 µs and for PLL1 as
jitter cleaner (loop bandwidth < 1 kHz) is 300 ms.
Step 4: VCO1 wait period
Programmable cycles of
internal 10-MHz oscillator.
This counter is needed for the VCO1 to stabilize. The
duration can range from 20 µs to 200 ms.
Recommended duration for VCO1 is 400 µs.
Step 5: PLL1 lock time
~4/LBW of PLL1
The Outputs turn on immediately after calibration. A
small frequency error remains for the duration of
~4/LBW (so in clock generator mode typically 10 µs for
a PLL bandwidth of 400 kHz). The initial output
frequency will be lower than the target output
frequency, as the loop filter starts out initially
discharged.
TLOL-PLL1
Step 6: PLL1 LOL
indicator low
~1 PFD clock cycle
The PLL1 loss of lock indicator if selected on
STATUS0 or STATUS1 will go low after 1 PFD clock
cycle to indicate PLL1 is now locked.
TCAL-PLL2
Step 7: Closed loop
Programmable cycles of
calibration period for PLL2 internal 10-MHz oscillator.
This counter is needed for the PLL2 loop to stabilize.
The duration can range from 30 µs to 300 ms.
Recommended duration for PLL2 as clock generator
(loop bandwidth > 10 kHz) is 300 µs and for PLL2 as
jitter cleaner (loop bandwidth < 1 kHz) is 300 ms.
Step 8: VCO2 wait period
Programmable cycles of
internal 10-MHz oscillator.
This counter is needed for the VCO2 to stabilize. The
duration can range from 20 µs to 200 ms.
Recommended duration for VCO2 is 400 µs.
Step 9: PLL2 lock time
~4/LBW of PLL2
The Outputs turn on immediately after calibration. A
small frequency error remains for the duration of
~4/LBW (so in clock generator mode typically 10 µs for
a PLL bandwidth of 400 kHz). The initial output
frequency will be lower than the target output
frequency, as the loop filter starts out initially
discharged.
Step 10: PLL2 LOL
indicator low
~1 PFD clock cycle
The PLL2 loss of lock indicator if selected on
STATUS0 or STATUS1 will go low after 1 PFD clock
cycle to indicate PLL2 is now locked.
TVCO1
TLOCK-PLL1
TVCO2
TLOCK-PLL2
TLOL-PLL2
Submit Documentation Feedback
Copyright © 2015–2018, Texas Instruments Incorporated
Product Folder Links: LMK03328
141
�LMK03328
SNAS668D – AUGUST 2015 – REVISED APRIL 2018
www.ti.com
The LMK03328 start-up time for PLL1 or PLL2 is defined as the time taken, from the moment the core supplies
reach 2.72 V and the VDDO_01 reaches 1.7 V, for either PLL to be locked and valid outputs are available at the
outputs with no more than ±300-ppm error. Start-up time for PLL1 can be calculated as Equation 5.
TPLL1-SU = TXO + TCAL-PLL1 + TVCO1 + TLOCK-PLL1
(5)
When R12.1 = 0, start-up time for PLL2 can be calculated as Equation 6.
TPLL2-SU = TPLL1 sU + TCAL-PLL2 + TVCO2 + TLOCK-PLL2
(6)
When R12.1 = 1, start-up time for PLL2 can be calculated as Equation 7.
TPLL2-SU = TXO + TCAL-PLL2 + TVCO2 + TLOCK-PLL2
(7)
12.3 Power Down
The PDN pin (active low) can be used both as device power-down pin and to initialize the device. When this pin
is pulled low, the entire device is powered down. When it is pulled high, the power-on/reset (POR) sequence is
triggered and causes all registers to be set to an initial state. The initial state is determined by the device control
pins as described in the Device Configuration Control section. When PDN is pulled low, I2C is disabled. When
PDN is pulled high, the device power-up sequence is initiated as described in Device Power Up Sequence and
Device Power Up Timing.
Table 22. PDN Control
PDN
DEVICE OPERATION
0
Device is disabled
1
Normal operation
12.4 Power Rail Sequencing, Power Supply Ramp Rate, and Mixing Supply Domains
12.4.1 Mixing Supplies
The LMK03328 incorporates flexible power supply architecture. TI recommends that the VDD_IN, VDD_PLL1,
VDD_PLL2, and VDD_DIG supplies are driven by the same 3.3-V supply rail, but the individual VDDO_x supplies
can be driven from separate 1.8-V, 2.5-V, or 3.3-V supply rails. Lowest power consumption can be realized by
operating the VDD_IN, VDD_PLL1, VDD_PLL2, and VDD_DIG supplies from a 3.3-V rail and the VDDO_x
supplies from a 1.8-V rail.
12.4.2 Power-On Reset
The LMK03328 integrates a built-in power-on reset (POR) circuit, that holds the device in reset until all of the
following conditions have been met:
• the VDD_IN, VDD_PLL1, VDD_PLL2, or VDD_DIG supplies have reached at least 2.72 V
• the VDDO_01 supply has reached at least 1.7 V
• the PDN pin has reached at least 1.2 V
After this POR release, device internal counters start (see Device Power Up Timing) followed by device
calibration.
12.4.3 Powering Up From Single-Supply Rail
If the VDD_IN, VDD_PLL1, VDD_PLL2, VDD_DIG, and VDDO supplies are driven by the same 3.3-V supply rail
that ramp in a monotonic manner from 0 V to 3.135 V, irrespective of the ramp time, then there is no requirement
to add a capacitor on the PDN pin to externally delay the device power-up sequence. As shown in Figure 85, the
PDN pin can be left floating, pulled up externally to VDD, or otherwise driven by a host controller for meeting the
clock sequencing requirements in the system.
142
Submit Documentation Feedback
Copyright © 2015–2018, Texas Instruments Incorporated
Product Folder Links: LMK03328
�LMK03328
www.ti.com
SNAS668D – AUGUST 2015 – REVISED APRIL 2018
Power Rail Sequencing, Power Supply Ramp Rate, and Mixing Supply Domains (continued)
VDD_PLL1, VDD_PLL2,
VDD_IN, VDD_DIG,
VDDO_01, PDN
3.135 V
Decision Point 3:
VDD_PLLx/VDD_IN/
VDD_',* • 2.72 V
VDDO_01
Decision Point 2:
VDDO_01 • 1.7 V
200 k
Decision Point 1:
3'1 • 1.2 V
PDN
0V
Figure 85. Recommendations for Power Up From Single-Supply Rail
12.4.4 Powering Up From Split-Supply Rails
If the VDD_IN, VDD_PLL1, VDD_PLL2, VDD_DIG, and VDDO supplies are driven from different supply rails, TI
recommends starting the device POR sequence after all core and output supplies have reached their minimum
voltage tolerances (VDD ≥ 3.135 V and VDDO ≥ 1.71 V). This can be realized by delaying the PDN low-to-high
transition. The PDN input incorporates a 200-kΩ resistor to VDDO_01 and as shown in Figure 86, a capacitor
from the PDN pin to GND can be used to form a R-C time constant with the internal pullup resistor or an external
pullup resistor. This R-C time constant can be designed to delay the low-to-high transition of PDN until all core
and output supplies have reached their minimum voltage tolerances. Alternatively, the delayed PDN low-to-high
transition could be controlled by a logic output of a host controller (CPLD/FPGA/CPU) or power sequencer.
VDD_PLL1,
VDD_PLL2,
VDD_IN,
VDD_DIG
3.135 V
VDDO_01
200 NŸ
PDN
Decision Point 3
VDD_PLL1/VDD_PLL2/
VDD_IN/VDD_DIG
• 2.72 V
VDDO_01,
VDDO_x,
PDN
Decision Point 2:
VDDO_01 • 1.7 V
Decision Point 1:
3'1 • 1.2 V
CPDN
Delay
0V
Figure 86. Recommendations for Power Up From Split-Supply Rails
12.4.5 Slow Power-Up Supply Ramp
In case the VDD_IN, VDD_PLL1, VDD_PLL2, and VDD_DIG, and VDDO supplies ramp slowly with a ramp time
over 100 ms, TI recommends starting the device POR sequence after all core and output supplies have reached
their minimum voltage tolerances (VDD ≥ 3.135 V and VDDO ≥ 1.71 V). This can be realized by delaying the
PDN low-to-high transition in a manner similar to the condition detailed in Powering Up From Split-Supply Rails
and shown in Figure 86.
If a VDD supply cannot reach 3.135 V before the PDN low-to-high transition, TI recommends toggling the PDN
pin again or chip soft reset bit in R12.7 after all VDD and VDDO supplies reached their minimum tolerances to
re-trigger the device POR sequence for normal chip operation.
Submit Documentation Feedback
Copyright © 2015–2018, Texas Instruments Incorporated
Product Folder Links: LMK03328
143
�LMK03328
SNAS668D – AUGUST 2015 – REVISED APRIL 2018
www.ti.com
Power Rail Sequencing, Power Supply Ramp Rate, and Mixing Supply Domains (continued)
If only VDDO supplies ramp after the PDN low-to-high transition, issuing a channel reset on any PLL-driven
output channel with its PLL SYNC enabled (PLL_SYNC_EN=1) is recommended to ensure normal output divider
operation without requiring a full chip reset (via PDN pin or soft reset). A local channel reset can be issued by
toggling the corresponding power-down bit(s) in R30 after its VDDO supply has reached 1.71 V. Alternatively, an
output SYNC can be issued to reset any SYNC-enabled channel (see Output Synchronization).
12.4.6 Non-Monotonic Power-Up Supply Ramp
In case the VDD_IN, VDD_PLL1, VDD_PLL2, VDD_DIG, and VDDO supplies ramp in a non-monotonic manner,
TI recommends starting the device POR sequence after all core and output supplies have reached their minimum
voltage tolerances (VDD ≥ 3.135 V and VDDO ≥ 1.71 V). This can be realized by delaying the PDN low-to-high
transition in a manner similar to the condition detailed in Powering Up From Split-Supply Rails and shown in
Figure 86.
12.4.7 Slow Reference Input Clock Start-Up
If the reference input clock is direct coupled to the LMK03328 and has a very slow start-up time of over 10 ms,
as defined from the time power supply reaches acceptable operating voltage for the reference input generator,
which is typically 2.97 V for a 3.3-V supply, to the time when the reference input has a stable clock output, take
additional care to prevent unsuccessful PLL calibration. In the case of the reference input building up its
amplitude slowly, TI recommends setting the input buffer to differential irrespective of the input type (LVCMOS or
differential). In case of LVCMOS inputs, TI also recommends enabling on-chip termination by setting R29.4 (for
primary input) and/or R29.5 (for secondary input) to 1. Take one approach of the two additional steps. The first
approach is to add a capacitor to GND on the PDN pin that forms a R-C time constant with the internal 200-kΩ
pullup resistor. This R-C time constant can be designed to delay the low-to-high transition of PDN, until after the
reference input clock is stable. The second approach is to program a larger PLL closed-loop delay in R119[3-2]
for PLL1 and in R133[3-2] for PLL2 that is longer than the time taken for the reference input clock to be stable.
12.5 Power Supply Bypassing
Figure 87 shows two conceptual layouts detailing recommended placement of power supply bypass capacitors. If
the capacitors are mounted on the back side, 0402 components can be employed; however, soldering to the
Thermal Dissipation Pad can be difficult. For component side mounting, use 0201 body size capacitors to
facilitate signal routing. Keep the connections between the bypass capacitors and the power supply on the
device as short as possible. Ground the other side of the capacitor using a low impedance connection to the
ground plane.
144
Submit Documentation Feedback
Copyright © 2015–2018, Texas Instruments Incorporated
Product Folder Links: LMK03328
�LMK03328
www.ti.com
SNAS668D – AUGUST 2015 – REVISED APRIL 2018
Power Supply Bypassing (continued)
Figure 87. Conceptual Placement of Power Supply Bypass Capacitors (NOT Representative of LMK03328
Supply Pin Locations)
Submit Documentation Feedback
Copyright © 2015–2018, Texas Instruments Incorporated
Product Folder Links: LMK03328
145
�LMK03328
SNAS668D – AUGUST 2015 – REVISED APRIL 2018
www.ti.com
13 Layout
13.1 Layout Guidelines
The following section provides the layout guidelines to ensure good thermal performance and power supply
connections for the LMK03328.
13.1.1 Ensure Thermal Reliability
The LMK03328 is a high performance device. Therefore pay careful attention to device configuration and printedcircuit board (PCB) layout with respect to device power consumption and thermal considerations. Employing a
thermally-enhanced PCB layout can insure good thermal dissipation from the device to the PCB layers.
Observing good thermal layout practices enables the thermal slug, or die attach pad (DAP), on the bottom of the
48-pin WQFN package to provide a good thermal path between the die contained within the package and the
ambient air through the PCB interface. This thermal pad also serves as the singular ground connection the
device; therefore, a low inductance connection to multiple PCB ground layers (both internal and external) is
essential.
13.1.2 Support for PCB Temperature up to 105°C
The LMK03328 can maintain a safe junction temperature below the recommended maximum value of 125°C
even when operated on a PCB with a maximum board temperature (Tb) of 105°C. This can shown by the
following example calculation, assuming a worst-case device current consumption from Electrical Characteristics
- Power Supply and the thermal data in Thermal Information using a 4-layer JEDEC test board with no airflow.
TJ = Tb+ (ψjb × Pdmax) = 117.6°C
where
•
•
•
Tb = 105°C
ψjb = 4.02°C/W
Pdmax = IDD × VDD = 952 mA × 3.3 V = 3.14 W
(8)
13.2 Layout Example
Figure 88 shows a PCB layout example showing the application of thermal design practices and low-inductance
ground connection between the device DAP and the PCB. Connecting a 6 x 6 thermal via pattern and using
multiple PCB ground layers (for example, 8- or 10-layer PCB) can help to reduce the junction-to-ambient thermal
resistance, as indicated in the Thermal Information section. The 6 × 6 filled via pattern facilitates both
considerations.
146
Submit Documentation Feedback
Copyright © 2015–2018, Texas Instruments Incorporated
Product Folder Links: LMK03328
�LMK03328
www.ti.com
SNAS668D – AUGUST 2015 – REVISED APRIL 2018
Layout Example (continued)
Figure 88. 4-Layer PCB Thermal Layout Example for LMK03318 (8+ Layers Recommended)
Submit Documentation Feedback
Copyright © 2015–2018, Texas Instruments Incorporated
Product Folder Links: LMK03328
147
�LMK03328
SNAS668D – AUGUST 2015 – REVISED APRIL 2018
www.ti.com
14 Device and Documentation Support
14.1 Receiving Notification of Documentation Updates
To receive notification of documentation updates, navigate to the device product folder on ti.com. In the upper
right corner, click on Alert me to register and receive a weekly digest of any product information that has
changed. For change details, review the revision history included in any revised document.
14.2 Community Resources
The following links connect to TI community resources. Linked contents are provided "AS IS" by the respective
contributors. They do not constitute TI specifications and do not necessarily reflect TI's views; see TI's Terms of
Use.
TI E2E™ Online Community TI's Engineer-to-Engineer (E2E) Community. Created to foster collaboration
among engineers. At e2e.ti.com, you can ask questions, share knowledge, explore ideas and help
solve problems with fellow engineers.
Design Support TI's Design Support Quickly find helpful E2E forums along with design support tools and
contact information for technical support.
14.3 Trademarks
E2E is a trademark of Texas Instruments.
All other trademarks are the property of their respective owners.
14.4 Electrostatic Discharge Caution
These devices have limited built-in ESD protection. The leads should be shorted together or the device placed in conductive foam
during storage or handling to prevent electrostatic damage to the MOS gates.
14.5 Glossary
SLYZ022 — TI Glossary.
This glossary lists and explains terms, acronyms, and definitions.
15 Mechanical, Packaging, and Orderable Information
The following pages include mechanical, packaging, and orderable information. This information is the most
current data available for the designated devices. This data is subject to change without notice and revision of
this document. For browser-based versions of this data sheet, refer to the left-hand navigation.
148
Submit Documentation Feedback
Copyright © 2015–2018, Texas Instruments Incorporated
Product Folder Links: LMK03328
�PACKAGE OPTION ADDENDUM
www.ti.com
10-Dec-2020
PACKAGING INFORMATION
Orderable Device
Status
(1)
Package Type Package Pins Package
Drawing
Qty
Eco Plan
(2)
Lead finish/
Ball material
MSL Peak Temp
Op Temp (°C)
Device Marking
(3)
(4/5)
(6)
LMK03328RHSR
ACTIVE
WQFN
RHS
48
2500
RoHS & Green
SN
Level-3-260C-168 HR
-40 to 85
K03328A
LMK03328RHST
ACTIVE
WQFN
RHS
48
250
RoHS & Green
SN
Level-3-260C-168 HR
-40 to 85
K03328A
(1)
The marketing status values are defined as follows:
ACTIVE: Product device recommended for new designs.
LIFEBUY: TI has announced that the device will be discontinued, and a lifetime-buy period is in effect.
NRND: Not recommended for new designs. Device is in production to support existing customers, but TI does not recommend using this part in a new design.
PREVIEW: Device has been announced but is not in production. Samples may or may not be available.
OBSOLETE: TI has discontinued the production of the device.
(2)
RoHS: TI defines "RoHS" to mean semiconductor products that are compliant with the current EU RoHS requirements for all 10 RoHS substances, including the requirement that RoHS substance
do not exceed 0.1% by weight in homogeneous materials. Where designed to be soldered at high temperatures, "RoHS" products are suitable for use in specified lead-free processes. TI may
reference these types of products as "Pb-Free".
RoHS Exempt: TI defines "RoHS Exempt" to mean products that contain lead but are compliant with EU RoHS pursuant to a specific EU RoHS exemption.
Green: TI defines "Green" to mean the content of Chlorine (Cl) and Bromine (Br) based flame retardants meet JS709B low halogen requirements of