Product
Folder
Order
Now
Support &
Community
Tools &
Software
Technical
Documents
LMX2594
SNAS696C – MARCH 2017 – REVISED APRIL 2019
LMX2594 15-GHz Wideband PLLATINUM™ RF Synthesizer
With Phase Synchronization and JESD204B Support
1 Features
3 Description
•
•
The LMX2594 is a high-performance, wideband
synthesizer that can generate any frequency from 10
MHz to 15 GHz without using an internal doubler,
thus eliminating the need for sub-harmonic filters. The
high-performance PLL with figure of merit of –236
dBc/Hz and high-phase detector frequency can attain
very low in-band noise and integrated jitter. The highspeed N-divider has no pre-divider, thus significantly
reducing the amplitude and number of spurs. There is
also a programmable input multiplier to mitigate
integer boundary spurs.
1
•
•
•
•
•
•
•
•
•
10-MHz to 15-GHz output frequency
–110 dBc/Hz phase noise at 100-kHz offset with
15-GHz carrier
45-fs rms jitter at 7.5 GHz (100 Hz to 100 MHz)
Programmable output power
PLL key specifications
– Figure of merit: –236 dBc/Hz
– Normalized 1/f noise: –129 dBc/Hz
– High phase detector frequency
– 400-MHz integer mode
– 300-MHz fractional mode
– 32-bit fractional-N divider
Remove integer boundary spurs with
programmable input multiplier
Synchronization of output phase across multiple
devices
Support for SYSREF with 9-ps resolution
programmable delay
Frequency ramp and chirp generation ability for
FMCW applications
< 20-µs VCO calibration speed
3.3-V single power supply operation
The LMX2594 allows users to synchronize the output
of multiple devices and also enables applications that
need deterministic delay between input and output. A
frequency ramp generator can synthesize up to two
segments of ramp in an automatic ramp generation
option or a manual option for maximum flexibility. The
fast calibration algorithm allows changing frequencies
faster than 20 µs. The LMX2594 adds support for
generating or repeating SYSREF (compliant to
JESD204B standard) designed for low-noise clock
sources in high-speed data converters. A fine delay
adjustment (9-ps resolution) is provided in this
configuration to account for delay differences of board
traces.
The output drivers within LMX2594 deliver output
power as high as 7 dBm at 15-GHz carrier frequency.
The device runs from a single 3.3-V supply and has
integrated LDOs that eliminate the need for on-board
low noise LDOs.
2 Applications
•
•
•
•
•
•
5G and mm-Wave wireless infrastructure
Test and measurement equipment
Radar
MIMO
Phased array antennas and beam forming
High-speed data converter clocking (supports
JESD204B)
Device Information(1)
PART NUMBER
LMX2594
PACKAGE
VQFN (40)
BODY SIZE (NOM)
6.00 mm × 6.00 mm
(1) For all available packages, see the orderable addendum at
the end of the data sheet.
Simplified Schematic
CPout
Phase
Detector
OSCinP
Input
signal
OSCin
Douber
OSCinM
Pre-R
Divider
Multiplier
Post-R
Divider
ϕ
Vtune
Charge
Pump
Sigma-Delta
Modulator
CSB
SCK
SDI
RFoutAP
MUX
Vcc
RFoutAM
Channel
Divider
RFoutBM
MUX
Serial Interface
Control
Loop Filter
Vcc
RFoutBP
N Divider
SYSREF
MUXout
Copyright © 2017, Texas Instruments Incorporated
1
An IMPORTANT NOTICE at the end of this data sheet addresses availability, warranty, changes, use in safety-critical applications,
intellectual property matters and other important disclaimers. PRODUCTION DATA.
�LMX2594
SNAS696C – MARCH 2017 – REVISED APRIL 2019
www.ti.com
Table of Contents
1
2
3
4
5
6
Features ..................................................................
Applications ...........................................................
Description .............................................................
Revision History.....................................................
Pin Configuration and Functions .........................
Specifications.........................................................
6.1
6.2
6.3
6.4
6.5
6.6
6.7
7
1
1
1
2
6
8
Absolute Maximum Ratings ...................................... 8
ESD Ratings.............................................................. 8
Recommended Operating Conditions....................... 8
Thermal Information .................................................. 8
Electrical Characteristics........................................... 9
Timing Requirements .............................................. 11
Typical Characteristics ............................................ 14
Detailed Description ............................................ 18
7.1
7.2
7.3
7.4
Overview .................................................................
Functional Block Diagram .......................................
Feature Description.................................................
Device Functional Modes........................................
18
19
19
39
7.5 Programming........................................................... 40
7.6 Register Maps ......................................................... 41
8
Application and Implementation ........................ 59
8.1 Application Information............................................ 59
8.2 Typical Application .................................................. 61
9 Power Supply Recommendations...................... 64
10 Layout................................................................... 65
10.1 Layout Guidelines ................................................. 65
10.2 Layout Example .................................................... 66
11 Device and Documentation Support ................. 67
11.1
11.2
11.3
11.4
11.5
11.6
11.7
Device Support......................................................
Documentation Support ........................................
Receiving Notification of Documentation Updates
Community Resources..........................................
Trademarks ...........................................................
Electrostatic Discharge Caution ............................
Glossary ................................................................
67
67
67
67
67
67
67
12 Mechanical, Packaging, and Orderable
Information ........................................................... 68
4 Revision History
Changes from Revision B (March 2018) to Revision C
Page
•
Deleted the recommended bypass capacitor values for Vcc pins 7, 11, 15, 21, 26 and 37, as these capacitor values
are not mandatory and the power supply filtering design is up to the user............................................................................ 7
•
Changed all the 'FRAC_ORDER' to 'MASH_ORDER' to avoid confusion ............................................................................. 9
•
Changed the names of timing specs to align with timing diagram: changed tCE to tES, tCS to tDCS, tCH to tCDH, and tCES
to tECS .................................................................................................................................................................................... 11
•
Changed the names of timing specs to align with timing diagram: changed tES to tCE, tCES to tECS, added tDCS and
tCDH, and changed tCS to tCR .................................................................................................................................................. 12
•
Changed the serial data input timing diagram and corrected the typo for 'SCK'.................................................................. 12
•
Deleted the note 'The CSB transition from high to low must occur when SCK is low' from the serial data input timing
diagram, because SPI mode 4 (CPOL = 1, CPHA = 1) is also supported, and SCK is held high when idle in mode 4 ..... 12
•
Added note for the serial data input timing diagram to explain the tCE requirement for mode 4 (CPOL = 1, CPHA = 1)
of SPI, because the diagram only indicated SPI mode 1 (CPOL = 0, CPHA = 0) ............................................................... 12
•
Changed the serial data readback timing diagram............................................................................................................... 13
•
Changed the note about MUXout clocking out and emphasized the effect of tCR on the readback data available time ..... 13
•
Changed the fOUT test conditions in the Closed-Loop Phase Noise at 3.5 GHz graph from: 14 GHz / 2 = 3.5 GHz to:
to 14 GHz / 4 = 3.5 GHz ...................................................................................................................................................... 15
•
Added Normalized Output Power Across OUTA_PWR With Resistor Pullup graph............................................................ 15
•
Changed "Vtune" to "Indirect Vtune" when LD_TYPE = 1 ................................................................................................... 21
•
Changed description for LD_TYPE. .................................................................................................................................... 21
•
Added description of Indirect Vtune. ................................................................................................................................... 22
•
Added description for the 'no assist' mode, mphasized the effect of VCO_SEL, VCO_DACISET_STRT and
VCO_CAPCTRL_STRT under 'no assist' mode, and added recommended values for these registers .............................. 23
•
Added description for the 'full assist' mode to allow the user to set VCO amplitude and capcode using linear
interpolation under certain conditions................................................................................................................................... 23
•
Changed OUTx_PWR Recommendations for Resistor Pullup table ................................................................................... 25
•
Added description for category 3 of SYNC feature stating that FCAL_EN needs to be 1. .................................................. 29
•
Changed description of MASH_SEED ................................................................................................................................ 29
2
Submit Documentation Feedback
Copyright © 2017–2019, Texas Instruments Incorporated
Product Folder Links: LMX2594
�LMX2594
www.ti.com
SNAS696C – MARCH 2017 – REVISED APRIL 2019
Revision History (continued)
•
Added 10-ms wait time before re-programming register R0 in recommended initial power-up sequence ......................... 40
•
Added the General Programming Requirements section based on frequently asked questions......................................... 40
•
Changed register R4 in the register map to: exposed ACAL_CMP_DLY ........................................................................... 41
•
Changed the register R20[14] value from 0 to 1 in the full register map to match the R20 register description ................ 41
•
Changed the default value of R25 to align with register map of LMX2595. This change has no impact on the LMX2594. 42
•
Changed the R0[14] register field name in the register map from VCO_PHASE_SYNC_EN to VCO_PHASE_SYNC.
to align with the rest of the data sheet ................................................................................................................................. 46
•
Added recommended value for register CAL_CLK_DIV when lock time is not of concern.................................................. 46
•
Changed the typo for register 'VCO_DACISET' in the register map. Bit 0 of this register was not included in the
map. The full register map and register description were correct ........................................................................................ 48
•
Added description to the R4[15:8]: ACAL_CMP_DLY register............................................................................................. 48
•
Deleted the bit description '0: disabled; 1: enabled' for register 'PLL_N' ............................................................................. 49
•
Added description to the R60[15:0] LD_DLY register .......................................................................................................... 51
•
Changed the R31[14] register name from CHDIV_DIV2 to SEG1_EN to align with the naming in the TICS Pro GUI ....... 53
•
Changed the R105[1:0] field name from RAMP_NEXT_TRIG to RAMP1_NEXT_TRIG ..................................................... 58
•
Added the Bias Levels of Pins table..................................................................................................................................... 64
Changes from Revision A (August 2017) to Revision B
Page
•
Changed all the VCO Gain typical values in the Electrical Characteristics table. This is due to improved
measurement methods and NOT a change in the device itself ........................................................................................... 11
•
Moved the high-level output voltage parameter VCC – 0.4 value from the MAX column to the MIN.................................... 11
•
Moved the high-level output current parameter 0.4 value from the MIN column to the MAX .............................................. 11
•
Changed bulleted text: data is clocked out on MUXout, not SDI pin ................................................................................... 13
•
Added comment that OSCin is clocked on rising edges of the signal. and reformatted with bulleted list ........................... 19
•
Added description of the state machine clock ..................................................................................................................... 20
•
Changed example from: 200 MHz / 232 to: 200 MHz / (232 – 1) .......................................................................................... 21
•
Changed LD_DLY description in Table 4 and removed duplicated text in the Lock Detect section .................................... 21
•
Changed name from VCO_AMPCAL to VCO_DACISET_STRT ........................................................................................ 23
•
Added more programmable settings to Table 5 ................................................................................................................... 23
•
Changed VCO Gain table..................................................................................................................................................... 24
•
Added that OUTx_PWR states 32 to 47 are redundant and reworded section ................................................................... 25
•
Added term "IncludedDivide" for clarity ............................................................................................................................... 26
•
Changed Fixed Diagram to show SEG0, SEG1, SEG2, and SEG3 ................................................................................... 27
•
Changed included channel divide to IncludedDivide and 2 X SEG0 to 2 X SEG1. Also clarified IncludedDivide
calculations ........................................................................................................................................................................... 29
•
Added more description on conditions for phase adust ....................................................................................................... 29
•
Changed text from: (VCO_PHASE_SYNC = 1) to: (VCO_PHASE_SYNC = 0) ................................................................. 29
•
Changed text so the user does not incorrectly assume that MASH_SEED varies from part ot part ................................... 30
•
Changed the RAMP_THRESH programming from: 0 to ± 232 to: 0 to ± 233 – 1 .................................................................. 30
•
Removed comment that RAMP_TRIG_CAL only applies in automatic ramping mode........................................................ 30
•
Changed the RAMP_LOW and _HIGH programming from: 0 to ± 231 to: 0 to ± 233 – 1...................................................... 30
•
Changed description to be in terms of state machine cycles ............................................................................................... 31
•
Changed RAMP_MODE to RAMP_MANUAL in the Manual Pin Ramping and Automatic Ramping sections .................... 31
•
Added that the RampCLK pin input is reclocked to the phase detector frequency.............................................................. 31
•
Added that RampDir rising edges should be targeted away from rising edges of RampCLK pin........................................ 31
•
Changed programming enumerations for RAMP0_INC and RAMP1_INC .......................................................................... 33
Submit Documentation Feedback
Copyright © 2017–2019, Texas Instruments Incorporated
Product Folder Links: LMX2594
3
�LMX2594
SNAS696C – MARCH 2017 – REVISED APRIL 2019
www.ti.com
•
Changed programming enumerations for RAMP_THRESH, RAMPx_LEN, and RAMP1_INC............................................ 34
•
Changed Figure 29 .............................................................................................................................................................. 34
•
Changed SysRef description ................................................................................................................................................ 35
•
Added divide by 2 to figure................................................................................................................................................... 35
•
Changed some entries in the table ...................................................................................................................................... 35
•
Changed fINTERPOLATOR SYSREF setup equation in Table 18 .............................................................................................. 35
•
Changed SysRef delay from: 224 and 225 to: 225 and 226 ................................................................................................ 36
•
Changed "generator" mode to "master" mode. They mean the same thing ........................................................................ 36
•
Changed description for SYSREF_DIV ................................................................................................................................ 36
•
Changed Figure 31 .............................................................................................................................................................. 37
•
Changed wording for repeater mode and master mode....................................................................................................... 38
•
Changed description of a few of the steps ........................................................................................................................... 39
•
Changed typo in R17 and R19 ............................................................................................................................................ 48
•
Deleted reference to VCO_SEL_STRT_EN. This is always 1 ............................................................................................. 48
•
Added VCO_SEL_STRT_EN reference. This is always 1 ................................................................................................... 48
•
Changed the enumerations 0-3 and added content to the INPIN_LVL field description ..................................................... 50
•
Added Divide by 1' to SYSREF_DIV_PRE register description. Also fixed the name misspelling ...................................... 52
•
Deleted redundant formula for Fout and also clarified SYSREF_DIV starts at 4 and counts by 2 ...................................... 52
•
Deleted reference to VCO_CAPCTRL_EN, which is always 1, and clarified....................................................................... 54
•
Changed text from: fMAX to: fHIGH ........................................................................................................................................... 55
•
Changed text from: RAMP_LIMIT_LOW=232 - (fLOW - fVCO) / fPD × 16777216 to: RAMP_LIMIT_LOW=233 - 16777216
x (fVCO - fLOW) / fPD ................................................................................................................................................................ 55
•
Removed the OSCin Configuration table and added content to the OSCin Configuration section...................................... 59
•
Changed pin 27 recommendation from 10 µF to 1 µF in Figure 51 ..................................................................................... 61
Changes from Original (March 2017) to Revision A
Page
•
Added DAP pin described as "Die Attach Pad"...................................................................................................................... 7
•
Added H2 Spec for 11 GHz ................................................................................................................................................... 9
•
Clarified that output power assumes that load is matched and losses are de-embedded..................................................... 9
•
Changed "SDA" pin name mispelled. Should be "SDI". Also fixed in timing diagrams. Also added CE Pin ...................... 11
•
Swapped SDI and SCK in diagram ..................................................................................................................................... 12
•
Added graphs and reordered ............................................................................................................................................... 14
•
Added 12-GHz VCO frequency for PLL Noise Metrics Plot ................................................................................................ 14
•
Added Phase Noise plots vs. Temperature ......................................................................................................................... 15
•
Added Phase noise vs. Fpd Graph ..................................................................................................................................... 16
•
Moved second paragraph of Readback into Lock Detect section; deleted last paragraph of Readback (was in wrong
place) .................................................................................................................................................................................... 22
•
Changed table to allow 11.5 GHz max frequency for divides >6 ......................................................................................... 24
•
Added Recommendations table .......................................................................................................................................... 25
•
Changed the IncludedDivide table........................................................................................................................................ 26
•
Added section on fine tune adjustments ............................................................................................................................. 30
•
Changed graphic and description......................................................................................................................................... 35
•
Added SYSREF_EN = 1 if and only if OUTB_MUX=2 ........................................................................................................ 36
•
Changed SysRef Example Description and Pictures .......................................................................................................... 38
•
Added recommendation to make fInterpolator a multiple of fOSC .............................................................................................. 39
•
Added SEG1_EN.................................................................................................................................................................. 42
•
Added INPIN_IGNORE, INPIN_LVL, and INPIN_HYST ...................................................................................................... 43
4
Submit Documentation Feedback
Copyright © 2017–2019, Texas Instruments Incorporated
Product Folder Links: LMX2594
�LMX2594
www.ti.com
SNAS696C – MARCH 2017 – REVISED APRIL 2019
•
Removed RAMP0_FL from register map ............................................................................................................................. 45
•
Changed address for VCO_DACISET_STRT and VCO_CAPCTRL .................................................................................. 48
•
Clarified MASH_RESET_N. 0 = RESET (integer mode), 1 = Fractional mode .................................................................. 49
•
Changed OUT_ISEL to OUTI_SET ..................................................................................................................................... 50
•
Added SYSREF_EN=1 when OUTB_MUX=2 ..................................................................................................................... 50
•
Added section for input register descriptions ...................................................................................................................... 50
•
Added description for SEG1_EN ......................................................................................................................................... 53
•
Fixed TYPO table to match main register map. ................................................................................................................... 53
•
Added SEG1_EN.................................................................................................................................................................. 53
•
Corrected RAMP_BURST_TRIG description to match other place in data sheet................................................................ 56
•
Removed duplicate error in R101[2] .................................................................................................................................... 57
•
Changed RAMP1_INC from RAMP0 to RAMP1 .................................................................................................................. 57
•
Clarified that the delay was in state machine cycles............................................................................................................ 57
•
Swapped 1 and 3 in the R110[10:9] description .................................................................................................................. 58
•
Fixed pin names in schematic ............................................................................................................................................. 61
Submit Documentation Feedback
Copyright © 2017–2019, Texas Instruments Incorporated
Product Folder Links: LMX2594
5
�LMX2594
SNAS696C – MARCH 2017 – REVISED APRIL 2019
www.ti.com
5 Pin Configuration and Functions
GND
RampDir
VbiasVARAC
GND
Vtune
VrefVCO
VccVCO
VregVCO
GND
GND
RHA Package
40-Pin VQFN
Top View
CE
RampClk
GND
VrefVCO2
VbiasVCO
SysRefReq
GND
VbiasVCO2
SYNC
VccVCO2
GND
GND
GND
VccDIG
CSB
OSCinP
RFoutAP
OSCinM
RFoutAM
6
Submit Documentation Feedback
MUXout
RFoutBP
RFoutBM
SDI
SCK
VccMASH
GND
GND
CPout
VccBUF
VccCP
VregIN
Copyright © 2017–2019, Texas Instruments Incorporated
Product Folder Links: LMX2594
�LMX2594
www.ti.com
SNAS696C – MARCH 2017 – REVISED APRIL 2019
Pin Functions
PIN
NO.
1
NAME
I/O
DESCRIPTION
CE
Input
GND
Ground
VCO ground.
3
VbiasVCO
Bypass
VCO bias. Requires a 10-µF capacitor connected to VCO ground. Place close to pin.
5
SYNC
Input
6, 14
GND
Ground
Digital ground.
7
VccDIG
Supply
Digital supply. TI recommends bypassing with decoupling capacitor to digital ground.
8
OSCinP
Input
Reference input clock (+). High-impedance self-biasing pin. Requires AC-coupling capacitor.
(0.1 µF recommended)
9
OSCinM
Input
Reference input clock (–). High impedance self-biasing pin. Requires AC-coupling capacitor.
(0.1 µF recommended)
10
VregIN
Bypass
Input reference path regulator output. Requires a 1-µF capacitor connected to ground. Place
close to pin.
11
VccCP
Supply
Charge pump supply. TI recommends bypassing with decoupling capacitor to charge pump
ground.
12
CPout
Output
Charge pump output. TI recommends connecting C1 of loop filter close to pin.
13
GND
Ground
Charge pump ground.
15
VccMASH
Supply
Digital supply. TI recommends bypassing with decoupling capacitor to digital ground.
16
SCK
Input
SPI clock. High impedance CMOS input. 1.8-V to 3.3-V logic.
17
SDI
Input
SPI data. High impedance CMOS input. 1.8-V to 3.3-V logic.
18
RFoutBM
Output
Differential output B (–). Requires a pullup (typically 50-Ω resistor) connected to Vcc as close
to the pin as possible. Can be used as an output signal or SYSREF output.
19
RFoutBP
Output
Differential output B (+). Requires a pullup (typically 50-Ω resistor) connected to Vcc as close
to the pin as possible. Can be used as an output signal or SYSREF output.
2, 4, 25, 31,
34, 39, 40
Chip enable input. Active HIGH powers on the device.
Phase synchronization pin. Has programmable threshold.
20
MUXout
Output
Multiplexed output pin — lock detect, readback, diagnostics, ramp status.
21
VccBUF
Supply
Output buffer supply. TI recommends bypassing with decoupling capacitor to RFout ground.
22
RFoutAM
Output
Differential output A (–). Requires connecting a 50-Ω resistor pullup to Vcc as close to the
pin as possible.
23
RFoutAP
Output
Differential output A (+). Requires connecting a 50-Ω resistor pullup to Vcc as close to the
pin as possible.
24
CSB
Input
SPI latch. Chip Select Bar. High-impedance CMOS input. 1.8-V to 3.3-V logic.
26
VccVCO2
Supply
VCO supply. TI recommends bypassing with decoupling capacitor to VCO ground.
27
VbiasVCO2
Bypass
VCO bias. Requires a 1-µF capacitor connected to VCO ground.
28
SysRefReq
Input
29
VrefVCO2
Bypass
30
RampClk
Input
Input pin for ramping mode that can be used to clock the ramp in manual ramping mode or
as a trigger input.
32
RampDir
Input
Input pin for ramping mode that can be used to change ramp direction in manual ramping
mode or as a trigger input.
33
VbiasVARAC
Bypass
35
Vtune
Input
36
VrefVCO
Bypass
VCO supply reference. Requires a 10-µF capacitor connected to VCO ground.
37
VccVCO
Supply
VCO supply. Recommend bypassing with decoupling capacitor to ground.
38
VregVCO
Bypass
VCO regulator node. Requires a 1-µF capacitor connected to ground.
GND
Ground
Die Attached Pad. Used for RFout ground.
DAP
SYSREF request input for JESD204B support.
VCO supply reference. Requires a 10-µF capacitor connected to VCO ground.
VCO Varactor bias. Requires a 10-µF capacitor connected to VCO ground.
VCO tuning voltage input.
Submit Documentation Feedback
Copyright © 2017–2019, Texas Instruments Incorporated
Product Folder Links: LMX2594
7
�LMX2594
SNAS696C – MARCH 2017 – REVISED APRIL 2019
www.ti.com
6 Specifications
6.1 Absolute Maximum Ratings
over operating free-air temperature range (unless otherwise noted) (1)
MIN
MAX
UNIT
VCC
Power supply voltage
–0.3
3.6
V
TJ
Junction temperature
–40
150
°C
Tstg
Storage temperature
–65
150
°C
(1)
Stresses beyond those listed under Absolute Maximum Ratings may cause permanent damage to the device. These are stress ratings
only, which do not imply functional operation of the device at these or any other conditions beyond those indicated under Recommended
Operating Conditions. Exposure to absolute-maximum-rated conditions for extended periods may affect device reliability.
6.2 ESD Ratings
VALUE
V(ESD)
(1)
(2)
Electrostatic discharge
Human-body model (HBM), per ANSI/ESDA/JEDEC JS-001 (1)
±2000
Charged-device model (CDM), per JEDEC specification JESD22C101 (2)
±750
UNIT
V
JEDEC document JEP155 states that 500 V HBM allows safe manufacturing with a standard ESD control process. Manufacturing with
less than 500 V HBM is possible with the necessary precautions. Pins listed as ±XXX V may actually have higher performance.
JEDEC document JEP157 states that 250 V CDM allows safe manufacturing with a standard ESD control process. Manufacturing with
less than 250 V CDM is possible with the necessary precautions. Pins listed as ±YYY V may actually have higher performance.
6.3 Recommended Operating Conditions
over operating free-air temperature range (unless otherwise noted)
MIN
NOM
MAX
UNIT
VCC
Power supply voltage
3.15
3.3
3.45
V
TA
Ambient temperature
–40
25
85
°C
TJ
Junction temperature
125
°C
6.4 Thermal Information
LMX2594
THERMAL METRIC (1)
RHA (VQFN)
UNIT
40 PINS
RθJA
Junction-to-ambient thermal resistance
RθJC(top)
Junction-to-case (top) thermal resistance
30.5
°C/W
15.3
°C/W
RθJB
ψJT
Junction-to-board thermal resistance
5.4
°C/W
Junction-to-top characterization parameter
0.2
°C/W
ψJB
Junction-to-board characterization parameter
5.3
°C/W
RθJC(bot)
Junction-to-case (bottom) thermal resistance
0.9
°C/W
(1)
(2)
8
(2)
For more information about traditional and new thermal metrics, see the Semiconductor and IC Package Thermal Metrics application
report (SPRA953).
DAP
Submit Documentation Feedback
Copyright © 2017–2019, Texas Instruments Incorporated
Product Folder Links: LMX2594
�LMX2594
www.ti.com
SNAS696C – MARCH 2017 – REVISED APRIL 2019
6.5 Electrical Characteristics
3.15 V ≤ VCC ≤ 3.45 V, –40°C ≤ TA ≤ +85°C. Typical values are at VCC = 3.3 V, 25°C (unless otherwise noted).
PARAMETER
TEST CONDITIONS
MIN
TYP
MAX
UNIT
3.15
3.3
3.45
V
POWER SUPPLY
VCC
Supply voltage
OUTA_PD = 0, OUTB_PD = 1
OUTA_MUX = OUTB_MUX = 1
OUTA_PWR = 31, CPG=7
fOSC= fPD = 100 MHz, fVCO = fOUT = 14 GHz
pOUT = 3 dBm with 50-Ω resistor pullup
340
Power-on reset current
RESET=1
170
Power-down current
POWERDOWN=1
Supply current
ICC
mA
5
OUTPUT CHARACTERISTICS
pOUT
Xtalk
H2
Single-ended output power (1) (2)
fOUT = 8 GHz
5
fOUT = 15 GHz
2
1-nH inductor pullup
OUTx_PWR = 50
fOUT = 8 GHz
10
fOUT = 15 GHz
7
Isolation between outputs A and OUTA_MUX = VCO
B. Measured on output A
OUTB_MUX = channel divider
Second harmonic
(2)
Third harmonic (2)
H3
50-Ω resistor pullup
OUTx_PWR = 50
dBm
–50
OUTA_MUX = VCO
fVCO = 8 GHz
–20
OUTA_MUX = VCO
fVCO = 11 GHz
–30
OUTA_MUX = VCO
fVCO = 8 GHz
–50
dBc
dBc
dBc
INPUT SIGNAL PATH
OSC_2X = 0
5
1400
OSC_2X = 1
5
200
fOSCin
Reference input frequency
vOSCin
Reference input voltage
AC-coupled required
Input range
fMULT
Multiplier frequency (only
applies when multiplier is
enabled)
(3)
Output range
0.2
2
30
70
180
250
MHz
Vpp
MHz
PHASE DETECTOR AND CHARGE PUMP
Phase detector frequency (3)
fPD
Charge-pump leakage current
ICPout
Effective charge pump current.
This is the sum of the up and
down currents
Integer mode
MASH_ORDER = 0
0.125
400
Fractional mode
MASH_ORDER= 1, 2,
3
5
300
MASH_ORDER = 4
5
Normalized PLL 1/f noise
PNPLL_flat Normalized PLL noise floor
(1)
(2)
(3)
(4)
240
CPG = 0
15
CPG = 4
3
CPG = 1
6
CPG = 5
9
CPG = 3
12
CPG = 7
PNPLL_1/f
MHz
nA
mA
15
fPD = 100 MHz, fVCO = 12 GHz (4) (4) (4) (4)
–129
dBc/Hz
–236
dBc/Hz
Single ended output power obtained after de-embedding microstrip trace losses and matching with a manual tuner. Unused port
terminated to 50 ohm load.
Output power, spurs, and harmonics can vary based on board layout and components.
For lower VCO frequencies, the N divider minimum value can limit the phase-detector frequency.
The PLL noise contribution is measured using a clean reference and a wide loop bandwidth and is composed into flicker and flat
components. PLL_flat = PLL_FOM + 20 × log(Fvco/Fpd) + 10 × log(Fpd / 1Hz). PLL_flicker (offset) = PLL_flicker_Norm + 20 × log(Fvco
/ 1GHz) – 10 × log(offset / 10kHz). Once these two components are found, the total PLL noise can be calculated as PLL_Noise = 10 ×
log(10 PLL_Flat / 10 + 10 PLL_flicker / 10 )
Submit Documentation Feedback
Copyright © 2017–2019, Texas Instruments Incorporated
Product Folder Links: LMX2594
9
�LMX2594
SNAS696C – MARCH 2017 – REVISED APRIL 2019
www.ti.com
Electrical Characteristics (continued)
3.15 V ≤ VCC ≤ 3.45 V, –40°C ≤ TA ≤ +85°C. Typical values are at VCC = 3.3 V, 25°C (unless otherwise noted).
PARAMETER
TEST CONDITIONS
MIN
TYP
MAX
UNIT
VCO CHARACTERISTICS
VCO1
fVCO = 8 GHz
VCO2
fVCO = 9.2 GHz
VCO3
fVCO = 10.3 GHz
PNVCO
VCO phase noise
VCO4
fVCO = 11.3 GHz
VCO5
fVCO = 12.5 GHz
VCO6
fVCO = 13.3 GHz
VCO7
fVCO = 14.5 GHz
tVCOCAL
(5)
10
VCO calibration speed
Switch across the entire
frequency band
fOSC = 200 MHz, fPD =
100 MHz (5)
10 kHz
–80
100 kHz
–107
1 MHz
–128
10 MHz
–148
90 MHz
–157
10 kHz
–79
100 kHz
–105
1 MHz
–127
10 MHz
–147
90 MHz
–157
10 kHz
–77
100 kHz
–104
1 MHz
–126
10 MHz
–147
90 MHz
–157
10 kHz
–76
100 kHz
–103
1 MHz
–125
10 MHz
–145
90 MHz
–158
10 kHz
–74
100 kHz
–100
1 MHz
–123
10 MHz
–144
90 MHz
–157
10 kHz
–73
100 kHz
–100
1 MHz
–122
10 MHz
–143
90 MHz
–155
10 kHz
–73
100 kHz
–99
1 MHz
–121
10 MHz
–143
90 MHz
–152
No assist
50
Partial assist
35
Close frequency
20
Full assist
dBc/Hz
µs
5
See Application and Implementation for more details on the different VCO calibration modes.
Submit Documentation Feedback
Copyright © 2017–2019, Texas Instruments Incorporated
Product Folder Links: LMX2594
�LMX2594
www.ti.com
SNAS696C – MARCH 2017 – REVISED APRIL 2019
Electrical Characteristics (continued)
3.15 V ≤ VCC ≤ 3.45 V, –40°C ≤ TA ≤ +85°C. Typical values are at VCC = 3.3 V, 25°C (unless otherwise noted).
PARAMETER
TEST CONDITIONS
MIN
TYP
8 GHz
KVCO
VCO gain
MAX
UNIT
92
9.2 GHz
91
10.3 GHz
115
11.3 GHz
121
12.5 GHz
195
13.3 GHz
190
14.5 GHz
213
|ΔTCL|
Allowable temperature drift
when VCO is not recalibrated
RAMP_EN = 0 or RAMP_MANUAL= 1
125
H2
VCO second harmonic
fVCO = 8 GHz, divider disabled
–20
H3
VCO third haromonic
fVCO = 8 GHz, divider disabled
–50
MHz/V
°C
dBc
SYNC PIN AND PHASE ALIGNMENT
fOSCinSY
NC
Maximum usable OSCin with
sync pin (Figure 27)
Category 3
0
100
Categories1 and 2
0
1400
MHz
DIGITAL INTERFACE
Applies to SLK, SDI, CSB, CE, RampDir, RampClk, MUXout, SYNC (CMOS Mode), SysRefReq (CMOS Mode)
VIH
High-level input voltage
1.4
Vcc
VIL
IIH
Low-level input voltage
0
0.4
V
High-level input current
–25
25
µA
IIL
Low-level input current
–25
25
µA
VOH
High-level output voltage
VOL
Low-level output voltage
Load current = –10 mA
MUXout pin
V
VCC – 0.4
V
Load current = 10 mA
0.4
V
6.6 Timing Requirements
(3.15 V ≤ VCC ≤ 3.45 V, –40°C ≤ TA ≤ +85°C, except as specified. Nominal values are at VCC = 3.3 V, TA = 25°C)
MIN
NOM
MAX
UNIT
SYNC, SYSRefReq, RampClk, and RampDIR Pins
tSETUP
Setup time for pin relative to
OSCin rising edge
SYNC pin
2.5
SysRefReq pin
2.5
tHOLD
Hold time for SYNC pin
relative to OSCin rising edge
SYNC pin
2
SysRefReq pin
2
ns
ns
DIGITAL INTERFACE WRITE SPECIFICATIONS
fSPIWrite
SPI write speed
tCWL + tCWH > 13.333 ns
tCE
Clock to enable low time
5
ns
tDCS
Data to clock setup time
2
ns
tCDH
Clock to data hold time
2
ns
tCWH
Clock pulse width high
5
ns
tCWL
Clock pulse width low
5
ns
tECS
Enable to clock setup time
5
ns
tEWH
Enable pulse width high
2
ns
See Figure 1
75
MHz
Submit Documentation Feedback
Copyright © 2017–2019, Texas Instruments Incorporated
Product Folder Links: LMX2594
11
�LMX2594
SNAS696C – MARCH 2017 – REVISED APRIL 2019
www.ti.com
Timing Requirements (continued)
(3.15 V ≤ VCC ≤ 3.45 V, –40°C ≤ TA ≤ +85°C, except as specified. Nominal values are at VCC = 3.3 V, TA = 25°C)
MIN
NOM
MAX
UNIT
50
MHz
DIGITAL INTERFACE READBACK SPECIFICATIONS
fSPIReadback
SPI readback speed
tCE
Clock to enable low time
10
ns
tDCS
Data to clock setup time
2
ns
tCDH
Clock to data hold time
2
ns
tCR
Clock falling edge to
available readback data wait
time.
tCWH
Clock pulse width high
10
ns
tCWL
Clock pulse width low
10
ns
tECS
Enable to clock setup time
10
ns
tEWH
Enable pulse width high
10
ns
See Figure 2
0
10
ns
SCK
tCWL
tCWH
tCDH
SDI
R/W
A6
A5 ~ A1
A0
D15
D14 ~ D2
D1
D0
tDCS
tCE
tECS
tEWH
CSB
Figure 1. Serial Data Input Timing Diagram
There are several other considerations for writing on the SPI:
• The R/W bit must be set to 0.
• The data on SDI pin is clocked into a shift register on each rising edge on the SCK pin.
• The CSB must be held low for data to be clocked. Device will ignore clock pulses if CSB is held high.
• When SCK and SDI lines are shared between devices, TI recommends to hold the CSB line high on the
device that is not to be clocked.
• Note that tCE is only a valid spec if CPOL (Clock Polarity) = 0 and CPHA (Clock Phase) = 0 is used for SPI
protocol. For SPI mode (CPOL = 1 and CPHA = 1), the minimum distance required between the last rising
edge of clock and the rising edge of CSB is tCE + clock_period/2.
12
Submit Documentation Feedback
Copyright © 2017–2019, Texas Instruments Incorporated
Product Folder Links: LMX2594
�LMX2594
www.ti.com
SNAS696C – MARCH 2017 – REVISED APRIL 2019
SCK
tCWL
tCWH
tCDH
R/W
SDI
A6
A5 ~ A1
A0
tDCS
tCR
D15
MUXout
D14 ~ D2
D1
D0
tECS
tCE
tEWH
CSB
Figure 2. Serial Data Readback Timing Diagram
There are several other considerations for SPI readback:
• The R/W bit must be set to 1.
• The MUXout pin will always be low for the address portion of the transaction.
• The data on MUXout is clocked out at tCR after the falling edge of SCK. In other words, the readback data will
be available at the MUXout pin tCR after the clock falling edge.
• The data portion of the transition on the SDI line is always ignored.
Submit Documentation Feedback
Copyright © 2017–2019, Texas Instruments Incorporated
Product Folder Links: LMX2594
13
�LMX2594
SNAS696C – MARCH 2017 – REVISED APRIL 2019
www.ti.com
-30
1: 100 Hz -84.0 dBc/Hz
-40
2: 1 kHz
-94.5 dBc/Hz
-50
3: 10 kHz -104.8 dBc/Hz
-60
4: 100 kHz -107.5 dBc/Hz
5: 1 MHz -114.7 dBc/Hz
-70
-80
-90
-100
-110
-120
-130
-140
-150
-160
-170
-180 15.0 GHz
-4.1 dBm
-190
1*10^2
1*10^3
1*10^4
1*10^5
6: 10 MHz
7: 40 MHz
8: 95 MHz
9: 100 MHz
-141.8 dBc/Hz
-150.2 dBc/Hz
-148.6 dBc/Hz
-147.6 dBc/Hz
Phase Noise (dBc/Hz)
Phase Noise (dBc/Hz)
6.7 Typical Characteristics
1*10^6
1*10^7
1*10^8
Offset (Hz)
fOSC = 100 MHz
fPD = 200 MHz
fOSC = 100 MHz
fPD = 200 MHz
-145.6 dBc/Hz
-154.5 dBc/Hz
-158.8 dBc/Hz
-159.1 dBc/Hz
1*10^6
1*10^7
1*10^8
Offset (Hz)
fOSC = 100 MHz
fPD = 200 MHz
fOSC = 100 MHz
fPD = 200 MHz
Phase Noise (dBc/Hz)
Phase Noise (dBc/Hz)
1*10^6
1*10^7
fOSC = 100 MHz
fPD = 200 MHz
1*10^8
14
6: 10 MHz
7: 40 MHz
8: 95 MHz
9: 100 MHz
1*10^6
-147.4 dBc/Hz
-154.7 dBc/Hz
-155.2 dBc/Hz
-155.0 dBc/Hz
1*10^7
1*10^8
D005
Jitter = 46.9 fs (100 Hz - 100 MHz)
-30
1: 100 Hz -90.1 dBc/Hz
-40
2: 1 kHz -100.4 dBc/Hz
-50
3: 10 kHz -110.6 dBc/Hz
-60
4: 100 kHz -113.7 dBc/Hz
5: 1 MHz -125.1 dBc/Hz
-70
-80
-90
-100
-110
-120
-130
-140
-150
-160
-170
-180 7.5 GHz
5.3 dBm
-190
1*10^2
1*10^3
1*10^4
1*10^5
Jitter = 46.87 fs (100 Hz - 100 MHz)
6: 10 MHz
7: 40 MHz
8: 95 MHz
9: 100 MHz
1*10^6
-149.3 dBc/Hz
-154.8 dBc/Hz
-155.1 dBc/Hz
-148.5 dBc/Hz
1*10^7
1*10^8
Offset (Hz)
D001
Figure 7. Closed-Loop Phase Noise at 8 GHz
D003
Figure 6. Closed-Loop Phase Noise at 9 GHz
-148.3 dBc/Hz
-155.2 dBc/Hz
-157.1 dBc/Hz
-148.2 dBc/Hz
Offset (Hz)
1*10^8
Offset (Hz)
Figure 5. Closed-Loop Phase Noise at 11 GHz
6: 10 MHz
7: 40 MHz
8: 95 MHz
9: 100 MHz
1*10^7
Jitter = 52.6 fs (100 Hz - 100 MHz)
-30
1: 100 Hz -88.3 dBc/Hz
-40
2: 1 kHz
-98.5 dBc/Hz
-50
3: 10 kHz -108.9 dBc/Hz
-60
4: 100 kHz -111.4 dBc/Hz
5: 1 MHz -123.1 dBc/Hz
-70
-80
-90
-100
-110
-120
-130
-140
-150
-160
-170
-180 9.0 GHz
1.6 dBm
-190
1*10^2
1*10^3
1*10^4
1*10^5
D004
Jitter = 46.8 fs (100 Hz - 100 MHz)
-30
1: 100 Hz -89.6 dBc/Hz
-40
2: 1 kHz
-99.8 dBc/Hz
-50
3: 10 kHz -110.1 dBc/Hz
-60
4: 100 kHz -113.4 dBc/Hz
5: 1 MHz -123.1 dBc/Hz
-70
-80
-90
-100
-110
-120
-130
-140
-150
-160
-170
-180 8.0 GHz
5.0 dBm
-190
1*10^2
1*10^3
1*10^4
1*10^5
1*10^6
-143.2 dBc/Hz
-151.5 dBc/Hz
-153.8 dBc/Hz
-153.8 dBc/Hz
Figure 4. Closed-Loop Phase Noise at 13 GHz
Phase Noise (dBc/Hz)
Phase Noise (dBc/Hz)
Figure 3. Closed-Loop Phase Noise at 15 GHz
6: 10 MHz
7: 40 MHz
8: 95 MHz
9: 100 MHz
6: 10 MHz
7: 40 MHz
8: 95 MHz
9: 100 MHz
Offset (Hz)
D002
Jitter = 55.8 fs (100 Hz - 100 MHz)
-30
1: 100 Hz -87.1 dBc/Hz
-40
2: 1 kHz -97.2 dBc/Hz
-50
3: 10 kHz -107.2 dBc/Hz
-60
4: 100 kHz -109.4 dBc/Hz
5: 1 MHz -121.8 dBc/Hz
-70
-80
-90
-100
-110
-120
-130
-140
-150
-160
-170
-180 11.0 GHz
-0.3 dBm
-190
1*10^2
1*10^3
1*10^4
1*10^5
-30
1: 100 Hz -85.5 dBc/Hz
-40
2: 1 kHz -95.6 dBc/Hz
-50
3: 10 kHz -105.6 dBc/Hz
-60
4: 100 kHz -108.7 dBc/Hz
5: 1 MHz -117.3 dBc/Hz
-70
-80
-90
-100
-110
-120
-130
-140
-150
-160
-170
-180 13.0 GHz
0.1 dBm
-190
1*10^2
1*10^3
1*10^4
1*10^5
fOSC = 100 MHz
fPD = 200 MHz
D011
Jitter = 44.1 fs (100 Hz - 100 MHz)
Figure 8. Closed-Loop Phase Noise at 7.5 GHz
Submit Documentation Feedback
Copyright © 2017–2019, Texas Instruments Incorporated
Product Folder Links: LMX2594
�LMX2594
www.ti.com
SNAS696C – MARCH 2017 – REVISED APRIL 2019
-30
1: 100 Hz -96.7 dBc/Hz
-40
2: 1 kHz -106.8 dBc/Hz
-50
3: 10 kHz -117.0 dBc/Hz
-60
4: 100 kHz -119.7 dBc/Hz
5: 1 MHz -130.6 dBc/Hz
-70
-80
-90
-100
-110
-120
-130
-140
-150
-160
-170
-180 3.5 GHz
1.3 dBm
-190
1*10^2
1*10^3
1*10^4
1*10^5
6: 10 MHz
7: 40 MHz
8: 95 MHz
9: 100 MHz
12.1
12.08
12.06
12.04
12.02
11.98
1*10^6
1*10^7
1*10^8
D012
fOUT = 14 GHz / 4 = 3.5 GHz
Jitter = 49.4 fs (100 Hz - 100 MHz)
15
14.5
14
13.5
13
12.5
12
11.5
11
10.5
10
9.5
9
8.5
8
7.5
7
11.96
-500 -400 -300 -200 -100 0
100
Time (Ps)
200
300
400
500
D010
Figure 10. VCO Ramping 12-GHz to 12.125-GHz Calibration
Free
8.5
8
Frequency (GHz)
7.5
7
6.5
6
5.5
1: -2.1 Ps
2: 2.9 Ps
3: 3.7 Ps
4: 17.7 Ps
5: 31.5 Ps
5
4.5
4
0
1
2
3
4
5
6
Time (ms)
7
8
9
3.5
-10
10
-5
-84
7.5
-88
Phase Noise (dBc/Hz)
-80
8
7
6.5
6
5.5
1: -200 ns 3.4745 GHz
2: 400 ns 7.4476 GHz
3: 1.1 Ps 7.4437 GHz
4: 10.2 Ps 7.0531 GHz
5: 25 Ps 7.0382 GHz
4
3.5
-10
-5
0
5
10
15
20
Time (Ps)
10
25
30
35
15
20
Time (Ps)
25
30
35
40
D008
Figure 12. VCO Unassisted Calibration
8.5
4.5
5
3.7177 GHz
7.5832 GHz
7.5845 GHz
6.9996 GHz
6.9991 GHz
CalTime = 33.6 µs = 5.8 µs (Core) + 14 µs (Fcal) + 13.8 µs
(Ampcal)
fOSC = 200 MHz, fPD = 100 MHz, fVCO = 7.5 - 14 GHz, CHDIV = 2
Figure 11. VCO Ramping 7.5-GHz to 15-GHz Triangle Wave
With VCO Calibration
5
0
D013
The glitches in the plot are due to the inability of the measurement
equipment to track the VCO while calibrating.
Frequency (GHz)
2: 2 Ps 12.1255 GHz
12.12
Figure 9. Closed-Loop Phase Noise at 3.5 GHz
Frequency (GHz)
1: -95.988 ns 12.0006 GHz
12.14
12
Offset (Hz)
fOSC = 100 MHz
fPD = 200 MHz
fVCO = 14 GHz
12.16
-149.5 dBc/Hz
-150.9 dBc/Hz
-151.1 dBc/Hz
-127.8 dBc/Hz
Frequency (GHz)
Phase Noise (dBc/Hz)
Typical Characteristics (continued)
Flicker (PLL 1/f =-129.2 dBc/Hz)
Flat (FOM = -236.2 dBc/Hz)
Modeled Phase Noise
Measurement
-92
-96
-100
-104
-108
-112
-116
40
D009
CalTime = 25.2 µs = 1.3 µs (Core) + 9.1 µs (Fcal) +14.8 µs
(Ampcal)
fOSC = 200 MHz, fPD = 100 MHz, fVCO = 7.5 GHz - 14 GHz, CHDIV
=2
Figure 13. VCO Calibration With Partial Assist
-120
100
1000
10000
Offset (Hz)
fVCO = 12 GHz
100000
D014
fPD = 100 MHz
Figure 14. Calculation of PLL Noise Metrics
Submit Documentation Feedback
Copyright © 2017–2019, Texas Instruments Incorporated
Product Folder Links: LMX2594
15
�LMX2594
SNAS696C – MARCH 2017 – REVISED APRIL 2019
www.ti.com
Typical Characteristics (continued)
-80
-80
Fpd=100 MHz
Fpd=200 MHz
Fpd=400 MHz
-88
-96
Phase Noise (dBc/Hz)
Phase Noise (dBc/Hz)
-96
-104
-112
-120
-128
-136
-104
-112
-120
-128
-136
-144
-144
-152
-152
-160
100
1000
10000
100000
Offset (Hz)
1000000
Ta=25
Ta=-40
Ta=85
-88
-160
10000
1E+7 5E+7
fOSC = 200 MHz
fVCO = 14.8 GHz
Power (dBm)
Phase Noise Variation (dB)
0.8
0.4
0
-0.4
-0.8
-1.2
-1.6
100000
1000000
14
13
12
11
10
9
8
7
6
5
4
3
2
1
0
1E+72E+7 5E+71E+8
Offset (Hz)
Resistor Pull-up
Inductor Pull-Up
3
4
5
D017
6
7
8
9 10 11 12
Output Frequency (GHz)
Single-Ended Output
13
14
15
D018
OUTx_PWR = 50
Figure 18. Output Power Across Frequency
0
14
13
12
11
10
9
8
7
6
5
4
3
2
1
0
Ta=-40
Ta=25
Ta=85
-1
Normalized Output Power (dB)
Power (dBm)
Figure 17. CHANGE in 8-GHz VCO Phase Noise Over
Temperature
-2
-3
-4
-5
-6
-7
-8
-9
RF_out = 8 GHz
-10
3
4
5
6
7
8
9 10 11
Frequency (GHz)
12
13
14
15
0
D019
Single-ended output with resistor pullup and OUTx_PWR = 50.
Note that Near 13.3 to 14.3 GHz, output power can be impacted at
hot temperature. See the Application Information section for more
information.
Figure 19. Output Power vs Temperature
16
D016
Figure 16. VCO Phase Noise Over Temperature
Ta=25
Ta=-40
Ta=85
1.2
1E+72E+7 5E+71E+8
fVCO = 8 GHz, Narrow Loop Bandwidth ( 1), the input frequency to this divider is limited to 250 MHz.
7.3.2.5 State Machine Clock
The state machine clock is a divided down version of the OSCin signal that is used internally in the device. This
divide value is 1, 2, 4, or 8, and is determined by CAL_CLK_DIV programming word (described in the
Programming section). This state machine clock impacts various features like the lock detect delay, VCO
calibration, and ramping. The state machine clock is calculated as fsmclk = fOSC / 2CAL_CLK_DIV.
7.3.3 PLL Phase Detector and Charge Pump
The phase detector compares the outputs of the Post-R divider and N-divider, and generates a correction current
corresponding to the phase error until the two signals are aligned in-phase. This charge-pump current is software
programmable to many different levels, allowing modification of the closed-loop bandwidth of the PLL. See the
Application Information section for more information.
20
Submit Documentation Feedback
Copyright © 2017–2019, Texas Instruments Incorporated
Product Folder Links: LMX2594
�LMX2594
www.ti.com
SNAS696C – MARCH 2017 – REVISED APRIL 2019
Feature Description (continued)
7.3.4 N-Divider and Fractional Circuitry
The N-divider includes fractional compensation and can achieve any fractional denominator from 1 to (232 – 1).
The integer portion of N is the whole part of the N-divider value, and the fractional portion, Nfrac = NUM / DEN, is
the remaining fraction. In general, the total N-divider value is determined by N + NUM / DEN. The N, NUM and
DEN are software programmable. The higher the denominator, the finer the resolution step of the output. For
example, even when using fPD = 200 MHz, the output can increment in steps of 200 MHz / (232 – 1) = 0.047 Hz.
Equation 2 shows the relationship between the phase detector and VCO frequencies. Note that in SYNC mode,
there is an extra divider that is not shown in Equation 2.
NUM ·
§
fVCO fpd u ¨ N
DEN ¸¹
©
(2)
The sigma-delta modulator that controls this fractional division is also programmable from integer mode to fourth
order. To make the fractional spurs consistent, the modulator is reset any time that the R0 register is
programmed.
The N-divider has minimum value restrictions based on the modulator order and VCO frequency. Furthermore,
the PFD_DLY_SEL bit must be programmed in accordance to the Table 2.
Table 2. Minimum N-Divider Restrictions
MASH_ORDER
fVCO (MHz)
MINIMUM N
PFD_DLY_SEL
≤ 12500
28
1
> 12500
32
2
≤ 10000
28
1
10000-12500
32
2
>12250
36
3
≤ 10000
32
2
>10000
36
3
≤ 10000
36
3
>10000
40
4
≤ 10000
44
5
>10000
48
6
0
1
2
3
4
7.3.5 MUXout Pin
The MUXout pin can be used to readback programmable states of the device or for lock detect.
Table 3. MUXout Pin Configurations
MUXOUT_SEL
FUNCTION
0
Readback
1
Lock Detect
7.3.5.1 Lock Detect
The MUXout pin can be configured for lock detect done in by reading back the rb_LD_VTUNE field or using the
pin as shown in the Table 4.
Table 4. Configuring the MUXout Pin for Lock Detect
FIELD
PROGRAMMING
DESCRIPTION
LD_TYPE
0 = VCO Calibration Status
1 = Indirect Vtune
Select Lock Detect Type.
LD_DLY
0 to 65535
Only valid for Vtune lock detect. This is a delay in state machine cycles.
OUT_MUTE
0 = Disabled
1 = Enabled
Turns off outputs when lock detect is low.
Submit Documentation Feedback
Copyright © 2017–2019, Texas Instruments Incorporated
Product Folder Links: LMX2594
21
�LMX2594
SNAS696C – MARCH 2017 – REVISED APRIL 2019
www.ti.com
VCO calibration status lock detect works by indicating a low signal on the MUXout pin whenever the VCO is
calibrating or the LD_DLY counter is running. The delay from the LD_DLY is added to the true VCO calibration
time (tVCOCAL), so it can be used to account for the analog lock time of the PLL.
Indirect Vtune lock detect is based on internally generated voltage that is related to (but not the same as) the
Vtune voltage of the charge pump. It indicates a high signal on MUXout pin or reads back state 2 of
rb_LD_VTUNE when the device is locked.
7.3.5.2 Readback
The MUXout pin can be configured to read back useful information from the device. Common uses for readback
are:
1. Read back registers to ensure that they have been programmed to the correct value.
2. Read back the lock detect status to determine if the PLL is in lock.
3. Read back VCO calibration information so that it can be used to improve the lock time.
4. Read back information to help troubleshoot.
7.3.6 VCO (Voltage-Controlled Oscillator)
The LMX2594 includes a fully integrated VCO. The VCO takes the voltage from the loop filter and converts this
into a frequency. The VCO frequency is related to the other frequencies is shown in Equation 3:
fVCO = fPD × N divider
(3)
7.3.6.1 VCO Calibration
To reduce the VCO tuning gain and therefore improve the VCO phase-noise performance, the VCO frequency
range is divided into several different frequency bands. The entire range, 7.5 to 15 GHz, covers an octave that
allows the divider to take care of frequencies below the lower bound. This creates the need for frequency
calibration to determine the correct frequency band given a desired output frequency. The frequency calibration
routine is activated any time that the R0 register is programmed with the FCAL_EN = 1. It is important that a
valid OSCin signal must present before VCO calibration begins.
The VCO also has an internal amplitude calibration algorithm to optimize the phase noise which is also activated
any time the R0 register is programmed.
The optimum internal settings for this are temperature dependent. If the temperature is allowed to drift too much
without being recalibrated, some minor phase noise degradation could result. The maximum allowable drift for
continuous lock, ΔTCL, is stated in the electrical specifications. For this device, a number of 125°C means the
device never loses lock if the device is operated under the Recommended Operating Conditions.
22
Submit Documentation Feedback
Copyright © 2017–2019, Texas Instruments Incorporated
Product Folder Links: LMX2594
�LMX2594
www.ti.com
SNAS696C – MARCH 2017 – REVISED APRIL 2019
The LMX2594 allows the user to assist the VCO calibration. In general, there are three kinds of assistance, as
shown in Table 5:
Table 5. Assisting the VCO Calibration Speed
ASSISTANCE LEVEL
DESCRIPTION
PROGRAMMABLE SETTINGS
No assist
User does nothing to improve VCO calibration speed, but the user-specified
VCO_SEL, VCO_DACISET_STRT and VCO_CAPCTRL_STRT values do
affect the starting point of VCO calibration. For oscillation to start up
properly and for VCO to calibrate correctly, TI recommends setting
VCO_SEL = 7, VCO_DACISET_STRT = 300 and VCO_CAPCTRL_STRT =
183 for all frequencies except 11.9 GHz ~ 12.1 GHz. For frequencies within
11.9 ~ 12.1 GHz, user must use VCO_SEL = 4 for proper VCO calibration.
QUICK_RECAL_EN=0
VCO_SEL_FORCE=0
VCO_DACISET_FORCE=0
VCO_CAPCTRL_FORCE=0
Partial assist
Upon every frequency change, before the FCAL_EN bit is checked, the
user provides the initial starting point for the VCO core (VCO_SEL), band
(VCO_CAPCTRL_STRT), and amplitude (VCO_DACISET_STRT) based on
Table 6.
QUICK_RECAL_EN=0
VCO_SEL_FORCE=0
VCO_DACISET_FORCE=0
VCO_CAPCTRL_FORCE=0
Upon initialization of the device, user enables QUICK_RECAL_EN bit.
Close Frequency Assist The VCO uses the current VCO_CAPCTRL and VCO_DACISET_STRT
settings as the initial starting point.
QUICK_RECAL_EN=1
VCO_SEL_FORCE=0
VCO_DACISET_FORCE=0
VCO_CAPCTRL_FORCE=0
The user forces the VCO core (VCO_SEL), amplitude settings
(VCO_DACISET), and frequency band (VCO_CAPCTRL) and manually
sets the value. If the two frequency points are no more than 5MHz apart
and on the same VCO core, the user can set the VCO amplitude and
capcode for any frequency between those two points using linear
interpolation.
QUICK_RECAL_EN=0
VCO_SEL_FORCE=1
VCO_DACISET_FORCE=1
VCO_CAPCTRL_FORCE=1
Full assist
To do the partial assist for the VCO calibration, follow this procedure:
1. Determine the VCO Core
Find a VCO Core that includes the desired VCO frequency. If at the boundary of two cores, choose one
based on phase noise or performance.
2. Calculate the VCO CapCode as follows:
VCO_CAPCTRL_STRT = round (CCoreMin – (CCoreMin – CCoreMax) × (fVCO – fCoreMin) / (fCoreMax – fCoreMin))
3. Get the VCO amplitude setting from Table 6.
VCO_DACISET_STRT = round (ACoreMin + (ACoreMax – ACoreMin) × (fVCO – fCoreMin)/(fCoreMax – fCoreMin))
Table 6. VCO Core Ranges
VCO CORE
fCoreMin
fCoreMax
CCoreMin
CCoreMax
ACoreMin
ACoreMax
VCO1
7500
8600
164
12
299
240
VCO2
8600
9800
165
16
356
247
VCO3
9800
10800
158
19
324
224
VCO4
10800
12000
140
0
383
244
VCO5
12000
12900
183
36
205
146
VCO6
12900
13900
155
6
242
163
VCO7
13900
15000
175
19
323
244
SPACE
NOTE
In the range of 11900 MHz to 12100 MHz, VCO assistance cannot be used, and the
settings must be: VCO_SEL = 4, VCO_DACISET_STRT = 300, and
VCO_CAPCTRL_STRT = 1. Outside this range, in the partial assist for the VCO
calibration, the VCO calibration runs. This means that if the settings are incorrect, the
VCO still locks with the correct settings. The only consequence is that the calibration time
might be a little longer. The closer the calibration settings are to the true final settings, the
faster the VCO calibration will be.
Submit Documentation Feedback
Copyright © 2017–2019, Texas Instruments Incorporated
Product Folder Links: LMX2594
23
�LMX2594
SNAS696C – MARCH 2017 – REVISED APRIL 2019
www.ti.com
7.3.6.2 Determining the VCO Gain
The VCO gain varies between the seven cores and is the lowest at the lowest end of the band and highest at the
highest end of each band. For a more accurate estimation, use Table 7:
Table 7. VCO Gain
CORE
f1
f2
Kvco1
Kvco2
VCO1
7500
8600
73
114
VCO2
8600
9800
61
121
VCO3
9800
10800
98
132
VCO4
10800
12000
106
141
VCO5
12000
12900
170
215
VCO6
12900
13900
172
218
VCO7
13900
15000
182
239
Based on Table 7, Equation 4 can estimate the VCO gain for an arbitrary VCO frequency of fVCO:
Kvco = Kvco1 + (Kvco2 – Kvco1) × (fVCO – f1) / (f2 – f1)
(4)
7.3.7 Channel Divider
To go below the VCO lower bound of 7.5 GHz, the channel divider can be used. The channel divider consists of
four segments, and the total division value is equal to the multiplication of them. Therefore, not all values are
valid.
VCO
1/2
Divide by
2 or 3
Divide by
2,4,6,8
Divide by
2,4,6,8,16
MUX
RFoutA
MUX
RFoutB
MUX
Figure 24. Channel Divider
When the channel divider is used, there are limitations on the values. Table 8 shows how these values are
implemented and which segments are used.
24
Submit Documentation Feedback
Copyright © 2017–2019, Texas Instruments Incorporated
Product Folder Links: LMX2594
�LMX2594
www.ti.com
SNAS696C – MARCH 2017 – REVISED APRIL 2019
Table 8. Channel Divider Segments
EQUIVALENT
DIVISION
VALUE
FREQUENCY
LIMITATION
OutMin (MHz)
OutMax (MHz)
CHDIV[4:0]
SEG0
SEG1
SEG2
SEG3
3750
7500
0
2
1
1
1
1875
3750
1
2
2
1
1
6
1250
2500
2
2
3
1
1
2
4
None
8
937.5
1437.5
3
2
2
2
1
12
625
958.333
4
2
3
2
1
16
468.75
718.75
5
2
2
4
1
24
312.5
479.167
6
2
2
6
1
32
234.375
359.375
7
2
2
8
1
48
156.25
239.583
8
2
3
8
1
64
117.1875
179.6875
9
2
2
8
2
72
fVCO ≤ 11.5 GHz
104.167
159.722
10
2
3
6
2
96
78.125
119.792
11
2
3
8
2
128
58.594
89.844
12
2
2
8
4
192
39.0625
59.896
13
2
2
8
6
256
29.297
44.922
14
2
2
8
8
384
19.531
29.948
15
2
3
8
8
512
14.648
22.461
16
2
2
8
16
768
9.766
14.974
17
2
3
8
16
n/a
n/a
18-31
n/a
n/a
n/a
n/a
Invalid
n/a
The channel divider is powered up whenever an output (OUTx_MUX) is selected to the channel divider or
SysRef, regardless of whether it is powered down or not. When an output is not used, TI recommends selecting
the VCO output to ensure that the channel divider is not unnecessarily powered up.
Table 9. Channel Divider
OUTA MUX
OUTB MUX
CHANNEL DIVIDER
Channel Divider
X
Powered up
X
Channel Divider or SYSREF
Powered up
All Other Cases
Powered down
7.3.8 Output Buffer
The RF output buffer type is open collector and requires an external pullup to Vcc. This component may be a 50Ω resistor to target 50-Ω output impedance match, or an inductor for higher output power at the expense of the
output impedance being far from 50 Ω. If inductor is used, it is recommended to follow with resistive pad for
better impedance matching. The current to the output buffer increases for states 0 to 31 and then again from
states 48 to 63. States 32 to 47 are redundant and mimic states 16 to 31. If using a resistor, limit the
OUTx_PWR setting to 50. Higher settings may actually reduce power due to the voltage drop across the resistor.
Table 10. OUTx_PWR Recommendations for Resistor Pullup
RECOMMENDATION
fOUT
COMMENTS
HIGHEST POWER
LOWEST NOISE
FLOOR
10 MHz ≤ fOUT < 13.3 GHz
OUTx_PWR = 50
OUTx_PWR = 50
-
13.3 GHz ≤ fOUT ≤ 14.3 GHz
OUTx_PWR = 15
OUTx_PWR = 15
TI recommends to set OUTx_PWR ≤ 15 to avoid
the power drop at hot temperature.
14.3 GHz < fOUT ≤ 15 GHz
OUTx_PWR = 31
OUTx_PWR = 20
-
Submit Documentation Feedback
Copyright © 2017–2019, Texas Instruments Incorporated
Product Folder Links: LMX2594
25
�LMX2594
SNAS696C – MARCH 2017 – REVISED APRIL 2019
www.ti.com
7.3.9 Power-Down Modes
The LMX2594 can be powered up and down using the CE pin or the POWERDOWN bit. When the device comes
out of the powered down state, either by resuming the POWERDOWN bit to zero or by pulling back CE pin
HIGH, register R0 must be programmed with FCAL_EN high again to re-calibrate the device.
7.3.10 Phase Synchronization
7.3.10.1 General Concept
The SYNC pin allows one to synchronize the LMX2594 such that the delay from the rising edge of the OSCin
signal to the output signal is deterministic. Initially, the devices are locked to the input, but are not synchronized.
The user sends a synchronization pulse that is reclocked to the next rising edge of the OSCin pulse. After a
given time, t1, the phase relationship from OSCin to fOUT will be deterministic. This time is dominated by the sum
of the VCO calibration time, the analog setting time of the PLL loop, and the MASH_RST_CNT if used in
fractional mode.
...
Device 1
SYNC
...
Device 2
...
...
fOSC
t2
t1
Figure 25. Devices Are Now Synchronized to OSCin Signal
When the SYNC feature is enabled, part of the channel divide may be included in the feedback path. This will be
referred to as IncludedDivide
Table 11. IncludedDivide With VCO_PHASE_SYNC = 1
OUTx_MUX
OUTA_MUX = OUTB_MUX = 1 ("VCO")
All Other Valid Conditions
26
CHANNEL DIVIDER
INCLUDEDDIVIDE
Don't Care
1
Divisible by 3, but NOT 24 or 192
SEG0 × SEG1 = 6
All other values
SEG0 × SEG1 = 4
Submit Documentation Feedback
Copyright © 2017–2019, Texas Instruments Incorporated
Product Folder Links: LMX2594
�LMX2594
www.ti.com
SNAS696C – MARCH 2017 – REVISED APRIL 2019
External loop filter
OSCin
Doubler
Pre-R
Divider
XM
R
Divider
I
Charge
Pump
MUX
RFoutA
MUX
RFoutB
SEG0
SEG2
SEG1
SEG3
N Divider
Figure 26. Phase SYNC Diagram
7.3.10.2 Categories of Applications for SYNC
The requirements for SYNC depend on certain setup conditions. In cases that the SYNC is not timing critical, it
can be done through software by toggling the VCO_PHASE_SYNC bit from 0 to 1. When it is timing critical, then
it must be done through the pin and the setup and hold times for the OSCin pin are critical. Figure 27 gives the
different categories.
Submit Documentation Feedback
Copyright © 2017–2019, Texas Instruments Incorporated
Product Folder Links: LMX2594
27
�LMX2594
SNAS696C – MARCH 2017 – REVISED APRIL 2019
www.ti.com
Start
NO
CHDIV 1, additional constraints may
be necessary to produce a monotonic relationship between MASH_SEED and the phase shift, especially
when the VCO frequency is below 10 GHz. These constraints are application specific, but some general
guidelines are to reduce modulator order and increase the N divider. One possible guideline is for PLL_N ≥
45 (2nd order modulator), PLL_N ≥ 49 (3rd Order modulator), PLL_N ≥ 54 (4th Order Modulator).
Submit Documentation Feedback
Copyright © 2017–2019, Texas Instruments Incorporated
Product Folder Links: LMX2594
29
�LMX2594
SNAS696C – MARCH 2017 – REVISED APRIL 2019
www.ti.com
7.3.12 Fine Adjustments for Phase Adjust and Phase SYNC
Phase SYNC refers to the process of getting the same phase relationship for every power-up cycle and each
time assuming that a given programming procedure is followed. However, there are some adjustments that can
be made to get the most accurate results. As for the consistency of the phase SYNC, the only source of variation
could be if the VCO calibration chooses a different VCO core and capacitor, which can introduce a bimodal
distribution with about 10 ps of variation. If this 10 ps is not desirable, then it can be eliminated by reading back
the VCO core, capcode, and DACISET values and forcing these values to ensure the same calibration settings
every time. The delay through the device varies from part to part and can be on the order of 60 ps. This part to
part variation can be calibrated out with the MASH_SEED. The variation in delay through the device also
changes on the order of +2.5 ps/°C, but devices on the same board likely have similar temperatures, so this will
somewhat track. In summary, the device can be made to have consistent delay through the part and there are
means to adjust out any remaining errors with the MASH_SEED. This tends only to be an issue at higher output
frequencies when the period is shorter.
7.3.13 Ramping Function
The LMX2594 supports the ability to make ramping waveforms using manual mode or automatic mode. In
manual mode, the user defines a step and uses the RampClk and RampDir pins to create the ramp. In automatic
mode, the user sets up the ramp with up to two linear segments in advance and the device automatically creates
this ramp. Table 12 fields apply in both automatic mode and manual pin mode.
Table 12. Ramping Field Descriptions
FIELD
PROGRAMMING
DESCRIPTION
GENERAL COMMANDS
0 = Disabled
1 = Enabled
RAMP_EN must be 1 for any ramping functions to work.
0 = Automatic ramping mode
1 = Manual pin ramping mode
In automatic ramping mode, the ramping is automatic and the
clock is based on the phase detector. In manual pin ramping
mode, the clock is based on rising edges on the RampClk
pin.
RAMPx_INC
0 to 230 – 1
This is the amount the fractional numerator is increased for
each phase detector cycle in the ramp.
RAMPx_DLY
0 to 65535
RAMP_EN
RAMP_MANUAL
This is the length of the ramp in phase detector cycles.
DEALING WITH VCO CALIBRATION
RAMP_THRESH
0 to ± 233 – 1
Whenever the fractional numerator changes this much (either
positive or negative) because the VCO was last calibrated,
the VCO is forced to recalibrate.
RAMP_TRIG_CAL
0 = Disabled
1 = Enabled
When enabled, the VCO is forced to recalibrate at the
beginning each ramp.
PLL_DEN
4294967295
In ramping mode, the denominator must be fixed to this
forced value of 232 – 1. However, the effective denominator in
ramping mode is 224.
0
This must be zero to avoid interfering with calibration.
LD_DLY
RAMP LIMITS
RAMP_LIMIT_LOW
RAMP_LIMIT_HIGH
30
0 to ± 233 – 1
2’s complement of the total value of the ramp low and high
limits can never go beyond. If this value is exceeded, then the
frequency is limited.
Submit Documentation Feedback
Copyright © 2017–2019, Texas Instruments Incorporated
Product Folder Links: LMX2594
�LMX2594
www.ti.com
SNAS696C – MARCH 2017 – REVISED APRIL 2019
Table 13. General Restrictions for Ramping
RULE
RESTRICTION
fOSC/2CAL_CLK_DIV
≤ fPD≤
125 MHz
Phase Detector
Frequency
EXPLANATION
Minimum Phase Detector Frequency when Ramping
The phase detector frequency cannot be less than the state machine clock
frequency, which is calculated from expression on the left-hand side of the
inequality. This is satisfied provided there is no division in the input path.
However, if the PLL R-divider is used, it is necessary to adjust CAL_CLK_DIV
to adjust the state machine clock frequency. This also implies a maximum R
divide of 8 this is the maximum value of 2CAL_CLK_DIV.
Maximum Phase Detector Frequency
TI recommends to set the phase-detector frequency ≤ 125 MHz because, if
the phase detector frequency is too high, it can lead to distortion in the ramp.
Higher phase-detector frequency may be possible, but this distortion is
application specific.
7.3.13.1 Manual Pin Ramping
Manual pin ramping is enabled by setting RAMP_EN = 1 and RAMP_MANUAL = 1. The rising edges are applied
to the RampClk pin are reclocked to the phase detector frequency. The RampDir pin controls the size of the
change. If a rising edge is seen on the RampClk pin while the VCO is calibrating, then this rising edge is ignored.
The frequency for the RampClk must be limited to a frequency of 250 kHz or less, and the rising edge of the
RampDir signal must be targeted away from the rising edges of the RampCLK pin.
Table 14. RAMP_INC
RampDir PIN
STEP SIZE
Low
Add RAMP0_INC
High
Add RAMP1_INC
7.3.13.1.1 Manual Pin Ramping Example
In this ramping example, assume that we want to use the pins for UP/Down control of the ramp for 10-MHz steps
and the phase detector is 100 MHz.
Table 15. Step Ramping Example
FIELD
RAMP_EN
RAMP_MANUAL
PROGRAMMING
DESCRIPTION
1 = Enabled
1 = Manual pin ramping mode
RAMP0_INC
1677722
(10 MHz )/ (100 MHz) × 16777216 = 1677722
2’s complement = 1677722
RAMP1_INC
1072064102
(–10 MHz )/ (100 MHz) × 16777216 = –1677722
2’s complement = 230 – 1677722 = 1072064102
1
Recalibrate at every clock cycle
RAMP_TRIG_CAL
Submit Documentation Feedback
Copyright © 2017–2019, Texas Instruments Incorporated
Product Folder Links: LMX2594
31
�LMX2594
www.ti.com
Output Frequency
SNAS696C – MARCH 2017 – REVISED APRIL 2019
RampClk/Trig1 Pin
time
RampDir/Trig2 Pin
time
time
Figure 28. Step Ramping Example
32
Submit Documentation Feedback
Copyright © 2017–2019, Texas Instruments Incorporated
Product Folder Links: LMX2594
�LMX2594
www.ti.com
SNAS696C – MARCH 2017 – REVISED APRIL 2019
7.3.13.2 Automatic Ramping
Automatic ramping is enabled when RAMP_EN = 1 and RAMP_MANUAL = 0. The action of programming FCAL
= 1 starts the ramping. In this mode, there are two ramps that one can use to set the length and frequency
change. In addition to this, there are ramp limits that can be used to create more complicated waveforms.
Automatic ramping can really be divided into two classes depending on if the VCO must calibrate in the middle of
the ramping waveform or not. If the VCO can go the entire range without calibrating, this is calibration-free
ramping, which is shown in Typical Characteristics. Note that this range is less at hot temperatures and for lower
frequency VCOs. This range is not ensured, so margin must be built into the design.
For waveforms that are NOT calibration free, the slew rate of the ramp must be kept less than 250 kHz/µs. Also,
for all automatic ramping waveforms, be aware that there is a very small phase disturbance as the VCO crosses
over the integer boundary, so one might consider using the input multiplier to avoid these or timing the VCO
calibrations at integer boundaries.
Table 16. Automatic Ramping Field Descriptions
FIELD
PROGRAMMING
DESCRIPTION
RAMP_DLY
0 = One clock cycle
1 = Two clock cycles
Normally, the ramp clock is equal to the phase detector frequency.
When this feature is enabled, it reduces the ramp clock by a factor of
2.
RAMP0_LEN
RAMP1_LEN
0 to 65535
This is the length of the ramp in clock cycles. Note that the VCO
calibration time is added to this time.
RAMP0_INC
RAMP1_INC
0 to 230 – 1
2’s complement of the value for the ramp increment.
RAMP0_NEXT
RAMP1_NEXT
0 = RAMP0
1 = RAMP1
Defines which ramp comes after the current ramp.
0
1
2
3
Determines what triggers the action of the next ramp occurrence.
RAMP0_NEXT_TRIG
RAMP1_NEXT_TRIG
RAMP_TRIG_A
RAMP_TRIG_B
RAMP0_RST
RAMP1_RST
RAMP_BURST_COUNT
RAMP_BURST_TRIG
= Timeout counter
= Trigger A
= Trigger B
= Reserved
0 = Disabled
1 = RampClk rising edge
2 = RampDir rising edge
4 = Always triggered
9 = RampClk falling edge
10 = RampDir falling edge
All other States = invalid
This field defines the ramp trigger.
0 = Disabled
1 = Enabled
Enabling this bit causes the ramp to reset to the original value when
the ramping started. This is useful for roundoff errors.
0 to 8191
This is the number the ramping pattern repeats and only applies for a
terminating ramping pattern.
0 = Ramp Transition
1 = Trigger A
2 = Trigger B
This defines what causes the RAMP_COUNT to increment.
3 = Reserved
Submit Documentation Feedback
Copyright © 2017–2019, Texas Instruments Incorporated
Product Folder Links: LMX2594
33
�LMX2594
SNAS696C – MARCH 2017 – REVISED APRIL 2019
www.ti.com
7.3.13.2.1 Automatic Ramping Example (Triangle Wave)
Suppose user wants to generate a sawtooth ramp that goes from 8 to 10 GHz in 2 ms (including calibration
breaks) with a phase-detector frequency of 50 MHz. Divide this into segments of 50 MHz where the VCO ramps
for 25 µs, then calibrates for 25 µs, for a total of 50 µs. There would therefore be 40 such segments which span
over a 2-GHz range and would take 2 ms, including calibration time.
Table 17. Sawtooth Ramping Example
FIELD
RAMP_EN
RAMP_MANUAL
RAMP_TRIG_CAL
RAMP_THRESH
PROGRAMMING
DESCRIPTION
1 = Enabled
0 = Automatic ramping
mode
0 = Disabled
16777216 (= 50-MHz
ramp_thresh)
50 MHz / 50 MHz × 224 = 16777216
RAMP_DLY
0 = 1 clock cycle
RAMPx_LEN
50000
1000 µs × 50 MHz = 50000
RAMP0_INC
13422
(2000 MHz) / (50 MHz) × 224 / 50000 = 13422
RAMP1_INC
1073728402
(–2000 MHz) / (50 MHz) × 224 / 50000 = –13422
2’s complement = 230 – 13422 = 1073728402
RAMP0_NEXT
1 = RAMP1
RAMP1_NEXT
0 = RAMP0
RAMPx_NEXT_TRIG
0 = Timeout counter
RAMP_TRIG_x
0 = Disabled
RAMP0_RST
1 = Enabled
Not necessary, but good practice to reset.
RAMP1_RST
0 = Disabled
Do not reset this, or ramp does not work.
RAMP_BURST_COUNT
RAMP_BURST_TRIG
0
0 = Ramp Transition
NOTE
To calculate ramp_scale_count and ramp_dly_cnt, remember that the desired calibration
time is 25 µs.
10
GHz
RA
MP
RA 0
1
MP
MP
RA 0
8 GHz
2 ms
time
4 ms
Figure 29. Triangle Waveform Example
34
Submit Documentation Feedback
Copyright © 2017–2019, Texas Instruments Incorporated
Product Folder Links: LMX2594
�LMX2594
www.ti.com
SNAS696C – MARCH 2017 – REVISED APRIL 2019
7.3.14 SYSREF
The LMX2594 can generate a SYSREF output signal that is synchronized to fOUT with a programmable delay.
This output can be a single pulse, series of pulses, or a continuous stream of pulses. To use the SYSREF
capability, the PLL must first be placed in SYNC mode with VCO_PHASE_SYNC = 1.
fOUT
fVCO
To Phase
Detector
MUX
Rest of Channel
Divider
IncludedDivide
RFoutA
N Divider
fINTERPOLATOR
Divider
(SYSREF_DIV_PRE)
SysRefReq Pin
Divider
(SYSREF_DIV)
1/2
fSYSREF
Delay Circuit
RFoutB
Re-clocking
Circuit
Figure 30. SYSREF Setup
As Figure 30 shows, the SYSREF feature uses IncludedDivide and SYSREF_DIV_PRE divider to generate
fINTERPOLATOR. This frequency is used for reclocking of the rising and falling edges at the SysRefReq pin. In
master mode, the fINTERPOLATOR is further divided by 2 × SYSREF_DIV to generate finite series or continuous
stream of pulses.
Table 18. SYSREF Setup
PARAMETER
MIN
fVCO
fINTERPOLATOR
MAX
UNIT
7.5
15
GHz
0.8
1.5
GHz
IncludedDivide
TYP
4 or 6
SYSREF_DIV_PRE
1, 2, or 4
SYSREF_DIV
4,6,8, ... , 4098
fINTERPOLATOR
fINTERPOLATOR = fVCO / (IncludedDivide ×
SYSREF_DIV_PRE)
fSYSREF
fSYSREF = fINTERPOLATOR / (2 × SYSREF_DIV)
Delay step size
9
Pulses for pulsed mode (SYSREF_PULSE_CNT)
0
ps
15
n/a
The delay can be programmed using the JESD_DAC1_CTRL, JESD_DAC2_CTRL, JESD_DAC3_CTRL, and
JESD_DAC4_CTRL words. By concatenating these words into a larger word called "SYSREFPHASESHIFT", the
relative delay can be found. The sum of these words should always be 63.
Submit Documentation Feedback
Copyright © 2017–2019, Texas Instruments Incorporated
Product Folder Links: LMX2594
35
�LMX2594
SNAS696C – MARCH 2017 – REVISED APRIL 2019
www.ti.com
Table 19. SysRef Delay
SYSREFPHASESHIFT
DELAY
JESD_DAC1
JESD_DAC2
JESD_DAC3
JESD_DAC4
0
Minimum
36
27
0
0
0
0
36
0
63
0
0
37
62
1
0
0
99
0
0
63
0
100
0
0
62
1
161
0
0
1
62
162
0
0
0
63
163
1
0
0
62
225
63
0
0
0
226
62
1
0
0
...
...
...
247
Maximum
41
22
0
0
> 247
Invalid
Invalid
Invalid
Invalid
Invalid
7.3.14.1 Programmable Fields
Table 20 has the programmable fields for the SYSREF functionality.
Table 20. SYSREF Programming Fields
FIELD
SYSREF_EN
0: Disabled
1: Enabled
DEFAULT
0
DESCRIPTION
Enables the SYSREF mode. SYSREF_EN
should be 1 if and only if OUTB_MUX = 2
(SysRef).
SYSREF_DIV_PRE
1: DIV1
2: DIV2
4: DIV4
Other states: invalid
SYSREF_REPEAT
0: Master mode
1: Repeater mode
0
In master mode, the device creates a series
of SYSREF pulses. In repeater mode,
SYSREF pulses are generated with the
SysRefReq pin.
0: Continuous mode
1: Pulsed mode
0
Continuous mode continuously makes
SYSREF pulses, where pulsed mode makes
a series of SYSREF_PULSE_CNT pulses.
0 to 15
4
In the case of using pulsed mode, this is the
number of pulses. Setting this to zero is an
allowable, but not practical state.
0: Divide by 4
1: Divide by 6
2: Divide by 8
...
2047: Divide by 4098
0
This is one of the dividers between the VCO
and SysRef output used in master mode.
SYSREF_PULSE
SYSREF_PULSE_CNT
SYSREF_DIV
36
PROGRAMMING
The output of this divider is fINTERPOLATOR.
Submit Documentation Feedback
Copyright © 2017–2019, Texas Instruments Incorporated
Product Folder Links: LMX2594
�LMX2594
www.ti.com
SNAS696C – MARCH 2017 – REVISED APRIL 2019
7.3.14.2 Input and Output Pin Formats
7.3.14.2.1 Input Format for SYNC and SysRefReq Pins
These pins are single-ended, but a differential signal can be converted to drive them. In the LVDS mode, if the
INPIN_FMT is set to LVDS mode, then the bias level can be adjusted with INPIN_LVL and the hysteresis can be
adjusted with INPIN_HYST.
VMIN
SYNC / SysRefReq
LMX2594
VMAX
Copyright © 2017, Texas Instruments Incorporated
Figure 31. Driving SYNC/SYSREF With Differential Signal
7.3.14.2.2 SYSREF Output Format
The SYSREF output comes in differential format through RFoutB. This will have a minimum voltage of about 2.3
V and a maximum of 3.3 V. If DC coupling cannot be used, there are two strategies for AC coupling.
3.3 V
SysRefOutP
Data
Converter
SysRefOutN
LMX2594
3.3 V
Copyright © 2017, Texas Instruments Incorporated
Figure 32. SYSREF Output
1. Send a series of pulses to establish a DC-bias level across the AC-coupling capacitor.
2. Establish a bias voltage at the data converter that is below the threshold voltage by using a resistive divider.
Submit Documentation Feedback
Copyright © 2017–2019, Texas Instruments Incorporated
Product Folder Links: LMX2594
37
�LMX2594
SNAS696C – MARCH 2017 – REVISED APRIL 2019
www.ti.com
7.3.14.3 Examples
The SysRef can be used in a repeater mode (SYSREF_REPEAT = 1), which just echos the SysRefReq pin, after
being reclocked to the fINTERPOLATOR frequency and then fOUT (from RFoutA).
RFoutAM
RFoutAP
OSCinM
OSCinP
SysRefReq
t1
RFoutBP
RFoutBM
t2
I
t1
I t2
Figure 33. SYSREF Out In Repeater Mode
In master mode (SYSREF_REPEAT = 0), rising and falling edges at the SysRefReq pin are first reclocked to the
fOSC, then fINTERPOLATOR, and finally to fOUT. A programmable number of pulses is generated with a frequency
equal to fVCO / (2 × IncludedDivide × SYSREF_DIV_PRE × SYSREF_DIV). In continuous mode
(SYSREF_PULSE = 0), the SysRefReq pin is held high to generate a continuous stream of pulses. In pulse
mode (SYSREF_PULSE = 1), a finite number of pulses determined by SYSREF_PULSE_CNT is sent for each
rising edge of the SysRefReq pin.
RFoutAM
RFoutAP
OSCinM
OSCinP
SysRefReq
RFoutBP
RFoutBM
I
I
Figure 34. Figure 1. SYSREF Out In Pulsed/Continuous Mode
38
Submit Documentation Feedback
Copyright © 2017–2019, Texas Instruments Incorporated
Product Folder Links: LMX2594
�LMX2594
www.ti.com
SNAS696C – MARCH 2017 – REVISED APRIL 2019
7.3.14.4 SYSREF Procedure
To
1.
2.
3.
use SYSREF, do the these steps:
Put the device in SYNC mode using the procedure already outlined.
Figure out IncludedDivide the same way it is done for SYNC mode.
Calculate the SYSREF_DIV_PRE value such that the interpolator frequency (fINTERPOLATOR) is in the range of
800 to 1500 MHz. fINTERPOLATOR = fVCO/IncludedDivide/SYSREF_DIV_PRE. Make this frequency a multiple of
fOSC if possible.
4. If using continuous mode (SYSREF_PULSE = 0), ensure the SysRefReq pin is high.
5. If using pulse mode (SYSREF_PULSE = 1), set up the pulse count as desired. Pulses are created by
toggling the SysRefReq pin.
6. Adjust the delay between the RFoutA and RFoutB signal using the JESD_DACx_CTL fields.
7.3.15 SysRefReq Pin
The SysRefReq pin can be used in CMOS all the time, or LVDS mode is also optional if SYSREF_REPEAT = 1.
LVDS mode cannot be used in master mode.
7.4 Device Functional Modes
Although there are a vast number of ways to configure this device, only one is really functional.
Table 21. Device Functional Modes
MODE
DESCRIPTION
RESET
Registers are held in their reset state. This device does have a
power on reset, but it is good practice to also do a software reset if
there is any possibility of noise on the programming lines, especially
if there is sharing with other devices. Also realize that there are
registers not disclosed in the data sheet that are reset as well.
RESET = 1, POWERDOWN = 0
Device is powered down.
POWERDOWN = 1
or CE Pin = Low
POWERDOWN
Normal operating mode
SYNC mode
SYSREF mode
SOFTWARE SETTINGS
This is used with at least one output on as a frequency synthesizer.
This is used where part of the channel divider is in the feedback path
VCO_PHASE_SYNC = 1
to ensure deterministic phase.
In this mode, RFoutB is used to generate pulses for SYSREF.
VCO_PHASE_SYNC =1,
SYSREF_EN = 1
Submit Documentation Feedback
Copyright © 2017–2019, Texas Instruments Incorporated
Product Folder Links: LMX2594
39
�LMX2594
SNAS696C – MARCH 2017 – REVISED APRIL 2019
www.ti.com
7.5 Programming
The LMX2594 is programmed using 24-bit shift registers. The shift register consists of a R/W bit (MSB), followed
by a 7-bit address field and a 16-bit data field. For the R/W bit, 0 is for write, and 1 is for read. The address field
ADDRESS[6:0] is used to decode the internal register address. The remaining 16 bits form the data field
DATA[15:0]. While CSB is low, serial data is clocked into the shift register upon the rising edge of clock (data is
programmed MSB first). When CSB goes high, data is transferred from the data field into the selected register
bank. See Figure 1 for timing details.
7.5.1 Recommended Initial Power-Up Sequence
For the most reliable programming, TI recommends this procedure::
1. Apply power to device.
2. Program RESET = 1 to reset registers.
3. Program RESET = 0 to remove reset.
4. Program registers as shown in the register map in REVERSE order from highest to lowest.
5. Wait 10 ms.
6. Program register R0 one additional time with FCAL_EN = 1 to ensure that the VCO calibration runs from a
stable state.
7.5.2 Recommended Sequence for Changing Frequencies
The recommended sequence for changing frequencies is as follows:
1. Change the N-divider value.
2. Program the PLL numerator and denominator.
3. Program FCAL_EN (R0[3]) = 1.
7.5.3 General Programming Requirements
Follow these requirements when programming the device:
1. For register bits that do not have field names in Table 23, it is necessary to program these values just as
shown in the register map.
2. Not all registers need to be programmed. Refer to Table 22 for details.
3. Power-on-reset register values may not be optimal, so it is always necessary to program all of the required
registers after powering on the device. Note that the 'Reset' column in register descriptions is the power-onreset value.
Table 22. Programming Requirement
40
Registers
Function
R107 – R112
Readback
These registers are for readback only and do not need to be programmed.
Comment
R79 – R106
Ramping
If ramping function is not used (RAMP_EN = 0), then these registers do not need to be
programmed.
R0 – R78
General
These registers need to be programmed for all scenarios.
Submit Documentation Feedback
Copyright © 2017–2019, Texas Instruments Incorporated
Product Folder Links: LMX2594
�LMX2594
www.ti.com
SNAS696C – MARCH 2017 – REVISED APRIL 2019
7.6 Register Maps
Table 23. Full Register Map
R/W
A6
A5
A4
A3
A2
A1
A0
D15
D14
VCO
_PH
ASE
_SY
NC
D13
D12
1
0
D11
D10
D9
0
1
OUT
_MU
TE
D8
D7
D5
D3
D2
D1
D0
1
FCA
L
_EN
MUX
OUT
_LD_
SEL
RES
ET
POW
ERD
OWN
R0
0
0
0
0
0
0
0
0
R1
0
0
0
0
0
0
0
1
0
0
0
0
1
0
0
0
0
0
0
0
1
CAL_CLK_DIV
R2
0
0
0
0
0
0
1
0
0
0
0
0
0
1
0
1
0
0
0
0
0
0
0
0
R3
0
0
0
0
0
0
1
1
0
0
0
0
0
1
1
0
0
1
0
0
0
0
1
0
R4
0
0
0
0
0
1
0
0
0
1
0
0
0
0
1
1
R5
0
0
0
0
0
1
0
1
0
0
0
0
0
0
0
0
1
1
0
0
1
0
0
0
R6
0
0
0
0
0
1
1
0
1
1
0
0
1
0
0
0
0
0
0
0
0
0
1
0
0
OUT
_FO
RCE
0
0
0
0
0
0
1
0
1
1
0
0
1
0
1
0
VCO
_CA
PCT
RL_F
ORC
E
0
0
0
0
0
0
0
0
0
0
0
0
1
1
0
0
0
0
0
0
1
0
0
1
0
1
1
0
0
0
1
0
0
0
0
0
0
0
0
0
0
0
1
1
1
1
1
0
0
0
0
0
0
0
1
1
1
ACAL_CMP_DLY
FCAL_LPFD
_ADJ
D4
RAMP
_EN
R7
FCAL_HPF
D_ADJ
D6
R8
0
0
0
0
1
0
0
0
0
VCO
_DA
CISE
T_F
ORC
E
R9
0
0
0
0
1
0
0
1
0
0
0
OSC
_2X
R10
0
0
0
0
1
0
1
0
0
0
0
1
R11
0
0
0
0
1
0
1
1
0
0
0
0
R12
0
0
0
0
1
1
0
0
0
1
0
1
R13
0
0
0
0
1
1
0
1
0
1
0
0
0
0
0
0
0
R14
0
0
0
0
1
1
1
0
0
0
0
1
1
1
1
0
0
R15
0
0
0
0
1
1
1
1
0
0
0
0
0
1
1
0
0
R16
0
0
0
1
0
0
0
0
0
0
0
0
0
0
0
VCO_DACISET
R17
0
0
0
1
0
0
0
1
0
0
0
0
0
0
0
VCO_DACISET_STRT
R18
0
0
0
1
0
0
1
0
0
0
0
0
0
0
0
0
R19
0
0
0
1
0
0
1
1
0
0
1
0
0
1
1
1
VCO
_SEL
_FO
RCE
0
0
0
1
0
0
1
0
0
0
1
0
0
0
0
0
0
0
0
0
1
R20
0
0
0
1
0
1
0
0
1
1
R21
0
0
0
1
0
1
0
1
0
0
MULT
PLL_R
PLL_R_PRE
VCO_SEL
0
0
0
0
0
0
0
CPG
1
1
0
1
0
0
0
VCO_CAPCTRL
Submit Documentation Feedback
Copyright © 2017–2019, Texas Instruments Incorporated
Product Folder Links: LMX2594
41
�LMX2594
SNAS696C – MARCH 2017 – REVISED APRIL 2019
www.ti.com
Register Maps (continued)
Table 23. Full Register Map (continued)
R/W
A6
A5
A4
A3
A2
A1
A0
D15
D14
D13
D12
D11
D10
D9
D8
D7
D6
D5
D4
D3
D2
D1
D0
R22
0
0
0
1
0
1
1
0
0
0
0
0
0
0
0
0
0
0
0
0
0
0
0
1
R23
0
0
0
1
0
1
1
1
0
0
0
0
0
0
0
0
0
1
1
1
1
1
0
0
R24
0
0
0
1
1
0
0
0
0
0
0
0
0
1
1
1
0
0
0
1
1
0
1
0
R25
0
0
0
1
1
0
0
1
0
0
0
0
1
1
0
0
0
0
1
0
1
0
1
1
R26
0
0
0
1
1
0
1
0
0
0
0
0
1
1
0
1
1
0
1
1
0
0
0
0
R27
0
0
0
1
1
0
1
1
0
0
0
0
0
0
0
0
0
0
0
0
0
0
1
0
R28
0
0
0
1
1
1
0
0
0
0
0
0
0
1
0
0
1
0
0
0
1
0
0
0
R29
0
0
0
1
1
1
0
1
0
0
1
1
0
0
0
1
1
0
0
0
1
1
0
0
R30
0
0
0
1
1
1
1
0
0
0
1
1
0
0
0
1
1
0
0
0
1
1
0
0
0
0
0
0
1
1
1
1
1
0
1
1
0
0
R31
0
0
0
1
1
1
1
1
0
CHDI
V
_DIV
2
R32
0
0
1
0
0
0
0
0
0
0
0
0
0
0
1
1
1
0
0
1
0
0
1
1
R33
0
0
1
0
0
0
0
1
0
0
0
1
1
1
1
0
0
0
1
0
0
0
0
1
R34
0
0
1
0
0
0
1
0
0
0
0
0
0
0
0
0
0
0
0
0
0
R35
0
0
1
0
0
0
1
1
0
0
0
0
0
0
0
0
0
0
0
0
0
1
0
0
R36
0
0
1
0
0
1
0
0
R37
0
0
1
0
0
1
0
1
0
0
0
0
0
1
0
0
R38
0
0
1
0
0
1
1
0
PLL_DEN[31:16]
R39
0
0
1
0
0
1
1
1
PLL_DEN[15:0]
R40
0
0
1
0
1
0
0
0
[31:16]
R41
0
0
1
0
1
0
0
1
[15:0]
R42
0
0
1
0
1
0
1
0
PLL_NUM[31:16]
R43
0
0
1
0
1
0
1
1
PLL_NUM[15:0]
OUT
B_P
D
OUT
A_P
D
MAS
H_R
ESE
T_N
0
0
MASH_ORDER
0
1
1
PLL_N[18:16]
PLL_N
MASH
_SEED
_EN
0
PFD_DLY_SEL
R44
0
0
1
0
1
1
0
0
0
0
R45
0
0
1
0
1
1
0
1
1
1
0
R46
0
0
1
0
1
1
1
0
0
0
0
0
0
1
1
1
1
1
1
1
1
1
R47
0
0
1
0
1
1
1
1
0
0
0
0
0
0
1
1
0
0
0
0
0
0
0
0
R48
0
0
1
1
0
0
0
0
0
0
0
0
0
0
1
1
0
0
0
0
0
0
0
0
42
OUTA_PWR
OUTA_MUX
Submit Documentation Feedback
OUT_ISET
OUTB_PWR
OUTB_MUX
Copyright © 2017–2019, Texas Instruments Incorporated
Product Folder Links: LMX2594
�LMX2594
www.ti.com
SNAS696C – MARCH 2017 – REVISED APRIL 2019
Register Maps (continued)
Table 23. Full Register Map (continued)
R/W
A6
A5
A4
A3
A2
A1
A0
D15
D14
D13
D12
D11
D10
D9
D8
D7
D6
D5
D4
D3
D2
D1
D0
R49
0
0
1
1
0
0
0
1
0
1
0
0
0
0
0
1
1
0
0
0
0
0
0
0
R50
0
0
1
1
0
0
1
0
0
0
0
0
0
0
0
0
0
0
0
0
0
0
0
0
R51
0
0
1
1
0
0
1
1
0
0
0
0
0
0
0
0
1
0
0
0
0
0
0
0
R52
0
0
1
1
0
1
0
0
0
0
0
0
1
0
0
0
0
0
1
0
0
0
0
0
R53
0
0
1
1
0
1
0
1
0
0
0
0
0
0
0
0
0
0
0
0
0
0
0
0
R54
0
0
1
1
0
1
1
0
0
0
0
0
0
0
0
0
0
0
0
0
0
0
0
0
R55
0
0
1
1
0
1
1
1
0
0
0
0
0
0
0
0
0
0
0
0
0
0
0
0
R56
0
0
1
1
1
0
0
0
0
0
0
0
0
0
0
0
0
0
0
0
0
0
0
0
R57
0
0
1
1
1
0
0
1
0
0
0
0
0
0
0
0
0
0
1
0
0
0
0
0
0
0
0
0
0
0
0
0
1
0
0
0
0
0
0
0
0
LD_T
YPE
R58
0
0
1
1
1
0
1
0
INPIN_IGNO
RE
INPI
N_H
YST
R59
0
0
1
1
1
0
1
1
0
0
0
0
0
0
0
R60
0
0
1
1
1
1
0
0
R61
0
0
1
1
1
1
0
1
0
0
0
0
0
0
0
0
1
0
1
0
1
0
0
0
R62
0
0
1
1
1
1
1
0
0
0
0
0
0
0
1
1
0
0
1
0
0
0
1
0
R63
0
0
1
1
1
1
1
1
0
0
0
0
0
0
0
0
0
0
0
0
0
0
0
0
R64
0
1
0
0
0
0
0
0
0
0
0
1
0
0
1
1
1
0
0
0
1
0
0
0
R65
0
1
0
0
0
0
0
1
0
0
0
0
0
0
0
0
0
0
0
0
0
0
0
0
R66
0
1
0
0
0
0
1
0
0
0
0
0
0
0
0
1
1
1
1
1
0
1
0
0
R67
0
1
0
0
0
0
1
1
0
0
0
0
0
0
0
0
0
0
0
0
0
0
0
0
R68
0
1
0
0
0
1
0
0
0
0
0
0
0
0
1
1
1
1
1
0
1
0
0
0
R69
0
1
0
0
0
1
0
1
MASH_RST_COUNT[31:16]
R70
0
1
0
0
0
1
1
0
MASH_RST_COUNT[15:0]
SYS
REF
_EN
SYS
REF
_RE
PEA
T
0
1
0
0
INPIN_LVL
INPIN_FMT
LD_DLY
R71
0
1
0
0
0
1
1
1
0
0
0
0
0
R72
0
1
0
0
1
0
0
0
0
0
0
0
0
R73
0
1
0
0
1
0
0
1
0
0
0
0
R74
0
1
0
0
1
0
1
0
SYSREF_PULSE_CNT
R75
0
1
0
0
1
0
1
1
0
0
0
0
0
0
SYS
REF
SYSREF_DIV_PRE
_PUL
SE
SYSREF_DIV
JESD_DAC2_CTRL
JESD_DAC1_CTRL
JESD_DAC4_CTRL
0
1
CHDIV
JESD_DAC3_CTRL
0
0
0
0
Submit Documentation Feedback
Copyright © 2017–2019, Texas Instruments Incorporated
Product Folder Links: LMX2594
43
�LMX2594
SNAS696C – MARCH 2017 – REVISED APRIL 2019
www.ti.com
Register Maps (continued)
Table 23. Full Register Map (continued)
R/W
A6
A5
A4
A3
A2
A1
A0
D15
D14
D13
D12
D11
D10
D9
D8
D7
D6
D5
D4
D3
D2
D1
D0
R76
0
1
0
0
1
1
0
0
0
0
0
0
0
0
0
0
0
0
0
0
1
1
0
0
R77
0
1
0
0
1
1
0
1
0
0
0
0
0
0
0
0
0
0
0
0
0
0
0
0
0
RAM
P_T
HRE
SH[3
2]
0
QUIC
K_R
ECA
L_EN
R78
0
1
0
0
1
1
1
0
0
R79
0
1
0
0
1
1
1
1
RAMP_THRESH[31:16]
R80
0
1
0
1
0
0
0
0
RAMP_THRESH[15:0]
0
0
0
1
0
1
0
0
0
1
R82
0
1
0
1
0
0
1
0
RAMP_LIMIT_HIGH[31:16]
R83
0
1
0
1
0
0
1
1
RAMP_LIMIT_HIGH[15:0]
0
0
0
0
0
0
0
0
0
0
0
0
1
0
0
RAM
P_LI
MIT_
HIGH
[32]
0
0
0
0
0
0
RAM
P_LI
MIT_
LOW
[32]
0
0
0
0
0
0
0
0
0
0
0
0
0
0
0
0
0
0
0
0
0
0
0
0
0
0
0
0
0
0
0
0
0
0
0
0
0
0
0
0
0
0
0
0
0
0
0
0
0
0
0
0
0
0
0
0
0
0
0
0
0
0
0
0
0
0
0
0
0
0
0
0
0
0
0
0
0
0
0
0
0
0
0
0
0
0
0
0
0
0
0
0
0
0
R84
0
1
0
1
0
1
0
0
R85
0
1
0
1
0
1
0
1
R86
0
1
0
1
0
1
1
0
R87
0
1
0
1
0
1
1
1
0
0
0
0
0
0
0
0
R88
0
1
0
1
1
0
0
0
0
0
0
0
0
0
0
0
R89
0
1
0
1
1
0
0
1
0
0
0
0
0
0
0
R90
0
1
0
1
1
0
1
0
0
0
0
0
0
0
R91
0
1
0
1
1
0
1
1
0
0
0
0
0
0
R92
0
1
0
1
1
1
0
0
0
0
0
0
0
R93
0
1
0
1
1
1
0
1
0
0
0
0
R94
0
1
0
1
1
1
1
0
0
0
0
0
R95
0
1
0
1
1
1
1
1
0
0
0
0
R96
0
1
1
0
0
0
0
0
RAMP_BUR
ST_EN
R97
0
1
1
0
0
0
0
1
RAMP0_RS
T
44
0
0
VCO_CAPCTRL_STRT
R81
0
0
0
0
0
0
0
0
RAMP_LIMIT_LOW[31:16]
RAMP_LIMIT_LOW[15:0]
RAMP_BURST_COUNT
0
0
0
1
Submit Documentation Feedback
RAMP_TRIGB
RAMP_TRIGA
0
RAMP_BUR
ST_TRIG
Copyright © 2017–2019, Texas Instruments Incorporated
Product Folder Links: LMX2594
�LMX2594
www.ti.com
SNAS696C – MARCH 2017 – REVISED APRIL 2019
Register Maps (continued)
Table 23. Full Register Map (continued)
R/W
A6
A5
A4
A3
A2
A1
A0
D15
D14
D13
D12
D11
D10
D9
D8
D7
D6
R98
0
1
1
0
0
0
1
0
R99
0
1
1
0
0
0
1
1
RAMP0_INC[15:0]
R100
0
1
1
0
0
1
0
0
RAMP0_LEN
R101
0
1
1
0
0
1
0
1
0
0
R102
0
1
1
0
0
1
1
0
0
0
R103
0
1
1
0
0
1
1
1
RAMP1_INC[15:0]
R104
0
1
1
0
1
0
0
0
RAMP1_LEN
R105
0
1
1
0
1
0
0
1
R106
0
1
1
0
1
0
1
0
0
0
0
0
0
0
0
0
0
0
R107
0
1
1
0
1
0
1
1
0
0
0
0
0
0
0
0
0
R108
0
1
1
0
1
1
0
0
0
0
0
0
0
0
0
0
0
R109
0
1
1
0
1
1
0
1
0
0
0
0
0
0
0
0
0
D5
D4
D3
D2
RAMP0_INC[29:16]
0
0
0
0
0
0
0
D0
0
RAM
P0_D
LY
RAM
P0
_NE
XT
0
0
RAMP0
_NEXT
_TRIG
RAM
RAM
P_M
P1_N
ANU
EXT
AL
0
0
RAMP1_NE
XT_TRIG
0
RAM
P_T
RIG_
CAL
0
0
0
0
0
0
0
0
0
0
0
0
0
0
0
0
0
0
0
0
0
0
0
0
0
0
0
RAM
P1
_DLY
RAM
P1
_RS
T
D1
RAMP1_INC[29:16]
RAMP_DLY_CNT
rb_LD_VTU
NE
R110
0
1
1
0
1
1
1
0
0
0
0
0
0
R111
0
1
1
0
1
1
1
1
0
0
0
0
0
0
0
R112
0
1
1
1
0
0
0
0
0
0
0
0
0
0
0
0
0
rb_VCO_SEL
RAMP_SCALE_CO
UNT
rb_VCO_CAPCTRL
rb_VCO_DACISET
Submit Documentation Feedback
Copyright © 2017–2019, Texas Instruments Incorporated
Product Folder Links: LMX2594
45
�LMX2594
SNAS696C – MARCH 2017 – REVISED APRIL 2019
www.ti.com
7.6.1 General Registers R0, R1, & R7
Figure 35. Registers Excluding Address
Addre
ss
D15
D14
D13
VCO_
PHAS
RAMP
E_SY
_EN
NC_E
N
0
0
OUT_
0
FORC
E
R0
R1
R7
D12
D11
D10
D9
D8
D7
OUT_ FCAL_HPFD_
MUTE
ADJ
D6
D5
D4
D3
D2
1
FCAL
_EN
MUX
OUT_
LD_S
EL
FCAL_LPFD_
ADJ
1
0
0
1
0
0
1
0
0
0
0
0
0
0
1
0
0
0
0
0
0
1
0
1
1
0
D1
D0
POW
RESE
ERDO
T
WN
CAL_CLK_DIV
0
1
0
LEGEND: R/W = Read/Write; R = Read only; -n = value after reset
Table 24. Field Descriptions
Location
Field
Type
Reset
Description
R0[15]
RAMP_EN
R/W
0
0: Disable frequency ramping mode
1: Enable frequency ramping mode
R0[14]
VCO_PHASE_SYNC
R/W
0
0: Disable phase SYNC mode
1: Enable phase SYNC mode
R0[9]
OUT_MUTE
R/W
0
Mute the outputs when the VCO is calibrating.
0: Disabled. If disabled, also be sure to enable OUT_FORCE
1: Enabled. If enabled, also be sure to disable OUT_FORCE
R0[8:7]
FCAL_HPFD_ADJ
R/W
R0[6:5]
FCAL_LPFD_ADJ
R/W
0
Set this field in accordance to the phase detector frequency for
optimal VCO calibration.
0: fPD ≥ 10 MHz
1: 10 MHz > fPD ≥ 5 MHz
2: 5 MHz > fPD ≥ 2.5 MHz
3: fPD < 2.5 MHz
R0[3]
FCAL_EN
R/W
0
Enable the VCO frequency calibration. Also note that the action
of programming this bit to a 1 activates the VCO calibration
R0[2]
MUXOUT_LD_SEL
R/W
0
Selects the state of the function of the MUXout pin
0: Readback
1: Lock detect
R0[1]
RESET
R/W
0
Resets and holds all state machines and registers to default
value.
0: Normal operation
1: Reset
R0[0]
POWERDOWN
R/W
0
Powers down entire device
0: Normal operation
1: Powered down
R1[2:0]
CAL_CLK_DIV
R/W
3
Sets divider for VCO calibration state machine clock based on
input frequency.
0: Divide by 1. Use for fOSC ≤ 200 MHz
1: Divide by 2. Use for fOSC ≤ 400 MHz
2: Divide by 4. Use for fOSC ≤ 800 MHz
3: Divide by 8. All fOSC
Set this field in accordance to the phase-detector frequency for
optimal VCO calibration.
0: fPD ≤ 100 MHz
1: 100 MHz < fPD ≤ 150 MHz
2: 150 MHz < fPD ≤ 200 MHz
3: fPD >200 MHz
If user is not concerned with lock time, it is recommended to set
this value to 3. By slowing down the VCO calibration, the best
and most repeatable VCO phase noise can be attained
R7[14]
46
OUT_FORCE
R/W
0
Works with OUT_MUTE in disabling outputs when VCO
calibrating.
Submit Documentation Feedback
Copyright © 2017–2019, Texas Instruments Incorporated
Product Folder Links: LMX2594
�LMX2594
www.ti.com
SNAS696C – MARCH 2017 – REVISED APRIL 2019
7.6.2 Input Path Registers
Figure 36. Registers Excluding Address
D15
D14
D13
R9
0
0
0
R10
R11
R12
0
0
0
0
0
1
0
0
0
D12
OSC_
2X
1
0
1
D11
D10
D9
D8
D7
D6
D5
D4
D3
D2
D1
D0
0
1
1
0
0
0
0
0
0
1
0
0
1
0
1
1
1
0
0
0
0
0
0
MULT
PLL_R
PLL_R_PRE
LEGEND: R/W = Read/Write; R = Read only; -n = value after reset
Table 25. Field Descriptions
Location
Field
Type
Reset
Description
OSC_2X
R/W
0
Low=noise OSCin frequency doubler.
0: Disabled
1: Enabled
R10[11:7]
MULT
R/W
1
Programmable input frequency multiplier
0,2,,8-31: Reserved
1: Byapss
3: 3X
...
7: 7X
R11[11:4]
PLL_R
R/W
1
Programmable input path divider after the programmable input
frequency multiplier.
R12[11:0]
PLL_R_PRE
R/W
1
Programmable input path divider before the programmable input
frequency multiplier.
R9[12]
7.6.3 Charge Pump Registers (R13, R14)
Figure 37. Registers Excluding Address
R14
D15
0
D14
0
D13
0
D12
1
D11
1
D10
1
D9
1
D8
0
D7
0
D6
D5
CPG
D4
D3
0
D2
0
D1
0
D0
0
LEGEND: R/W = Read/Write; R = Read only; -n = value after reset
Table 26. Field Descriptions
Location
Field
Type
Reset
Description
R14[6:4]
CPG
R/W
7
Effective charge-pump current. This is the sum of up and down
currents.
0: 0 mA
1: 6 mA
2: Reserved
3: 12 mA
4: 3 mA
5: 9 mA
6: Reserved
7: 15 mA
Submit Documentation Feedback
Copyright © 2017–2019, Texas Instruments Incorporated
Product Folder Links: LMX2594
47
�LMX2594
SNAS696C – MARCH 2017 – REVISED APRIL 2019
www.ti.com
7.6.4 VCO Calibration Registers
Figure 38. Registers Excluding Address
D15
D14
D13
R4
R8
0
R16
R17
R19
0
0
0
VCO_
DACI
SET_
FORC
E
0
0
0
R20
1
1
1
0
0
1
D12
D11
D10
ACAL_CMP_DLY
VCO_
CAPC
0
TRL_
0
FORC
E
0
0
0
0
0
0
0
0
1
VCO_
SEL_
VCO_SEL
FORC
E
D9
D8
D7
0
D6
1
D5
0
D4
0
D3
0
D2
0
D1
1
D0
1
0
0
0
0
0
0
0
0
0
0
0
0
0
0
0
1
1
0
0
VCO_DACISET
VCO_DACISET_STRT
VCO_CAPCTRL
0
1
0
0
1
LEGEND: R/W = Read/Write; R = Read only; -n = value after reset
Table 27. Field Descriptions
Location
Field
Type
Reset
Description
R4[15:8]
ACAL_CMP_DELAY
R/W
10
VCO amplitude calibration delay. Lowering this value can speed
up VCO calibration, but lowering it too much may degrade VCO
phase noise. The minimum allowable value for this field is 10
and this allows the VCO to calibrate to the correct frequency for
all scenarios. To yield the best and most repeatable VCO phase
noise, this relationship should be met: ACAL_CMP_DLY >
Fsmclk / 10 MHz, where Fsmclk = Fosc / 2CAL_CLK_DIV and Fosc
is the input reference frequency. If calibration time is of concern,
then it is recommended to set this register to ≥ 25.
R8[14]
VCO_DACISET_FORCE
R/W
0
This forces the VCO_DACISET value
R8[11]
VCO_CAPCTRL_FORCE
R/W
0
This forces the VCO_CAPCTRL value
R16[8:0]
VCO_DACISET
R/W
128
This sets the final amplitude for the VCO calibration in the case
that amplitude calibration is forced.
R17[8:0]
VCO_DACISET_STRT
R/W
250
This sets the initial starting point for the VCO amplitude
calibration.
R19[7:0]
VCO_CAPCTRL
R/W
183
This sets the final VCO band when VCO_CAPCTRL is forced.
R/W
7
This sets VCO start core for calibration and the VCO when it is
forced.
0: Not Used
1: VCO1
2: VCO2
3: VCO3
4: VCO4
5: VCO5
6: VCO6
7: VCO7
R/W
0
This forces the VCO to use the core specified by VCO_SEL. It is
intended mainly for diagnostic purposes.
0: Disabled (recommended)
1: Enabled
R20[13:11] VCO_SEL
R20[10]
48
VCO_SEL_FORCE
Submit Documentation Feedback
Copyright © 2017–2019, Texas Instruments Incorporated
Product Folder Links: LMX2594
�LMX2594
www.ti.com
SNAS696C – MARCH 2017 – REVISED APRIL 2019
7.6.5 N Divider, MASH, and Output Registers
Figure 39. Registers Excluding Address
D15
0
D14
0
MASH
_SEE
D
_EN
0
R34
R36
R37
D13
0
D12
0
D11
0
D10
0
D9
0
D8
D7
0
0
PLL_N
PFD_DLY_SEL
D6
0
D5
0
D4
0
D3
0
D2
0
0
0
0
1
MASH
_RES
ET_N
0
0
1
1
0
R38
R39
R40
R41
R42
R43
D1
D0
PLL_N[18:16]
0
0
PLL_DEN[31:16]
PLL_DEN[15:0]
[31:16]
[15:0]
PLL_NUM[31:16]
PLL_NUM[15:0]
R44
0
0
R45
R46
1
0
1
0
OUTB OUTA
_PD
_PD
OUTA_PWR
0
0
OUTA_MUX
0
0
OUT_ISET
1
1
0
1
1
1
1
1
MASH_ORDER
OUTB_PWR
1
1
OUTB_MUX
LEGEND: R/W = Read/Write; R = Read only; -n = value after reset
Table 28. Field Descriptions
Location
Field
Type
Reset
Description
R34[2:0]
R36[15:0]
PLL_N
R/W
100
The PLL_N divider value is in the feedback path and divides the
VCO frequency.
MASH_SEED_EN
R/W
0
Enabling this bit allows the to be applied to shift the phase at the
output or optimize spurs.
R37[13:8]
PFD_DLY_SEL
R/W
2
The PFD_DLY_SEL must be adjusted in accordance to the Ndivider value. This is with the functional description for the Ndivider.
R38[15:0]
R39[15:0]
PLL_DEN
R/W
42949672
95
The fractional denominator.
R40[15:0]
R41[15:0]
MASH_SEED
R/W
0
The initial state of the MASH engine first accumulator. Can be
used to shift phase or optimize fractional spurs. Every time the
field is programmed, it ADDS this MASH seed to the existing
one. To reset it, use the MASH_RESET_N bit.
R42[15:0]
R43[15:0]
PLL_NUM
R/W
0
The fractional numerator
R44[13:8]
OUTA_PWR
R/W
31
Adjusts output power. Higher numbers give more output power
to a point, depending on the pullup component used.
R44[7]
OUTB_PD
R/W
1
Powers down output B
0: Output B active
1: Output B powered down
R44[6]
OUTA_PD
R/W
0
Powers down output A
0: Output A Active
1: Output A powered down
R44[5]
MASH_RESET_N
R/W
1
Resets MASH circuitry to an initial state
0: MASH held in reset. All fractions are ignored
1: Fractional mode enabled. MASH is NOT held in reset.
MASH_ORDER
R/W
0
Sets the MASH order
0: Integer mode
1: First order modulator
2: Second order modulator
3: Third order modulator
4: Fourth order modulator
5-7: Reserved
R37[15]
R44[2:0]
Submit Documentation Feedback
Copyright © 2017–2019, Texas Instruments Incorporated
Product Folder Links: LMX2594
49
�LMX2594
SNAS696C – MARCH 2017 – REVISED APRIL 2019
www.ti.com
Table 28. Field Descriptions (continued)
Type
Reset
Description
R45[12:11] OUTA_MUX
Location
Field
R/W
1
Selects what signal goes to RFoutA
0: Channel divider
1: VCO
2: Reserved
3: High impedance
R45[10:9]
OUT_ISET
R/W
0
Setting to a lower value allows slightly higher output power at
higher frequencies at the expense of higher current
consumption.
0: Maximum output power boost
...
3: No output power boost
R45[5:0]
OUTB_PWR
R/W
31
Output power setting for RFoutB.
R46[1:0]
OUTB_MUX
R/W
1
Selects what signal goes to RFoutB
0: Channel divider
1: VCO
2: SysRef (also ensure SYSREF_EN=1)
3: High impedance
7.6.6 SYNC and SysRefReq Input Pin Register
Figure 40. Registers Excluding Address
R58
D15
INPIN
_IGN
ORE
D14
INPIN
_HYS
T
D13
D12
INPIN_LVL
D11
D10
D9
INPIN_FMT
D8
D7
D6
D5
D4
D3
D2
D1
D0
0
0
0
0
0
0
0
0
1
LEGEND: R/W = Read/Write; R = Read only; -n = value after reset
Table 29. Field Descriptions
Location
Field
Type
Reset
Description
R58[15]
INPIN_IGNORE
R/W
1
Ignore SYNC and SysRefReq Pins
0: Pins are used. Only valid for VCO_PHASE_SYNC = 1
1: Pin is ignored
R58[14]
INPIN_HYST
R/W
0
High Hysteresis for LVDS mode
0: Disabled
1: Enabled
R58[13:12] INPIN_LVL
R/W
0
Sets bias level for LVDS mode. In LVDS mode, a voltage divider
can be inserted to reduce susceptibility to common-mode noise
of an LVDS line because the input is single-ended. With a
reasonable setup, TI recommends using INPIN_LVL = 1 (Vin) to
use the entire signal swing of an LVDS line.
0: Vin/4
1: Vin
2: Vin/2
3: Invalid
R58[11:9]
R/W
0
0: SYNC = SysRefReq = CMOS
1: SYNC = LVDS, SysRefReq=CMOS
2: SYNC = CMOS, SysRefReq = LVDS
3: SYNC = SysRefReq = LVDS
4: Invalid
5: Invalid
6: Invalid
7: Invalid
50
INPIN_FMT
Submit Documentation Feedback
Copyright © 2017–2019, Texas Instruments Incorporated
Product Folder Links: LMX2594
�LMX2594
www.ti.com
SNAS696C – MARCH 2017 – REVISED APRIL 2019
7.6.7 Lock Detect Registers
Figure 41. Registers Excluding Address
D15
D14
D13
D12
D11
D10
D9
D8
D7
D6
D5
D4
D3
D2
D1
0
0
0
0
0
0
0
0
0
0
0
0
0
0
0
R59
R60
D0
LD_T
YPE
LD_DLY
LEGEND: R/W = Read/Write; R = Read only; -n = value after reset
Table 30. Field Descriptions
Location
R59[0]
R60[15:0]
Field
Type
Reset
Description
LD_TYPE
R/W
1
Lock detect type
0: VCO calibration status
1: VCO calibration status and Indirect Vtune
LD_DLY
R/W
1000
Lock Detect Delay. This is the delay added to the lock detect
after the VCO calibration is successful and before the lock
detect is asserted high. The delay added is in phase-detector
cycles. If set to 0, the lock detect immediately becomes high
after the VCO calibration is successful.
7.6.8 MASH_RESET
Figure 42. Registers Excluding Address
D15
D14
D13
D12
D11
D10
R69
R70
D9
D8
D7
D6
MASH_RST_COUNT[31:16]
MASH_RST_COUNT[15:0]
D5
D4
D3
D2
D1
D0
LEGEND: R/W = Read/Write; R = Read only; -n = value after reset
Table 31. Field Descriptions
Location
Field
Type
Reset
Description
R69[15:0]
R70[15:0]
MASH_RST_COUNT
R/W
50000
If the designer does not use this device in fractional mode with
VCO_PHASE_SYNC = 1, then this field can be set to 0. In
phase-sync mode with fractions, this bit is used so that there is a
delay for the VCO divider after the MASH is reset. This delay
must be set to greater than the lock time of the PLL. It does
impact the latency time of the SYNC feature.
Submit Documentation Feedback
Copyright © 2017–2019, Texas Instruments Incorporated
Product Folder Links: LMX2594
51
�LMX2594
SNAS696C – MARCH 2017 – REVISED APRIL 2019
www.ti.com
7.6.9 SysREF Registers
Figure 43. Registers Excluding Address
D15
D14
D13
D12
D11
R71
0
0
0
0
0
R72
R73
R74
0
0
0
0
0
0
0
0
SYSREF_PULSE_CNT
0
D10
D9
D8
D7
D6
D5
D4
D3
D2
D1
SYSR
SYSR SYSR
EF_R
0
0
0
SYSREF_DIV_PRE
EF_P EF_E
0
EPEA
ULSE
N
T
SYSREF_DIV
JESD_DAC2_CTRL
JESD_DAC1_CTRL
JESD_DAC4_CTRL
JESD_DAC3_CTRL
D0
1
LEGEND: R/W = Read/Write; R = Read only; -n = value after reset
Table 32. Field Descriptions
Location
Field
Type
Reset
Description
R71[7:5]
SYSREF_DIV_PRE
R/W
4
Pre-divider for SYSREF
1: Divide by 1
2: Divide by 2
4: Divide by 4
All other states: invalid
R71[4]
SYSREF_PULSE
R/W
0
Enable pulser mode in master mode
0: Disabled
1: Enabled
R71[3]
SYSREF_EN
R/W
0
Enable SYSREF
R71[2]
SYSREF_REPEAT
R/W
0
Enable repeater mode
0: Master mode
1: Repeater mode
R72[10:0]
SYSREF_DIV
R/W
0
Divider for the SYSREF
0: Divide by 4
1: Divide by 6
2: Divide by 8
...
2047: Divide by 4098
These are the adjustments for the delay for the SYSREF. Two of
these must be zero and the other two values must sum to 63.
R73[5:0]
JESD_DAC1_CTRL
R/W
63
R73[11:6]
JESD_DAC2_CTRL
R/W
0
R74[5:0]
JESD_DAC3_CTRL
R/W
0
R74[11:6]
JESD_DAC4_CTRL
R/W
0
R/W
0
R74[15:12] SYSREF_PULSE_CNT
52
Number of pulses in pulse mode in master mode
Submit Documentation Feedback
Copyright © 2017–2019, Texas Instruments Incorporated
Product Folder Links: LMX2594
�LMX2594
www.ti.com
SNAS696C – MARCH 2017 – REVISED APRIL 2019
7.6.10 CHANNEL Divider Registers
Figure 44. Registers Excluding Address
15
14
13
12
11
10
9
8
7
6
5
4
3
2
1
0
R31
Reg
0
CHDIV
_DIV2
0
0
0
0
1
1
1
1
1
0
1
1
0
0
R75
0
0
0
0
1
0
0
0
0
0
0
CHDIV
Table 33. Field Descriptions
Location
R31[14]
R75[10:6]
Field
Type
Reset
Description
SEG1_EN
R/W
0
Enable driver buffer for CHDIV > 2
0: Disabled (only valid for CHDIV = 2)
1: Enabled (use for CHDIV > 2)
CHDIV
R/W
0
VCO divider value
0: 2
1: 4
2: 6
3: 8
4: 12
5: 16
6: 24
7: 32
8: 48
9: 64
10: 72
11: 96
12: 128
13: 192
14: 256
15: 384
16: 512
17: 768
18-31: Reserved
Submit Documentation Feedback
Copyright © 2017–2019, Texas Instruments Incorporated
Product Folder Links: LMX2594
53
�LMX2594
SNAS696C – MARCH 2017 – REVISED APRIL 2019
www.ti.com
7.6.11 Ramping and Calibration Fields
Figure 45. Registers Excluding Address
D15
D14
D13
D12
0
0
0
0
R78
D11
RAMP
_THR
ESH[3
2]
D10
0
R79
R80
D9
D8
D7
D6
D5
D4
D3
QUIC
K_RE
VCO_CAPCTRL_STRT
CAL_
EN
RAMP_THRESH[31:16]
RAMP_THRESH[15:0]
D2
D1
D0
1
LEGEND: R/W = Read/Write; R = Read only; -n = value after reset
Table 34. Field Descriptions
Location
Field
Type
Reset
Description
R78[11]
R79[15:0]
R80[15:0]
RAMP_THRESH
R/W
0
This sets how much the ramp can change the VCO frequency
before calibrating. If this frequency is chosen to be Δf, then it is
calculated as follows:
RAMP_THRESH = (Δf / fPD) × 16777216
QUICK_RECAL_EN
R/W
0
Causes the initial VCO_CORE, VCO_CAPCTRL, and
VCO_DACISET to be based on the last value. Useful if the
frequency change is small, as is often the case for ramping.
0: Disabled
1: Enabled
VCO_CAPCTRL_STRT
R/W
0
This sets the initial value for VCO_CAPCTRL if not overridden
by other settings. Smaller values yield a higher frequency band
within a VCO core. Valid number range is 0 to 183.
R78[9]
R78[8:1]
54
Submit Documentation Feedback
Copyright © 2017–2019, Texas Instruments Incorporated
Product Folder Links: LMX2594
�LMX2594
www.ti.com
SNAS696C – MARCH 2017 – REVISED APRIL 2019
7.6.12 Ramping Registers
These registers are only relevant for ramping functions and are enabled if and only if RAMP_EN (R0[15]) = 1.
7.6.12.1 Ramp Limits
Figure 46. Registers Excluding Address
D15
D14
D13
D12
D11
D10
D9
D8
D7
D6
D5
D4
D3
D2
D1
0
0
0
0
0
0
0
0
0
0
0
0
0
0
0
0
0
0
0
0
R81
R82
R83
R84
D0
RAMP
_LIMI
T_HIG
H[32]
RAMP_LIMIT_HIGH[31:16]
RAMP_LIMIT_HIGH[15:0]
0
0
0
0
0
0
0
R85
R86
0
0
0
RAMP
_LIMI
T_LO
W[32]
RAMP_LIMIT_LOW[31:16]
RAMP_LIMIT_LOW[15:0]
LEGEND: R/W = Read/Write; R = Read only; -n = value after reset
Table 35. Field Descriptions
Location
Field
Type
Reset
Description
R81[0]
R82[15:0]
R83[15:0]
RAMP_LIMIT_HIGH
R/W
0
This sets a maximum frequency that the ramp can not exceed
so that the VCO does not get set beyond a valid frequency
range. Suppose fHIGH is this frequency and fVCO is the starting
VCO frequency then:
For fHIGH ≥ fVCO:
RAMP_LIMIT_HIGH = (fHIGH – fVCO)/fPD × 16777216
For fHIGH < fVCO this is not a valid condition to choose.
R84[0]
R85[15:0]
R86[15:0]
RAMP_LIMIT_LOW
R/W
0
This sets a minimum frequency that the ramp can not exceed so
that the VCO does not get set beyond a valid frequency range.
Suppose fLOW is this frequency and fVCO is the starting VCO
frequency then:
For fLOW ≤ fVCO:
RAMP_LIMIT_LOW = 233 – 16777216 x (fVCO – fLOW) / fPD
For fLOW > fVCO, this is not a valid condition to choose.
Submit Documentation Feedback
Copyright © 2017–2019, Texas Instruments Incorporated
Product Folder Links: LMX2594
55
�LMX2594
SNAS696C – MARCH 2017 – REVISED APRIL 2019
www.ti.com
7.6.12.2 Ramping Triggers, Burst Mode, and RAMP0_RST
Figure 47. Registers Excluding Address
R96
R97
D15
RAMP
_BUR
ST_E
N
RAMP
0_RS
T
D14
D13
D12
D11
D10
D9
D8
D7
D6
D5
D4
D3
D2
RAMP_BURST_COUNT
0
0
0
1
RAMP_TRIGB
RAMP_TRIGA
0
D1
D0
0
0
RAMP_BURS
T_TRIG
LEGEND: R/W = Read/Write; R = Read only; -n = value after reset
Table 36. Field Descriptions
Location
R96[15]
Field
Type
Reset
Description
RAMP_BURST_EN
R/W
0
Enables burst ramping mode. In this mode, a
RAMP_BURST_COUNT ramps are sent out when RAMP_EN is
set from 0 to 1.
0: Disabled
1: Enabled
R/W
0
Sets how many ramps are run in burst ramping mode.
RAMP96[1 RAMP_BURST_COUNT
4:2]
R97[15]
RAMP0_RST
R/W
0
Resets RAMP0 at start of ramp to eliminate round-off errors.
Must only be used in automatic ramping mode.
0: Disabled
1: Enabled
R97[6:3]
RAMP_TRIGA
R/W
0
Multipurpose Trigger A definition:
0: Disabled
1: RampClk pin rising edge
2: RampDir pin rising edge
4: Always triggered
9: RampClk pin falling edge
10: RampDir pin falling edge
All other states: reserved
R97[10:7]
RAMP_TRIGB
R/W
0
Multipurpose trigger B definition:
0: Disabled
1: RampClk pin Rising Edge
2: RampDir pin Rising Edge
4: Always Triggered
9: RampClk pin Falling Edge
10: RampDir pin Falling Edge
All other states: Reserved
R97[1:0]
RAMP_BURST_TRIG
R/W
0
Ramp burst trigger definition that triggers the next ramp in the
count. Note that RAMP_EN starts the count, not this word.
0: Ramp Transition
1: Trigger A
2: Trigger B
3: Reserved
56
Submit Documentation Feedback
Copyright © 2017–2019, Texas Instruments Incorporated
Product Folder Links: LMX2594
�LMX2594
www.ti.com
SNAS696C – MARCH 2017 – REVISED APRIL 2019
7.6.12.3 Ramping Configuration
Figure 48. Registers Excluding Address
D15
D14
D13
D12
D11
D10
R98
D9
D7
D6
D5
D4
D3
D2
RAMP0_INC[29:16]
R99
R100
D1
0
D0
RAMP
0_DL
Y
RAMP0_INC[15:0]
RAMP0_LEN
R101
0
0
R102
R103
R104
0
0
0
0
R105
R106
D8
0
0
RAMP
RAMP RAMP
0
1
1
_NEX
_DLY _RST
T
RAMP1_INC[29:16]
RAMP1_INC[15:0]
RAMP1_LEN
RAMP
RAMP
1
_MAN
_NEX
UAL
T
RAMP
0
0
0
0
_TRIG
_CAL
0
0
RAMP_DLY_CNT
0
0
0
0
0
0
0
0
0
0
RAMP0_
NEXT_TRIG
0
0
RAMP1_
NEXT_TRIG
0
RAMP_SCALE_COUN
T
LEGEND: R/W = Read/Write; R = Read only; -n = value after reset
Table 37. Field Descriptions
Location
Field
Type
Reset
Description
R98[15:2]
R99[15:0]
RAMP0_INC
R/W
0
2's complement of the amount the RAMP0 is incremented in
phase detector cycles.
R98[0]
RAMP0_DLY
R/W
0
Enabling this bit uses two clocks instead of one to clock the
ramp. Effectively doubling the length.
0: Normal ramp length
1: Double ramp length
R100[15:0] RAMP0_LEN
R/W
0
Length of RAMP0 in phase detector cycles
R101[6]
RAMP1_DLY
R/W
0
Enabling this bit uses two clocks instead of one to clock the
ramp. Effectively doubling the length.
0: Normal ramp length
1: Double ramp length
R101[5]
RAMP1_RST
R/W
0
Resets RAMP1 to eliminate rounding errors. Must be used in
automatic ramping mode.
0: Disabled
1: Enabled
R101[4]
RAMP0_NEXT
R/W
0
Defines what ramp comes after RAMP0
0: RAMP0
1: RAMP1
RAMP0_NEXT_TRIG
R/W
0
Defines what triggers the next ramp
0: RAMP0_LEN timeout counter
1: Trigger A
2: Trigger B
3: Reserved
R102[13:0] RAMP1_INC
R103[15:0]
R/W
0
2's complement of the amount the RAMP1 is incremented in
phase detector cycles.
R104[15:0] RAMP1_LEN
R/W
0
Length of RAMP1 in phase detector cycles
R105[15:6] RAMP_DLY_CNT
R/W
0
This is the number of state machine clock cycles for the VCO
calibration in automatic mode. If the VCO calibration is less, then
it is this time. If it is more, then the time is the VCO calibration
time.
R/W
0
Enables manual ramping mode, or otherwise automatic mode
0: Automatic ramping mode
1: Manual ramping mode
R101[1:0]
R105[5]
RAMP_MANUAL
Submit Documentation Feedback
Copyright © 2017–2019, Texas Instruments Incorporated
Product Folder Links: LMX2594
57
�LMX2594
SNAS696C – MARCH 2017 – REVISED APRIL 2019
www.ti.com
Table 37. Field Descriptions (continued)
Location
R105[4]
R105[1:0]
R106[4]
R106[2:0]
Field
Type
Reset
Description
RAMP1_NEXT
R/W
0
Determines what ramp comes after RAMP1:
0: RAMP0
1: RAMP1
RAMP1_NEXT_TRIG
R/W
0
Defines what triggers the next ramp
0: RAMP1_LEN timeout counter
1: Trigger A
2: Trigger B
3: Reserved
RAMP_TRIG_CAL
R/W
0
Enabling this bit forces the VCO to calibrate after the ramp.
RAMP_SCALE_COUNT
R/W
7
Multiplies RAMP_DLY count by 2RAMP_SCALE_COUNT
7.6.13 Readback Registers
Figure 49. Registers Excluding Address
D15
D14
D13
D12
D11
R110
0
0
0
0
0
R111
R112
0
0
0
0
0
0
0
0
0
0
D10
D9
rb_LD_
VTUNE
0
0
0
0
D8
0
D7
D6
D5
rb_VCO_SEL
0
D4
D3
D2
D1
D0
0
0
0
0
0
rb_VCO_CAPCTRL
rb_VCO_DACISET
LEGEND: R/W = Read/Write; R = Read only; -n = value after reset
Table 38. Field Descriptions
Type
Reset
Description
R110[10:9] rb_LD_VTUNE
Location
R
0
Readback of Vtune lock detect
0: Unlocked (Vtune low)
1: Invalid State
2: Locked
3: Unlocked (Vtune High)
R110[7:5]
rb_VCO_SEL
R
0
Reads back the actual VCO that the calibration has selected.
0: Invalid
1: VCO1
...
7: VCO7
R111[7:0]
rb_VCO_CAPCTRL
R
183
Reads back the actual CAPCTRL capcode value the VCO
calibration has chosen.
R112[8:0]
rb_VCO_DACISET
R
170
Reads back the actual amplitude (DACISET) value that the VCO
calibration has chosen.
58
Field
Submit Documentation Feedback
Copyright © 2017–2019, Texas Instruments Incorporated
Product Folder Links: LMX2594
�LMX2594
www.ti.com
SNAS696C – MARCH 2017 – REVISED APRIL 2019
8 Application and Implementation
NOTE
Information in the following applications sections is not part of the TI component
specification, and TI does not warrant its accuracy or completeness. TI’s customers are
responsible for determining suitability of components for their purposes. Customers should
validate and test their design implementation to confirm system functionality.
8.1 Application Information
8.1.1 OSCin Configuration
The OSCin supports single-ended or differential clocks. There must be a AC-coupling capacitor in series before
the device pin. The OSCin inputs are high-impedance CMOS with internal bias voltage. TI recommends putting
termination shunt resistors to terminate the differential traces (if there are 50-Ω characteristic traces, place 50-Ω
resistors). The OSCin and OSCin* side should be matched in layout. A series AC-coupling capacitors should
immediately follow OSCin pins in the board layout, then the shunt termination resistors to ground should be
placed after.
Input clock definitions are shown in Figure 50:
VOSCin
VOSCin
VOSCin
CMOS
Sine wave
Differential
Figure 50. Input Clock Definitions
8.1.2 OSCin Slew Rate
The slew rate of the OSCin signal can impact the spurs and phase noise of the LMX2594 if it is too low. In
general, a high slew rate and a lower amplitude signal, such as LVDS, can give best performance.
8.1.3 RF Output Buffer Power Control
The OUTA_PWR and OUTB_PWR registers can be used to control the output power of the output buffers. The
setting for optimal power may depend on the pullup component, but is typically around 50. The higher the setting,
the higher the current consumption of the output buffer.
8.1.4 RF Output Buffer Pullup
The choice of output buffer components is very important and can have a profound impact on the output power.
Table 39 shows how to treat each pin. If using a single-ended output, a pullup is required, and the user can put a
50-Ω resistor after the capacitor.
Submit Documentation Feedback
Copyright © 2017–2019, Texas Instruments Incorporated
Product Folder Links: LMX2594
59
�LMX2594
SNAS696C – MARCH 2017 – REVISED APRIL 2019
www.ti.com
Application Information (continued)
Table 39. Different Methods for Pullup on Outputs
PULLUP STYLE
DIAGRAM
COMMENTS
+vcc
Potentially higher output power,
but output impedance is far from
50 Ω. Consider also using with a
resistive pad.
L
Inductor
C
RFoutAP
+vcc
Resistor
More consistent matching
R
C
RFoutAP
Table 40. Output Pullup Configuration
60
COMPONENT
VALUE
Inductor
Varies with frequency
Resistor
50 Ω
Vishay FC0402E50R0BST1
Capacitor
Varies with frequency
ATC 520L103KT16T
ATC 504L50R0FTNCFT
Submit Documentation Feedback
PART NUMBER
Copyright © 2017–2019, Texas Instruments Incorporated
Product Folder Links: LMX2594
�LMX2594
www.ti.com
SNAS696C – MARCH 2017 – REVISED APRIL 2019
8.2 Typical Application
C5
RFoutAP
R37
50
VccRF
0.01µF
C30
C6
L1
0.1µF
VccRF
0.01µF
U1
C27
C26
1µF
C18
1µF
Vcc
1µF
C29
1µF
C23
1µF
C24
C20
15
VCCMASH
RFOUTBM
18
26
VCCVCO2
RFOUTBP
19
37
VCCVCO
CSB
1µF
C19
C21
1 µF
10µF
CSB
SDI
SCK
VREGIN
36
VREFVCO
38
VREGVCO
29
VREFVCO2
3
VBIASVCO
10 µF 27
33
VBIASVCO2
VBIASVARAC
8
OSCINP
9
OSCINM
C14
OSCinP
CE
10
C25
10µF
RFOUTAM
VCCCP
24
17
16
10µF
23
22
11
CE
1µF
RFOUTAP
VCCDIG
C28
C22
VCCBUF
7
1
SDI
SCK
21
18nH
R38
50
C7
RFoutAM
0.01µF
C12
MUXOUT
20
CPOUT
12
VTUNE
35
SYNC
5
RFoutBM
0.01µF
VccRF
R4_LF
SYNC
28
SysRefReq
RAMPCLK
RAMPDIR
30
32
RampCLK
RampDir
GND
GND
GND
GND
GND
GND
GND
GND
GND
GND
GND
2
4
6
13
14
25
31
34
39
40
41
SYSREFREQ
R40
50
MUXout
18
C4_LF
1800pF
R3_LF
0
C3_LF
Open
L2
18nH
C2_LF
0.068µF
R2_LF
68
C11
C1_LF
390pF
R39
50
0.01µF
C10
RFoutBP
0.01µF
0.1µF
LMX2594RHAR
R32
100
C15
OSCinN
0.1µF
Copyright © 2017, Texas Instruments Incorporated
Figure 51. Typical Application Schematic
Submit Documentation Feedback
Copyright © 2017–2019, Texas Instruments Incorporated
Product Folder Links: LMX2594
61
�LMX2594
SNAS696C – MARCH 2017 – REVISED APRIL 2019
www.ti.com
8.2.1 Design Requirements
The design of the loop filter is complex and is typically done with software. The PLLATINUM™ Sim software is
an excellent resource for doing this and the design is shown in the Figure 52. For those interested in the
equations involved, the PLL Performance, Simulation, and Design Handbook listed in the end of this document
goes into great detail as to the theory and design of PLL loop filters.
Figure 52. PLLATINUM™ Sim Design Screen
8.2.2 Detailed Design Procedure
The integration of phase noise over a certain bandwidth (jitter) is an performance specification that translates to
signal-to-noise ratio. Phase noise inside the loop bandwidth is dominated by the PLL, while the phase noise
outside the loop bandwidth is dominated by the VCO. Generally, jitter is lowest if the loop bandwidth is designed
to the point where the two intersect. A higher phase margin loop filter design has less peaking at the loop
bandwidth and thus lower jitter. The tradeoff with this is that longer lock times and spurs must be considered in
design as well.
62
Submit Documentation Feedback
Copyright © 2017–2019, Texas Instruments Incorporated
Product Folder Links: LMX2594
�LMX2594
www.ti.com
SNAS696C – MARCH 2017 – REVISED APRIL 2019
8.2.3 Application Curve
Figure 53. Typical Jitter
Submit Documentation Feedback
Copyright © 2017–2019, Texas Instruments Incorporated
Product Folder Links: LMX2594
63
�LMX2594
SNAS696C – MARCH 2017 – REVISED APRIL 2019
www.ti.com
9 Power Supply Recommendations
If fractional spurs are a large concern, using a ferrite bead to each of these power supply pins can reduce spurs
to a small degree. This device has integrated LDOs, which improves the resistance to power supply noise.
However, the pullup components on the RFoutA and RFoutB pins on the outputs have a direct connection to the
power supply, take extra care to ensure that the voltage is clean for these pins. Figure 54 is a typical application
example.
This device can be powered by an external DC-DC buck converter, such as the TPS62150. Note that although
Rtps, Rtps1, and Rtps2 are 0 Ω in the schematic, they could be potentially replaced with a larger resistor value or
inductor value for better power supply filtering.
Figure 54. Using the TPS62150 as a Power Supply
For DC bias levels, refer to .
Table 41. Bias Levels of Pins
(1)
64
Pin Number
Pin Name
Bias Level
3
VBIASVCO
1.3
27
VBIASVCO2
0.7
29
VREFVCO2
2.9
33
VBIASVARAC
1.7
36
VREFVCO
2.9
38
VREGVCO
2.1
(1)
The bias level is measured after following Recommended Initial Power-Up Sequence.
Submit Documentation Feedback
Copyright © 2017–2019, Texas Instruments Incorporated
Product Folder Links: LMX2594
�LMX2594
www.ti.com
SNAS696C – MARCH 2017 – REVISED APRIL 2019
10 Layout
10.1 Layout Guidelines
In general, the layout guidelines are similar to most other PLL devices. Here are some specific guidelines.
• GND pins may be routed on the package back to the DAP.
• The OSCin pins are internally biased and must be AC-coupled.
• If not used, RampClk, RampDir, and SysRefReq can be grounded to the DAP.
• For the Vtune pin, try to place a loop filter capacitor as close as possible to the pin. This may mean
separating the capacitor from the rest of the loop filter.
• For the outputs, keep the pullup component as close as possible to the pin and use the same component on
each side of the differential pair.
• If a single-ended output is needed, the other side must have the same loading and pullup. However, the
routing for the used side can be optimized by routing the complementary side through a via to the other side
of the board. On this side, use the same pullup and make the load look equivalent to the side that is used.
• Ensure that DAP on device is well-grounded with many vias, preferably copper filled.
• Have a thermal pad that is as large as the LMX2594 exposed pad. Add vias to the thermal pad to maximize
thermal performance.
• Use a low loss dielectric material, such as Rogers 4003, for optimal output power.
• See instructions for the LMX2594EVM (LMX2594 EVM Instructions, 15 GHz Wideband Low Noise PLL With
Integrated VCO) for more details on layout.
Submit Documentation Feedback
Copyright © 2017–2019, Texas Instruments Incorporated
Product Folder Links: LMX2594
65
�LMX2594
SNAS696C – MARCH 2017 – REVISED APRIL 2019
www.ti.com
10.2 Layout Example
Figure 55. LMX2594 PCB Layout
66
Submit Documentation Feedback
Copyright © 2017–2019, Texas Instruments Incorporated
Product Folder Links: LMX2594
�LMX2594
www.ti.com
SNAS696C – MARCH 2017 – REVISED APRIL 2019
11 Device and Documentation Support
11.1 Device Support
11.1.1 Third-Party Products Disclaimer
TI'S PUBLICATION OF INFORMATION REGARDING THIRD-PARTY PRODUCTS OR SERVICES DOES NOT
CONSTITUTE AN ENDORSEMENT REGARDING THE SUITABILITY OF SUCH PRODUCTS OR SERVICES
OR A WARRANTY, REPRESENTATION OR ENDORSEMENT OF SUCH PRODUCTS OR SERVICES, EITHER
ALONE OR IN COMBINATION WITH ANY TI PRODUCT OR SERVICE.
11.1.2 Development Support
Texas Instruments has several software tools to aid in the development at www.ti.com. Among these tools are:
• EVM software to understand how to program the device and for programming the EVM board.
• EVM board instructions for seeing typical measured data with detailed measurement conditions and a
complete design.
• PLLatinum Sim program for designing loop filters, simulating phase noise, and simulating spurs .
11.2 Documentation Support
11.2.1 Related Documentation
For related documentation see the following:
• AN-1879 Fractional N Frequency Synthesis (SNAA062)
• PLL Performance, Simulation, and Design Handbook (SNAA106)
• LMX2594 EVM Instructions –15-GHz Wideband Low Noise PLL With Integrated VCO (SNAU210)
11.3 Receiving Notification of Documentation Updates
To receive notification of documentation updates, navigate to the device product folder on ti.com. In the upper
right corner, click on Alert me to register and receive a weekly digest of any product information that has
changed. For change details, review the revision history included in any revised document.
11.4 Community Resources
The following links connect to TI community resources. Linked contents are provided "AS IS" by the respective
contributors. They do not constitute TI specifications and do not necessarily reflect TI's views; see TI's Terms of
Use.
TI E2E™ Online Community TI's Engineer-to-Engineer (E2E) Community. Created to foster collaboration
among engineers. At e2e.ti.com, you can ask questions, share knowledge, explore ideas and help
solve problems with fellow engineers.
Design Support TI's Design Support Quickly find helpful E2E forums along with design support tools and
contact information for technical support.
11.5 Trademarks
PLLATINUM, E2E are trademarks of Texas Instruments.
All other trademarks are the property of their respective owners.
11.6 Electrostatic Discharge Caution
These devices have limited built-in ESD protection. The leads should be shorted together or the device placed in conductive foam
during storage or handling to prevent electrostatic damage to the MOS gates.
11.7 Glossary
SLYZ022 — TI Glossary.
This glossary lists and explains terms, acronyms, and definitions.
Submit Documentation Feedback
Copyright © 2017–2019, Texas Instruments Incorporated
Product Folder Links: LMX2594
67
�LMX2594
SNAS696C – MARCH 2017 – REVISED APRIL 2019
www.ti.com
12 Mechanical, Packaging, and Orderable Information
The following pages include mechanical, packaging, and orderable information. This information is the most
current data available for the designated devices. This data is subject to change without notice and revision of
this document. For browser-based versions of this data sheet, refer to the left-hand navigation.
68
Submit Documentation Feedback
Copyright © 2017–2019, Texas Instruments Incorporated
Product Folder Links: LMX2594
�PACKAGE OPTION ADDENDUM
www.ti.com
10-Dec-2020
PACKAGING INFORMATION
Orderable Device
Status
(1)
Package Type Package Pins Package
Drawing
Qty
Eco Plan
(2)
Lead finish/
Ball material
MSL Peak Temp
Op Temp (°C)
Device Marking
(3)
(4/5)
(6)
LMX2594RHAR
ACTIVE
VQFN
RHA
40
2500
RoHS & Green
NIPDAUAG
Level-3-260C-168 HR
-40 to 85
LMX2594
LMX2594RHAT
ACTIVE
VQFN
RHA
40
250
RoHS & Green
NIPDAUAG
Level-3-260C-168 HR
-40 to 85
LMX2594
(1)
The marketing status values are defined as follows:
ACTIVE: Product device recommended for new designs.
LIFEBUY: TI has announced that the device will be discontinued, and a lifetime-buy period is in effect.
NRND: Not recommended for new designs. Device is in production to support existing customers, but TI does not recommend using this part in a new design.
PREVIEW: Device has been announced but is not in production. Samples may or may not be available.
OBSOLETE: TI has discontinued the production of the device.
(2)
RoHS: TI defines "RoHS" to mean semiconductor products that are compliant with the current EU RoHS requirements for all 10 RoHS substances, including the requirement that RoHS substance
do not exceed 0.1% by weight in homogeneous materials. Where designed to be soldered at high temperatures, "RoHS" products are suitable for use in specified lead-free processes. TI may
reference these types of products as "Pb-Free".
RoHS Exempt: TI defines "RoHS Exempt" to mean products that contain lead but are compliant with EU RoHS pursuant to a specific EU RoHS exemption.
Green: TI defines "Green" to mean the content of Chlorine (Cl) and Bromine (Br) based flame retardants meet JS709B low halogen requirements of
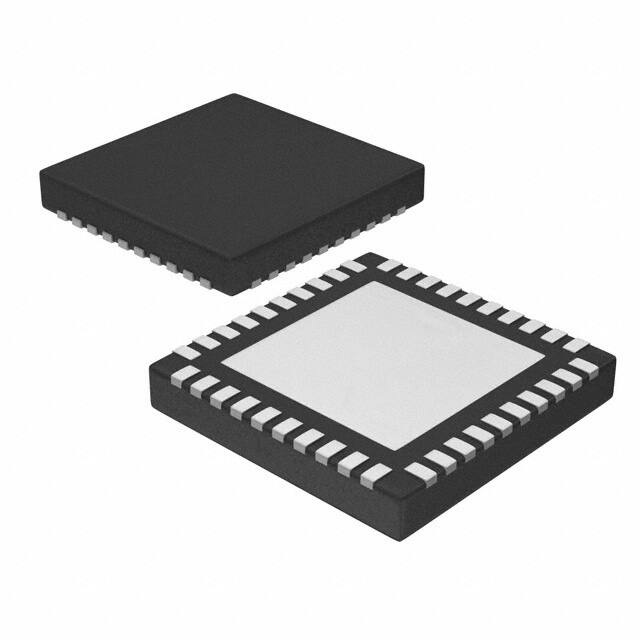


 工商网监
湘ICP备2023018690号
工商网监
湘ICP备2023018690号
