MAX1115X/MAX1116X Family
Evaluation Kit
Evaluates: MAX11150/MAX11152/MAX11158/
MAX11160/MAX11161/MAX11162/MAX11163/
MAX11168/MAX11169
General Description
The evaluation kit (EV kit) demonstrates the MAX1115X/
MAX1116X family of 18-/16-bit SAR ADCs. The EV kit
includes a graphical user interface (GUI) that provides
communication from the target device to the PC. The EV
kit can operate in multiple modes:
1) Standalone Mode: In “standalone” mode, the EV kit
is connected to the PC via a USB cable and performs
a subset of the complete EV kit functions with limitation for sample rate, sample size, and no support for
coherent sampling.
2) FPGA Mode: In “FPGA” mode, the EV kit is connected to an Avnet ZedBoard™ through a low-pin-count
FMC connector. The ZedBoard features a Xilinx®
Zynq® -7000 SoC, that connects to the PC through
an Ethernet port, which allows the GUI to perform
different operations with full control over mezzanine
card functions. The EV kit with FPGA platform performs the complete suite of evaluation tests for the
target IC.
3) User-Supplied SPI Mode: In addition to the USB and
FMC interfaces, the EV kit provides a 12-pin PMODstyle header for user-supplied SPI interface to connect
the signals for SCLKx, DINx, DOUTx, and CNVSTx.
The EV kit includes Windows XP®-, Windows® 7, and
Windows 8.1-compatible software for exercising the features of the IC. The EV kit GUI allows different sample
sizes, adjustable sampling rates, internal or external reference options (depending upon target device selected),
and graphing software that includes the FFT and histogram of the sampled signals.
The ZedBoard board accepts a +12V AC-DC wall adapter.
The EV kit can be powered by a local +20V supply. The
EV kit has on-board transformers and digital isolators to
separate the IC from the ZedBoard/on-board processor.
The MAX1115X/MAX1116X EV kit comes installed with
a MAX1115XEUB+/MAX1116XEUB+ in a 10-pin µMAX®
package, but can also evaluate other pin-compatible parts
in the family. For a full list of products supported by this
EV kit, see Table 4.
ZedBoard is a trademark of Avnet, Inc.
Xilinx and Zynq are registered trademarks of Xilinx, Inc.
Windows XP and Windows are registered trademarks and registered service marks of Microsoft Corporation.
µMAX is a registered trademark of Maxim Integrated Products, Inc.
19-7582; Rev 0; 5/15
Features
●● High-Speed USB Connector, FMC Connector, and
PMOD-Style Connector
●● 75MHz SPI Clock Capability through FMC Connector
●● 10MHz SPI Clock Capability in Standalone Mode
●● Various Sample Sizes and Sample Rates (Up to
500ksps)
●● Collects Up to 1 Million samples (with FPGA
Platform)
●● Time Domain, Frequency Domain, and Histogram
Plotting
●● Sync In/Out for Coherent Sampling (with FPGA platform)
●● On-Board Input Buffers (MAX9632 and MAX44242)
●● On-Board Voltage References (MAX6126 and
MAX6070)
●● Proven PCB Layout
●● Fully Assembled and Tested
●● Windows XP-, Windows 7-, and Windows
8.1-Compatible Software
Ordering Information appears at end of data sheet.
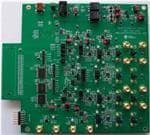
EV Kit Photo
�Evaluates: MAX11150/MAX11152/
MAX11158/MAX11160/MAX11161/MAX11162/
MAX11163/MAX11168/MAX11169
MAX1115X/MAX1116X Family
Evaluation Kit
System Block Diagram
SYNC IN,
SYNC OUT
+
ISOLATED
DC-DC
MAX9632
+
MAX9632
+
MAX44242
+
MAX44242
+
MAX9632
U10
ADC # 1
ADC_EXT_REF
MAX6126
VREF1_ADC
VREF2_ADC
MAX6070
+
MAX9632
- MAX44242
+
SCLK1
CNVST1
DOUT1
DIN1
U14
ADC # 2
+
MAX44242
F
M
C
DOUT_DAISY
+3.3V/
+2.5V
DOUT
DOUT2
SCLK
SCLK1
CNVST1
CNVST
DIN
FPGA ZedBoard
I
S
O
L
A
T
I
O
N
H
E
A
D
E
R
USER-SUPPLIED
SPI
PC - USB
SCLK2
CNVST2
FTDI
USB
+3.3V/+2.5V
GND
MAX1115X/MAX1116X EV Kit Files
FILE
DESCRIPTION
MAX1115X_6XEVKitSetupV1.0.exe
Application Program (GUI)
Boot.bin
ZedBoard firmware (SD card to boot Zynq)
Quick Start
Required Equipment
●●
MAX1115X/MAX1116X EV kit
●●
+20V (500mA) power supply
●●
Micro-USB cable
●●
ZedBoard development board
●●
Function generator (optional)
●●
DMM (for calibration – optional)
●●
Windows XP, Windows 7, or Windows 8.1 PC with a
spare USB port
Note: In the following section(s), software-related items
are identified by bolding. Text in bold refers to items directly from the EV system software. Text in bold and underline refers to items from the Windows operating system.
www.maximintegrated.com
Procedure
The EV kit is fully assembled and tested. Follow the steps
below to verify board operation:
1) Visit http://www.maxim-ic.com/evkitsoftware to
download the latest version of the EV kit software,
MAX1115X_6XEVK.ZIP. Save the EV kit software to
a temporary folder and uncompress the ZIP file.
2) Install the EV kit software and USB driver on your computer by running the MAX1115X_6XEVKitSetupV1.0.exe
program inside the temporary folder. The program
files are copied to your PC and icons are created in
the Windows Start | Programs menu. At the end of
the installation process, the installer will launch the
installer for the FTDIChip CDM drivers.
Maxim Integrated │ 2
�MAX1115X/MAX1116X Family
Evaluation Kit
Evaluates: MAX11150/MAX11152/
MAX11158/MAX11160/MAX11161/MAX11162/
MAX11163/MAX11168/MAX11169
For Standalone Mode:
1) Verify that all jumpers are in their default positions for
the EV kit board (Table 2).
2) Connect the PC to the EV kit using a micro USB cable.
3) Connect the +20V adapter to the EV kit.
4) Start the EV kit software by opening its icon in the
Start | Programs menu. The EV kit software appears
in Figure 1.
5) The software should automatically connect to the
hardware and display EV kit Hardware Connected
in the Status bar. If it does not connect, then from the
Device menu, select Standalone and click Search
for USB Device. Then select Standalone again and
select a device in the list. Verify that the lower right
status bar indicates the EV kit hardware is Connected.
For FPGA Mode (When Connected to a Zedboard):
1) Connect the Ethernet cable from the PC to the ZedBoard and configure the Internet Protocol Version
4 (TCP/Ipv4) properties in the local area connection to IP address 192.168.1.2 and subnet mask to
255.255.255.0.
2) Verify that the ZedBoard SD card contains the Boot.
bin file for the MAX1115X/MAX1116X EV kit.
3) Connect the EV kit FMC connector to the ZedBoard
FMC connector. Gently press them together.
4) Verify that all jumpers are in their default positions for
the ZedBoard (Table 1) and EV kit board (Table 2).
5) Connect the 12V power supply to the ZedBoard.
Leave the Zedboard powered off.
6) Enable the ZedBoard power supply by sliding SW8 to
ON and connect the +20V adapter to the EV kit.
7) Start the EV kit software by opening its icon in the
Start | Programs menu. The EV kit software appears
as shown in Figure 1. From the Device menu select
FPGA. Verify that the lower right status bar indicates
the EV Kit hardware is Connected.
For Either Standalone or FPGA Mode:
1) Connect the positive terminal of the function generator to the AIN0+ (TP2) test point on the EV kit. Connect the negative terminal of the function generator to
the AIN0- (TP1) test point on the EV kit.
2) Configure the signal source to generate a 1kHz,
1VP-P sinusoidal wave with +500mV offset.
3) Turn on the function generator.
4) In the Configuration group, select Device to match
IC type, select Channel 1 and then click Capture.
5) Click on the Scope tab.
6) Check the Remove DC Offset checkbox to remove
the DC component of the sampled data.
7) Click the Capture button to start the data analysis.
The default sample size is 8192.
8) The EV kit software appears as shown in Figure 1.
9) Verify the frequency is approximately 1kHz is displayed on the right. The scope image has buttons in
the upper right corner that allow zooming in to detail.
Table 1. ZedBoard Jumper Settings
JUMPER
SHUNT POSITION
J18
1-2
VDDIO set for 3.3V.
JP11
JP10
JP9
JP8
JP7
JP10
2-3
1-2
1-2
2-3
2-3
Boot from SD card
J12
—
SD card installed
J20
—
Connected to 12V wall adapter
SW8
OFF
www.maximintegrated.com
DESCRIPTION
ZedBoard power switch, OFF while connecting boards
Maxim Integrated │ 3
�MAX1115X/MAX1116X Family
Evaluation Kit
Evaluates: MAX11150/MAX11152/
MAX11158/MAX11160/MAX11161/MAX11162/
MAX11163/MAX11168/MAX11169
Table 2. EV kit Jumper Settings†
JUMPER
J3 (Red)
J4 (Red)
J5 (Black)
J6 (Black)
J7 (Black)
J8 (Red)
J9 (Black)
J10 (Black)
J11 (Black)
J12 (Black)
JUMPER
POSITION
OPEN*
Set output of U5 to 3.3V
1-2
Set output of U5 to 2.5V
1-2
Power U23 with 12V for 5V FPGA power (Do not populate 1-2 and 3-4 at same time)
3-4*
Power U23 with 20V for 5V FPGA power (Do not populate 1-2 and 3-4 at same time)
1-2*
Connect BIN0- to AGND
3-4
Connect BIN0+ to AGND
1-2*
Connect BIN2- to AGND
3-4
Connect BIN2+ to AGND
1-2*
Connect BIN3- to AGND
3-4
Connect BIN3+ to AGND
1-2
Power U20 with +12V from FPGA
3-4*
Power U20 with 5V from USB
1-2*
Connect BIN1- to AGND
3-4
Connect BIN1+ to AGND
1-2
Connects output of U27 (BIN0) to inverting input of U28
3-4*
Connects BIN1- to inverting input of U28
5-6*
Connects output of U27 (BIN0) to noninverting input of U28
7-8
Connects BIN1+ to noninverting input of U28
1-2
Connects output of U26A (BIN2) to inverting input of U26B
3-4*
Connects BIN3- to inverting input of U26B
5-6*
Connects output of U26A (BIN2) to noninverting input of U28
7-8
Connects BIN3+ to noninverting input of U28
OPEN
Disable on-board power supplies
1-2*
Enable on-board power supplies
OPEN*
J13 (Black)
J14 (Red)
J15 (Red)
J16 (Red)
J17 (Red)
J19 (Black)
DESCRIPTION
User connect external reference to TP12 – ADC_EXT_REF (If the target device has an internal
reference J13 should be left open)
1-2
MAX6070 is VREF source
2-3**
MAX6126 is VREF source
OPEN
Disable +3V3_USB power for FTDI chip
1-2*
Enable +3V3_USB power for FTDI chip
1-2
Power U2 from EXTERNAL +18V source
3-4*
Power U2 from T1 +18V output
1-2
Power U3 from EXTERNAL -18V source
3-4*
Power U3 from T2 -18V output
1-2
Use external +10V applied at TP9
3-4*
Use U2 output for +10V, 100mA supply
1-2*
Connect U10 SDI to DVDD (CS mode)
3-4
Connect U10 SDI to U14 SDO (daisy-chain mode)
www.maximintegrated.com
Maxim Integrated │ 4
�MAX1115X/MAX1116X Family
Evaluation Kit
Evaluates: MAX11150/MAX11152/
MAX11158/MAX11160/MAX11161/MAX11162/
MAX11163/MAX11168/MAX11169
Table 2. EV kit Jumper Settings† (continued)
JUMPER
J20 (Black)
JUMPER
POSITION
1-2
OPEN*
DESCRIPTION
Connects U10 SDO to DVDD (enable busy bit)
No pullup on U10 SDO
J21
—
ADC2 SPI Port Test Points (header – no jumpers)
J22
—
ADC1 SPI Port Test Points (header – no jumpers)
J23
—
Serial EEPROM Test Points (header – no jumpers)
1-2
Changes the -10V supply to ground
3-4
-10V supplied by external test point (TP23)
5-6*
-10V supplied by U3
J24 (Red)
J25
J26 (Red)
—
PMOD-style connector. Connects to ADC1 and ADC2 SPI ports, 12 pins (no jumpers).
1-2
+15V supplied from external test point (TP38)
3-4*
+15V supplied by U6
1-2
Changes the -15V supply to ground
J27 (Red)
J28 (Black)
J29 (Black)
J31 (Black)
J32 (Black)
J33 (Black)
3-4
-15V supplied by external test point (TP37)
5-6*
-15V supplied by U13
1-2*
Connect AIN0- to AGND
3-4
Connect AIN0+ to AGND
1-2*
Connect AIN1- to AGND
3-4
Connect AIN1+ to AGND
1-2*
Connect AIN3- to AGND
3-4
Connect AIN3+ to AGND
1-2
Connect U7 output (AIN0) to U8 inverting input
3-4*
Connect AIN1- to U8 inverting input
5-6*
Connect U7 output (AIN0) to U8 noninverting input
7-8
Connect AIN1+ to U8 noninverting input
1-2*
Connect AIN2- to AGND
3-4
Connect AIN2+ to AGND
1-2*
Connect U8 output to U10 AIN+
3-4
Connect U9B output to U10 AIN+
5-6
Connect GND_SENSE (TP26) to U10 AIN-
7-8*
Connect U10 AIN- to AGND
J34 (Black)
J35 (Black)
1-2
Connect U14 CVNST to CNVST1_ADC
3-4*
Connect U14 CVNST to CNVST2_ADC
5-6
Connect U14 SCLK to SCLK1_ADC
7-8*
Connect U14 SCLK to SCLK2_ADC
9-10
Connect U14 SDI to AGND
11-12*
Connect U14 SDI to DVDD
www.maximintegrated.com
Maxim Integrated │ 5
�MAX1115X/MAX1116X Family
Evaluation Kit
Evaluates: MAX11150/MAX11152/
MAX11158/MAX11160/MAX11161/MAX11162/
MAX11163/MAX11168/MAX11169
Table 2. EV kit Jumper Settings† (continued)
JUMPER
J36 (Black)
JUMPER
POSITION
1-2
Connect U9A output (AIN2) to U9B inverting input
3-4*
Connect AIN3- to U9B inverting input
5-6*
Connect U9A output (AIN2) to U9B noninverting input
7-8
Connect AIN3+ to U9B noninverting input
1-2**
Connect ADC_EXT_REF to U10 REF (ADC1)
3-4
Connect ADC_EXT_REF to U9 VREF2
5-6
Connect ADC_EXT_REF to U8 VREF1
7-8
Connect ADC_EXT_REF to U26 VREF4
9-10
Connect ADC_EXT_REF to U28 VREF3
J37 (Black)
11-12**
J38 (Bue)
DESCRIPTION
Connect ADC_EXT_REF to U14 REF (ADC2)
1-2*
Connect U14 SDO to DOUT2_ADC
3-4
Connect U14 SDO to DOUT_DAISY
1-2*
Connect U28 output to U14 AIN+
3-4
Connect U26B output to U14 AIN+
5-6
Connect GND_SENSE to U14 AIN-
7-8*
Connect AGND to U14 AIN-
J39 (Black)
Red test points and red jumpers are used for power settings. Black test points are used for ground points, white test points are used
for all signal points, black jumper for I/O settings.
*Default positions
**If the target ADC requires an external reference this should be populated (MAX11152 and MAX11162)
†
www.maximintegrated.com
Maxim Integrated │ 6
�MAX1115X/MAX1116X Family
Evaluation Kit
General Description of Software
Evaluates: MAX11150/MAX11152/
MAX11158/MAX11160/MAX11161/MAX11162/
MAX11163/MAX11168/MAX11169
CS Mode (Single ADC Mode)
The main window of the EV kit software contains five
tabs: Configuration, Scope, DMM, Histogram, and FFT.
The Configuration tab provides control for the two ADCs
configuration during data capture. The other four tabs are
used for evaluating the data captured by the ADCs. In
addition, the sample data can be saved to a file.
The factory-default jumper settings have the ADCs on the
EV kit configured for CS mode, using the Channel 1 device
(U10) and Channel 2 device (U14). In the Configuration
tab the correct selection must be made for CS Mode. If
the busy bit is desired, select CS Mode with Busy and
populate J20.
Configuration Tab
Daisy-Chain Mode
The Configuration tab provides an interface for selecting
and configuring the ADC from a functional perspective.
Select the desired Device in the drop-down list and the
corresponding properties of the device are displayed
including Resolution, Input Range, Reference Voltage,
and Max Sample Rate. If the selected ADC uses an
external reference, then use the Reference Voltage
numeric box to enter the measured reference value. The
on-board reference is 5V.
To use the ADCs in daisy-chain mode, move the shunts
described in Table 3 for J19 and J38 so the SDO of U14
(DOUT2_DAISY) connects to the SDI of U10. The SDO
of U10 connects to the SPI MISO for the GUI to read
the data. In the Configuration tab, the correct selection
must be made for Interface Mode set as Daisy-chain.
The channel selection automatically changes to Both
Channels in daisy-chain mode.
The sampling settings are available on the left, which
allow the user to select the Channel, Sample Rate,
Number of Samples, and SCLK Frequency. The SCLK
Frequency selection is required prior to adjusting to the
desired sampling rate.
There are two ADCs on the EV kit. In standalone mode,
the two ADCs are read sequentially, while in FPGA mode
they can be read simultaneously. To use the ADCs in
multichannel mode, move the shunts described in Table 3
for CS Mode. In the Configuration tab, the correct selection must be made for Both Channels and the Interface
Mode must be in CS mode.
The two ADCs on the EV kit have a variety of interface
modes to the master. The modes include CS mode and
daisy-chain mode.
Dual ADC Mode (Sequential or Simultaneous)
Table 3. Interface Mode Jumper Settings
INTERFACE MODE
J35
J38
J19
CS Mode, No Busy
CNVST2 (3-4), SCLK2 (7-8), DVDD (11-12)
DOUT2 (1-2)
DVDD (1-2)
OPEN
CS Mode, With Busy
CNVST2 (3-4), SCLK2 (7-8), DVDD (11-12)
DOUT2 (1-2)
DVDD (1-2)
SHORT
Daisy Chain
CNVST1 (1-2), SCLK1 (5-6), AGND (9-10)
DOUT_DAISY (3-4)
DOUT_DAISY (3-4)
OPEN
www.maximintegrated.com
J20
Maxim Integrated │ 7
�MAX1115X/MAX1116X Family
Evaluation Kit
System Calibration
The purpose of this procedure is to calculate coefficients
to compensate gain and offset error. This procedure
allows the calibration using any two points that fit the input
voltage range. A DC supply and DMM is required for this
procedure.
1) Measure the zero-scale and full-scale signal applied
at the input of the EV kit.
2) Enter the voltage values into the Input Measured
(V) Min and Max numeric boxes (±5V or ±10V depending upon the ADC device on the EV kit).
3) Apply a zero-scale signal (-5V or -10V depending
upon ADC device on the EV kit) to the ADC inputs
and click Read Data.
Evaluates: MAX11150/MAX11152/
MAX11158/MAX11160/MAX11161/MAX11162/
MAX11163/MAX11168/MAX11169
4) Enter the Data (V) value into the ADC Data Read
(V) Min numeric box.
5) Apply a full-scale signal (+5V or +10V depending
upon ADC device on the EV kit) to the ADC inputs
and click Read Data.
6) Enter the Data (V) value into the ADC Data Read
(V) Max numeric box.
7) Click Calculate.
8) The GUI will adjust the Gain Coefficient value and
Offset (mV) value.
9) Software calibration is enabled by checking the Enable Calibration checkbox. This calibration is used
for measurements taken with the Scope, DMM,
Histogram, and FFT tabs.
Figure 1. EV Kit Software (Configuration Tab)
www.maximintegrated.com
Maxim Integrated │ 8
�MAX1115X/MAX1116X Family
Evaluation Kit
Scope Tab
The Scope tab sheet is used to capture data and display it
in the time domain. Sampling rate and number of samples
can also be set in this tab if they were not appropriately
adjusted in other tabs. The Display Unit drop-down list
Evaluates: MAX11150/MAX11152/
MAX11158/MAX11160/MAX11161/MAX11162/
MAX11163/MAX11168/MAX11169
allows counts and voltages. Once the desired configuration
is set, click on the Capture button. The right side of the tab
sheet displays details of the waveform, such as average,
standard deviation, maximum, minimum, and fundamental
frequency. Figure 2 displays the ADC data when a
sinusoidal signal is applied to the inputs on the EV kit.
Figure 2. EV Kit Software (Scope Tab)
www.maximintegrated.com
Maxim Integrated │ 9
�MAX1115X/MAX1116X Family
Evaluation Kit
Evaluates: MAX11150/MAX11152/
MAX11158/MAX11160/MAX11161/MAX11162/
MAX11163/MAX11168/MAX11169
DMM Tab
The DMM tab sheet provides the typical information as a digital multimeter. Once the desired configuration is set, click
on the Capture button.
Figure 3. EV Kit Software (DMM Tab)
www.maximintegrated.com
Maxim Integrated │ 10
�MAX1115X/MAX1116X Family
Evaluation Kit
Histogram Tab
The Histogram tab sheet is used to capture the histogram
of the data. Sampling rate and number of samples can
also be set in this tab if they were not appropriately
adjusted in other tabs. Once the desired configuration is
set, click on the Capture button. The right side of the tab
Evaluates: MAX11150/MAX11152/
MAX11158/MAX11160/MAX11161/MAX11162/
MAX11163/MAX11168/MAX11169
sheet displays details of the histogram such as average,
standard deviation, maximum, minimum, peak-to-peak
noise, effective resolution, and noise-free resolution.
Figure 4 shows data when inputs AIN0+ and AIN0- are
connected to GND.
Figure 4. EV Kit Software (Histogram Tab)
www.maximintegrated.com
Maxim Integrated │ 11
�MAX1115X/MAX1116X Family
Evaluation Kit
FFT Tab
The FFT tab sheet is used to display the FFT of the data.
Sampling rate and number of samples can also be set in
this tab if they were not appropriately adjusted in other tabs.
Once the desired configuration is set, click on the Capture
button. The right side of the tab displays the performance
based on the FFT, such as fundamental frequency, SNR,
SINAD, THD, SFDR, ENOB, and noise floor.
Evaluates: MAX11150/MAX11152/
MAX11158/MAX11160/MAX11161/MAX11162/
MAX11163/MAX11168/MAX11169
When coherent sampling is needed, this tab allows the
user to calculate the input frequency or the master clock
coming into the board. Either adjust the input frequency
applied to the signal generator or adjust the master
applied to the SYNC_IN SMA connector. See the Sync
Input and Sync Output section before using this feature.
Figure 13 shows the setup Maxim Integrated uses to capture data for coherent sampling.
Figure 5. EV Kit Software (FFT Tab)
www.maximintegrated.com
Maxim Integrated │ 12
�Evaluates: MAX11150/MAX11152/
MAX11158/MAX11160/MAX11161/MAX11162/
MAX11163/MAX11168/MAX11169
MAX1115X/MAX1116X Family
Evaluation Kit
Detailed Description of Hardware
The MAX1115X/MAX1116X EV kit provides a proven
signal path to demonstrate the performance of the
MAX1115X/MAX1116X 18-/16-bit SAR ADCs. Included in
the EV kit are digital isolators, isolated DC-DC converters,
ultra-low-noise LDOs to all supply pins of the IC, on-board
references (MAX6126 and MAX6070), precision amplifiers (MAX9632 for bipolar and MAX44242 for unipolar)
for analog inputs, and sync-in and sync-out signals for
coherent sampling. Two ADCs are on the board to allow
daisy-chain mode operation if desired.
An on-board FTDI controller is provided to allow for
evaluation in standalone mode, which has limitations on
maximum sample speed and on sample depth. The EV
kit can be used with a FPGA to achieve full speed and a
larger sample depth.
The EV kit supports a number of different devices with a
10-pin µMAX package as listed in Table 4.
For the MAX11156 and MAX11154 in a 12-pin TDFN
package, please refer to the MAX11156EVSYS#
and for the MAX11166, MAX11167, MAX11164, and
MAX11165 in a 12-pin TDFN package, please refer to the
MAX11166EVSYS#. A full 18-bit data acquisition system
featuring the MAX11156 ADC and the MAX5318 DAC
is available as the MAXREFDES74# reference design,
which includes an FMC interface to the FPGA and standalone USB.
Table 4. Products Supported with MAX1115X/MAX1116X EV Kit
PART NO.
RESOLUTION
(BITS)
MAX. SAMPLE RATE
(ksps)
INPUT RANGE
(V)
VOLTAGE
REFERENCE
MAX11150
18
500
0 to +5
Internal REF
MAX11152
18
500
0 to +5
External REF
MAX11158
18
500
±5
Internal REF
MAX11160 (MAX11161)
16
500 (250)
0 to +5
Internal REF
MAX11162 (MAX11163)
16
500 (250)
0 to +5
External REF
MAX11168 (MAX11169)
16
500 (250)
±5
Internal REF
www.maximintegrated.com
Maxim Integrated │ 13
�Evaluates: MAX11150/MAX11152/
MAX11158/MAX11160/MAX11161/MAX11162/
MAX11163/MAX11168/MAX11169
MAX1115X/MAX1116X Family
Evaluation Kit
USB Interface
The maximum sample rate is 250ksps and the maximum
sample size is 16384.
FMC Interface
The user should confirm compatibility of pin usage
between their own FMC implementation and that of the
MAX1115X/MAX1116X EV kit before connecting the
MAX1115X/MAX1116X EV kit to a different system with
FMC connectors.
User-Supplied SPI Interface
In addition to the USB and FMC interfaces, the EV kit provides a 12-pin PMOD-style header (J25) for user-supplied
SPI interface. To evaluate the EV kit with a user-supplied
SPI bus, disconnect from the FMC bus and remove
jumper J14. Apply the user-supplied SPI signals to SCLK,
CNVST, DIN, and DOUT at the PMOD header. Make sure
the return ground is connected to the PMOD ground.
The on-board FTDI chip used for standalone mode does
not conflict with the user-supplied SPI if it is powered off
by removing jumper J14.
WARNING: DO NOT PLUG THIS HEADER INTO A
STANDARD PMOD INTERFACE FOUND ON OTHER
FPGA OR MICROCONTROLLER PRODUCTS. THE
SIGNAL DEFINITION IS UNIQUE TO THIS EV KIT.
Reference
Depending upon the target IC on the EV kit, there are
different sources for the voltage reference. As listed in
Table 4, some ADCs have the option to use an internal
reference. In addition, there are two voltage references
on the board and the option to provide a user-supplied
external reference signal.
For ADCs that require an external reference, the EV kit
includes two on-board references plus the option for a
user-supplied reference. The MAX6126 (U11) is an ultrahigh-precision, ultra-low-noise, series voltage reference
with 3ppm/°C maximum temperature coefficient and the
MAX6070 (U12) low-noise, high-precision series voltage
reference offers the highest performance SOT23 voltage
references with 6ppm/°C maximum temperature coefficient.
To use these voltage reference sources, populate jumpers J13 and J37. See Table 5 for jumper settings.
For a user-supplied external reference, remove the
jumper on J13 and connect a reference voltage to
ADC_EXT_REF at TP12. Measure and enter the value
of the external reference voltage into the Reference
Voltage edit box on the Configuration tab of the GUI.
When using devices with an internal reference, remove
all jumpers from J13 and J37.
Table 5. Reference Source Options
REF SOURCE
MAX6070
MAX6126
EXT_REF (TP12)
INT_REF
www.maximintegrated.com
JUMPER
CONNECTION
FUNCTION
J13
1-2
Select U12 MAX6070
J37
1-2 and 11-12
VREF1_ADC, VREF2_ADC
J13
2-3
Select U11 MAX6126
J37
1-2 and 11-12
VREF1_ADC, VREF2_ADC
J13
OPEN
Select ADC_EXT_REF
J37
1-2 and 11-12
VREF1_ADC, VREF2_ADC
J13
OPEN
—
J37
OPEN
MAX11150/MAX11158/MAX11160/MAX11168 only
Maxim Integrated │ 14
�Evaluates: MAX11150/MAX11152/
MAX11158/MAX11160/MAX11161/MAX11162/
MAX11163/MAX11168/MAX11169
MAX1115X/MAX1116X Family
Evaluation Kit
User-Supplied Power Supply
The EV kit receives power from a single DC source of
20V, 500mA through a J1 power jack. The MAX13256,
H-bridge driver and transformer create an additional
negative rail for +18V and -18V. The power is then rectified and regulated down to a +15V and -15V supplies
for the MAX9632 op amps, as well +10V and -10V supplies for the MAX44242 op amps. Additional supplies are
generated for +5V, +5.33V, and +3.3V/+2.5 for the ADCs
and VREF. See the EV kit schematics for details. Specific
voltages can be connected to the board for each rail, see
Table 6 for corresponding jumper positions.
Table 6. Power Supply to the Board
POWER
Single +20V input from a wall adapter
(default)
An external ±18V
An external ±15V
An external ±10V
www.maximintegrated.com
INPUT CONNECTORS
JUMPERS
J1
J12: 1-2
J15: 3-4
J16: 3-4
J26: 3-4
J27: 5-6
J17: 3-4
J24: 5-6
TP35 (+18V)
TP30 (-18V)
J12: Open
J15: 1-2
J16: 1-2
J26: 3-4
J27: 5-6
J17: 3-4
J24: 5-6
TP38 (+15V)
TP37 (-15V)
J12: Open
J15: Open
J16: Open
J26: 1-2
J27: 3-4
J17: 3-4
J24: 5-6
TP9 (+10V)
TP23 (-10V)
J12: Open
J15: Open
J16: Open
J26: 3-4
J27: 5-6
J17: 1-2
J24: 3-4
Maxim Integrated │ 15
�MAX1115X/MAX1116X Family
Evaluation Kit
Analog Input Voltage Ranges
The MAX1115X/MAX1116X are 18-/16-bit, single-channel, pseudo-differential ADCs. The ADCs convert input
signals on the ADC pin AIN+ (ADx_INP) in the range of
(±5V + AIN-) for bipolar or (5V + AIN-) to AIN- for unipolar.
For accurate conversions, the ADC pin AIN+ should also
be limited to ±(VDD + 0.1V) for bipolar and (VDD + 0.1V)
to -0.1V for unipolar. The ADC pin AIN- (ADx_INM) has an
input range of -0.1V to +0.1V and is typically connected
to the analog ground plane (AGND) of the EV kit. The
MAX1115X/MAX1116X perform a true differential sample
on inputs between AIN+ and AIN- with good commonmode rejection and by connecting the EV kit input signal
GND_SENSE to the ground reference of the input signal
source. This allows for improved sampling of remote
transducer inputs. See the jumper settings in Table 2 for
J34 and J39.
ADC Input Amplifiers
The input amplifiers allow for significant flexibility, supporting bipolar or unipolar input paths, as well as the option
Evaluates: MAX11150/MAX11152/
MAX11158/MAX11160/MAX11161/MAX11162/
MAX11163/MAX11168/MAX11169
for gain control. Each ADC channel can be configured
as single-ended bipolar, differential bipolar, single-ended
unipolar, and differential unipolar. See Tables 8 and 9 for
these analog input configurations for channels A and B,
respectively.
The analog front-end consists of two channels (A and B,
one for each ADC) and for each channel there are four
user-selectable input pairs (for example AINx+ and AINxwhere x is 0, 1, 2, or 3) allowing selection between one of
two op amp solutions. The MAX9632, which is a 36V, precision, low-noise, wide-band amplifier or the MAX44242,
which is a 20V, low input-bias-current, low-noise, dual
op amp. The op amps can be configured as inverting or
noninverting amplifiers by jumper selectors. Both op amps
work as anti-aliasing lowpass filters (LPF) and can be
daisy-chained to create a second-order LPF.
The range of possible configurations for Channels A and
B are listed in Tables 8 and 9, and the jumper connections
are shown in Figures 6 to 12.
Table 7. Analog Input Voltage Ranges
ADC
ADC INPUT
RANGE
MAX9632 INPUT
RANGE
MAX44242 INPUT
RANGE
±5V
±10V
±10V
MAX11158,
MAX11168
MAX11150,
MAX11152,
MAX11160,
MAX11162
0 to +5V
www.maximintegrated.com
±5V
VREF1 bias’s common
mode for U8 (MAX9632)
at 2.5V.
VREF3 bias’s common
mode for U28
(MAX9632) at 2.5V
±5V
VREF2 bias’s
common mode for U9
(MAX44242) at 2.5V.
VREF4 bias’s common
mode for U26
(MAX44242) at 2.5V
COMMENTS
Beyond-the-Rail ADCs work from
unipolar supply
VREF is used to bias the op amp
common mode to support 0 to +5V
input to the ADC.
The first ADC (U10) Common Mode
(CM) bias is set with VREF1 and
VREF2 depending upon the op amp
selected, and the second ADC (U14)
CM bias is set with VREF3 and
VREF4 depending upon the op amp
selected.
Maxim Integrated │ 16
�MAX1115X/MAX1116X Family
Evaluation Kit
Evaluates: MAX11150/MAX11152/
MAX11158/MAX11160/MAX11161/MAX11162/
MAX11163/MAX11168/MAX11169
Table 8. Analog Input Configurations (Channel A0–A3)
CONFIGURATION
NO.
1
2
3
4
5
6
7
8
9
10
DESCRIPTION
SIGNAL-PATH INPUT
CONFIGURATION
INPUT CONNECTORS
JUMPER POSITIONS
MAX9632, Channel A0
Noninverting, single-ended,
second-order LPF (default)
CON3: AIN0+ (or TP2)
and AGND (or TP8)
J28: 1-2
J29: 1-2
J32: 5-6 and 3-4
J34: 1-2 and 7-8
MAX9632, Channel A0
Noninverting, differential, secondorder LPF
CON3 (TP2): AIN0+
CON2 (TP1): AIN0-
J28: Open
J29: 1-2
J32: 5-6 and 3-4
J34: 1-2 and 7-8
MAX9632, Channel A0
Inverting, single-ended, secondorder LPF
CON3: AIN0+
or (TP2) and AGND (or
TP8)
J28: 1-2
J29: 3-4
J32: 1-2 and 7-8
J34: 1-2 and 7-8
MAX9632, Channel A0
Inverting, differential, second-order
LPF
CON2 (TP1): AIN0CON3 (TP2): AIN0+
J28: Open
J29: 3-4
J32: 1-2 and 7-8
J34: 1-2 and 7-8
MAX9632, Channel A1
Noninverting, single-ended, firstorder LPF
CON5: AIN1+ (or TP7)
and AGND (or TP15)
J28: Open
J29: 1-2
J32: 3-4 and 7-8
J34: 1-2 and 7-8
MAX9632, Channel A1
Differential, first-order LPF
CON5 (TP7): AIN1+
CON4 (TP10): AIN1-
J28: Open
J29: Open
J32: 3-4 and 7-8
J34: 1-2 and 7-8
MAX9632, Channel A1
Inverting, single-ended, first-order
LPF
CON4: AIN1- (or TP10)
and AGND (or TP15)
J28: Open
J29: 3-4
J32: 3-4 and 7-8
J34: 1-2 and 7-8
MAX44242, Channel A2
Noninverting, single-ended,
second-order LPF (default)
TP19: AIN2+ and AGND
(or TP11)
J33: 1-2
J31: 1-2
J36: 5-6 and 3-4
J34: 3-4 and 7-8
MAX44242, Channel A2
Noninverting, differential, secondorder LPF
TP19: AIN2+
TP18: AIN2-
J33: Open
J31: 1-2
J36: 5-6 and 3-4
J34: 3-4 and 7-8
MAX44242, Channel A2
Inverting, single-ended, secondorder LPF
TP19: AIN2+ and AGND
(or TP11)
J33: 1-2
J31: 3-4
J36: 1-2 and 7-8
J34: 3-4 and 7-8
www.maximintegrated.com
Maxim Integrated │ 17
�Evaluates: MAX11150/MAX11152/
MAX11158/MAX11160/MAX11161/MAX11162/
MAX11163/MAX11168/MAX11169
MAX1115X/MAX1116X Family
Evaluation Kit
Table 8. Analog Input Configurations (Channel A0–A3) (continued)
CONFIGURATION
NO.
SIGNAL-PATH INPUT
CONFIGURATION
DESCRIPTION
INPUT CONNECTORS
JUMPER POSITIONS
TP18: AIN2TP19: AIN2+
J33: Open
J31: 3-4
J36: 1-2 and 7-8
J34: 3-4 and 7-8
11
MAX44242, Channel A2
Inverting, differential, second-order
LPF
12
MAX44242, Channel A3
Noninverting, single-ended, firstorder LPF
TP14: AIN3+ and AGND
(or TP17)
J31: 1-2
J36: 3-4 and 7-8
J34: 3-4 and 7-8
13
MAX44242, Channel A3
Differential, first-order LPF
TP14: AIN3+
TP16: AIN3-
J31: Open
J36: 3-4 and 7-8
J34: 3-4 and 7-8
14
MAX44242, Channel A3
Inverting, single-ended, first-order
LPF
TP16: AIN3- and AGND
(or TP17)
J31: 3-4
J36: 3-4 and 7-8
J34: 3-4 and 7-8
AIN0J28
1
3
VIN
2
4
MAX9632
+
AIN0+
1 J32 2
3
4
5
7
6
8
MAX9632
+
1 J34 2
3
4
5
7
6
8
ADC_INP
ADC_INM
MAX1115X/
MAX1116X
SAR ADC
VREF
AIN11
3
J29
2
4
AIN1+
INPUT FROM MAX44242 AMPS
GND_SENSE
Figure 6. Noninverting, Single-Ended, Second-Order LPF
www.maximintegrated.com
Maxim Integrated │ 18
�Evaluates: MAX11150/MAX11152/
MAX11158/MAX11160/MAX11161/MAX11162/
MAX11163/MAX11168/MAX11169
MAX1115X/MAX1116X Family
Evaluation Kit
AIN0VIN
-
J28
1
3
2
4
MAX9632
+
AIN0+
1
J32
2
3
4
5
6
8
7
MAX9632
+
1
J34
ADC_INP
2
3
4
5
7
6
8
MAX1115X/
MAX1116X
SAR ADC
ADC_INM
VREF
AIN11
3
J29
2
4
AIN1+
INPUT FROM MAX44242 AMPS
GND_SENSE
Figure 7. Noninverting, Differential, Second-Order LPF
AIN0-
J28
1
3
2
4
MAX9632
+
AIN0+
VIN
1
3
5
7
J32
2
-
4
6
8
MAX9632
+
1
3
5
7
J34
2
4
6
8
ADC_INP
ADC_INM
MAX1115X/
MAX1116X
SAR ADC
VREF
AIN11
3
J29
2
4
AIN1+
INPUT FROM MAX44242 AMPS
GND_SENSE
Figure 8. Inverting, Single-Ended, Second-Order LPF
www.maximintegrated.com
Maxim Integrated │ 19
�Evaluates: MAX11150/MAX11152/
MAX11158/MAX11160/MAX11161/MAX11162/
MAX11163/MAX11168/MAX11169
MAX1115X/MAX1116X Family
Evaluation Kit
AIN0VIN
-
J28
1
3
2
4
MAX9632
+
AIN0+
1
J32
2
3
4
5
6
8
7
MAX9632
+
J34
1
ADC_INP
2
3
4
5
6
7
8
ADC_INM
MAX1115X/
MAX1116X
SAR ADC
VREF
AIN11
3
J29
2
4
AIN1+
INPUT FROM MAX44242 AMPS
GND_SENSE
Figure 9. Inverting, Differential, Second-Order LPF
AIN0J28
1
3
2
4
MAX9632
+
AIN0+
1
J32
2
3
4
5
7
6
8
MAX9632
+
1
J34
2
3
4
5
7
6
8
ADC_INP
ADC_INM
MAX1115X/
MAX1116X
SAR ADC
VREF
AIN11
3
J29
2
4
AIN1+
VIN
INPUT FROM MAX44242 AMPS
GND_SENSE
Figure 10. Noninverting, Single-Ended, First-Order LPF
www.maximintegrated.com
Maxim Integrated │ 20
�Evaluates: MAX11150/MAX11152/
MAX11158/MAX11160/MAX11161/MAX11162/
MAX11163/MAX11168/MAX11169
MAX1115X/MAX1116X Family
Evaluation Kit
AIN0-
-
J28
1
3
2
4
MAX9632
+
AIN0+
1
J32
2
3
4
5
6
8
7
MAX9632
+
J34
1
3
ADC_INP
2
5
4
6
7
8
ADC_INM
MAX1115X/
MAX1116X
SAR ADC
VREF
AIN11
3
VIN
J29
2
4
AIN1+
INPUT FROM MAX44242 Amps
GND_SENSE
Figure 11. Differential, First-Order LPF
AIN0J28
1
3
-
2
4
MAX9632
+
AIN0+
1
J32
2
3
4
-
5
6
MAX9632
7
8
+
1
J34
2
3
4
5
6
7
8
ADC_INP
ADC_INM
MAX1115X/
MAX1116X
SAR ADC
VREF
AIN11
3
VIN
J29
2
4
AIN1+
INPUT FROM MAX44242 AMPS
GND_SENSE
Figure 12. Inverting, Single-Ended, First-Order LPF
www.maximintegrated.com
Maxim Integrated │ 21
�MAX1115X/MAX1116X Family
Evaluation Kit
Evaluates: MAX11150/MAX11152/
MAX11158/MAX11160/MAX11161/MAX11162/
MAX11163/MAX11168/MAX11169
Table 9. Analog Input Configurations (Channel B0–B3)
CONFIGURATION
No.
DESCRIPTION
SIGNAL-PATH INPUT
CONFIGURATION
INPUT CONNECTORS
JUMPER POSITIONS
MAX9632, Channel B0
Noninverting, single-ended,
second-order LPF (default)
CON11: BIN0+ (or TP54):
and AGND (or TP39)
J5: 1-2
J9: 1-2
J10: 5-6 and 3-4
J39: 1-2 and 7-8
MAX9632, Channel B0
Noninverting, differential,
second-order LPF
CON11 (TP54): BIN0+
CON10 (TP53): BIN0-
J5: Open
J9: 1-2
J10: 5-6 and 3-4
J39: 1-2 and 7-8
MAX9632, Channel B0
Inverting, single-ended, secondorder LPF
CON11: BIN0+
or (TP54): and AGND (or
TP39)
J5: 1-2
J9: 3-4
J10: 1-2 and 7-8
J39: 1-2 and 7-8
4
MAX9632, Channel B0
Inverting, differential, secondorder LPF
CON10 (TP53): BIN0CON11 (TP54): BIN0+
J5: Open
J9: 3-4
J10: 1-2 and 7-8
J39: 1-2 and 7-8
5
MAX9632, Channel B1
Noninverting, single-ended, firstorder LPF
CON13: BIN1+
or (TP56): and AGND (or
TP41)
J9: 1-2
J10: 3-4 and 7-8
J39: 1-2 and 7-8
6
MAX9632, Channel B1
Differential, first-order LPF
CON13 (TP56): BIN1+
CON12 (TP55): BIN1-
J9: Open
J10: 3-4 and 7-8
J39: 1-2 and 7-8
7
MAX9632, Channel B1
Inverting, single-ended, firstorder LPF
CON12: BIN1- or (TP55):
and AGND (or TP41)
J9: 3-4
J10: 3-4 and 7-8
J39: 1-2 and 7-8
MAX44242, Channel B2
Noninverting, single-ended,
second-order LPF (default)
TP58: BIN2+ and AGND (or
TP40)
J6: 1-2
J7: 1-2
J11: 5-6 and 3-4
J39: 3-4 and 7-8
MAX44242, Channel B2
Noninverting, differential,
second-order LPF
TP58: BIN2+
TP57: BIN2-
J6: Open
J7: 1-2
J11: 5-6 and 3-4
J39: 3-4 and 7-8
MAX44242, Channel B2
Inverting, single-ended, secondorder LPF
TP58: BIN2+ and AGND (or
TP40)
J5: 1-2
J7: 3-4
J11: 1-2 and 7-8
J39: 3-4 and 7-8
1
2
3
8
9
10
www.maximintegrated.com
Maxim Integrated │ 22
�Evaluates: MAX11150/MAX11152/
MAX11158/MAX11160/MAX11161/MAX11162/
MAX11163/MAX11168/MAX11169
MAX1115X/MAX1116X Family
Evaluation Kit
Table 9. Analog Input Configurations (Channel B0–B3) (continued)
CONFIGURATION
No.
SIGNAL-PATH INPUT
CONFIGURATION
DESCRIPTION
INPUT CONNECTORS
JUMPER POSITIONS
TP57: BIN2TP58: BIN2+
J6: Open
J7: 3-4
J11: 1-2 and 7-8
J39: 3-4 and 7-8
11
MAX44242, Channel B2
Inverting, differential, secondorder LPF
12
MAX44242, Channel B3
Noninverting, single-ended, firstorder LPF
TP60: BIN3+ and AGND (or
TP42)
J7: 1-2
J11: 3-4 and 7-8
J39: 3-4 and 7-8
13
MAX44242, Channel B3
Differential, first-order LPF
TP60: BIN3+
TP59: BIN3-
J7: Open
J11: 3-4 and 7-8
J39: 3-4 and 7-8
14
MAX44242, Channel B3
Inverting, single-ended, firstorder LPF
TP59: BIN3- and AGND (or
TP42)
J7: 3-4
J11: 3-4 and 7-8
J39: 3-4 and 7-8
Note: Alternate connections are shown in parentheses.
Sync Input and Sync Output
one option should be used at a time. The relationship
between fIN, fS, NCYCLES, and MSAMPLES is given as
follows:
Sync input and sync output is applicable to the FPGA
(ZedBoard) and is not used in standalone mode. The
SYNC_IN SMA accepts an approximate 100MHz waveform signal to generate the system clock of the ZedBoard.
For maximum performance, use a low-jitter clock that
syncs to the user’s analog function generator. The
SYNC_OUT SMA outputs a 10MHz square waveform
that syncs to the user’s analog function generator. Both
options are used for coherent sampling of the IC. Only
fIN/fS = NCYCLES/MSAMPLES
where:
fIN = Input frequency
fS = Sampling frequency
NCYCLES = Prime number of cycles in the sampled set
MSAMPLES = Total number of samples
LOW-JITTER CLOCK
REF_OUT
~100MHz
OUT
10MHz
ZedBoard/FPGA Board
SIGNAL GENERATOR
10kHz
REF_IN
_
INV-
+
INV+
SYNC _IN
MASTER_CLOCK
FPGA
PC
MAX1115X/MAX1116X EV KIT
ETHERNET CABLE
Figure 13. EV Kit Coherent Sampling Setup
www.maximintegrated.com
Maxim Integrated │ 23
�MAX1115X/MAX1116X Family
Evaluation Kit
Evaluates: MAX11150/MAX11152/
MAX11158/MAX11160/MAX11161/MAX11162/
MAX11163/MAX11168/MAX11169
Figure 14. MAX1115X/MAX1116X EV Kit Component Placement Guide—Top Side
www.maximintegrated.com
Maxim Integrated │ 24
�MAX1115X/MAX1116X Family
Evaluation Kit
Evaluates: MAX11150/MAX11152/
MAX11158/MAX11160/MAX11161/MAX11162/
MAX11163/MAX11168/MAX11169
Figure 15. MAX1115X/MAX1116X EV Kit PCB Layout—Layer 1
www.maximintegrated.com
Maxim Integrated │ 25
�MAX1115X/MAX1116X Family
Evaluation Kit
Evaluates: MAX11150/MAX11152/
MAX11158/MAX11160/MAX11161/MAX11162/
MAX11163/MAX11168/MAX11169
Figure 16. MAX1115X/MAX1116X EV Kit PCB Layout—Layer 2
www.maximintegrated.com
Maxim Integrated │ 26
�MAX1115X/MAX1116X Family
Evaluation Kit
Evaluates: MAX11150/MAX11152/
MAX11158/MAX11160/MAX11161/MAX11162/
MAX11163/MAX11168/MAX11169
Figure 17. MAX1115X/MAX1116X EV Kit PCB Layout—Layer 3
www.maximintegrated.com
Maxim Integrated │ 27
�MAX1115X/MAX1116X Family
Evaluation Kit
Evaluates: MAX11150/MAX11152/
MAX11158/MAX11160/MAX11161/MAX11162/
MAX11163/MAX11168/MAX11169
Figure 18. MAX1115X/MAX1116X EV Kit PCB Layout—Layer 4
www.maximintegrated.com
Maxim Integrated │ 28
�MAX1115X/MAX1116X Family
Evaluation Kit
Evaluates: MAX11150/MAX11152/
MAX11158/MAX11160/MAX11161/MAX11162/
MAX11163/MAX11168/MAX11169
Figure 19. MAX1115X/MAX1116X EV Kit PCB Layout—Layer 5
www.maximintegrated.com
Maxim Integrated │ 29
�MAX1115X/MAX1116X Family
Evaluation Kit
Evaluates: MAX11150/MAX11152/
MAX11158/MAX11160/MAX11161/MAX11162/
MAX11163/MAX11168/MAX11169
Figure 20. MAX1115X/MAX1116X EV Kit PCB Layout—Layer 6
www.maximintegrated.com
Maxim Integrated │ 30
�MAX1115X/MAX1116X Family
Evaluation Kit
Evaluates: MAX11150/MAX11152/
MAX11158/MAX11160/MAX11161/MAX11162/
MAX11163/MAX11168/MAX11169
Figure 21. MAX1115X/MAX1116X EV Kit Component Placement Guide—Bottom Side
www.maximintegrated.com
Maxim Integrated │ 31
�MAX1115X/MAX1116X Family
Evaluation Kit
Evaluates: MAX11150/MAX11152/
MAX11158/MAX11160/MAX11161/MAX11162/
MAX11163/MAX11168/MAX11169
Component List and Schematic Diagrams
Refer to files “evkit_bom_max1115x6x_evkit_revA.csv” and “MAX1115X6X_EVKIT_Reva.SCH.pdf” attached to this data
sheet for component information and schematics diagrams.
Contact Avnet to purchase a ZedBoard (AES-Z7EV-7Z020-G) to communicate with the MAX1115X/MAX1116X EV kit.
Ordering Information
PART
TYPE
MAX11150EVKIT#
EVKIT
MAX11152EVKIT#
EVKIT
MAX11158EVKIT#
EVKIT
MAX11160EVKIT#
EVKIT
MAX11162EVKIT#
EVKIT
MAX11168EVKIT#
EVKIT
#Denotes RoHS compliant.
www.maximintegrated.com
Maxim Integrated │ 32
�MAX1115X/MAX1116X Family
Evaluation Kit
Evaluates: MAX11150/MAX11152/
MAX11158/MAX11160/MAX11161/MAX11162/
MAX11163/MAX11168/MAX11169
Revision History
REVISION
NUMBER
REVISION
DATE
0
5/15
DESCRIPTION
Initial release
PAGES
CHANGED
—
For pricing, delivery, and ordering information, please contact Maxim Direct at 1-888-629-4642, or visit Maxim Integrated’s website at www.maximintegrated.com.
Maxim Integrated cannot assume responsibility for use of any circuitry other than circuitry entirely embodied in a Maxim Integrated product. No circuit patent licenses
are implied. Maxim Integrated reserves the right to change the circuitry and specifications without notice at any time.
Maxim Integrated and the Maxim Integrated logo are trademarks of Maxim Integrated Products, Inc.
© 2015 Maxim Integrated Products, Inc. │ 33
�


 工商网监
湘ICP备2023018690号
工商网监
湘ICP备2023018690号
