Instruction Sheet
Hydraulic Crimping Head, PN 1752787-1
408-8914
31 JUL 17 Rev C
Products Crimped
AMPLI-BOND* and PLASTI-GRIP* Terminals
TERMINYL* Terminals and Splices
Pre-Insulated AMPOWER* Terminals
Pre-Insulated Nylon Heavy Duty Terminals
COPALUM* Sealed Terminals and Splices
Figure 1
1. INTRODUCTION
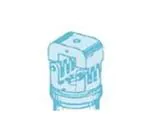
This instruction sheet covers application, inspection and maintenance procedures for Crimping Head 17527871 (see Figure 1). This crimping head uses interchangeable crimping dies and is used to crimp the products
listed in the table above; for large wire sizes 8 thru 4/0 AWG.
Note: This instruction sheet provides general information for the insertion of dies and the crimping procedure.
Always refer to the instructions packaged with specific die sets for specific crimping instructions and for
compatible products, wire ranges, strip dimensions, and application procedures.
This crimping head is designed for use with Foot Hydraulic Pump PN 1583659-1, Hand Hydraulic Pump PN
1583661-1, or Electric Hydraulic Pumps; PN 1804700-1 (115 VAC) and PN 1804700-2 (220 VAC).
Warning: To avoid personal injury and potential damage to the crimp head, TE Connectivity (TE) requires the
crimp head to operate at 9,800 to 10,200 PSI [676 to 703 bar]. TE recommends using 10,000 PSI [689 bar] TE
Hydraulic Pumps as other manufacturers’ pumps may apply insufficient pressure (resulting in an inadequate
crimp) or excessive pressure (resulting in failure of the head). Additionally, the TE pump must be used to
maintain CE certification; if using other manufacturers’ pumps, the user is responsible for self-certification.
NOTE
Dimensions in this instruction sheet are in millimeters [with inches in brackets]. Illustrations and figures are for reference only
and are not drawn to scale.
Reasons for reissue of this Instruction Sheet are provided in Section 8; REVISION SUMMARY
© 2017 TE Connectivity Ltd. family of companies.
All Rights Reserved.
*Trademark
PRODUCT INFORMATION 1-800-522-6752
This controlled document is subject to change.
For latest revision and Regional Customer Service,
visit our website at www.te.com.
TE Connectivity, TE connectivity (logo), and TE (logo) are trademarks. Other logos, product, and/or company names may be trademarks of their respective owners.
1 of 6
�408-8914
2. DESCRIPTION
Main components of the crimping head are: a yoke which houses the stationary die and retains the terminal
assembly for crimping, a removable latch pin which allows pivoting of the yoke on the pivot pin (typically
required for splice terminations), a cylinder which contains the head’s hydraulic chamber, a piston (ram) which
holds and controls the moving die, and a quick connect/disconnect coupler (cylinder half) which mates with the
coupler on the hose or handle control to release or supply pressure.
DANGER
To avoid injury when using hydraulic crimping equipment, observe the following precautions:
DO NOT modify the crimping equipment in any way.
USE ONLY dies, terminals, and wire specified for the head.
DO NOT perform repairs other than those specified in the instructional material supplied with the equipment.
3. CRIMPING HEAD INSTALLATION
Each crimping head is shipped with a coating of lubricating oil to prevent rust and corrosion. Wipe the oil off
before installing the crimping head on the power unit. Note that the crimping head is shipped without oil inside
the cylinder. To install crimping head, proceed as follows:
DANGER
Verify that hydraulic pressure to the hose or handle control is released and that power supply is disconnected from electric
power unit, if applicable.
1. Thoroughly clean coupling area of handle control or hose assembly and crimping head (see Figure 1).
2. Remove protective dust caps from both quick connect/disconnect couplers.
3. Hold hose or handle control in vertical position to prevent oil spillage. Attach hose or handle control to
coupling section on head. THREAD PROPERLY AND TIGHTEN SECURELY.
CAUTION
Oil flow must be unobstructed between power unit and crimping head. Verify that all couplers are fully mated and tightened.
NOTE
If crimping head must be removed after being in production, pressure must be released in the hydraulic system beforehand.
If using Electric Hydraulic Pumps; PN 1804700-1 (115 VAC) and PN 1804700-2 (220 VAC), disconnect power unit from
power supply.
If using Foot Hydraulic Pump PN 1583659-1, or Hand Hydraulic Pump PN 1583661-1, depress pressure release lever.
4. DIE INSERTION AND REMOVAL (FIGURE 2)
DANGER
Use extreme care when operating power unit. DO NOT inadvertently actuate the tool when installing or changing dies.
Personal injury could result.
4.1. Die Insertion
CAUTION
Verify that matched die set, terminal, and wire size are compatible.
1. Remove latch pin and open yoke on crimping head.
2. Loosen setscrew in yoke. Refer to die set instructions and insert stationary (upper) die which includes
the nest area into well of yoke. Tighten setscrew.
3. Activate power unit to advance ram until setscrew is visible (about 12.7mm [.50 in.]. Loosen setscrew.
4. Insert moving (lower) die, which serves as the indenter, into ram well, making sure that moving die is
properly oriented to mate with stationary die. Tighten setscrew.
5. Close yoke and secure with latch pin.
6. Slowly close dies to ensure proper alignment.
Rev C
2 of 6
�408-8914
7. Complete the cycle and return the ram to the “DOWN” position.
CAUTION
Ensure latch pin is fully inserted or damage may occur to the yoke, dies, or latch pin.
Figure 2
4.2. Die Removal
1. Remove latch pin and open yoke.
2. Activate power unit to advance ram slightly to gain access to the ram setscrew which secures the
moving die. Loosen the setscrew and remove the moving die.
3. Loosen setscrew in yoke and remove the stationary die.
5. CRIMPING PROCEDURE
The following crimping procedure provides general information. Refer to instructions packaged with individual
die sets for specific products, wire sizes, strip dimensions, positioning of terminals and splices in the dies, and
crimping procedures.
DANGER
To prevent personal injury when operating the power unit, exercise caution while holding terminals, splices or wire near
crimping area.
CAUTION
Never operate the power unit without having a crimping head attached to the handle control or crimping head coupling.
1. Insert terminal or splice in the stationary (upper) die in accordance with instructions packaged with the
dies. Verify the latch pin is secure before activating the power unit.
2. Slowly advance moving (lower) die with short, quick strokes until terminal or splice is secure.
3. Insert the stripped wire.
4. Cycle tool to complete crimp.
Remove crimped terminal or splice.
NOTE
If the splice or terminal sticks in the die after crimping, apply a rocking action to release it.
Rev C
3 of 6
�408-8914
6. INSPECTION AND MAINTENANCE
DANGER
Verify hydraulic pressure is released and power supply is disconnected before following maintenance and inspection
procedures; unless otherwise specified in the procedure.
Each crimping head is assembled and inspected before shipment. TE Connectivity recommends that the
crimping head be inspected immediately upon its arrival at the facility of use, and at regularly scheduled
intervals, to ensure the head has not been damaged during handling and use. Frequency of inspection
depends upon the following: care, amount of use, and handling of the head; type and size of products crimped;
degree of operator skill; and environmental conditions.
6.1. Cleaning
Remove accumulations of dirt and grease on the crimping head; especially in areas where dies are installed
and terminals are crimped. Clean the entire head frequently with a clean, lint-free cloth.
6.2. Visual Inspection
Refer to Figure 3 and proceed as follows:
1. With hydraulic pressure released, inspect the assembled head for nicks, scratches, and cracks.
Inspect for cracks especially at the corners of the yoke and around the top of the cylinder.
Figure 3
2. Inspect pivot pin holes and latch pin holes for wear. Replace parts, as needed.
3. Activate power unit. Raise ram to “UP” position. Inspect flat/round surfaces of ram for galling (fretting
or wear by friction), cracks or oil leakage. Release pressure and verify that ram retracts smoothly.
4. If head shows evidence of galling, cracks, oil leakage, or rough cycling, return the crimping head to TE
for repairs. Refer to Section 7, REPLACEMENT AND REPAIR.
NOTE
Once per year, or every 7,500 cycles (whichever comes first), the hydraulic head should be returned to TE for magnetic
particle inspection. Additionally, inspect and service the head (as described in Figure 3) every month or 1,000 cycles;
whichever comes first. Refer to Instruction Sheet 408-8909.
Rev C
4 of 6
�408-8914
6.3. Crimping Head Check-Out Procedure
If the ram fails to return to the “DOWN” position after completion of a crimping cycle, the cause may be in the
crimping head. To determine whether the trouble is in the crimping head or not, release pressure in the
hydraulic system.
If the ram retracts, the trouble is not in the crimping head.
If ram does NOT retract, return the crimping head to TE for repairs. refer to Section 7; REPLACEMENT AND
REPAIR.
7. REPLACEMENT AND REPAIR
Customer-replaceable parts are listed in Figure 4. A complete inventory should be stocked and controlled to
prevent lost time when replacement of parts is necessary. Order parts through your TE representative or call
1-800-526-5142, or send a facsimile of your purchase order to 1-717-986-7605, or write, or return the entire
tool for evaluation and repair, with a written description of the problem to:
CUSTOMER SERVICE (38-35)
TE CONNECTIVITY CORPORATION
P.O. BOX 3608
HARRISBURG, PA 17105-3608
Tools may also be returned for evaluation and repair. For tool repair service, contact a TE representative at
1-800-526-5136.
Item
Number
1
2
3
4
5
6
7
8
9
Rev C
Part Number
Description
311470-1
306209-8
8-59558-5
1-21045-1
21061-9
4-23147-7
1-21919-6
4-21012-0
23150-3
Coupler, Quick-Disconnect, Cylinder Half
Pin, Removable Latch
Pin, Pivot
Ring, Retaining
Screw, Socket Set, Cone Point, 8-32 UNC x .250 in. Long
Spring, Compression
Pin, Dowel
Screw, Socket Set, Flat Point, Self-Locking, 8-32 UNC x .250 in. Long
Nipple, Hex
Figure 4
Quantity
Per Head
1
1
1
1
2
1
1
1
1
5 of 6
�408-8914
8. REVISION SUMMARY
Revisions to this instruction sheet include:
Latest TE format, logo, and enterprise name
Section 1: Added Warning
Updated Electric Hydraulic Pump part numbers from 1583660-1 to 1804700-1 (115 VAC) and from
1583660-2 to 1804700-2 (220 VAC) in several places.
Added paragraph 4.2. Die Removal.
Updating of information in paragraph 6.3.
Rev C
6 of 6
�