PAC-POWR1220AT8-HA-EVN 数据手册
Power Manager II
Hercules Development Kit
This document provides a brief introduction and instructions to install and run the Power Manager II
Hercules Standard and Advanced Development Kits on Windows 7/Vista/XP. More documentation
can be downloaded from www.latticesemi.com/herculesdevkit.
Check Kit Contents
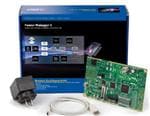
The Power Manager II Hercules Development Kit
contains the following items:
• Power Manager II Hercules Evaluation Board
pre-loaded with Hercules support demos
• USB connector cable
• 12V DC wall adapter power supply
• QuickSTART Guide
Static electricity can shorten the lifespan of electronic
components. Please handle the kit components
carefully.
Powering the Evaluation Board
Running the pre-loaded demonstration does not require connecting the provided USB cable to a
PC. The USB cable is required to modify the pre-loaded demo, interface to advanced demos, or
load pre-configured designs. Do not plug the USB cable into the PC until after loading Lattice’s
USB drivers (included with ispVM). The default operating system drivers are not compatible with
Lattice programming tools.
Main 12V DC Supply
Main Supply Toggle Switch
1.2V DC-DC Supply
External 12V
Supply
Supply Status
LEDs
External
3.3V DC
Supply
USB
PLD Output
LEDs
Interface
LEDs
Interface
Select
Switch
Mode
MachXO
Slide
Switch LatticeMico8 Pot.
Reset Switch VMON9
This procedure is continued on the next page.
Demo DIP
Switch
3-Digit
LCD
Panel
�Power Manager II
Hercules Development Kit
The Power Manager II Hercules Development Kit User’s Guide is available for download along with
the latest USB drivers and design software at www.latticesemi.com/herculesdevkit.
In the following steps, the evaluation board will be powered and made ready to run the pre-loaded
demonstrations. Verify the jumpers J5 (VMON7) and J6 (VMON8) select the “12V_OR” option and
not the “cPCI_HS” option.
1. Connect the AC adapter from a wall outlet to the power socket. After a connection is made to the
12V wall adapter plug, the green PWR_3.3V interface LED (D14) will light up indicating the onboard 3.3V regulator (U1) is operational. The Power Manager II will next illuminate three supply
status LEDs: 12V_HS, 1.2V_SEQ, and PWR_GOOD (D1, D2, and D7). The TDO (D12) and
data (D8 through D11) LEDs may also light up.
Run the Demonstrations
This step describes the functionality of the pre-configured Power Manager II Hercules demos:
voltage supply trimming, supply margining, voltage monitoring, fault monitoring and logging.
Operation of the pre-loaded demos is accomplished by setting the demo DIP switches and pressing
the mode switch (SW3). The following tables summarize the demo and switch settings pertaining to
each of the pre-loaded demos.
Demo
Default
SW3
Up=1
Pressed=0
n/a
1
2
Demo DIP Switch Setting
Mode
0
6
0
5
4
3
1=CLT, 0=OLT
0
0
0
0
1=CLT, 0=OLT
0
0
0
1
2a
1=CLT, 0 =OLT
0
0
1
3
n/a
0
0
0
4
n/a
0
0
0
4a
1=Display
0=Clear All
1
x
x
Demo
SW3
Default=1
Pressed=0
7
0
VMON
2
1
0
0
0
0
0
0
0
0
0
0
0
1
0
1
0
1
0
0
x
x
x
x
0
0
0
0
0
Comment
0 LCD self-test
Trim 1.2V to
PAC-POWR1220AT8-HA-EVN 价格&库存
很抱歉,暂时无法提供与“PAC-POWR1220AT8-HA-EVN”相匹配的价格&库存,您可以联系我们找货
免费人工找货- 国内价格
- 1+13977.53280
- 200+5577.13080
- 500+5390.76600
- 1000+5298.67440


 工商网监
湘ICP备2023018690号
工商网监
湘ICP备2023018690号
