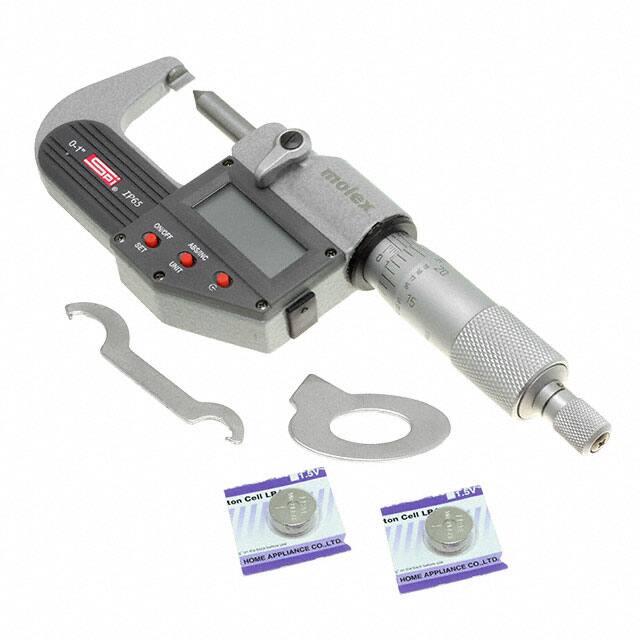
Crimp Height Micrometer
Order Number
63800-2850
Application Tooling Specification
FEATURES
Measuring range: 0.0-25.0mm (0.00-1.00”)
Resolution: 0.001mm (.00005”)
Accuracy: ±0.002mm (.0001”)
Calibration certificate included (traceable to NIST)
DESCRIPTION
HANDLE
SPINDLE LOCK
RATCHET STOP
SPINDLE
ANVIL
FRAME
LCD DISPLAY
Figure 1
FUNCTION KEYS
This micrometer is specifically designed to measure crimp height. It has a flat anvil (thin blade)
that supports the top of the crimp while a pointed spindle contacts the bottom radial surface. See
Figure 1.
LCD DISPLAY
ABSOLUTE
MEASURING
RELATIVE
MEASURING
SET THE ORIGIN
BATTERY VOLTAGE
IS LOW
DATA OUTPUT
TO PC
Figure 2
Doc. No: 638002850
Revision: A
Release Date: 04-27-18
Revision Date: 04-27-18
UNCONTROLLED COPY
INCH MODE
Page 1 of 4
�Crimp Height Micrometer
OPERATION
1. There are two ways of pressing the function keys:
Press (less than 2 seconds) and release
Press and hold (more than 2 seconds)
2. ON/OFF or SET
= ON/OFF = Power on/off
= SET = Set the origin (“SET” flashes once on the display, and the display is set to “0”.)
3. ABS/INC or UNIT
= ABS/INC = Absolute/Relative measuring mode selection
= UNIT = Metric/Inch measuring mode conversion
4. DATA OUTPUT
(Requires data cable, Molex part number 638002855)
= Output data once (
flashes once)
= Output data continuously (
on continuously). To stop,
the key
Do not press the keys with a sharp object.
Do not press the keys with a sideways motion.
POWER
1. The battery is LR44, 1.5V. Replace the battery when the display is blurring or the
symbol
appears.
Note: Be sure to wipe the battery clean before installation.
2. If the micrometer is not in use for 5 minutes, the device will shut off. The micrometer will turn on
when pressing and releasing the ON/OFF key or turning the spindle.
3. Power off the micrometer when not in use by pressing and releasing the ON/OFF key.
4. Remove the battery before storing the micrometer.
Doc. No: 638002850
Revision: A
Release Date: 04-27-18
Revision Date: 04-27-18
UNCONTROLLED COPY
Page 2 of 4
�Crimp Height Micrometer
HOW TO MEASURE CRIMP HEIGHT (See Figure 4)
1. Complete the crimping tool setup procedure.
2. Crimp a minimum of five samples.
MICROMETER ANVIL
The formed side of the crimp is
against the micrometer’s anvil.
Position the micrometer
spindle in the center of
the conductor crimp.
BELL MOUTH
SPINDLE
LOCK
HANDLE
CONDUCTOR CRIMP
HEIGHT
Figure 4
3. Place the micrometer anvil (flat blade) across the top of the form radii of the conductor crimp.
Do not take the measurement near the conductor bell mouth.
4. Rotate the micrometer spindle until the point contacts the bottom radial (curved) surface. Do
not excessively tighten the point against the terminal.
5. Record the crimp height readings. A minimum of five crimp height readings are necessary to
confirm the crimping tool setup. A minimum of 25 readings should be taken for determining
process capability.
For additional information, refer to the Molex Quality Crimping Handbook (TM-638000029).
SPECIFICATIONS
Measuring force: 5-10N
Operation temperature: 0-40°C (32-104°F)
Protection class: IP65 (Resists water spray)
TROUBLESHOOTING
Symptom
Display “E 1”
Display “Exxxxx”
Display “E 2”
Display “E 3”
Display “E 8”
Measuring value is incorrect
No display
Display is blurring or
appears
Output data is incorrect
Doc. No: 638002850
Revision: A
Cause
Resolution
Measuring value over display range .1”
Reset the origin or convert to relative
measurement mode.
Origin is too great
Internal error in the micrometer
Something wrong with the sensor
Measuring surfaces are dirty
Origin is not correct
Reset the origin.
Battery voltage is low
Replace the battery.
Battery voltage is low
Replace the battery.
Release Date: 04-27-18
Revision Date: 04-27-18
Reset the battery.
Clean the measuring surfaces.
Reset the origin.
UNCONTROLLED COPY
Page 3 of 4
�Crimp Height Micrometer
MAINTENANCE
Each operator of the tool should be aware of and responsible for the following maintenance steps:
1. Remove dust, moisture and other contaminants with a clean brush or a soft, lint-free
cloth.
2. Do not use any abrasive materials that could damage the tool.
3. When the tool is not in use, turn it off and store it in a clean, dry area.
4. There are no repair parts available for this tool except for the batteries. Should the tool
be damaged, a new tool is required.
Warranty
This tool is only for measuring crimped terminals. All tools are warranted to be free of
manufacturing defects for one year. Should such a defect occur, a repair or exchange of the tool
would be free of charge. This repair or exchange will not be applicable to altered, misused or
damaged tools. This tool is designed for hand use only.
Application Tooling Support
Phone: (402) 458-TOOL (8665)
E-Mail: applicationtooling@molex.com
Website: www.molex.com/applicationtooling
Molex is a registered trademark of Molex, LLC in the United States of America and may be registered in other countries; all other
trademarks listed herein belong to their respective owners.
Doc. No: 638002850
Revision: A
Release Date: 04-27-18
Revision Date: 04-27-18
UNCONTROLLED COPY
Page 4 of 4
�
很抱歉,暂时无法提供与“0638002850”相匹配的价格&库存,您可以联系我们找货
免费人工找货- 国内价格 香港价格
- 1+5235.848871+656.58551
- 5+4853.508605+608.63931
- 10+4697.7390510+589.10551
