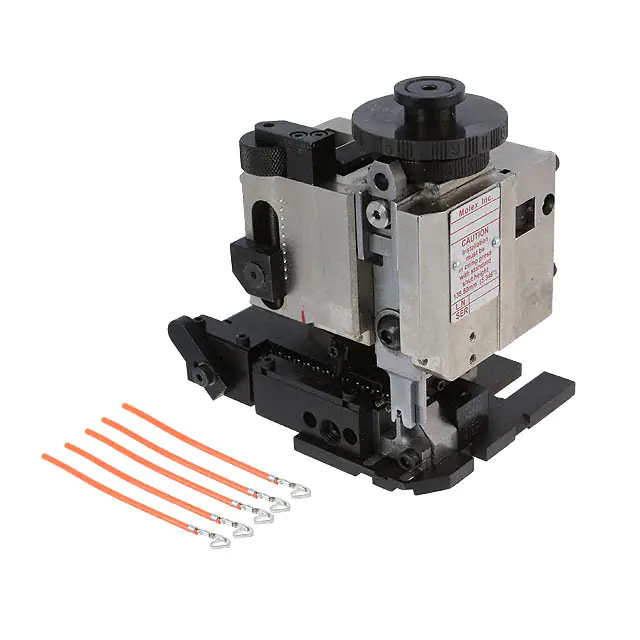
Molex Mini-Mac Applicators
Mini-Mac Applicators
Order No. 63880-0000
Instruction Manual
Description
Operation
Maintenance
Doc. No: TM-638800000
Revision: D
Release Date: 01-05-05
Revision Date: 02-05-13
UNCONTROLLED COPY
Page 1 of 69
�Molex Mini-Mac Applicators
Safety Warnings and Information
Read and understand all of the instructions and safety information in this manual before
operating or servicing this tool.
Keep this manual available when using this tool.
Replacement manuals are available for download at no charge at www.molex.com.
SAFETY ALERT SYMBOL
This symbol is used to call your attention to hazards or unsafe practices which could result in an injury
or property damage. The signal word, defined below, indicates the severity of the hazard. The message
after the signal word provides information for preventing or avoiding the hazard.
DANGER:
DANGER
Indicates an imminently hazardous situation which, if not avoided, could result in death or serious injury.
WARNING:
WARNING
Indicates a potentially hazardous situation which, if not avoided, could result in death or serious injury.
CAUTION:
CAUTION
Indicates a potentially hazardous situation which, if not avoided, may result in minor or moderate injury.
CAUTION may also be used to alert against unsafe practices associated with events that could lead
to personal injury.
WARNING
Always wear proper eye protection when
Operating or servicing this equipment.
Failure to wear eye protection could result
in serious eye injury from flying debris.
WARNING
Never wear clothing or jewelery that is loose or
That could potentially hang into the equipement
and get caught.
Failure to observe this warning could result in
Severe Injury or death.
WARNING
Never operate, service, install, or adjust this
machine without proper instruction and without
first reading and understanding the instructions
in this manual and all applicable press and/or
wire processing machine.
manuals.
Doc. No: TM-638800000
Revision: D
Release Date: 01-05-05
Revision Date: 02-05-13
WARNING
Heavy Object
To avoid muscle strain or back injury, use lifting
aids and proper lifting techniques when removing
or replacing.
Failure to observe these precautions may result in
injury or property damage.
WARNING
Never install or service this machine while
connected to any electrical power source.
Disconnect power by unplugging the press
from its power source.
Failure to observe this warning could result
In severe injury or death.
WARNING
Always hand cycle the applicator in the equipment
to ensure the tooling is properly aligned.
Failure to observe these precautions may result in
Injury or property damage.
UNCONTROLLED COPY
Page 2 of 69
�Molex Mini-Mac Applicators
WARNING
WARNING
Do not use compressed air to clean
this equipment.
The forces created by compressed
air can force debris into the tool.
Never use this press or wire processing machine
without guards or safety devices that are intended
to prevent hands from remaining in the die space.
Failure to observe this warning could result in
Severe injury or death.
Failure to observe these precautions may
result in injury or property damage.
WARNING
Always wear proper ear protection when Operating or servicing this applicator.
CAUTION
The Molex applicators are designed to operate in presses with standard shut heights of 135.80mm (5.346”).
Installation in crimp presses with other than standard shut heights can cause severe tool breakage. It is advisable that before
installation, a check of the shut height be performed. Molex will not be liable for any damages as a result of installation in a
crimp press with nonstandard or improperly set shut height.
Failure to observe these precautions may result in injury or property damage.
CAUTION
Never perform any service or maintenance other than as described in this manual.
Never modify, alter or misuse the equipment
Molex crimp specifications are valid only when used with Molex terminals, applicators and tooling.
Failure to observe this precaution may result in injury and property damage.
Tooling Technical Assistance
Molex offers tooling technical assistance for customers who may need some guidance for tooling adjustments. This support can be
obtained by calling either of the two numbers listed below and asking for the Molex Tooling Group.
Call Toll Free 1-800-786-6539 (US) 1-630-969-4550 (Global).
This assistance is limited to the operation and set-up of a customer’s Molex Press. Questions with regard to Molex connector products
or how to identify the proper tooling and/ or tooling documentation should be directed to your local Molex personnel or Customer Service
Representative.
When calling for service on the press a copy of the Tooling Manual and Specific Applicator Tooling Specification Sheet should be
present and a person that is familiar with the applicator should be present. Be sure the following information is supplied:
1.
2.
3.
4.
5.
6.
7.
8.
Customer name
Customer address
Person to contact such as (name, title, e-mail, and telephone number
Applicator order number (Lease number also if applicable)
Serial number (Lease number also if applicable)
Molex Connector product order number
Urgency of request
Nature of problem
Molex Application Tooling Group
2200 Wellington Court
Lisle, IL 60532, USA
Tel: +1 (630) 969-4550
Fax:+1 (630) 505-0049
Visit our Web site at http://www.molex.com
Doc. No: TM-638800000
Revision: D
Release Date: 01-05-05
Revision Date: 02-05-13
UNCONTROLLED COPY
Page 3 of 69
�Molex Mini-Mac Applicators
Table of Contents
Contents
Mini-Mac Applicators ............................................................................................................................................................. 1
Order No. 63880-0000........................................................................................................................................................... 1
Safety Warnings and Information ...................................................................................................................................... 2
Table of Contents ................................................................................................................................................................ 4
Section 1 ............................................................................................................................................................................... 5
Earlier Models ............................................................................................................................................................... 8
Later Models ................................................................................................................................................................. 9
General Descrition .......................................................................................................................................................... 10
1.1 Description....................................................................................................................................................... 10
1.2 General Features............................................................................................................................................. 10
1.3 Technical Specification .................................................................................................................................... 10
1.4 Delivery Check ................................................................................................................................................ 11
1.5 Tools................................................................................................................................................................ 11
1.6 Specification Sheets ........................................................................................................................................ 11
Section 2 ............................................................................................................................................................................. 12
Set-Up and Operation ..................................................................................................................................................... 12
2.1 Shut Height ...................................................................................................................................................... 13
2.2 Set-Up ............................................................................................................................................................. 13
2.3. Crimp Height Adjustments ............................................................................................................................... 14
2.4 Crimp Tooling Installation and Removal .......................................................................................................... 15
2.5 Specific Applicator Adjustments ...................................................................................................................... 16
Section 3 ............................................................................................................................................................................. 34
Maintenance ................................................................................................................................................................... 34
3.1 Cleaning .......................................................................................................................................................... 35
3.2 Lubrication ....................................................................................................................................................... 35
3.3 Spare Parts...................................................................................................................................................... 36
3.4 Perishable Parts .............................................................................................................................................. 36
3.5 Storage ............................................................................................................................................................ 36
Section 4 ............................................................................................................................................................................. 37
4.1 Parts Lists and Assembly Drawings ................................................................................................................ 37
4.2. Troubleshooting ............................................................................................................................................... 60
APPENDIX ...................................................................................................................................................................... 64
Terminal Oiler.............................................................Error! Bookmark not defined.Error! Bookmark not defined.
Doc. No: TM-638800000
Revision: D
Release Date: 01-05-05
Revision Date: 02-05-13
UNCONTROLLED COPY
Page 4 of 69
�Molex Mini-Mac Applicators
Section 1
General Description
1.1
Description
1.2
Features
1.3
Technical Specifications
1.4
Delivery Check
1.5
Tools
1.6
Specification Sheets
Doc. No: TM-638800000
Revision: D
Release Date: 01-05-05
Revision Date: 02-05-13
UNCONTROLLED COPY
Page 5 of 69
�Molex Mini-Mac Applicators
Principal Mechanical Parts of the Rear-Carrier Metal Strip Applicator
LUG BOLT
FEED ARM
PIVOT LEVER
PUNCHES
FORWARD FEED
LOCKING SCREW
FORWARD FEED
ADJUSTING KNOB
TERMINAL
STRIPPING BLADE
DRAG
RELEASE
DRAG FRAME
TERMINAL
FRONT GUIDE
CONDUCTOR
ADJUSTING CAM
TERMINAL
CARRIER COVER
RAM
BACK STROKE
ADJUSTING KNOB
PIVOT CLAMP
INSULATION
ADJUSTING CAM
TRACK
BASE PLATE
FEED FINGER
SCRAP CHUTE, CUT-OFF
PLUNGER AND RETAINER
TRACK
ADJUSTING SCREW
ANVILS
SPACER
Figure 1-1 REAR-CARRIER METAL STRIP APPLICATOR
Doc. No: TM-638800000
Revision: D
Release Date: 01-05-05
Revision Date: 02-05-13
UNCONTROLLED COPY
Page 6 of 69
�Molex Mini-Mac Applicators
Principal Mechanical Parts of the Molded Strip Applicator
LUG BOLT
FEED ARM
PIVOT LEVER
PUNCHES
FORWARD FEED
LOCKING SCREW
FORWARD FEED
ADJUSTING KNOB
TERMINAL
STRIPPING BLADE
TRACK BRAKE
CONDUCTOR
ADJUSTING CAM
TRACK
INSULATION
ADJUSTING CAM
FRONT GUIDE
BACK STROKE
ADJUSTING KNOB
RAM
PIVOT CLAMP
FRONT TRACK COVER
TERMINAL NOSE
SUPPORT
FEED FINGER
TRACK
BRAKE RELEASE
BASE PLATE
TRACK
ADJUSTING SCREW
ANVILS
ANVIL
MOUNT
Figure 1-2 MECHANICAL FEED MOLDED STRIP APPLICATOR
Doc. No: TM-638800000
Revision: D
Release Date: 01-05-05
Revision Date: 02-05-13
UNCONTROLLED COPY
Page 7 of 69
�Molex Mini-Mac Applicators
Principal Mechanical Parts of the Mechanical Air Feed Tape Applicator
LUG BOLT
Earlier Models
RAM
PUNCHES
AIR FITTING:
FEED RETRACT
FEED BAR
BACK STOP
AIR FITTING:
FEED FORWARD
TERMINAL
STRIPPING BLADE
TERMINAL
GUIDE
FRONT GUIDE
CONDUCTOR
ADJUSTING CAM
INSULATION
ADJUSTING CAM
TAPE LOCK
PAWL
AIR HOSES
BASE PLATE
FRONT GUIDE
CLAMP
ANVILS
ANVIL MOUNT
TERMINAL
SUPPORT
Figure 1-3 AIR-FEED MYLAR TAPE APPLICATOR
EARLIER MODELS
Doc. No: TM-638800000
Revision: D
Release Date: 01-05-05
Revision Date: 02-05-13
UNCONTROLLED COPY
Page 8 of 69
�Molex Mini-Mac Applicators
Principal Mechanical Parts of the Mechanical Air Feed Tape Applicator
Later Models
LUG BOLT
RAM
AIR FITTING:
FEED RETRACT
PUNCHES
AIR FITTING:
FEED FORWARD
TERMINAL
STRIPPING BLADE
TERMINAL
GUIDE
CONDUCTOR
ADJUSTING CAM
INSULATION
ADJUSTING
CAM
TAPE LOCK
PAWL
AIR HOSES
BASE PLATE
FRONT GUIDE
ANVIL MOUNT
ANVILS
TERMINAL
SUPPORT
Figure 1-4 AIR-FEED MYLAR TAPE APPLICATOR
LATER MODELS
Doc. No: TM-638800000
Revision: D
Release Date: 01-05-05
Revision Date: 02-05-13
UNCONTROLLED COPY
Page 9 of 69
�Molex Mini-Mac Applicators
General Descrition
1.1 Description
The Molex Applicator provides an effective method
of applying a wide range of side feed terminals to
pre-stripped discrete wire(s). Quick adjustments of
crimp height, track position, and terminal feed are
possible without taking the applicator out of the
press and without shimming. This allows crimp
heights to maintain statistical control at, or near,
mean even after wire change over.
This applicator works in the Molex TM-2000,
TM-3000, and TM-4000 Universal Press, and in
most industry standard presses. The Mini-Mac
Applicator offers minimal setup time without the
need for shimming, is versatile, reliable, easy to
install, and is designed for mid-volume to highvolume, semi or fully-automatic operations.
Molex offers the following crimp presses for
operating the Mini-Mac Applicator:
TM-3000 Universal Press 120V AC 60 Hz.
63801-7200
TM-3000 Universal Press 240V AC 60 Hz.
63801-7300
TM-4000 Universal Press 240V AC 60 Hz.
63801-7600
The Mini-Mac Applicator is also compatible with
most OEM presses (Artos, Mecal, Komax,
Megomat, Toyojamco, etc). It also adapts to most
wire processing machines.
1.2
Caution: DO NOT use the applicator without
guards
1.3 Technical Specification
Dimensions
Metal Strip and Molded Applicators
Width:
145mm
(5.7")
Depth:
110mm
(4.3")
Height:
(with ram down)
145mm
(5.7")
Air Feed Tape Applicators
Width:
250mm
Depth:
110mm
Height:
(with ram down)
145mm
Weight
4.1kg
(9.8")
(4.3")
(5.7")
(9lbs)
Press Stroke Compatibility
General Features
Fine adjustment allows users to achieve target
with little effort by adjusting in increments (14
settings) of 0.015mm (.0006") for conductor crimp
height and (29 settings) in increments of .063mm
(.0025") for insulation height.
Independent adjustment rings allow users to
quickly adjust either conductor or insulation crimp
height without affecting each other.
Punches are accessed from the front of the ram,
simplifying change over.
Doc. No: TM-638800000
Revision: D
Track adjustment is done while the applicator is in
the press.
Compatible with the Molex TM-3000 Universal
Press and most industry standard presses.
However, it does NOT fit into Molex TM-40 or
TM-42 presses.
Directly adapts to most automatic wire
processing machines.
Applicator designed to industry standard
mounting and 135.80mm (5.346") press shut
height.
Terminal feed adjusted with applicator in press
Release Date: 01-05-05
Revision Date: 02-05-13
Recommended maximum: 41.28mm (1 5/8")
Recommended minimum: 28.58mm (1 1/8")
Guarding
The Industrial Applicator is supplied with no
guards and is intended to be used with the
guards supplied by the press or wire processor
manufacturer.
UNCONTROLLED COPY
Page 10 of 69
�Molex Mini-Mac Applicators
1.4 Delivery Check
Carefully remove the Mini-Mac Applicator from its
shipping container and determine that the
following items are included in the package.
Mini-Mac Applicator
(Tooled for desired terminal)
1
Specification Sheet
TM-638800000 Instruction Manual
Sample Crimped Terminals
1
1
5
The specification sheet should be filed. These
are available on the Molex website
(www.molex.com).
Metal Strip and Molded Strip applicators also
include:
11-18-4238 Short Feed Cam
1
1.5 Tools
The following tools are recommended for setup
and adjustments to the applicator in this press:
1.
Metric standard hex wrench set
2.
Wire stripper / cutter
3.
Standard screwdriver, 1/8” tip
4.
7mm open-end ignition wrench
(air feed applicators only-earlier model)
1.6 Specification Sheets
Specification sheets with every applicator. The
specification sheet contains the following:
Applicable terminal numbers
Wire AWG ranges
Insulation diameter ranges
Pull Force specification
Strip lengths
Slug height/crimp height specification
Tooling parts lists and assembly drawings
Doc. No: TM-638800000
Revision: D
Release Date: 01-05-05
Revision Date: 02-05-13
UNCONTROLLED COPY
Page 11 of 69
�Molex Mini-Mac Applicators
Section 2
Set-Up and Operation
2.1
Shut Height
2.2
Setup
2.3
Crimp Height Adjustments
2.4
Crimp Tooling Installation and Removal
2.5
Specific Applicator Adjustments
2.5.1 Mechanical Feed Rear Metal Strip Applicators (63881 and 63882 series)
2.5.2 Mechanical Feed Molded Strip Applicator (63883 and 63884 series)
2.5.3 Air Feed Tape Applicator (63885 and 63886 series) Earlier Models
2.5.4 Air Feed Tape Applicator (63885 and 63886 series) Later Models
2.5.5 Mechanical Feed Front Metal Strip Applicators (63887 series)
2.6
Operation
2.6.1 Mechanical Feed Rear Metal Strip Applicators (63881 and 63882 series)
2.6.2 Mechanical Feed Molded Strip Applicator (63883 and 63884 series)
2.6.3 Air Feed Tape Applicator (63885 and 63886 series) Earlier Models
2.6.4 Air Feed Tape Applicator (63885 and 63886 series) Later Models
2.6.5 Mechanical Feed Front Metal Strip Applicators (63887 series)
Order No 63880-0000
Revision: B
Release Date: 01-05-05
UNCONTROLLED COPY Page 12 of 69
Revision Date: 03-21-05
�Molex Mini-Mac Applicator
Read the following instructions before attempting to operate the applicators.
2.1
Shut Height
PRESS QUICK CHANGE
MOUNTING PLATE
Molex Industrial Applicators must operate in crimp presses with
standard shut height of 135.80mm (5.346"). Installation in crimp
presses with other than standard shut heights can cause severe
tool damage. Before installing the applicator, the press shut
height must be verified. The correct shut height is required to
prevent the punches from hitting the anvils and/or the cut-off
plunger from bottoming out on the applicator’s base plate.
Proper shut height allows the exchange of applicators from
press to similar press without readjusting the applicator’s crimp
height.
The shut height of the press can be checked with a shut height
gauge, which is calibrated under load to achieve the 135.80mm
(5.346") measurement. It is recommended that the shut height
be checked monthly. A shut height gauge is available from
most press manufacturers.
PRESS
SHUT HEIGHT GAUGE
Figure 2-1
Measuring Press Shut Height
1. Disconnect the power supply from the press. Remove the machine guards if necessary.
2. Remove the applicator from the press (See Applicator Installation and Removal for additional information). Make
sure that the bottom of the press ram and quick change mounting plate are free from foreign material.
3. Place the shut height gauge into the press on the press quick change mounting plate. See Figure 2-1.
4. Manually cycle the press to the full down stroke
position. (Follow press manufacturers’ instructions on
manually cycling the press.)
5. Read the shut height measurement from the front of
the gauge. Follow gauge manufacturer’s instruction,
ENGAGE
usually the gauge reads “0” at the correct shut height.
PRESS
YOKE
6. If adjustments are necessary, refer to the press
manufacturer for adjustment of the press shut height.
7. Repeat the above steps until the correct shut height is
obtained.
LUG BOLT
8. Shut height gauges must be calibrated on a regular
basis.
2.2
Set-Up
IMPORTANT
Power must be shut off and electrical cord
disconnected. Manual press cycling is an absolutely
required procedure for safety and preventing
equipment damage. Always cycle by hand when
trouble shooting or changing adjustments, tooling,
applicator, or accessories.
Doc. No: TM-638800000
Revision: D
Release Date: 01-05-05
Revision Date: 02-05-13
QUICK
CHANGE
PLATE
LOCATOR
CLAMPS
LOCKING
CLAMP
M5 SHCS
Figure 2-2
UNCONTROLLED COPY
BASE PLATE
Page 13 of 69
�Molex Mini-Mac Applicator
The principal mechanical parts of the Applicator are illustrated in Section 4.1 Assembly Drawings.
Applicator Installation and Removal
1. The press must be equipped with a common universal type quick-change mounting plate and adapter on the
press. Contact the press manufacturer for specific information.
2. Turn off and disconnect the power. Remove the press guards.
3. Clean the quick-change mounting plate of scrap or chips that may interfere with the applicator installation.
4. For the TM-3000 and TM-4000 Press follow the procedure below:
a. Using a 4mm hex wrench, turn the M5 SHCS clockwise until the locking clamp is fully opened.
b. Visually align the applicator base plate slots with the location clamps on the press quick-change mounting
plate.
c. Slide the Mini-Mac Applicator onto the quick-change mounting plate until the two notches on the left side
engage against the stops, and at the same time, guide the lug bolt into the adapter on the press. See
Figure 2-2.
d. To lock applicator, turn the M5 SHCS counter clockwise until tight.
5. Some presses have locking latches on the quick-change mounting plate which have to be flipped up to secure
the applicator. Others have knurled finger screws or "T" type latches. Most of these are located on the right side
of the quick-change mounting plate to secure the position of the applicator. These must be in place and secured
before operating the press.
6. Air Feed Applicator: Connect the air lines from the feed cylinder to the press air valve. The air line connected
to the left side of the cylinder causes the feed to advance and should be connected to the “normally open” valve
port. The air line connected to the right side of the cylinder (with the flow control valve) causes the feed to retract
and should be connected to the “normally closed” valve port.
7. Replace the press guards.
8. Remove the applicator by reversing the previous steps. When storing an
applicator, always leave a strip of terminals in the applicator on the anvils
to prevent damage to the tooling. See Section 3.5 Storage.
Punch and Anvil Alignments
Note: Always clean mounting surfaces of crimp tooling and tooling holders
prior to alignment.
RELEASE M4 SHCS
1. Disconnect power from the press. Remove the machine guards if
necessary.
2. Using a 3mm hex wrench, slightly loosen the anvil mounting screws.
See Figure 2-3.
3. Slowly hand-cycle the ram of the press to bottom of its stroke. With
the punches engaging the anvils, securely tighten the anvil mounting
screws to ensure alignment of punches and anvils.
4. Hand cycle the press ram to its up position.
5. Replace the machine guards before operating the press.
2.3.
Figure 2-3
CONDUCTOR
CAM (TOP)
Crimp Height Adjustments
Figure 2-4
Conductor Crimp Punch Adjustment
INSULATION
1. Obtain a piece of solder, approximately 40mm (1.5”) long and
CAM
(BOTTOM)
approximately 0.5mm (.02”) larger in diameter than the crimped slug
height. If the solder diameter is too large the crimped slug will have large extrusions, making it difficult to
measure the overall slug height.
Doc. No: TM-638800000
Revision: D
Release Date: 01-05-05
Revision Date: 02-05-13
UNCONTROLLED COPY
Page 14 of 69
�Molex Mini-Mac Applicator
2. With no terminals in the applicator, lay the solder across the anvils and cycle the press (by hand or under
power).
3. Using a crimp micrometer or dial caliper, measure the solder slug height and compare to specification.
4. If adjustments are necessary, turn off the press. Remove the machine guards.
5. The desired crimp height can be achieved by rotating the conductor adjusting cam. See Figure 2-4. There are
14 cam positions, with increments of 0.015mm (.0006") between positions (a total adjustment of 1.80mm). The
"A" setting is the loosest (highest) crimp height and the "N" setting is the tightest (lowest). If crimp height is not
within specification, rotate the adjusting cam, crimp another solder slug, and measure until crimp height is in
spec.
NOTE: Crimp height adjustments for open-barrel industrial terminals are always based on solder slug heights, not
terminal crimp heights.
1. Replace the machine guards, load the terminals, and crimp several wires under power.
2. Perform a pull test on conductor crimp to verify the mechanical integrity of the crimp. See Appendix A-Pull Force
Test.
Insulation Crimp Height / Molded Strip Cut-off Timing
1. Place a stripped length of the appropriate wire into the terminal and crimp under power.
2. Observe quality of insulation crimp.
3. If adjustments are necessary, turn off the press. Remove the machine guards.
4. Rotate the insulation adjusting cam to achieve the desired insulation height. There are 29 cam positions, with
increments of 0.06mm (.0025") between positions (a total adjustment
of 3.00mm). The "1" setting is for the loosest (highest) crimp height
and the "29" setting is the tightest (lowest).
RAM
5. Repeat the previous steps until the desired insulation crimp is
obtained.
PUNCHES
Note: Due to the large variety of insulation wall thickness, materials, and
durometers, Molex does not specify insulation crimp height.
WASHER
Note: On the molded strip applicator, the insulation adjusting cam is
used for setting the cutoff punch timing. A low (“1”) setting may result in
the carrier not being cut.
2.4
Crimp Tooling Installation and Removal
BUSHINGS
Figure 2-5
M8 BHCS
Caution: Always disconnect power before installing or removing tooling.
Installation and Removal of the Upper Tooling (Punches)
NOTE: Always clean mounting surfaces of crimp tooling and tooling holders prior to installation.
1. Disconnect power from the press. Remove the machine guards if necessary.
2. To remove the punches, use a 5mm hex wrench to remove the M8 BHCS holding the punches, washer, and the
bushings to the ram. See Figure 2-5.
3. Remove the screw, punches, washer, and bushings together. Be careful not to lose the washer or bushings that
go between the punches.
Doc. No: TM-638800000
Revision: D
Release Date: 01-05-05
Revision Date: 02-05-13
UNCONTROLLED COPY
Page 15 of 69
�Molex Mini-Mac Applicator
4. To install, place the punches with the bushings and washer against the ram and securely tighten the M8 BHCS.
The conductor punch (“E2”) goes against the ram and the insulation (or cutoff) punch (“I2”) is stacked on the
conductor punch. Make sure the etched part numbers on each punch face outward.
Note: The correct length bushing must be used with the punches. A bushing that is too short will cause the
punches to be clamped tight, preventing adjustment. A bushing that is too long will cause excessive movement
of the punches and possibly damage or destroy the punches and/or anvils. See the parts list in the desired
Specification Sheet for the correct bushings.
Installation and Removal of the Lower Tooling (Anvils)
NOTE: Always clean mounting surfaces of crimp tooling and
tooling holders prior to installation.
PLUNGER STRIKER
1. Disconnect power from the press. Remove the machine
CUT-OFF PLUNGER
guards if necessary.
2. If the ram is down, move it manually to the full up position.
PLUNGER RETAINER
3. Metal strip applicators (63881 and 63882 series) have a
SCREW (SCRAP CHUTE
NOT SHOWN)
spring loaded cutoff plunger that must be released prior to
removing the anvils. To release the spring load, hold the
Figure 2-6
cutoff plunger down (if the applicator ram is hand-cycled
partly down, the plunger striker will hold down the plunger) and use a 3mm hex wrench to remove the plunger
retaining screw. After the screw is removed, slowly release the plunger. See Figure 2-6.
4. To remove the anvils, use a 3mm hex wrench to remove the (2) M4 SHCS that hold the lower tooling in place.
5. To install, insert the new anvils, leaving the mounting screws slightly loose. The conductor anvil (“E1”) is
installed first and the insulation anvil (“I1”) is stacked onto it. Make sure the etched part numbers on each anvil
face outward.
6. Metal strip applicators (63881 and 63882 series) use front and rear spacers along with a cutoff blade and a
plunger retainer. These items must be stacked in the proper order before installing the anvils. The proper
stacking is shown in the applicator’s Specification Sheet.
7. The anvils must be aligned to the punches before tightening the screws. See section 2.2 (Set Up; Punch and
Anvil Alignment).
2.5
Specific Applicator Adjustments
2.5.1
Mechanical Feed Rear Metal Strip Applicators (63881 and 63882 series)
Terminal Front Guide Adjustments
The front guide (63801-4510) keeps the terminal strip in position for a
uniform crimp location and a consistent cut-off from the carrier strip. If the
terminal strip is excessively loose or tight in the applicator track, follow
this adjustment procedure:
1. Disconnect power from the press. Remove the machine guards if
necessary.
2. Load a short (approx. 150mm/6”) strip of terminals into the applicator
track. If the strip cannot be started into the track (track too tight),
proceed to step 3.
3. Using a 3mm hex wrench, loosen the (2) M4 SHCS holding the guide
in place. See Figure 2-7.
Doc. No: TM-638800000
Revision: D
Release Date: 01-05-05
Revision Date: 02-05-13
M4 SHCS (2)
TERMINAL
FRONT GUIDE
UNCONTROLLED COPY
Figure 2-7
Page 16 of 69
�Molex Mini-Mac Applicator
4. Gently push the guide up to the terminals until it touches.
5. Securely tighten the (2) M4 SHCS.
6. Verify that the terminal strip slides freely in the applicator track, without excessive play.
Terminal Carrier Cover Positioning
The applicator track accommodates various terminal lengths. There are two steps in the track for the terminal
carrier strip. Longer and/or insulated terminal carriers typically rest on the upper step. Some shorter, un-insulated
terminals use the lower step.
When changing products, it may be necessary to reposition the carrier cover depending on which track step is used:
1. Disconnect power from the press. Remove the machine guards if necessary.
2. Remove the applicator from the press. See Section 2.2.
3. Lay the applicator on its side. Using a 4mm hex wrench, remove the (2) M6 BHCS that hold the applicator frame
to the base plate. See Figure 2.8.
4. Lift the applicator frame off the base plate.
5. Using a 2mm hex wrench, remove the (2) M3 BHCS holding the carrier cover to the track. See Figure 2-9.
M3 BHCS (2)
TERMINAL
CARRIER COVER
ROTATE
COVER 180°°
M6 BHCS (2)
BASE PLATE
Figure 2-9
Figure 2-8
6. Rotate the carrier cover 180° and place it back on the track, pushing the step in the cover against the track edge.
The carrier cover can be mounted in two positions.
7. Securely tighten the (2) M3 BHCS.
8. Place the applicator frame back on the base plate and securely tighten the (2) M6 BHCS.
9. After repositioning the carrier cover, it will be necessary to adjust the terminal front guide, track position, and feed
finger location.
Track Position Adjustment
1. Disconnect power from the press. Remove the machine guards if
necessary.
2. To position the terminal track in or out, first use a 5mm hex
wrench to loosen the M10 lock screw located on the front of the
track. . See Figure 2-10.
3. Put a regular screwdriver through the hole in the lock screw and
turn the adjusting screw to position the terminal in the correct
location. Turning the screw clockwise will move the track
Doc. No: TM-638800000
Revision: D
Release Date: 01-05-05
Revision Date: 02-05-13
ALLEN
WRENCH
M10 LOCK SCREW
UNCONTROLLED COPY
Figure 2-10
Page 17 of 69
�Molex Mini-Mac Applicator
4.
5.
6.
7.
8.
9.
towards the operator; to move the track towards the applicator turn the screw counterclockwise. Depending on
the amount of movement, the feed finger mount may need to be loosened and readjusted. See Feed Finger
adjustment.
To lock the track in position, tighten the M10 lock screw.
If the feed finger mount was loosened during the track positioning, remember to tighten its mounting screw.
Replace machine guards.
Hand cycle the press to ensure the terminal is positioned properly on the anvils and does not have an excessive
cutoff tab. Also verify the terminal feed operation.
Restore power to the press, crimp a terminal under power, and observe the quality of the termination.
Repeat the above steps until the desired terminal position is obtained.
Feed Finger Adjustments
1. The feed finger must be located to properly feed the terminals. Typically the feed finger pushes on the web
between the terminal nose and the carrier strip. Sometimes the carrier strip hole is used.
2. Depending on the feed cam installation (pre-feed or post-feed), move the press ram until the feed is forward (this
makes the feed finger mount more accessible), then disconnect power from the press. Remove the machine
guards if necessary.
3. Using a 2.5mm hex wrench, loosen the M3 SHCS located on the feed finger mount. While holding the feed
finger lever down slightly, slide the feed finger to the desired position. See Figure 2-11.
M5 SHCS
FEED LOCK
FORWARD
FEED STROKE
ADJ. KNOB
FEED FINGER
LEVER
TERMINAL
FEED FINGER
BACK
STROKE
ADJ. KNOB
M3 SHCS
Figure 2-11
Figure 2-12
PIVOT CLAMP
4. If the feed finger mount cannot be moved far enough, remove the M3 SHCS completely and install it in another
tapped hole on the feed finger lever. In addition, the feed finger mount can be reversed (the feed finger must be
reversed as well) to gain additional adjustment.
5. Tighten the M3 SHCS to lock the feed finger in position.
Forward Feed Adjustments
1. The forward feed position must locate the terminal that is being crimped exactly over the anvils.
2. Disconnect the power from the press. Remove the machine guards if necessary.
3. Make sure there is a terminal over the anvils and the feed finger is fully forward (closest to the anvils).
Depending on the feed cam setup, the ram must be either (partly) down or fully up at this point.
4. Turn the forward feed adjusting knob to position the terminal. To decrease the feed position, turn the forward
feed adjusting knob clockwise. To increase the feed position turn the forward feed adjusting knob
counterclockwise. See Figure 2-12.
5. When adjusting to decrease the feed position, it is necessary to pull the terminal strip backwards until it is
against the feed finger. When increasing the feed position, the feed finger will push the terminal farther over the
anvils.
6. Restore power to the press and crimp several terminals under power. Observe the terminal location on the
anvils and readjust if necessary.
Doc. No: TM-638800000
Revision: D
Release Date: 01-05-05
Revision Date: 02-05-13
UNCONTROLLED COPY
Page 18 of 69
�Molex Mini-Mac Applicator
Feed Stroke Cam Adjustments
1. The feed stroke is controlled by the ram and is determined by the press stroke. For example, a press with a
28.58mm (1 1/8") stroke uses a shorter feed cam. A press with a 41.28mm (1 5/8") stroke uses a longer feed
cam. Refer to the press manual to determine the press stroke.
2. Determine what feed timing is desired. Typically, when the applicator is mounted in a wire processing machine,
the feed cam should be assembled in the down stroke
Figure 2-13
position. While the press is idle (in the up position), a
Feed Cam
Press Stroke
Feed Timing
terminal will not be present over the anvil. For most bench
Order No.
applications, the cam is installed in the up stroke position.
mm
In.
This will leave a terminal over the anvil when the press is
Up stroke
idle (in the up position). See Figure 2-13.
41.28 1-5/8
(terminal present
over anvil)
3. Turn off and disconnect the power supply from the press.
28.58
1-1/8
Remove the machine guards if necessary.
63801-3202
4. Remove the applicator from the press. See Applicator
Installation and Removal.
Down stroke
5. Pull back on the feed pivot lever and remove the ram from
41.28 1-5/8 (terminal not present
the applicator.
over anvil)
6. Remove the punch(es) from the ram.
7. Use a 3mm hex wrench to remove the M4 SHCS holding
63801-3202
the cam on the back of the ram.
8. Position the cam in the desired position for feeding and
Down stroke
attach with the M4 SHCS. See Figure 2-13.
28.58 1-1/8 (terminal not present
9. Replace the punch(es) and reinstall the ram in the
over anvil)
applicator.
11-18-4238
Back Stroke Feed Adjustments
1. To properly feed the terminal strip, the back feed stroke should have enough over-travel to pick up the next
terminal. Too much over travel may, in some cases, cause a double-feed.
2. Disconnect the power from the press. Remove the machine guards if necessary.
3. To achieve the correct back stroke location, adjust the position of the hinge bushing. First, use a 3mm hex
wrench to loosen the pivot clamp. Turning the back stroke adjustment knob (which is located above the hinge
bushing) clockwise (CW) will raise the hinge bushing and will increase the feed back stroke. Turning the knob
counter clockwise (CCW) will lower the hinge bushing and will decrease the feed back stroke. When
adjustment is complete, tighten the pivot clamp securely. See Figure 2-12.
4. Since back feed stroke adjustment may not be visibly obvious, the terminal feed should be cycled (by hand, if
possible) to observe the changes.
5. Back feed stroke adjustments may affect the entire feed linkage; re-adjustment of the forward feed stroke could
be necessary. See Forward Feed Adjustments.
2.5.2
Mechanical Feed Molded Strip (63883 series)
Front Guide Adjustments
The front guide (63801-4459) is not adjustable. The travel of the track brake allows various terminal lengths to fit in
the track.
While the track brake accommodates various terminal lengths, the track assembly must be adjusted to position the
terminal over the anvils. See Track Adjustments.
Front Track Cover Adjustments
Doc. No: TM-638800000
Revision: D
Release Date: 01-05-05
Revision Date: 02-05-13
UNCONTROLLED COPY
Page 19 of 69
�Molex Mini-Mac Applicator
1. Disconnect power from the press. Remove the machine guards if necessary.
2. The front track cover (63801-4456) is adjusted up or down, depending on the diameter of the terminal barrel.
See Figure 2-14.
3. The cover height adjustment is done by moving the thumb nuts (63600-1517 and 63600-1518) up or down,
allowing the terminal strip to move through the track with a minimal clearance. The top thumb nut (63600-1518)
should be tightened against the bottom thumb nut to lock the adjustment.
NOTE: Excessive clearance between the front track cover and the terminal strip can cause cutoff problems.
Insufficient clearance will create excessive drag and possible feed or terminal positioning problems.
TOP
THUMB NUT
FRONT
TRACK COVER
TOP THUMB
NUT
FEED FINGER
LEVER
TERMINAL
FEED FINGER
M3 SHCS
Figure 2-15
THUMB NUTS
63600-1517
63600-1518
Figure 2-14
Feed Finger Adjustments
1. The feed finger must be located to properly feed the terminal. The feed finger runs in the slot of the front cover,
pushing on the terminal barrel just above the molded carrier.
2. Depending on the feed cam installation (pre-feed or post-feed), move the press ram until the feed is forward (this
makes the feed finger adjustment more accessible), then disconnect power from the press. Remove the
machine guards if necessary.
3. Using a 2.5mm hex wrench, loosen the M3 SHCS located on the feed finger mount. While holding the feed
finger lever down slightly, slide the feed finger to the desired position. See Figure 2-15.
4. If the feed finger mount cannot be moved far enough, remove the M3 SHCS completely and install it in another
tapped hole on the feed finger lever. Tighten the M3 SHCS to lock the feed finger in position.
M5 SHCS
Forward Feed Adjustments
FEED LOCK
1. The forward feed position must locate the terminal that is
being crimped exactly over the anvils.
2. Disconnect the power from the press. Remove the machine
BACK
guards if necessary.
FORWARD
STROKE
3. Make sure there is a terminal over the anvils and the feed
FEED STROKE
ADJ. KNOB
finger is fully forward (closest to the anvils). Depending on
ADJ. KNOB
the feed cam setup, the ram must be either (partly) down or
fully up at this point.
PIVOT CLAMP
Figure 2-16
4. Turn the forward feed adjusting knob to position the
terminal. To decrease the feed position, turn the forward feed adjusting knob clockwise. To increase the feed
position turn the forward feed adjusting knob counterclockwise. See Figure 2-16.
Doc. No: TM-638800000
Revision: D
Release Date: 01-05-05
Revision Date: 02-05-13
UNCONTROLLED COPY
Page 20 of 69
�Molex Mini-Mac Applicator
5. When adjusting to decrease the feed position, it is necessary to pull the terminal strip backwards until it is
against the feed finger. When increasing the feed position, the feed finger will push the terminal farther over the
anvils.
6. Restore power to the press and crimp several terminals under power. Observe the terminal location on the
anvils and the quality of the molded strip cutoff (each side of the barrel should have a similar appearance);
readjust if necessary.
Feed Cam Selection and Mounting
1. The feed stroke is controlled by the ram and is determined by the press stroke. For example, a press with a
28.58mm (1 1/8") stroke uses a shorter feed cam. A press with a 41.28mm (1 5/8") stroke uses a longer feed
cam. Refer to the press manual to determine the press stroke.
2. Determine what feed timing is desired. Typically, when the applicator is mounted in a wire processing machine,
the feed cam should be assembled in the down stroke position. While the press is idle (in the up position), a
terminal will not be present over the anvil. For most bench applications, the cam is installed in the up stroke
position. This will leave a terminal over the anvil when the press is idle (in the up position). See Figure 2-17.
3. Turn off and disconnect the power from the press. Remove the machine guards if necessary.
4. Remove the applicator from the press. See Applicator Installation and Removal.
5. Pull back on the feed pivot lever and remove the ram from the applicator.
6. Remove the punches from the ram.
7. Use a 3mm hex wrench to remove the M4 SHCS holding the
Figure 2-17
cam on the back of the ram.
Feed Cam
Press Stroke
Feed Timing
8. Position the cam in the desired position for feeding and attach
Order No.
with the M4 SHCS. See Figure 2-17.
mm
In.
9. Replace the punches and reinstall the ram in the applicator.
Up stroke
41.28
1-5/8
(terminal present
over anvil)
Back Stroke Feed Adjustments
28.58
1-1/8
1. To properly feed the terminal strip, the back feed stroke should 63801-3202
have enough over-travel to pick up the next terminal. Too
much over travel may, in some cases, cause a double-feed.
Down stroke
2. Disconnect power from the press. Remove the machine
41.28 1-5/8 (terminal not present
guards if necessary.
over anvil)
3. To achieve the correct back stroke location, adjust the position
of the hinge bushing. First, use a 3mm hex wrench to loosen
63801-3202
the pivot clamp. Turning the back stroke adjustment knob
(which is located above the hinge bushing) clockwise (CW) will
Down stroke
raise the hinge bushing and will lengthen the feed back stroke.
28.58 1-1/8 (terminal not present
Turning the knob counter clockwise (CCW) will lower the hinge
over anvil)
bushing and will decrease the feed back stroke. When
11-18-4238
adjustment is complete, tighten the pivot clamp securely. See
Figure 2-16.
4. Since back feed stroke adjustment may not be visibly obvious, the terminal feed should be cycled (by hand, if
possible) to observe the changes.
5. Back feed stroke adjustments may affect the entire feed linkage; re-adjustment of the forward feed stroke could
be necessary. See Forward Feed Adjustments.
Track Position Adjustment
1. Disconnect power from the press. Remove the machine
guards if necessary.
Doc. No: TM-638800000
Revision: D
Release Date: 01-05-05
Revision Date: 02-05-13
ALLEN
WRENCH
UNCONTROLLED COPY
M10 LOCK SCREW
Figure
Page
21 2-18
of 69
�Molex Mini-Mac Applicator
2. To position the terminal track in or out, first use a 5mm hex wrench to loosen the M10 lock screw located on the
front of the track. See Figure 2-18.
3. Put a regular screwdriver through the hole in the lock screw and turn the adjusting screw to position the terminal
in the correct location. Turning the screw clockwise will move the track towards the operator; to move the track
towards the applicator turn the screw counterclockwise. Depending on the amount of movement, the feed finger
mount may need to be loosened and readjusted. See Feed Finger adjustment.
4. To lock the track in position, tighten the M10 lock screw.
5. If the feed finger mount was loosened during the track positioning, remember to tighten its mounting screw.
6. Replace machine guards.
7. Hand cycle the press to ensure the terminal is positioned properly on the anvils. Also verify the terminal feed
operation.
8. Restore power to the press, crimp a terminal under power, and observe the quality of the termination.
9. Repeat the above steps until the desired terminal position is obtained.
Nose Support Adjustment
The nose support (part no. 63466-0931) is used to prevent the terminal from being pushed back when the wire is
pushed into the terminal.
1. If the nose support is adjusted too far forward it may create
excessive drag on the terminal nose and may cause terminal
position problems.
2. If the nose support is adjusted too far back the terminal could
be pushed back by the wire, misaligning the terminal to the
crimp and cutoff tooling.
3. To adjust the nose support, use a 4mm hex wrench to loosen
the M5 SHCS holding the nose support to the applicator frame.
Move the support forward or back until it just clears the
terminal nose. Retighten the screw. See Figure 2-19.
M5 SHCS
FORWARD
OR BACK
NOSE SUPPORT
Terminal Support Adjustment
TERMINAL M3 SHCS
TERMINAL SUPPORT
The terminal support (63466-0913) is located behind the conductor
NOSE
anvil, providing support for the nose of the terminal during
Figure 2-19
crimping. Most terminal bending problems can be remedied with a
terminal support adjustment. For molded strip applicators, the terminal support position can influence the cutoff
performance.
1. Disconnect power from the press. Remove the machine guards if necessary.
2. To adjust the terminal support, use a 2.5mm wrench to loosen the M3 SHCS holding it in place. See Figure 219.
3. Raise or lower the support until it is just below the terminal. Remember that, during crimping, the entire terminal
goes down. If the support is adjusted too high, the terminal nose will bend up. An adjustment that is too low will
not support the terminal and will cause cut off timing problems.
4. When adjustment is complete, securely tighten the M3 SHCS.
Stripping Blade Adjustment
The stripping blade (part no. 63466-0921) is used to prevent the crimped terminal from sticking in the punches when
the ram moves up.
1. If the stripping blade is adjusted too far down, it may create excessive drag on the terminals, resulting in feed
problems.
Doc. No: TM-638800000
Revision: D
Release Date: 01-05-05
Revision Date: 02-05-13
UNCONTROLLED COPY
Page 22 of 69
�Molex Mini-Mac Applicator
2. If the stripping blade is adjusted too far up, it may cause a wire bend problem (in a wire processor) since the
crimped terminal will be carried farther up by the retracting punch.
3. To adjust the stripping blade, loosen the two M4 SHCS holding the blade to the applicator frame.
4. Move the stripping blade up or down as necessary, until the bottom of the blade is just above the terminal that is
over the anvils.
5. Retighten the two M4 SHCS. See Figure 2-20.
6. The clearance in the stripper blade’s adjustment slot can cause the blade to interfere with back of the
conductor punch. After adjusting the stripper blade, always hand-cycle the press to insure that the
blade clears the conductor punch.
SHOULDER
SCREW (2)
M4 SHCS
STRIPPING
BLADE
FRONT GUIDE
Figure 2-20
2.5.3
JUST ABOVE TERMINAL
IN/OUT ADJ.
M4 SHCS
FRONT GUIDE
CLAMP (2)
UP/DOWN ADJ.
M4 SHCS (2)
IN AND OUT
ADJ. M4 SHCS
Figure 2-21
Air Feed Tape Applicator (63885 and 63886 series) Earlier Model
Front Guide Adjustment
1. Disconnect power from the press. Remove the machine guards if necessary.
2. The front guide (63801-5865) can be adjusted in or out to properly contain the tape in the track for feeding. It
can also have its angle adjusted, to guide the terminals to feed just over the crimp anvil(s).
3. To adjust the front guide in or out, use a 3mm hex wrench to loosen the (2) M4 SHCS that clamp the guide to the
shoulder screws. See Figure 2-21.
FRONT GUIDE
TERMINAL INSIDE
EDGE OF FRONT GUIDE
CLAMP
FRONT GUIDE
CLAMPS
BLADE
JUST
ABOVE
TERMINAL
M4 SHCS
STRIPPING
BLADE
TERMINAL
SUPPORT
ANVILS
Figure 2-22
Figure 2-23
Doc. No: TM-638800000
Revision: D
Release Date: 01-05-05
Revision Date: 02-05-13
UNCONTROLLED COPY
Page 23 of 69
�Molex Mini-Mac Applicator
4. With taped product loaded in the track, adjust the front guide up to the product so its running surface contacts
the terminals. See Figure 2-22. The front guide is adjusted in or out to keep the Mylar tape captured in the
track. If the guide is adjusted too far in, excessive drag on the terminals will result, causing slow or short feeds
or terminal misalignment on the tape. If the guide is adjusted too far out, the mylar tape may drift off the feed
pawls and stop feeding altogether.
5. When the in/out adjustment is complete, lock the guide on the shoulder screws by tightening the (2) M4 SHCS.
6. To adjust the angle of the front guide, loosen the (2) M4 SHCS that hold the front guide to the front guide clamp.
See Figure 2-21.
7. Tilt the front guide up or down, so the terminal will feed over the anvil(s). This adjustment is important when
crimping expanded-flare products. See Figure 2-22.
8. When the angle adjustment is complete, lock the guide on the clamps by tightening the (2) M4 SHCS.
9. Replace the machine guards before operating the press.
Terminal Support Adjustment
The terminal support (63466-0913) is located behind the conductor anvil, providing support for the nose of the
terminal during crimping. Most terminal bending problems can be remedied with a terminal support adjustment.
1.
2.
3.
4.
Disconnect power from the press. Remove the machine guards if necessary.
To adjust the terminal support, use a 2.5mm wrench to loosen the M3 SHCS holding it in place. See Figure 223.
Raise or lower the support until it is just below the terminal. Remember that, during crimping, the entire terminal
goes down. If the support is adjusted too high, the terminal nose will bend up. Too low of an adjustment that is
will not support the terminal, possibly causing a bent-down terminal.
When adjustment is complete, securely tighten the M3 SHCS.
Stripping Blade Adjustment
The stripping blade (part no. 63466-0921) is used to prevent the crimped terminal from sticking in the punches when
the ram moves up.
1. If the stripping blade is adjusted too far down, it may create excessive drag on the terminals, resulting in feed
problems.
2. If the stripping blade is adjusted too far up, it may cause a wire bend problem (in a wire processor) since the
crimped terminal could be carried farther up by the retracting punch.
3. To adjust the stripping blade, loosen the two M4 SHCS holding the blade to the applicator frame.
4. Move the stripping blade up or down as necessary, until the bottom of the blade is just above the terminal that is
over the anvils.
5. Retighten the two M4 SHCS. See Figure 2-23.
6. The clearance in the stripper blade’s adjustment slot can cause the blade to interfere with back of the
conductor punch. After adjusting the stripper blade, always hand-cycle the press to insure that the
blade clears the conductor punch.
Forward Feed Adjustments
Forward feed adjustment is usually not necessary, unless there is a terminal position problem relative to the tape
feed holes.
1. The forward feed position is set so the terminal being crimped is exactly over the anvil(s).
2. Disconnect power from the press. Remove the machine guards if necessary.
3. Using a 7mm open-end ignition wrench, loosen the stroke adjustment lock nut (63600-1564).
Doc. No: TM-638800000
Revision: D
Release Date: 01-05-05
Revision Date: 02-05-13
UNCONTROLLED COPY
Page 24 of 69
�Molex Mini-Mac Applicator
4. Using a 2mm hex wrench, adjust the forward feed position setscrew. Turning the wrench clockwise will reduce
the feed stroke; counterclockwise increases the stroke. See Figure 2-24. When reducing the feed stroke, pull
the tape backwards to keep the tape index holes against the feed pawls. If (forward) air pressure is on the feed
cylinder, the feed assembly should follow the adjustment.
5. Tighten the stroke adjustment lock nut.
Feed Cam Selection and Mounting
The air feed tape applicator feed timing is based purely on the press or
wire processor air valve timing. No feed cam is mounted to the
applicator ram.
STROKE
ADJUSTMENT
LOCK NUT
WARNING: Since the air feed applicator has no feed cam
or feed linkage, the applicator ram can fall out if the
applicator is turned upside-down.
Back Stroke Feed Adjustment
Molex industrial terminals delivered on mylar tape are placed on
15.24mm (0.600”) or 30.48 (1.200”) center spacing, so the back stroke
feed is limited to two settings.
1. For products on 15.24mm (0.600”) spacing, the feed bar
back stop (63801-5860) is flipped down.
2. To increase the back stroke for 30.48mm (1.200”) spaced
products, pull back on the spring plunger (63600-1566)
and flip up the back stop counterclockwise. Release the
spring plunger. See Figure 2-25.
3. Both positions of the back stop allow sufficient over travel
of the feed pawls so they can engage the tape index
holes.
FORWARD
FEED ADJUSTMENT
SETSCREW
Figure 2-24
PULL BACK ON
SPRING PLUNGER
ROTATE 180°°
Feed Speed Adjustments
BACK STOP
Figure 2-25
The forward feed speed is adjusted by turning the knob on the
flow control valve mounted to the feed cylinder. Turning the
knob clockwise causes more exhaust flow restriction, resulting in a slower forward feed. Turning the knob
counterclockwise will increase the forward feed speed.
Retract feed speed is not critical, runs at full speed, and has no adjustment.
Feed speed should be matched to the wire processing needs. Some wire processors may require a slower forward
feed as they try to pull the crimped terminal off the tape. (Note: earlier AMP CLS machines may require a “shift” in
their eject to break the adhesive bond between the terminal and the tape)
If feed forward speed is set too fast, the tape may exhibit overfeeding.
Tape Lock Pawl Adjustment
The tape lock pawl (63801-5858) is intended to hold the tape in place while the feed is not advancing. Some
operators tend to pull the crimped terminal off the tape towards the right; without the tape lock pawl, the tape could
be pulled out of position.
Doc. No: TM-638800000
Revision: D
Release Date: 01-05-05
Revision Date: 02-05-13
UNCONTROLLED COPY
Page 25 of 69
�Molex Mini-Mac Applicator
1. Make sure the tape is loaded in the track, the terminal is in
position over the anvil(s), and some empty tape is exiting the
track.
2. Using a 3mm hex wrench, loosen the (2) M4 SHCS holding the
lock pawl guide. See Figure 2-26.
3. Lift up the tape lock pawl, just enough to clear the tape, and slide
the lock pawl guide to the left or right until the lock pawl “drops
in” to the tape holes.
4. While it is engaged in the tape holes, be aware of the clearance
between the lock pawl and the tape holes. If the lock pawl is
moved too far to the left, it may not always “find” the tape holes.
If it is moved too far to the right, it may end up resting on top of
the tape, not dropping down. Try to position the pawl between
these extremes.
5. Secure the lock pawl guide in position by tightening the (2) M4
SHCS.
2.5.4
TAPE LOCK PAWL
LOCK PAWL GUIDE
M4 SHCS
LOCK PAWL lEVER
Figure 2-26
Air Feed Tape Applicator (63885 and 63886 series) Later Model
Front Guide Adjustment
1. Disconnect power from the press. Remove the machine guards if necessary.
2. The front guide (63801-5882) can be adjusted in or out to properly contain the tape in the track for feeding.
3. To adjust the front guide, use a 3mm hex wrench to loosen the (2) M4 SHCS that hold the guide to the track.
See Figure 2-38.
4. With taped product loaded in the track, adjust the front guide up to the product so its running surface contacts
the terminals. See Figure 2-39.
5. The slotted holes in the front guide allow for adjustment. If adjustment is exceeded, the guide can be
repositioned to the next set of holes in the track.
6. When the guide adjustment is complete, tighten the (2) M4 SHCS to secure the guide to the track.
7. Replace the machine guards before operating the press.
TERMINAL
FRONT GUIDE
M4 SHCS
FRONT GUIDE
ANVILS
Figure 2-38
Figure 2-39
Forward Feed Adjustments
Forward feed adjustment is usually not necessary, unless there is a terminal position problem relative to the tape
feed holes.
1. The forward feed position is set so the terminal being crimped is exactly over the anvil(s).
2. Disconnect power from the press. Remove the machine guards if necessary.
Doc. No: TM-638800000
Revision: D
Release Date: 01-05-05
Revision Date: 02-05-13
UNCONTROLLED COPY
Page 26 of 69
�Molex Mini-Mac Applicator
3. Using a 2.5mm hex wrench, loosen the (2) M3 SHCS lock screws.
4. Using a 2.5mm hex wrench, turn the forward feed adjustment screw clockwise to reduce the feed stroke or
counterclockwise to increase the stroke. See Figure 2-40. When reducing the feed stroke, pull the tape
backwards to keep the tape index holes against the feed pawls. If (forward) air pressure is on the feed cylinder,
the feed assembly should follow the adjustment.
5. When adjustment is complete, tighten the (2) lock screws. To avoid damaging the screw threads, do not over
tighten the lock screw that clamps the forward feed adjustment screw.
LOCK SCREWS
TAPE LOCK PAWL
Figure 2-40
FORWARD
STOP
FORWARD FEED
ADJ. SCREW
DO NOT
THIS SCREW
LOOSEN
THIS SCREW
LOCK PAWL GUIDE
Figure 2-41
M4 SHCS (2)
Tape Lock Pawl Adjustment
The tape lock pawl (63801-5808) is intended to hold the tape in place while the feed is not advancing. Some
operators tend to pull the crimped terminal off the tape towards the right; without the tape lock pawl, the tape could
be pulled out of position.
1. Make sure the tape is loaded in the track, the terminal is in position over the anvil(s), and some empty tape is
exiting the track.
2. Using a 3mm hex wrench, loosen the (2) M4 SHCS holding the lock pawl guide. See Figure 2-41.
3. Lift up the tape lock pawl, just enough to clear the tape, and slide the lock pawl guide to the left or right until the
lock pawl “drops in” to the tape holes.
4. While it is engaged in the tape holes, be aware of the clearance between the lock pawl and the tape holes. If the
lock pawl is moved too far to the left, it may not always
“find” the tape holes. If it is moved too far to the right, it
may end up resting on top of the tape, not dropping down.
TRACK COVER
Try to position the pawl between these extremes.
5. Secure the lock pawl guide in position by tightening the (2)
STRIP OF
M4 SHCS.
TERMINALS
2.5.5 Mechanical Feed Front Metal Strip Applicators
(63887 series)
Track Cover Adjustment
The track cover shown in the following illustrations is a generic
representation and may vary depending on the terminal being
processed. Most track covers have a vertical lip that guides
the terminal strip in the slot between the conductor and
insulation grips of the terminal.
Doc. No: TM-638800000
Revision: D
Release Date: 01-05-05
Revision Date: 02-05-13
DRAG RELEASE
LEVER
Figure 2-27
UNCONTROLLED COPY
Page 27 of 69
�Molex Mini-Mac Applicator
1.
2.
3.
4.
Disconnect power from the press. Remove the machine guards if necessary.
Open the drag by turning the knob on the front of the track.
Using a 3mm hex wrench, loosen the (2) M4 SHCS holding the track cover in place. See Figure 2-27.
With a strip of terminals in the track, adjust the track cover in or out until the terminals move freely with minimal
drag. Excessive in-out movement of the terminal strip will cause variation in crimp position and cutoff tab length.
Excessive drag can cause terminals to be damaged during feeding, resulting in poor crimp quality.
5. When adjustment is complete, tighten the (2) M4
M3 SHCS
PUSH DOWN
SHCS.
Feed Finger Adjustments
1. The feed finger must be positioned to properly feed the
terminal. Typically, the feed finger runs in the slot of
the carrier cover, pushing on the hole in the carrier
strip. Some applicators may have the feed finger push
near the insulation or conductor grip of the terminal.
2. Depending on the feed cam installation (pre-feed or
post-feed), move the press ram until the feed is
forward (this makes the feed finger mount more
accessible), then disconnect power from the press.
Remove the machine guards if necessary.
3. Using a 2.5mm hex wrench, loosen the M3 SHCS
located on the feed finger mount. While holding the feed
finger lever down slightly, slide the feed finger to the desired
position. See Figure 2-28.
4. If the feed finger mount cannot be moved far enough, remove
the M3 SHCS completely and install it in another tapped hole
on the feed finger lever. Tighten the M3 SHCS to lock the
feed finger in position.
FEED FINGER
LEVER
TERMINAL
FEED FINGER
FEED FINGER
MOUNT
Figure 2-28
M5 SHCS
FEED LOCK
FORWARD
FEED STROKE
ADJ. KNOB
BACK
STROKE
ADJ. KNOB
Forward Feed Adjustments
1. The forward feed position must locate the terminal that is
being crimped exactly over the anvils.
Figure 2-29
2. Disconnect the power from the press. Remove the machine
guards if necessary.
3. Make sure there is a terminal over the anvils and the feed finger is fully forward (closest to the anvils).
Depending on the feed cam setup, the ram must be either (partly) down or fully up at this point.
4. Turn the forward feed adjusting knob to position the terminal. To decrease the feed position, turn the forward
feed adjusting knob clockwise. To increase the feed position turn the forward feed adjusting knob
counterclockwise. See Figure 2-29.
5. When adjusting to decrease the feed position, it is necessary to pull the terminal strip backwards until it is
against the feed finger. When increasing the feed position, the feed finger will push the terminal farther over the
anvils.
6. Restore power to the press and crimp several terminals under power. Observe the terminal location on the
anvils; readjust if necessary.
Doc. No: TM-638800000
Revision: D
Release Date: 01-05-05
Revision Date: 02-05-13
UNCONTROLLED COPY
Page 28 of 69
�Molex Mini-Mac Applicator
Figure 2-30
Feed Cam Selection and Mounting
Feed Cam
Press Stroke
Feed Timing
1. The feed stroke is controlled by the ram and is determined by the
Order No.
press stroke. For example, a press with a 28.58mm (1 1/8") stroke
mm
In.
uses a shorter feed cam. A press with a 41.28mm (1 5/8") stroke uses
Up stroke
41.28 1-5/8
(terminal present
a longer feed cam. Refer to the press manual to determine the press
over anvil)
stroke.
28.58
1-1/8
2. Determine what feed timing is desired. Typically, when the applicator
63801-3202
is mounted in a wire processing machine, the feed cam should be
assembled in the down stroke position. While the press is idle (in the
Down stroke
up position), a terminal will not be present over the anvil. For most
41.28 1-5/8 (terminal not present
bench applications, the cam is installed in the up stroke position. This
over anvil)
will leave a terminal over the anvil when the press is idle (in the up
63801-3202
position). See Figure 2-30.
3. Turn off and disconnect the power supply from the press. Remove the
machine guards if necessary.
Down stroke
4. Remove the applicator from the press. See Applicator Installation and
28.58 1-1/8 (terminal not present
Removal.
over anvil)
5. Pull back on the feed pivot lever and remove the ram from the
11-18-4238
applicator.
6. Remove the punches from the ram.
7. Use a 3mm hex wrench to remove the M4 SHCS holding the cam on the back of the ram.
8. Position the cam in the desired position for feeding and attach with the M4 SHCS. See Figure 2-30.
9. Replace the punches and reinstall the ram in the applicator.
Track Position Adjustment
1. Disconnect power from the press. Remove the machine guards if necessary.
2. To position the terminal track in or out, first use a 5mm hex wrench
to loosen the M10 lock screw located on the front of the track. See
ALLEN
Figure 2-31.
3. Put a regular screwdriver through the hole in the lock screw and turn WRENCH
the adjusting screw to position the terminal in the correct location.
Turning the screw clockwise will move the track towards the
M10 LOCK
operator; to move the track towards the applicator turn the screw
Figure 2-31
SCREW
counterclockwise. Depending on the amount of movement, the feed
finger mount may need to be loosened and readjusted. See Feed Finger adjustment.
4. To lock the track in position, tighten the M10 lock screw.
5. If the feed finger mount was loosened during the track positioning, remember to tighten its mounting screw.
6. Replace machine guards.
7. Hand cycle the press to ensure the terminal is positioned properly on the anvils and does not have an excessive
cutoff tab. Also verify the terminal feed operation.
8. Restore power to the press, crimp a terminal under power, and observe the quality of the termination.
9. Repeat the above steps until the desired terminal position is obtained.
Wire Stop Adjustment
The wire stop is a target used by the operator to control the length of wire in the conductor crimp. It is also used as a
stripper, to prevent the crimped terminal from sticking in the punches as they retract.
If the applicator is used in a wire processor, the wire stop can be adjusted far back (or removed completely) since the
wire processor will consistently control wire position.
Doc. No: TM-638800000
Revision: D
Release Date: 01-05-05
Revision Date: 02-05-13
UNCONTROLLED COPY
Page 29 of 69
�Molex Mini-Mac Applicator
1. If the wire stop is adjusted too far forward it may create an insufficient brush (the amount of wire that protrudes
from the terminal’s conductor grip) or it may create
WIRE STOP
terminal feed jams if the terminal hits the wire stop.
2. If the wire stop is adjusted too far back there will be
excessive brush or the wire stop may interfere with
the terminal nose.
3. To adjust the wire stop, use a 4mm hex wrench to
loosen the M5 SHCS holding the wire stop to the
FORWARD
applicator frame. Move the wire stop forward or back
OR BACK
to the position that results in the proper brush, without
causing feed jams or terminal damage. Retighten the
screw. See Figure 2-32.
2.6 Operation
2.6.1
M5 SHCS
Figure 2-32
Mechanical Feed Rear Metal Strip Applicators (63881 and 63882 series)
Loading and Unloading the Terminal Strip
To avoid terminal damage or feed jams, the terminal dereeler should present the terminals to the
applicator track with minimum bending or curling of the carrier strip.
1. Applicable terminals are listed on the Specification Sheet for the applicator. Do not crimp terminals that are not
listed on the Specification Sheet.
2. Disconnect power from the press. Remove the machine guards if necessary.
3. Raise the terminal drag by pivoting the drag release lever away from the applicator. This will allow the terminals
to slide freely through the applicator track. See Figure 2-33.
TRACK BRAKE
DRAG
RELEASE
LEVER
(CLOSED)
1ST TERMINAL
CENTERED
ABOVE ANVILS
TERMINAL
STRIP
FRONT GUIDE
AND COVER
FEED FINGER
FEED FINGER
TERMINAL STRIP
Figure 2-33
1ST TERMINAL CENTERED
ABOVE ANVILS
Figure 2-34
4. Push the terminal strip through the track until the first terminal is centered over the anvils.
5. Lower the terminal drag by pivoting the drag release lever towards the applicator.
6. Cycle the press by hand, crimping the empty terminal. Observe that the feed finger transfers the next terminal to
a centered position over the anvils. If it does not fall out by it self, remove the loose terminal from the tooling.
7. Install guards, restore power to the press, and resume production.
8. To unload the terminal strip, make sure the press power is turned off. Remove the machine guards if necessary.
9. Raise the terminal drag.
Doc. No: TM-638800000
Revision: D
Release Date: 01-05-05
Revision Date: 02-05-13
UNCONTROLLED COPY
Page 30 of 69
�Molex Mini-Mac Applicator
10. Release the feed finger by pushing down on the lever. While holding the lever down, pull the terminal strip
backwards through the track.
2.6.2
Mechanical Feed Molded Strip Applicators (63883 and 63884 series)
Loading and Unloading the Terminal Strip
To avoid terminal damage or feed jams, the terminal dereeler should present the terminals to the
applicator track with minimum bending or curling of the carrier strip.
1. Applicable terminals are listed on the Specification Sheet for the applicator. Do not crimp terminals that are not
listed on the Specification Sheet.
2. Disconnect power from the press. Remove the machine guards if necessary.
3. Push the spring loaded track brake back. This will allow the terminal strip to slide freely through the
applicator track. See Figure 2-34.
4. While holding the track brake back, push the terminal strip through the track until the first terminal comes to rest
centered above the anvil.
5. Release the track brake to apply drag to the terminals.
6. Cycle the press by hand, crimping the empty terminal. Observe that the feed finger transfers the next terminal
to a centered position over the anvils. If it does not fall out by it self, remove the loose terminal from the tooling.
7. Install guards, restore power to the press, and resume production.
8. To unload the terminal strip, make sure the press power is turned off. Remove the machine guards if necessary.
9. Raise the feed finger by pushing down on the lever, while holding the track brake open, pull the terminal strip
backwards through the track.
2.6.3
Air Feed Tape Applicators (63885 and 63886 series) Earlier Models
Loading and Unloading Mylar Tape
1. Applicable terminals are listed on the Specification Sheet for the applicator. Do not crimp terminals that are not
listed on the Specification Sheet.
2. Disconnect power from the press. Remove the machine guards if necessary.
NOTE: Large-reeled (24” diameter) products are heavy and should be power-dereeled on a wire
processor.
3. Raise the tape drag by pivoting the drag release lever away from the applicator. This will allow the tape to enter
the applicator track.
4. The tape will be easier to “start” in the track if the corner of the tape is trimmed as shown in Figure 2-35.
To avoid terminal damage or feed jams, the terminal dereeler should present the terminals to the
applicator track with minimum bending or curling of the carrier strip.
5. For narrow (1 1/8” wide) tape, align the front edge of the tape with the front edge of the track and gently push the
tape into the track until it reaches the feed pawls (the pawls will “click” into the feed holes of the tape). The
process is the same for wider (1 7/16”) tape but the front edge will protrude about 8mm (0.3”) from the front of
the track. See Figure 2-36.
6. If the press or wire processor has a manual-mode air feed, cycle it until the first terminal is in location over the
anvil(s). Make any necessary front guide adjustments.
Doc. No: TM-638800000
Revision: D
Release Date: 01-05-05
Revision Date: 02-05-13
UNCONTROLLED COPY
Page 31 of 69
�Molex Mini-Mac Applicator
7. To unload the tape, it must be cut at the track entrance and fed through the track. DO NOT ATTEMPT TO PULL
THE TAPE BACKWARDS THROUGH THE TRACK.
8. As the cut tape exits the track, it will be necessary to slightly lift up the tape lock pawl to completely free the tape
from the track.
TRIM CORNER
OF TAPE
Figure 2-35
PUSH TAPE UNTIL
PAWL CLICKS
2.6.4
ALIGN FRONT EDGE OF
TAPE WITH TRACK
Figure 2-36
DRAG
Air Feed Tape Applicators(63885 and 63886 series) Later Models
Loading and Unloading Mylar Tape+
1. Applicable terminals are listed on the Specification Sheet for the applicator. Do not crimp terminals that are not
listed on the Specification Sheet.
2. Disconnect power from the press. Remove the machine guards if necessary.
NOTE: Large-reeled (24” diameter) products are heavy and should be power-dereeled on a wire
processor.
3. Raise the tape drag by pivoting the drag release lever away from the applicator. This will allow the tape to enter
the applicator track.
4. The tape will be easier to “start” in the track if the corner of the tape is trimmed as shown in Figure 2-35.
To avoid terminal damage or feed jams, the terminal dereeler should present the terminals to the applicator
track with minimum bending or curling of the carrier strip.
DRAG RELEASE
LEVER
(SHOWN CLOSED)
GUIDE LIP
PUSH TAPE
UNTIL
PAWL CLICKS
Figure 2-42
Doc. No: TM-638800000
Revision: D
Release Date: 01-05-05
Revision Date: 02-05-13
FEED PAWL
LEVER
Figure 2-43
UNCONTROLLED COPY
Page 32 of 69
�Molex Mini-Mac Applicator
5. Align the back edge of the tape with the guide lip on the track and gently push the tape straight in. Finding the
guide lip can be done by laying the tape on the front area of the track and slowly pushing it back until it touches
the guide lip. See Figure 2-42.
6. If the press or wire processor has a manual-mode air feed, cycle it until the first terminal is in location over the
anvil(s). Make any necessary front guide adjustments.
7. To unload the tape, first raise the tape drag. Then lift the feed pawl by pulling back on the feed pawl lever.
While the feed pawls are lifted, pull the tape backwards through the track. See Figure 2-43.
2.6.5
Mechanical Feed Front Metal Strip Applicators (63887 series)
Loading and Unloading the Terminal Strip
1. Applicable terminals are listed on the Specification Sheet for the
applicator. Do not crimp terminals that are not listed on the
Specification Sheet.
2. Disconnect power from the press. Remove the machine guards if
necessary.
3. Raise the terminal drag by turning the knob on the front of the
TURN DRAG
LEVER
track. This will allow the terminals to slide freely through the
applicator track. See Figure 2-37.
Figure 2-37
1ST TERMINAL CENTERED
4. Push the terminal strip through the track until the first terminal is
ABOVE ANVILS
centered over the anvils.
5. Lower the terminal drag by turning the knob until the drag frame drops down.
6. Cycle the press by hand, crimping the empty terminal. Observe that the feed finger transfers the next terminal to
a centered position over the anvils. If it does not fall by itself, remove the loose terminal from the tooling.
7. Install guards, restore power to the press, and resume production.
8. To unload the terminal strip, make sure the press power is turned off. Remove the machine guards if necessary.
9. Raise the terminal drag.
10. Release the feed finger by pushing down on the lever. While holding the lever down, pull the terminal strip
backwards through the track.
Doc. No: TM-638800000
Revision: D
Release Date: 01-05-05
Revision Date: 02-05-13
UNCONTROLLED COPY
Page 33 of 69
�Molex Mini-Mac Applicator
Section 3
Maintenance
3.1
Cleaning
3.2
Lubrication
3.3
Spare parts
3.4
Perishable Parts
3.5
Storage
Doc. No: TM-638800000
Revision: D
Release Date: 01-05-05
Revision Date: 02-05-13
UNCONTROLLED COPY
Page 34 of 69
�Molex Mini-Mac Applicator
CAUTION: Always disconnect power before any maintenance activity
3.1
Cleaning
The Industrial Applicator should be cleaned daily. Use a soft bristle brush to remove debris from critical areas
such as the crimp tooling and applicator track. For best results, remove the tooling from the applicator.
Brush and then use a clean cloth to wipe off the upper and lower tooling mounting areas. Tooling that crimps
un-insulated terminals should be inspected for possible plating build-up.
Before reinstalling tooling, wipe all sides of the punches and anvils with a clean cloth.
Do not use compressed air to clean the applicator. The forces created by compressed air can force debris
into the tool.
3.2
Lubrication
1. Grease the ram including the up and down stroke feed arm.
2. Oil the feed finger assembly and all moving parts.
3. Lubricate with multipurpose synthetic lubricant with Teflon or an equivalent. Molex ships its applicators
pre-greased with Permatex multi-purpose synthetic grease with Teflon No. 82329. A SAE 30W nondetergent oil, light spindle oil, or “3-in-1” oil should be used on pivot points.
WARNING: Never use penetrates such as WD-40 or Liquid Wrench for any lubrication on the applicator.
4. Lubricate all points shown in Figures 3-1 with the specified oil and grease (or equivalent).
5. Never lubricate the air cylinder. It is designed to run on dry air.
GREASE RAM
AND FEED CAM
GREASE RAM
OIL FEED FINGER
ASSEMBLY AND
SLIDER
OIL
Figure 3-1 MECHANICAL FEED
Doc. No: TM-638800000
Revision: D
Release Date: 01-05-05
Revision Date: 02-05-13
Figure 3-2 AIR-FEED
UNCONTROLLED COPY
Page 35 of 69
�Molex Mini-Mac Applicator
An example of a maintenance chart is shown below. Copy and use this chart to track the maintenance of your
Mini-Mac Applicator or use this as a template to create you own schedule or use your company’s standard
chart, if applicable.
Preventive Maintenance Chart
Daily: Clean. See Section 3.1.
As Required: Lubricate. See Section 3.2.
CHECK SHEET MONTH__________ YEAR _________
Week
Days of the Week
Daily
Cycles
Daily
Clean
25,000
Yes
Soft Brush
Industrial
Degreaser
25,000
Yes
Replace if
signs of wear.
MON
TUE
WED
THU
FRI
SAT
SUN
Solution
1
2
3
4
Cleaning
Reapply grease
Reapply oil
Inspect all tooling,
feed fingers etc. for
wear
Schedule should be adjusted up or down depending on usage. Molex recommends that a log of preventive
maintenance be kept with the press.
3.3
Spare Parts
Customers are responsible for maintaining the Mini-Mac Applicator. Spare parts are available. Moving and
functioning parts can be damaged or wear out over time and will require replacement. Molex recommends
that the customer keep some or all of them in stock to reduce production down time. These parts are
identified in the Parts List. See Section 5.
3.4
Perishable Parts
Customers are responsible for maintaining the Mini-Mac Applicator. Perishable parts are those parts that
come in contact with, the product and will wear out over time. Molex recommends that all customers keep
at least one set of the perishable tool kits in stock at all times. This will reduce the amount of production
down time. For the proper perishable tool kit information, refer to the Crimp Tooling Specification
Sheet supplied with the Applicator.
3.5
Storage
To prevent the bottoming of the ram which can cause damage to the crimp punches and anvils, leave a
strip of terminals in the applicator or place a piece of wood or rubber between the punches and the anvils.
Doc. No: TM-638800000
Revision: D
Release Date: 01-05-05
Revision Date: 02-05-13
UNCONTROLLED COPY
Page 36 of 69
�Molex Mini-Mac Applicator
Section 4
4.1
Parts Lists and Assembly Drawings
For perishable tooling information, refer to the appropriate Specification Sheet
4.1.1 Mechanical Feed Rear Metal Strip Applicator (63881 and 63882 series)
4.1.2 Mechanical Feed Molded Strip Applicator (63883 and 63884 series)
4.1.3 Air Feed Tape Applicator (63885 and 63886 series) Earlier Models
4.1.4 Air Feed Tape Applicator (63885 and 63886 series) Later Models
4.1.5 Mechanical Feed Front Metal Strip Applicator (63887 series)
4.2
Troubleshooting
4.2.1 Mechanical Feed Rear Metal Strip Applicators (63881 and 63882 series)
Mechanical Feed Front Metal Strip Applicators (63887 series)
4.2.2 Mechanical Feed Molded Strip Applicators (63883 and 63884 series)
4.2.3 Air Feed Tape Applicators (63885 and 63886 series)
Doc. No: TM-638800000
Revision: D
Release Date: 01-05-05
Revision Date: 02-05-13
UNCONTROLLED COPY
Page 37 of 69
�Molex Mini-Mac Applicator
4.1.1 Mechanical Feed Rear Metal Strip Applicator Parts List and Assembly Drawings (63881 and 63882
series)
Item
1
2
3
4
5
6
7
8
9
10
11
12
13
14
15
16
17
18
19
20
21
22
23
24
25
26
27
28
29
30
31
32
33
34
35
36
37
38
39
40
41
Order No.
11-18-4238
11-32-5346
63800-0120
63800-0121
63800-0123
63800-0124
63800-0127
63800-0140
63800-0142
63800-0143
63800-0144
63800-0310
63800-0311
63800-0312
63800-0314
63800-0316
63800-4309
63801-3202
63801-3211
63801-3225
63801-3281
63801-4462
63801-4551
63801-4556
63801-4558
63801-4561
63801-5862
63801-6441
63801-6442
63801-6443
63801-6444
63801-6445
63801-6446
63801-6447
63890-0817
63890-0863
63890-0864
63890-0881
63890-0883
63890-0884
63890-0885
Doc. No: TM-638800000
Revision: D
Mini-Mac Mechanical Feed Rear Metal Strip Applicator
Engineering No.
Description
60700-1
Feed Cam (Short)
600000Y422
M4 Ball Spring Plunger
63800-0120
Feed Arm
63800-0121
Lever Feed Pivot
63800-0123
Slider-Feed Cam
63800-0124
Pin-Feed Adjusting
63800-0127
Torsion Spring-Feed Pawl
63800-0140
Cylindrical Pin
63800-0142
Roller-Cam Follower
63800-0143
Pin-Cam Follower
63800-0144
Key Stock 3 by 3 by 19mm Long
63800-0310
Adjusting Screw
63800-0311
Locking Nut
63800-0312
Drag Frame
63800-0314
Retaining Bar
63800-0316
Guide Pin
63800-4309
Rear Support Block
63801-3202
Feed Cam
63801-3211
Back Frame
63801-3225
Torsion Spring
63801-3281
Base Plate
63801-4462
Feed Finger Mount
63801-4551
Track
63801-4556
Drag Extension
63801-4558
Rear Cover
63801-4561
Feed Finger
63801-5862
Drag Release Lever
63801-6441
Ram
63801-6442
Conductor Striker
63801-6443
Insulation Striker
63801-6444
Conductor Adjusting Cam
63801-6445
Insulation Adjusting Cam
63801-6446
Detent Spacer
63801-6447
Ram Adapter
63890-0817
Feed Pawl Lever
63890-0863
Left Front Cover
63890-0864
Right Front Cover
63890-0881
Feed Adjusting Screw
63890-0883
Adjusting Knob Retainer
63890-0884
Adjustable Pivot
63890-0885
Slider
Release Date: 01-05-05
Revision Date: 02-05-13
UNCONTROLLED COPY
Qty
1
5
1
1
1
1
1
1
1
1
2
1
1
1
1
2
1
1
1
1
1
1
1
1
1
1
1
1
1
1
1
1
1
1
1
1
1
1
1
1
1
Page 38 of 69
�Molex Mini-Mac Applicator
Mini-Mac Mechanical Feed Rear Metal Strip Applicator
Item Order No. Engineering No.
Description
Qty
42 63890-0886
63890-0886
Feed Positioning Screw
1
43 63890-0887
63890-0887
Pivot Clamp
1
44 63890-0899
63890-0899
Feed Adjusting Knob
2
45 63890-0999
63890-0999
Serial Tag
REF
46 69028-0660
69028-0660
Compression Spring (Lee Spring # LC-032E-OMW)
4
47
N/A
N/A
2mm by 6 Long Roll Pin
2**
48
N/A
N/A
3mm by 12 Long Roll Pin
2**
49
N/A
N/A
5mm by 20 Long Dowel Pin
1**
50
N/A
N/A
5mm by 25 Long Dowel Pin
1**
51
N/A
N/A
6mm by 10 Long Dowel Pin
2**
52
N/A
N/A
6mm by 20 Long Dowel Pin
2**
53
N/A
N/A
6mm by 45 Long Dowel Pin
2**
54
N/A
N/A
Grooved Pin 3/32 Diameter by 3/8” Long
2**
55
N/A
N/A
Extension Spring 0.12 OD by 0.022 W by 0.62” Long
2**
56
N/A
N/A
Extension Spring 0.25 OD by 0.041 W by 2.25” Long
1**
57
N/A
N/A
M3 by 6 Long FHCS
2**
58
N/A
N/A
M3 by 5 Long SHCS
1**
59
N/A
N/A
M3 by 12 Long SHCS
1**
60
N/A
N/A
M3 by 20 Long SHCS
2**
61
N/A
N/A
M4 by 8 Long BHCS
2**
62
N/A
N/A
M4 by 8 Long SHCS
2**
63
N/A
N/A
M4 by 12 Long BHCS
1**
64
N/A
N/A
M4 by 12 Long SHCS
2**
65
N/A
N/A
M4 by 16 Long SHCS
1**
66
N/A
N/A
M4 by 8 Long Set Screw
1**
67
N/A
N/A
M5 by 6 Long BHCS
1**
68
N/A
N/A
M5 by 8 Long FHCS
1**
69
N/A
N/A
M5 by 10 Long SHCS
1*
70
N/A
N/A
M5 by 35 Long SHCS
4**
71
N/A
N/A
M6 by 10 Long BHCS
2**
72
N/A
N/A
M8 by 20 Long FHCS
1**
73
N/A
N/A
Stripper Bolt M6 by 10 Long-M4 Thread
1**
74
N/A
N/A
Shoulder Screw M6 by 10 Long
1**
75
N/A
N/A
Snap Ring 3.2 ID by 7 OD by 0.62 Thick
2**
76
N/A
N/A
Shim Washer 6.0 ID by 10.0 by 0.3 Thick
1**
77
N/A
N/A
#2 (.098 Diameter) by .125 inch Long Drive Screw 2**REF
** Available from an industrial supply company such as MSC (1-800-645-7270).
Doc. No: TM-638800000
Revision: D
Release Date: 01-05-05
Revision Date: 02-05-13
UNCONTROLLED COPY
Page 39 of 69
�Molex Mini-Mac Applicator
Mechanical Feed Rear Metal Strip Applicator Assembly
11 (2)
56
48
70 (4)
(2)
69
65
6
50
44
63
42
4
49
3
19
75
20
(2)
(2)
9
35
40
57
15
5
41
10
52
(2)
22
See
Figure 4-2
53
8
12
(2)
17
59
26
58
(2)
64 (2)
(2)
61
46
7
51 (2)
24
14
21
25
71
73
76
(2)
67
27
23
46
(2)
13
16
Doc. No: TM-638800000
Revision: D
MECHANICAL FEED
METAL/MOLDED STRIP APPLICATOR
Figure 4-1
(2)
Release Date: 01-05-05
Revision Date: 02-05-13
UNCONTROLLED COPY
Page 40 of 69
�Molex Mini-Mac Applicator
Mechanical Feed Rear Metal Strip Applicator (Cont.)
72
(2)
34
60
66
32
39
2
(3)
44
33
2
38
(2)
31
62
(2)
1
47 (2)
29
18
30
28
74
54
55
40
(2)
REF-See
Figure 4-1
(2)
43
68
45
77 (2)
36
37
Doc. No: TM-638800000
Revision: D
Release Date: 01-05-05
Revision Date: 02-05-13
MECHANICAL FEED REAR
METAL STRIP APPLICATOR
Figure 4-2
UNCONTROLLED COPY
Page 41 of 69
�Molex Mini-Mac Applicator
4.1.2
Mechanical Feed Molded Strip Applicator Parts List and Assembly Drawings (63883 and 63884 series)
Item
1
2
3
4
5
6
7
8
9
10
11
12
13
14
15
16
17
18
19
20
21
22
23
24
25
26
27
28
29
30
31
32
33
34
35
36
37
38
39
40
41
Mini-Mac Mechanical Feed Molded Strip Applicator
Order No. Engineering No.
Description
11-18-4238
60700-1
Feed Cam (Short)
11-32-5346
600000Y422
M4 Ball Spring Plunger
63800-0120
63800-0120
Feed Arm
63800-0121
63800-0121
Lever Feed Pivot
63800-0123
63800-0123
Slider-Feed Cam
63800-0124
63800-0124
Pin-Feed Adjusting
63800-0127
63800-0127
Torsion Spring-Feed Pawl
63800-0140
63800-0140
Cylindrical Pin
63800-0142
63800-0142
Roller-Cam Follower
63800-0143
63800-0143
Pin-Cam Follower
63800-0144
63800-0144
Key Stock 3 by 3 by 19mm Long
63800-0310
63800-0310
Adjusting Screw
63800-0311
63800-0311
Locking Nut
63800-0314
63800-0314
Retaining Bar
63800-4309
63800-4309
Rear Support Block
63801-3202
63801-3202
Feed Cam
63801-3211
63801-3211
Back Frame
63801-3225
63801-3225
Torsion Spring
63801-3281
63801-3281
Base Plate
63801-4451
63801-4451
Track
63801-4452
63801-4452
Track Brake
63801-4453
63801-4453
Rear Brake Retract Cover
63801-4456
63801-4456
Front Track Cover
63801-4459
63801-4459
Front Guide Anti-Backup
63801-4462
63801-4462
Feed Finger Mount
63801-4561
63801-4561
Feed Finger
63801-6441
63801-6441
Ram
63801-6442
63801-6442
Conductor Striker
63801-6443
63801-6443
Insulation Striker
63801-6444
63801-6444
Conductor Adjusting Cam
63801-6445
63801-6445
Insulation Adjusting Cam
63801-6446
63801-6446
Detent Spacer
63801-6447
63801-6447
Ram Adapter
63890-0817
63890-0817
Feed Pawl Lever
63890-0863
63890-0863
Left Front Cover
63890-0864
63890-0864
Right Front Cover
63890-0881
63890-0881
Feed Adjusting Screw
63890-0883
63890-0883
Adjusting Knob Retainer
63890-0884
63890-0884
Adjustable Pivot
63890-0885
63890-0885
Slider
63890-0886
63890-0886
Feed Positioning Screw
Doc. No: TM-638800000
Revision: D
Release Date: 01-05-05
Revision Date: 02-05-13
UNCONTROLLED COPY
Qty
1
5
1
1
1
1
1
1
1
1
2
1
1
1
1
1
1
1
1
1
1
1
1
1
1
1
1
1
1
1
1
1
1
1
1
1
1
1
1
1
1
Page 42 of 69
�Molex Mini-Mac Applicator
Mini-Mac Mechanical Feed Molded Strip Applicator
Item Order No. Engineering No.
Description
Qty
42
63890-0887
63890-0887
Pivot Clamp
1
43
63890-0899
63890-0899
Feed Adjusting Knob
2
44
69028-0660
69028-0660
Compression Spring (Lee Spring # LC-032E-OMW)
2
45
63890-0999
63890-0999
Serial Tag
REF
46
N/A
N/A
2mm by 6 Long Roll Pin
2**
47
N/A
N/A
3mm by 12 Long Roll Pin
2**
48
N/A
N/A
4mm by 10 Long Roll Pin
6**
49
N/A
N/A
5mm by 20 Long Dowel Pin
1**
50
N/A
N/A
5mm by 25 Long Dowel Pin
1**
51
N/A
N/A
6mm by 10 Long Dowel Pin
2**
52
N/A
N/A
6mm by 20 Long Dowel Pin
2**
53
N/A
N/A
6mm by 45 Long Dowel Pin
2**
54
N/A
N/A
Grooved Pin 3/32 Diameter by 3/8” Long
2**
55
N/A
N/A
Compression Spring 0.18 OD by 0.012 W by 0.44” Long 3**
56
N/A
N/A
Compression Spring 0.18 OD by 0.02 W by 0.88” Long 2**
57
N/A
N/A
Extension Spring 0.12 OD by 0.022 W by 0.62” Long
2**
58
N/A
N/A
Extension Spring 0.25 OD by 0.041 W by 2.25” Long
1**
59
N/A
N/A
M3 by 6 Long FHCS
2**
60
N/A
N/A
M3 by 6 Long SHCS
2**
61
N/A
N/A
M3 by 5 Long SHCS
1**
62
N/A
N/A
M3 by 12 Long SHCS
1**
63
N/A
N/A
M3 by 14 Long SHCS
2**
64
N/A
N/A
M3 by 20 Long SHCS
2**
65
N/A
N/A
M3 by 20 Long Set Screw
3**
66
N/A
N/A
M3 Thread Knurled Thumb Nut
2**
67
N/A
N/A
M3 Knurled Knob
2**
68
N/A
N/A
M4 by 8 Long SHCS
2**
69
N/A
N/A
M4 by 12 Long BHCS
1**
70
N/A
N/A
M4 by 16 Long SHCS
1**
71
N/A
N/A
M4 by 8 Long Set Screw
1**
72
N/A
N/A
M5 by 6 Long BHCS
1**
73
N/A
N/A
M5 by 8 Long FHCS
1**
74
N/A
N/A
M5 by 10 Long SHCS
1**
75
N/A
N/A
M5 by 35 Long SHCS
4**
76
N/A
N/A
M6 by 10 Long BHCS
2**
77
N/A
N/A
M8 by 20 Long FHCS
1**
78
N/A
N/A
Shoulder Screw M5 by 6 Long
2**
79
N/A
N/A
Shoulder Screw M6 by 10 Long
1**
80
N/A
N/A
Snap Ring 3.2 ID by 7 OD by .62 Thick
2**
81
N/A
N/A
#2 (.098 Diameter .125 in. Long Drive Screw
2**
** Available from an industrial supply company such as MSC (1-800-645-7270).
Doc. No: TM-638800000
Revision: D
Release Date: 01-05-05
Revision Date: 02-05-13
UNCONTROLLED COPY
Page 43 of 69
�Molex Mini-Mac Applicator
Mechanical Feed Molded Strip Applicator Assembly
11
58
(2)
75
47
(2)
(4)
74
70
6
50
43
41
69
4
49
3
18
17
80 (2)
9
34
39
59
14
5
40
(2)
10
7
See
Figure 4-2
52 (2)
25
53
(2)
12
8
15
(2) 66
62
(2) 67
61
23
26
63
(2)
(2)
44
(2)
56
(2)
78
51 (2)
(3) 65
19
(3) 55
76 (2)
(2) 60
24
72
21
(4) 48
48 (2)
13
20
22
Doc. No: TM-638800000
Revision: D
Release Date: 01-05-05
Revision Date: 02-05-13
MECHANICAL FEED MOLDED STRIP APPLICATOR
Figure 4-3
UNCONTROLLED COPY
Page 44 of 69
�Molex Mini-Mac Applicator
Mechanical Feed Molded Strip Applicator Assembly
77
(2)
33
64
71
31
38
2
(3)
43
32
2
37
(2)
30
68
(2)
1
46 (2)
28
16
29
27
79
54
57
39
(2)
REF-See
Figure 4-3
(2)
42
73
45
81 (2)
35
36
MECHANICAL FEED MOLDED STRIP APPLICATOR
Figure 4-4
Doc. No: TM-638800000
Revision: D
Release Date: 01-05-05
Revision Date: 02-05-13
UNCONTROLLED COPY
Page 45 of 69
�Molex Mini-Mac Applicator
4.1.3Parts List and Assembly Drawings for Air Feed Tape Applicator (63885 and 63886 series) Earlier Models
Item
1
2
3
4
5
6
7
8
9
10
11
12
13
14
15
16
17
18
19
20
21
22
23
24
25
26
27
28
29
30
31
32
33
34
35
36
37
38
39
40
41
42
43
44
45
46
47
48
49
50
51
Order No.
11-18-4795
11-32-1111
625001584
63600-1532
63700-3601
63800-0129
63800-0144
63800-0310
63800-0311
63800-0312
63800-0314
63800-0316
63800-4309
63801-3211
63801-3281
63801-3390
63801-4556
63801-5851
63801-5852
63801-5853
63801-5854
63801-5855
63801-5856
63801-5857
63801-5858
63801-5859
63801-5860
63801-5861
63801-5862
63801-5863
63801-5864
63801-5865
63801-5866
63890-0829
63890-0830
63890-0831
63890-0863
63890-0864
63890-0871
63890-0872
63890-0873
63890-0874
63890-0875
63890-0876
63890-0999
N/A
N/A
N/A
N/A
N/A
N/A
Doc. No: TM-638800000
Revision: D
Air Feed Mylar Tape Applicator-Earlier Models
Engineering No.
Description
60700-66
Wave Washer Spring
AM60001-150
Male Connector
625001584
Flow Control-Cylinder Mount
63600-1532
Feed Cylinder
63700-3601
Retaining Ring
63800-0129
Washer –3.40 Thick
63800-0144
Key Stock 3 by 3 by 29mm Long
63800-0310
Screw-Adjusting
63800-0311
Locking Nut
63800-0312
Drag Frame
63800-0314
Retaining Bar
63800-0316
Guide Pin-Drag Frame
63800-4309
Rear Support Block
63801-3211
Back Frame
63801-3281
Base Plate
63801-3390
Air Line Kit
63801-4556
Drag Extension
63801-5851
Mylar Tape Track
63801-5852
Feed Bar Guide
63801-5853
Feed Bar
63801-5854
Feed Bar Retainer
63801-5855
Feed Cylinder Rod Mount
63801-5856
Lock Pawl Guide
63801-5857
Lock Pawl Lever
63801-5858
Tape Lock Pawl
63801-5859
Lock Pawl Release
63801-5860
Feed Bar Back Stop
63801-5861
Feed Bar Forward Stop
63801-5862
Drag Release Lever
63801-5863
Feed Cylinder Mount
63801-5864
Terminal Guide
63801-5865
Front Guide
63801-5866
Guide Clamp Block
63890-0829
Feed Pawl
63890-0830
Tape Detent Pawl
63890-0831
Detent Pawl Pivot
63890-0863
Left Front Cover
63890-0864
Right Front Cover
63890-0871
Conductor Adjusting Cam
63890-0872
Insulation Adjusting Cam
63890-0873
Conductor Striker
63890-0874
Insulation Striker
63890-0875
Lug Bolt
63890-0876
Ram
63890-0999
Serial Tag
N/A
2mm by 6 Long Roll Pin
N/A
2mm by 8 Long Dowel Pin
N/A
3mm by 8 Long Dowel Pin
N/A
4mm by 16 Long Dowel Pin
N/A
5mm by 25 Long Dowel Pin
N/A
6mm by 10 Long Dowel Pin
Release Date: 01-05-05
Revision Date: 02-05-13
UNCONTROLLED COPY
Qty
1
1
1
1
1
1
2
1
1
1
1
2
1
1
1
2
2
1
1
1
1
1
1
1
1
1
1
1
1
1
1
1
2
2
2
2
1
1
1
1
1
1
1
1
1
2**
2**
1**
2**
1**
1**
Page 46 of 69
�Molex Mini-Mac Applicator
Item
52
53
54
55
56
57
58
59
60
61
62
63
64
65
66
67
68
69
70
71
72
73
74
75
76
77
78
79
80
81
82
83
84
85
86
87
88
89
90
91
92
93
94
95
96
97
Order No.
N/A
N/A
N/A
N/A
N/A
N/A
N/A
N/A
N/A
N/A
N/A
N/A
N/A
N/A
N/A
N/A
N/A
N/A
N/A
N/A
N/A
N/A
N/A
N/A
N/A
N/A
N/A
N/A
N/A
N/A
N/A
N/A
N/A
N/A
N/A
N/A
N/A
N/A
N/A
N/A
N/A
N/A
N/A
N/A
N/A
N/A
Air Feed Mylar Tape Applicator-Earlier Models
Engineering No.
Description
N/A
6mm by 16 Long Dowel Pin
N/A
6mm by 20 Long Dowel Pin
N/A
6mm by 45 Long Dowel Pin
N/A
Grooved Pin 3/32 Diameter by 3/8” Long
N/A
Hinge Pin 5 Diameter by 20 Long
N/A
Roll Pin 1.5 Diameter by 8 Long
N/A
Ball Retainer 1/8 in.
N/A
Radial Ball Bearing 3 ID by 8 OD by 4 Long
N/A
Compression Spring 0.09 OD by 0.008 W by 0.31” Long
N/A
Compression Spring 0.12 OD by 0.016 W by 0.50” Long
N/A
Compression Spring 0.12 OD by 0.02 W by 0.44” Long
N/A
Compression Spring 0.36 OD by 0.032 W by 0.38” Long
N/A
Extension Spring 0.12 OD by 0.022 W by 0.62” Long
N/A
Extension Spring 0.18 OD by 0.02 W by 0.88” Long
N/A
M3 by 5 Long SHCS
N/A
M3 by 6 Long FHCS
N/A
M3 by 8 Long SHCS
N/A
M3 by 12 Long SHCS
N/A
M3 by 6 Long Set Screw
N/A
M3 by 15 Long Spring Post
N/A
M5 by 15 Long Spring Post
N/A
M4 by 6 Long SHCS
N/A
M4 by 12 Long SHCS
N/A
M4 by 16 Long SHCS
N/A
M4 by 20 Long SHCS
N/A
M4 Hex Nut
N/A
M4 by 5 Long Set Screw
N/A
M4 by 6 Long Set Screw
N/A
M4 by 16 Long Set Screw
N/A
M5 Ball Plunger
N/A
M5 by 6 Long BHCS
N/A
M5 by 35 Long SHCS
N/A
M5 Hex Nut
N/A
M5 Washer 8 OD by 5.0 Thick
N/A
M5 Washer 10 OD by 1.0 Thick
N/A
M6 by 10 Long BHCS
N/A
M6 by 8 Long Set Screw
N/A
M6 by 10 Long Shoulder Screw
N/A
M6 by 10 Long Shoulder Screw
N/A
M6 by 35 Long Shoulder Screw
N/A
M6 Indexing Plunger
N/A
Shim Ring 3 ID by 6 OD by 0.3 Thick
N/A
Shim Washer 6 ID by 10 OD by 0.3 Thick
N/A
Washer 13 ID by 28.6 OD by 0.15 Thick
N/A
Washer 13 ID by 28.6 OD by 0.18 Thick
N/A
#2 (.098 Diameter) by .125 in. Long Drive Screw
Qty
2**
2**
2**
2**
1**
3**
1**
1**
2**
2**
1**
4**
2**
1**
1**
3**
3**
4**
2**
1**
1**
2**
4**
4**
5**
1**
1**
4**
1**
1**
1**
4**
2**
1**
2**
2**
2**
1**
1**
2**
1**
1**
1**
1**
1**
2**
** Available from an industrial supply company such as MSC (1-800-645-7270).
Doc. No: TM-638800000
Revision: D
Release Date: 01-05-05
Revision Date: 02-05-13
UNCONTROLLED COPY
Page 47 of 69
�Molex Mini-Mac Applicator
Air Feed Tape Applicator Assembly Earlier Models
72
(2)
65
75
14
25
93
24
(2)
68
70
56
23
19
59
67
71
49
(2)
69
(2)
35
11
(2)
53
(2)
60
18
(2)
36
79
(2)
32
(2)
(2)
8
33
(2)
67
13
51
(2)
(2)
54
52
63
9
74
(2)
91
(2)
76
12
(2)
(2)
63 (2)
89
94
29
74
(2)
17
Doc. No: TM-638800000
Revision: D
15
87
(2)
82
10
Release Date: 01-05-05
Revision Date: 02-05-13
AIR FEED TAPE
APPLICATOR Figure 4-5
UNCONTROLLED COPY
Page 48 of 69
�Molex Mini-Mac Applicator
Air Feed Tape Applicator Assembly (Cont.) Earlier Models
92
76
(3)
57
27
21
28
52
31
16
(2) 79
(2)
69
80
20
(2)
77
73
(2)
47
(2)
68 (2)
66
57
61
(2)
(2)
75
34 (2)
2
(2)
19
30
REF See
Figure 4-5
3
4
48
AIR FEED TAPE
APPLICATOR Figure 4-6
(2)
86
85
26
22
84
Doc. No: TM-638800000
Revision: D
Release Date: 01-05-05
Revision Date: 02-05-13
(2)
UNCONTROLLED COPY
Page 49 of 69
�Molex Mini-Mac Applicator
Air Feed Tape Applicator Assembly (Cont.) Earlier Models
43
1
39
81
58
78
40
5
62
95
96
88
7
6
(2)
(2)
50
55
(2)
(2)
42
41
46
90
83
44
(4)
64
14
45
(2)
REF See
Figure 4-5
97 (2)
37
38
AIR FEED TAPE
APPLICATOR Figure 4-7
Doc. No: TM-638800000
Revision: D
Release Date: 01-05-05
Revision Date: 02-05-13
UNCONTROLLED COPY
Page 50 of 69
�Molex Mini-Mac Applicator
4.1.4
Air Feed Tape Applicator Parts List and Assembly Drawings Later Models (63885 and 63886 series)
Item
1
2
3
4
5
6
7
8
9
10
11
12
13
14
15
16
17
18
19
20
21
22
23
24
25
26
27
28
29
30
31
32
33
34
35
36
37
38
39
40
41
42
43
44
45
46
47
48
49
50
Order No.
11-32-1111
11-32-5346
625001584
63600-1532
63600-1596
63800-0115
63800-0144
63800-0310
63800-0311
63800-0312
63800-0314
63800-0316
63800-4309
63801-3211
63801-3281
63801-3390
63801-4556
63801-5801
63801-5802
63801-5803
63801-5804
63801-5805
63801-5806
63801-5807
63801-5808
63801-5809
63801-5810
63801-5811
63801-5812
63801-5813
63801-5862
63801-5864
63801-5882
63801-6441
63801-6442
63801-6443
63801-6444
63801-6445
63801-6446
63801-6447
63890-0863
63890-0864
63890-0999
69028-0660
N/A
N/A
N/A
N/A
N/A
N/A
Doc. No: TM-638800000
Revision: D
Air Feed Mylar Tape Applicator-Later Models
Engineering No.
Description
AM60001-150
Male Connector
600000Y422
M4 Ball Spring Plunger
625001584
Flow Control-Cylinder Mount
63600-1532
Feed Cylinder
63600-1596
Cantilever Shaft
63800-0115
Spacer Tube
63800-0144
Key Stock 3 by 3 by 19mm Long
63800-0310
Screw-Adjusting
63800-0311
Locking Nut
63800-0312
Drag Frame
63800-0314
Retaining Bar
63800-0316
Guide Pin-Drag Frame
63800-4309
Rear Support Block
63801-3211
Back Frame
63801-3281
Base Plate
63801-3390
Air Line Kit
63801-4556
Drag Extension
63801-5801
Mylar Tape Track
63801-5802
Feed Bar Guide
63801-5803
Feed Bar
63801-5804
Feed Bar Retainer
63801-5805
Feed Cylinder Rod Mount
63801-5806
Lock Pawl Guide
63801-5807
Tape Feed Pawl
63801-5808
Tape Lock Pawl
63801-5809
Lock Pawl Release Cam
63801-5810
Feed Bar Back Stop
63801-5811
Feed Bar Forward Stop
63801-5812
Stop Adjusting Block
63801-5813
Feed Cylinder Mount
63801-5862
Tape Drag Release Lever
63801-5864
Terminal Guide
63801-5882
Guide Bar
63801-6441
Ram
63801-6442
Conductor Striker
63801-6443
Insulation Striker
63801-6444
Conductor Adjusting Cam
63801-6445
Insulation Adjusting Cam
63801-6446
Detent Spacer
63801-6447
Ram Adapter
63890-0863
Left Front Cover
63890-0864
Right Front Cover
63890-0999
Serial Tag
69028-0660
Compression Spring (Lee Spring # LC-032E-OMW)
N/A
1.5mm by 8 Long Roll Pin
N/A
2mm by 6 Long Roll Pin
N/A
2mm by 8 Long Dowel Pin
N/A
2.5mm by 6 Long Dowel Pin
N/A
2.5mm by 10 Long Dowel Pin
N/A
3mm by 8 Long Dowel Pin
Release Date: 01-05-05
Revision Date: 02-05-13
UNCONTROLLED COPY
Qty.
1
5
1
1
1
2
2
1
1
1
1
2
1
1
1
2
2
1
1
1
1
1
1
2
1
1
1
1
1
1
1
1
1
1
1
1
1
1
1
1
1
1
1
4
1**
2**
1**
1**
5**
3**
Page 51 of 69
�Molex Mini-Mac Applicator
Item
51
52
53
54
55
56
57
58
59
60
61
62
63
64
65
66
67
68
69
70
71
72
73
74
75
76
77
78
79
80
81
82
83
84
Air Feed Mylar Tape Applicator-Later Models
Order No. Engineering No.
Description
N/A
N/A
4mm by 16 Long Dowel Pin
N/A
N/A
5mm by 25 Long Dowel Pin
N/A
N/A
6mm by 10 Long Dowel Pin
N/A
N/A
6mm by 20 Long Dowel Pin
N/A
N/A
6mm by 45 Long Dowel Pin
N/A
N/A
Grooved Pin 3/32 Diameter by 3/8” Long
N/A
N/A
Radial Ball Bearing 3 ID by 8 OD by 4 Long
N/A
N/A
Compression Spring .064 OD by .088 W by 0.50” Long
N/A
N/A
Compression Spring .120 OD by .088 W by 0.50” Long
N/A
N/A
Extension Spring .120 OD by .022 W by 0.62” Long
N/A
N/A
M3 by 6 Long FHCS
N/A
N/A
M3 by 6 Long SHCS
N/A
N/A
M3 by 8 Long SHCS
N/A
N/A
M3 by 10 Long SHCS
N/A
N/A
M3 by 12 Long SHCS
N/A
N/A
M4 by 6 Long BHCS
N/A
N/A
M4 by 6 Long SHCS
N/A
N/A
M4 by 10 Long SHCS
N/A
N/A
M4 by 12 Long SHCS
N/A
N/A
M4 by 16 Long SHCS
N/A
N/A
M4 by 20 Long SHCS
N/A
N/A
M5 by 6 Long BHCS
N/A
N/A
M5 by 35 Long SHCS
N/A
N/A
M5 Hex Nut
N/A
N/A
M5 Washer 8 OD by 5.0 Thick
N/A
N/A
M5 Washer 10 OD by 1.0 Thick
N/A
N/A
M6 by 10 Long BHCS
N/A
N/A
M6 by 10 Long Shoulder Screw
N/A
N/A
M6 Indexing Plunger
N/A
N/A
M8 by 20 Long FHCS
N/A
N/A
Shim Ring 3 ID by 6 OD by 0.3 Thick
N/A
N/A
Shim Washer 6 ID by 10 OD by 0.3 Thick
N/A
N/A
Stripper Bolt M6 by 10 Long-M4 Thread
N/A
N/A
#2 (.098 Diameter) by .125 in. Long Drive Screw
** Available from an industrial supply company such as MSC (1-800-645-7270).
Doc. No: TM-638800000
Revision: D
Release Date: 01-05-05
Revision Date: 02-05-13
UNCONTROLLED COPY
Qty.
4**
1**
2**
2**
2**
2**
1**
1**
1**
2**
2**
2**
3**
5**
2**
1**
2**
2**
2**
2**
5**
1**
4**
2**
1**
2**
2**
1**
1**
1**
1**
1**
1**
2**
Page 52 of 69
�Molex Mini-Mac Applicator
Air Feed Tape Applicator Assembly Later Models
51
14
(2)
19
62
70 (2)
54
65
33
61
(2)
(2)
29
(2)
64 (2)
55
11
(2)
44
8
(2)
13
9
18
53 (2)
12
(2)
(2)
44
6
83
82
(2)
15
31
69
77 (2)
(2)
72
10
17
Doc. No: TM-638800000
Revision: D
AIR FEED TAPE
APPLICATOR Figure 4-8
LATER MODELS
Release Date: 01-05-05
Revision Date: 02-05-13
UNCONTROLLED COPY
Page 53 of 69
�Molex Mini-Mac Applicator
Air Feed Tape Applicator Assembly (Cont.) Later Models
71 (2)
30
5
79
32
51
67 (2)
27
71 (3)
64
51
28
50 (2)
22
68
45
47
66
(2)
20
21
(2)
64
24
50
19
25
59
REF See
Figure 4-8
58
(2)
63
26
48
16
1
(2)
62
57
81
49
3
4
23
74 (2)
76 (2)
AIR FEED TAPE
APPLICATOR Figure 4-9
LATER MODELS
Doc. No: TM-638800000
Revision: D
Release Date: 01-05-05
Revision Date: 02-05-13
75
UNCONTROLLED COPY
Page 54 of 69
�Molex Mini-Mac Applicator
Air Feed Tape Applicator Assembly (Cont.) Later Models
80
40
38
2
(3)
39
(2)
2
37
7
(2)
73
(4)
34
35
46
(2)
52
36
78
56
(2)
60
(2)
14
REF-See
Figure 4-8
43
84 (2)
41
42
Doc. No: TM-638800000
Revision: D
Release Date: 01-05-05
Revision Date: 02-05-13
AIR FEED TAPE
APPLICATOR Figure 4-10
LATER MODELS
UNCONTROLLED COPY
Page 55 of 69
�Molex Mini-Mac Applicator
4.1.5
Mechanical Feed Front Metal Strip Applicator Parts List and Assembly Drawings (63887 series)
Item
1
2
3
4
5
6
7
8
9
10
11
12
13
14
15
16
17
18
19
20
21
22
23
24
25
26
27
28
29
30
31
32
33
34
35
36
37
38
39
40
41
42
43
44
45
46
47
48
49
Order No.
11-18-4238
11-32-5346
63443-6202
63800-0120
63800-0121
63800-0123
63800-0124
63800-0127
63800-0140
63800-0142
63800-0143
63800-0144
63800-0310
63800-0311
63800-0312
63800-0314
63800-0316
63800-4309
63801-3202
63801-3211
63801-3225
63801-3281
63801-4462
63801-4561
63801-5862
63801-6441
63801-6442
63801-6443
63801-6444
63801-6445
63801-6446
63801-6447
63890-0817
63890-0863
63890-0864
63890-0881
63890-0883
63890-0884
63890-0885
63890-0886
63890-0887
63890-0899
63890-0999
69028-0660
N/A
N/A
N/A
N/A
N/A
Doc. No: TM-638800000
Revision: D
Mini-Mac Mechanical Feed Front Metal Strip Applicator
Engineering No.
Description
60700-1
Feed Cam (Short)
600000Y422
M4 Ball Spring Plunger
63443-6202
Front Track
63800-0120
Feed Arm
63800-0121
Lever Feed Pivot
63800-0123
Slider-Feed Cam
63800-0124
Pin-Feed Adjusting
63800-0127
Torsion Spring-Feed Pawl
63800-0140
Cylindrical Pin
63800-0142
Roller-Cam Follower
63800-0143
Pin-Cam Follower
63800-0144
Key Stock 3 by 3 by 19mm Long
63800-0310
Adjusting Screw
63800-0311
Locking Nut
63800-0312
Drag Frame
63800-0314
Retaining Bar
63800-0316
Guide Pin
63800-4309
Rear Support Block
63801-3202
Feed Cam
63801-3211
Back Frame
63801-3225
Torsion Spring
63801-3281
Base Plate
63801-4462
Feed Finger Mount
63801-4561
Feed Finger
63801-5862
Drag Release Lever
63801-6441
Ram
63801-6442
Conductor Striker
63801-6443
Insulation Striker
63801-6444
Conductor Adjusting Cam
63801-6445
Insulation Adjusting Cam
63801-6446
Detent Spacer
63801-6447
Ram Adaptor
63890-0817
Feed Pawl Lever
63890-0863
Left Front Cover
63890-0864
Right Front Cover
63890-0881
Feed Adjusting Screw
63890-0883
Adjusting Knob Retainer
63890-0884
Adjustable Pivot
63890-0885
Slider
63890-0886
Feed Positioning Screw
63890-0887
Pivot Clamp
63890-0899
Feed Adjusting Knob
63890-0999
Serial Tag
69028-0660
Compression Spring (Lee Spring # LC-032E-OMW)
N/A
2mm by 6 Long Roll Pin
N/A
3mm by 12 Long Roll Pin
N/A
5mm by 20 Long Dowel Pin
N/A
5mm by 25 Long Dowel Pin
N/A
6mm by 10 Long Dowel Pin
Release Date: 01-05-05
Revision Date: 02-05-13
UNCONTROLLED COPY
Qty
1
5
1
1
1
1
1
1
1
1
1
2
1
1
1
1
2
1
1
1
1
1
1
1
1
1
1
1
1
1
1
1
1
1
1
1
1
1
1
1
1
2
REF
4
2**
2**
1**
1**
2**
Page 56 of 69
�Molex Mini-Mac Applicator
Item
50
51
52
53
54
55
56
57
58
59
60
61
62
63
64
65
66
67
68
69
70
71
72
73
Mini-Mac Mechanical Feed Front Metal Strip Applicator
Order No. Engineering No.
Description
N/A
N/A
6mm by 20 Long Dowel Pin
N/A
N/A
6mm by 45 Long Dowel Pin
N/A
N/A
Grooved Pin 3/32 Diameter by 3/8” Long
N/A
N/A
Extension Spring 0.12 OD by 0.022 W by 0.62” Long
N/A
N/A
Extension Spring 0.25 OD by 0.041 W by 2.25” Long
N/A
N/A
M3 by 6 Long FHCS
N/A
N/A
M3 by 5 Long SHCS
N/A
N/A
M3 by 12 Long SHCS
N/A
N/A
M3 by 20 Long SHCS
N/A
N/A
M4 by 8 Long SHCS
N/A
N/A
M4 by 12 Long BHCS
N/A
N/A
M4 by 16 Long SHCS
N/A
N/A
M4 by 8 Long Set Screw
N/A
N/A
M5 by 6 Long BHCS
N/A
N/A
M5 by 8 Long FHCS
N/A
N/A
M5 by 10 Long SHCS
N/A
N/A
M5 by 35 Long SHCS
N/A
N/A
M6 by 10 Long BHCS
N/A
N/A
M8 by 20 Long FHCS
N/A
N/A
Stripper Bolt M6 by 10 Long-M4 Thread
N/A
N/A
Shoulder Screw M6 by 10 Long
N/A
N/A
Snap Ring 3.2 ID by 7 OD by 0.62 Thick
N/A
N/A
Shim Washer 6.0 ID by 10.0 by 0.3 Thick
N/A
N/A
#2 (.098 Diameter) by .125 in. Long Drive Screw
** Available from an industrial supply company such as MSC (1-800-645-7270).
Doc. No: TM-638800000
Revision: D
Release Date: 01-05-05
Revision Date: 02-05-13
UNCONTROLLED COPY
Qty
2**
2**
2**
2**
1**
2**
1**
1**
2**
2**
1**
1**
1**
1**
1**
1**
4**
2**
1**
1**
1**
2**
1**
2**
Page 57 of 69
�Molex Mini-Mac Applicator
Mechanical Feed Front Metal Strip Applicator Assembly
12 (2)
54
46
66 (4)
(2)
65
61
7
48
42
40
60
5
47
4
21
20
71 (2)
6
39
(2)
10
33
38
55
16
11
50
(2)
23
(2)
51
See
Figure 4-12
13
9
18
57
24
56
8
(2) 44
49 (2)
15
25
72
22
69
3
14
67
44
(2)
Doc. No: TM-638800000
Revision: D
17
(2)
Release Date: 01-05-05
Revision Date: 02-05-13
MECHANICAL FEED FRONT
METAL STRIP APPLICATOR
Figure 4-11
UNCONTROLLED COPY
(2)
63
Page 58 of 69
�Molex Mini-Mac Applicator
Mechanical Feed Fronr Metal Strip Applicator (Cont.)
68
(2)
32
58
62
30
37
2
(3)
42
31
2
36
(2)
29
59
(2)
1
45 (2)
27
19
28
26
70
52
53
38
(2)
REF-See
Figure 4-11
(2)
41
64
43
73 (2)
34
35
Doc. No: TM-638800000
Revision: D
Release Date: 01-05-05
Revision Date: 02-05-13
MECHANICAL FEED FRONT
METAL STRIP APPLICATOR
Figure 4-12
UNCONTROLLED COPY
Page 59 of 69
�Molex Mini-Mac Applicator
4.2.
Troubleshooting
4.2.1 Troubleshooting:Mechanical Feed Rear Metal Strip Applicators (63881 and 63882 series) and
Mechanical Feed Front Metal Strip Applicators (63887 series)
Symptom
Terminals do
not feed
Excessive flare
(bellmouth)
(Un-insulated
Product)
Conductor crimp
is
too loose
Conductor crimp
is
too tight
Insulation crimp
is
too tight
Terminal sticks
during crimping
Doc. No: TM-638800000
Revision: D
Cause
Solution
Verify terminals are not bent or damaged
Feed finger worn or not properly adjusted
Track drag brake open or jammed shut
Terminal jammed under stripper blade/wire stop
Cutoff plunger jammed down/broken spring
Track cover/Front guide set too tight
Conductor punch worn
Terminal track out of position (too far in or out)
Cut-off plunger spring damaged or broken
Plunger sides or plunger retainer scored
Wrong tooling
Anvil spacers in wrong position
Wrong crimp height
Press shut height too high
Wrong tooling
Wrong crimp height
Anvil spacers in wrong position
Punch installed backwards
Press shut height too low
Wire insulation too big for terminal
Wrong crimp height
Wrong tooling
Press shut height too low
Stripping blade too high
Wrong tooling
Terminal plating buildup on punches
Lack of lubrication on terminal
Tooling worn or damaged
Release Date: 01-05-05
Revision Date: 02-05-13
Replace terminals.
Check feed finger condition and setting.
Check operation of track brake.
Adjust stripper blade/wire stop to clear.
Check cutoff plunger operation.
Readjust track cover/front guide.
Replace conductor punch.
Adjust track for proper alignment with
the punches and anvil.
Replace spring
Remove scoring marks.
If problem not solved, replace with
new cut-off parts.
Replace with proper tooling.
Reassemble anvil stack.
Reset crimp height.
Calibrate press shut height.
Replace with proper tooling.
Reset crimp height.
Reassemble anvil stack.
Reverse mounting of punch.
Calibrate press shut height.
Check product specification.
Reset crimp height.
Replace with proper tooling.
Calibrate press shut height.
Lower stripping blade.
Replace with proper tooling.
Inspect punches.
Add a terminal lubricator to applicator.
Replace tooling.
UNCONTROLLED COPY
Page 60 of 69
�Molex Mini-Mac Applicator
4.2.2
Troubleshooting: Mechanical Feed Molded Strip Applicators (63883 and 63884 series)
Symptom
Terminals do
not feed
Conductor crimp
is
too loose
Conductor crimp
is
too tight
No cutoff
Poor cutoff
Terminal sticks
during crimping
Doc. No: TM-638800000
Revision: D
Cause
Solution
Verify terminals are not bent or damaged
Feed finger worn or not properly adjusted
Track drag brake not operating/jammed
Terminal jammed under stripper blade
Terminals jamming against nose support
Front cover set too tight
Wrong tooling
Wrong conductor crimp height
Press shut height too high
Wrong tooling
Wrong crimp height
Punch installed backwards
Press shut height too low
Front track cover too loose
Terminal feed position underfed or overfed
Wrong (insulation) cam setting
Terminal (nose) support too low
Stripping blade too high
Wrong cutoff tooling
Dull cutoff punch
Old, dried-out nylon product
Wrong tooling
Stripping blade too high
Tooling worn or damaged
Release Date: 01-05-05
Revision Date: 02-05-13
Replace terminals.
Check feed finger condition and setting.
Check operation of track brake.
Adjust stripper blade to clear.
Adjust nose support back.
Adjust front cover up.
Replace with proper tooling.
Reset conductor crimp height.
Calibrate press shut height.
Replace with proper tooling.
Reset crimp height.
Reverse mounting of punch.
Calibrate press shut height.
Adjust front cover down.
Adjust feed forward position.
Increase cam setting for more punch travel.
Raise terminal support.
Lower stripping blade.
Replace with proper tooling.
Sharpen or replace punch.
Replace with new reel.
Replace with proper tooling.
Lower stripping blade.
Replace tooling.
UNCONTROLLED COPY
Page 61 of 69
�Molex Mini-Mac Applicator
4.2.3
Troubleshooting: Air Feed Tape Applicators (63885 and 63886 series)
Symptom
Tape does
not feed
Cause
Solution
Reel jam or jam at track entry
Tape drifted off track
Front guide set too tight
Feed cylinder flow too restricted
Tape drag left open or jammed shut
Insufficient air pressure to feed cylinder
Tape overfeeds
Excessive flare
(bellmouth)
(Un-insulated Product)
Conductor crimp
is
too loose
Conductor crimp
is
too tight
Terminal sticks
during crimping
Insulation crimp
is too tight
Doc. No: TM-638800000
Revision: D
Tape splice jammed in track
Feed cylinder advancing too fast
Feed forward position out of adjustment
Conductor punch worn
Terminal track out of position (too far in or
out)
Wrong tooling
Wrong conductor crimp height
Press shut height too high
Wrong tooling
Wrong crimp height
Punch installed backwards
Press shut height too low
Stripping blade too high
Wrong tooling
Tooling worn or damaged
Wire insulation too big for terminal
Wrong insulation crimp height
Wrong tooling
Press shut height too low
Release Date: 01-05-05
Revision Date: 02-05-13
Check tape entry into track.
Adjust front guide in.
Readjust front guide.
Adjust flow control open.
Check operation of tape drag.
Adjust air pressure >80psi
(0.5MPa).
Clear jam.
Adjust flow control.
Adjust feed forward position.
Replace.
Adjust track for proper alignment
with the punches and anvil.
Replace with proper tooling.
Reset conductor crimp height.
Calibrate press shut height.
Replace with proper tooling.
Reset crimp height.
Reverse mounting of punch.
Calibrate press shut height.
Lower stripping blade.
Replace with proper tooling.
Replace tooling.
Check product specification.
Reset insulation crimp height.
Replace with proper tooling.
Calibrate press shut height.
UNCONTROLLED COPY
Page 62 of 69
�Molex Mini-Mac Applicator
For more information use the Quality Crimping Handbook
And Industrial Crimping Handbook
There is no charge for these books, they can be found on the Molex Website (www.molex.com) or contact you
local Molex sales engineer
Doc. No: TM-638800000
Revision: D
Release Date: 01-05-05
Revision Date: 02-05-13
UNCONTROLLED COPY
Page 63 of 69
�Molex Mini-Mac Applicator
Appendix
A
Pull Force Testing
B
Options
1.
Oiler
Doc. No: TM-638800000
Revision: D
Release Date: 01-05-05
Revision Date: 02-05-13
UNCONTROLLED COPY
Page 64 of 69
�Molex Mini-Mac Applicator
Appendix A
Pull Force Testing
A.1
Pull Force Procedure
A.2
Pull Force Problems
Doc. No: TM-638800000
Revision: D
Release Date: 01-05-05
Revision Date: 02-05-13
UNCONTROLLED COPY
Page 65 of 69
�Molex Mini-Mac Applicator
Pull Force Testing
A.1 Pull Force Procedure
Wire connectors and soldering lugs for use with copper conductors. (Per UL486A October 8, 1991) UL
Section 12 Pullout Test.
12.1 The connectors subjected to the static heating test or secureness
test shall be subjected to a direct pull of the value specified for
one minute. The connector is acceptable if it does not become
separated from the conductor or conductors after completion of
the test.
12.2 For an insulated connector in which the insulation is assembled to
the connector during installation, the test should be conducted
with the insulation in place if it is always supplied with the
connector by the manufacturer. Otherwise, the test should be
conducted without the insulation assembled to the connector.
Breaking or tearing of the insulation of an insulated connector is
acceptable in the pullout test. The pull is to be exerted by means
of a tension testing machine or equivalent, so that there will be no
sudden application of force or jerking during the test.
The following is the procedure Molex uses for the qualification of
pull force:
1. Cut wire length approximately 150mm (6.0”) long.
2. Strip one end to 13mm (.50”), or long enough so no wire insulation
is under the insulation grip.
3. Terminate the appropriate terminal to the wire to the nominal crimp
PULL FORCE TESTING
height.
4. Visually inspect the termination for wire brush and cut strands.
5. Set pull tester to 25.4mm (1.0”) per minute. For most applications, a higher rate will not have a significant
impact on the data. Verify higher pull rates with data taken at 25.4mm (1.0”) per minute.
6. Knot the non-terminated end of the wire.
7. Regardless of pull tester type, both wire and terminated end must be securely clamped. (Note: Clamp the
terminal contact interface; do not clamp the conductor crimp. Insulated terminals should have their
insulation trimmed back so the contact can be clamped.)
8. Activate pull test.
9. Record a minimum of 25 readings of maximum pull force. After the application has been qualified, a
minimum of 5 pull force measurements should be done to confirm each setup.
10. Compare lowest reading to minimum pull force specification.
Doc. No: TM-638800000
Revision: D
Release Date: 01-05-05
Revision Date: 02-05-13
UNCONTROLLED COPY
Page 66 of 69
�Molex Mini-Mac Applicator
A.2 Pull Test Problems
2) Correct stripping machine setup.
1. Wire breaks before conductor grip, pull force
low
2. Wire pulls out of conductor grip, crimp height
good
Material Evaluation
Cause:
Wire material properties, and/or coatings.
Solution: Test non-terminated wire for breaking
strength.
Material Evaluation
Cause: 1) Terminal material thickness too small.
2) Terminal serration depth/form.
3) Terminal plating thickness.
4) Gold plating application.
Solution: 1) Evaluate a new terminal.
2) Or 3) Contact terminal manufacturer.
4) Evaluate selective Gold application.
Stripping Evaluation
Cause: Cut or nicked strands from stripping
operation.
1) Wire being manually stripped.
2) Poor automatic stripping cutoff.
3) Worn strip tooling.
Stripping Evaluation
Cause: Wrong strip length, poor conductor brush.
Solution: Adjust strip length.
Solution: 1) Switch to semiautomatic or automatic
wire stripping machine.
Wire Size (AWG)
26
24
22
20
18
16
14
12
10
8
6
4
2
1
1/0
2/0
3/0
4/0
Tensile Test Value (LB)
*Military **UL- 486A ***UL – 486C *****UL-310
7
10
15
19
38
50
70
110
150
225
300
400
550
650
700
750
825
875
3
5
8
13
20
30
50
70
80
90
100
140
180
200
250
300
350
450
N/A
N/A
8
10
10
15
25
35
40
45
50
N/A
N/A
N/A
N/A
N/A
N/A
N/A
N/A
N/A
8
13
20
30
50
70
80
N/A
N/A
N/A
N/A
N/A
N/A
N/A
N/A
N/A
*Military – Military Approved Terminals
**UL-486A – Terminals (Copper conductors only)
***UL-486C – Butt Splices, Parallel Splices, Closed End Connectors, and Wire Nuts
****UL-310 – Quick Disconnects, Flags and Couplers
Doc. No: TM-638800000
Revision: D
Release Date: 01-05-05
Revision Date: 02-05-13
UNCONTROLLED COPY
Page 67 of 69
�Molex Mini-Mac Applicator
Appendix B
Options
1
Oiler
Doc. No: TM-638800000
Revision: D
Release Date: 01-05-05
Revision Date: 02-05-13
UNCONTROLLED COPY
Page 68 of 69
�Molex Mini-Mac Applicator
Terminal Oiler
For FineAdjust and
Mini-Mac Applicators
Application Tooling
Information Sheet
Order No. 63890-0719
Terminal Oiler
To install a Terminal Oiler (Order No. 63890-0719) to any
FineAdjust or Mini-Mac Applicator, use the following
procedure.
1. Remove lid assembly from the oiler jar.
2. Remove upper oiler nut from lid assembly.
3. Place oiler mtg. bracket over tube, replace upper nut,
and tighten securely.
FRAME
M5 X 12LG
BHCS
4. Place lid assembly with mtg. bracket on the oiler jar
and turn until hand tight. Do not over tighten.
5. Mount terminal oiler assembly with bracket on the
frame of the FineAdjust or Mini-Mac Applicator.
APPLICATOR
6. Recommended lubricant oil:
NUT-UPPER
Product Name: Transdraw B-19
Vendor
Mid-Town Petroleum
9707 South 76th Avenue
Bridgeview, IL 60455
Toll-Free: 877-255-3533
Direct: 708-599-8700
Fax: 708-599-1040
E-mail: sales@midtownoil.com
www.midtownoil.com
www.precisionlubricantsinc.com
63890-0713
MTG. BRACKET
LID
ASSEMBLY
JAR
7. For replacement wicks use part no. 63890-0727 (package of 25).
Visit our Web site at http://www.molex.com
Doc. No: TM-638800000
Revision: D
Release Date: 01-05-05
Revision Date: 02-05-13
UNCONTROLLED COPY
Page 69 of 69
�