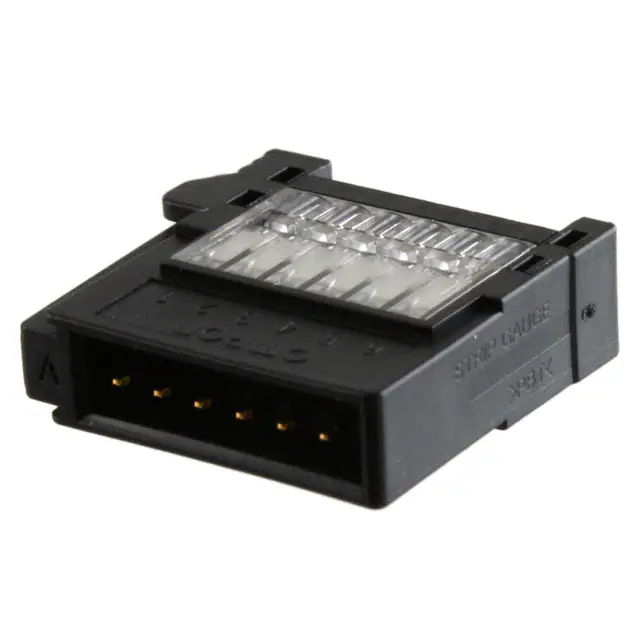
Easy-wire Connectors for Industrial Components
XN2
CSM_XN2_DS_E_4_3
Easy-wire Connectors with
-CON ∗ Specifications; Ideal for
Connecting Sensors.
e
■ Use industry-proven spring clamps for wiring.
■ No special tools required for easy wiring.
■ Rewiring (repairing) is possible.
■ Each Connector accepts any wire size from
AWG28 (0.08 mm2) to AWG20 (0.5 mm2).
(External sheath diameter: 1.5 mm max.)
■ See the "Standards certification / conformity list" for
information on conformity to certification standards.
Note: *E-con specifications are currently being promoted for standardization by
manufacturers of FA components and connectors. Connector specifications are
disclosed only for the mating portions.
RoHS Compliant
Wiring Configuration Example
Connecting to FA Components
XN2A
• FA components with e-CON connectors
XN2A
• Original Controller PCBs
Sensor with prewired cable
Linking cables
XN2D
XN2A
XN2B
• FA components that connect
via terminal blocks
1
�XN2
Ordering Information
Type
Cable Plug Connector
Single-socket PCB Socket
Connector
Cable Socket Connector
Four-socket PCB Socket
Connector
Appearance
No. of
contacts
Model
3
XN2A-1370
—
XN2D-1371
—
4
XN2A-1470
5
XN2A-1570
XN2B-1470
XN2D-1471
XN2D-4471
—
XN2D-1571
—
6
8
XN2A-1670
—
XN2D-1671
—
XN2A-1870
—
XN2D-1871
—
Ratings and Specifications
Rated current
3 A/pole (Using AWG20 wire)
2 A/pole (Using AWG22 wire)
1 A/pole (Using AWG24 wire)
0.5 A/pole (Using AWG26 or 28 wire)
Rated voltage
32 VDC
Contact resistance ∗1
30 mΩ max. (20 mVDC max., 100 mA max.)
Insulation resistance
1000 MΩ min. (at 500 VDC)
Dielectric strength
1,000 VAC for 60 s (leakage current: 1 mA max.)
Insertion tolerance
50 times
Ambient temperature ∗2 Operating: −30°C to 75°C
Applicable wires ∗3
0.08 mm2 (AWG28) to 0.5mm2 (AWG20)
The external diameter of the cable sheath is
1.5 mm max.
* 1. This value is the contact resistance of the connector.
* 2. The temperature is limited, however, to the maximum operating temperature for the cables.
* 3. When using cables with a wire diameter of 0.16 mm or smaller, contact your OMRON sales
representative.
Materials and Finish
Item
Cable type
PCB type
Case
Black PBT resin (UL94V-0)
Cover
Black PBT resin (UL94V-0)
—
Base
Transparent PC resin (UL94V-0)
—
Lever
PA resin (UL94V-0)/natural (white)
—
Contact
Phosphor bronze/Underplating: Nickel (1.5 to 3.0 µm)
Contacts: Gold (0.2 µm min.)
Terminals: Tin plating (1.0 µm min.)
Spring
Stainless steel
Pin clamp
—
—
Copper alloy/nickel base with tin-alloy plating
2
�XN2
Assembly Instructions
(3) Insert the screwdriver into the
release slot, and gently pull
back the lever until a click is
heard by resetting the lever.
Preparing the Cable
Align the cable with the guide
marked STRIP GAUGE on the side
of the Connector, strip 7 to 8 mm of
the cable sheath, and then twist the
wires several times.
Operating lever
(white)
Release slot
7 to 8 mm
Connecting the Cable to the Connector
(1) IUse a flat-blade
screwdriver to push
down the white,
square operating lever
inside the operation
slot until it locks.
Flat-blade screwdriver
(2) Insert the wire fully to
Operation slot
the back of the wire
insertion hole. Make sure that the cable sheath is inserted into the
hole, and that the end of the wire has passed through the contact
section.
Contact section
Cable sheath
Wire
insertion hole
(4) Make sure that the following operations
have been performed.
• Check that the operating lever is reset.
• Check that the procedure in step 2 has been
followed. (Pull gently on the cable to make
sure that there is resistance, indicating that
the Connectors are wired correctly.)
Removing Cables from the
Connector
Operating lever
(white)
(1) Press down on the operating lever to
lock the lever before removing the
cable.
(2) After removing the cable from the
Connector, always reset the operating
lever, except when rewiring the
Connector. The Connector can be
rewired without resetting the operating
lever.
Safety Precautions
Precautions for Safe Use
Precautions for Correct Use
• Do not pull on the Connectors or cables. Doing so may cause
damage to the Connectors or cause the cables to disconnect.
• Install the Connectors in a location where they will not be stepped
on, to prevent disconnection of the cables or damage to the
Connectors. If the Connectors have to be installed in such a
location, use a protective cover.
• Make sure that the Connectors are mated in the correct direction.
Mating the Connectors incorrectly will damage to the Connectors.
• Do not use the Connectors if the lock lever is bent or broken. Doing
so may cause the Connector to become loose or the device to
malfunction.
• Before mounting Connectors to a PCB, make sure that the
Connectors are positioned in the correct direction.
• Before bending a cable to connect it to a Connector, check the
bending specifications of the cable to be used.
• Do not exceed the rated current of the cable. Always check the
rated current of each cable to be used.
• Do not use pliers or other tools to remove the Connectors.
• Hold the Connectors firmly by hand when handling them. Do not
use excessive force to push the Connectors. Forcing the
Connectors may result in injury.
• These Connectors do not resist water. Do not use Connectors in
places where water or oil may be sprayed onto the Connectors.
Do not use the product in atmospheres or environments that exceed
product ratings.
Wiring
• Insert one wire into each insertion hole. Inserting two or more wires
into a single hole may cause unexpected problems.
• Make sure that no power is being supplied to a Connector before
wiring, inserting, or removing the Connector. Doing so may result in
electric shock.
• Follow the wiring diagrams for the device being used when wiring
the cables.
• Strip the cables according to the instructions in the applicable
operation manual, making sure not to damage the wires.
• Do not use a screwdriver with a tip larger than the specified width
when wiring the Connectors.
• Make sure short-circuits are not created, e.g., by protruding wires.
Inserting and Removing Connectors
• When connecting or disconnecting Connectors, always hold the
case of the Connector.
• When mating Connectors, insert the Connector fully into the back
of the socket, and then make sure that the Connector will not
become loose by lightly pulling it in the opposite direction.
Recommended Screwdriver
• Use a flat-blade screwdriver with a tip of 2 mm max. Do not use
screwdrivers that gradually widen towards the base of the
screwdriver.
• Using other screwdrivers may cause damage to the adjacent poles.
3
�XN2
Dimensions
(Unit: mm)
Cable Plug Connector
XN2A-1@70
Cable Socket Connector
XN2B-1470
A
6
2 (pitch)
2 (pitch)
3.4
3.3
3.1
B
8.9
5.05
15.8
6.4
17.6
7.5
(Strip
gauge)
6.75
18
12.3
23.2
C
6
1.2 dia. (internal)
1.65 dia. (external)
1.65 1.05
6
12.85
1.1
Dimensions
Dimension
(mm)
No. of contacts
A
B
C
3
4.0
7.2
13.8
4
6.0
9.2
15.8
5
8.0
11.2
17.8
6
10.0
13.2
19.8
8
14.0
17.2
23.8
Single-socket PCB Socket Connector
XN2D-1@71
Applicable PCB Dimensions (Top View)
D
C
A
2±0.05 (pitch)
3.1 5.2
6.4
t=1.6±0.2
+0.05
1−0.10 dia.
6.4
4-C1
Exterior of Singlesocket PCB Connector
B
B
E
Dimensions
13
(3.5)
3.3
0.2
2 (pitch)
C
D
Dimension
(mm)
No. of contacts
A
B
C
3
6.9
5.8
4.0
8.0
13.8
4
8.9
6.8
6.0
10.0
15.8
5
10.9
7.8
8.0
12.0
17.8
6
12.9
8.8
10.0
14.0
19.8
8
16.9
10.8
14.0
18.0
23.8
D
E
E
4
�XN2
Four-socket PCB Socket Connector
XN2D-4471
25.9
19.5
Applicable PCB Dimensions (Top View)
6.5 (pitch)
3.1
t=1.6±0.2
19.5±0.1
6.5±0.05 (pitch)
+0.05
1−0.10 dia.
2±0.05 (pitch)
6.75
8.9
6±0.1
9.05
1±0.05
3.2
15.8
3.2
Exterior of Four-socket
PCB Connector
6.75
13
3.3
0.2
2 (pitch)
1
6
5
�
很抱歉,暂时无法提供与“XN2A-1670”相匹配的价格&库存,您可以联系我们找货
免费人工找货- 国内价格
- 1+35.00280
- 216+13.97520
- 540+13.50000
- 972+13.27320