AT25QF641
64-Mbit, 2.7V Minimum
SPI Serial Flash Memory with Dual I/O, Quad I/O and QPI Support
Features
Single 2.7V - 3.6V Supply
Serial Peripheral Interface (SPI) and Quad Peripheral Interface (QPI) Compatible
Supports SPI Modes 0 and 3
Supports Dual Output Read and Quad I/O Program and Read
Supports QPI Program and Read
104 MHz* Maximum Operating Frequency
Clock-to-Output (tV1) of 6 ns
Up tp 52MB/S continuous data transfer rate
Quad Enabled (factory default setting: see Section 6-7)
Full Chip Erase
Flexible, Optimized Erase Architecture for Code and Data Storage Applications
0.6 ms Typical Page Program (256 Bytes) Time
60 ms Typical 4-Kbyte Block Erase Time
350 ms Typical 32-Kbyte Block Erase Time
700 ms Typical 64-Kbyte Block Erase Time
Hardware Controlled Locking of Protected Blocks via WP Pin
4K-bit secured One-Time Programmable Security Register
Software and Hardware Write Protection
Serial Flash Discoverable Parameters (SFDP) Register
Flexible Programming
Byte/Page Program (1 to 256 Bytes)
Dual or Quad Input Byte/Page Program (1 to 256 Bytes)
Erase/Program Suspend and Resume
JEDEC Standard Manufacturer and Device ID Read Methodology
Low Power Dissipation
2µA Deep Power-Down Current (Typical)
10µA Standby current (Typical)
5mA Active Read Current (Typical)
Endurance: 100,000 program/erase cycles (4KB, 32KB or 64KB blocks)
Data Retention: 20 Years
Industrial Temperature Range: -40°C to +85°C
Industry Standard Green (Pb/Halide-free/RoHS Compliant) Package Options
8-lead SOIC (208-mil)
8-pad DFN (6 x 5 x 0.6 mm)
Die in Wafer Form
DS-25QF641–127E–3/2018
�1.
Introduction
The Adesto® AT25QF641 is a serial interface Flash memory device designed for use in a wide variety of high-volume
consumer based applications in which program code is shadowed from Flash memory into embedded or external RAM
for execution. The flexible erase architecture of the AT25QF641 is ideal for data storage as well, eliminating the need for
additional data storage devices.
The erase block sizes of the AT25QF641 have been optimized to meet the needs of today's code and data storage
applications. By optimizing the size of the erase blocks, the memory space can be used much more efficiently. Because
certain code modules and data storage segments must reside by themselves in their own erase regions, the wasted and
unused memory space that occurs with large block erase Flash memory devices can be greatly reduced. This increased
memory space efficiency allows additional code routines and data storage segments to be added while still maintaining
the same overall device density.
SPI clock frequencies of up to 104MHz are supported allowing equivalent clock rates of 208 MHz for Dual Output and
416MHz for Quad Output when using the QPI and Fast Read Dual/Quad I/O instructions.The AT25QF641 array is
organized into 65,536 programmable pages of 256-bytes each. Up to 256 bytes can be programmed at a time using the
Page Program instructions. Pages can be erased 4KB Block, 32KB Block, 64KB Block or the entire chip.
The devices operate on a single 2.7V to 3.6V power supply with current consumption as low as 5 mA active and 3 µA for
Deep Power Down. All devices offered in space-saving packages. The device supports JEDEC standard manufacturer
and device identification with a 4K-bit Secured OTP.
AT25QF641
DS-25QF641–127E–3/2018
2
�2.
Pinouts and Pin Descriptions
The following figures show the available package types.
Figure 1-1. 8-SOIC (Top View)
CS
SO (IO1)
WP (IO2)
GND
1
2
3
4
8
7
6
5
VCC
HOLD OR RESET (IO
SCK
SI (IO0)
During all operations, VCC must be held stable and within the specified valid range: VCC (min) to VCC (max).
All of the input and output signals must be held high or low (according to voltages of VIH, VOH, VIL or VOL.
Table 1-1.
Pin Descriptions
Symbol
Name and Function
CS
CHIP SELECT
Asserted
State
Type
Low
Input
-
Input
-
Input/Output
When this input signal is high, the device is deselected and serial data output
pins are at high impedance. Unless an internal program, erase or write status
register cycle is in progress, the device will be in the standby power mode (this
is not the deep power down mode). Driving Chip Select (CS) low enables the
device, placing it in the active power mode. After power-up, a falling edge on
Chip Select (CS) is required prior to the start of any instruction.
SCK
SERIAL CLOCK
This input signal provides the timing for the serial interface. Instructions,
addresses, or data present at serial data input are latched on the rising edge of
Serial Clock (SCK). Data are shifted out on the falling edge of the Serial Clock
(SCK).
SI (I/O0)
SERIAL INPUT
The SI pin is used to shift data into the device. The SI pin is used for all data
input including command and address sequences. Data on the SI pin is always
latched in on the rising edge of SCK.
With the Dual-Output and Quad-Output Read commands, the SI Pin becomes
an output pin (I/O0) in conjunction with other pins to allow two or four bits of data
on (I/O3-0) to be clocked in on every falling edge of SCK
To maintain consistency with the SPI nomenclature, the SI (I/O0) pin is
referenced as the SI pin unless specifically addressing the Dual-I/O and QuadI/O modes in which case it is referenced as I/O0.
Data present on the SI pin is ignored whenever the device is deselected (CS is
deasserted).
AT25QF641
DS-25QF641–127E–3/2018
3
�Table 1-1.
Pin Descriptions (Continued)
Symbol
Name and Function
SO (I/O1)
SERIAL OUTPUT
Asserted
State
Type
-
Input/Output
-
Input/Output
-
Input/Output
The SO pin is used to shift data out from the device. Data on the SO pin is
always clocked out on the falling edge of SCK.
With the Dual-Output Read commands, the SO Pin remains an output pin (I/O0)
in conjunction with other pins to allow two bits of data on (I/O1-0) to be clocked in
on every falling edge of SCK
To maintain consistency with the SPI nomenclature, the SO (I/O1) pin is
referenced as the SO pin unless specifically addressing the Dual-I/O modes in
which case it is referenced as I/O1. The SO pin is in a high-impedance state
whenever the device is deselected (CS is deasserted).
WP (I/O2) WRITE PROTECT
The Write Protect (WP) pin can be used to protect the Status Register against data
modification. Used in company with the Status Register's Block Protect (SEC, TB,
BP2, BP1 and BP0) bits and Status Register Protect SRP) bits, a portion or the entire
memory array can be hardware protected. The WP pin is active low. When the QE bit
of Status Register-2 is set for Quad I/O, the WP pin (Hardware Write Protect)
function is not available since this pin is used for IO2. See figures 1-1, 1-2, and 1-3
for the pin configuration of Quad I/O and QPI operation.
HOLD
(I/O3)
HOLD
The HOLD pin is used to pause a serial sequence of the SPI flash memory
without resetting the clocking sequence. To enable the HOLD mode, the CS
must be in low state. The HOLD mode effects on with the falling edge of the
HOLD signal with CLK being low. The HOLD mode ends on the rising edge of
HOLD signal with SCK being low.
In other words, HOLD mode can't be entered unless SCK is low at the falling
edge of the HOLD signal. And HOLD mode can't be exited unless SCK is low at
the rising edge of the HOLD signal.
If CS is driven high during a HOLD condition, it resets the internal logic of the
device. As long as HOLD signal is low, the memory remains in the HOLD
condition. To re-work communication with the device, HOLD must go high, and
CS must go low. See Figure 8.10 for HOLD timing.
VCC
DEVICE POWER SUPPLY: VCC is the supply voltage. It is the single voltage
used for all device functions including read, program, and erase. The VCC pin is
used to supply the source voltage to the device. Operations at invalid VCC
voltages may produce spurious results and should not be attempted.
-
Power
GND
GROUND: VSS is the reference for the VCC supply voltage. The ground
reference for the power supply. GND should be connected to the system
ground.
-
Power
AT25QF641
DS-25QF641–127E–3/2018
4
�Block Diagram
Figure 2-1 shows a block diagram of the AT25QF641 serial Flash.
Figure 2-1. AT25QF641 Block Diagram
Control and
Protection Logic
CS
I/O Buffers
and Latches
SRAM
Data Buffer
SCK
SI (I/O0)
SO (I/O1)
WP (I/O2)
Interface
Control
And
Logic
Address Latch
2.
Y-Decoder
Y-Gating
X-Decoder
Flash
Memory
Array
HOLD
(I/O3)
Note: I/O3-0 pin naming convention is used for Dual-I/O and Quad-I/O commands.
AT25QF641
DS-25QF641–127E–3/2018
5
�Memory Array
To provide the greatest flexibility, the memory array of the AT25QF641 can be erased in four levels of granularity
including a full chip erase. The size of the erase blocks is optimized for both code and data storage applications, allowing
both code and data segments to reside in their own erase regions. The Memory Architecture Diagram illustrates the
breakdown of each erase level.
Figure 3-1. Memory Architecture Diagram
32KB
32KB
64KB
32KB
32KB
64KB
•••
32KB
32KB
64KB
32KB
4KB
4KB
4KB
4KB
4KB
4KB
4KB
4KB
4KB
4KB
4KB
4KB
4KB
4KB
4KB
4KB
4KB
4KB
4KB
4KB
4KB
4KB
4KB
4KB
4KB
4KB
4KB
4KB
4KB
4KB
4KB
4KB
4KB
Block Address
Range
7F F F F F h
7F E F F F h
7F DF F F h
7F CF F F h
7F BF F F h
7F AF F F h
7F 9F F F h
7F 8F F F h
7F 7F F F h
7F 6F F F h
7F 5F F F h
7F 4F F F h
7F 3F F F h
7F 2F F F h
7F 1F F F h
7F 0F F F h
7E F F F F h
7E E F F F h
7E DF F F h
7E CF F F h
7E BF F F h
7E AF F F h
7E 9F F F h
7E 8F F F h
7E 7F F F h
7E 6F F F h
7E 5F F F h
7E 4F F F h
7E 3F F F h
7E 2F F F h
7E 1F F F h
7E 0F F F h
– 7F F 000h
– 7F E 000h
– 7F D000h
– 7F C000h
– 7F B000h
– 7F A000h
– 7F 9000h
– 7F 8000h
– 7F 7000h
– 7F 6000h
– 7F 5000h
– 7F 4000h
– 7F 3000h
– 7F 2000h
– 7F 1000h
– 7F 0000h
– 7E F 000h
– 7E E 000h
– 7E D000h
– 7E C000h
– 7E B000h
– 7E A000h
– 7E 9000h
– 7E 8000h
– 7E 7000h
– 7E 6000h
– 7E 5000h
– 7E 4000h
– 7E 3000h
– 7E 2000h
– 7E 1000h
– 7E 0000h
00F F F F h
00E F F F h
00DF F F h
00CF F F h
00BF F F h
00AF F F h
009F F F h
008F F F h
007F F F h
006F F F h
005F F F h
004F F F h
003F F F h
002F F F h
001F F F h
000F F F h
– 00F 000h
– 00E 000h
– 00D000h
– 00C000h
– 00B000h
– 00A000h
– 009000h
– 008000h
– 007000h
– 006000h
– 005000h
– 004000h
– 003000h
– 002000h
– 001000h
– 000000h
•••
64KB
Page Program Detail
4KB
4KB
4KB
4KB
4KB
4KB
4KB
4KB
4KB
4KB
4KB
4KB
4KB
4KB
4KB
4KB
1-256 byte
256 bytes
256 bytes
256 bytes
256 bytes
256 bytes
256 bytes
256 bytes
256 bytes
256 bytes
256 bytes
256 bytes
256 bytes
256 bytes
256 bytes
256 bytes
256 bytes
256 bytes
256 bytes
256 bytes
256 bytes
256 bytes
256 bytes
256 bytes
256 bytes
Page Address
Range
7F F F F F h
7F F E F F h
7F F DF F h
7F F CF F h
7F F BF F h
7F F AF F h
7F F 9F F h
7F F 8F F h
7F F 7F F h
7F F 6F F h
7F F 5F F h
7F F 4F F h
7F F 3F F h
7F F 2F F h
7F F 1F F h
7F F 0F F h
7F E F F F h
7F E E F F h
7F E DF F h
7F E CF F h
7F E BF F h
7F E AF F h
7F E 9F F h
7F E 8F F h
– 7F F F 00h
– 7F F E 00h
– 7F F D00h
– 7F F C00h
– 7F F B00h
– 7F F A00h
– 7F F 900h
– 7F F 800h
– 7F F 700h
– 7F F 600h
– 7F F 500h
– 7F F 400h
– 7F F 300h
– 7F F 200h
– 7F F 100h
– 7F F 000h
– 7F E F 00h
– 7F E E 00h
– 7F E D00h
– 7F E C00h
– 7F E B00h
– 7F E A00h
– 7F E 900h
– 7F E 800h
0017F F h
0016F F h
0015F F h
0014F F h
0013F F h
0012F F h
0011F F h
0010F F h
000F F F h
000E F F h
000DF F h
000CF F h
000BF F h
000AF F h
0009F F h
0008F F h
0007F F h
0006F F h
0005F F h
0004F F h
0003F F h
0002F F h
0001F F h
0000F F h
– 001700h
– 001600h
– 001500h
– 001400h
– 001300h
– 001200h
– 001100h
– 001000h
– 000F 00h
– 000E 00h
– 000D00h
– 000C00h
– 000B00h
– 000A00h
– 000900h
– 000800h
– 000700h
– 000600h
– 000500h
– 000400h
– 000300h
– 000200h
– 000100h
– 000000h
•••
Block Erase Detail
•••
3.
256 bytes
256 bytes
256 bytes
256 bytes
256 bytes
256 bytes
256 bytes
256 bytes
256 bytes
256 bytes
256 bytes
256 bytes
256 bytes
256 bytes
256 bytes
256 bytes
256 bytes
256 bytes
256 bytes
256 bytes
256 bytes
256 bytes
256 bytes
256 bytes
AT25QF641
DS-25QF641–127E–3/2018
6
�4.
Device Operation
4.1
Standard SPI Operation
The AT25QF641 features a serial peripheral interface on four signals: Serial Clock (SCK). Chip Select (CS), Serial
Data Input (SI) and Serial Data Output (SO). Standard SPI instructions use the SI input pin to serially write instructions,
addresses or data to the device on the rising edge of SCK. The SO output pin is used to read data or status from the
device on the falling edge of SCK.
SPI bus operation Modes 0 (0, 0) and 3 (1, 1) are supported. The primary difference between Mode 0 and Mode 3
concerns the normal state of the SCK signal when the SPI bus master is in standby and data is not being transferred
to the Serial Flash. For Mode 0 the SCK signal is normally low on the falling and rising edges of CS. For Mode 3 the
SCK signal is normally high on the falling and rising edges of CS.
4.2
Dual SPI Operation
The AT25QF641 supports Dual SPI operation. This instruction allows data to be transferred to or from the device at two
times the rate of the standard SPI. The Dual Read instruction is ideal for quickly downloading code to RAM upon powerup (code-shadowing) or for executing non-speed- critical code directly from the SPI bus (XIP). When using Dual SPI
instructions the SI and SO pins become bidirectional I/0 pins; IO0 and IO1.
4.3
Quad SPI Operation
The AT25QF641 supports Quad SPI operation. This instruction allows data to be transferred to or from the device at
four times the rate of the standard SPI. The Quad Read instruction offers a significant improvement in continuous
and random access transfer rates allowing fast code- shadowing to RAM or execution directly from the SPI bus (XIP).
When using Quad SPI instruction the SI and SO pins become bidirectional IO0 and IO1, and the WP and HOLD pins
become IO2 and IO3 respectively. Quad SPI instructions require the non-volatile Quad Enable bit (QE) in Status
Register-2 to be set.
4.4
QPI Operation
The AT25QF641 supports Quad Peripheral Interface (QPI) operation when the device is switched from Standard/ Dual/
Quad SPI mode to QPI mode using the “Enable QPI (38h)” instruction. To enable QPI mode, the non-volatile Quad
Enable bit (QE) in Status Register-2 is required to be set. When using QPI instructions, the SI and SO pins become
bidirectional IO0 and IO1, and the WP and HOLD pins become IO2 and IO3 respectively.
The typical SPI protocol requires that the byte-long instruction code being shifted into the device only via SI pin in eight
serial clocks. The QPI mode utilizes all four IO pins to input the instruction code, thus only two serial clocks are required.
This can significantly reduce the SPI instruction overhead and improve system performance in an XIP environment.
Standard/ Dual/ Quad SPI mode and QPI mode are exclusive. Only one mode can be active at any given time, “Enable
QPI” and “Disable QPI/ Disable QPI 2” instructions are used to switch between these two modes. Upon power-up or after
software reset using “Reset (99h) instruction, the default state of the device is Standard/ Dual/ Quad SPI mode.
AT25QF641
DS-25QF641–127E–3/2018
7
�5.
Write Protection
To protect inadvertent writes by the possible noise, several means of protection are applied to the Flash memory.
5.1
Write Protect Features
While Power-on reset, all operations are disabled and no instruction is recognized.
An internal time delay of tPUW can protect the data against inadvertent changes while the power supply is outside
the operating specification. This includes the Write Enable, Page program, Block Erase, Chip Erase, Write Security
Register and the Write Status Register instructions.
For data changes, Write Enable instruction must be issued to set the Write Enable Latch (WEL) bit to “0”. Powerup, Completion of Write Disable, Write Status Register, Page program, Block Erase and Chip Erase are subjected to
this condition.
Status Register protect (SRP) and Block protect (SEC, TB, BP2, BP1, and BP0) bits may be used to configure a
portion of the memory as read-only (software protection).
The Write Protect (WP) pin can be used to change the Status Register (hardware control).
The Deep Power Down mode provides extra software protection from unexpected data changes as all instructions
are ignored under this status except for Release Deep Power Down instruction.
AT25QF641
DS-25QF641–127E–3/2018
8
�6.
Status Registers
The Read Status Register instruction can be used to provide status on the availability of the Flash memory array, if the device
is write enabled or disabled the state of write protection and the Quad SPI setting. The Write Status Register instruction can be
used to configure the devices writes protection features and Quad SPI setting. Write access to the Status Register is controlled
by in some cases of the WP pin.
Table 6-1.
Status Register 1
S7
S6
S5
S4
S3
S2
S1
S0
SRP0
SEC
TB
BP2
BP1
BP0
WEL
BUSY
Block Protect
1 (NonVolatile)
Block Protect
0 (NonVolatile)
Write Enable
Latch
Erase or Write
in Progress
Status
Sector Protect Top/Bottom
Block Protect
Register
(Non- Volatile) Write Protect
2 (NonProtect 0
(Non- Volatile)
Volatile)
(Non- Volatile)
Table 6-2.
S15
S14
S13
S12
S11
S10
S9
S8
SUS
CMP
(R)
(R)
(R)
(R)
QE
SRP1
Suspend
Complement
Protect (NonVolatile)
Reserved
Reserved
Reserved
Reserved
Quad Enable
(Non- Volatile)
Status
Register
Protect 1
(Non- Volatile)
Status
6.1
Status Register 2
Busy
BUSY is a read only bit in the status register (S0) that is set to a 1 state when the device is executing a Page Program, Erase,
Write Status Register or Write Security Register instruction. During this time the device will ignore further instruction except for
the Read Status Register and Erase / Program Suspend instruction (see tW, tPP, tSE, tBE1, tBE2 and tCE in Section , ). When the
Program, Erase, Write Status Register or Write Security Register instruction has completed, the BUSY bit will be cleared to a 0
state indicating the device is ready for further instructions.
6.2
Write Enable Latch (WEL)
Write Enable Latch (WEL) is a read only bit in the status register (S1) that is set to a 1 after executing a Write Enable instruction.
The WEL status bit is cleared to a 0 when device is write disabled. A write disable state occurs upon power-up or after any of
the following instructions: Write Disable, Page Program, Erase and Write Status Register.
6.3
Block Protect Bits (BP2, BP1, BP0)
The Block Protect Bits (BP2, BP1, BP0) are non-volatile read/write bits in the status register (S4, S3, and S2) that provide write
protection control and status. Block protect bits can be set using the Write Status Register Instruction (see tW in Section , ). All,
none or a portion of the memory array can be protected from Program and Erase instructions (see Status Register Memory
Protection table). The factory default setting for the Block Protection Bits is 0, none of the array protected.
6.4
Top/Bottom Block protect (TB)
The Top/Bottom bit (TB) is non-volatile bits in the status register (S5) that controls if the Block Protect Bits (BP2, BP1, BP0)
protect from the Top (TB = 0) or the Bottom (TB = 1) of the array as shown in the Status Register Memory Protection table. The
factory default setting is TB = 0. The TB bit can be set with the Write Status Register Instruction depending on the state of the
SRP0, SRP1 and WEL bits.
AT25QF641
DS-25QF641–127E–3/2018
9
�6.5
Sector/Block Protect (SEC)
The Sector protect bit (SEC) is non-volatile bits in the status register (S6) that controls if the Block Protect Bits (BP2, BP1, BP0)
protect 4KB Sectors (SEC = 1)or 64KB Blocks (SEC = 0) in the Top (TB = 0) or the Bottom (TB = 1) of the array as shown in the
Status Register Memory protection table. The default setting is SEC = 0.
6.6
Status Register Protect (SRP1, SRP0)
The Status Register Protect bits (SRP1 and SRP0) are non-volatile read/write bits in the status register (S8 and S7). The
SRP bits control the method of write protection: software protection, hardware protection, power supply lock-down or one time
programmable (OTP) protection.
Table 6-3.
Status Register Protect Field Encoding
SRP1
SRP0
WP
0
0
X
Status
Register
Software
Protection
0
1
0
Hardware
Protected
0
1
1
Hardware
Unprotected
1
1
0
1
X
Description
WP pin no control. The register can be written to and is not affected
by the state of the WP pin.
When WP pin is low the Status Register locked and cannot be
written to.
When WP pin is high the Status register is unlocked and can be
written to after a Write Enable instruction, WEL=1
Lock-Down
Status Register is protected and cannot be written to again until
the next power down, power-up cycle(1)
One Time
Status Register is permanently protected and cannot be written to.
Power Supply
X
Program
Note: 1. When SRP1, SRP0 = (1,0), a power down, the power-up cycle changes SRP1, SRP0 to (0,0) state.
6.7
Quad Enable (QE)
The Quad Enable (QE) bit is a non-volatile read/write bit in the status register (S9) that allows Quad operation.
When the QE pin is set to a 1 (factory default setting) the Quad IO2 and IO3 pins are enabled. WARNING: The QE bit
should never be set to a 1 during standard SPI or Dual SPI operation if the WP or HOLD pins are tied directly to
the power supply or ground.
6.8
Complement Protect (CMP)
The Complement Protect bit (CMP) is a non-volatile read/write bit in the status register (S14). It is used in conjunction
with SEC, TB, BP2, BP1 and BP0 bits to provide more flexibility for the array protection. Once CMP is set to 1, previous
array protection set by SEC, TB, BP2, BP1 and BP0 is reversed. For instance, when CMP = 0, a top 4KB sector can be
protected while the rest of the array is not; when CMP = 1, the top 4KB sector will become unprotected while the rest of
the array become read-only. Please refer to the Status Register Memory Protection table for details. The default setting is
CMP = 0.
6.9
Erase/Program Suspend Status (SUS)
The Suspend Status bit (SUS) is a read only bit in the status register (S15) that is set to 1 after executing an Erase/Program
Suspend (75h) instruction. The SUS status bit is cleared to 0 by Erase/Program Resume (7Ah) instruction as well as a power
down, power-up cycle.
AT25QF641
DS-25QF641–127E–3/2018
10
�Table 6-4.
Status Register Memory Protection (CMP = 0)
Status Register
Memory Protection
SEC
TB
BP2
BP1
BP0
Block(s)
Addresses
Density
Portion
X
X
0
0
0
NONE
NONE
NONE
NONE
0
0
0
0
1
126 and 127
7E0000h-7FFFFFh
128KB
Upper 1/64
0
0
0
1
0
124 thru 127
7C0000h-7FFFFFh
256KB
Upper 1/32
0
0
0
1
1
120 thru 127
780000h-7FFFFFh
512KB
Upper 1/16
0
0
1
0
0
112 thru 127
700000h-7FFFFFh
1MB
Upper 1/8
0
0
1
0
1
96 thru 127
600000h-7FFFFFh
2MB
Upper 1/4
0
0
1
1
0
64 thru 127
400000h-7FFFFFh
4MB
Upper 1/2
0
1
0
0
1
0 and 1
000000h-01FFFFh
128KB
Lower 1/64
0
1
0
1
0
0 thru 3
000000h-03FFFFh
256KB
Lower 1/32
0
1
0
1
1
0 thru 7
000000h-07FFFFh
512KB
Lower 1/16
0
1
1
0
0
0 thru 15
000000h-0FFFFFh
1MB
Lower 1/8
0
1
1
0
1
0 thru 31
000000h-1FFFFFh
2MB
Lower 1/4
0
1
1
1
0
0 thru 63
000000h-3FFFFFh
4MB
Lower 1/2
X
X
1
1
1
0 thru 127
000000h-7FFFFFh
8MB
ALL
1
0
0
0
1
127
7FF000h-7FFFFFh
4KB
U – 1/2048
1
0
0
1
0
127
7FE000h-7FFFFFh
8KB
U – 1/1024
1
0
0
1
1
127
7FC000h-7FFFFFh
16KB
U – 1/512
1
0
1
0
X
127
7F8000h-7FFFFFh
32KB
U – 1/256
1
1
0
0
1
0
000000h-000FFFh
4KB
L – 1/2048
1
1
0
1
0
0
000000h-001FFFh
8KB
L – 1/1024
1
1
0
1
1
0
000000h-003FFFh
16KB
L – 1/512
1
1
1
0
X
0
000000h-007FFFh
32KB
L – 1/256
Note:
1.
X = Don’t care
2.
L = Lower; U = Upper
3.
If any Erase or Program instruction specifies a memory region that contains protected data portion, this instruction will
be ignored.
Table 6-5.
Status Register Memory Protection (CMP = 1)
Status Register
Memory Protection
SEC
TB
BP2
BP1
BP0
Block(s)
Addresses
Density
Portion
X
X
0
0
0
0 thru 127
000000h - 7FFFFFh
8MB
ALL
0
0
0
0
1
0 thru 125
000000h – 7DFFFFh
8,064KB
Lower 63/64
0
0
0
1
0
0 thru 123
000000h – 7BFFFFh
7,936KB
Lower 31/32
0
0
0
1
1
0 thru 119
000000h – 77FFFFh
7,680KB
Lower 15/16
AT25QF641
DS-25QF641–127E–3/2018
11
�Table 6-5.
Status Register Memory Protection (CMP = 1) (Continued)
Status Register
Memory Protection
SEC
TB
BP2
BP1
BP0
Block(s)
Addresses
Density
Portion
0
0
1
0
0
0 thru 111
000000h – 6FFFFFh
7,168KB
Lower 7/8
0
0
1
0
1
0 thru 95
000000h – 5FFFFFh
6MB
Lower 3/4
0
0
1
1
0
0 thru 63
000000h – 3FFFFFh
4MB
Lower 1/2
0
1
0
0
1
2 thru 127
020000h - 7FFFFFh
8,064KB
Upper 63/64
0
1
0
1
0
4 and 127
040000h - 7FFFFFh
7,936KB
Upper 31/32
0
1
0
1
1
8 thru 127
080000h - 7FFFFFh
7,680KB
Upper 15/16
0
1
1
0
0
16 thru 127
100000h - 7FFFFFh
7,168KB
Upper 7/8
0
1
1
0
1
32 thru 127
200000h - 7FFFFFh
6MB
Upper 3/4
0
1
1
1
0
64 thru 127
400000h - 7FFFFFh
4MB
Upper 1/2
X
X
1
1
1
NONE
NONE
NONE
NONE
1
0
0
0
1
0 thru 127
000000h - 7FEFFFh
8,188KB
L – 2047/2048
1
0
0
1
0
0 thru 127
000000h - 7FDFFFh
8,184KB
L – 1023/1024
1
0
0
1
1
0 thru 127
000000h - 7FBFFFh
8,176KB
L – 511/512
1
0
1
0
X
0 thru 127
000000h - 7F7FFFh
8,160KB
L – 255/256
1
1
0
0
1
0 thru 127
001000h - 7FFFFFh
8,188KB
U – 2047/2048
1
1
0
1
0
0 thru 127
002000h - 7FFFFFh
8,184KB
U – 1023/1024
1
1
0
1
1
0 thru 127
004000h - 7FFFFFh
8,176KB
U – 511/512
1
1
1
0
X
0 thru 127
008000h - 7FFFFFh
8,160KB
U – 255/256
Notes:
1.
X = don’t care
2.
L = Lower; U = Upper
3.
If any Erase or Program instruction specifies a memory region that contains protected data portion, this instruction will be ignored.
AT25QF641
DS-25QF641–127E–3/2018
12
�7.
Instructions
The SPI instruction set of the AT25QF641 consists of thirty eight basic instructions and the QPI instruction set of the
AT25QF641 consists of thirty one basic instructions that are fully controlled through the SPI bus (see Instruction Set
table). Instructions are initiated with the falling edge of Chip Select (CS). The first byte of data clocked into the input
pins (SI or IO [3:0]) provides the instruction code. Data on the SI input is sampled on the rising edge of clock with
most significant bit (MSB) first.
Instructions are completed with the rising edge of edge CS. Clock relative timing diagrams for each instruction are
included in figures 8-1 through 8-66 All read instructions can be completed after any clocked bit. However, all instructions
that Write, Program or Erase must complete on a byte (CS driven high after a full 8-bit have been clocked) otherwise the
instruction will be terminated. This feature further protects the device from inadvertent writes. Additionally, while the
memory is being programmed or erased, or when the Status Register is being written, all instructions except for Read
Register will be ignored until the program or erase cycle has completed.
Table 7-1.
7.1
Manufacturer and Device Identification
ID Type
Name
ID Code
Instruction(s)
Manufacturer ID
Adesto
1Fh
90h, 92h, 94h, 9Fh
Device ID
AT25QF641
16h
90h, 92h, 94h, ABh
Memory Type ID
SPI / QPI
32h
9Fh
Capacity Type ID
64M
17h
9Fh
Instruction Set Tables
Table 7-2.
Instruction Set Table 1 (SPI instruction)(1)
Instruction Name
Byte 1
Byte 2
Byte 3
Byte 4
Byte 5
Byte 6
(Clock Number)
(0 – 7)
(8 - 15)
(16 - 23)
(24 - 31)
(32 - 39)
(40 - 47)
Write Enable
06h
Write Enable
50h
Write Disable
04h
Read Status Register 1
05h
(SR7-SR0)(2)
Read Status Register 2
35h
(SR15-SR8)(2)
Write Status Register 1
01h
(SR7-SR0)
Write Status Register 2
31h
(SR15-SR8)
Read Data
03h
A23-A16
A15-A8
A7-A0
(D7-D0)
Fast Read Data
0Bh
A23-A16
A15-A8
A7-A0
dummy
Page Program
02h
A23-A16
A15-A8
A7-A0
(D7-D0)(3)
Enable QPI
38h
Block Erase (4KB)
20h
A23-A16
A15-A8
A7-A0
Block Erase (32KB)
52h
A23-A16
A15-A8
A7-A0
Block Erase(64KB)
D8h
A23-A16
A15-A8
A7-A0
(SR15-SR8)
(D7-D0)
AT25QF641
DS-25QF641–127E–3/2018
13
�Instruction Set Table 1 (SPI instruction)(1) (Continued)
Table 7-2.
Instruction Name
Byte 1
Byte 2
Byte 3
Byte 4
Byte 5
Byte 6
(Clock Number)
(0 – 7)
(8 - 15)
(16 - 23)
(24 - 31)
(32 - 39)
(40 - 47)
Chip Erase
60h/C7h
Erase/Program
75h
Suspend
Erase/Program
7Ah
Resume
Deep Power Down
B9h
Release Deep power
ABh
dummy
dummy
dummy
(ID7-ID0)(2)
90h
00h
00h
00h or 01h
(MID7-
down/ Device ID(4)
Read Manufacturer/
Device ID
(4)
(DID7-DID0)
MID0)
Read JEDEC ID
9Fh
Reset Enable
66h
Reset
99h
Enter Secured OTP
B1h
Exit Secured OTP
C1h
Read
2Bh
(MID7-MID0)
(D7-D0)
(D7-D0)
A15-A8
A7-A0
dummy
(D7-D0)
(SC7-SC0) (10)
Security Register
2Fh
Write
Security Register
Read Serial Flash
5Ah
A23-A16
Discovery Parameter
Table 7-3.
Instruction Set Table 2 (Dual SPI Instruction)
Instruction
Byte 1
Byte 2
Byte 3
Byte 4
Byte 5
Byte 6
(Clock Number)
(0 – 7)
(8 - 15)
(16 - 23)
(24 - 31)
(32 - 39)
(40 - 47)
Fast Read Dual Output
3Bh
A23-A16
A15-A8
A7-A0
dummy
(D7-D0)(6)
Fast Read Dual I/O
BBh
A23-A8(5)
A7-A0,
(D7-D0, T)(6)
Read Dual Manufacturer/
92h
0000h
(00h, xxxx) or
(MID7-MID0)
(01h, xxxx)
(DID7-DID0)(6)
Device ID
(4)
AT25QF641
DS-25QF641–127E–3/2018
14
�Table 7-4.
Instruction Set Table 3 (Quad SPI Instruction)
Instruction
Byte 1
Byte 2
Byte 3
Byte 4
Byte 5
Byte 6
(Clock Number)
(0 – 7)
(8 - 15)
(16 - 23)
(24 - 31)
(32 - 39)
(40 - 47)
Fast Read Quad Output
6Bh
A23-A16
Fast Read Quad I/O
EBh
A23-A0,
M7-M0(7)
Quad Page Program
33h
A23-A0
(D7-D0, T)(8)
Read Quad
94h
Manufacturer /Device ID(4)
(00_0000h, xx)
or
(00_0001h, xx)
Word Read Quad I/O
E7h
A23-A0,
M7-M0(7)
Set Burst with Wrap
77h
xxxxxx, W6W4(7)
Table 7-5.
A15-A8
A7-A0
(xxx, D7-D0,T)(9)
(D7-D0) (8)
dummy
(D7-D0, T)(8)
(xxxx,
MID7-MID0) (xxxx,
DID7-DID0)(9)
(xx, D7-D0..)
(D7-D0)(8)
Instruction Set Table 4 (QPI instruction)
Instruction
(Clock Number)
Byte 1
Byte 2
Byte 3
Byte 4
Byte 5
Byte 6
Byte 7
Byte 8
Byte 9
(0 – 1)
(2 - 3)
(4 - 5)
(6 - 7)
(8 - 9)
(10 - 11)
(12 - 13)
(14 - 15)
(16 - 17)
Write Enable
06h
Write Enable for Volatile
50h
Write Disable
04h
Read Status Register-1
05h
(SR7SR0) (2)
Read Status Register-2
35h
(SR15SR8)(2)
Write Status Register-1(5)
Write Status Register-2
01h
31h
(SR7-
(SR15-
SR0)
SR8)
(SR15SR8)
Fast Read >80MHz
Data
>104MHz
0Bh
A23-A16
A15-A8
A7-A0
dummy
dummy
(D7-D0)
A23-A16
A15-A8
A7-A0
dummy
dummy
dummy
(D7D0)
Page Program
02h
A23-A16
A15-A8
A7-A0
Block Erase(4KB)
20h
A23-A16
A15-A8
A7-A0
Block Erase(32KB)
52h
A23-A16
A15-A8
A7-A0
Block Erase(64KB)
D8h
A23-A16
A15-A8
A7-A0
Chip Erase
Erase/Program Suspend
(D7-D0)(3)
60h/C7h
75h
AT25QF641
DS-25QF641–127E–3/2018
15
�Table 7-5.
Instruction Set Table 4 (QPI instruction)
Instruction
(Clock Number)
Byte 1
Byte 2
Byte 3
Byte 4
Byte 5
Byte 6
Byte 7
Byte 8
Byte 9
(0 – 1)
(2 - 3)
(4 - 5)
(6 - 7)
(8 - 9)
(10 - 11)
(12 - 13)
(14 - 15)
(16 - 17)
00h
00h
00h or
(MID7-
(DID7-
01h
MID0)
DID0)
Erase/Program Resume
7Ah
Deep Power Down
B9h
Release Deep Power
ABh
Read
Manufacturer/Device
ID(4)
Read JEDEC ID(4)
90h
9Fh
Enter Security
B1h
Exit Security
C1h
Read Security Register
2Bh
(MID7-MID0)
Manufacturer
(D7-D0)
Memory
Type
(D7-D0)
Capacity
Type
A23-A16
A15-A8
A7-A0
(M7-M0)
dummy
(D7-D0)
A23-A16
A15-A8
A7-A0
(M7-
dummy
dummy
(SC7-SC0)
(10)
Write Security Register
2Fh
Fast Read
Quad I/O
EBh
>80MHz
>104MHz
M0)
Reset Enable
66h
Reset
99h
Disable QPI
FFh
Burst Read >80MHz
with Wrap
>104MHz
0Ch
Set Read Parameter
C0h
P7-P0
Quad Page Program
33h
A23-A16
Notes:
1.
on the
2.
3.
4.
5.
6.
7.
(D7D0)
A23-A16
A15-A8
A7-A0
dummy
dummy
(D7-D0)
A23-A16
A15-A8
A7-A0
dummy
dummy
dummy
A15-A8
A7-A0
(D7-D0)
(D7 - D0)
Data bytes are shifted with Most Significant Bit first. Byte fields with data in parenthesis “()” indicate data being read from the device
IO pin.
SR = status register, The Status Register contents and Device ID will repeat continuously until CS terminates the instruction.
At least one byte of data input is required for Page Program, Quad Page Program and Program Security Register, up to 256 bytes
of data input. If more than 256 bytes of data are sent to the device, the addressing will wrap to the beginning of the page and
overwrite previously sent data.
See Manufacturer and Device Identification table for Device ID information.
Dual Input Address
IO0 = A22, A20, A18, A16, A14, A12, A10, A8, A6, A4, A2, A0, M6, M4, M2, M0
IO1 = A23, A21, A19, A17, A15, A13, A11, A9, A7, A5, A3, A1, M7, M5, M3, M1
Dual Output data
IO0 = (D6, D4, D2, D0)
IO1 = (D7, D5, D3, D1)
Quad Input Address
Set Burst with Wrap Input
IO0 = A20, A16, A12, A8, A4, A0, M4, M0
IO1 = A21, A17, A13, A9, A5, A1, M5, M1
IO2 = A22, A18, A14, A10, A6, A2, M6, M2
IO0 = x, x, x, x, x, x, W4,
IO1 = x, x, x, x, x, x, W5,
IO2 = x, x, x, x, x, x, W6,
x
x
x
AT25QF641
DS-25QF641–127E–3/2018
16
�IO3 = A23, A19, A15, A11, A7, A3, M7, M3
7.2
8.
Quad Input/ Output Data
IO0 = (D4, D0T)
IO1 = (D5, D1T)
IO2 = (D6, D2T)
IO3 = (D7, D3T)
9.
Fast Read Quad I/O Data Output
IO0 = (x, x, x, x, D4, D0T)
IO1 = (x, x, x, x, D5, D1T)
IO2 = (x, x, x, x, D6, D2T)
IO3 = (x, x, x, x, D7, D3T)
10.
SC = security register
IO3 = x, x, x, x, x, x, x
x
Write Enable (06h)
Write Enable instruction is for setting the Write Enable Latch (WEL) bit in the Status Register. The WEL bit must be set prior to
every Program, Erase and Write Status Register instruction. To enter the Write Enable instruction, CS goes low prior to the
instruction “06h” into Data Input (SI) pin on the rising edge of SCK, and then driving CS high.
Figure 7-1. Write Enable Instruction for SPI Mode (left) and QPI Mode (right)
7.3
Write Enable for Volatile Status Register (50h)
This gives more flexibility to change the system configuration and memory protection schemes quickly without waiting
for the typical non-volatile bit write cycles or affecting the endurance of the Status Register non-volatile bits. To write the
volatile values into the Status Register bits, the Write Enable for Volatile Status Register (50h) instruction must be issued
prior to a Write Status Register (01h) instruction. Write Enable for Volatile Status Register instruction (Figure 7-2) will
not set the Write Enable Latch (WEL) bit. Once Write Enable for Volatile Status Register is set, a Write Enable
instruction should not have been issued prior to setting Write Status Register instruction (01h or 31h).
AT25QF641
DS-25QF641–127E–3/2018
17
�Figure 7-2. Write Enable for Volatile Status Register Instruction for SPI Mode (left) and QPI Mode (right)
7.4
Write Disable (04h)
The Write Disable instruction is to reset the Write Enable Latch (WEL) bit in the Status Register. To enter the Write Disable
instruction, CS goes low prior to the instruction “04h” into Data Input (SI) pin on the rising edge of SCK, and then driving CS
high. WEL bit is automatically reset write- disable status of “0” after Power-up and upon completion of the every Program,
Erase and Write Status Register instructions.
Figure 7-3. Write Disable Instruction for SPI Mode (left) and QPI Mode (right)
7.5
Read Status Register-1 (05h) and Read Status Register-2 (35h)
The Read Status Register instructions are to read the Status Register. The Read Status Register can be read at any
time (even in program/erase/write Status Register and Write Security Register condition). It is recommended to check
the BUSY bit before sending a new instruction when a Program, Erase, Write Status Register or Write Status Register
operation is in progress.
AT25QF641
DS-25QF641–127E–3/2018
18
�The instruction is entered by driving CS low and sending the instruction code “05h” for Status Register-1 or “35h” for Status
Register-2 into the SI pin on the rising edge of SCK. The status register bits are then shifted out on the SO pin at the falling
edge of SCK with most significant bit (MSB) first as shown in (Figure 7-4 and Figure 7-5). The Status Register can be read
continuously. The instruction is completed by driving CS high.
Figure 7-4. Read Status Register Instruction (SPI Mode)
Figure 7-5. Read Status Register Instruction (QPI Mode)
7.6
Write Status Register (01h - See Errata)
The Write Status Register instruction is to write only non-volatile Status Register-1 bits (SRP0, SEC, TB, BP2, BP1
and BP0) and Status Register-2 bits (CMP, QE and SRP1). All other Status Register bit locations are read-only and will
not be affected by the Write Status Register instruction.
A Write Enable instruction must previously have been issued prior to setting Write Status Register Instruction (Status
Register bit WEL must equal 1). Once write is enabled, the instruction is entered by driving CS low, sending the
instruction code, and then writing the status register data byte as illustrated in Figure 7-6 and Figure 7-7.
The CS pin must be driven high after the eighth or sixteenth bit of data that is clocked in. If this is not done the Write
Status Register instruction will not be executed. After CS is driven high, the self- timed Write Status Register cycle
commences for a time duration of tW (refer to Section , ).
While the Write Status Register cycle is in progress, the Read Status Register instruction may still be accessed to
check the status of the BUSY bit. The BUSY bit is a 1 during the Write Status Register cycle and a 0 when the
AT25QF641
DS-25QF641–127E–3/2018
19
�cycle is finished and ready to accept other instructions again. When the BUSY bit is asserted, the Write Enable Latch
(WEL) bit in Status Register will be cleared to 0.
Figure 7-6. Write Status Register Instruction (SPI Mode)
Figure 7-7. Write Status Register Instruction (QPI Mode)
7.7
Write Status Register-2 (31h)
The Write Status Register-2 instruction is to write only non-volatile Status Register-2 bits (CMP, QE and SRP1).
A Write Enable instruction must previously have been issued prior to setting Write Status Register Instruction (Status
Register bit WEL must equal 1). Once write is enabled, the instruction is entered by driving CS low, sending the
instruction code, and then writing the status register data byte as illustrated in Figure 7-8 and Figure 7-9.
Using Write Status Register-2 (31h) instruction, software can individually access each one-byte status registers via different
instructions.
AT25QF641
DS-25QF641–127E–3/2018
20
�Figure 7-8. Write Status Register-2 Instruction (SPI Mode)
Figure 7-9. Write Status Register-2 Instruction (QPI Mode)
7.8
Read Data (03h)
The Read Data instruction is to read data out from the device. The instruction is initiated by driving the CS pin low and then
sending the instruction code “03h” with following a 24-bit address (A23- A0) into the SI pin. After the address is received, the
data byte of the addressed memory location will be shifted out on the SO pin at the falling edge of SCK with most significant bit
(MSB) first. The address is automatically incremented to the next higher address after byte of data is shifted out allowing for a
continuous stream of data. This means that the entire memory can be accessed with a single instruction as long as the clock
continues. The instruction is completed by driving CS high. The Read Data instruction sequence is shown in Figure 7-10. If a
Read Data instruction is issued while an Erase, Program or Write Status Register cycle is in process (BUSY = 1) the instruction
is ignored and will not have any effects on the current cycle. The Read Data instruction allows clock rates from D.C to a
maximum of fR (see Section , ).
AT25QF641
DS-25QF641–127E–3/2018
21
�Figure 7-10. Read Data Instruction
7.9
Fast Read (0Bh)
The Fast Read instruction is high speed reading mode that it can operate at the highest possible frequency of fR. The address
is latched on the rising edge of the SCK. After the 24-bit address, this is accomplished by adding “dummy” clocks as shown in
Figure 7-11. The dummy clocks means the internal circuits require time to set up the initial address. During the dummy clocks,
the data value on the SO pin is a “don’t care”. Data of each bit shifts out on the falling edge of SCK.
Figure 7-11. Fast Read Instruction (SPI Mode)
7.10
Fast Read in QPI Mode
When QPI mode is enabled, the number of dummy clock is configured by the “Set Read Parameters (C0h)” instruction to
accommodate wide range applications with different needs for either maximum Fast Read frequency or minimum data
access latency. Depending on the Read Parameter Bit P[4] and P[5] setting, the number of dummy clocks can be
configured as either 4, or 6 or 8. The default number of dummy clocks upon power up or after a Reset instruction is 4.
(Please refer to Figure 7-12 and Figure 7-13).
AT25QF641
DS-25QF641–127E–3/2018
22
�Figure 7-12. Fast Read instruction (QPI Mode, 80MHz)
Figure 7-13. Fast Read instruction (QPI Mode, 104MHz)
7.11
Fast Read Dual Output (3Bh)
By using two pins (IO0 and IO1, instead of just IO0), The Fast Read Dual Output instruction allows data to be transferred from
the AT25QF641 at twice the rate of standard SPI devices. The Fast Read Dual Output instruction is ideal for quickly
downloading code from Flash to RAM upon power-up or for application that cache code-segments to RAM for execution.
The Fast Read Dual Output instruction can operate at the highest possible frequency of F R (see Section , ). After the 24-bit
address, this is accomplished by adding eight “dummy” clocks as shown in Figure 7-14. The dummy clocks allow the internal
circuits additional time for setting up the initial address. During the dummy clocks, the data value on the SO pin is a “don’t care”.
However, the IO0 pin should be high-impedance prior to the falling edge of the first data out clock.
AT25QF641
DS-25QF641–127E–3/2018
23
�Figure 7-14. Fast Read Dual Output instruction (SPI Mode)
7.12
Fast Read Quad Output (6Bh)
By using four pins (IO0, IO1, IO2, and IO3), The Fast Read Quad Output instruction allows data to be transferred from the
AT25QF641 at four times the rate of standard SPI devices. A Quad enable of Status Register-2 must be executed before
the device will accept the Fast Read Quad Output instruction (Status Register bit QE must equal 1).
The Fast Read Quad Output instruction can operate at the highest possible frequency of F R (see Section , ). This is
accomplished by adding eight “dummy” clocks after the 24- bit address as shown in Figure 7-15. The dummy clocks
allow the internal circuits additional time for setting up the initial address. During the dummy clocks, the data value on
the SO pin is a “don’t care”. However, the IO0 pin should be high-impedance prior to the falling edge of the first data out
clock.
AT25QF641
DS-25QF641–127E–3/2018
24
�Figure 7-15. Fast Read Quad Output instruction (SPI Mode)
7.13
Fast Read Dual I/O (BBh)
The Fast Read Dual I/O instruction reduces cycle overhead through double access using two IO pins: IO0 and IO1.
Continuous read mode
The Fast Read Dual I/O instruction can further reduce cycle overhead through setting the Mode bits (M7-0) after the
input Address bits (A23-0). The upper nibble of the Mode (M7-4) controls the length of the next Fast Read Dual I/O
instruction through the inclusion or exclusion of the first byte instruction code. The lower nibble bits of the Mode (M3-0)
are don’t care (“X”), However, the IO pins should be high-impedance prior to the falling edge of the first data out clock.
If the Mode bits (M7-0) equal “Ax” hex, then the next Fast Dual I/O instruction (after CS is raised and then lowered) does
not require the instruction (BBh) code, as shown in Figure 7-16 and Figure 7-17. This reduces the instruction sequence
by eight clocks and allows the address to be immediately entered after CS is asserted low. If Mode bits (M7-0) are
any value other “Ax” hex, the next instruction (after CS is raised and then lowered) requires the first byte instruction
code, thus returning to normal operation. A Mode Bit Reset can be used to reset Mode Bits (M7-0) before issuing
normal instructions.
AT25QF641
DS-25QF641–127E–3/2018
25
�Figure 7-16. Fast Read Dual I/O Instruction (initial instruction or previous M7-0 ≠ Axh)
Figure 7-17. Fast Read Dual I/O Instruction (previous M7-0= Axh)
AT25QF641
DS-25QF641–127E–3/2018
26
�7.14
Fast Read Quad I/O (EBh)
The Fast Read Quad I/O instruction reduces cycle overhead through quad access using four IO pins: IO0, IO1, IO2, and IO3.
The Quad Enable bit (QE) of Status Register-2 must be set to enable the Fast read Quad I/O Instruction.
Continuous read mode
The Fast Read Quad I/O instruction can further reduce instruction overhead through setting the Mode bits (M7-0) with
following the input Address bits (A23-0), as shown in Figure 7-18. The upper nibble of the Mode (M7-4) controls the
length of the next Fast Read Quad I/O instruction through the inclusion or exclusion of the first byte instruction code.
The lower nibble bits of the Mode (M3-0) are don’t care (“X”). However, the IO pins should be high-impedance prior to
the falling edge of the first data out clock.
If the Mode bits (M7-0) equal “Ax” hex, then the next Fast Read Quad I/O instruction (after CS is raised and then
lowered) does not require the EBh instruction code, as shown in Figure 7-19. This reduces the instruction sequence by
eight clocks and allows the address to be immediately entered after CS is asserted low. If the Mode bits (M7-0) are any
value other than “Ax” hex, the next instruction (after CS is raised and then lowered) requires the first byte instruction
code, thus retuning normal operation. A Mode Bit Reset can be used to reset Mode Bits (M7-0) before issuing normal
instructions.
Figure 7-18. Fast Read Quad I/O Instruction (Initial instruction or previous M7-0 ≠ Axh, SPI mode)
AT25QF641
DS-25QF641–127E–3/2018
27
�Figure 7-19. Fast Read Quad I/O Instruction (previous M7-0 = Axh, SPI mode)
Wrap Around in SPI Mode
The Fast Read Quad I/O instruction can also be used to access specific portion within a page by issuing a “Set Burst
with Wrap” (77h) instruction prior Fast Read Quad I/O (EBh) instruction. The “Set Burst with Wrap” (77h) instruction can
either enable or disable the “Wrap Around” feature for the following Fast Read Quad I/O instruction.
When “Wrap Around” is enabled, the data being accessed can be limited to an 8/16/32/64-byte section of a 256-byte
page. The output data starts at the initial address specified in the instruction, once it reaches the ending boundary of the
8/16/32/64-byte section, the output will wrap around to the beginning boundary automatically until CS is pulled high to
terminate the instruction.
The Burst with Wrap feature allows applications that use cache to quickly fetch a critical address and then fill the
cache afterwards within a fixed length (8/16/32/64-byte) of data without issuing multiple read instructions. (Please
refer to Section 7.31 Set Burst with Wrap).
Fast Read Quad I/O in QPI Mode
When QPI mode in enabled, the number of dummy clocks is configured by the “Set Read Parameters (C0h)” instruction
to accommodate a wide range applications with different needs for either maximum Fast Read frequency or minimum
data access latency. Depending on the Read Parameter Bits P [4] and P [5] setting, the number of dummy clocks can
be configured as either 4 or 6 or 8. The default number of dummy clocks upon power up or after a Reset (99h)
instruction is 4.
“Continuous Read Mode” feature is also available in QPI mode for Fast Read Quad I/O instruction. In QPI mode, the
“Continuous Read Mode” bits M7-0 are also considered as dummy clocks. In the default setting, the data output will
follow the Continuous Read Mode bits immediately.
“Wrap Around” feature is not available in QPI mode for Fast Read Quad I/O instruction. To perform a read operation with
fixed data length wrap around in QPI mode, a “Burst Read with Wrap” (0Ch) instruction must be used. (Please refer to
Section 7.32 Burst Read with Wrap).
AT25QF641
DS-25QF641–127E–3/2018
28
�Figure 7-20. Fast Read Quad I/O Instruction (Initial instruction or previous M7-0 ≠ Axh, QPI mode, 80MHz)
Figure 7-21. Fast Read Quad I/O Instruction (Initial instruction or previous M7-0 ≠ Axh, QPI mode, 104MHz)
7.15
Page Program (02h)
The Page Program instruction is for programming the memory to be “0”. A Write Enable instruction must be issued
before the device accept the Page Program Instruction (Status Register bit WEL=1). After the Write Enable (WREN)
instruction has been decoded, the device sets the Write Enable Latch (WEL). The instruction is entered by driving the
CS pin low and then sending the instruction code “02h” with following a 24-bits address (A23-A0) and at least one data
byte, into the SI pin. The CS pin must be driven low for the entire time of the instruction while data is being sent to the
device. (Please refer to Figure 7-22 and Figure 7-23).
If an entire 256 byte page is to be programmed, the last address byte (the 8 least significant address bits) should be set
to 0. If the last address byte is not zero, and the number of clocks exceeds the remaining page length, the addressing
will wrap to the beginning of the page. In some cases, less than 256 bytes (a partial page) can be programmed without
having any effect on other bytes within the same page. One condition to perform a partial page program is that the
AT25QF641
DS-25QF641–127E–3/2018
29
�number of clocks cannot exceed the remaining page length. If more than 256 bytes are sent to the device the addressing
will wrap to the beginning of the page and overwrite previously sent data
The CS pin must be driven high after the eighth bit of the last byte has been latched. If this is not done the Page
Program instruction will not be executed. After CS is driven high, the self-timed Page Program instruction will
commence for a time duration of tPP (See AC Characteristics). While the Page Program cycle is in progress, the Read
Status Register instruction may still be accessed for checking the status of the BUSY bit. The BUSY bit is a 1 during the
Page Program cycle and becomes a 0 when the cycle is finished and the device is ready to accept other instructions
again. When the BUSY bit is asserted, the Write Enable Latch (WEL) bit in the Status Register is cleared to 0. The Page
Program instruction will not be executed if the addressed page is protected by the Protect (CMP, SEC, TB, BP2, BP1 and
BP0) bits.
Figure 7-22. Page Program Instruction (SPI Mode)
Figure 7-23. Page Program Instruction (QPI Mode)
AT25QF641
DS-25QF641–127E–3/2018
30
�7.16
Quad Page Program (33h)
The Quad Page Program instruction is to program the memory as being “0” at previously erased memory areas. The Quad
Page Program takes four pins: IO0, IO1, IO2 and IO3 as address and data input, which can improve programmer performance
and the effectiveness of application of lower clock less than 5MHz. System using faster clock speed will not get more benefit for
the Quad Page Program as the required internal page program time is far more than the time data clock-in.
To use Quad Page Program, the Quad Enable bit must be set, A Write Enable instruction must be executed before the
device will accept the Quad Page Program instruction (Status Register-1, WEL=1). The instruction is initiated by driving
the CS pin low then sending the instruction code “33h” with following a 24-bit address (A23-A0) and at least one data,
into the IO pins. The CS pin must be held low for the entire length of the instruction while data is being sent to the device.
All other functions of Quad Page Program are perfectly same as standard Page Program. (Please refer to Figure 724 and Figure 7-25).
Figure 7-24. Quad Page Program Instruction (SPI mode)
AT25QF641
DS-25QF641–127E–3/2018
31
�Figure 7-25. Quad Page Program Instruction (QPI mode)
7.17
Block Erase (20h)
The Block Erase instruction is to erase the data of the selected sector as being “1”. The instruction is used for 4K-byte
Block. Prior to the Block Erase Instruction, the Write Enable instruction must be issued. The instruction is initiated by
driving the CS pin low and shifting the instruction code “20h” followed a 24-bit Block address (A23-A0). (Please refer to
Figure 7-26 and Figure 7-27). The CS pin must go high after the eighth bit of the last byte has been latched in,
otherwise, the Block Erase instruction will not be executed. After CS goes high, the self-timed Block Erase instruction will
commence for a time duration of tSE (See Section , ).
While the Block Erase cycle is in progress, the Read Status Register instruction may still be accessed for checking the
status of the BUSY bit. The BUSY bit is a 1 during the Block Erase cycle and becomes a 0 when the cycle is finished
and the device is ready to accept other instructions again. When the BUSY bit is asserted, the Write Enable Latch (WEL)
bit in the Status Register is cleared to 0. The Block Erase instruction will not be executed if the addressed page is
protected by the Protect (CMP, SEC, TB, BP2, BP1 and BP0) bits.
Figure 7-26. Block Erase Instruction (SPI Mode)
AT25QF641
DS-25QF641–127E–3/2018
32
�Figure 7-27. Block Erase Instruction (QPI Mode)
7.18
32KB Block Erase (52h)
The Block Erase instruction is to erase the data of the selected block as being “1”. The instruction is used for 32K-byte
Block erase operation. Prior to the Block Erase Instruction, a Write Enable instruction must be issued. The instruction is
initiated by driving the CS pin low and shifting the instruction code “52h” followed a 24-bit block address (A23-A0).
(Please refer to Figure 7-28 and Figure 7-29). The CS pin must go high after the eighth bit of the last byte has been
latched in, otherwise, the Block Erase instruction will not be executed. After CS is driven high, the self-timed Block Erase
instruction will commence for a time duration of tBE1 (See Section , ).
While the Block Erase cycle is in progress, the Read Status Register instruction may still be read the status of the
BUSY bit. The BUSY bit is a 1 during the Block Erase cycle and becomes a 0 when the cycle is finished and the
device is ready to accept other instructions again. When the BUSY bit is asserted, the Write Enable Latch (WEL) bit in
the Status Register is cleared to 0. The Block erase instruction will not be executed if the addressed page is protected
by the Protect (CMP, SEC, TB, BP2, BP1 and BP0) bits.
Figure 7-28. 32KB Block Erase Instruction (SPI Mode)
AT25QF641
DS-25QF641–127E–3/2018
33
�Figure 7-29. 32KB Block Erase Instruction (QPI Mode)
7.19
64KB Block Erase (D8h)
The Block Erase instruction is to erase the data of the selected block as being “1”. The instruction is used for 64K-byte
Block erase operation. Prior to the Block Erase Instruction, a Write Enable instruction must be issued. The instruction is
initiated by driving the CS pin low and shifting the instruction code “D8h” followed a 24-bit block address (A23-A0).
(Please refer to Figure 7-30 and Figure 7-31). The CS pin must go high after the eighth bit of the last byte has been
latched in, otherwise, the Block Erase instruction will not be executed. After CS is driven high, the self-timed Block Erase
instruction will commence for a time duration of tBE2 (See Section , ).
While the Block Erase cycle is in progress, the Read Status Register instruction may still be read the status of the
BUSY bit. The BUSY bit is a 1 during the Block Erase cycle and becomes a 0 when the cycle is finished and the
device is ready to accept other instructions again. When the BUSY bit is asserted, the Write Enable Latch (WEL) bit in
the Status Register is cleared to 0. The Block erase instruction will not be executed if the addressed page is protected
by the Protect (CMP, SEC, TB, BP2, BP1 and BP0) bits.
Figure 7-30. 64KB Block Erase Instruction (SPI Mode)
AT25QF641
DS-25QF641–127E–3/2018
34
�Figure 7-31. 64KB Block Erase Instruction (QPI Mode)
7.20
Chip Erase (C7h / 60h)
The Chip Erase instruction clears all bits in the device to be FFh (all 1s). Prior to the Chip Erase Instruction, a Write
Enable instruction must be issued. The instruction is initiated by driving the CS pin low and shifting the instruction code
“C7h” or “60h”. (Please refer to Figure 7-32). The CS pin must go high after the eighth bit of the last byte has been
latched in, otherwise, the Chip Erase instruction will not be executed. After CS is driven high, the self-timed Chip Erase
instruction will commence for a duration of tCE (See Section , ).
While the Chip Erase cycle is in progress, the Read Status Register instruction may still be accessed to check the status
of the BUSY bit. The BUSY bit is a 1 during the Chip Erase cycle and becomes a 0 when the cycle is finished and the
device is ready to accept other instructions again. When the BUSY bit is asserted, the Write Enable Latch (W EL) bit in
the Status Register is cleared to 0. The Chip erase instruction will not be executed if any page is protected by the Protect
(CMP, SEC, TB, BP2, BP1 and BP0) bits.
Figure 7-32. Chip Erase Instruction for SPI Mode (left) and QPI Mode (right)
AT25QF641
DS-25QF641–127E–3/2018
35
�7.21
Erase / Program Suspend (75h)
The Erase/Program Suspend instruction allows the system to interrupt a Block Erase operation or a Page Program,
Quad Data Input Page Program, Quad Page Program operation.
Erase Suspend is valid only during the Block erase operation. The Write Status Register-1 (01h), Write Status Register2 (31h) instruction and Erase instructions (20h, 52h, D8h, C7h, 60h) are not allowed during Erase Suspend. During the
Chip Erase operation, the Erase Suspend instruction is ignored.
Program Suspend is valid only during the Page Program, Quad Data Input Page Program or Quad Page Program
operation. The Write Status Register-1(01h), Write Status Register-2 (31h) instruction and Program instructions (02h
and 33h) and Erase instructions (20h, 52h, D8h, C7h and 60h) are not allowed during Program Suspend.
The Erase/Program Suspend instruction “75h” will be accepted by the device only if the SUS bit in the Status Register
equals to 0 and the BUSY bit equals to 1 while a Block Erase or a Page Program operation is on-going. If the SUS bit
equals to 1 or the BUSY bit equals to 0, the Suspend instruction will be ignored by the device. A maximum of time of
“tSUS” (See AC Characteristics) is required to suspend the erase or program operation. After Erase/Program Suspend,
the SUS bit in the Status Register will be set from 0 to 1 immediately and The BUSY bit in the Status Register will be
cleared from 1 to 0 within “tSUS”. For a previously resumed Erase/Program operation, it is also required that the
Suspend instruction “75h” is not issued earlier than a minimum of time of “tSUS” following the preceding Resume
instruction “7Ah”.
Unexpected power off during the Erase/Program suspend state will reset the device and release the suspend state.
SUS bit in the Status Register will also reset to 0. The data within the page or block that was being suspended may
become corrupted. It is recommended for the user to implement system design techniques against the accidental
power interruption and preserve data integrity during erase/program suspend state. (Please refer to Figure 7-33 and
Figure 7-34).
Figure 7-33. Erase Suspend instruction (SPI Mode)
AT25QF641
DS-25QF641–127E–3/2018
36
�Figure 7-34. Erase Suspend instruction (QPI Mode)
7.22
Erase / Program Resume (7Ah)
The Erase/Program Resume instruction “7Ah” is to re-work the Block Erase operation or the Page Program operation
upon an Erase/Program Suspend. The Resume instruction “7Ah” will be accepted by the device only if the SUS bit in
the Status Register equals to 1 and the BUSYbit equals to 0. After issued, the SUS bit will be cleared from 1 to 0
immediately, the BUSY bit will be set from 0 to 1 within 200ns and the Block will complete the erase operation or the
page will complete the program operation. If the SUS bit equals to 0 or the BUSY bit equals to 1, the Resume
instruction “7Ah” will be ignored by the device.
Resume instruction cannot be accepted if the previous Erase/Program Suspend operation was interrupted by
unexpected power off. It is also required that a subsequent Erase/Program Suspend instruction not to be issued within a
minimum of time of “tSUS” following a previous Resume instruction. (Please refer to Figure 7-35 and Figure 7-36).
Figure 7-35. Erase / Program Resume instruction (SPI Mode)
AT25QF641
DS-25QF641–127E–3/2018
37
�Figure 7-36. Erase / Program Resume instruction (QPI Mode)
7.23
Deep Power Down (B9h)
Executing the Deep Power Down instruction is the best way to put the device in the lowest power consumption. The
Deep Power Down instruction reduces the standby current (from ICC1 to ICC2, as specified in Section , ). The
instruction is entered by driving the CS pin low with following the instruction code “B9h”. (Please refer to Figure 7-37 and
Figure 7-38).
The CS pin must go high exactly at the byte boundary (the latest eighth bit of instruction code been latched-in);
otherwise, the Deep Power Down instruction is not executed. After CS goes high, it requires a delay of tDP and the Deep
Power Down mode is entered. While in the Release Deep Power Down / Device ID instruction, which restores the device
to normal operation, will be recognized. All other instructions are ignored including the Read Status Register instruction,
which is always available during normal operation. Deep Power Down Mode automatically stops at Power-Down, and the
device always Power-up in the Standby Mode.
Figure 7-37. Deep Power Down Instruction (SPI Mode)
AT25QF641
DS-25QF641–127E–3/2018
38
�Figure 7-38. Deep Power Down Instruction (QPI Mode)
7.24
Release Deep Power Down / Device ID (ABh)
The Release Deep Power Down / Device ID instruction is a multi-purpose instruction. It can be used to release the
device from the Deep Power Down state or obtain the device identification (ID).
The instruction is issued by driving the CS pin low, sending the instruction code “ABh” and driving CS high as shown in
figure Figure 7-39 and Figure 7-40. Release from Deep Power Down require the time duration of tRES1 (See AC
Characteristics) for re-work a normal operation and accepting other instructions. The CS pin must keep high during the
tRES1 time duration.
The Device ID can be read during SPI mode only. In other words, Device ID feature is not available in QPI mode for Release
Deep Power Down/Device ID instruction. To obtain the Device ID in SPI mode, instruction is initiated by driving the CS pin
low and sending the instruction code “ABh” with following 3-dummy bytes. The Device ID bits are then shifted on the
falling edge of SCK with most significant bit (MSB) first as shown in Figure 7-41. After CS is driven high it must keep
high for a time duration of tRES2 (See Section , ). The Device ID can be read continuously. The instruction is completed
by driving CS high.
If the Release from Deep Power Down /Device ID instruction is issued while an Erase, Program or Write cycle is in process
(when BUSY equals 1) the instruction is ignored and will not have any effects on the current cycle.
Figure 7-39. Release Power Down Instruction (SPI Mode)
AT25QF641
DS-25QF641–127E–3/2018
39
�Figure 7-40. Release Power Down Instruction (QPI Mode)
Figure 7-41. Release Power Down / Device ID Instruction (SPI Mode)
7.25
Read Manufacturer / Device ID Dual I/O (90h)
The Read Manufacturer/ Device ID Dual I/O instruction provides both the JEDEC assigned manufacturer ID and the
specific device ID.
The Read Manufacturer/ Device ID instruction is very similar to the Fast Read Dual I/O instruction. The instruction is
initiated by driving the CS pin low and shifting the instruction code “90h” followed by a 24-bit address (A23-A0) of
000000h. After which, the Manufacturer ID for Adesto (1Fh) and the Device ID (17h) are shifted out on the falling edge of
SCK with most significant bit (MSB) first as shown in Figure 7-42 and Figure 7-43. If the 24-bit address is initially set to
000001h the Device ID will be read first and then followed by the Manufacturer ID. The Manufacturer and Device ID can
be read continuously, alternating from one to the other. The instruction is completed by driving CS high.
AT25QF641
DS-25QF641–127E–3/2018
40
�Figure 7-42. Read Manufacturer/ Device ID instruction (SPI Mode)
Figure 7-43. Read Manufacturer/ Device ID instruction (QPI Mode)
7.26
Read Manufacturer / Device ID Dual I/O (92h)
The Read Manufacturer/ Device ID Dual I/O instruction provides both the JEDEC assigned manufacturer ID and the
specific device ID.
The Read Manufacturer/ Device ID instruction is very similar to the Fast Read Dual I/O instruction. The instruction is
initiated by driving the CS pin low and shifting the instruction code “92h” followed by a 24-bit address (A23-A0) of
000000h. After which, the Manufacturer ID for Adesto (1Fh) and the Device ID (17h) are shifted out on the falling edge of
AT25QF641
DS-25QF641–127E–3/2018
41
�SCK with most significant bit (MSB) first as shown in Figure 7-44. If the 24-bit address is initially set to 000001h the
Device ID will be read first and then followed by the Manufacturer ID. The Manufacturer and Device ID can be read
continuously, alternating from one to the other. The instruction is completed by driving CS high.
Figure 7-44. Read Dual Manufacturer/ Device ID Dual I/O instruction (SPI Mode)
7.27
Read Manufacturer / Device ID Quad I/O (94h)
The Read Manufacturer/ Device ID Quad I/O instruction provides both the JEDEC assigned manufacturer ID and the
specific device ID.
The Read Manufacturer/ Device ID instruction is very similar to the Fast Read Quad I/O instruction. The instruction is
initiated by driving the CS pin low and shifting the instruction code “94h” followed by a 24-bit address (A23-A0) of
000000h. After which, the Manufacturer ID for Adesto (1Fh) and the Device ID(17h) are shifted out on the falling edge of
SCK with most significant bit (MSB) first as shown in Figure 7-45. If the 24-bit address is initially set to 000001h the
Device ID will be read first and then followed by the Manufacturer ID. The Manufacturer and Device ID can be read
continuously, alternating from one to the other. The instruction is completed by driving CS high.
AT25QF641
DS-25QF641–127E–3/2018
42
�Figure 7-45. Read Quad Manufacturer/ Device ID Quad I/O instruction (SPI Mode)
JEDEC ID (9Fh)
For compatibility reasons, the AT25QF641 provides several instructions to electronically determine the identity of the
device. The Read JEDEC ID instruction is congruous with the JEDEC standard for SPI compatible serial flash memories
that was adopted in 2003. The instruction is entered by driving the CS pin low with following the instruction code “9Fh”.
JEDEC assigned Manufacturer ID byte for Adesto (1Fh) and two Device ID bytes, Memory Type (ID-15-ID8) and
Capacity (ID7-ID0) are then shifted out on the falling edge of SCK with most significant bit (MSB) first shown in Figure
7-46 and Figure 7-47. For memory type and capacity values refer to Manufacturer and Device Identification table. The
JEDEC ID can be read continuously. The instruction is terminated by driving CS high.
AT25QF641
DS-25QF641–127E–3/2018
43
�Figure 7-46. Read JEDEC ID instruction (SPI Mode)
Figure 7-47. Read JEDEC ID instruction (QPI Mode)
7.28
Enable QPI (38h)
The AT25QF641 support both Standard/Dual/Quad Serial Peripheral interface (SPI) and Quad Peripheral Interface
(QPI). However, SPI mode and QPI mode cannot be used at the same time. Enable QPI instruction is the only way to
switch the device from SPI mode to QPI mode.
AT25QF641
DS-25QF641–127E–3/2018
44
�In order to switch the device to QPI mode, the Quad Enable (QE) bit in Status Register 2 must be set to 1 first, and an
Enable QPI instruction must be issued. If the Quad Enable (QE) bit is 0, the Enable QPI instruction will be ignored and
the device will remain in SPI mode.
After power-up, the default state of the device is SPI mode. See the instruction Set Table 7-2 for all the commands
supported in SPI mode and the instruction Set Table 7-5 for all the instructions supported in QPI mode.
When the device is switched from SPI mode to QPI mode, the existing Write Enable and Program/Erase Suspend status,
and the Wrap Length setting will remain unchanged.
Figure 7-48. Enable QPI instruction (SPI Mode only)
7.29
Disable QPI (FFh)
By issuing Disable QPI (FFh) instruction, the device is reset SPI mode. When the device is switched from QPI mode to
SPI mode, the existing Write Enable Latch (WEL) and Program/Erase Suspend status, and the Wrap Length setting
remains unchanged.
Figure 7-49. Disable QPI instruction for QPI mode
AT25QF641
DS-25QF641–127E–3/2018
45
�7.30
Word Read Quad I/O (E7h)
The Quad I/O dramatically reduces instruction overhead allowing faster random access for code execution (XIP) directly
from the Quad SPI. The Quad Enable bit (QE) of Status Register-2 must be set to enable the Word Read Quad I/O
instruction. The lowest Address bit (A0) must equal 0 and only two dummy clocks are required prior to the data output.
Continuous Read Mode
The Word Read Quad I/O instruction can further reduce instruction overhead through setting the “Continuous Read
Mode” bits (M7-0) after the input Address bits (A23-0), as shown in Figure 7-50. The upper nibble of the (M7-4)
controls the length of the next Word Read Quad I/O instruction through the inclusion or exclusion of the first byte
instruction code. The lower nibble bits of the (M[3:0]) are don’t care (“X”). However, the IO pins should be highimpedance prior to the falling edge of the first data out clock.
If the “Continuous Read Mode” bits M[7-4]= Ah, then the next Fast Read Quad I/O instruction (after CS is raised and then
lowered) does not require the E7h instruction code, as shown in Figure 7-51. This reduces the instruction sequence by
eight clocks and allows the Read address to be immediately entered after CS is asserted low. If the “Continuous Read
Mode” bits M[7:4] do not equal to Ah (1,0,1,0) the next instruction (after CS is raised and then lowered) requires the
first byte instruction code, thus returning to normal operation.
Figure 7-50. Word Read Quad I/O instruction (Initial instruction or previous set M7-0 ≠ Axh, SPI Mode)
Figure 7-51. Word Read Quad I/O instruction (Previous instruction set M7-0= Axh, SPI Mode)
AT25QF641
DS-25QF641–127E–3/2018
46
�Wrap Around in SPI mode
The Word Read Quad I/O instruction can also be used to access a specific portion within a page by issuing a “Set
Burst with Wrap” (77h) instruction prior to E7h. The “Set Burst with Wrap” (77h) instruction can either enable or disable
the “Wrap Around” feature for the following E7h commands. When “Wrap Around” is enabled, the output data starts at
the initial address specified in the instruction, once it reaches the ending boundary of the 8/16/32/64-byte section,
the output will wrap around to the beginning boundary automatically until CS is pulled high to terminate the instruction.
The Burst with Wrap feature allows applications that use cache to quickly fetch a critical address and then fill the cache
afterwards within a fixed length (8/16/32/64-byte) of data without issuing read instructions.
The “Set Burst with Wrap” instruction allows three “Wrap Bits”, W6-4 to be set. The W4 bit is used to enable or disable
the “Wrap Around” operation while W6-5 is used to specify the length of the wrap around section within a page.
7.31
Set Burst with Wrap (77h)
The Set Burst with Wrap (77h) instruction is used in conjunction with “Fast Read Quad I/O” and “Word Read Quad
I/O” instructions to access a fixed length of 8/16/32/64-byte section within a 256-byte page. Certain applications can
benefit from this feature and improve the overall system code execution performance. Before the device will accept the
Set Burst with Wrap instruction, a Quad enable of Status Register-2 must be executed (Status Register bit QE must
equal 1).
The Set Burst with Wrap instruction is initiated by driving the CS pin low and then shifting the instruction code “77h”
followed by 24 dummy bits and 8 “Wrap Bits”, W7-0. The instruction sequence is shown in Set Burst with Wrap
Instruction Sequence. Wrap bit W7 and W3-0 are not used.
Table 7-6.
Set Burst with Wrap W6:W4 Encoding
W6, W5
W4 = 0
W4 = 1(Default)
Wrap Around
Wrap Length
Wrap Around
Wrap Length
00
Yes
8-byte
No
N/A
01
Yes
16-byte
No
N/A
10
Yes
32-byte
No
N/A
11
Yes
64-byte
No
N/A
Once W6-4 is set by a Set Burst with Wrap instruction, all the following “Fast Read Quad I/O” and Word Read Quad I/O
instructions will use the W6-4 setting to access the 8/16/32/64-byte section within any page. To exit the “Wrap Around” function
and return to normal read operation, another Set Burst with Wrap instruction should be issued to set W4 = 1. The default
value of W4 upon power on is 1. In the case of a system Reset while W4 = 0, it is recommended that the controller issues a
Set Burst with Wrap instruction or Reset (99h) instruction to reset W4 = 1 prior to any normal Read instructions since
AT25QF641 does not have a hardware Reset Pin.
AT25QF641
DS-25QF641–127E–3/2018
47
�Figure 7-52. Set Burst with Wrap Instruction Sequence
7.32
Burst Read with Wrap (0Ch)
The “Burst Read with Wrap (0Ch)” instruction provides an alternative way to perform the read operation with “Wrap
Around” in QPI mode. The instruction is similar to the “Fast Read (0Bh)” instruction in QPI mode, except the
addressing of the read operation will “Wrap Around” to the beginning boundary of the “Wrap Length” once the ending
boundary is reached.
The “Wrap Length” and the number of dummy of clocks can be configured by the “Set Read Parameters (C0h)”
instruction.
Figure 7-53. Burst Read with Wrap instruction (QPI Mode, 80MHz)
AT25QF641
DS-25QF641–127E–3/2018
48
�Figure 7-54. Burst Read with Wrap instruction (QPI Mode, 104MHz)
7.33
Set Read Parameters (C0h)
In QPI mode, to accommodate a wide range of applications with different needs for either maximum read
frequency or minimum data access latency, “Set Read Parameters (C0h)” instruction can be used to configure
the number of dummy clocks for “Fast Read (0Bh)”, “Fast Read Quad I/O (EBh)” & “Burst Read with Wrap (0Ch)”
instructions, and to configure the number of bytes of “Wrap Length” for the “Burst Read with Wrap (0Ch)” instruction.
In Standard SPI mode, the “Set Read Parameters (C0h)” instruction is not accepted. The dummy clocks for various Fast
Read instructions in Standard/Dual/Quad SPI mode are fixed, please refer to the instruction. and for details Table 7-2,
Table 7-3, Table 7-4, and Table 7-5. The “Wrap Length” is set by W6-5 bit in the “Set Burst with Wrap (77h)” instruction.
This setting will remain unchanged when the device is switched from Standard SPI mode to QPI mode.
The default “Wrap Length” after a power up or a Reset instruction is 8 bytes, the default number of dummy clocks is 4.
Table 7-7.
Dummy Clock Encoding
P5, P4
Dummy
Clocks
Maximum
Read Freq.
00
4
80MHz
01
4
80MHz
10
6
104MHz
Table 7-8.
Wrap Length Encoding
P1, P0
Wrap Length
00
8-bytes
01
16-bytes
10
32-bytes
11
64-bytes
AT25QF641
DS-25QF641–127E–3/2018
49
�Figure 7-55. Set Read Parameters instruction (QPI Mode)
7.34
Enable Reset (66h) and Reset (99h)
Because of the small package and the limitation on the number of pins, the AT25QF641 provide a software Reset
instruction instead of a dedicated RESET pin.
Once the Reset instruction is accepted, any on-going internal operations will be terminated and the device will return to
its default power-on state and lose all the current volatile settings, such as Volatile Status Register bits, Write Enable
Latch (WEL) status, Program/Erase Suspend status, Continuous Read Mode bit setting, Read parameter setting and
Wrap bit setting.
“Enable Reset (66h)” and “Reset (99h)” instructions can be issued in either SPI mode or QPI mode. To avoid accidental
reset, both instructions must be issued in sequence. Any other instructions other than “Reset (99h)” after the “Enable
(66h)” instruction will disable the “Reset Enable” state. A new sequence of “Enable Reset (66h)” and “Reset (99h)” is
needed to reset the device. Once the Reset instruction is accepted by the device will take approximately tRST= 30us
to reset. During this period, no instruction will be accepted.
Data corruption may happen if there is an on-going or suspended internal Erase or Program operation when Reset
instruction sequence is accepted by device. It is recommended to check the BUSY bit and the SUS bit in Status Register
before issuing the Reset instruction sequence.
Figure 7-56. Enable Reset and Reset Instruction (SPI Mode)
AT25QF641
DS-25QF641–127E–3/2018
50
�Figure 7-57. Enable Reset and Reset Instruction (QPI Mode)
7.35
Read Serial Flash Discovery Parameter (5Ah)
The Read Serial Flash Discovery Parameter (SFDP) instruction allows reading the Serial Flash Discovery Parameter
area (SFDP). This SFDP area is composed of 2048 read-only bytes containing operating characteristics and vendor
specific information. The SFDP area is factory programmed. If the SFDP area is blank, the device is shipped with all the
SFDP bytes at FFh. If only a portion of the SFDP area is written to, the portion not used is shipped with bytes in erased
state (FFh). The instruction sequence for the read SFDP has the same structure as that of a Fast Read instruction. First,
the device is selected by driving Chip Select (CS) Low. Next, the 8-bit instruction code (5Ah) and the 24-bit address
are shifted in, followed by 8 dummy clock cycles. The bytes of SFDP content are shifted out on the Serial Data Output
(SO) starting from the specified address. Each bit is shifted out during the falling edge of Serial Clock (SCK). The
instruction sequence is shown here. The Read SFDP instruction is terminated by driving Chip Select (CS) High at any
time during data output.
AT25QF641
DS-25QF641–127E–3/2018
51
�Figure 7-58. Read SFDP Register Instruction
Table 7-9.
SFDP Signature and Headers
Description
Comment
SFDP Signature
Address
(h) Byte
Address
(Bit)
Data (b)
(Bit)
Data (h)
(Byte)
00h
07:00
0101 0011
53h
01h
15:08
0100 0110
46h
02h
23:16
0100 0100
44h
03h
31:24
0101 0110
50h
SFDP Minor Revision
Start from 00h
04h
07:00
0000 0110
06h
SFDP Major Revision
Start from 01h
05h
15:08
0000 0001
01h
Number of Parameters
Headers
Start from 00h
06h
23:16
0000 0001
01h
Reserved
FFh
07h
31:24
1111 1111
FFh
JEDEC Parameter ID (LSB)
JEDEC Parameter ID
(LSB) = 00H
08h
07:00
0000 0000
00h
Parameter Table Minor
Revision
Start from 00H
09h
15:08
0000 0110
06h
Parameter Table Major
Revision
Start from 01H
0Ah
23:16
0000 0001
01h
0Bh
31:24
0001 0000
10h
Parameter Table Length
(double words)
How many DWORDs in
the parameter table
AT25QF641
DS-25QF641–127E–3/2018
52
�Table 7-9.
SFDP Signature and Headers
Description
Comment
Parameter Table Pointer
Address of Adesto
Parameter Table
Address
(h) Byte
Address
(Bit)
Data (b)
(Bit)
Data (h)
(Byte)
0Ch
07:00
0011 0000
30h
0Dh
15:08
0000 0000
00h
0Eh
23:16
0000 0000
00h
JEDEC Parameter ID (MSB)
JEDEC Parameter ID
(MSB):FFH
0Fh
31:24
1111 1111
FFh
JEDEC Parameter ID (LSB)
Adesto Manufacturer ID
10h
07:00
0001 1111
1Fh
Parameter Table Minor
Revision
Start from 00H
11h
15:08
0000 0000
00h
Parameter Table Major
Revision
Start from 01H
12h
23:16
0000 0001
01h
13h
31:24
0000 0010
02h
14h
07:00
1000 0000
80h
15h
15:08
0000 0000
00h
16h
23:16
0000 0000
00h
17h
31:24
0000 0001
01h
Parameter Table Length
(double words)
Parameter Table Pointer
(PTP)
How many DWORDs in
the parameter table
Address of Adesto
Parameter Table
Reserved
FFh
Table 7-10. SFDP Parameters Table 1
Description
Comment
Address
(h) Byte
Address
(Bit)
Data (b)
(Bit)
Data (h)
(Byte)
Erase Granularity
01:4KB available
30h
01:00
01
E5h
11:4KB not available
Write Granularity
0:1Byte, 1:64 bytes or larger
02
1
Volatile Status Register Block
Protect Bits
0: Nonvolatile status bit
03
0
Volatile Status Register Write
Enable Opcode
0:50H Opcode to enable,
if bit-3 = 1
04
0
07:05
111
15:08
0010 0000
1: Volatile status bit
Reserved
4KB Erase Opccde
Opcode or FFh
31h
20h
AT25QF641
DS-25QF641–127E–3/2018
53
�Description
Comment
Address
(h) Byte
Address
(Bit)
Data (b)
(Bit)
Data (h)
(Byte)
Fast Dual Read Output
(1 -1 -2)
0=Not supported, 1=Supported
32h
16
1
F1h
18:17
00
Number of Address Bytes
00:3 Byte only
01:3 or 4 Byte
10:4 Byte only
11:Reserved
Double Transfer Rate (DTR)
Clocking
0=Not supported, 1=Supported
19
0
Fast Dual I/O Read
(1-2- 2)
0=Not supported, 1=Supported
20
1
Fast Quad I/O Read
(1-4-4)
0=Not supported, 1=Supported
21
1
Fast Quad Output Read
(1-1-4)
0=Not supported, 1=Supported
22
1
FFh
23
1
33h
31:24
1111 1111
FFh
34h
07:00
1111 1111
FFh
35h
15:08
1111 1111
FFh
36h
23:16
1111 1111
FFh
37h
31:24
0000 0011
03h
38h
04:00
00100
44h
07:05
010
Reserved
Reserved
FFh
Flash Memory Density
Fast Quad I/O (1-4-4)
Number of dummy clocks
number of dummy clocks
Fast Quad I/O (1-4-4)
Number of mode bits
number of mode bits
Fast Quad I/O (1-4-4)
Opcode or FFh
39h
15:08
1110 1011
EBh
Fast Quad Output (1-1-4)
Number of dummy clocks
number of dummy clocks
3Ah
20:16
01000
08h
Fast Quad Output (1-1-4)
Number of mode bits
number of mode bits
23:21
000
Fast Quad Output (1-1-4)
Opcode or FFh
3Bh
31:24
0110 1011
6Bh
Fast Dual Output (1-1-2)
Number of dummy clocks
number of dummy clocks
3Ch
04:00
01000
08h
Fast Dual Output (1-1-2)
Number of mode bits
number of mode bits
07:05
000
Fast Dual Output (1-1-2)
Opcode or FFh
15:08
0011 1011
Read Opcode
Read Opcode
3Dh
3Bh
Read Opcode
AT25QF641
DS-25QF641–127E–3/2018
54
�Description
Comment
Address
(h) Byte
Address
(Bit)
Data (b)
(Bit)
Data (h)
(Byte)
Fast Dual I/O (1-2-2)
Number of dummy clocks
number of dummy clocks
3Eh
20:16
00000
80h
Fast Dual I/O (1-2-2)
Number of mode bits
number of mode bits
23:21
100
Fast Dual I/O (1-2-2)
Opcode or FFh
3Fh
31:24
1011 1011
BBh
Fast Dual DPI (2-2-2)
0=Not supported, 1=Supported
40h
0
0
FEh
Reserved
FFh
03:01
111
Fast Quad QPI (4-4-4)
0=Not supported, 1=Supported
04
1
Reserved
FFh
07:05
111
Reserved
FFh
41h
15:08
1111 1111
FFh
Reserved
FFh
42h
23:16
1111 1111
FFh
Reserved
FFh
43h
31:24
1111 1111
FFh
Reserved
FFh
44h
07:00
1111 1111
FFh
Reserved
FFh
45h
15:08
1111 1111
FFh
Fast Dual DPI (2-2-2)
Number of dummy clocks
number of dummy clocks
46h
20:16
0 0000
00h
Fast Dual DPI (2-2-2)
Number of mode bits
number of mode bits
23:21
000
Fast Dual DPI(2-2-2)
Opcode or FFh
47h
31:24
1111 1111
FFh
Reserved
FFh
48h
07:00
1111 1111
FFh
Reserved
FFh
49h
15:08
1111 1111
FFh
Fast Quad QPI (4-4-4)
Number of dummy clocks
number of dummy clocks
4Ah
20:16
00010
42h
Fast Quadl QPI (4-4-4)
Number of mode bits
number of mode bits
23:21
010
Fast Quad QPI(4-4-4)
Opcode or FFh
4Bh
31:24
1110 1011
EBh
4KB=2^0Ch,
32KB=2^0Fh,64KB=2^10h;
(2^Nbyte)
4Ch
07:00
0000 1100
0Ch
Opcode or FFh
4Dh
15:08
0010 0000
20h
4KB=2^0Ch,
32KB=2^0Fh,64KB=2^10h;
(2^Nbyte)
4Eh
23:16
0000 1111
0Fh
Opcode or FFh
4Fh
31:24
0101 0010
52h
Read Opcode
Read Opcode
Read Opcode
Erase type-1 Size
Erase type-1 Opcode
Erase type-2 Size
Erase type-2 Opcode
AT25QF641
DS-25QF641–127E–3/2018
55
�Address
(h) Byte
Address
(Bit)
Data (b)
(Bit)
Data (h)
(Byte)
4KB=2^0Ch,
32KB=2^0Fh,64KB=2^10h;
(2^Nbyte)
50h
07:00
0001 0000
10h
Opcode or FFh
51h
15:08
1101 1000
D8h
4KB=2^0Ch,
32KB=2^0Fh,64KB=2^10h;
(2^Nbyte)
52h
23:16
0000 0000
00h
Erase Type-4 Opcode
Opcode or FFh
53h
31:24
1111 1111
FFh
Erase Maximum/Typical
Ratio
Maximum = 2 * (COUNT + 1) *
Typical
54h
03:00
0011
33h
Erase type-1 Typical time
Count or 00h
56h
08:04
0 0011
C9h
00b: 1ms
57h
10:09
01
00h
Description
Erase Type-3 Size
Erase Type-3 Opcode
Erase Type-4 Size
Erase type-1 Typical units
Comment
55h
62h
01b: 16ms
10b: 128ms
11b: 1s
Erase type-2 Typical time
Count or 00h
15:11
0110 0
Erase type-2 Typical units
00b: 1ms
17:16
01
01b: 16ms
10b: 128ms
11b: 1s
Erase type-3 Typical time
Count or 00h
22:18
100 10
Erase type-3 Typical units
00b: 1ms
24:23
01
Count or 00h
29:25
00 000
00b: 1ms
31:30
00
03:00
0100
07:04
1000
01b: 16ms
10b: 128ms
11b: 1s
Erase type-4 Typical time
Erase type-4 Typical units
01b: 16ms
10b: 128ms
11b: 1s
Program Maximum/Typical
Ratio
Maximum = 2 * (COUNT + 1) *
Typical
Page Size
2^N bytes
58h
84h
AT25QF641
DS-25QF641–127E–3/2018
56
�Description
Comment
Address
(h) Byte
Address
(Bit)
Data (b)
(Bit)
Data (h)
(Byte)
Program Page Typical time
Count or 00h
59h
12:08
0 1001
29h
Program Page Typical units
0: 8us,
5Ah
13
1
01h
1: 64us
5Bh
C7h
Program Byte Typical time,
1st byte
Count or 00h
17:14
01 00
Program Byte Typical units,
1st byte
0: 1us,
18
0
Program Additional Byte
Typical time
Count or 00h
22:19
000 0
Program Additional Byte
Typical units
0: 1us,
23
0
Erase Chip Typical time
Count or 00h
28:24
0 1110
Erase Chip Typical units
00b: 16ms
30:29
10
31
1
03:00
11010
07:04
1110
1: 8us
1: 8us
01b: 256ms
10b: 4s
11b: 64s
Reserved
1h
Prohibited Op during
Program Suspend
see datasheet
Prohibited Op during Erase
Suspend
see datasheet
5Ch
ECh
AT25QF641
DS-25QF641–127E–3/2018
57
�Description
Comment
Address
(h) Byte
Address
(Bit)
Data (b)
(Bit)
Data (h)
(Byte)
Reserved
1h
5Dh
08
1
A1h
5Eh
Program Resume to
Suspend time
Count of 64us
Program Suspend Maximum
time
Program Suspend Maximum
units
5Fh
07h
12:09
0 000
Count or 00h
17:13
11 101
00b: 128ns,
19:18
01
3Dh
01b: 1us,
10b: 8us,
11b: 64us
Erase Resume to Suspend
time
Count of 64us
23:20
0000
Erase Suspend Maximum
time
Count or 00h
28:24
1 1101
Erase Suspend Maximum
units
00b: 128ns,
30:29
01
31
0
01b: 1us,
10b: 8us,
11b: 64us
Suspend / Resume
supported
0: Program and Erase suspend
supported
1: not supported
Program Resume Opcode
Opcode or FFh
60h
7:0
0111 1010
7Ah
Program Suspend Opcode
Opcode or FFh
61h
15:8
0111 0101
75h
Resume Opcode
Opcode or FFh
62h
23:16
0111 1010
7Ah
Suspend Opcode
Opcode or FFh
63h
31:24
0111 0101
75h
Reserved
11b
64h
01:00
11
F7h
Status Register Busy Polling
xxxxx1b: Opcode = 05h, bit-0 =
1 Busy,
07:02
1111 01
xxxx1xb: Opcode = 70h, bit-7 =
0 Busy,
others: reserved
AT25QF641
DS-25QF641–127E–3/2018
58
�Description
Comment
Address
(h) Byte
Address
(Bit)
Data (b)
(Bit)
Data (h)
(Byte)
Exit Deep Powerdown time
Count or 00h
65h
12:08
0 0010
A2h
Exit Deep Powerdown units
00b: 128ns,
66h
14:13
01
D5h
01b: 1us,
67h
5Ch
10b: 8us,
11b: 64us
Exit Deep Powerdown
Opcode
Opcode or FFh
22:15
101 0101 1
Enter Deep Powerdown
Opcode
Opcode or FFh
30:23
101 1100 1
Deep Powerdown Supported
0: Deep Powerdown supported,
31
0
1: not supported
Disable 4-4-4 Read Mode
68h
03:00
1001
19h
Enable 4-4-4 Read Mode
69h
08:04
0 0001
F6h
09
1
Fast Quad I/O Continuous
(0-4-4) Exit
15:10
1111 01
Fast Quad I/O Continuous
(0-4-4) Enter
19:16
1100
Quad Enable Requirements
(QER)
22:20
001
23
0
6Bh
31;24
1111 1111
FFh
6Ch
06:00
110 1000
E8h
07
1
Fast Quad I/O Continuous
(0-4-4) supported
HOLD or RESET Disable
0: not supported,
6Ah
1Ch
1: Quad I/O 0-4-4 supported
0: not supported,
1: use Configuration Register
bit-4
Reserved
FFh
Status Register Opcode
Reserved
1h
Soft Reset Opcodes
6Dh
13:08
01 0000
4-Byte Address Exit
6Eh
23:14
1100 0000 00
4-Byte Address Enter
6Fh
31:24
1000 0000
10h
C0h
80h
AT25QF641
DS-25QF641–127E–3/2018
59
�Table 7-11. SFDP Parameters Table 2
Description
Comment
Address
(h) Byte
Address
(Bit)
Data (b)
(Bit)
Data (h)
(Byte)
VCC Minimum Voltage
1650h: 1.65V,
80h
15:0
0000 0000
1700h: 1.70V,
81h
00h
27h
0001 0111
2300h: 2.30V,
2500h: 2.50V,
2700h: 2.70V
VCC Maximum Voltage
1950h: 1.95V,
82h
3600h: 3.60V,
83h
31:16
0000 0000
0011 0110
00h
36h
4000h: 4.00V,
4400h: 4.40V
Array Protection Method
10b: use non-volatile
status register
Power up Protection default
0: power up unprotected,
84h
01:00
10
85h
02
0
DAh
06h
1: power up protected
Protection Disable Opcodes
011b: use status register
05:03
01 1
Protection Enable Opcodes
011b: use status register
08:06
0 11
Protection Read Opcodes
011b: use status register
11:09
011
Protection Register Erase
Opcode
00b: not supported,
13:12
00
Protection Register Program
Opcode
00b: not supported,
15:14
00
01b: Opcodes
3Dh,2Ah,7Fh,CFh,
01b: Opcodes
3Dh,2Ah,7Fh,FCh
Reserved
FFh
86h
23:16
1111 1111
FFh
Reserved
FFh
87h
31:24
1111 1111
FFh
Reserved
FFh
88h-FFh
7.36
Reserved
Enter Secured OTP (B1h)
The Enter Secured OTP instruction is for entering the additional 4K-bit secured OTP mode. The additional 4K-bit
secured OTP is independent from main array, which may be used to store unique serial number for system identifier.
After entering the Secured OTP mode, and then follow standard read or program, procedure to read out the data or
update data. The Secured OTP data cannot be updated again once it is lock-down
Please note that Write Status Register-1, Write Status Register-2 and Write Security Register instructions are not
acceptable during the access of secure OTP region. Once security OTP is lock down, only commands related with read
are valid. The Enter Secured OTP instruction sequence is shown in Figure 7-59.
AT25QF641
DS-25QF641–127E–3/2018
60
�Figure 7-59. Enter Secured OTP instruction for SPI Mode (left) and QPI Mode (right)
7.37
Exit Secured OTP (C1h)
The Exit Secured OTP instruction is for exiting the additional 4K-bit secured OTP mode. (Please refer to Figure 7-60).
Figure 7-60. Exit Secured OTP instruction for SPI Mode (left) and QPI Mode (right)
7.38
Read Security Register (2Bh)
The Read Security Register can be read the value of Security Register bits at any time (even in program/erase/write
status register-1 and write status register-2 condition) and continuously.
Secured OTP Indicator bit. The Secured OTP indicator bit shows the chip is locked by factory before ex-factory or not.
When it is “0”, it indicates non-factory lock, “1” indicates factory-lock.
Lock-down Secured OTP (LDSO) bit. By writing Write Security Register instruction, the LDSO bit may be set to “1” for
customer lock-down purpose. However, once the bit it set to “1” (Lock-down), the LDSO bit and the 4K-bit Secured OTP
area cannot be updated any more. While it is in 4K-bit Secured OTP mode, array access is not allowed to write.
AT25QF641
DS-25QF641–127E–3/2018
61
�Table 7-12. Security Register Definition
Bit7
Bit6
Bit5
Bit4
Bit3
Bit2
Bit1
Bit0
x
x
x
x
x
x
LDSO
(indicates if
lock- down)
Secured OTP
indicator bit
Reserved
Reserved
Reserved
Reserved
Reserved
Reserved
0 = not lockdown
0 = non factory
lock
1 = lock- down 1 = factory lock
(cannot
program/
erase OTP)
Volatile bit
Volatile bit
Volatile bit
Volatile bit
Volatile bit
Volatile bit
Non- Volatile bit Non-Volatile bit
Figure 7-61. Read Security Register instruction (SPI Mode)
Figure 7-62. Read Security Register instruction (QPI Mode)
7.39
Write Security Register (2Fh)
The Write Security Register instruction is for changing the values of Security Register bits. Unlike Write Status Register,
the Write Enable instruction is not required before writing Write Security Register instruction. The Write Security
Register instruction may change the value of bit1 (LDSO bit) for customer to lock-down the 4K-bit Secured OTP area.
Once the LDSO bit is set to “1”, the Secured OTP area cannot be updated any more.
AT25QF641
DS-25QF641–127E–3/2018
62
�The CS must go high exactly at the boundary; otherwise, the instruction will be rejected and not executed.
Figure 7-63. Write Security Register instruction for SPI Mode (left) and QPI Mode (right)
7.40
4K-bit Secured OTP
It’s for unique identifier to provide 4K-bit one-time-program area for setting device unique serial number which may
be set by factory or system customer. Please refer to table of “4K-bit secured OTP definition”.
- Security register bit 0 indicates whether the chip is locked by factory or not.
- To program the 4K-bit secured OTP by entering 4K-bit secured OTP mode (with ENSO command) and going through
normal program procedure, and then exiting 4K-bit secured OTP mode by writing EXSO command
- Customer may lock-down bit1 as “1”. Please refer to “table of security register definition” for security register bit
definition and table of “4K-bit secured OTP definition” for address range definition.
Note. Once lock-down whatever by factory or customer, it cannot be changed any more. While in 4K-bit secured OTP
mode, array access is not allowed to write.
Table 7-13. Secured OTP
Address Range
Size
Standard
Customer Lock
000000 ~ 00000F
128-bit
ESN
Determined by customer
(Electrical Serial Number)
000010 ~ 0001FF
3968-bit
N/A
AT25QF641
DS-25QF641–127E–3/2018
63
�8.
Electrical Characteristics
8.1
Absolute Maximum Ratings(1)
Parameter
Symbol
Conditions
Range
Unit
-0.6 to VCC+0.4
V
Supply Voltage
VCC
Voltage Applied to Any Pin
VIO
Relative to Ground
-0.6 to VCC +0.4
V
Transient Voltage on any Pin
VIOT
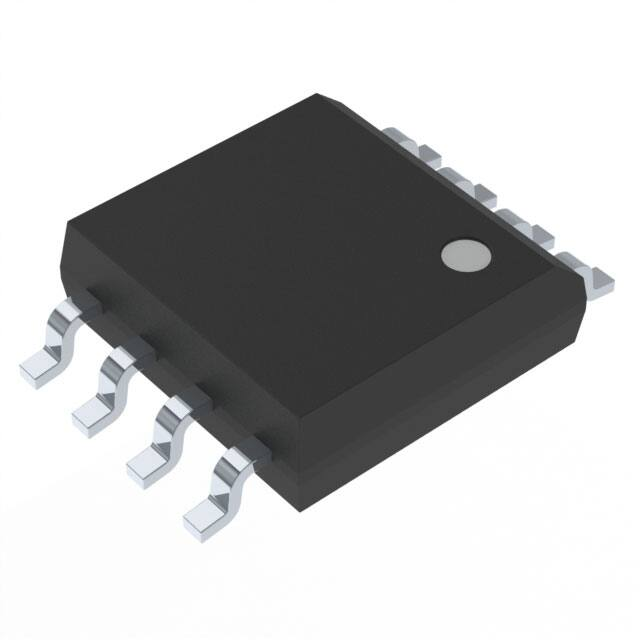


 工商网监
湘ICP备2023018690号
工商网监
湘ICP备2023018690号
