RZ/G1M Starter Kit
Board Hardware Manual
YR8A77430S000BE
All information contained in these materials, including products and product specifications,
represents information on the product at the time of publication and is subject to change by Renesas
Electronics Corp. without notice.
Rev.1.00, Oct 2015
�Notice
1.
Descriptions of circuits, software and other related information in this document are provided only to illustrate the operation of
semiconductor products and application examples. You are fully responsible for the incorporation of these circuits, software,
and information in the design of your equipment. Renesas Electronics assumes no responsibility for any losses incurred by you
or third parties arising from the use of these circuits, software, or information.
2.
Renesas Electronics has used reasonable care in preparing the information included in this document, but Renesas Electronics
does not warrant that such information is error free. Renesas Electronics assumes no liability whatsoever for any damages
incurred by you resulting from errors in or omissions from the information included herein.
3.
Renesas Electronics does not assume any liability for infringement of patents, copyrights, or other intellectual property rights of
third parties by or arising from the use of Renesas Electronics products or technical information described in this document. No
license, express, implied or otherwise, is granted hereby under any patents, copyrights or other intellectual property rights of
Renesas Electronics or others.
4.
You should not alter, modify, copy, or otherwise misappropriate any Renesas Electronics product, whether in whole or in part.
Renesas Electronics assumes no responsibility for any losses incurred by you or third parties arising from such alteration,
modification, copy or otherwise misappropriation of Renesas Electronics product.
5.
Renesas Electronics products are classified according to the following two quality grades: “Standard” and “High Quality”. The
recommended applications for each Renesas Electronics product depends on the product’s quality grade, as indicated below.
“Standard”:
Computers; office equipment; communications equipment; test and measurement equipment; audio and visual
equipment; home electronic appliances; machine tools; personal electronic equipment; and industrial robots etc.
“High Quality”: Transportation equipment (automobiles, trains, ships, etc.); traffic control systems; anti-disaster systems; anticrime systems; and safety equipment etc.
Renesas Electronics products are neither intended nor authorized for use in products or systems that may pose a direct threat to
human life or bodily injury (artificial life support devices or systems, surgical implantations etc.), or may cause serious property
damages (nuclear reactor control systems, military equipment etc.). You must check the quality grade of each Renesas
Electronics product before using it in a particular application. You may not use any Renesas Electronics product for any
application for which it is not intended. Renesas Electronics shall not be in any way liable for any damages or losses incurred by
you or third parties arising from the use of any Renesas Electronics product for which the product is not intended by Renesas
Electronics.
6.
You should use the Renesas Electronics products described in this document within the range specified by Renesas Electronics,
especially with respect to the maximum rating, operating supply voltage range, movement power voltage range, heat radiation
characteristics, installation and other product characteristics. Renesas Electronics shall have no liability for malfunctions or
damages arising out of the use of Renesas Electronics products beyond such specified ranges.
7.
Although Renesas Electronics endeavors to improve the quality and reliability of its products, semiconductor products have
specific characteristics such as the occurrence of failure at a certain rate and malfunctions under certain use conditions. Further,
Renesas Electronics products are not subject to radiation resistance design. Please be sure to implement safety measures to
guard them against the possibility of physical injury, and injury or damage caused by fire in the event of the failure of a Renesas
Electronics product, such as safety design for hardware and software including but not limited to redundancy, fire control and
malfunction prevention, appropriate treatment for aging degradation or any other appropriate measures. Because the evaluation
of microcomputer software alone is very difficult, please evaluate the safety of the final products or systems manufactured by
you.
8.
Please contact a Renesas Electronics sales office for details as to environmental matters such as the environmental compatibility
of each Renesas Electronics product. Please use Renesas Electronics products in compliance with all applicable laws and
regulations that regulate the inclusion or use of controlled substances, including without limitation, the EU RoHS Directive.
Renesas Electronics assumes no liability for damages or losses occurring as a result of your noncompliance with applicable laws
and regulations.
9.
Renesas Electronics products and technology may not be used for or incorporated into any products or systems whose
manufacture, use, or sale is prohibited under any applicable domestic or foreign laws or regulations. You should not use
Renesas Electronics products or technology described in this document for any purpose relating to military applications or use by
the military, including but not limited to the development of weapons of mass destruction. When exporting the Renesas
Electronics products or technology described in this document, you should comply with the applicable export control laws and
regulations and follow the procedures required by such laws and regulations.
10. It is the responsibility of the buyer or distributor of Renesas Electronics products, who distributes, disposes of, or otherwise places
the product with a third party, to notify such third party in advance of the contents and conditions set forth in this document,
Renesas Electronics assumes no responsibility for any losses incurred by you or third parties as a result of unauthorized use of
Renesas Electronics products.
11. This document may not be reproduced or duplicated in any form, in whole or in part, without prior written consent of Renesas
Electronics.
12. Please contact a Renesas Electronics sales office if you have any questions regarding the information contained in this document
or Renesas Electronics products, or if you have any other inquiries.
(Note 1) “Renesas Electronics” as used in this document means Renesas Electronics Corporation and also includes its majorityowned subsidiaries.
(Note 2) “Renesas Electronics product(s)” means any product developed or manufactured by or for Renesas Electronics.
�RZ/G1M Starter Kit Board Hardware Manual Rev1.00
Revision
History
Revision
RZ/G1M Starter Kit Board Hardware Manual
Date
Description
Page
1.00
Oct. 2015
YR8A77430S000BE
Oct 2015
-
Modification
First revision issued.
Page I
�RZ/G1M Starter Kit Board Hardware Manual Rev1.00
Contents
1.
OVERVIEW .................................................................................................................................. 1
1.1.
Features ............................................................................................................................................................. 1
1.1.1. The RZ/G1M includes: ........................................................................................................................................... 1
1.1.2. The RZ/G1M Starter Kit Board includes: ............................................................................................................... 2
1.2.
Usage Notes ....................................................................................................................................................... 4
1.2.1. RZ/G1M Starter Kit Board Specifications .............................................................................................................. 4
1.3.
Board Configuration ......................................................................................................................................... 5
1.3.1. Block Diagram of RZ/G1M Starter Kit Board........................................................................................................ 5
1.3.2. Address Map of RZ/G1M Starter Kit Board........................................................................................................... 6
2.
RZ/G1M STARTER KIT BOARD INTERFACE MODULE SPECIFICATIONS ................ 7
2.1.
Mode Setting...................................................................................................................................................... 7
2.1.1. Specifications.......................................................................................................................................................... 7
2.1.2. Initial Values of Mode Setting Pins on RZ/G1M Starter Kit Board........................................................................ 9
2.1.3. Multiplexing and Method of Setting for Mode Setting Pins ................................................................................. 10
2.1.4. Block Diagram of Peripheral Circuit for Mode Pins ............................................................................................ 11
2.2.
DDR3L-SDRAM Interface .............................................................................................................................. 12
2.2.1. Specifications........................................................................................................................................................ 12
2.2.2. Signal Correlation ................................................................................................................................................. 13
2.2.3. Block Diagram...................................................................................................................................................... 14
2.3.
SPI-FLASH Interface (QSPI) ......................................................................................................................... 15
2.3.1. Specifications........................................................................................................................................................ 15
2.3.2.
Block Diagram.................................................................................................................................................... 15
2.4.
Video Input Interface ...................................................................................................................................... 16
2.4.1. Specifications........................................................................................................................................................ 16
2.4.2. Block Diagram...................................................................................................................................................... 16
2.5.
Video Output Interface ................................................................................................................................... 17
2.5.1. Specifications........................................................................................................................................................ 17
2.5.2. Block Diagram...................................................................................................................................................... 18
2.6.
Debugger Interface .......................................................................................................................................... 19
2.6.1. Specifications........................................................................................................................................................ 19
2.6.2. Block Diagram...................................................................................................................................................... 19
2.7.
Debug Ether Interface (EtherMAC) ............................................................................................................... 20
2.7.1. Specifications........................................................................................................................................................ 20
2.7.2. Block Diagram...................................................................................................................................................... 20
2.8.
Audio Codec Interface (SSI0, SSI1, SSI2, and SSI9) ...................................................................................... 21
2.8.1. Specifications........................................................................................................................................................ 21
2.8.2. Block Diagram...................................................................................................................................................... 21
2.9.
PCI-Express Interface ........................................................................................................................................ 22
YR8A77430S000BE
Oct 2015
Page II
�RZ/G1M Starter Kit Board Hardware Manual Rev1.00
2.9.1.
2.9.2.
Specifications........................................................................................................................................................ 22
Block Diagram...................................................................................................................................................... 22
2.10.
Serial-ATA Interface ....................................................................................................................................... 23
2.10.1.
Specifications .................................................................................................................................................... 23
2.10.2.
Block Diagram .................................................................................................................................................. 23
2.10.3.
PCI-Express and Serial-ATA Clock Source Unit .............................................................................................. 23
2.11.
SD Card Host Interface 0 (SDHI0) ................................................................................................................. 24
2.11.1.
Specifications .................................................................................................................................................... 24
2.11.2.
Block Diagram .................................................................................................................................................. 24
2.12.
SD Card Host Interface 2 (SDHI2) ................................................................................................................. 25
2.12.1.
Specifications .................................................................................................................................................... 25
2.12.2.
Block Diagram .................................................................................................................................................. 25
2.13.
USB2.0 Interface ............................................................................................................................................. 26
2.13.1.
Specifications .................................................................................................................................................... 26
2.13.2.
Block Diagram .................................................................................................................................................. 26
2.14.
Debug Serial Interfaces (SCIF0) ..................................................................................................................... 27
2.14.1.
Specifications .................................................................................................................................................... 27
2.15.
Reset ................................................................................................................................................................ 28
2.15.1.
Specifications .................................................................................................................................................... 28
2.15.2.
Block Diagram .................................................................................................................................................. 28
2.16.
I2C Interface .................................................................................................................................................... 29
2.16.1.
Specifications .................................................................................................................................................... 29
2.17.
External Interrupts ......................................................................................................................................... 30
2.17.1.
Specifications .................................................................................................................................................... 30
2.17.2.
Block Diagram .................................................................................................................................................. 30
2.18.
PWM ............................................................................................................................................................... 31
2.19.
Clock ................................................................................................................................................................ 32
2.19.1.
Clocks Supplied to the RZ/G1M ....................................................................................................................... 32
2.19.2.
Clocks Supplied to Devices Other than RZ/G1M ............................................................................................. 32
2.20.
Power Supply................................................................................................................................................... 33
2.20.1.
Specifications .................................................................................................................................................... 33
2.20.2.
Power-On Sequence .......................................................................................................................................... 34
3.
OUTLINE DIAGRAMS OF RZ/G1M STARTER KIT BOARD ........................................... 35
3.1.
External Dimensions and Hole Locations of RZ/G1M Starter Kit Board...................................................... 35
3.2.
Connector Locations on RZ/G1M Starter Kit Board (Component Surface) ................................................. 36
3.3.
Connector Locations on RZ/G1M Starter Kit Board (Solder Surface) ................................................................. 37
YR8A77430S000BE
Oct 2015
Page III
�RZ/G1M Starter Kit Board Hardware Manual Rev1.00
Tables
Table 1.1.1 List of RZ/G1M Starter Kit Board Functions (1) ......................................................................................... 2
Table 1.1.2 List of RZ/G1M Starter Kit Board Functions (2) ......................................................................................... 3
Table 2.1.1 Initial Values of RZ/G1M Mode Setting Pins on RZ/G1M Starter Kit Board ............................................................ 9
Table 2.1.2 Pin Multiplexing of Mode Setting Pins of RZ/G1M............................................................................................. 10
Table 2.2.1 DDR3L-SDRAM Specifications ....................................................................................................................... 12
Table 2.2.2 DDR3L-SDRAM Signal Correlation ................................................................................................................. 13
Table 2.4.1 Video Input Specifications................................................................................................................................ 16
Table 2.5.1 Video Output Interface Specifications ................................................................................................................ 17
Table 2.6.1 DBG Specifications ......................................................................................................................................... 19
Table 2.7.1 Debug Ether Interface Specifications ................................................................................................................. 20
Table 2.8.1 SSI Codec Specifications ................................................................................................................................. 21
Table 2.9.1 PCI-Express Interface Specifications ................................................................................................................. 22
Table 2.10.1 Serial-ATA Interface Specifications ................................................................................................................. 23
Table 2.11.1 SD Card Host Interface (SDHI0) Specifications ................................................................................................ 24
Table 2.12.1 SD Card Host Interface (SDHI2) Specifications................................................................................................ 25
Table 2.13.1 USB2.0 Specifications ................................................................................................................................... 26
Table 2.14.1 Debug Serial Interface Specifications .............................................................................................................. 27
Table 2.15.1 RESET Specifications .................................................................................................................................... 28
Table 2.16.1 I2C Interface Specifications ............................................................................................................................ 29
Table 2.17.1 External Interrupt Specifications ..................................................................................................................... 30
Table 2.18.1 Pin Functions Given Priority over PWM Functions ........................................................................................... 31
Table 2.19.1 List of Clocks and Crystals for RZ/G1M .......................................................................................................... 32
Table 2.19.2 List of Clocks and Crystals Other than for RZ/G1M .......................................................................................... 32
Table 2.20.1 List of RZ/G1M Starter Kit Board Switching Controllers and Regulators ............................................................ 33
YR8A77430S000BE
Oct 2015
Page IV
�RZ/G1M Starter Kit Board Hardware Manual Rev1.00
Figures
Figure 1.3.1 Block Diagram of RZ/G1M Starter Kit Board..................................................................................................... 5
Figure 2.1.1 Peripheral Circuit for Mode Pins on RZ/G1M Starter Kit Board ......................................................................... 11
Figure 2.2.1 Block Diagram of DDR3-SDRAM Interface .................................................................................................... 14
Figure 2.4.1 Block Diagram of Video Input Interface ........................................................................................................... 16
Figure 2.5.1 Block Diagram of Video Output Interface ........................................................................................................ 18
Figure 2.6.1 Block Diagram of JTAG (DBG) Interface ........................................................................................................ 19
Figure 2.7.1 Block Diagram of Debug Ether Interface ......................................................................................................... 20
Figure 2.8.1 Block Diagram of Audio Codec Interface ......................................................................................................... 21
Figure 2.9.1 Block Diagram of PCI-Express Interface.......................................................................................................... 22
Figure 2.10.1 Block Diagram of Serial-ATA Interface.......................................................................................................... 23
Figure 2.10.2 Block Diagram of PCI-Express and Serial-ATA Clock Source .......................................................................... 23
Figure 2.11.1 Block Diagram of SD Card Host Interface (SDHI0) ........................................................................................ 24
Figure 2.12.1 Block Diagram of SD Card Host Interface (SDHI2) ........................................................................................ 25
Figure 2.13.1 Block Diagram of USB2.0 Interface .............................................................................................................. 26
Figure 2.15.1 Block Diagram of Reset Circuit .................................................................................................................... 28
Figure 2.17.1 Block Diagram of External Interrupts ............................................................................................................ 30
Figure 2.20.1 Power-On Sequence..................................................................................................................................... 34
Figure 3.1.1 External Dimensions and Hole Locations of the RZ/G1M Starter Kit Board ........................................................ 35
Figure 3.2.1 Connector Locations of the RZ/G1M Starter Kit Board (Component Surface) ...................................................... 36
Figure 3.3.1 Connector Locations of the RZ/G1M Starter Kit Board (Solder Surface) ............................................................. 37
YR8A77430S000BE
Oct 2015
Page V
�RZ/G1M Starter Kit Board Hardware Manual Rev1.00
1. Overview
The RZ/G1M is a new generation product featuring the functionality required for the Human Machine Interface systems. Its newly
employed bus configuration maximizes system performance, space saving, and cost efficiency.
The RZ/G1M Starter Kit Board, is an RZ/G1M-specific evaluation board that can be used to evaluate solutions using the RZ/G1M and to
develop operating systems, device drivers, and applications. Using the RZ/G1M Starter Kit Board allows the developers to efficiently
conduct required tasks such as evaluation of the RZ/G1M system performance and thus greatly reduces the turn-around time in product
development.
1.1. Features
1.1.1.
The RZ/G1M includes:
Two 1.5-GHz ARM Cortex™-A15 MPCore™ cores (dual core: option)
Memory controller for DDR3-SDRAM (DDR3-1600) with 32 bits × 2 channel
Three-dimensional graphics engines
Video processing unit
Sound processing unit
SD card host interface (3 channels), MMCIF (1 channel)
USB2.0 host (1 channel), USB2.0 host/function (1 channel)
DU (digtal RGB 2 channels), DCU, TCON, VIN (2 channels)
VSP1, VCP3, FDP1, 2D-DMAC
SCU, SSIU (10 channels), ADG
CAN, Ethernet MAC, Ethernet AVB
WDT, TPU, CMT1, TMU, CPG, INTC, DMAC, LBSC
I2C (5 channels), IIC (2 channels), SCIF (6 channels), SCIFA (6 channels), SCIFB (3 channels), MSIOF (3 channels), QSPI, HSCIF
(3 channels), PWM (7 channels)
GPIO, etc
Power supply voltages (typ.) 3.3 V, 1.8 V, 1.5 V/1.35 V, 1.0 V
YR8A77430S000BE
Oct 2015
Page 1 of 37
�RZ/G1M Starter Kit Board Hardware Manual Rev1.00
1.1.2.
The RZ/G1M Starter Kit Board includes:
Table 1.1.1 List of RZ/G1M Starter Kit Board Functions (1)
RZ/G1M Starter Kit Board Function List. Page 1 of 2
The
PORTER_C(Rev3.0) board Function List. Page 1 of 2
Board Function
Module
Description
RAM
DDR3
Dual Channel DDR3L-1600, 1GByte x2 channels, 32bit data width x2 channels
4Gbit(16bit data width) x4 devices.
SDRAM Backup feature: Not Supported.
LBSC
No device.
ROM
LBSC
No device.
QSPI
two SPI Flash on board.
Spansion S25FL512SAGMFIG11 (512Mbit=64MB) x1
Spansion S25FL032P0XMFI011 (32Mbit=4MB) x1
Debug I/F
DBG
Connector: HTST-110-01-S-DV (20pin)
DBG2
--GPIO
LED x3 devices 'GPLED' for General Purpose. LED2~LED4
Mechanical switch x3 elements 'TactSW' for General Purpose.
SCIF0
Debug Serial x1 (TX, RX)
USB to UART Bridge
SILICON LABS CP2102-GM x1 (Bridge spec: max 1Mbps)
Connector: USB Type miniAB
SCIF1
--LAN
EtherMAC
Debug Ether(100Mbps)
RMII PHY:
MICREL KSZ8041RNLI
Connector:
CN10 CWKRJ-13BNL
EXIO Connector B (CN3 : QSH-030-01-L-D-A-K)
SATA I/F
SATA0
3Gbps, Gen2
Connector: CN4: HSAT-M07-V5D-40
PCIE I/F
PCI express
PCI Express Base Specification Revision 2.0, 1-lane, 2.5GT/s or 5.0GT/s
Connector: CN5: JPCIE-4CEEB36XRT110
USB2.0 I/F
USB2.0 ch0 USB2.0 Host or Function
Connector: Type miniAB.
USB2.0 ch1 USB2.0 Host
Connector: Type A.
MLB+ I/F
MLB+
6wire-MOST Interface(150Mbps)
(MOST)
Connector: CN23: QSE-060-01-F-D-A
SDHI
SDHI0
Connector:
SD Card slot.
Interface voltage:
Either 3.3V or 1.8V.
SDHI1
--SDHI2
Connector:
microSD Card slot. DBG3 can be connected instead of microSD card.
Interface voltage:
Either 3.3V or 1.8V.
Video Output
DU0_LVDS
LVDS output.
5 pair (CLK, CH0~CH3)
Connector:
Signal: Hirose CN30: DF14A-20P-1.25H(55), TouchScreen: CN31: JW-XH250S-10-K
DU1
HDMI output
HDMI Transmitter.ADV7511WBSWZ
Connector: Type A Receptacle: CN45:Accurate Innotech HMNF-195N-4BH90
Video Input
VIN0
YCbCr 8bit. BT656
Video Decoder: Analog Devices ADV7180WBCP32Z, Connector: CN15 RCA compite Video
VIN1
Connector:
EXIO Connector B (CN3 :QSH-030-01-L-D-A-K)
YR8A77430S000BE
Oct 2015
Note
Hynix H5TC4G63AFR-PBA x4
Pin Multi: QSPI
Pin Multi:
LBSC_A[25:20]
Related Jumper: JP2
not suppoted
GPIOs: GP2_19~GP2_21
GPIOs: GP7_0~GP7_2
not suppoted
For Interrupt:
IRQ0
For Reset:
GP5_22 (AVB_TXD4)
Pin Multi:
EtherAVB
Pin Multi:
USB3.0
Pin Multi:
SATA1
For voltage control:
GP2_12
not suppoted
For voltage control:
GP2_26
Pin Multi:
MMC
For Interrupt:
IRQ1
For Interrupt:
GP3_29 (DU1_ODDF_3)
For Interrupt:
Pin Multi:
EtherAVB
Page 2 of 37
�RZ/G1M Starter Kit Board Hardware Manual Rev1.00
Table 1.1.2 List of RZ/G1M Starter Kit Board Functions (2)
RZ/G1M Starter Kit Board Function List. Page 2 of 2
YR8A77430S000BE
Oct 2015
Page 3 of 37
�RZ/G1M Starter Kit Board Hardware Manual Rev1.00
1.2. Usage Notes
1.2.1.
RZ/G1M Starter Kit Board Specifications
•
Take particular care to ensure the correct configurations of the jumpers and switches mounted on the
RZ/G1M Starter Kit Board. Incorrect configurations may damage on-board devices.
•
For the RZ/G1M Starter Kit Board, be sure to use the power supply that comes with it. Applying a
voltage greater than 12 V may damage devices on the RZ/G1M Starter Kit Board.
•
There are sequences for turning on and off the power supply to the RZ/G1M. For the RZ/G1M Starter
Kit Board, be sure to obey the notes below.
(1) When power is turned on
Be sure to confirm that the ACC switch (SW26) is off before plugging the AC adapter into the power
source.
It is prohibited to plug the AC adapter into a power source while the ACC switch (SW26) is on.
(2) When power is shut off
Be sure to turn off the ACC switch (SW26) before unplugging the AC adapter from the power
source,
It is prohibited to unplug the AC adapter from the power source while the ACC switch (SW26) is
on.
•
The maximum current draw for the VSYS and D5.0V pins on the RZ/G1M Starter Kit Board is 7A
each. Therefore, operation should be such that the current drawn by either pin does not exceed 7A. Also
ensure that the current draw does not exceed 7A if an IO expansion board or external storage device is
connected to the RZ/G1M Starter Kit Board.
YR8A77430S000BE
Oct 2015
Page 4 of 37
�RZ/G1M Starter Kit Board Hardware Manual Rev1.00
1.3. Board Configuration
The RZ/G1M Starter Kit Board is composed of a single board whose size is 170 mm × 125 mm.
Figure 1.3.1 shows a block diagram of the RZ/G1M Starter Kit Board.
1.3.1.
Block Diagram of RZ/G1M Starter Kit Board
RZ/G1M
R-CarM2
DDR3(L)-SDRAM
1600 MHz
DDR3-SDRAM
1 GB
devices)
(21600MHz
32 bits
DDR3
ch0 I/F
QSPI
SPI Flash
Memory
64 MB, 4 MB
ExA[20..25] / QSPI
DDR3(L)-SDRAM
1600 MHz
DDR3-SDRAM
1 GB
(21600MHz
devices)
32 bits
DDR3
ch1 I/F
PCIe
1 lane slot
PCIE
SATA
SATA0
/ SATA1
/USB3.0
USB2.0
USB HOST
Type-A Connector
USB2.0
USB Host/Func
mini-AB CN
6-wire
6-wire
3-wire
3-wire
USB2.0 CH1 I/F
USB2.0 CH0 I/F
MLB+ I/F
MLB I/F
I2C2_3.3 V
EtherMAC
/EtherAVB
IRQ0
EEPROM
for MAC
RMII PHY
KSZ8041RNLI
RJ45
CN
GP5_22 (RESET)
1.8 V/3.3 V
SD Card
Slot CN
SDHI0
IRQ1
Power Switch
DA9063(LDOx)
GP2_12
LVDS OUT
Flat CN
DU0_LVDS
LVDS Touch
Screen
I2C4_3.3 V
IRQ0
IRQ0
IRQ2
IRQ2
IRQ7
DBG3
1.8 V/3.3 V
Micro SD Card
Slot CN
SDHI2 / DBG3
/MMC
Power Switch
DA9063(LDOx)
RGB888
MDx / DU1
CAN
tranceiver
MAX3051
IEBUS
tranceiver
HA12240
FP
CTX, CRX
RCAN
8-bit YCbCr
(BT656)
VIN0
(VIN0_CLK, D[7:0])
VIN1
Video Dec.
ADV7180
RCA
Composite IN
Audio
DAC/ADC
AK4642
Mini-Jack
Line Out
Mini-Jack
Line/MIC In
I2C2_3.3 V
IETX, IERX
USB to UART
CP2102
USB miniAB CN
GP3_29 (IRQ)
I2C2_3.3 V
DBG
DBG CN
IE-BUS0
HDMI OUT
Type A
SSI_OUT0,1,2,9
GP2_26
JTAG
CAN0
HDMI
Transmitter
ADV7511W
TX, RX
IEBUS
SCIF0
SSI0,1,2,9
to HDMI Transmitter
SSI_OUT0,1,2,9
SSI0,1 or
SSI3,4
(debug serial -1)
SSI3,4
TX, RX
I2C2_3.3 V
SCIF1
(debug serial -2)
E-AVB
/VIN1/GPIO
GP7_0 to 6
GPIO
/HSCIF0,1
Power
Switch
DA9063
IRQ2
Power
Switch
DA9210
I2C2_3.3 V
I2C2 (3.3 V)
I2C1 (3.3 V)
I2C6 (1.8 V)
I2C4_3.3 V
I2C4 (3.3 V)
I2C5 (1.8 V)
GPIO
MSIOF0
TSIF0
GP2_19,20,21
NPN Tr
x3
LED
x3
6-pin
Header
EXIO Connector A
Figure 1.3.1 Block Diagram of RZ/G1M Starter Kit Board
YR8A77430S000BE
Oct 2015
Page 5 of 37
�RZ/G1M Starter Kit Board Hardware Manual Rev1.00
1.3.2.
Address Map of RZ/G1M Starter Kit Board
For the DDR3L memory space, see the section DDR3L-SDRAM Interface.
For other address space, see the Hardware section in the RZ/G Series User's Manual
YR8A77430S000BE
Oct 2015
Page 6 of 37
�RZ/G1M Starter Kit Board Hardware Manual Rev1.00
2. RZ/G1M Starter Kit Board Interface Module Specifications
2.1. Mode Setting
2.1.1.
Specifications
The operating mode of the RZ/G1M is set by a power-on reset. Each of the mode pins is set by pull up or pull down resistors, mounted
on the development board. Several may also be changed by jumpers. For details on each operating mode, see the documents related to the
RZ/G1M operating mode specifications.
2.1.1.1.
MD0 Pin Selection of Free-Running Mode or Step-Up Mode2
This pin selects the free-running mode or step-up mode.
MD0
Free-Running Mode or Step-Up Mode
0
Free-running mode (Fixed)
1
Step-up mode
2.1.1.2.
MD[3:1] Pins Selection of Boot Device
These pins select the boot device.
MD3
MD2
MD1 Selection of Boot Device
0
0
0
Boot from area 0 (boot from the external mask ROM)
0
1
0
QSPI (48.75 MHz/16-Kbyte transfer) (Fixed)
0
0
1
Reserved
0
1
1
Reserved
1
0
0
QSPI (39 MHz/16-Kbyte transfer)
1
0
1
Reserved
1
1
0
QSPI (39 MHz/4-Kbyte transfer)
1
1
1
Reserved
2.1.1.3.
MD4 Pin Selection of CS0 Space Size
This pin selects whether the area 0 space (CS0) is used as a normal space (64 Mbytes) or an expanded space (128 Mbytes).
MD4
Area Division
0
Area 0: 64 Mbytes (Fixed…. Area0 not used)
1
Area 0: 128 Mbytes
2.1.1.4.
MD5 Pin Selection of Secure or Non-Secure Mode
This pin selects the secure or non-secure mode
MD5
Selection of Secure or Non-Secure Mode
0
Secure (When LCS = Secure, the value read from the register for MD5 is forcibly set to 0.)
1
Non-secure (Default)
2.1.1.5.
MD[7:6] Pins Selection of Master Boot Processor
These pins select the master boot processor.
MD7
MD6
Selection of Master Boot Processor
0
0
CA15 boot (Fixed)
0
1
Reserved
1
0
SH boot (32 bits)
1
1
Reserved
2.1.1.6.
MD8 Pin Selection of Area 0 Space Data Bus Width
This pin sets the data bus width of the area 0 space (CS0) to 8 bits or 16 bits. Select the data bus width of the boot device connected to
the LBSC.
MD8
EXBUS Area 0 Data Bus Width
0
8-bit bus (Fixed…. Area0 not used)
1
16-bit bus
YR8A77430S000BE
Oct 2015
Page 7 of 37
�RZ/G1M Starter Kit Board Hardware Manual Rev1.00
2.1.1.7.
MD9 Pin Selection of Crystal Resonator or Crystal Oscillator
This pin selects either a crystal resonator or a crystal oscillator to be connected to the EXTAL/XTAL pins. A crystal oscillator (X6: 20
MHz) is mounted on the RZ/G1M Starter Kit Board by default. The crystal resonator (X5) and its peripheral circuit are not mounted.
MD9
EXTAL/XTAL Pin Setting
0
An external clock is input to the EXTAL pin. (Fixed)
1
A crystal resonator is connected to the EXTAL and XTAL pins.
2.1.1.8.
MD12 Reserved
Do not change the initial setting at shipment (MD12 = 0).
2.1.1.9.
MD21, MD20, MD11, MD10, and MDT[1:0] Pins Switching of JTAG, SDHI1, and SDHI2
These pins select the debugging function through the JTAG connector (CN1) or the SD card slot. Debugging through SDHI1 or SDHI2
is possible by the combination of MD pin settings in the RZ/G1M specifications, but not available on the RZ/G1M Starter Kit Board.
MD10
MD[21:20]
MD11
MDT[1:0]
JTAG
SDHI1
SDHI2
0
00
-Boundary scan
Normal function
Normal function
0
10
0
-Coresight (*1)
Normal function
Normal function
0
10
1
00
Coresight (*1)
Tensilica
Normal function
0
10
1
01
Coresight (*1)
SH-X4
Normal function
0
10
1
10
Coresight (*1)
Normal function
Tensilica
0
10
1
11
Coresight (*1)
Normal function
SH-X4
0
11
0
-SH-X4
Normal function
Normal function
0
11
1
00
SH-X4
Coresight (*1)
Normal function
1
01
0
-Coresight (*1)
Normal function
Normal function
1
01
1
00
Coresight (*1)
GPS
Normal function
1
01
1
01
Coresight (*1)
SH-X4
Normal function
1
10
0
-SH-X4
Normal function
Normal function
(*1) “Coresight” is an abbreviation of “Coresight debug port”.
2.1.1.10.
MD[14:13] Pins Frequency Mode Setting
These pins select the frequency mode. A crystal oscillator (X6: 20 MHz) is mounted on the RZ/G1M Starter Kit Board.
Do not change the initial setting at shipment (MD14 = 0, MD13 = 1).
EXTAL
EXTAL
PLL3 DDR1600/DDR1333
MD14 MD13
PLL1 (CPGM Main) PLL0 (CPGMC)
Frequency Divider
MD19 = 0/MD19 = 1
×208
×172
×106/×88
0
0
15 MHz
× 1/1
VCO = 3120 MHz
VCO = 1290 MHz
VCO = 1590 MHz/1320 MHz
×156
×130
×80/×66
0
1
20 MHz
× 1/1
VCO = 3120 MHz
VCO = 1300 MHz
VCO = 1600 MHz/1320 MHz
×240
×200
×122/×102
1
0
26 MHz
× 1/2
VCO = 3120 MHz
VCO = 1300 MHz
VCO = 1586 MHz/1326 MHz
×208
×172
×106/×88
1
1
30 MHz
× 1/2
VCO = 3120 MHz
VCO = 1290 MHz
VCO = 1590 MHz/1320 MHz
2.1.1.11.
MD19 Pin Selection of DDR3-SDRAM Bus Clock
This pin selects the frequency of the DDR3-SDRAM bus clock.
MD19 Switching of DDR Clock
0
DDR3-1600 mode
1
DDR3-1333 mode
YR8A77430S000BE
Oct 2015
Page 8 of 37
�RZ/G1M Starter Kit Board Hardware Manual Rev1.00
2.1.1.12.
MD28, MD27, and MD22 Pins Selection of DDR Mode and MTSB Mode
These pins select the DDR3-SDRAM interface mode and MTSB mode.
MD28
MD27
MD22
DDR 64 Bits/
Remarks
32 Bits
0
0
0
DDR 64 bits × 1ch
1
DDR 64 bits × 1ch
1
0
Reserved
Setting prohibited
1
User PinMAX
DDR 64 bits × 1ch
1
0
0
DDR 32 bits × 1ch
1
DDR 32 bits × 1ch
1
0
User PinMAX
DDR 32 bits × 1ch
1
DDR 32 bits × 2ch
Note: The MD28, MD27, and MD22 pins are fixed to "1" on the board.
2.1.1.13.
(Fixed)
MD23 Pin Selection of SATA0 or USB3.0 Function
This pin selects the SATA0 or USB3.0 function. MD23 is fixed to "0" on the RZ/G1M Starter Kit Board.
MD23 Selection of SATA0 or USB3.0
0
SATA0 (Fixed)
1
USB3.0
2.1.1.14.
MD24 Pin Selection of SATA1 or PCIE Function
This pin selects the SATA1 or PCIE function. MD24 is fixed to "1" on the RZ/G1M Starter Kit Board.
MD24 Selection of SATA1 or PCIE
0
SATA1
1
PCIE (Fixed)
2.1.2.
Initial Values of Mode Setting Pins on RZ/G1M Starter Kit Board
Table 2.1.1 Initial Values of RZ/G1M Mode Setting Pins on RZ/G1M Starter Kit Board
MD Pins
MD0
MD[3:1]
MD4
MD5
MD[7:6]
MD8
MD9
MD12
MD10, MD[21:20], MD11, MDT[1:0]
Initial
Value
0
010
0
1
00
0
0
0
0,10,0,00
MD[14:13]
MD19
MD28, MD27, MD22
MD23
MD24
01
0
111
0
1
YR8A77430S000BE
Oct 2015
Initial Function
Free-running mode
Boot from QSPI
CS0 space size (64 Mbytes)
Non-secure mode
Cortex-A15 boot
CS0 space data bus width (16 bits)
Crystal oscillator is used.
JTAG (CN1) = Boundary SCAN
SDHI1 and SDHI2 = Normal function
Input frequency = 20 MHz
DDR3-1600 mode
DDR 32 bits × 2ch
SATA0
PCIE
Page 9 of 37
�RZ/G1M Starter Kit Board Hardware Manual Rev1.00
2.1.3.
Multiplexing and Method of Setting for Mode Setting Pins
The following table covers the pin functions that are multiplexed with the mode pins of the RZ/G1M, and how the individual mode pins
are set. For the mode pins that are used with fixed values, resistors are used to set them to their fixed values according to the initial settings
in table 2.1.1, Initial Values of RZ/G1M Mode Setting Pins on RZ/G1M Starter Kit Board. Such mode pins are described as "Fixed by a
resistor" in the Setting Method column in the table below.
Table 2.1.2 Pin Multiplexing of Mode Setting Pins of RZ/G1M
MD Pin
MD0
MD1
MD2
MD3
MD4
MD5
MD6
MD7
MD8
MD9
MD10
MD11
MD12
MD13
MD14
MD15
MD16
MD17
MD18
MD19
MD20
MD21
MD22
MD23
MD24
MD25
MD26
MD27
MD28
MDT0
MDT1
Pin Function
DU1_CDE
(GPIO)
DU1_DISP
DU1_VSYNC
DU1_HSYNC
WE1#
AUDIO_CLKOUT
(GPIO)
WE0#
DACK0 (GPIO)
EX_CS5# (GPIO)
EX_CS3# (GPIO)
BS#
DU1_DB5
RD#
A3
A19
A14
A15
A13
A10
A2
A4
A7
A1
SIM0_CLK
SIM0_RST
YR8A77430S000BE
Oct 2015
Strapping Options
Setting Method
Default
Free-running (0)/Step-up (1)
Fixed by resistor
Pulled-down (0)
Selects boot device
Fixed by resistor
Fixed by resistor
Fixed by resistor
Fixed by resistor
Pulled-down (0)
PULLED-UP(1)
Pulled-down (0)
Pulled-down (0)
Fixed by resistor
PULLED-UP(1)
Fixed by resistor
Fixed by resistor
Fixed by a resistor
Fixed by a resistor
Fixed by resistor
Fixed by resistor
Fixed by resistor
Fixed by a resistor
Fixed by a resistor
Fixed by resistor
Fixed by resistor
Fixed by resistor(JP9 off)
Fixed by a resistor
Fixed by a resistor
Fixed by a resistor
Fixed by a resistor
Fixed by a resistor
Fixed by resistor
Fixed by resistor
Pulled-down (0)
Pulled-down (0)
Pulled-down (0)
Pulled-down (0)
Pulled-down (0)
Pulled-down (0)
Pulled-down (0)
Pulled-up (1)
Pulled-down (0)
Pulled-down (0)
Pulled-down (0)
PULLED-UP(1)
Pulled-up (1)
Pulled-down (0)
Pulled-up (1)
Pulled-up (1)
Pulled-up (1)
Pulled-down (0)
Pulled-down (0)
Selects area 0 size
Secure (0) or non-secure (1)
mode
Selects boot processor
Selects EXBUS width
EXTAL or EXTAL/XTAL
Debugging mode
Selects frequency mode
DDR clock 1600/1333
Debugging mode
DDR, MTSB mode
Selects SATA0/USB3.0
Selects SATA1/PCIE
DDR, MTSB mode
Debugging mode
Page 10 of 37
�RZ/G1M Starter Kit Board Hardware Manual Rev1.00
2.1.4.
Block Diagram of Peripheral Circuit for Mode Pins
On the RZ/G1M Starter Kit Board, pull-up (100 kΩ) and pull-down (10 kΩ) resistors are used to implement the settings of the mode
pins that are largely used with fixed values. When changes to the settings of mode pins are likely, this can be implemented by switches
which, through resistive voltage division, select the low level when turned on and the high level when turned off.
When the RZ/G1M is released from the power-on reset (when the PRESET# signal of the RZ/G1M is changed from low to high), the
mode value set by the switch or resistive voltage division is input to the RZ/G1M.
D3.3V
RZ/G1M
R-carM2
100k
MD21/A13
10k
D3.3V
100k
10k
D3.3V
100k
D3.3V
MD2/DU1_VSYNC
MD13/A3
MD24/A4
MD27/A7
MD28/A1
JP9
Not
mounted
5
100k
MD5/GP2_31
Not
mounted
MD19/A14
10k
D3.3V
100k
MD0/DU_CDE
MD1/DU1_DISP
MD3/DU1_HSYNC
MD4/WE1#
MD6/WE0#
MD7/GP1_25
MD8/G1_17
MD9/GP1_15
MD10/BS#
MD11/DU1_DB5
MD12/RD#
MD14/A19
MD20/A15
MD23/A2
MDT0/SIM0_CLK
MDT1/SIM0_RST
16
10k
MD22/A10
10k
Not
mounted
Figure 2.1.1 Peripheral Circuit for Mode Pins on RZ/G1M Starter Kit Board
YR8A77430S000BE
Oct 2015
Page 11 of 37
�RZ/G1M Starter Kit Board Hardware Manual Rev1.00
2.2. DDR3L-SDRAM Interface
2.2.1.
Specifications
The RZ/G1M Starter Kit Board incorporates four 4-Gbit DDR3-SDRAMs (16-bit bus width) (DDR: 32 bits × 2 channels) and operates
at a maximum speed of DDR3-1600. On the RZ/G1M Starter Kit Board, the RZ/G1M and DDR3-SDRAMs are connected in 32-bit × 2channel mode; the DDR3-SDRAMs on the channel 0 side are allocated to the address space from H'01_0000 0000 to H'01_3FFF FFFF
and those on the channel 1 side are allocated to the address space from H'02_0000 0000 to H'02_3FFF FFFF. The address ranges from
H'00_4000 0000 to H'00_7FFF FFFF can be accessed by default as a mirror area of H'01_0000 0000 to H'01_3FFF FFFF.
Table 2.2.1 DDR3L-SDRAM Specifications
Interface
Product name
Power supply voltage
Capacity
Bus width
Memory bus frequency (RZ/G1M spec.)
DDR3L-SDRAM
H5TC4G63AFR-PBA (DDR3-1600, ×16 bits, 4 Gbits) × 4 pcs
1.35 V
Total: 2 Gbytes,
Channel 0: H'01_0000 0000 to H'01_3FFF FFFF
Channel 1: H'02_0000 0000 to H'02_3FFF FFFF
32-bit data bus × 2ch
DDR3-1600 max.
Note:
To access the address spaces for channels 0 and 1 as a single consecutive area, register settings are necessary. For details, refer to the
RZ/G1M documentation.
YR8A77430S000BE
Oct 2015
Page 12 of 37
�RZ/G1M Starter Kit Board Hardware Manual Rev1.00
2.2.2.
Signal Correlation
Table 2.2.2 DDR3L-SDRAM Signal Correlation
DDR3L-SDRAM
RZ/G1M
(DDR 32 bits × 2ch)
Channel 1
M1
D[31:16]
DQU[7:0], DQL[7:0]
A[15:0]
BA[2:0]
CK, CK#
CKE
CS#
WE#
RAS#
CAS#
DQSU, DQSL
DQSU#, DQSL#
M2W
D[15:0]
DQU[7:0], DQL[7:0]
A[15:0]
BA[2:0]
CK, CK#
CKE
CS#
WE#
RAS#
CAS#
-
Channel 0
M3
M4
D[31:16]
D[15:0]
DQU[7:0], DQL[7:0]
DQU[7:0], DQL[7:0]
A[15:0]
A[15:0]
BA[2:0]
BA[2:0]
CK, CK#
CK, CK#
CKE
CKE
CS#
CS#
WE#
WE#
RAS#
RAS#
CAS#
CAS#
M1DQ[31:16]
M1DQ[15:0]
M0DQ[31:16]
M0DQ[15:0]
M1A[15:0]
M0A[15:0]
M1BA[2:0]
M0BA[2:0]
M1CK1, M1CK1#
M1CK0, M1CK0#
M0CK1, M0CK1#
M0CK0, M0CK0#
M1CKE1
M1CKE0
M0CKE1
M0CKE0
M1CS1#
M1CS0#
M0CS1#
M0CS0#
M1WE#
M0WE#
M1RAS#
M0RAS#
M1CAS#
M0CAS#
M1DQS[3:2],
M1DQS[3:2]#
M1DQS[1:0],
DQSU, DQSL
M1DQS[1:0]#
DQSU#, DQSL#
M0DQS[3:2],
DQSU, DQSL
M0DQS[3:2]#
DQSU#, DQSL#
M0DQS[1:0]
M0DQS[1:0]#
M1DM[3:2]
DMU, DML
M1DM[1:0]
DMU, DML
M0DM[3:2]
DMU, DML
M0DM[1:0]
M1ODT1
ODT
M1ODT0
ODT
M0ODT1
ODT
M0ODT0
M1RESET#
RESET#
RESET#
M0RESET#
RESET#
(*) DDR_VDD/2 [V] is supplied to the M0VREFDQ[1:0] and M1VREFDQ[1:0] pins of the RZ/G1M.
YR8A77430S000BE
Oct 2015
DQSU, DQSL
DQSU#, DQSL#
DMU, DML
ODT
RESET#
Page 13 of 37
�RZ/G1M Starter Kit Board Hardware Manual Rev1.00
2.2.3.
Block Diagram
The following figure shows a block diagram of the DDR3-SDRAM interface.
R- CarM2
:D ifferential termination
:Vtt T ermination
M0DQ[31:0]
M0A[15:0]
A[15:0]
M0BA[2:0]
BA[2:0]
RAS#
CAS#
WE#
RESET#
CS#
CKE
ODT
M0 RAS#
M0 CAS#
M0WE#
M0 RESET#
M0CS0#
M0 CKE0
M0 ODT0
B1.35V
DQL[7:0]
M0DQ[15:8]
0.1uF
M0DM[1:0]
10k
0.1uF
10k
VREFCA
VREFDQ
10k
10k
DQS
DQS#
DM
M0 DQS[1:0]
M0 DQS[1:0]#
B1.35V
M0DQ[7:0]
DQU[7:0]
CK
CK#
M0CK0
M0CK0#
B1.35V
DDR3LSDRAM
M0CS1#
M0 CKE1
M0 ODT1
CS#
CKE
ODT
M0CK1
M0CK1#
CK
CK#
0.1uF
M0DM[3:2]
M0DQ[23:16]
DQL[7:0]
M0DQ[31:24]
DQU[7:0]
DQS
DQS#
DM
M0 DQS[3:2]
M0 DQS[3:2]#
0.1uF
M1DQ[31:0]
M1A[15:0]
A[15:0]
M1BA[2:0]
BA[2:0]
RAS#
CAS#
WE#
RESET#
CS#
CKE
ODT
M1 RAS#
M1 CAS#
M1WE#
M1 RESET#
M1CS0#
M1KE0
M1 ODT0
D1.35V
M1DQ[15:8]
DQU[7:0]
0.1uF
M1DM[1:0]
M1CS1#
M1 CKE1
M1 ODT1
CS#
CKE
ODT
M1CK1
M1CK1#
CK
CK#
M1DM[3:2]
0.1uF
10k
VREFCA
10k
10k
0.1uF
0.1uF
M1DQ[23:16]
DQL[7:0]
DQS
DQS#
DM
M1 DQS[3:2]
M1 DQS[3:2]#
10k
VREFDQ
DQS
DQS#
DM
M1 DQS[1:0]
M1 DQS[1:0]#
D1.35V
M1DQ[7:0]
DQL[7:0]
CK
CK#
M1CK0
M1CK0#
D1.35V
DDR3LSDRAM
M1DQ[31:24]
DQU[7:0]
B1.35V
D1.35V
4.7k
4.7k
M0 BKPRST#
D1.35V
B1.35V
M1 BKPRST#
D1.35V
0.1uF
M1 VREFDQ[1:0]
M0 VREFDQ[1:0]
M1 VREFCA
M0 VREFCA
10k
0.1uF
10k
0.1uF
10k
10k
10k
10k
M0ZQ
M1ZQ
0.1uF
0.1uF
0.1uF
240
240
Figure 2.2.1 Block Diagram of DDR3-SDRAM Interface
YR8A77430S000BE
Oct 2015
Page 14 of 37
�RZ/G1M Starter Kit Board Hardware Manual Rev1.00
2.3. SPI-FLASH Interface (QSPI)
2.3.1.
Specifications
The RZ/G1M Starter Kit board incorporates 512-Mbit and 32-Mbit SPI flash memory devices manufactured by Spansion. These SPI
flash memory devices are connected to the QSPI of the RZ/G1E via jumper JP2. When the 512-Mbit SPI flash memory (U16) is to be
accessed, set JP2 to pin 1 side, and when the 32-Mbit SPI flash memory (U579) is to be accessed, set JP2 to the pin 3 side.
Since the loader and mini-monitor are stored in the lower-order address space of the SPI flash memory (U579, 32 Mbits), do not
modify the contents of this area. The contents of the SPI flash memory (U16, 512 Mbits) can be modified as required.
Table 2.3.1 Flash Memory Specifications
QSPI controller
RZ/G1M’s on-chip QSPI module
(1) U16: Spansion S25FL512SAGMFIG11 (512 Mbits)
(2) U579: Spansion S25FL032P0XMFI011 (32 Mbits)
48.75-MHz operation (max.)
SPI flash memory
Clock rate of RZ/G1M’s QSPI
2.3.2.
Block Diagram
A block diagram of the SPI flash memory interface is shown below.
D3.3V
SPCLK / A20
SCK
SPI-FLASH1
S25FL032P0XMFI011
MOSI/IO0 / A21
SI/IO0
VCC
MISO/IO1 / A22
SO/IO1
R-CarM2
RZ/G1M
IO2 / A23
W#/ACC/IO2
IO3 / A24
HOLD#/IO3
VSS
D3.3V
CS#
10K
D3.3V
CLK
SPI-FLASH2
S25FL512SAGMFIG11
SI/IO0
VCC
SO/IO1
JP2
WP#/IO2
SSL / A25
VSS
HOLD#/IO3
D3.3V
10K
Level Shift
3.3V to 1.8V
PRESET#(1.8V)
CS#
RESET#
Power On Reset
Figure 2.3.1 Block Diagram of SPI-Flash Interface
YR8A77430S000BE
Oct 2015
Page 15 of 37
�RZ/G1M Starter Kit Board Hardware Manual Rev1.00
2.4. Video Input Interface
2.4.1.
Specifications
On the RZ/G1M Starter Kit Board, ADV7180WBCP32Z (U22) manufactured by Analog Devices is connected to VIN0 of the RZ/G1M
and used as a composite video decoder. The ADV7180WBCP32Z (U22) handles inputs in the ITU-R BT.656 8-bit (YCbCr) format
according to the switch settings. The block diagram of the VIN0 interface is shown below.
The registers of ADV7180 should be set via channel 2 of the I2C.
Table 2.4.1 Video Input Specifications
Video input module
RZ/G1M’s on-chip video input module channel 0
U22: ADV7180WBCP32Z by Analog Devices
I2C-BUS ch2 slave address = H'40 for write, H'41 for read
CN: RCA connector for VIN1
Composite video decoder for VIN1
Video input connector
2.4.2.
Block Diagram
R- CarM2
RZ/G1M
Video Decoder
ADV7180
GP4_0 / VI0_CLK
GP4_[12:5] / VI0_DATA[7:0]
8
8
N.C.
LLC
AIN1
P[7:0]
AIN2
/ INTRQ
VS/ FIELD
HS
AIN3
XTAL
GP2_ 6 / SCL2
GP2_ 7 / SDA2
Composite IN
CN15
RCA
28. 63636MHz
I2C
ALSB
I2 C address ( ALSB=0)
Write:H’40
Read:H’41
Figure 2.4.1 Block Diagram of Video Input Interface
YR8A77430S000BE
Oct 2015
Page 16 of 37
�RZ/G1M Starter Kit Board Hardware Manual Rev1.00
2.5. Video Output Interface
2.5.1.
Specifications
The RZ/G1M Starter Kit Board incorporates one display unit (DU) with the LVDS interface and one display unit with the digital RGB
interface.
On the RZ/G1M Starter Kit Board, the HDMI transmitter (ADV7511) converts the digital RGB signals of DU1 to HDMI signals. These
digital RGB signals are also connected to the EXIO connector (CN30). In addition, the LCD connector (CN30) is directly connected to
DU_LVDS channel 0 (DU0_LVDS).
Table 2.5.1 Video Output Interface Specifications
Display controller
DU0_LVDS
DU1 (digital RGB)
YR8A77430S000BE
Oct 2015
RZ/G1M’s on-chip display unit
[LVDS Output]
Connector
CN30: DF14A-20P-1.25H by Hirose, for LVDS signals.
CN31: Backlight control and I2C / interrupt input for touch.
[HDMI Output]
HDMI transmitter converts digital RGB signals to HDMI signals.
U44: ADV7511WBSWZ by Analog Devices
Connector
CN45: HMNF-195N-4BH90 (HDMI type A, standard, 19-pin) by Accurate Innotech
Page 17 of 37
�RZ/G1M Starter Kit Board Hardware Manual Rev1.00
2.5.2.
Block Diagram
A block diagram of the video output interface on the RZ/G1M Starter Kit Board is shown below.
RZ/G1M
R- CarM2
D3.3V
D3.3V
HDMI
Transmitter
ADV7511 WBSWZ
SCL2/ Other
SCL
SDA2/ Other
SDA
DU1_R[7:0]
DU1_G[7:0]
DU1_B[7:0]
CN45
HDMI CN
8
8
D[23:0]
8
HSYNC
VSYNC
CLK
DE
HSYNC
VSYNC
CLKOUT
DISP
PD/AD
X3
148.5 MHz
1.8 V type
TX2+
TX2TX1+
TX1TX0+
TX0TXC+
TXCDDCSCL
DDCSDA
CEC
HPD
HDMI
Companion Chip
TPD12S016PWR
5 VOUT
DATA2P
DATA2M
DATA1P
DATA1M
DATA0P
DATA0M
CLKP
CLKM
DDC_ SCL
DDC_ SDA
CEC
HPD
VCC
I2 C address
Write:H’72
Read:H’73
DU0_ DOTCLKIN
CN30
LVDS I/F
DU0_ LVDS_CH0_N
DU0_ LVDS_CH0_P
DU0_ LVDS_CH1_N
DU0_ LVDS_CH1_P
DU0_ LVDS_CH2_N
DU0_ LVDS_CH2_P
DU0_ LVDS_CH3_N
DU0_ LVDS_CH3_P
DU0_ LVDS_ CLK_N
DU0_ LVDS_ CLK_P
TATA+
TBTB+
TCTC+
TDTD+
TCLKTCLK+
differential
impedance=100ohm
D1.8V
VDDQ_ LVDS
D1.8V
DU0_ LVDS_PLL1_ VCC
DU0_ LVDS_PLL1_ VSS
Figure 2.5.1 Block Diagram of Video Output Interface
YR8A77430S000BE
Oct 2015
Page 18 of 37
�RZ/G1M Starter Kit Board Hardware Manual Rev1.00
2.6. Debugger Interface
2.6.1.
Specifications
The RZ/G1M Starter Kit Board incorporates a debugger interface via a 20-pin connector (DBG) for connection to the JTAG emulator.
The RZ/G1M supports the DBG3 interface as a debugger interface, but the RZ/G1M Starter Kit Board does not include this function.
The signals related to DBG3 (SDHI2) are instead connected to EXIO connector. On the RZ/G1M Starter Kit Board, the debugging function
can be accessed through the JTAG connector CN1
(Attension)
If use as ARM Coresight debug port, remove JP9 jumper off.
Table 2.6.1 DBG Specifications
DBG interface (20-pin)
Block Diagram
1.8V
RZ/G1M
R- CarM2
TCK, TDI, TMS
TCK
TRST_N
TMS
TDI
TDO
3
7
7
TRST_N
2.6.2.
CN1: HTST-110-01-S-DV by Samtec
1.8V
ASEBRK
D3.3V
PRESET#
CN1
ARM_ JTAG
(20-pin)
JP 1
100k
MD21
JP9
10k
Figure 2.6.1 Block Diagram of JTAG (DBG) Interface
YR8A77430S000BE
Oct 2015
Page 19 of 37
�RZ/G1M Starter Kit Board Hardware Manual Rev1.00
2.7. Debug Ether Interface (EtherMAC)
2.7.1.
Specifications
The RZ/G1M Starter Kit Board incorporates the EtherMAC that supports 100Base-T or 10Base-T compliant with IEEE 802.3u. On the
RZ/G1M Starter Kit Board, the EtherMAC signals are connected to the RMII PHY interface (KSZ8041RNLI) manufactured by Micrel. In
addition, CN3 on the bottom of the board supports the REACH interface sub boards.
Table 2.7.1 Debug Ether Interface Specifications
2.7.2.
MAC layer
RZ/G1M’s on-chip EtherMAC
Physical layer transceiver
U21: KSZ8041RNLI (RMII) by Micrel
Reach connector
CN3
Modular connector
CN10: CWKRJ-13BNL (RJ-45 with pulse transformer) by CWE
(as EtherAVB)
Block Diagrams
A block diagram of the debug Ether interface is shown below.
D3.3V
RZ/G1M
R- CarM2
CN 3
REACH Connector
LED2
D3.3V
LED3
KSZ8041RNLI
ETH_LNK/ other
LED0/ NWAYEN
LED1/ SPEED
ETH_ MDC/ other
ETH_ MDIO/ other
ETH_TX_EN/ other
ETH_ TXD1/ other
ETH_ TXD0/ other
ETH_ CRS_DV/ other
ETH_ RXD1/ other
ETH_ RXD0/ other
ETH_RX_ER/ other
ETH_ REF_CLK/ other
MDC
MDIO
TX_EN
TXD1
TXD0
CRS_DV
RXD1
RXD0
RX_ER
REF_ CLK
GP5_22/ ETH_ MAGIC/ other
CN10
CWKRJ-13BNL
TX+
TXRX+
RX-
XI
XO
RST#
RJ45
(P/T)
XTAL
(25MHz)
D3.3V
VDDIO_3.3
3.3V
VDDA3.3V
VDDA_3.3
IRQ0/ Other
INTRP
GND
VDDPLL_1.8
REXT
Figure 2.7.1 Block Diagram of Debug Ether Interface
YR8A77430S000BE
Oct 2015
Page 20 of 37
�RZ/G1M Starter Kit Board Hardware Manual Rev1.00
2.8. Audio Codec Interface (SSI0, SSI1, SSI2, and SSI9)
2.8.1.
Specifications
On the RZ/G1M Starter Kit Board, the codec (AK4642EN) is connected to the SSI0 and SSI1of the RZ/G1M. The PDN (power-down)
pin of AK4643EN is controlled by the PRESETOUT# signal output from the RZ/G1M.
The audio interface of AK4642EN is in the slave mode after PRESETOUT# is released from a reset and can be switched to the master
mode by a register that is accessed via channel 2 of the I2C. Furthermore, the SSI on the RZ/G1M side can be set as the master or a slave.
It is assumed that SSI_SDATA0 is set to transmit mode and SSI_SDATA1 is set to receive mode on the RZ/G1M Starter Kit Board.
Among the signals of the audio interface, the signals of SSI0, SSI1, SSI2, and SSI9 are also connected to HDMI transmitter ADV7511
(U44) on the RZ/G1M Starter Kit Board.
Table 2.8.1 SSI Codec Specifications
Controller
Codec
Audio interface
Audio connector
2.8.2.
RZ/G1M’s on-chip SSI0 and SSI1
U24: AK4642EN by Asahi Kasei
RZ/G1M (SSI) = Master or slave selectable
AK4642EN = Master or slave selectable (default: slave)
LINE-OUT CN13, 3.5-mm green mini-jack
LINE-IN/MIC-IN CN14 3.5-mm pink mini-jack)
Block Diagram
R- CarM2
RZ/G1M
EXIO
Connector A
AK4642
GP2_ 9 / SSI_ SCK34
GP2_ 10 / SSI_WS34
GP2_ 11 / SSI_ DATA3
GP2_ 14 / SSI_ DATA4
GP2_ 0 / SSI_ SCK0129
GP2_ 1 / SSI_WS0129
GP2_ 2 / SSI_ DATA0
0
0
0
BICK
LRCK
SDTI
CN13
Line Out
( lower side)
LOUT
ROUT
MPWR
JP 3
SDTO
GP2_ 5 / SSI_ DATA1
CN14
Line/ MIC In
( upper side)
LIN
RIN
GP2_ 28 / AUDIO_ CLKA
0
MCKO
GP2_ 8 / SSI_ DATA2
X12
11. 2896MHz
MCKI
0
GP2_ 27 / SSI_ DATA9
PDN
PRESETOUT#
2
SCL, SDA
GP2_6 , GP2_ 7 / I C(ch2)
HDMI Transmitter
ADV7511
I2 C address
Write:H’24
Read:H’25
CAD0
2k
Do not stuff.
Figure 2.8.1 Block Diagram of Audio Codec Interface
YR8A77430S000BE
Oct 2015
Page 21 of 37
�RZ/G1M Starter Kit Board Hardware Manual Rev1.00
2.9. PCI-Express Interface
2.9.1.
Specifications
The RZ/G1M Starter Kit Board incorporates the PCI-Express interface for one lane (×1) as a dedicated interface for the PCI-Express
bus. The on-chip PCIE module in the RZ/G1M works in either of two modes, Root Port or Endpoint, which are defined in the PCI Express
specifications. In the RZ/G1M, the operating mode is specified through internal register settings (mode setting register (PCIEMSR)). For
details, refer to the RZ/G Series User’s Manual:Hardware.
Note:
To reduce the difference in wiring length between each pair of differential signals from the RZ/G1M to the PCI-Express slot, the D+ and
D- line automatic swap function is used to swap the TODP1_PCIe and TODN1_PCIe signals output from the transmit pins before
connection to the slot.
Table 2.9.1 PCI-Express Interface Specifications
PCI-Express controller
RZ/G1M’s on-chip PCI-Express controller
PCI-Express slot (1 lane)
JPCIE-4CEEB36XRT110by Weknowtechnology (CN5)
PCI-Express clock source
IDT5V41066PGGI by IDT
2.9.2.
Block Diagram
R- CarM2
RZ/G1M
CN5
PCI- Express Slot
( 1 Lane)
0.1uF
TODN1_ PCIe/ SATA1
TODP1_ PCIe/ SATA1
RIDP1_ PCIe/ SATA1
RIDN1_ PCIe/ SATA1
PRESETOUTn
2
PET_P
PET_N
2
PER_P
PER_N
PERST#
GP1_16
PRSNT2#
CICREFP1_ PCIe/ SATA1
CICREFN1_ PCIe/ SATA1
REFCLK+
REFCLK-
Clock Source
IDT5V 41066
X9
25MHz
CLKA
CLKAn
CLKC
CLKCn
Figure 2.9.1 Block Diagram of PCI-Express Interface
YR8A77430S000BE
Oct 2015
Page 22 of 37
�RZ/G1M Starter Kit Board Hardware Manual Rev1.00
2.10. Serial-ATA Interface
2.10.1. Specifications
The RZ/G1M Starter Kit Board incorporates one serial-ATA interface (SATA0) channel. The RZ/G1M's on-chip serial-ATA interface
conforms to the Serial ATA standard rev. 3.1 and supports transfer rates of 1.5 Gbps (Gen1) and 3.0 Gbps (Gen2). The RZ/G1M Starter Kit
Board incorporates a 4-pin power connector (CN2) for the ATAPI device. The power connector conversion cable (4-pin to 15-pin) is
required to supply power to the SATA device.
Table 2.10.1 Serial-ATA Interface Specifications
Serial-ATA interface controller
RZ/G1M’s on-chip serial-ATA controller
Serial-ATA connector (signal)
HSAT-M07-V5D-40 by HON KON (CN4)
Serial-ATA clock source
IDT5V41066PGGI by IDT
2.10.2. Block Diagram
CN4
Serial ATA Connector
R- CarM2
RZ/G1M
TODP0_ SATA/ USB3
TODN0_ SATA/ USB3
Clock Source
CLKB
CLKBn
2
2
RIDP0_ SATA/ USB3
RIDN0_ SATA/ USB3
IDT5V 41066
X9
25MHz
0.01uF
TXP
TXN
0.01uF
RXP
RXN
CICREFN0_ SATA/ USB3
CICREFP0_ SATA/ USB3
Figure 2.10.1 Block Diagram of Serial-ATA Interface
2.10.3. PCI-Express and Serial-ATA Clock Source Unit
The details on the clock source unit of the PCI-Express interface and serial-ATA interface are shown below. IDT5V41066PGGI
manufactured by IDT is used for the clock driver. This clock driver multiplies the input frequency (25 MHz) to supply a 100-MHz
differential clock to the RZ/G1M and PCI-Express slot.
Note:
To reduce the difference in wiring length between each pair of differential signals from the RZ/G1M to the clock source, the P and N
lines from the clock pins (CICREFP0_SATA/PCIe_18 and CICREFN0_SATA/PCIe_18 signals) are swapped before connection to the
clock source.
IDT5V 41066
2
0
S0
S1
33
CLKA
R- CarM2( PCIE)
33
CLKAn
S2
49.9
Do not stuff
0
0
PDn
OE
49.9
33
CLKB
R- CarM2( SATA0)
33
CLKBn
49.9
475
49.9
IREF
33
CLKC
PCI- Express Slot
33
X9
25MHz
X1
X2
CLKCn
49.9
49.9
Figure 2.10.2 Block Diagram of PCI-Express and Serial-ATA Clock Source
YR8A77430S000BE
Oct 2015
Page 23 of 37
�RZ/G1M Starter Kit Board Hardware Manual Rev1.00
2.11. SD Card Host Interface 0 (SDHI0)
2.11.1. Specifications
The RZ/G1M Starter Kit Board incorporates an SD card slot (CN8) for the on-chip SD card host interface (SDHI0) of the RZ/G1M. For
details on the SDHI0, see the RZ/G Series User’s Manual: Hardware.
On the RZ/G1M Starter Kit Board, the interface voltage (VCCQ_SD0) of the SD card slot can be selected by GP2_12. When GP2_12
is set to 1, 3.3 V is supplied as VCCQ_SD0. When GP2_12 is set to 0, 1.8 V is supplied as VCCQ_SD0.
Table 2.11.1 SD Card Host Interface (SDHI0) Specifications
SD card host interface
RZ/G1M’s on-chip SD card host interface channel 0 (SDHI0)
VCCQ_SD0 = 3.3 V (GP2_12 = ‘1’ )
VCCQ_SD0 = 1.8 V (GP2_12 = ‘0’ )
SDC009-A0-0003by PROCONN (CN8)
Interface voltage control
SD card slot
2.11.2. Block Diagram
R- CarM2
RZ/G1M
3.3V
VCCQ_SD0
CN8
SDC009-A0-0003
VDD
CLK
SD0_ CLK
4
DAT[3:0]
SD0_ DAT[3:0]
USB0_ OVC1/ SD0_WP
WP
USB0_ EXTLP/ SD0_CD
CD
CMD
SD0_ CMD
VCCQ_SD0
COM
VCCQ_SD0
VCCQ_SD0
GP2_12
PMIC
DA9063
Figure 2.11.1 Block Diagram of SD Card Host Interface (SDHI0)
YR8A77430S000BE
Oct 2015
Page 24 of 37
�RZ/G1M Starter Kit Board Hardware Manual Rev1.00
2.12. SD Card Host Interface 2 (SDHI2)
2.12.1. Specifications
The RZ/G1M Starter Kit Board incorporates a microSD card slot (CN9) for the on-chip SD card host interface (SDHI2) of the RZ/G1M.
For details on the SDHI2, see the RZ/G Series User’s Manual:Hardware.
On the RZ/G1M Starter Kit Board, the interface voltage (VCCQ_SD2) of the microSD card slot can be selected by GP2_26. When
GP2_26 is set to 1, 3.3 V is supplied as VCCQ_SD2. When GP2_26 is set to 0, 1.8 V is supplied as VCCQ_SD2.
Table 2.12.1 SD Card Host Interface (SDHI2) Specifications
SD card host interface
RZ/G1M’s on-chip SD card host interface channel 2 (SDHI2)
VCCQ_SD2 = 3.3 V (GP2_26 = ‘1’ )
VCCQ_SD2 = 1.8 V (GP2_26 = ‘0’ )
MSPN09-A0-1002 by PROCONN (CN9)
Interface voltage control
microSD card slot
2.12.2. Block Diagram
3.3V
VCCQ_SD2
RZ/G1M
R- CarM2
CN 9
MSPN09-A0-1002
VDD
CLK
SD2_ CLK
4
SD2_ DAT[3:0]
DAT[3:0]
A
B
SD2_CD
CMD
SD2_ CMD
SD2_WP
VCCQ_SD2
VCCQ_SD2
VCCQ_SD2
GP2_26
PMIC
DA9063
Figure 2.12.1 Block Diagram of SD Card Host Interface (SDHI2)
YR8A77430S000BE
Oct 2015
Page 25 of 37
�RZ/G1M Starter Kit Board Hardware Manual Rev1.00
2.13. USB2.0 Interface
2.13.1. Specifications
The RZ/G1M Starter Kit Board has two USB2.0 ports that can be used as two USB2.0 host interface ports or one USB2.0 host interface
port and one USB2.0 function interface port. The function interface is supported in channel 0. The RZ/G1M Starter Kit Board incorporates
a micro-AB connector as CN22 and a type A connector as CN7. For details, see the USB specifications in the RZ/G Series User’s
Manual:Hardware and related datasheets.
Table 2.13.1 USB2.0 Specifications
USB controller
USB power supply
USB host CN
USB host/function CN
RZ/G1M’s on-chip USB2.0 host and function controller
BD6516F by ROHM
Current limit: 2.4 [A]
RZ/G1M USB CH1 CN7: Type A connector
67643-3911 by Molex
RZ/G1M USB CH0 CN22: micro-AB connector
KS-MCR-AB01N3- by Weknowtechnology
ESD protection diode
HZD6.2Z4 by Renesas
Common mode filter
Chip beads
DLP11SN900HL2 by Murata
BLM18PG330SN1D by Murata
* The connector for channel 0 of the USB in the RZ/G1M Starter Kit Board is a mini connector shared by the USB host
and function.
2.13.2. Block Diagram
R- CarM2
RZ/G1M
DIFFERENTIAL
Impedance
90 ohms
DIFFERENTIAL
Impedance
90 ohms
Common
Mode
Filter
USB1_DP
USB1_DM
U28
Pull down
USB1_ PWEN
2k
CTRLA
(3.3V)
1k
USB1_ OVC
5.0V
IN
OUTA
1k
FLAGA
2k
D+
DESD
Protection
Chip
Beads
VBUS
GND
Pull down
Pull up
Pull down
USB0_ PWEN
+5V
GND
USB Host (CN7)
Type A
CTRLB
(3.3V)
1k
Pull up
OUTB
FLAGB
1k
Pull down
BD6516F
USB0_OVC / VBUS
USB Host/Func
(CN22)
Type micro AB
DIFFERENTIAL
Impedance
90 ohms
USB0_DP
DIFFERENTIAL
Impedance
90 ohms
D+
Common
Mode
Filter
USB0_DM
DESD
Protection
USB_ EXTAL
48MHz
USB_ XTAL
+5V
Chip
GND Beads
ID
VBUS
GND
Figure 2.13.1 Block Diagram of USB2.0 Interface
YR8A77430S000BE
Oct 2015
Page 26 of 37
�RZ/G1M Starter Kit Board Hardware Manual Rev1.00
2.14. Debug Serial Interfaces (SCIF0)
2.14.1. Specifications
On the RZ/G1M Starter Kit Board, the SCIF0 (port D) of the RZ/G1M are used as debug serial interface. The SCIF0 of the RZ/G1M is
connected to the USB micro-AB connector (CN18) via the USB to UART bridge CP2102. By connecting CN18 to the host PC through a
USB cable, this interface can be used as debug serial interface.
The SCIF0 has the features shown below. For details, see the SCIF specifications in the RZ/G Series User’s Manual: Hardware.
•
•
•
Asynchronous serial communications
Full-duplex communication supported
Selectable bit rates by using the RZ/G1M's on-chip baud-rate generator
The host PC connected to the RZ/G1M Starter Kit Board requires the CP2102 USB driver software. This driver software can be obtained
from the following URL.
http://www.silabs.com/products/mcu/Pages/USBtoUARTBridgeVCPDrivers.aspx
Table 2.14.1 Debug Serial Interface Specifications
Serial controller
USB to UART bridge
Connector
YR8A77430S000BE
Oct 2015
RZ/G1M’s on-chip SCIF0 (port D)
CP2102 (1 Mbps max.) by Silicon Laboratories
CN18: SCIF0, KS-MCR-B02T3-L by Weknowtechnology
Page 27 of 37
�RZ/G1M Starter Kit Board Hardware Manual Rev1.00
2.15. Reset
2.15.1. Specifications
In the RZ/G1M Starter Kit Board specifications, the power-on reset signal is cleared by the reset IC MAX708SCSA, 200 ms after the
3.3-V power supply has settled. The power supplies for other voltage levels, 12.0 V, 5.0 V, 1.8 V, 1.5 V, and 1.0 V, are not monitored.
A power-on reset signal can be generated by pushing the push switch (SW9). The reset signal is level-shifted from 3.3 V to 1.8 V by the
HD74ALVC1G07 and is input to the PRESET# pin of the RZ/G1M.
Table 2.15.1 RESET Specifications
Reset IC
MAX708SCSA by Maxim Integrated
• Threshold voltage: 2.93 V
• Reset delay time: 200 ms
2.15.2. Block Diagram
D3.3V
D1.8V
Reset-IC
SW9
MAX708SCSA
D1.8V
RES
/ RES
R- CarM2
PRESET#
HD74 ALVC1G07
Figure 2.15.1 Block Diagram of Reset Circuit
YR8A77430S000BE
Oct 2015
Page 28 of 37
�RZ/G1M Starter Kit Board Hardware Manual Rev1.00
2.16. I2C Interface
2.16.1. Specifications
The RZ/G1M incorporates seven I2C interface channels. Channels 5 and 6 are 1.8-V interfaces and channels 0 to 4 are 3.3-V interfaces.
The following devices are connected to each channel of the I2C interfaces on the RZ/G1M Starter Kit Board.
Table 2.16.1 I2C Interface Specifications
I2C controller
I2C devices through I2C (ch5)
RZ/G1M’s on-chip I2C controller
[1.8 V]
CN23: External IO Connector
[1.8 V]
I2C devices through I2C (ch6)
U37: DA9063 by Dialog Semiconductor
U38: DA9210 by Dialog Semiconductor
[3.3 V]
I2C devices through I2C (ch4)
I2C devices through I2C (ch2)
I2C devices through I2C (ch1 port E)
YR8A77430S000BE
Oct 2015
CN31: Touch screen connector
[3.3 V]
U44: ADV7511WBSWZ by Analog Devices
U22: ADV7180WBCP32Z by Analog Devices
U24: AK4642EN by AKM Semiconductor
U50: R1EX24002ATAS0 by Renesas
[3.3 V]
U55: DA9063 by Dialog Semiconductor
Page 29 of 37
�RZ/G1M Starter Kit Board Hardware Manual Rev1.00
2.17. External Interrupts
2.17.1. Specifications
The RZ/G1M has external interrupt input pins NMI, IRQ[9:0], INTC_IRQ[4:0]#, and INTC_EN[1:0]#. The RZ/G1M Starter Kit Board
uses IRQ0, IRQ1, and IRQ2 as external interrupt input pins. It also uses GP3_29 and GP6_29 as GPIO interrupts. These pins should be
used as active-low signals in programs. For the interrupt functions of the RZ/G1M, see the RZ/G Series User’s Manual:Hardware.
The devices and connectors of the interrupt request sources on the RZ/G1M Starter Kit Board are shown below.
Table 2.17.1 External Interrupt Specifications
Interrupt Pin
IRQ0
IRQ1
IRQ2
GP3_29
GP6_29
Devices that Output Interrupt Request
RMII PHY
U21: KSZ8041RNLI by Micrel
Touch Screen
PMIC
U55: DA9063 by Dialog Semiconductor
HDMI transmitter
U44: ADV7511WBSWZ by Analog Devices
Clock Synchronized Serial Device
Connectors
CN31: GB10BXHAMLFSNP
CN6: 6-pin header
2.17.2. Block Diagram
A block diagram of external interrupts is shown below.
R- CarM2
RZ/G1M
GP7_10
/ IRQ0
U21
KSZ8041
GP7_11
/ IRQ1
CN31
GP7_12
/ IRQ2
U55
DA9063
GP6_29
CN6
GP3_29
U44
ADV7511
Figure 2.17.1 Block Diagram of External Interrupts
YR8A77430S000BE
Oct 2015
Page 30 of 37
�RZ/G1M Starter Kit Board Hardware Manual Rev1.00
2.18. PWM
The RZ/G1M incorporates a seven-channel pulse width modulation timer (PWM). On the RZ/G1M Starter Kit Board, the use of other
pin functions is given priority over the PWM functions in the case of pins that have multiplexed PWM functions. See the table below for
details.
Table 2.18.1 Pin Functions Given Priority over PWM Functions
PWM
PWM0
PWM0_B
PWM1
PWM1_B
PWM2W
PWM2W_B
PWM3
PWM4
PWM4_B
PWM5
PWM5_B
PWM6
YR8A77430S000BE
Oct 2015
Pin Functions Given Priority over PWM Functions
SD1_CD to SDHI1 interface
GPIO (GP5_30)
Mode pin ‘MD8’
SD1_WP to SDHI1 interface
LBSC ‘BS#’
LBSC address ‘A0’
GPIO (GP1_24)
GPIO (GP3_26)/DU1_DOTCLKOUT1
Mode pin ‘MD0’
GPIO (GP7_21)
GPIO (GP7_20)
GPIO (GP7_22)
Page 31 of 37
�RZ/G1M Starter Kit Board Hardware Manual Rev1.00
2.19. Clock
The RZ/G1M Starter Kit Board uses the crystal oscillators and resonators shown below.
2.19.1. Clocks Supplied to the RZ/G1M
Table 2.19.1 List of Clocks and Crystals for RZ/G1M
No.
1
2
3
4
5
Xn
X1
X16
X3
X4
X7
Frequency
48.0000 MHz
148.500 MHz
20.0000 MHz
Pin Name on RZ/G1M
USB_XTAL,
USB_EXTAL
DU1_DOTCLKIN
DU0_DOTCLKIN
SCIF_CLK
EXTAL
Type
Resonator
Remarks
-
(Oscillator, not installed)
Oscillator
(Oscillator, not installed)
Oscillator
3.3V
1.8V
3.3V
1.8V
2.19.2. Clocks Supplied to Devices Other than RZ/G1M
Table 2.19.2 List of Clocks and Crystals Other than for RZ/G1M
No.
1
2
3
4
5
6
7
8
Xn
X9
X8
X13
X11
X14
X10
X12
X15
YR8A77430S000BE
Oct 2015
Frequency
25.0000 MHz
25.0000 MHz
12.0000 MHz
28.63636 MHz
11.2896 MHz
74.25MHz
74.25MHz
74.25MHz
Device
IDT5V41066
KSZ8041RNLI
ADV7511WBSWZ
ADV7180WBCP32Z
AK4642
SG-8002CE
SG-8002CE
SG-8002CE
Device Pin Name
X1, X2
XI, XO
CEC_CLK
XTAL
MCKI
CAN_CLK
IECLK_B
AVB_GTXREFCLK
Type
Resonator
Resonator
Oscillator
Oscillator
Oscillator
Oscillator
Oscillator
Oscillator
Page 32 of 37
�RZ/G1M Starter Kit Board Hardware Manual Rev1.00
2.20. Power Supply
2.20.1. Specifications
The RZ/G1M Starter Kit Board operates on a single 12.0-VDC power supply. The power supplies used for the RZ/G1M Starter Kit
Board are generated by the switching regulators and low-dropout regulators.
Specified sequences should be used to turn on and off the power supply to the RZ/G1M. Be sure to control the ACC switch (SW26) to
obey the power sequence on the RZ/G1M Starter Kit Board.
See the table below for regulators used to generate power supplies on the RZ/G1M Starter Kit Board, their input voltage (Vin) and output
voltage (Vout), and whether the ACC switch can be used to enable or disable output of power supplies.
Table 2.20.1 List of RZ/G1M Starter Kit Board Switching Controllers and Regulators
Vin
Vout
Power Supply 12.0 VDC
through CN25
D12.0V
D12.0V
D5.0V / VSYS
VTT
D1.8V
D1.0V
D1.35V
D3.3V
D1.8V_PERI
D5.0V
VCCQ1.8V
VLDO3_SD0
(3.3 / 1.8 V)
VLDO4_SD1
(3.3 / 1.8 V)
VIO33
(3.3 V)
VLDO7_1.8V
VLDO8_SD2
(3.3 / 1.8 V)
DVFS1.0V
Switching Controller
and Regulator
IR 3838 (U576)
Dialog Semiconductor
DA9063 (U55)
Dialog Semiconductor
DA9063 (U55)
Dialog Semiconductor
DA9063 (U55)
Dialog Semiconductor
DA9063 (U55)
Dialog Semiconductor
DA9063 (U55)
Dialog Semiconductor
DA9063 (U55)
Dialog Semiconductor
DA9063 (U55)
Dialog Semiconductor
DA9063 (U55)
Dialog Semiconductor
DA9063 (U55)
Dialog Semiconductor
DA9063 (U55)
Dialog Semiconductor
DA9063 (U55)
Dialog Semiconductor
DA9063 (U55)
Dialog Semiconductor
DA9210 (U56)
ACC Switch
Control
Not supported
Supported
Supported
Supported
Supported
Supported
Supported
Supported
Supported
Supported
Supported
Supported
Supported
Supported
Supported
[Note]
As D12.0V is output to the following connectors, connecting or disconnecting an external board or a cable to these connectors must be
performed while 12 V is not supplied to CN25 (while the 120-VAC switch is off).
• Power supply connector for serial-ATA interface (CN4)
• Connector for PCI Express (CN5)
• Back Light Header Connector (CN31)
YR8A77430S000BE
Oct 2015
Page 33 of 37
�RZ/G1M Starter Kit Board Hardware Manual Rev1.00
2.20.2. Power-On Sequence
The diagram of the sequence for turning on the power (DA9063L-6B) for the RZ/G1M Starter Kit Board Rev2.0 is shown below.
POWER_UP
DA9210 (DVFS1.0V+Core1.0V) power-up timing *2
EXT_ON
D1.8V_Peri gate switch *3
ACC_CONT
*4
D3.3V (for M2 & others) *5
D1.8V (for M2 & others) *7
D1.35V (for DDR) *6
D1.35V (for DDR) *6
VTT/0.675V (for DDR)
D3.3V (for M2 & others) *5
LDOE
1.8V (for power circuit)
SDHI2 Power (3.3V/1.8V)
LDOD
SDHI1 Power (unused)
LDOC
SDHI0 Power (3.3V/1.8V)
LDOB
LDOA
*1
*2
*3
*4
*5
*6
*7
3.3V (for power circuit)
In the power-off sequence, turn off the power supplies in reverse order of the power-on sequence.
The Co-PMIC (DA9210: DVFS1.0V and Core1.0V) are turned on/off with this ‘POWER_UP’ timing.
‘EXT_ON‘ signal controls U581(MOS-SW: NX3P1108) to turn on/off D1.8V_Peri(ADV7511, ADV7180etc)
‘ACC_CONT’ signal is used with other control signals to turn on/off 5V(VSYS).
In the power-off sequence, ‘ACC_CONT’ keep 5V turn on.
BUCKIO and BUCKMem are merge mode.
BUCKCore1 and BUCKCore2 are merge mode.
BUCKPeri provide D1.8V including VCCQ_ISO and D1.8V_Peri
Figure 2.20.1 Power-On Sequence
YR8A77430S000BE
Oct 2015
Page 34 of 37
�RZ/G1M Starter Kit Board Hardware Manual Rev1.00
3. Outline Diagrams of RZ/G1M Starter Kit Board
3.1. External Dimensions and Hole Locations of RZ/G1M Starter Kit Board
The following shows the external dimensions and hole locations of the RZ/G1M Starter Kit Board. (Unit: mm)
Figure 3.1.1 External Dimensions and Hole Locations of the RZ/G1M Starter Kit Board
(Top View)
YR8A77430S000BE
Oct 2015
Page 35 of 37
�RZ/G1M Starter Kit Board Hardware Manual Rev1.00
s
3.2. Connector Locations on RZ/G1M Starter Kit Board (Component Surface)
The following shows the connector locations on the component surface.
Audio
USB0
Audio
In(SSI1) Out(SSI0) Func/
Host
USB1
Host
SATA
PCIE
HDMI(DU1)
RJ45
Ether
CVB
(VIN0)
LCD touch(I2C)
Reset
JTAG
CAN
Power
Switch
Power Jack(12V)
Debug Console
(SCIF0 => USB)
Figure 3.2.1 Connector Locations of the RZ/G1M Starter Kit Board (Component Surface)
(Top View)
YR8A77430S000BE
Oct 2015
Page 36 of 37
�RZ/G1M Starter Kit Board Hardware Manual Rev1.00
a
3.3. Connector Locations on RZ/G1M Starter Kit Board (Solder Surface)
The following shows the connector locations on the solder surface.
LVDS(DU0)
Expansion CN
(EtherAVB)
SDHI0
FullSize SD Slot
Expansion CN
SDHI2
MicroSD Slot
Figure 3.3.1 Connector Locations of the RZ/G1M Starter Kit Board (Solder Surface)
(Bottom View)
YR8A77430S000BE
Oct 2015
Page 37 of 37
�
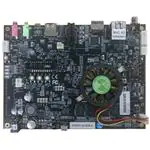


 工商网监
湘ICP备2023018690号
工商网监
湘ICP备2023018690号
