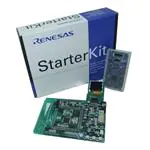
Starter Kit
Quick Start Renesas
for RX23T
Application
Headers
Pmod1
Header
Reset
Switch
USB
Serial
Power
LED
Pmod2
Header
DC Power
Jack
E1
Header
Pmod LCD
User
LEDs
User
Swiches
Application
Headers
E1 Debugger
Analog
Adjust
NOTE: This Quick Start Guide covers installation of the CS+ DVD.
1. Installation
Do not connect the E1 debugger module until the software support has been installed.
Internet access is required for activation during the installation process.
1. Insert the DVD into your computer’s DVD-ROM drive. The DVD should automatically run the installation program. If
the installer does not start, browse to the DVD root folder and double click on ‘CsPlusLauncher.exe’.
2. Windows™ 8.1 / 8 / 7 / Vista users may see a “User Account Control” dialog box. If applicable, enter the
administrator password and click ‘Yes’.
3. The pre-installer will first check that the CS+ prerequisites are present, and install any that are missing. Click ‘Install’
if prompted to. You will be prompted to obtain a product activation code by logging onto the My Renesas website.
Please follow the on screen instructions.
4. The CS+ installer will launch. Click ‘Next’ to continue.
5. The End User License Agreement appears. Read the license and select ‘Accept’ if you wish to continue. Click ‘Next’
6. The ‘Select Components’ window appears. Review the components by selecting each component in turn. Click
‘Next’ to continue.
7. The ‘Installation Settings Confirmation’ window appears. Review the information and click ‘Next’ to begin installation.
8. The ‘Installation Execution’ window will appear showing the installation progress.
Note: The Windows™ driver signing dialog box may be displayed. Please accept the driver to continue.
9. After the installation has completed, click ‘Next’.
10. Uncheck ‘Launch Update Manager’, then click ‘Finish’ to exit the installer.
Note: It is recommended to run the CS+ Update Manager and install updates after completion of this guide.
�2. Connection
11. Ensure the PMOD LCD is fitted to the connecter marked ‘PMOD1’ on the RSK.
12. Connect the E1 debugger module to the connector marked ‘E1’ on the RSK using the ribbon cable.
13. Connect the E1 debugger module to a spare USB port of your PC. The green ‘ACT’ LED on the E1 debugger will
flash.
14. The E1 debugger drivers will now be installed. Note that, this may take up to a minute and administrator privileges
will be required.
Windows™ 7 / Vista
“Device driver software installed
successfully” pop-up will appear in the
Windows™ taskbar and installation will
complete.
Windows™ 8.1 / 8
An icon will appear in the Windows™
taskbar and installation will complete.
15. The green ‘ACT’ LED on the E1 debugger will illuminate constantly.
3. CS+ Project
CS+ integrates various tools such as compiler, assembler, debugger and editor into a common graphical user interface.
To learn more on how to use CS+, refer to the CS+ Tutorial manual from the menu bar (Help > Tutorial).
Other CS+ manuals are available:
Windows™ 7 & Vista: Start Menu > All Programs > Renesas Electronics CS+ > Readme Documents > RSK > RSKRX23T
Windows™ 8.1 & 8: From Apps View , all documents are under "Renesas Electronics CS+"
16. Launch CS+:
Windows™ 7 & Vista: Start Menu > All Programs > Renesas Electronics CS+ > CS+ for CC (RL78, RX, RH850)
Windows™ 8.1 & 8: From Apps View , click ‘CS+ for CC (RL78, RX, RH850)’ icon
17. The ‘One Point Advice’ dialog box, which provides useful tips, will open. Click ‘OK’.
18. The Start panel will appear. Select the
‘RSKRX23T_Tutorial’ project under the ‘Open Sample
RSK Project’ entry and click ‘GO’.
19. In the “Create Project” dialog box that follows, specify a
name for the project. Leave the list of subprojects
unselected.
20. Click “Create” to launch the main Tutorial project.
21. If asked to create the project folder, click ‘OK’.
�4. Programming and Debug
22. Double-click on the Debug Tool to open the Property pane, ‘Connect Settings’ tab.
23. Verify that the option to ‘Power target from the emulator’ is set to ‘Yes’.
24. Build the project by clicking on the Build Project button.
25. Download the code to the microcontroller by clicking on the download button.
26. Click the ‘Restart’ button to reset the CPU and start program execution.
27. The LCD will display “RSKRX23T”, “Tutorial” and “Press Any Switch” on the first three lines of the panel.
28. Press any switch (SW1, SW2 or SW3). An A/D conversion will be performed and the result will be displayed on the
LCD panel.
29. Rotate the Analog Adjust Control and press any switch again. A new A/D conversion will be performed and the
count of A/D conversions will be displayed in binary form using LEDs 0-3.
30. Click the ‘Stop’ button.
The code will stop and the source code will be opened at the current program counter.
31. To end the debug session, click the disconnect button.
�5. Next Step
After you have completed this quick start procedure, please review the tutorial code and sample code that came
with the kit. You can review other samples by selecting sub-projects during the Open Sample RSK Project step
(step 18) and setting the required project as active in the Project Tree. The Tutorial Manuals will help you
understand the device and the development process using Renesas Development Tools.
The Hardware Manual supplied with this RSK is current at the time of publication. Please check for any updates to
the device manual from the Renesas internet site at: http://www.renesas.com/rskrx23t
6. Renesas RX Compiler
The version of the compiler provided with this RSK is fully functional for 60 days and then code size limited to
128kbytes of Code and Data. This restriction can be removed by purchasing a licenced copy of the tools.
7. User Manuals
User manuals can found in the following locations:
Windows™ 7 & Vista: Start Menu > All Programs > Renesas Electronics CS+ > Readme Documents > RSK > RSKRX23T
Windows™ 8.1 & 8: From Apps View , all documents are under "Renesas Electronics CS+"
8. Support
Online technical support and information is available at: http://www.renesas.com/rskrx23t
Technical Contact Details
Global & Japan: csc@renesas.com
Note on Update Manager: The Update Manager checks via the Internet for any updated resources available for
each installed CS+ tool and downloads and installs them to simplify the update process. It is recommended to
run the Update Manager and check for updates regularly.
© 2015 Renesas Electronics Europe Limited. All rights reserved
© 2015 Renesas Electronics Corporation. All rights reserved.
© 2015 Renesas System Design Co., Ltd. All rights reserved.
Website: http://www.renesas.com
D014154_11_S01_V01
�
YRTK5005130S00000BE 价格&库存
很抱歉,暂时无法提供与“YRTK5005130S00000BE”相匹配的价格&库存,您可以联系我们找货
免费人工找货