Z8F64820100ZCOG
Z8 Encore! XP® F6482 Series
Development Kit
User Manual
UM026302-0916
Copyright ©2016 Zilog®, Inc. All rights reserved.
www.zilog.com
�Z8 Encore! XP® F6482 Series Development Kit
User Manual
ii
Warning: DO NOT USE THIS PRODUCT IN LIFE SUPPORT SYSTEMS.
LIFE SUPPORT POLICY
ZILOG’S PRODUCTS ARE NOT AUTHORIZED FOR USE AS CRITICAL COMPONENTS IN LIFE
SUPPORT DEVICES OR SYSTEMS WITHOUT THE EXPRESS PRIOR WRITTEN APPROVAL OF
THE PRESIDENT AND GENERAL COUNSEL OF ZILOG CORPORATION.
As used herein
Life support devices or systems are devices which (a) are intended for surgical implant into the body, or (b)
support or sustain life and whose failure to perform when properly used in accordance with instructions for
use provided in the labeling can be reasonably expected to result in a significant injury to the user. A critical component is any component in a life support device or system whose failure to perform can be reasonably expected to cause the failure of the life support device or system or to affect its safety or effectiveness.
Document Disclaimer
©2016 Zilog, Inc. All rights reserved. Information in this publication concerning the devices, applications,
or technology described is intended to suggest possible uses and may be superseded. ZILOG, INC. DOES
NOT ASSUME LIABILITY FOR OR PROVIDE A REPRESENTATION OF ACCURACY OF THE
INFORMATION, DEVICES, OR TECHNOLOGY DESCRIBED IN THIS DOCUMENT. ZILOG ALSO
DOES NOT ASSUME LIABILITY FOR INTELLECTUAL PROPERTY INFRINGEMENT RELATED
IN ANY MANNER TO USE OF INFORMATION, DEVICES, OR TECHNOLOGY DESCRIBED
HEREIN OR OTHERWISE. The information contained within this document has been verified according
to the general principles of electrical and mechanical engineering.
Z8, Z8 Encore!, and Z8 Encore! XP are trademarks or registered trademarks of Zilog, Inc. All other product or service names are the property of their respective owners.
UM026302-0916
�Z8 Encore! XP® F6482 Series Development Kit
User Manual
iii
Revision History
Each instance in the Revision History table below reflects a change to this document from
its previous version. For more details, click the appropriate links in the table.
Revision
Level
Description
Page
Sep
2016
02
Removed RS-232 to 6-pin circuit adapter in the Kit Contents
3,12
Oct
2013
01
Original issue.
n/a
Date
UM026302-0916
Revision History
�Z8 Encore! XP® F6482 Series Development Kit
User Manual
iv
Safeguards
The following precautions must be observed when working with the devices described in
this document.
Caution: Always use a grounding strap to prevent damage resulting from electrostatic
discharge (ESD).
Safeguards
UM026302-0916
�Z8 Encore! XP® F6482 Series Development Kit
User Manual
v
Table of Contents
Revision History. . . . . . . . . . . . . . . . . . . . . . . . . . . . . . . . . . . . . . . . . . . . . . . . . . . . . . . . .iii
Safeguards . . . . . . . . . . . . . . . . . . . . . . . . . . . . . . . . . . . . . . . . . . . . . . . . . . . . . . . . . . . . . iv
The Z8 Encore! XP F6482 Series Development Kit . . . . . . . . . . . . . . . . . . . . . . . . . . . . . 1
Kit Contents . . . . . . . . . . . . . . . . . . . . . . . . . . . . . . . . . . . . . . . . . . . . . . . . . . . . . . . . 3
Kit Features . . . . . . . . . . . . . . . . . . . . . . . . . . . . . . . . . . . . . . . . . . . . . . . . . . . . . . . . . 3
Board Support Package . . . . . . . . . . . . . . . . . . . . . . . . . . . . . . . . . . . . . . . . . . . . . . . . 4
Supported Operating Systems . . . . . . . . . . . . . . . . . . . . . . . . . . . . . . . . . . . . . . . . . . . 4
Download and Install the ZDS II Software and Documentation . . . . . . . . . . . . . . . . . 4
Connect the F6482 Series Development Board to your PC . . . . . . . . . . . . . . . . . . . . 6
Start the Z8F6482 Demonstration Program . . . . . . . . . . . . . . . . . . . . . . . . . . . . . . . . 8
HyperTerminal Configuration . . . . . . . . . . . . . . . . . . . . . . . . . . . . . . . . . . . . . . . . . 12
F6482 Series Development Board . . . . . . . . . . . . . . . . . . . . . . . . . . . . . . . . . . . . . . 13
Power Sources . . . . . . . . . . . . . . . . . . . . . . . . . . . . . . . . . . . . . . . . . . . . . . . . . . . . . . 15
Z8F6482 MCU Features . . . . . . . . . . . . . . . . . . . . . . . . . . . . . . . . . . . . . . . . . . . . . . 15
SBLCDA4 LCD . . . . . . . . . . . . . . . . . . . . . . . . . . . . . . . . . . . . . . . . . . . . . . . . . . . . 17
32 Mbit Flash with SPI Bus . . . . . . . . . . . . . . . . . . . . . . . . . . . . . . . . . . . . . . . . . . . . 20
MIC5318 Low Voltage Drop-Out Regulator . . . . . . . . . . . . . . . . . . . . . . . . . . . . . . 21
RE200B Pyroelectric Sensor . . . . . . . . . . . . . . . . . . . . . . . . . . . . . . . . . . . . . . . . . . . 22
TPA301D Mono Audio Power Amplifier . . . . . . . . . . . . . . . . . . . . . . . . . . . . . . . . . 24
CVS-1508 Speaker . . . . . . . . . . . . . . . . . . . . . . . . . . . . . . . . . . . . . . . . . . . . . . . . . . 25
TEFT4300 PhotoTransistor . . . . . . . . . . . . . . . . . . . . . . . . . . . . . . . . . . . . . . . . . . . 26
LM285 Adjustable Micropower Voltage Reference . . . . . . . . . . . . . . . . . . . . . . . . . 27
J16 DBG . . . . . . . . . . . . . . . . . . . . . . . . . . . . . . . . . . . . . . . . . . . . . . . . . . . . . . . . . . 28
Jumper Settings . . . . . . . . . . . . . . . . . . . . . . . . . . . . . . . . . . . . . . . . . . . . . . . . . . . . . 29
ZDS II Flash Loader Utility . . . . . . . . . . . . . . . . . . . . . . . . . . . . . . . . . . . . . . . . . . . . 30
Z8F6482 Sample Projects . . . . . . . . . . . . . . . . . . . . . . . . . . . . . . . . . . . . . . . . . . . . . 30
F6482 Series Development Kit Documentation . . . . . . . . . . . . . . . . . . . . . . . . . . . . 31
Appendix A. Schematic Diagrams . . . . . . . . . . . . . . . . . . . . . . . . . . . . . . . . . . . . . . . . . 32
Appendix B. Installing the USB SmartCable Driver . . . . . . . . . . . . . . . . . . . . . . . . . . . .
Windows 7 32/64 Systems . . . . . . . . . . . . . . . . . . . . . . . . . . . . . . . . . . . . . . . . . . . .
Windows Vista 32/64 Systems . . . . . . . . . . . . . . . . . . . . . . . . . . . . . . . . . . . . . . . . .
Windows XP-32(SP3) Systems . . . . . . . . . . . . . . . . . . . . . . . . . . . . . . . . . . . . . . . .
36
36
37
37
Appendix C. Tera Term Configuration . . . . . . . . . . . . . . . . . . . . . . . . . . . . . . . . . . . . . . 39
Customer Support. . . . . . . . . . . . . . . . . . . . . . . . . . . . . . . . . . . . . . . . . . . . . . . . . . . . . . . 40
UM026302-0916
Table of Contents
�Z8 Encore! XP® F6482 Series Development Kit
User Manual
vi
List of Figures
Figure 1.
The F6482 Series Development Kit . . . . . . . . . . . . . . . . . . . 2
Figure 2.
The Downloadable Software category in the Zilog Store . . 5
Figure 3.
Connecting the 6-Circuit Ribbon Cable to the USB
SmartCable . . . . . . . . . . . . . . . . . . . . . . . . . . . . . . . . . . . . . . 6
Figure 4.
Debug Connector J16 . . . . . . . . . . . . . . . . . . . . . . . . . . . . . . 7
Figure 5.
Power Supply Port P1 Connector . . . . . . . . . . . . . . . . . . . . 8
Figure 6.
Open Project from the ZDS II File Menu . . . . . . . . . . . . . . . 9
Figure 7.
Select the ledblink.zdsproj Project . . . . . . . . . . . . . . . . . . . . 9
Figure 8.
Select Z8F64820100ZCOG and USB SmartCable . . . . . . 10
Figure 9.
Select Go from the Debug Menu . . . . . . . . . . . . . . . . . . . . 11
Figure 10. Console Output Using Hyperterminal (Windows XP) . . . 11
Figure 11. Console Output Using Tera Term (Windows 7) . . . . . . . . 12
Figure 12. The F6482 Series Development Board . . . . . . . . . . . . . . . 14
Figure 13. F6482 Series Development Kit Block Diagram . . . . . . . . 15
Figure 14. Seven-Segment LCD from Softbaugh . . . . . . . . . . . . . . . . 18
Figure 15. LCD1 Pin Configuration . . . . . . . . . . . . . . . . . . . . . . . . . . 18
Figure 16. LCD1 on the F6482 Series Development Board . . . . . . . . 19
Figure 17. 32 MBit Flash with SPI Bus . . . . . . . . . . . . . . . . . . . . . . . . 20
Figure 18. S25FL032A Pin Configuration . . . . . . . . . . . . . . . . . . . . . 20
Figure 19. U2 on the F6482 Series Development Board . . . . . . . . . . 21
Figure 20. MIC5318 Low Voltage Drop-Out Regulator Pin
Assignments . . . . . . . . . . . . . . . . . . . . . . . . . . . . . . . . . . . . 21
Figure 21. The MIC5318 Low Voltage Drop-Out Regulator Circuit . 22
Figure 22. The MIC5318 Low Voltage Drop-Out Regulator . . . . . . . 22
Figure 23. RE200B Pyroelectric Sensor Circuit . . . . . . . . . . . . . . . . . 23
Figure 24. The RE200B Pyroelectric Sensor . . . . . . . . . . . . . . . . . . . 23
Figure 25. TPA301D Mono Audio Power Amplifier Pin
Assignments . . . . . . . . . . . . . . . . . . . . . . . . . . . . . . . . . . . . 24
Figure 26. TPA301D Mono Audio Power Amplifier Circuit . . . . . . . 24
UM026302-0916
�Z8 Encore! XP® F6482 Series Development Kit
User Manual
vii
Figure 27. The TPA301D Mono Audio Power Amplifier . . . . . . . . . 25
Figure 28. The CVS-1508 Speaker . . . . . . . . . . . . . . . . . . . . . . . . . . . 25
Figure 29. TEFT4300 PhotoTransistor Circuit . . . . . . . . . . . . . . . . . . 26
Figure 30. The TEFT4300 PhotoTransistor . . . . . . . . . . . . . . . . . . . . 26
Figure 31. LM285 Adjustable Micropower Voltage Reference . . . . . 27
Figure 32. LM285 Adjustable Micropower Circuit . . . . . . . . . . . . . . 27
Figure 33. The LM285 Adjustable Micropower Device . . . . . . . . . . . 28
Figure 34. The J16 DBG Circuit . . . . . . . . . . . . . . . . . . . . . . . . . . . . . 28
Figure 35. The J16 DBG Device . . . . . . . . . . . . . . . . . . . . . . . . . . . . . 29
Figure 36. An Example Flash Loader Screen . . . . . . . . . . . . . . . . . . . 30
Figure 37. F6482 Series Development Board Schematic
Diagram, #1 of 4 . . . . . . . . . . . . . . . . . . . . . . . . . . . . . . . . 32
Figure 38. F6482 Series Development Board Schematic
Diagram, #2 of 4 . . . . . . . . . . . . . . . . . . . . . . . . . . . . . . . . 33
Figure 39. F6482 Series Development Board Schematic
Diagram, #3 of 4 . . . . . . . . . . . . . . . . . . . . . . . . . . . . . . . . 34
Figure 40. F6482 Series Development Board Schematic
Diagram, #4 of 4 . . . . . . . . . . . . . . . . . . . . . . . . . . . . . . . . 35
UM026302-0916
�Z8 Encore! XP® F6482 Series Development Kit
User Manual
viii
List of Tables
Table 1.
Table 2.
Table 3.
Table 4.
Table 5.
Table 6.
UM026302-0916
Z8F64820100ZCOG Contents . . . . . . . . . . . . . . . . . . . . . . . 3
USB to TTL Serial Converter Connections . . . . . . . . . . . . 13
LCD1 Pin Map . . . . . . . . . . . . . . . . . . . . . . . . . . . . . . . . . . 19
Jumper Settings . . . . . . . . . . . . . . . . . . . . . . . . . . . . . . . . . 29
Z8F6482 MCU Sample Projects . . . . . . . . . . . . . . . . . . . . 31
F6482 Series Development Kit Documentation . . . . . . . . 31
�Z8 Encore! XP® F6482 Series Development Kit
User Manual
1
The Z8 Encore! XP® F6482 Series
Development Kit
This document describes how to set up the F6482 Series Development Kit (Zilog part
number Z8F64820100ZCOG) and use it to evaluate your Z8F6482-based designs and
applications. The Kit features a development board consisting of four LEDs, three pushbuttons, a buzzer/speaker, a 7.1 seven-segment LCD, a pyroelectric sensor, a phototransistor, 32Mbit SPI Flash, port pin headers, and USB and UART ports. The Board features the
Z8F6482 MCU in a 80-pin LQFP package, plus a DBG connector to connect the Board to
a host development PC using Zilog’s USB SmartCable. To learn more about the Z8F6482
MCU, refer to the F6482 Series Product Specification (PS0294).
This document provides instructions for setting up and configuring Z86482 Development
Board and includes schematic diagrams and a discussion of Board features and ZDS II.
The first sections of this document guide you through the following tasks:
•
Download and Install the ZDS II Software and Documentation – see page 4
– Installing the USB SmartCable Driver – see Appendix B. Installing the USB
SmartCable Driver on page 36
•
•
Connect the F6482 Series Development Board to your PC – see page 6
Start the Z8F6482 Demonstration Program – see page 8
Further details, including memory configurations, jumper settings, and a listing of sample
projects can be found in the Z8F6482 Sample Projects section on page 30.
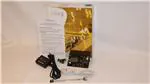
Figure 1 shows an image of the F6482 Series Development Kit.
UM026302-0916
The Z8 Encore! XP® F6482 Series Development Kit
�Z8 Encore! XP® F6482 Series Development Kit
User Manual
2
Figure 1. The F6482 Series Development Kit
The Z8 Encore! XP® F6482 Series Development Kit
UM026302-0916
�Z8 Encore! XP® F6482 Series Development Kit
User Manual
3
Kit Contents
Table 1 lists the contents of the F6482 Series Development Kit.
Table 1. Z8F64820100ZCOG Contents
Item
Description
Quantity
1
F6482 Series Development Board
1
2
USB SmartCable
1
3
6-circuit ribbon cable
1
4
A (male) to Mini-B USB cable
1
5
F6482 Series Development Kit Flyer (FL0160)
1
Kit Features
The key features of the F6482 Series Development Kit are:
•
F6482 Series Development Board, which includes:
– Z8F6482 MCU in an 80-pin LQFP package operating at 24 MHz with 64 KB of
internal Flash memory and 3.75 KB of internal RAM memory
– 32 Mbit SPI Flash
– A USB interface that provides:
○ Power to the Board with overcurrent protection
○ Connection to the Z8F6482 MCU’s USB port
–
–
–
–
–
–
–
–
–
•
•
UM026302-0916
7.1 segment LCD module
Speaker: SP1
Pyroelectric sensor
Phototransistor
UART(s) port J20
Test points, headers, and prototype area
External source of reference voltage (2.5 V)
MCU current measurement test points J5 and J6
Power supply level adjustable with potentiometer R13
USB SmartCable
ZDS II software, samples, and documentation available free for download
– Z8F6482 Board Support Package (BSP) source code and sample programs
Kit Contents
�Z8 Encore! XP® F6482 Series Development Kit
User Manual
4
Board Support Package
The ZDS II software download includes a Board Support Package (BSP) that provides an
application programming interface (API) to configure and control select Z8F6482 MCU
peripherals. This BSP API is accessible through a static library linked to customer applications and is a blend of macros and C functions that facilitate application development by
abstracting direct SFR manipulation from the programmer. Macros provide near-assembly-level access to SFRs without incurring the overhead (i.e., code size and execution
time) of C functions for basic operations (e.g., stopping a timer). More complex operations
are implemented in C functions, thereby eliminating the customer requirement for recreating code for frequently-used operations (e.g., transmitting a block of data through the
UART under DMA control). By using the BSP library, customers can develop applications
that access Z8F6482 MCU peripherals with only a few function calls, effectively reducing
development effort to a minimum.
The ZDS II software download also includes complete source code to all peripheral
devices supported by the BSP API. Advanced programmers can cut and paste code snippets from the BSP into their own applications, or simply study the BSP source code to
gain a better understanding of the Z8F6482 Series of MCUs.
To learn more about the BSP API, refer to the F6482 Series Board Support Package Reference Manual (RM0064).
Supported Operating Systems
The F6482 Series Development Board supports the following operating systems:
•
•
•
•
Microsoft Windows 8 (32-bit/64-bit)
Microsoft Windows 7 (32-bit/64-bit)
Microsoft Windows Vista (32-bit/64-bit)
Microsoft Windows XP
Download and Install the ZDS II Software and Documentation
Observe the following steps to install your ZDS II software and documentation.
The Z8 Encore! XP® F6482 Series Development Kit
UM026302-0916
�Z8 Encore! XP® F6482 Series Development Kit
User Manual
5
Note: If you have already installed ZDS II – Z8 Encore! and have downloaded the software and documentation by following the procedure on the paper insert in your kit
(FL0160), you’re ready for Appendix B. Installing the USB SmartCable Driver on page 36.
1. Prior to connecting the F6482 Series Development Board to your development PC,
download ZDS II for Z8 Encore! v5.2.2 (or later) from the Downloadable Software
category in the Zilog Store; see Figure 2.
Figure 2. The Downloadable Software category in the Zilog Store
2. When your download is complete, double-click the installation file named
ZDS2_Z8Encore!_.exe, and follow the on-screen instructions.
UM026302-0916
Download and Install the ZDS II Software and
�Z8 Encore! XP® F6482 Series Development Kit
User Manual
6
Connect the F6482 Series Development Board to your PC
Observe the following procedure to connect the F6482 Series Development Board to your
PC.
Caution: Disconnect or turn off the power to the F6482 Series Development Board before connecting or disconnecting the USB SmartCable.
1. Ensure that the following F6482 Series Development board default jumper settings
are configured (see Table 5 on page 31 for reference):
J1 IN
J2 OUT
J9 IN
J19 OUT
J21 1-2 IN
J21 5-6 IN
J23 1-2 IN
2. Connect one end of the 6-circuit ribbon cable provided in your Kit to the USB SmartCable unit, ensuring that the ribbon’s male connector is aligned correctly with the
female connector on the unit, as indicated by the red stripe in Figure 3.
Figure 3. Connecting the 6-Circuit Ribbon Cable to the USB SmartCable
The Z8 Encore! XP® F6482 Series Development Kit
UM026302-0916
�Z8 Encore! XP® F6482 Series Development Kit
User Manual
7
3. Connect the other end of the ribbon cable to Debug Connector J16 on the Development Board. Ensure that Pin 1 on the ribbon cable is aligned with Pin 1 on the target
connector, as highlighted in Figure 4.
Figure 4. Debug Connector J16
UM026302-0916
Connect the F6482 Series Development Board to
�Z8 Encore! XP® F6482 Series Development Kit
User Manual
8
4. With the USB A (male) to Mini-B cable, connect Port P1 on the F6482 Series Development Board to a USB port on the development PC to apply power to the Development Board, as highlighted in Figure 5.
Figure 5. Power Supply Port P1 Connector
Start the Z8F6482 Demonstration Program
The F6482 Series Development Kit includes a sample program that demonstrates a blinking LED application. An optional terminal emulation program and a 3rd Party USB to
TTL Serial converter (not supplied) maybe used and must be configured for 57600-8-N-1
with no flow control, as described in the HyperTerminal Configuration section on page 12.
To get started with the Z8F6482 demonstration, observe the following procedure.
1. Launch ZDS II by navigating from the Windows Start menu to Programs → Zilog
ZDS II – Z8 Encore! → ZDS II – Z8 Encore! .
2. From the File menu in ZDS II, select Open Project as shown in Figure 6, and navigate
via the following filepath.
\samples\XP_F6482\XP_F6482_LedBlink_C
The Z8 Encore! XP® F6482 Series Development Kit
UM026302-0916
�Z8 Encore! XP® F6482 Series Development Kit
User Manual
9
Figure 6. Open Project from the ZDS II File Menu
3. Select the ledblink.zdsproj project from within the XP_F6482_ledBlink_C
folder and click Open, as shown in Figure 7. A list of source files will appear in the
workspace panel.
Figure 7. Select the ledblink.zdsproj Project
UM026302-0916
Start the Z8F6482 Demonstration Program
�Z8 Encore! XP® F6482 Series Development Kit
User Manual
10
4. From the Build menu, select Set Active Configuration to open the Select Configuration dialog box.
5. Select Debug, then click OK to close the Select Configuration dialog box.
6. From the Project menu in ZDS II, select Settings to open the Project Settings dialog
box. In the Project Settings dialog box, click the Debugger tab.
7. On the Debugger page, select Z8F64820100ZCOG from the Target list, then select
USB SmartCable from the Debug Tool drop-down menu, as shown in Figure 8.
Figure 8. Select Z8F64820100ZCOG and USB SmartCable
8. Click OK to close the Project Settings dialog box.
9. If you are prompted to rebuild any affected files, click Yes. Otherwise, choose Build
from the menu bar, then click Rebuild All.
10. To run the application, select Go from the Debug menu, as indicated in Figure 9. As a
result, LEDs D4, D5, and D6 will blink in sequence.
The Z8 Encore! XP® F6482 Series Development Kit
UM026302-0916
�Z8 Encore! XP® F6482 Series Development Kit
User Manual
11
Figure 9. Select Go from the Debug Menu
11. After the application has started, console output should be visible in the terminal emulation program, as shown in Figures 10 and 11.
Figure 10. Console Output Using Hyperterminal (Windows XP)
UM026302-0916
Start the Z8F6482 Demonstration Program
�Z8 Encore! XP® F6482 Series Development Kit
User Manual
12
Figure 11. Console Output Using Tera Term (Windows 7)
HyperTerminal Configuration
A communications program such as HyperTerminal can be used on Windows XP systems
to view messages from the F6482 Series Development Board. The following procedure
examines how to configure HyperTerminal for the Z8F6482 demonstration project.
Note: The HyperTerminal application is not available in Windows Vista and Windows 7 systems. If
you are using either of these operating systems, consider using/installing different communication software such as Tera Term; see Appendix C. Tera Term Configuration on page 39.
1. Connect a 3rd Party USB to TTL Serial converter to J20 on the Development Board
using the connections shown in Table 2.
The Z8 Encore! XP® F6482 Series Development Kit
UM026302-0916
�Z8 Encore! XP® F6482 Series Development Kit
User Manual
13
Table 2. USB to TTL Serial Converter Connections
Z8F6482 Board
USB to TTL Serial Converter
J20-1 VCC
5V
J20-4 RXD
TXD
J20-5 TXD
RXD
J20-6 GND
GND
2. Connect the other end to your PC.
3. In HyperTerminal, choose File Properties; then, if your PC has a serial interface,
select the COM port assigned to your serial port. If you do not have a serial port on
your PC, use a USB-to-serial adapter (not included in the kit).
4. From the Windows Control Panel, navigate via the Device Manager to Ports (COM &
LPT) to determine the correct COM port assigned to your adapter. Configure this port
to reflect the following settings:
– 57600 bps
– 8 data bits
– No parity
– 1 stop bit
– No flow control
5. In HyperTerminal, click the Call button to connect to the F6482 Series Development
Board. When connected, you should be able to see the demonstration program menu
shown in Figure 11.
F6482 Series Development Board
The purpose of the F6482 Series Development Kit is to provide a set of hardware and software tools for applications based on the Z8F6482 microcontroller. An image of the F6482
Series Development Board is shown in Figure 12; a block diagram is shown in Figure 13.
UM026302-0916
F6482 Series Development Board
�Z8 Encore! XP® F6482 Series Development Kit
User Manual
14
Figure 12. The F6482 Series Development Board
The Z8 Encore! XP® F6482 Series Development Kit
UM026302-0916
�Z8 Encore! XP® F6482 Series Development Kit
User Manual
15
Figure 13. F6482 Series Development Kit Block Diagram
Power Sources
The Board features two power source options. It can be powered by connecting Port P1
(USB Mini-B) to the USB port of the development PC using the USB A-to-USB Mini-B
cable included in the Kit. The other option is to connect an external 5 VDC source with at
least 300–400 mA of current to J14 (5 VDC) and J15 (GND).
•
•
USB power at P1
External power across J14 and J15
Z8F6482 MCU Features
The Z8F6482 MCU is a member of Zilog’s Z8 Encore! XP Family of microcontroller
products. Key features include:
•
UM026302-0916
24 MHz eZ8 CPU core
Power Sources
�Z8 Encore! XP® F6482 Series Development Kit
User Manual
16
•
•
•
•
16 KB, 32 KB, 60 KB or 64 KB Flash memory with in-circuit programming capability
•
•
•
12-bit Digital-to-Analog Converter (DAC)
•
•
•
Real-Time Clock (RTC) supporting both Counter and Clock modes
•
Two on-chip, low-power operational amplifiers (32-pin and 64-pin with LCD packages contain only one)
•
8-channel event system provides communication between peripherals for autonomous
triggering
•
Full-speed Universal Serial Bus (USB 2.0) device supporting eight endpoints with
integrated USB PHY (not available on 64-pin package with LCD)
•
Two full-duplex 9-bit UART ports with the support of Local Interconnect Network
(LIN) and Digital Addressable Lighting Interface (DALI) protocols (32-pin and 64pin with LCD packages contain only one)
•
•
RS-485 Multidrop Mode up to 250 Kbit/sec (DMX support) integrated with UARTs
•
•
•
•
I2C controller which supports Master/Slave modes
•
16-bit multi-channel timer which supports four Capture/Compare/PWM modules (not
available on 32-pin and 64-pin with LCD packages)
•
•
Watchdog Timer (WDT)
2 KB or 3.75 KB internal RAM
128 B Non-Volatile Data Storage (NVDS)
Up to 17-channel, 12-bit Analog-to-Digital Converter (ADC) that can be configured
for internal or external voltage reference and single-ended or differential inputs
Integrated LCD driver with blinking and contrast control for up to 96 segments
128-bit Advanced Encryption Standard (AES) encryption/decryption hardware accelerator according to FIPS PUB 197
On-chip temperature sensor
Two on-chip analog comparators (32-pin and 64-pin with LCD packages contain only
one)
Two Enhanced Serial Peripheral Interface (ESPI) controllers (32-pin and 44-pin packages contain only one)
Four-channel DMA controller
Three enhanced 16-bit timers with Capture, Compare, and PWM capability
Two additional basic 16-bit timers with interrupts (shared as UART Baud Rate Generator)
26 to 67 General-Purpose Input/Output (GPIO) pins, depending upon package
The Z8 Encore! XP® F6482 Series Development Kit
UM026302-0916
�Z8 Encore! XP® F6482 Series Development Kit
User Manual
17
•
•
•
•
•
Up to 41 interrupt sources with up to 30 interrupt vectors
•
Internal clock sources and clock multiplication, including an Internal Precision Oscillator (IPO), Digitally Controlled Oscillator (DCO), Watchdog Timer Oscillator
(WTO), Frequency Locked Loop (FLL) and Phase Locked Loop (PLL)
•
•
•
•
High Frequency Crystal Oscillator (HFXO) operating in the 1–25 MHz range
On-Chip Debugger (OCD)
Power-On Reset (POR) and Voltage Brown-Out (VBO) protection
Built-in Low-Voltage Detection (LVD) with programmable voltage threshold
Low Frequency Crystal Oscillator (LFXO) operating at 32.768 kHz with low power
consumption
Wide 1.8 V–3.6 V operating voltage range
32-, 44-, 64-, and 80-pin packages
–40°C to +85°C (extended) operating temperature range
To learn more, refer to the F6482 Series Product Specification (PS0294).
SBLCDA4 LCD
The seven-segment LCD panel used at LCD1 on the F6482 Series Development Board is
an SBLCDA4 device manufactured by Softbaugh. The display footprint and pin labels for
this device are shown in Figure 14.
UM026302-0916
SBLCDA4 LCD
�Z8 Encore! XP® F6482 Series Development Kit
User Manual
18
Figure 14. Seven-Segment LCD from Softbaugh
The pin configuration of LCD1, as connected to the Z8F6482 MCU’s pins, is shown in
Figure 15.
Figure 15. LCD1 Pin Configuration
The Z8 Encore! XP® F6482 Series Development Kit
UM026302-0916
�Z8 Encore! XP® F6482 Series Development Kit
User Manual
19
Figure 16 shows an image of the SBLCDA4 LCD device mounted on the F6482 Series
Development Board.
Figure 16. LCD1 on the F6482 Series Development Board
Table 3 presents a pin map of the LCD1 device.
Table 3. LCD1 Pin Map
Pin
COM3
COM2
COM1
COM0
COM3
COM2
COM1
COM0
Pin
1
DP7
7E
7G
7F
X
X
X
X
X
2
7D
7C
7B
7A
MEM
MINUS
ERR
DOL
26
3
DP6
6E
6G
6F
8BC
RX
TX
ENV
25
4
6D
6C
6B
6A
A0
A1
A2
ANT
24
5
COL5
5E
5G
5F
BB
B0
B1
BT
23
6
5D
5C
5B
5A
AL
AD
AR
AU
22
7
DP4
4E
4G
4F
P2
P1
P0
PL
21
8
4D
4C
4B
4A
F4
F3
F2
F1
20
9
COL3
3E
3G
3F
P3
P4
PR
F5
19
10
3D
3C
3B
3A
COM0
18
11
DP2
2E
2G
2F
12
2D
2C
2B
2A
13
DP1
1E
1G
1F
COM3
14
1D
1C
1B
1A
X
COM1
17
COM2
16
15
X
X
X
X
To learn more about this SBLCDA4 LCD device, visit http://www.softbaugh.com/downloads/SBLCDA4_Specification.pdf.
UM026302-0916
SBLCDA4 LCD
�Z8 Encore! XP® F6482 Series Development Kit
User Manual
20
32 Mbit Flash with SPI Bus
The Spansion S25FL032A 32 Mbit device, shown in Figure 17, is a 3.0 V (2.7 V to 3.6 V)
single-power-supply Flash memory device that accepts data written to a serial input (SI)
and outputs data on a serial output (SO). Upon installing the ZDS II software, refer to the
following sample project folders for source code which can be used to read and program
SPI Flash memory:
..\BSP\Samples\AES\EncryptingDataLogger
..\BSP\Samples\UART_SPI_M2M
Figure 17. 32 MBit Flash with SPI Bus
The S25FL032A device can be found on the F6482 Series Development Board at location
U2. The pin configuration of this device is shown in Figure 18; a close-up image is shown
in Figure 19.
Figure 18. S25FL032A Pin Configuration
The Z8 Encore! XP® F6482 Series Development Kit
UM026302-0916
�Z8 Encore! XP® F6482 Series Development Kit
User Manual
21
Figure 19. U2 on the F6482 Series Development Board
To learn more about this S25FL032A device, visit http://html.alldatasheet.net/html-pdf/
465962/SPANSION/S25FL032P_12/3944/10/S25FL032P_12.html.
MIC5318 Low Voltage Drop-Out Regulator
The on-board regulator is the MIC5318 Low Voltage Drop-Out Regulator. This device
regulates the 5 V input voltage to the MCU’s VCC_T, which can be adjusted from 1.8 V to
3.6 V using the R13 trim pot. Pin assignments, a circuit diagram, and an image of the
MIC5318 device are shown in Figures 20 through 22.
Figure 20. MIC5318 Low Voltage Drop-Out Regulator Pin Assignments
UM026302-0916
MIC5318 Low Voltage Drop-Out Regulator
�Z8 Encore! XP® F6482 Series Development Kit
User Manual
22
Figure 21. The MIC5318 Low Voltage Drop-Out Regulator Circuit
Figure 22. The MIC5318 Low Voltage Drop-Out Regulator
RE200B Pyroelectric Sensor
The RE200B pyroelectric sensor is made of a crystalline material that generates a surface
electric charge when exposed to heat in the form of infrared radiation. A circuit diagram
and an image of the RE200B device are shown in Figures 23 and 24.
The Z8 Encore! XP® F6482 Series Development Kit
UM026302-0916
�Z8 Encore! XP® F6482 Series Development Kit
User Manual
23
Figure 23. RE200B Pyroelectric Sensor Circuit
Figure 24. The RE200B Pyroelectric Sensor
To learn more about this RE200B device, visit http://www.bucek.name/pdf/re200b.pdf.
UM026302-0916
RE200B Pyroelectric Sensor
�Z8 Encore! XP® F6482 Series Development Kit
User Manual
24
TPA301D Mono Audio Power Amplifier
The TPA301 is a bridge-tied load (BTL) audio power amplifier developed especially for
low-voltage applications in which internal speakers are required. Pin assignments, a circuit diagram, and an image of the TPA301D device are shown in Figures 25 through 27.
Figure 25. TPA301D Mono Audio Power Amplifier Pin Assignments
Figure 26. TPA301D Mono Audio Power Amplifier Circuit
The Z8 Encore! XP® F6482 Series Development Kit
UM026302-0916
�Z8 Encore! XP® F6482 Series Development Kit
User Manual
25
Figure 27. The TPA301D Mono Audio Power Amplifier
To learn more about this TPA301 device, visit http://www.ti.com/lit/ds/symlink/
tpa301.pdf
CVS-1508 Speaker
The CVS-1508 low-profile speaker manufactured by CUI Inc. consists of a 0.3 W, 8 Ω
neodymium magnet and mylar cone housed in a 15 mm round frame. An image of the
CVS-1508 device is shown in Figure 28.
Figure 28. The CVS-1508 Speaker
To learn more about this CVS-1508 device, visit http://www.cui.com/product/resource/
cvs-1508.pdf.
UM026302-0916
CVS-1508 Speaker
�Z8 Encore! XP® F6482 Series Development Kit
User Manual
26
TEFT4300 PhotoTransistor
The TEFT4300 phototransistor is a silicon NPN ambient light sensor with a high radiant
sensitivity and a daylight blocking filter. A circuit diagram and an image of the TEFT4300
device are shown in Figures 29 and 30.
Figure 29. TEFT4300 PhotoTransistor Circuit
Figure 30. The TEFT4300 PhotoTransistor
To learn more about this TEFT4300 device, visit http://www.vishay.com/docs/81549/
teft4300.pdf.
The Z8 Encore! XP® F6482 Series Development Kit
UM026302-0916
�Z8 Encore! XP® F6482 Series Development Kit
User Manual
27
LM285 Adjustable Micropower Voltage Reference
The 3-terminal LM285 micropower circuit manufactured by Texas Instruments is an
adjustable band-gap voltage reference diode which can be found on the F6482 Development Board at location VR1. Voltage references, a circuit diagram, and an image of the
LM285 device are shown in Figures 31 through 33.
Figure 31. LM285 Adjustable Micropower Voltage Reference
Figure 32. LM285 Adjustable Micropower Circuit
UM026302-0916
LM285 Adjustable Micropower Voltage Reference
�Z8 Encore! XP® F6482 Series Development Kit
User Manual
28
Figure 33. The LM285 Adjustable Micropower Device
J16 DBG
The J16 DBG device connects the F6482 Series Development Kit to the PC through a
debug tool. A circuit diagram and an image of the J16 DBG device are shown in
Figures 34 and 35.
Figure 34. The J16 DBG Circuit
The Z8 Encore! XP® F6482 Series Development Kit
UM026302-0916
�Z8 Encore! XP® F6482 Series Development Kit
User Manual
29
Figure 35. The J16 DBG Device
Jumper Settings
The functions of the F6482 Development Board’s six jumpers are described in Table 4.
Table 4. Jumper Settings
Jumper
Name
Description
State
Function
Factory
Setting
J1
VREF–
IN
GND is a source for VREF–
IN
OUT
External source could be connected, or PB3 can
be used as a GPIO.
IN
On-board source, 2.5 V, is VREF+.
OUT
Pin PB4 can be used as a GPIO, or the internal
source of VREF can be output here.
IN
On-board SPI Flash can be used.
OUT
PC1 can be used as a GPIO.
IN
On-board audio amplifier and speaker are disabled.
OUT
On-board audio amplifier and speaker are
enabled.
OUT
1–2,
5–6
UART0 enabled.
IN
3–4,
7–8
UART1 enabled.
1–2
VCC_T
2–3
VBIAS
J2
J9
J19
J21
J23
VREF+
SPI Flash Select
Audio Disable
UART Configuration
PIR Sensor Power
Source
UM026302-0916
OUT
IN
IN
Jumper Settings
�Z8 Encore! XP® F6482 Series Development Kit
User Manual
30
ZDS II Flash Loader Utility
A Flash Loader utility can be accessed from the Tools menu in Zilog Developer Studio.
With the Flash Loader, you can program the Z8F6482 MCU directly using the hex code
generated from the ZDS II IDE; Figure 36 presents an example.
Figure 36. An Example Flash Loader Screen
Z8F6482 Sample Projects
A number of sample projects are included with the ZDS II – Z8 Encore! v5.2.2 software,
which can be downloaded for free from the Zilog Store. These sample projects will be
accessible upon installation of ZDS II – Z8 Encore! v5.2.2; their locations are listed in
Table 4.
The Z8 Encore! XP® F6482 Series Development Kit
UM026302-0916
�Z8 Encore! XP® F6482 Series Development Kit
User Manual
31
Table 5. Z8F6482 MCU Sample Projects
Description
Installed Location
ledblink
\samples\XP_F6482\XP_F6482_LedBlink_C
\samples\XP_F6482\XP_F6482_LedBlink_asm
Buzzer
\samples\XP_F6482\XP_F6482_Buzzer
Demo
\samples\XP_F6482\XP_F6482_Demo
LCD
\samples\XP_F6482\XP_F6482_LCD
LightSensing
\samples\XP_F6482\XP_F6482_LightSensing
Motion
\samples\XP_F6482\XP_F6482_Motion
SMR_Demo
\samples\XP_F6482\XP_F6482_SMR_Demo
F6482 Series Development Kit Documentation
The following documents are each associated to the F6482 Series of MCUs, and are available free for download from the Zilog website.
Table 6. F6482 Series Development Kit Documentation
Description
Document
ID
Installed Location
F6482 Series Product Specification
PS0294
Documentation\Chip_Documentation
F6482 Series Product Brief
PB0246
Documentation\Chip_Documentation
eZ8 CPU User Manual
UM0128
Documentation\Chip_Documentation
Z8 Encore! XP F6482 Series API Programmer’s
Reference Manual
RM0064
Documentation\Technical_Articles
Z8 Encore! Design for Debug
TN0036
Documentation\Technical_Articles
F6482 Series Development Kit User Manual
UM0263
Documentation\Tools_Documentation
Ethernet SmartCable User Manual
UM0207
Documentation\Tools_Documentation
Opto-Isolated USB SmartCable User Manual
UM0195
Documentation\Tools_Documentation
USB SmartCable User Manual
UM0181
Documentation\Tools_Documentation
UM026302-0916
F6482 Series Development Kit Documentation
�Z8 Encore! XP® F6482 Series Development Kit
User Manual
32
Appendix A. Schematic Diagrams
Figures 37 through 40 present schematic diagrams of the F6482 Series Development Board.
J22
L1
P1
6
7
8
9
SH1
SH2
SH3
SH4
VBUS
DM
DP
ID
GND
FERRITE BEAD
R8
1
27
1
2
3
4
5
USB DM
USB_DM
USB_DP
J10
C18
27
R9
1
USB DP
J12
0.01uF
VCC_T
1
2
3
USB, mini B
GREEN
3
1
2
3
1
2
470
2
+ C22
10uF
PMEG3020
POWER
7
IN
OUT
EN
ADJ
GND
BYP
Center Pad
2
J14
5VDC
VCC_T
U3
D2
VCC_5v
1
1
R10
MIC5318
1
2
3
1.8 - 3.6V
4
5
C19
6
R11
16.5K
C20
C21
4.7uF
0.1uF
1uF
C23
1
VCC_5v
D1
0.01uF
2
3
20K
R13
BENCH POWER
VCC_T
J15
GND
1
2
3
R15
19.6K
R16
10K
VCC_T
R17
10K
J16
1
3
5
RSTDBG
2
4
6
RESET
DBG
1
2
SW1
LAYOUT OF J16
TOP VIEW
Figure 37. F6482 Series Development Board Schematic Diagram, #1 of 4
Schematic Diagrams
UM026302-0916
�Z8 Encore! XP® F6482 Series Development Kit
User Manual
33
POWER SUPPLY1
DBG
MCU
USB_DM
USB_DP
USB_DM
USB_DP
RST-
DBG
PYRO AND OTHER INTERFACES1
Power supply
Peripherals
PA0
PA1
PA2
PA3
PA4
PA5
PA6
PA7
PA0/T0IN/T0OUT-/CLKIN
PA1/T0OUT
PA2/DE0/CLK2IN
PA3/CTS0PA4/RXD0/MOSI0
PA5/TXD0/SCK0
PA6/T1IN/T1OUT-/SCL
PA7/T1OUT/SDA
PB0
PB1
PB2
PB3
PB4
PB5
PB6
PB7
PB0/ANA0/AMPAOUT
PB1/ANA1/AMPAINN
PB2/ANA2/AMPAINP
PB3/VREFPB4/VREF+
PB5/ANA9
PB6/ANA10
PB7
PC0
PC1
PC2
PC3
PC4
PC5
PC6
PC7
PC0/ANA4/VBIAS/C0INP
PC1/ANA5/C0INN
PC2/ANA3/SS0PC3/MISO0/ANA11/DAC
PC4/MOSI0/T0IN/T0OUT-/SCL/DE0
PC5/SCK0/T0OUT/SDA/CTS0PC6/T2IN/TOUT-/SCKOUT/ESOUT0
PC7/T2OUT/CTS1-/ESOUT1
PD0
PD1
PD2
PD3
PD4
PD5
PD6
PD7
PD0/RSTPD1/C1INN/AMPBINN/ANA7
PD2/C1INP/AMPBINP/ANA6
PD3/C1OUT/AMPBOUT/ANA8
PD4/RXD1
PD5/TXD1
PD6/DE1
PD7/C0OUT
PE2
PE3
PE4
PE5
PE6
PE2/T4IN
PE3/T4CHA/ESOUT0
PE4/T4CHB/ESOUT1
PE5/T4CHC/ESOUT2
PE6/T4CHD/ESOUT3
PF0
PF1
PF2
PF3
PF4
PF5
PF6
PF7
PF0/SEG2/ESOUT0
PF1/SEG7/ESOUT1
PF2/SEG8/ESOUT2
PF3/SEG9/ESOUT3
PF4/SEG10
PF5/SEG15
PF6/SS1-/SEG20
PF7/MISO1/SEG23
PG0
PG1
PG2
PG3
PG4
PG5
PG6
PG7
PG0/SCK1/SEG21
PG1/MOSI1/SEG22
PG2/COM0
PG3/COM1
PG4/SEG0
PG5/SEG1
PG6/COM2
PG7/COM3
PH0
PH1
PH2
PH3
PH4
PH5
PH6
PH7
PH0/SEG19
PH1/SEG16
PH2/SEG3
PH3/SEG4
PH4/SEG5
PH5/SEG6
PH6/SEG11
PH7/SEG12
PJ0
PJ1
PJ2
PJ3
PJ0/SEG13
PJ1/SEG14
PJ2/SEG17
PJ3/SEG18
MCU
Figure 38. F6482 Series Development Board Schematic Diagram, #2 of 4
UM026302-0916
Schematic Diagrams
�Z8 Encore! XP® F6482 Series Development Kit
User Manual
34
C37
J1
SH4
J2
1uF
SH5
2.21K
VCC_5v
1
2
1
2
R1
VR1
shunt
C38
1uF
PB4/VREF+
PB3/VREFPB1/ANA1/AMPAINN
PB2/ANA2/AMPAINP
PB5/ANA9
PF6/SS1-/SEG20
PE5/T4CHC/ESOUT2
PE6/T4CHD/ESOUT3
PJ2/SEG17
PJ3/SEG18
0 ohm
Y1
16 MHZ
PA1/T0OUT
0 ohm
COM0
COM1
PG2/COM0
PG3/COM1
PD7/C0OUT
PG6/COM2
PG7/COM3
USB_DM
USB_DP
SEG15
SEG14
SEG13
VDD
GND
VREFVREF+
SEG20
SEG18
SEG17
R2, R3, R4, R5 ARE NOT
POPULATED ON THE BOARD
PG4/SEG0
PG5/SEG1
0 ohm
J5
PA3/CTS0-
1
1
SEG12
SEG11
PC1/MISO0
GND
C3
0.015uF
C10
C9
1uF
GND
LCD
SH6
PC2/SS0J9
0.1uF
1
2
Z8F6482AT
1
2
3
4
CS
SO/IO1
WP/ACC/IO2
GND
VCC
HOLD/IO3
SCK
SI/IO0
8
7
6
5
PC5/SCK0
PC4/MOSI0
S25FL032
shunt
PH3/SEG4
PH2/SEG3
PA7/T1OUT/SDA
PC5/SCK0/T0OUT/SDA/CTS0PB7
PF0/SEG2/ESOUT0
PC4/MOSI0/T0IN/T0OUT-/SCL/DE0
PA6/T1IN/T1OUT-/SCL
PD5/TXD1
PA5/TXD0/SCK0
PA4/RXD0/MOSI0
PD6/DE1
PE3/T4CHA/ESOUT0
PC5/SCK0
C5
VCC_T
J4
1
2
3
GND
J3
1
2
3
VCC_T
12pF 12pF
1 ohm
C8
C7
1uF
SEG14
SEG15
SEG16
SEG17
SEG18
SEG19
SEG20
SEG21
COM0
COM1
COM2
COM3
U2
PC1/MISO0
J7
0.015uF
26
25
24
23
22
21
20
19
18
17
16
15
PF2/SEG8/ESOUT2
PF1/SEG7/ESOUT1
PC7/T2OUT/CTS1-/ESOUT1
PC6/T2IN/TOUT-/SCKOUT/ESOUT0
PD4/RXD1
PH5/SEG6
PH4/SEG5
SEG6
SEG5
VDD
0.015uF
J8
1
VCORE
C6
MEM-MIN-ERR-DOL
8BC-RX-TX-ENV
A0-A1-A2-ANT
BB-B0-B1-BT
AL-AD-AR-AU
P2-P1-P0-PL
F4-F3-F2-F1
P3-P4-PR-F5
COM0
COM1
COM2
COM3
PD3/C1OUT/AMPBOUT/ANA8
DBG
PD0/RST-
DBG
RSTVDD
SEG8
SEG7
R5
C4
DP7-7E-7G-7F
7D-7C-7B-7A
DP6-6E-6G-6F
6D-6C-6B-6A
COL5-5E-5G-5F
5D-5C-5B-5A
DP4-4E-4G-4F
4D-4C-4B-4A
COL3-3E-3G-3F
3D-3C-3B-3A
DP2-2E-2G-2F
2D-2C-2B-2A
DP1-1E-1G-1F
1D-1C-1B-1A
PH7/SEG12
PH6/SEG11
PC1/ANA5/C0INN
PC0/ANA4/VBIAS/C0INP
PB6/ANA10
PF4/SEG10
PF3/SEG9/ESOUT3
PE4/T4CHB/ESOUT1
SEG10
SEG9
Y2
32.768KHZ
J6
R6
40
39
38
37
36
35
34
33
32
31
30
29
28
27
26
25
24
23
22
21
PC4/MOSI0
0 ohm
VCC_T
1
2
3
4
5
6
7
8
9
10
11
12
13
14
VCC_T
PA2/DE0/CLK2IN
CURRENT
MEASUREMENT
LCD1
SEG13
SEG12
SEG11
SEG10
SEG9
SEG8
SEG7
SEG6
SEG5
SEG4
SEG3
SEG2
SEG1
SEG0
60
59
58
57
56
55
54
53
52
51
50
49
48
47
46
45
44
43
42
41
PJ3/SEG18
PJ2/SEG17
PE6/T4CHD/ESOUT3
PE5/T4CHC/ESOUT2
PF6/SS1-/SEG20
PB5/ANA9
PB3/VREFPB4/VREF+
PB2/ANA2/AMPAINP
PB1/ANA1/AMPAINN
VDD
VSS
PB0/ANA0/AMPAOUT
PD1/C1INN/AMPBINN/ANA7
PD2/C1INP/AMPBINP/ANA6
PC3/MISO0/ANA11/DAC
PC2/ANA3/SS0PF5/SEG15
PJ1/SEG14
PJ0/SEG13
COM2
COM3
R4
LM285
VLCD
1
R3
-
VREF
1
2
3
4
SBLCDA4
PH7/SEG12
PH6/SEG11
PC1/MISO0/ANA5/C0INN
PC0/ANA4/VBIAS/C0INP
PB6/ANA10
PF4/SEG10
PF3/SEG9/ESOUT3
PE4/T4CHB/ESOUT1
VSS
PD3/C1OUT/AMPBOUT/ANA8
DBG
PD0/RESETVDD
PF2/SEG8/ESOUT2
PF1/SEG7/ESOUT1
PC7/T2OUT/CTS1-/ESOUT1
PC6/T2IN/T2OUT-/SCKOUT/ESOUT0
PD4/RXD1
PH5/SEG6
PH4/SEG5
PG4/SEG0
PG5/SEG1
VLCD
PA2/DE0/CLK2IN/X2IN
PA3/CTS0-/X2OUT
PE3/T4CHA/ESOUT0
PD6/DE1
PA4/RXD0/MOSI0
PA5/TXD0/SCK0
VSS
VDD
PD5/TXD1
PA6/T1IN/T1OUT-/SCL
PC4/MOSI0/T0IN/T0OUT-/SCL/DE0
PF0/SEG2/ESOUT0
PB7
PC5/SCK0/T0OUT/SDA/CTS0PA7/T1OUT/SDA
PH2/SEG3
PH3/SEG4
R2
PH0/SEG19
PH1/SEG16
PE2/T4IN
PG0/SCK1/SEG21
PG1/MOSI1/SEG22
PF7/MISO1/SEG23
VCORE
AVDD
VDD
PA0/T0IN/T0OUT-/CLKIN/XIN
PA1/T0OUT/XOUT
VSS
AVSS
PG2/COM0
PG3/COM1
PD7/C0OUT
PG6/COM2
PG7/COM3
PE1/DM/T0OUT
PE0/DP/T0IN/T0OUT-
SEG0 1
SEG1 2
VLCD 3
4
5
6
7
PA4/RXD0/MOSI0 8
PA5/TXD0/SCK0 9
GND 10
VDD 11
12
TXD1
13
14
15
SEG2
16
17
18
SEG3 19
SEG4 20
PA0/T0IN/T0OUT-/CLKIN
61
62
63
64
SEG21
65
66
67
VCORE
68
69
VDD
70
71
72
GND
AGND 73
74
75
76
77
78
79
80
SEG19
SEG16
+
PB0/ANA0/AMPAOUT
PD1/C1INN/AMPBINN/ANA7
PD2/C1INP/AMPBINP/ANA6
PC3/MISO0/ANA11/DAC
PC2/ANA3/SS0PF5/SEG15
PJ1/SEG14
PJ0/SEG13
PC2/SS0-
U1
PH0/SEG19
PH1/SEG16
PE2/T4IN
PG0/SCK1/SEG21
PG1/MOSI1/SEG22
PF7/MISO1/SEG23
8
7
6
5
shunt
C14
C11
1uF
C13
C12
1uF
0.015uF
R7
0.015uF
AGND
C15
1uF
VLCD
VCORE
C16
C17
4.7uF
1uF
0 ohm
Figure 39. F6482 Series Development Board Schematic Diagram, #3 of 4
Schematic Diagrams
UM026302-0916
�Z8 Encore! XP® F6482 Series Development Kit
User Manual
35
VCC_T
R41
SH7
C24
PYRO POWER:
VCC_T = 1-2
VBIAS = 2-3
1500pF
C34
R47
3.3uF
383K
R42
shunt
J23
2M
R20
10K
VBIAS
1
2
3
VCC_T
C36
R18
R40
10uF
R21
PB1/AMPAINN
1
D
NCL-10IL
R44
2
GND
PB2/AMPAINP
R25
330K
3
1uF
2700pF
0 ohm
S
C26
0 ohm
PD3/AMPBOUT
10uF
LS1
U6
RE200B
R43
PA0
PA1
PA2
PA3
PA4
PA5
PA6
PA7
PC0
PC1
PC2
PC3
PC4
PC5
PC6
PC7
PE2
PE3
PE4
PE5
PE6
PG0
PG1
PG2
PG3
PG4
PG5
PG6
PG7
PJ0
PJ1
PJ2
PJ3
0 ohm
PD1/AMPBINN
C25
C35
R46
0 ohm
3.9M
0 ohm
PB0/AMPAOUT
C32
0 ohm
C33
0.01uF 1000pF
PIR SENSOR WITH AFE CONNECTIONS
SH1
1
2
J19
AUDIO:
EN - J19
DIS - J19
shunt
1uF
1
7
2
6
5
CVS-1508
O-
SD
GND
BP
VDD
I+
O+
I-
10K
C29
2.2uF
2
PD1/AMPBINN
PD3/AMPBOUT
PD4/RXD1
PD5/TXD1
U5
3
R28
C30
1
4
TEFT4300
2
PC3/DAC
ALS
10K
R45
VCC_T
VCC_T
PB5/ANA9
0.47uF
6.8K
R26
470
R32
10K
R31
10K
1
PB7
1
PC4
1
PC5
RED
R27
AUDIO AMPLIFIER
5pF
D4
2
0 ohm
R22
10K
C31
PB5/ANA9
PB6/ANA10
VCC_T
1
TPA301D
R30
PC3/DAC
PB0
PB1
PB2
PB3
PB4
PB5
PB6
PB7
PD0
PD1
PD2
PD3
PD4
PD5
PD6
PD7
PF0
PF1
PF2
PF3
PF4
PF5
PF6
PF7
PH0
PH1
PH2
PH3
PH4
PH5
PH6
PH7
1
SP1
PC0 VBIAS
PC1/C0INN
PB0/AMPAOUT
PB1/AMPAINN
PB2/AMPAINP
AMBIENT LIGHT SENSOR
U7
8
PA4/RXD0
PA5/TXD0
2
4
6
8
10
12
14
16
18
20
22
24
26
28
30
32
34
36
38
40
42
44
46
48
50
52
54
56
58
60
62
64
66
68
70
72
HDR/PIN 2x36
R38
C28
1
3
5
7
9
11
13
15
17
19
21
23
25
27
29
31
33
35
37
39
41
43
45
47
49
51
53
55
57
59
61
63
65
67
69
71
OUT
IN
2
VCC_T
VCC_T
J18
470
D5
2
PA7
PA6
YELL
J20
1
2
3
4
5
6
UART CONFIGURATION:
WAKEUP
UART0
1-2
5-6
1
UART1
2-3
7-8
SH2
1N4448W
D7
470
D6
2
2
GREEN
SW2
SW3
SH3
shunt
J21
4.7K
RxD
R35
4.7K
1
VCC_T
shunt
R33
R29
TEST
2
1
UART
3.3K
R37 100 ohm
R34
3.3K
1
3
5
7
2
4
6
8
PA4/RXD0
PD4/RXD1
PA5/TXD0
PD5/TXD1
HDR/PIN 2x4
2
PB6/ANA10
5K
R23
3
VCC_5v
R36
UART 0/1 CONNECTION
Figure 40. F6482 Series Development Board Schematic Diagram, #4 of 4
UM026302-0916
Schematic Diagrams
�Z8 Encore! XP® F6482 Series Development Kit
User Manual
36
Appendix B. Installing the USB
SmartCable Driver
The USB SmartCable can be installed on PCs that run on Windows 7 (32- and 64-bit),
Windows Vista (32- and 64-bit) and Windows XP operating systems. The procedures in
this section will guide you through the USB SmartCable installation process.
Windows 7 32/64 Systems
Observe the following steps to install the USB SmartCable on a Windows 7 system.
1. Connect the USB SmartCable to a USB port on your development PC. When the PC
detects the new hardware, it will display the Installing device driver software dialog.
2. Windows automatically searches for the driver; this process can take a few moments.
Because there is no option to terminate this search process, wait for the search to complete. If the driver was previously installed, Windows will automatically install the
USB SmartCable driver. If this is the case, skip ahead to Step 9. If Windows cannot
find the driver, close the search dialog and proceed to the next step.
3. In the Search programs and files field in the Windows Start menu, enter Device
Manager. The Device Manager will appear in a list of search results.
4. From this list of results, click Device Manager to open the Device Manager dialog,
which presents a list of devices that operate on your PC. Find and toggle Other
devices to view a sublist of additional devices, and right-click your mouse on USB
SmartCable.
5. In the submenu that appears, click Update Driver Software....
6. In the Update Driver Software – USB SmartCable dialog that appears, click the
Browse my computer for driver software option.
7. Click the Browse... button to browse to one of the following driver directories,
depending on the configuration of your PC.
On 32-bit Windows 7 systems, navigate to:
\device drivers\USB\x32
\device drivers\USB\x32
On 64-bit Windows 7 systems, navigate to:
\device drivers\USB\x64
\device drivers\USB\x64
Installing the USB SmartCable Driver
UM026302-0916
�Z8 Encore! XP® F6482 Series Development Kit
User Manual
37
8. Click Next to install the driver. On 32-bit Windows systems, a security dialog will
appear; select Install this driver software anyway.
9. After the Wizard finishes the installation, click Close.
Windows Vista 32/64 Systems
Observe the following steps to install the USB SmartCable on a Windows Vista system.
1. Connect the USB SmartCable to a USB port on the development PC.
2. After the PC detects the new hardware, it will display the Found New Hardware Wizard dialog box. Click Locate and install driver software (recommended).
3. Depending on your development PC’s User Account Control settings, Windows may
ask for permission to continue the installation. Click Continue.
4. When the Insert the Disc dialog appears, select I don’t have the disc. Show me
other options. Click the Next button to display the Windows couldn’t find driver dialog.
5. Select Browse my computer for driver software (advanced) to display the Browse
For Driver dialog, which prompts you to key in or browse for the location of the
driver’s .inf file. Depending on the type of computer you use (32- bit or 64-bit), use
the Browse... button to navigate to one of the following paths, then click the Next button.
On 32-bit Vista systems, navigate to:
\device drivers\USB\x32
\device drivers\USB\x32
On 64-bit Vista systems, navigate to:
\device drivers\USB\x64
\device drivers\USB\x64
6. When the Windows Security dialog prompts you whether to install or not to install,
click Install this driver software anyway and wait until the installation is completed
(Windows may prompt you more than once).
7. When the software has been installed successfully, click Close.
Windows XP-32(SP3) Systems
Observe the following steps to install the USB SmartCable on a Windows XP system.
1. Connect the USB SmartCable to a USB port on the development PC. When the PC
detects the new hardware, it will display the Found New Hardware Wizard dialog.
UM026302-0916
Installing the USB SmartCable Driver
�Z8 Encore! XP® F6482 Series Development Kit
User Manual
38
2. In the Wizard, select Install from a list or specific location (Advanced), then click
Next.
Note: If the Windows Hardware Installation dialog appears, click Continue Anyway.
3. In the Please choose your search and installations dialog, select Search for the
best driver in these locations and include this location in search.
4. Use the Browse... button to navigate to one of the following paths:
\device drivers\USB\x32
\Device Drivers\USB\x32
5. Click Next to locate the appropriate driver.
6. Click Next a second time, then click Finish to complete the installation.
Installing the USB SmartCable Driver
UM026302-0916
�Z8 Encore! XP® F6482 Series Development Kit
User Manual
39
Appendix C. Tera Term Configuration
If you are using Tera Term as your console program, observe the following procedure to
properly configure it.
1. Please refer to page 12 section Hyper Terminal Configuration on how to connect a
USB to TTL serial converter between the development board and your host PC.
2. In Tera Term, and if your PC has a serial interface, navigate via the Setup menu to
Serial port… to select the COM port assigned to your serial port. If you do not have a
serial port on your PC, use a USB-to-serial adapter (not included in the kit).
3. Use the Ports (COM & LPT) listing in the Device Manager to determine the correct
COM port assigned to your adapter. Configure this port to reflect the following settings:
– 57600 bps
– 8 data bits
– No parity
– 1 stop bit
– No flow control
4. Click the OK button to connect to the F6482 Development Board. Upon connection,
you should be able to see the demonstration program menu shown in Figure 11 on
page 12.
UM026302-0916
Tera Term Configuration
�Z8 Encore! XP® F6482 Series Development Kit
User Manual
40
Customer Support
To share comments, get your technical questions answered, or report issues you may be
experiencing with our products, please visit Zilog’s Technical Support page at http://support.zilog.com.
To learn more about this product, find additional documentation, or to discover other facets about Zilog product offerings, please visit the Zilog Knowledge Base or consider participating in the Zilog Forum.
This publication is subject to replacement by a later edition. To determine whether a later
edition exists, please visit the Zilog website at http://www.zilog.com.
Customer Support
UM026302-0916
�