A-GAGE® EZ-ARRAY™ System
Quick Start Guide
To view or download the latest technical information about this product, including specifications, dimensions, accessories, and wiring, go to
www.bannerengineering.com. Search for the instruction manual, part number 130426. This Quick Start Guide provides basic configuration and use
instructions when the receiver interface is used. Instructions for using the PC interface are available in the instruction manual.
•
•
•
•
•
•
•
•
•
A cost-effective, two-piece measuring light curtain designed for quick and simple installations with
the sophistication to handle the toughest sensing applications
Excels at high-speed, precise process monitoring and inspection, profiling, and web-guiding
applications
A comprehensive combination of scanning options:
◦ 14 measurement (scan analysis) modes
◦ Three scanning methods
◦ Selectable beam blanking
◦ Selectable continuous or gated scan initiation
◦ Selectable threshold setting for semi-transparent applications
◦ Two analog outputs, two discrete outputs
◦ Communication via PC interface
Outstanding 4 meter range with 5 mm beam spacing
Available in 12 lengths from 150 mm to 2400 mm
Excellent 5 mm minimum object detection or 2.5 mm edge resolution, depending on scanning
method
Receiver user interface for quick, intuitive setup of many common applications:
◦ Six-position DIP switch for setting scan mode, measurement mode, analog slope, discrete
output 2 option (complementary measurement or alarm operation)
◦ Two push buttons for gain method selection and alignment/ blanking
◦ Seven Zone LEDs for instant alignment and beam blockage information
◦ Three-digit display for sensing information and diagnostics
Software PC interface available for advanced configuration setup
Remote teach wire option for alignment, gain settings, inverted display, and DIP switch disable
WARNING:
• Do not use this device for personnel protection
• Using this device for personnel protection could result in serious injury or death.
• This device does not include the self-checking redundant circuitry necessary to allow its use in personnel safety
applications. A device failure or malfunction can cause either an energized (on) or de-energized (off) output condition.
System Components
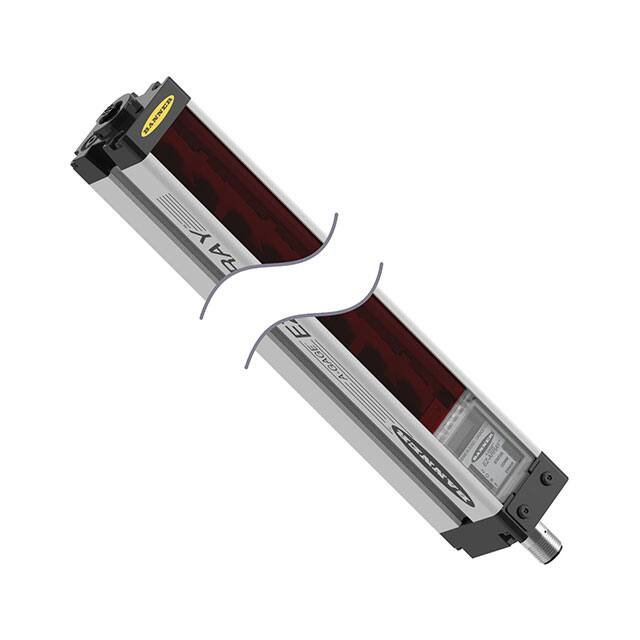
A typical A-GAGE EZ-ARRAY has four components: an emitter and a receiver,
each with an integral quick-disconnect (QD) fitting, plus an 8-pin QD cordset for
the emitter and for the receiver.
For applications that use the Modbus RTU-485 interface, an additional 5-wire
cable is used to connect the receiver with a PC or process controller, via the
Modbus 485-RTU connection. (A PC used with software version 2.0 for
configuration must run on Windows® XP, Vista™, or WIN7™.)
Figure 1. Components
Emitter
Receiver
8-Pin Euro
Sensor Cordset
Optional PC for PC interface
software configuaration
5-Pin Euro Communications
Cable for use with PC; USB
adaptoer not shown
Original Document
126701 Rev. C
12 July 2021
126701
�A-GAGE® EZ-ARRAY™ System
Models
Standard Models
The standard models can solve the majority of measuring array applications. The models have range of 400 mm to 4 m and are capable of
measuring a wide variety of objects. For low contrast applications, it has the ability to see changes in contrast down to 15%. These models are ideal
for web guiding, carton dimensioning, or other sizing applications.
Table 1: Standard models
Emitter Model
Receiver Model
EA5R150NIXMODQ
EA5E150Q
EA5R150NUXMODQ
EA5R150PIXMODQ
EA5R150PUXMODQ
EA5R300NIXMODQ
EA5E300Q
EA5R300NUXMODQ
EA5R300PIXMODQ
EA5R300PUXMODQ
EA5R450NIXMODQ
EA5E450Q
EA5R450NUXMODQ
EA5R450PIXMODQ
EA5R450PUXMODQ
EA5R600NIXMODQ
EA5E600Q
EA5R600NUXMODQ
EA5R600PIXMODQ
EA5R600PUXMODQ
EA5R750NIXMODQ
EA5E750Q
EA5R750NUXMODQ
EA5R750PIXMODQ
EA5R750PUXMODQ
EA5R900NIXMODQ
EA5E900Q
EA5R900NUXMODQ
EA5R900PIXMODQ
EA5R900PUXMODQ
EA5R1050NIXMODQ
EA5E1050Q
EA5R1050NUXMODQ
EA5R1050PIXMODQ
EA5R1050PUXMODQ
EA5R1200NIXMODQ
EA5E1200Q
EA5R1200NUXMODQ
EA5R1200PIXMODQ
EA5R1200PUXMODQ
EA5R1500NIXMODQ
EA5E1500Q
EA5R1500NUXMODQ
EA5R1500PIXMODQ
EA5R1500PUXMODQ
EA5R1800NIXMODQ
EA5E1800Q
EA5R1800NUXMODQ
EA5R1800PIXMODQ
EA5R1800PUXMODQ
EA5R2100NIXMODQ
EA5E2100Q
EA5R2100NUXMODQ
EA5R2100PIXMODQ
EA5R2100PUXMODQ
EA5R2400NIXMODQ
EA5E2400Q
EA5R2400NUXMODQ
EA5R2400PIXMODQ
EA5R2400PUXMODQ
Receiver Discrete
Output
NPN
PNP
NPN
PNP
NPN
PNP
NPN
PNP
NPN
PNP
NPN
PNP
NPN
PNP
NPN
PNP
NPN
PNP
NPN
PNP
NPN
PNP
NPN
PNP
Receiver Analog Output
Length Y 1
Total Beams
150 mm (5.9 in)
30
300 mm (11.8 in)
60
450 mm (17.7 in)
90
600 mm (23.6 in)
120
750 mm (29.5 in)
150
900 mm (35.4 in)
180
1050 mm (41.3 in)
210
1200 mm (47.2 in)
240
1500 mm (59.1 in)
300
1800 mm (70.9 in)
360
2100 mm (82.7 in)
420
2400 mm (94.5 in)
480
Current (4-20 mA)
Voltage (0-10 V)
Current (4-20 mA)
Voltage (0-10 V)
Current (4-20 mA)
Voltage (0-10 V)
Current (4-20 mA)
Voltage (0-10 V)
Current (4-20 mA)
Voltage (0-10 V)
Current (4-20 mA)
Voltage (0-10 V)
Current (4-20 mA)
Voltage (0-10 V)
Current (4-20 mA)
Voltage (0-10 V)
Current (4-20 mA)
Voltage (0-10 V)
Current (4-20 mA)
Voltage (0-10 V)
Current (4-20 mA)
Voltage (0-10 V)
Current (4-20 mA)
Voltage (0-10 V)
Current (4-20 mA)
Voltage (0-10 V)
Current (4-20 mA)
Voltage (0-10 V)
Current (4-20 mA)
Voltage (0-10 V)
Current (4-20 mA)
Voltage (0-10 V)
Current (4-20 mA)
Voltage (0-10 V)
Current (4-20 mA)
Voltage (0-10 V)
Current (4-20 mA)
Voltage (0-10 V)
Current (4-20 mA)
Voltage (0-10 V)
Current (4-20 mA)
Voltage (0-10 V)
Current (4-20 mA)
Voltage (0-10 V)
Current (4-20 mA)
Voltage (0-10 V)
Current (4-20 mA)
Voltage (0-10 V)
Short-range Low-contrast Models
The short-range low-contrast (SRLC) models offer superior ability to detect and measure clear objects. They have a range of 30 mm to 1.5 m and are
capable of detecting contrast changes as small as 3%. These models are ideal for profiling clear glass plates, monitoring flow of transparent bottles
on a conveyor, or other clear object applications. The receivers for these models have a PNP discrete output.
1 Models with array lengths 1050 mm and longer ship with a center bracket as well as two end-cap brackets.
2
www.bannerengineering.com - Tel: + 1 888 373 6767
P/N 126701 Rev. C
�A-GAGE® EZ-ARRAY™ System
Table 2: Short-range low-contrast models
Emitter Model
EA5E150Q
EA5E300Q
EA5E450Q
Receiver Model
Receiver Analog Output
EA5R150PUXMODSRLCQ
Voltage (0-10V)
EA5R150PIXMODSRLCQ
Current (4-20mA)
EA5R300PUXMODSRLCQ
Voltage (0-10V)
EA5R300PIXMODSRLCQ
Current (4-20mA)
EA5R450PUXMODSRLCQ
Voltage (0-10V)
EA5R450PIXMODSRLCQ
Current (4-20mA)
Length Y (mm)
Total Beams
150
30
300
60
450
90
600
120
EA5R600PUXMODSRLCQ
Voltage (0-10V)
EA5R600PIXMODSRLCQ
Current (4-20mA)
EA5E750Q
EA5R750PIXMODSRLCQ
Current (4-20mA)
750
150
EA5E900Q
EA5R900PIXMODSRLCQ
Current (4-20mA)
900
180
EA5E1050Q
EA5R1050PIXMODSRLCQ
Current (4-20mA)
1050
210
EA5R1200PUXMODSRLCQ
Voltage (0-10V)
EA5R1200PIXMODSRLCQ
Current (4-20mA)
1200
240
1500
300
EA5E600Q
EA5E1200Q
EA5E1500Q
EA5R1500PUXMODSRLCQ
Voltage (0-10V)
EA5R1500PIXMODSRLCQ
Current (4-20mA)
EA5E1800Q
EA5R1800PIXMODSRLCQ
Current (4-20mA)
1800
360
EA5E2100Q
EA5R2100PIXMODSRLCQ
Current (4-20mA)
2100
420
EA5E2400Q
EA5R2400PIXMODSRLCQ
Current (4-20mA)
2400
480
To select your components:
1. Select the desired array length.
2. Select the emitter model for that array length.
3. Select the corresponding receiver model with the discrete and analog outputs needed for your application.
Overview
The A-GAGE® EZ-ARRAY™ measuring light screen is ideal for such applications as on-the-fly product sizing and profiling, edge-guiding and centerguiding, loop tensioning control, hole detection, parts counting, and similar uses.
Emitters and receivers are available with arrays from 150 to 2400 mm (5.9 in to 94.5 in) long. The emitter has a column of infrared light emitting
diodes (LEDs) spaced 5 mm apart; their light is collimated and directed toward the receiver, positioned opposite the emitter, which has photodiodes
on the same 5 mm pitch. The light from each emitter LED is detected by the corresponding receiver photodiode.
This sophisticated light curtain is capable of detecting opaque cylindrical objects as small as 5mm in diameter or measuring part edges within 2.5
mm, depending on the scanning method selected . The sensing range is 400 mm to 4 m (16 in to 13 ft) on standard models and 30 mm to 1500 mm
(1.18 in to 59 in) on the short-range, low-contrast models. 2
Short range, low contrast models are available for applications requiring a shorter distance between emitter and receiver or where detection and
profiling of non-opaque targets is needed. Detection of glass or other clear objects is possible with this system.
The EZ-ARRAY’s two-piece design makes it economical and easy to use. Controller functionality is built into the receiver housing. It can be
configured for many straightforward applications using the six-position DIP switch on the front of the receiver (the receiver user interface). For more
advanced control, easy-to-use PC interface software is available on the included CD to configure the sensors using a PC.
The emitter and receiver housings can be side-mounted or end-cap-mounted using the included end-cap brackets; longer models also include a
center bracket.
Beam synchronization is achieved via the 8-conductor sensor cables. Individual LEDs and a 3-digit diagnostic display on the receiver provide
ongoing visual sensing status and diagnostic information. Comprehensive data is available to a process controller via a combination of five outputs:
two analog, two discrete, and one Modbus 485-RTU communication interface.
Figure 2. Application
Figure 3. Emitter and Receiver
Emitter
Receiver
Connection to 5-pin
Communication Cable
Under Hinged Access Panel:
Zone Indicators
3-Digit Diagnostic
Display
Alignment/Blanking
Push Button
Power ON
LED
Gain (Sensitivity Adjust)
Push Button
Beam #1
(Closest to
Display)
6-Position
Configuratio n
DIP Switch
Status, Communication Active, and
Communication Error LEDs
Screw-on Security Plate
limits access to DIP switch
and push buttons
2
Contact the factory for short-range, low-contrast models.
P/N 126701 Rev. C
www.bannerengineering.com - Tel: + 1 888 373 6767
3
�A-GAGE® EZ-ARRAY™ System
Diagnostic programming and easy-to-see indicators on the receiver simplify physical alignment and troubleshooting; more advanced diagnostics are
available via the PC interface.
The alignment/blanking button automatically equalizes the excess gain of each beam for reliable object detection throughout the array. This routine
need not be performed again unless the sensing application changes, or if the emitter and/or receiver is moved.
Configurable beam blanking accommodates machine components and fixtures that must remain in or move through the light screen. Blanking may
be set using the receiver interface, the teach wire, or the PC interface.
The EZ-ARRAY light screen provides a wide selection of sensing and output options, including measurement (“scan analysis”) modes and scanning
methods that can determine a target object’s location, overall size, total height, or total width, or the number of objects. Scanning may be
continuous or controlled by a gate sensor. Up to 15 systems may be networked via Modbus 485 RTU.
Status Indicators
Both the emitter and receiver provide ongoing visual indication of operating and configuration status.
The emitter has a red LED that signals proper operation (ON when power is applied).
Table 3: Emitter status indicators
LED
Status LED
Color
Description
Red ON
Status OK
Red Flashing at 1 Hz
Error
The receiver has a bright Status LED that indicates overall sensing status (OK, marginal alignment, and hardware error). Two other LEDs indicate
whether communication is active or if there is an error. Seven Zone indicators each communicate the blocked/aligned status of one-seventh of the
total array. A 3-digit diagnostic display provides further diagnostic information: number of beams blocked, whether blanking is configured, and error
codes. See the Instruction Manual for more information on the error codes.
Table 4: Receiver status indicators
LED
7 Zone Indicators
Color
Description
Red
Blocked channels within the zone
Green
All channels are clear within the zone
3-digit 7-segment Measurement Mode/Diagnostic Indicator
Status LED
Red
Hardware Error or marginal alignment
Green
Status OK
Modbus Activity Indicator LED
Amber
Modbus activity
Modbus Error Indicator LED
Red On
Error
Zone Indicators (Beams Blocked Segment)
Seven LEDs represent emitter/receiver alignment status. They provide a visual aid for sensor alignment and monitoring objects within the sensor’s
field of view. The sensor array is partitioned into seven equal segments, each of which is represented by one of the seven LEDs. The LED closest to
DIP switch S6 (see Configuration via DIP Switch or PC Interface on p. 5) represents the group of optical channels closest to the receiver display
(the “bottom” group). The LED closest to DIP switch 1 represents the far segment of channels.
These LEDs illuminate either green or red. When an LED is green, no unblanked beams are obstructed in that segment. When the LED is red, one or
more beams in that segment is obstructed.
Three-Digit Display
The 3-digit display has slightly different functions during normal operation, alignment, and gain adjust modes. In normal operation the display
indicates the current numerical value of measurement mode 1. The display also identifies the following activated sensor functions: blanking and
locked-out user interface/electronic configuration, as shown in Electronic Configuration Indicator on p. 4.
During blanking mode, the display reads “n”, followed by the number of blocked beams in the array. During alignment mode, it reads “A”, followed
by the number of blocked, unblanked beams; a period follows the A (“A.”) if blanking is configured.
During gain adjust mode, the display reads “ L ” followed by “1” or “2” to indicate the gain level. (A “1” represents high excess gain, and a “2”
represents low contrast.)
If a sensing error occurs, the display reads “c” followed by a number that corresponds to the recommended corrective action. Refer to for more
information.
Blanking Indicator
The Blanking indicator will be visible (ON) when the blanking feature is enabled. It appears as a period following the first digit of the display.
Electronic Configuration Indicator
The Electronic Configuration indicator is on when the sensor configuration is defined by the PC interface and not the DIP switch. When electronic
configuration is enabled, the DIP switch is ignored.
4
www.bannerengineering.com - Tel: + 1 888 373 6767
P/N 126701 Rev. C
�A-GAGE® EZ-ARRAY™ System
Figure 4. Electronic configuration indicator
‘A’ in this
position indicates
Alignment mode
Period ON
indicates
Blanking
Configured
Period ON indicates
Electronic Configuration
Enabled
Configuration Instructions
Configuration via DIP Switch or PC Interface
Commonly used configuration options can be set up easily via a six-position DIP switch located behind a hinged clear access panel on the front of
the receiver.
Access to the DIP switch can be prevented by using the screw-on security plate to hold the clear access panel closed or by disabling them via the
PC interface.
For more advanced, individualized applications, use the supplied software program to configure the receiver. The menu-driven program easily
accesses the many scanning and output options. After the desired options are selected, the combination of selections can be saved in an .xml file,
stored in the system configuration computer, and recalled as needed. Communication between the sensors and a PC is accomplished via the serial
output and Modbus 485 RTU interface.
The software also provides alignment and diagnostics routines. An Alignment screen displays the individual status of each beam in the light screen,
as well as the total number of beams, and totals of beams blocked, made, and blanked. Built-in diagnostics can be used to assess emitter and
receiver status.
Inverting the 3-Digit Display
When the sensors is mounted in an inverted position, invert the 3-digit display for readability. The periods on the three seven-segment indicators do
not move when the display is inverted.
Scanning Method
One of three scanning methods may be configured:
• Straight Scan
• Single-edge Scan
• Double-edge Scan (1, 2, 4, 8, 16, or 32 steps)
Sensor response time is a function of sensor length and scanning method. Maximum scan times are shown in Maximum Scan Times in SIO Mode on
p. 6.
Scanning Method
Straight Scan
Low-Contrast
Single-Edge Scan
High-ExcessGain
Double-Edge Scan (per Edge)
Step Size (Number of Beams)
1
2
4
8
16
32
Minimum Object
Detection Size*
5 mm (0.2")
10 mm (0.4")
10 mm (0.4")
10 mm (0.4")
20 mm (0.8")
30 mm (1.2")
50 mm (2")
90 mm (3.6")
170 mm (6.8")
Edge Resolution
5 mm (0.2")
5 mm (0.2")
2.5 mm (0.1")
2.5 mm (0.1")
2.5 mm (0.1")
2.5 mm (0.1")
2.5 mm (0.1")
2.5 mm (0.1")
2.5 mm (0.1")
*MODS determined using a rod target object
Straight Scan
Straight Scan is the default mode, in which all beams are scanned in sequence, from the display end to the far end of the array. This scanning
method provides the smallest object detection size.
Straight scan is used when low-contrast sensitivity is selected or when single-edge and double-edge scan cannot be used. The edge resolution is 5
mm (0.2 in). When low-contrast sensing is selected (used when measuring semi-transparent objects), the minimum object detection size is 5 mm (0.2
in) diameter. When high-excess-gain sensing is selected, the minimum object detection size is 10 mm (0.4 in).
Single-Edge Scan
Single-Edge Scan is used to measure the height of a single object. This scanning method is commonly used for box height measurement. For singleedge scan, the receiver always activates the first beam channel (or "bottom" beam, nearest the display). When the first beam is blocked, the sensor
performs a binary search to hunt for the last beam blocked, as follows:
1. The receiver scans only the first beam until it is blocked.
2. When the first beam is blocked, the sensor looks to see whether the middle beam is blocked or made (unblocked).
3. If the middle beam is made (unblocked), the sensor checks the bottom quarter beam; if the middle beam is blocked, the sensor checks the
top quarter beam.
4. The routine continues to divide the number of beams in half until the edge is found.
P/N 126701 Rev. C
www.bannerengineering.com - Tel: + 1 888 373 6767
5
�A-GAGE® EZ-ARRAY™ System
Single-edge scan can be used only for single, solid objects that block the first beam (closest to the display). Because the receiver checks only the
first beam until it is blocked, single-edge scan will not function when the item to be measured does not block the first beam. Single-edge scan is
also ineffective if the object does not present a continuous blocked pattern.
Single-edge scan works only when the high-excess-gain setting is enabled. When single-edge scan is selected, the sensor object detection size is
10 mm and edge resolution is 2.5 mm.
Double-Edge Scan
Double-edge scan is used to detect two edges of a single object, for example, to determine box width measurements. Double-edge scan requires
the selection of a step size: 1, 2, 4, 8, 16 or 32 beams.
The sensor uses the steps to "skip" over beams, as follows:
1. The sensor activates beam 1 (closest to the sensor display end).
2. The sensor activates the next beam, determined by the step size. (For example, if the step size is 2, beam 3 is next; if the step size is 8,
beam 9 is next.)
3. As long as the activated beam is made (unblocked), the sensor continues the stepping routine until a blocked beam is found.
4. When a blocked beam is found, a binary search is conducted to find the object's "bottom" edge.
5. When the bottom edge is found, the sensor continues to step through the array until it finds the next unblocked beam.
6. Another binary search is performed to find the second edge.
Similar to single-edge scan, double-edge scan has some restrictions: the object should provide a solid obstruction; the size of the object determines
the maximum step size. Double-edge scan can be used to detect up to three objects. Like single-edge scan, double-edge scan works only when the
high-excess-gain setting is selected. When double-edge scan is selected, the sensor object detection size varies, depending on the step size, but
edge resolution is 2.5 mm.
Figure 5. Double-edge scan
Step #1
Step #2
Beam #1 of 30
blocked
Step #3
Beam #15
blocked
Beam #23 clear
Emitter
Receiver
Step #4
Step #5
Beam #17
blocked
Step #6
Beam #19 clear
Beam #18
blocked
Maximum Scan Times in SIO Mode
Table 5: Maximum scan times (in milliseconds) during SIO mode
Array Length
Straight Scan
Single-Edge
Scan
Double-Edge Scan
Step 1 Beam
Step 2 Beams
Step 4 Beams
Step 8 Beams
Step 16 Beams
Step 32 Beams
150 mm (5.9 in)
2.8
1.5
3.4
2.8
2.5
2.4
1.9
N/A
300 mm (11.8 in)
5.0
1.5
5.9
4.1
3.2
2.8
2.3
2.1
450 mm (17.7 in)
7.1
1.6
8.5
5.5
4.2
4.0
3.2
2.5
600 mm (23.6 in)
9.3
1.6
11.0
6.8
4.9
4.2
4.0
2.8
750 mm (29.5 in)
11.4
1.7
13.5
8.1
5.7
4.6
4.5
4.5
900 mm (35.4 in)
13.6
1.7
16.0
9.5
6.1
4.7
4.6
4.6
1050 mm (41.3 in)
15.7
1.8
18.6
10.8
6.8
5.2
4.8
4.8
1200 mm (47.2 in)
17.9
1.8
21.1
12.2
7.4
5.5
4.9
4.9
1500 mm (59.1 in)
22.2
1.9
26.1
14.8
9.0
6.4
5.3
4.9
1800 mm (70.9 in)
26.5
2.0
31.2
17.5
10.5
7.3
6.0
5.6
2100 mm (82.7 in)
30.8
2.8
36.3
20.2
12.0
8.2
6.7
5.6
2400 mm (94.5 in)
35.1
2.8
41.4
22.9
13.5
9.1
7.4
5.9
Scan times are exclusive of serial communication transmission times.
Scan times are also dependent on analog filter speed. Refer to the instruction manual for more information.
6
www.bannerengineering.com - Tel: + 1 888 373 6767
P/N 126701 Rev. C
�A-GAGE® EZ-ARRAY™ System
Gain Configuration
The EZ-ARRAY provides two gain options for straight scan applications: high excess gain and low contrast. The gain method can be selected using
the receiver push button, the receiver remote teach wire, or the PC interface.
High (maximized) excess gain is suited for detecting opaque objects and for reliable sensing in dirtier environments where objects to be detected are
10 mm or larger. The high excess gain method is always used in single- and double-edge scan. The high excess gain option has a minimum blocked
threshold level, which provides reliable sensing at higher excess gain levels.
The low-contrast setting is used for sensing semi-transparent materials and for detecting objects as small as 5 mm (straight scan only). In lowcontrast operation, only a portion of a beam must be blocked for detection to occur. In low-contrast operation, the sensor sets an individual
threshold for each optical channel during the alignment process; this process equalizes the signal strength to allow semi-transparent object
detection.
When using the PC interface, low-contrast sensing provides a fine-tune sensitivity setting of 15% to 50%. When using the receiver interface, lowcontrast sensitivity is always 30%.
On short range, low contrast models, sensitivity can be set between 3% to 20% when using the PC interface. When using the receiver interface, low
contrast sensitivity is always 7%.
Table 6: Gain configuration settings
Gain Setting
Scan Method
EZ-ARRAY MODS 3
EZ-ARRAY Resolution
Low Contrast
Straight Scan
5 mm
5 mm
Single-edge Scan
-
-
Double-edge Scan
-
-
Straight Scan
10 mm
5 mm
Single-edge Scan
10 mm
2.5 mm
Double-edge Scan
Depends on step size
2.5 mm / edge 5 mm total (both edges)
High Excess Gain
Optical Alignment
The objective of the optical alignment process is to adjust the emitter light level to maximize sensor performance. Perform the alignment procedure
at installation and again whenever the emitter and/or receiver is moved.
During the alignment procedure, the receiver polls each beam channel to measure excess gain and performs a gain adjustment for each beam.
When the system exits the alignment procedure, each channel's signal strength is stored in non-volatile memory.
The procedure can be performed using the receiver remote wire, the receiver interface push button or the PC interface. The receiver's Alignment
push button may be disabled, by configuration thru the PC interface.
1. After the electrical connections are made, power up the emitter and receiver.
2. Verify that input power is present to both emitter and receiver; the emitter Status indicator and the receiver Status LED should be ON green.
If the receiver Status LED is on red (and a "c" appears on the 3-digit display), refer to the error codes.
Note: At power-up, all Zone indicators are tested (flash red), then the number of blocked beams is displayed.
3. Observe the receiver indicators.
4. Optimize Alignment and Maximize Excess Gain:
a. Verify that the emitter and receiver are pointed squarely at each other. A straightedge or level can help determine the direction the
sensor is facing.
b. Slightly loosen the sensor mounting screws and rotate one sensor to the left and right, noting the positions where the receiver Zone
indicators turn from green to red; repeat with the other sensor.
c. Center each sensor between the noted positions and tighten the end cap mounting screws, making sure to maintain the positioning.
The sensor windows should directly face each other.
5. After optimum optical alignment is verified, proceed to configuration, via the remote teach wire, the receiver interface, or the PC interface
and complete the electronic alignment. This further alignment step adjusts the emitted light level of each beam for the application, to
maximize sensing performance.
3 MODS: Minimum Object Detection Size
P/N 126701 Rev. C
www.bannerengineering.com - Tel: + 1 888 373 6767
7
�A-GAGE® EZ-ARRAY™ System
Figure 6. Optical alignment
a)
Straightedge
Straightedge
0 beams blocked; all Zone indicators ON Green
b)
60 beams blocked; all Zone indicators ON Red
c)
30 beams blocked; 4 Zone indicators ON Green, 3 ON Red
d)
0 beams blocked; all Zone indicators ON Green
Table 7: Receiver interface indicators during alignment
All Beams Either Clear or Blanked
Some Beams Blocked or Mis-Aligned
Zone Indicators
All ON Green
Some ON Red (zones with blocked beams)
All ON Red (Some beams blocked in each
Some ON Green (zones with all clear beams) zone)
Out of Alignment
Receiver Status Indicator
ON Green
ON Green
ON Green
3-Digit Display
0 (Number of blocked beams)
Number of blocked beams
Total number of beams in the array
Blanking
If a machine fixture or other equipment blocks one or more sensing beams, the affected beam channels may be blanked. The blanking option
causes the receiver to ignore the status of blanked beams for measurement mode calculations.
For example, if a machine fixture blocks one or more beams during sensing, the output data will be incorrect; if the beams blocked by the fixture are
blanked, the output data will be correct. Blanking may be configured using the receiver's Alignment push button, the receiver remote wire, or the PC
interface.
For total beam values (TBB and TBM analysis modes), selection of blanked beams affects the proportional analog outputs. Blanked beams are
ignored both in the number of blocked or made beams and in the total number of beams. For example, if a 30-beam array has 10 blanked beams
and 10 of the remaining 20 beams are blocked, the analog output values will be at mid-range.
Measurement Mode Selection
The outputs may be configured for any of the measurement (scan analysis) modes, which refer to specific beam locations, quantities of beams, or
edge transitions. Note that not all measurement mode options are available when the receiver interface is used for configuration.
When using the PC interface for configuration, the discrete outputs can have NPN or PNP polarity (regardless of model), be normally open or
normally closed, and be assigned to any of the measurement modes. When using the receiver interface, limited output configuration combinations
may be selected (see Configuration via DIP Switch or PC Interface on p. 5).
Note: Array beams are numbered in sequence (beam 1 located nearest the sensor display). The "first beam" referenced in the
following descriptions is the beam nearest the sensor display.
"Beam Location" Modes
First Beam Blocked (FBB)
The location of the first blocked beam.
First Beam Made (FBM)
The location of the first made (unblocked) beam.
Last Beam Blocked (LBB)
The location of the last blocked beam.
8
www.bannerengineering.com - Tel: + 1 888 373 6767
P/N 126701 Rev. C
�A-GAGE® EZ-ARRAY™ System
Last Beam Made (LBM)
The location of the last made beam.
Middle Beam Blocked (MBB)
The location of the beam midway between the first and last blocked beams.
"Beam Total" Modes
Total Beams Blocked (TBB)
The total number of blocked beams.
Total Beams Made (TBM)
The number of beams made.
Contiguous Beams Blocked (CBB)
The largest number of consecutively blocked beams.
Contiguous Beams Made (CBM)
The largest number of consecutively made beams.
Outside Dimension (OD)
The inclusive distance (measured in beams) from the first blocked beam to the last blocked beam.
Inside Dimension (ID)
The number of made beams, between the first and last blocked beams.
Transitions (TRN)
The number of changes from blocked to clear status and from clear to blocked status. (If beams 6–34 are blocked, then there is a clear-toblocked transition from beam 5 to bream 6, and a blocked-to-clear transition from beam 34 to beam 35.) Transition mode can be used to
count objects within the array.
Contiguous First Beam Blocked (CFBB)
The location of the first blocked beam in the largest group of adjacent blocked beams.
Contiguous Last Beam Blocked (CLBB)
The location of the last blocked beam in the largest group of adjacent blocked beams.
Carpet Nap and Carpet Edge
These measurement modes are used to measure the location of carpet backing and tuft and are selectable only via the PC interface and
only when the Scan Type Carpet Nap is selected. The modes can be measured from either end of the sensor, but at least 10 beams (2 in)
must be blocked from one edge.
Figure 7. Measurement mode - LBM-FBM
Receiver
Last Beam Made (LBM)
First Beam Made (FBM)
Emitter
60
50
40
30
20
10
In Last Beam Made mode, the last beam is #50 of 60. In First Beam Made mode, the first beam is #40 of 60.
P/N 126701 Rev. C
www.bannerengineering.com - Tel: + 1 888 373 6767
9
�A-GAGE® EZ-ARRAY™ System
Figure 8. Measurement mode - LBB-FBB
Receiver
Last Beam Blocked (LBB)
First Beam Blocked (FBB)
Emitter
60
50
40
30
20
10
In Last Beam Blocked mode, the last beam is #55 of 60. In First Beam Blocked mode, the first beam is #20 of 60.
Figure 9. Measurement mode - TBM-TBB
Receiver
Total Beams Made (TBM)
Total Beams Blocked (TBB)
Emitter
60
50
40
30
20
10
In Total Beams Made mode, 38 of 60 possible beams are made. In Total Beams Blocked mode, 22 of 60 possible beams are blocked.
Outputs
In addition to the serial output (see above), all models have two analog outputs and two discrete outputs.
The analog outputs are 4–20 mA or 0–10 V, depending on the model. They may be configured for either a positive or negative slope via DIP switch or
PC interface.
10
www.bannerengineering.com - Tel: + 1 888 373 6767
P/N 126701 Rev. C
�A-GAGE® EZ-ARRAY™ System
Discrete output 1 is always used for measurement; discrete output 2 may be used either for alarm or measurement operation (selectable via DIP
switch or PC interface). When the receiver interface is used, discrete output 1 follows the operation of analog output 1 (it conducts when the analog
output senses a target is present). When the PC interface is used for configuration, both discrete outputs have full configurability, including
measurement mode, NPN or PNP polarity, and normally open or normally closed operation.
Analog Output Configuration
Analog output configuration assigns analog outputs 1 and 2 to one of the measurement modes described in Measurement Mode Selection. When
the selected measurement mode involves first or last beam blocked or made (unblocked), the assigned output will vary in proportion to the beam
number identified during a scan. When the measurement mode involves total beams blocked or made, that assigned output will vary in proportion to
the total beams counted during a scan.
Analog outputs may have a filter setting (to smooth the output) and Zero Value (to specify the output value when the measurement mode value is
zero) set in the PC interface.
Discrete Output Configuration
Discrete Output 1; Receiver Interface
When the receiver interface is used for configuration, the measurement mode assigned to discrete output 1 is the same as that assigned
to analog output 1. When the analog output detects a target present, discrete output 1 conducts (normally open).
Discrete Output 2; Receiver Interface
Discrete output 2 (only) has two options: alarm and complementary (measurement) operation.
Alarm—Output 2 energizes when the receiver detects a sensor error (such as a disconnected cable) or whenever the excess gain of
one or more beams becomes marginal.
Complementary (Measurement)—Discrete output 2 operation is complementary to discrete output 1 (when output 1 is ON, output 2 is
OFF, and vice versa).
Discrete Output 1 and 2 Configuration; PC Interface
When the PC interface is used for configuration, the discrete outputs have more options: either discrete output can be assigned to any of
the measurement modes, high and low set points can be added, the outputs can be inverted, and hysteresis values can be set, as well as
a scan number to smooth output performance. Discrete output 2 can be assigned to alarm mode via the PC interface also.
Refer to the instruction manual for more information.
Specifications
Emitter/Receiver Range
Standard models: 400 mm to 4 m (16 in to 13 ft)
Short range, low contrast models: 30 mm to 1500 mm (1.18 in to 59 in)
Supply Power Requirements
Emitter/Receiver Pair (Exclusive of Discrete Load): Less than 9 W
Power-up delay: 2 seconds
Current Draw at 24 V DC
Length (mm)
Emitter (mA)
Receiver (mA)
150
10
10
300
20
25
450
30
40
600
40
60
750
50
75
900
60
90
1050
70
105
1200
80
120
1350
85
135
1500
95
150
1650
105
170
1800
115
185
1950
125
200
2100
135
215
2250
140
230
2400
150
245
Serial Communication Interface
EIA-485 Modbus RTU (up to 15 nodes per communication ring)
RTU binary format
Baud Rate: 9600, 19.2K or 38.4K 8
Data Bits, 1 Stop Bit, and Even, Odd, or 2 Stop Bits and No Parity
Minimum Object Detection Size
Straight Scan, Low-Contrast: 5 mm (0.2 in)
Straight Scan, High-Excess-Gain: 10 mm (0.4 in)
See Scanning Method on p. 5 for other scan mode values; size is tested using a rod.
Beam Spacing
5 mm (0.2 in)
Field of View
Nominally ±3°
Light Source
Infrared LED
System Configuration (Receiver Interface)
6-position DIP switch: Used to set scanning type, measurement modes, analog slope,
and discrete output 2 function (see Configuration via DIP Switch or PC Interface on p.
5)
Push Buttons: Two momentary push buttons for alignment and gain level selection
System Configuration
PC Interface: Supplied software provide all configuration options of receiver interface,
plus additional functionality
Supply Voltage (Limit Values)
Emitter: 12 V DC to 30 V DC
Receiver Analog Current Models: 12 V DC to 30 V DC
Receiver Analog Voltage Models: 15 V DC to 30 V DC
Teach Input (Receiver Gray Wire)
Low: 0 to 2 V
High: 6 to 30 V or open (input impedance 22 K ohms)
Sensor Positional Resolution
Straight Scan: 5 mm (0.2 in)
Double-Edge Scan: 2.5 mm (0.1 in)
Single-Edge Scan: 2.5 mm (0.1 in)
Two Analog Outputs
Voltage Sourcing: 0 to 10 V (maximum current load of 5 mA)
Current Sourcing: 4 to 20 mA (maximum resistance load = (Vsupply-3)/0.020)
Scan Time
Scan times depend on scan mode and sensor length. Straight scan times range from
2.8 to 26.5 ms. For all combinations, see Maximum Scan Times in SIO Mode on p. 6.
Two Discrete Outputs
Protected against false pulse on power-up and continuous overload or short circuit.
Solid-State NPN or PNP (current sinking or sourcing)
Rating: 100 mA maximum each output
OFF-State Leakage Current: NPN: less than 200 µA at 30 V DC; PNP: less than 10 µA
at 30 V DC
ON-State Saturation Voltage: NPN: less than 1.6 V at 100 mA; PNP: less than 2.0 V at
100 mA
Connections
Communication Interface: The receiver uses a PVC jacketed, 5-conductor 22-gauge
quick-disconnect cable, 5.4 mm diameter
Other sensor connections: 8-conductor quick-disconnect cables (one each for emitter
and receiver), ordered separately; PVC-jacketed cables measure 5.8 mm diameter,
have shield wire; 22-gauge conductors
Construction
Aluminum housing with clear-anodized finish; acrylic lens cover
Environmental Rating
IP65
Operating Conditions
–40 °C to +70 °C (–40 °F to +158 °F)
95% at +50 °C maximum relative humidity (non-condensing)
Certifications
P/N 126701 Rev. C
www.bannerengineering.com - Tel: + 1 888 373 6767
11
�A-GAGE® EZ-ARRAY™ System
Emitter and Receiver Dimensions
All measurements are listed in millimeters, unless noted otherwise.
Figure 10. Dimensions drawing
45.2 mm
(1.78")
36.0 mm
(1.42")
12 mm
(0.47")
Y
L1
L3
L2
56.0 mm
(2.20")
65 mm
(2.6")
4.2 mm
(0.17")
59 mm
(2.3")
IO-Link
Splitter
R13 mm (0.5")
minimum bend
With Cable Splitter Connection
With Cable Connection
Table 8: Dimensions for each model
Emitter or Receiver Model
Housing Length L1
Distance Between Bracket Holes L2 L3
Defined Area Y
EA5..150..
227 mm (8.9 in)
260 mm (10.2 in)
199 mm (7.8 in)
150 mm (5.9 in)
EA5..300..
379 mm (14.9 in)
412 mm (16.2 in)
351 mm (13.8 in)
300 mm (11.8 in)
EA5..450..
529 mm (20.8 in)
562 mm (22.1 in)
501 mm (19.7 in)
450 mm (17.7 in)
EA5..600..
678 mm (26.7 in)
704 mm (27.7 in)
650 mm (25.6 in)
600 mm (23.6 in)
EA5..750..
828 mm (32.6 in)
861 mm (33.9 in)
800 mm (31.5 in)
750 mm (29.5 in)
EA5..900..
978 mm (38.5 in)
1011 mm (39.8 in)
950 mm (37.4 in)
900 mm (35.4 in)
EA5..1050..
1128 mm (44.4 in)
1161 mm (45.7 in)
1100 mm (43.3 in)
1050 mm (41.3 in)
EA5..1200..
1278 mm (50.3 in)
1311 mm (51.6 in)
1250 mm (49.2 in)
1200 mm (47.2 in)
EA5..1500..
1578 mm (62.1 in)
1611 mm (63.4 in)
1550 mm (61.0 in)
1500 mm (59.1 in)
EA5..1800..
1878 mm (73.9 in)
1911 mm (75.2 in)
1850 mm (72.8 in)
1800 mm (70.9 in)
EA5..2100..
2178 mm (85.7 in)
2211 mm (87.0 in)
2150 mm (84.6 in)
2100 mm (82.7 in)
EA5..2400..
2478 mm (97.6 in)
2511 mm (98.9 in)
2450 mm (96.4 in)
2400 mm (94.5 in)
Standard Bracket Dimensions
Dimensions are identical for model EZA-MBK-11N stainless steel
brackets.
EZA-MBK-11
• Two end-cap replacement brackets for one
emitter/receiver
• 8-ga. cold-rolled steel with black corrosionresistant zinc chromate finish
• M5 and M6 mounting hardware
Hole center spacing: A to B = 20
Hole size: A , B = 15 × 7, C = ø 21.5
B
A
Supplied with emitters and receivers over 1050 mm.
EZA-MBK-12
• Two-piece center bracket for one emitter/
receiver
• 8-ga. cold-rolled steel with black corrosionresistant zinc chromate finish
• M5 and M6 mounting hardware
Hole center spacing: A = 20, A to B = 36
Hole size: A = ø 7, B = ø 8.3
C
12
www.bannerengineering.com - Tel: + 1 888 373 6767
B
A
P/N 126701 Rev. C
�A-GAGE® EZ-ARRAY™ System
Accessories
Replacement Parts
Description
Model
Access cover with label - receiver
EA5-ADR-1
Access cover security plate (includes 2 screws, wrench)
EZA-TP-1
Wrench, security
EZA-HK-1
Standard bracket kit with hardware (includes 2 end brackets and hardware to mount to MSA Black
Series stands)
Stainless Steel
EZA-MBK-11
Center bracket kit (includes 1 bracket and hardware to mount to MSA Series stands)
EZA-MBK-12
EZA-MBK-11N
Cordsets and Connections
8-Pin Threaded M12 Cordsets with Shield—Single Ended
Model
Length
MAQDC-806
2 m (6.56 ft)
MAQDC-815
5 m (16.4 ft)
MAQDC-830
10 m (32.81 ft)
Style
Dimensions
Pinout (Female)
2
1
7
6
44 Typ.
Straight
M12 x 1
ø 14.5
MAQDC-850
3
4
15 m (49.21 ft)
8
5
1 = White
2 = Brown
3 = Green
4 = Yellow
5 = Gray
6 = Pink
7 = Blue
8 = Red
8-Pin Threaded M12 Splitter Cordsets—Flat Junction
Trunk (Male)
Branches (Female)
CSB-M1280M1280
Model
No trunk
No branches
CSB-M1281M1281
0.3 m (1 ft)
CSB-M1288M1281
2.44 m (8 ft)
CSB-M12815M1281
4.57 m (15 ft)
CSB-M12825M1281
7.62 m (25 ft)
CSB-UNT825M1281
7.62 m (25 ft) Unterminated
Pinout
Male
1
2 x 0.3 m (1 ft)
7
6
2
3
4
8
5
Female
2
Ø4.5
[0.18"]
40 Typ.
[1.58"]
18.0
[0.71"]
44 Typ.
[1.73"]
Ø14.5 [0.57"]
Ø14.5 [0.57"]
M12 x 1
1
7
6
8
5
1 = Brown
2 = Or/Bk
3 = Orange
4 = White
5 = Black
6 = Blue
7 = Gn/Ye
8 = Violet
M12 x 1
35 [1.38"]
3
4
43.0
[1.69"]
Communication Connections
Model
Description
Image
Pinout
Communications Cables
MQDMC-506
2 m (6.5 ft) long
MQDMC-515
5 m (15 ft) long
Straight male connector,
5-pin Euro-style
MQDMC-530
Male Connector Shown
M12X1
1
2
Ø14.5 mm
(0.57")
9 m (30 ft) long
40.0 mm
(1.57")
P/N 126701 Rev. C
www.bannerengineering.com - Tel: + 1 888 373 6767
3
4
5
13
�A-GAGE® EZ-ARRAY™ System
Communication Connections
Model
Description
MQDMC-506RA
MQDMC-515RA
MQDMC-530RA
Image
Pinout
2 m (6.5 ft) long
31.8 mm
(1.25")
5 m (15 ft) long
Right-angle male
connector, 5-pin Eurostyle
31 mm
(1.22")
9 m (30 ft) long
M12X1
Ø13.5 mm
(0.53")
4-Pin Threaded M12/Euro-Style Cordsets - Double Ended
MQDEC-403SS
0.9 m
MQDEC-406SS
1.8 m
MQDEC-412SS
3.6 m
MQDEC-420SS
6.1 m
MQDEC-430SS
40 Typ.
[1.58"]
M12 x 1
ø 14.5 [0.57"]
9.2 m
Male Straight / Female
Straight
Female
44 Typ.
[1.73"]
MQDEC-450SS
M12 x 1
ø 14.5 [0.57"]
MQDEC-403RS
0.9 m
MQDEC-406RS
1.8 m
MQDEC-412RS
3.6 m
MQDEC-420RS
6.1 m
MQDEC-430RS
9.2 m
Male Right-Angle / Female
Straight
32 Typ.
[1.26"]
1
2
30 Typ.
[1.18"]
4
3
Male
ø 14.5 [0.57"]
15.2 m
M12 x 1
44 Typ.
[1.73"]
USB Serial Adapter
3
4
M12 x 1
ø 14.5 [0.57"]
MQDEC-450RS
2
1
15.2 m
Dimensions
INTUSB485-1
72.5 mm
(2.85 ")
EZA-USB485-01
MODBUS 485-RTU model
77.5 mm
(3.05")
For connection of 5-pin
communications cable to
computer USB port
70.0 mm
(2.75")
82.0 mm
(3.23")
22.5 mm
(0.88")
Alignment Aids
Model
Description
LAT-1-SS
Self-contained visible-beam laser tool for aligning any EZ-ARRAY emitter/receiver pair. Includes retroreflective target material and mounting clip.
EZA-LAT-SS
Replacement adaptor (clip) hardware for EZ-ARRAY models
EZA-LAT-2
Clip-on retroreflective LAT target
BRT-THG-2-100
2-inch retroreflective tape, 100 ft
BT-1
Beam Tracker
14
www.bannerengineering.com - Tel: + 1 888 373 6767
P/N 126701 Rev. C
�A-GAGE® EZ-ARRAY™ System
Accessory Mounting Brackets and Stands
EZA-MBK-20
• Adapter brackets for mounting to engineered/
slotted aluminum framing such as 80/20™ and
Unistrut™. Angled slots allow mounting to 20
mm to 40 mm dual channel and center slot.
allows mounting to single channel framing
• Retrofit for Banner MINI-SCREEN®
• Order EZA-MBK-20U for bracket with M5 and
M6 mounting hardware
Hole size:A = ø7 × 25 (2); B = ø7 × 18; C = ø21.5; D =
ø4.8 × 10.2;
See Replacement Parts on p. 13 for standard brackets. Order one EZAMBK-20 bracket per sensor, two per pair.
A
B
D
C
Note: Standard brackets shipped with sensors
connect directly to MSA series stand, using
hardware included with the stands.
Banner Engineering Corp. Limited Warranty
Banner Engineering Corp. warrants its products to be free from defects in material and workmanship for one year following the date of shipment. Banner Engineering Corp. will repair or replace, free of charge,
any product of its manufacture which, at the time it is returned to the factory, is found to have been defective during the warranty period. This warranty does not cover damage or liability for misuse, abuse, or the
improper application or installation of the Banner product.
THIS LIMITED WARRANTY IS EXCLUSIVE AND IN LIEU OF ALL OTHER WARRANTIES WHETHER EXPRESS OR IMPLIED (INCLUDING, WITHOUT LIMITATION, ANY WARRANTY OF MERCHANTABILITY OR
FITNESS FOR A PARTICULAR PURPOSE), AND WHETHER ARISING UNDER COURSE OF PERFORMANCE, COURSE OF DEALING OR TRADE USAGE.
This Warranty is exclusive and limited to repair or, at the discretion of Banner Engineering Corp., replacement. IN NO EVENT SHALL BANNER ENGINEERING CORP. BE LIABLE TO BUYER OR ANY OTHER
PERSON OR ENTITY FOR ANY EXTRA COSTS, EXPENSES, LOSSES, LOSS OF PROFITS, OR ANY INCIDENTAL, CONSEQUENTIAL OR SPECIAL DAMAGES RESULTING FROM ANY PRODUCT DEFECT OR
FROM THE USE OR INABILITY TO USE THE PRODUCT, WHETHER ARISING IN CONTRACT OR WARRANTY, STATUTE, TORT, STRICT LIABILITY, NEGLIGENCE, OR OTHERWISE.
Banner Engineering Corp. reserves the right to change, modify or improve the design of the product without assuming any obligations or liabilities relating to any product previously manufactured by Banner
Engineering Corp. Any misuse, abuse, or improper application or installation of this product or use of the product for personal protection applications when the product is identified as not intended for such
purposes will void the product warranty. Any modifications to this product without prior express approval by Banner Engineering Corp will void the product warranties. All specifications published in this
document are subject to change; Banner reserves the right to modify product specifications or update documentation at any time. Specifications and product information in English supersede that which is
provided in any other language. For the most recent version of any documentation, refer to: www.bannerengineering.com.
For patent information, see www.bannerengineering.com/patents.
©
Banner Engineering Corp. All rights reserved
�