Page 1 of 7
Si4703 FM Radio Receiver Quickstart Guide
by a1ronzo | June 22, 2011 |
Skill Level: Beginner
Time to Rock
This Si4703 FM Tuner Eval Board breaks out the Silicon Laboratories Si4703 FM
tuner chip. Beyond being a simple FM radio, the Si4703 is also capable of detecting
and processing both Radio Data Service (RDS) and Radio Broadcast Data Service
(RBDS) information. The Si4703 even does a very good job of filtering and carrier
detection, or rather, it’s good at detecting when a station is coming in clear. It also
enables data such as the station ID and song name to be displayed to the user.
Using this board, we are able to pick up multiple stations just as well as with a
standard FM radio. The board breaks out all major pins and makes it easy to
incorporate this great chip into your next radio project. Also, by plugging headphones
into the 3.5mm audio jack, you effectively use the cable in your headphones as an
antenna! Therefore, this board does not require an external antenna if using
headphones or a 3.5mm audio cable longer than 3 feet.
This quickstart guide will lead you through assembling the radio receiver, hooking it
up to an Arduino platform, and getting an Arduino to talk to the Si4703. The Arduino
sketch will illustrate how to set the radio receiver to tune an FM frequency, and we’ll
be able to change the station and the volume using the serial terminal in Arduino.
There will be some extra hardware required for the example: headphones or
speakers, some wire, and an Arduino Pro 3.3V (or similar platform) will get you
through the basic example.
�Page 2 of 7
Software Required
• Arduino 1.0 (or later)
Hardware Required
•
•
•
•
•
FM Radio Receiver (included in FM Radio Receiver Kit)
Male/Male Jumpers (or just wire)
Female Headers
Arduino Mini Pro 3.3V (or similar)
Headphones or Speakers
Firmware Required
• Radio Receiver Basic Arduino Library (This library contains two example
sketches, a basic example and an advanced example, both of which will be
covered in this tutorial).
Relevant Documentation
• Checkout the main product page for much more documentation, like the
datasheets for the parts on the device, more programming examples, and a
programming guide for the radio receiver chip from the manufacturer.
�Page 3 of 7
Assembly Guide
The assembly of the radio receiver is quick and easy. In order to interface with the
radio receiver we’ll need to interact with the pins on the board. All of the pins that we
need are accessible from the header holes located along the side of the radio receiver
board. You have a couple of options for interfacing to the board: you can solder wires
directly to these holes or you can solder male or female headers to the holes and then
connect them to a microcontroller using jumper wires. I go for female headers
because then a simple wire can be used to connect the radio receiver to an Arduino
board, and it keeps the radio receiver more usable without wires soldered semipermanently to it. So pick your method, and start soldering! If you’ve never soldered
before, check out this tutorial to pick up a new skill. Below are some pictures of how
my radio receiver turned out after soldering on the headers.
Hooking It Up
The method that we are going to use to communicate with the radio receiver requires
that we use five wires to connect an Arduino Mini to the radio receiver. Below is a
table which defines the pin connections that need to be made, and a fritzing diagram
of the connections should also help you get your wires connected properly. If you look
at the back of your radio receiver board you’ll notice that next to each header hole is a
small label. These signal names indicate how each pin is being used by the radio
receiver, and also how they can be used to interact with a microcontroller. For now,
just make sure you match the signal name on the radio receiver board to the correct
Arduino pin number.
Arduino PinReceiver Pin
3.3V
VCC
�Page 4 of 7
Arduino PinReceiver Pin
GND
GND
A4
SDIO
A5
SCLK
D2
RST
It’s very important to realize that the Si4703 radio receiver breakout is a 3.3V device;
that’s why we’re using an Arduino Mini Pro 3.3V. Using a 5 Volt Arduino (like the
Arduino) can ruin the radio receiver if proper care isn’t taken to shift the voltage levels
down to an acceptable level. You can read this sensor interfacing tutorial to learn how
to connect modules that communicate at different voltage levels.
Arduino Example: Tuning Stations and Setting Volume
In this example we’re going to use an Arduino with the radio receiver to tune a radio
station. The sketch will also allow us to use the serial port to change the station and
raise or lower the volume. We’ll be using the sample code located in the Si4703
Arduino Library. If you haven’t downloaded the Si4703 Library, you can grab it here.
Unzip the folder into your Arduino Libraries folder so that you have a folder in the
libraries directory which is called “Si4703.” Once you’ve downloaded and unzipped
the library, go ahead and open Arduino. Once the software has booted up, go to
File->Examples->Si4703->Si4703_Example; this will load the first example sketch.
You can upload the sketch and plug in some headphones to start playing around with
the radio, or continue reading to learn how the sketch works!
Once you’ve opened the sketch you’ll notice a big section of comments at the top.
Read through these comments to understand what the sketch does. The code for our
example sketch is pretty simple since we’re taking advantage of the Si4703 library
functions. First let’s look at the initialization and setup of the sketch.
�Page 5 of 7
//Add the Si4703 Library to the sketch.
#include
#include
//Create an instance of the Si4735 named radio.
Si4703 radio;
void setup()
{
//Create a serial connection
Serial.begin(9600);
//Initialize the radio to the FM mode (Possible modes are AM, FM, S
W, LW).
//The mode will set the proper bandwidth. Ensure that the antenna
//switch on the shield is configured for the desired mode.
radio.begin();
//Set the FM Frequency to 97.3 MHz
radio.tuneFrequency(973);
}
The setup and initialization is pretty easy. We start by including the Si4703 and Wire
libraries. The Wire library is needed for I2C communication, which is what is used to
talk to the radio receiver. The Si4703 library has the functions we need to control the
radio receiver. Next we create a variable (or instance) of the Si4703 library called
‘radio.’ In the setup section all we do is create a serial connection, and use the ‘begin’
function of the radio library to initialize the Si4703. Finally we tell the Si4703 to tune to
97.3 MHz. Once things are set up, we get into the loop routine which handles the
serial communication and sending commands to the Si4703.
�Page 6 of 7
void loop()
{
//Wait until a character comes in on the Serial port.
if(Serial.available()>0)
{
//Decide what to do based on the character received.
switch(Serial.read()){
//If we get the number 8, turn the volume up.
case '8':radio.volume(UP);
break;
//If we get the number 2, turn the volume down.
case '2':radio.volume(DOWN);
break;
//If we get the number 4, seek down to the next channel in the cu
rrent bandwidth (wrap to the top when the bottom is reached).
case '4':radio.seek(DOWN);
break;
//If we get the number 6, seek up to the next channel in the curr
ent bandwidth (wrap to the bottom when the top is reached).
case '6':radio.seek(UP);
break;
//If we get the letter m, mute the radio.
case 'M':
case 'm':radio.toggleMute();
break;
default:
break;
}
}
} //End main loop
The loop routine is also pretty straightforward. The loop waits for input from the serial
terminal. Once a character is received, a decision is made. Depending on what the
character is one of the library functions for the Si4703 is executed.
Conclusion
To find out what other functions there are in the Si4703 library, go into your libraries
folder for Arduino (the same one you unzipped the folder in) and open the Si4703.h
file with a text editor. This file will tell you all of the functions that exist in the library.
Play around with it, and if you come up with some cool new functions for the library
mention it in the comments so other people can use it as well. Good luck hacking! If
you have any problems, feel free to contact SparkFun Technical Support at
techsupport@sparkfun.com
�Page 7 of 7
2/12/2015
�
很抱歉,暂时无法提供与“WRL-10663”相匹配的价格&库存,您可以联系我们找货
免费人工找货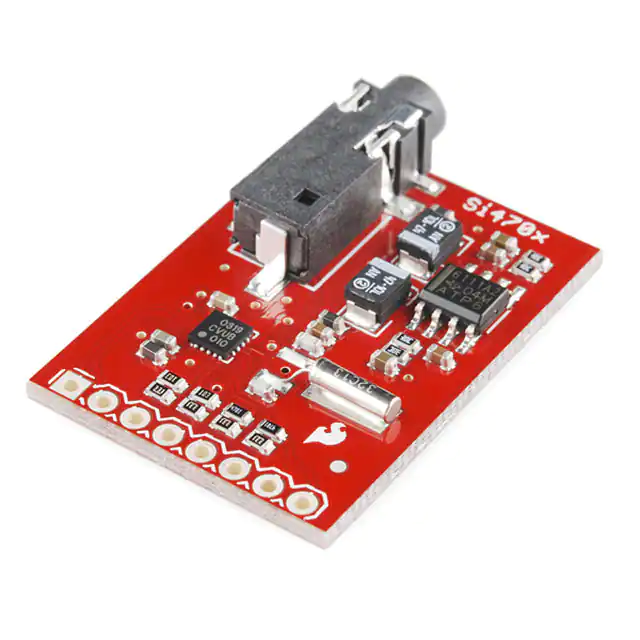


 工商网监
湘ICP备2023018690号
工商网监
湘ICP备2023018690号
