SparkFun Serial Enabled LCD Backpack
L C D - 00 2 5 8 R O H S
2
images are CC BY-NC-SA 3.0
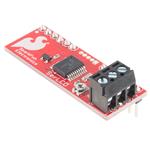
Description: The SparkFun Serial Enabled LCD Backpack allows you to control a
parallel based LCD over a single-wire serial interface. The SerLCD backpack takes
care of all the HD44780 commands allowing seamless integration with any micro that
can communicate over a wide range of TTL serial baud rates. The SerLCD currently
supports 16 and 20 character wide screens with 2 or 4 lines of display.
Communication with SerLCD requires 5V TTL serial at a default baud rate of 9600bps
(8-N-1). You can adjust the baud to any standard rate between 2400 and 38400bps.
The power, ground and RX pins are all broken out to a 3.5mm pitch screw terminal.
SerLCD has the ability to dim the backlight to conserve power if needed. There is also
a potentiometer on the backpack to adjust the contrast.
Note: The SerLCD v2.5 Datasheet incorrectly identifies the PIC as a 16F688, when
it’s actually a 16LF88. Sorry for blowing your mind.
Features:
•
•
•
•
•
•
•
PIC 16LF88 utilizes onboard UART for greater communication accuracy
Adjustable baud rates of 2400, 4800, 9600 (default), 14400, 19200 and 38400
Operational Backspace
Greater processing speed at 10MHz
Incoming buffer stores up to 80 characters
Backlight transistor can handle up to 1A
Pulse width modulation of backlight allows direct control of backlight brightness
and current consumption
�•
•
•
•
All surface mount design allows a backpack that is half the size of the original
Faster boot-up time
Boot-up display can be turned on/off via firmware
User definable splash screen
https://www.sparkfun.com/products/258
11/16/2015
�Serial LCD quickstart
by MikeGrusin | January 17, 2011 | 20 comments
Skill Level: Beginner
Welcome!
Thank you for purchasing our serial-enabled LCD! This LCD will allow your project to
display all kinds of text and numbers. LCDs can be difficult to use, so we've added an
embedded processor to this LCD that does the hard work for you. This LCD is easy to
connect to any 5V microprocessor that has a serial port, such as an Arduino, AVR,
PIC, etc.
Connecting the hardware
There are only three connections you need to make to the LCD:
signal
name
signal spec
wire color
(JST cable)
Serial receive (input to the display). 5V TTL level, 9600
RX
baud (default rate, can be changed), 8 bits, 1 stop, no
(receive)
parity.
Yellow
GND
Ground for the power supply.
(ground)
Black
VDD Power supply, this should be +5V at up to 60mA if the
(power) backlight is fully on.
Red
The board has two headers with the above three signals. They are electrically
identical, so you can use either one. One header is bare, the other has a 3-pin JST
connector preattached to it that matches a JST cable. The cable only connects one
way; press it in until it clicks. JST connectors are designed to be very snug; don't pull
on the wires to disconnect it, see our tutorial on the proper way to disconnect JST
cables.
(Tip: if you want to connect the display to a breadboard, tin the ends of the wires to
make them easier to insert into the breadboard holes. To tin wire, strip about 1/4",
and put some solder on the bare wire to make it stiffer).
Note that the RX input should be a 5V TTL-level signal directly from a 5V
microcontroller or other 5V system. You should NOT connect the board to RS232level voltages, which are +/-10V and will damage the board (see our explanation
here). If you do wish to connect this display to RS232 signals, you can use a levelshifting board such as our PRT-00449 to translate the RS232 signals to TTL-level
signals.
Using the display
When you power up the board, you'll briefly see a SparkFun splash screen, and then
the display will go blank. To send text to the board, wait 1/2 second (500ms) after
powerup for the splash screen to clear, then send text to the display through your
serial port. The display understands all of the standard ASCII characters (upper and
lowercase text, numbers, and punctuation), plus a number of graphic symbols and
Japanese characters. See the HD44780 datasheet for the full list of supported
characters.
If you send data that goes past the end of the first line, it will skip to the start of the
second line. If you go past the end of the second line, the display will jump back up to
the beginning of the first line. (Tip: you can simulate a scrolling window in software by
copying the second line to the first line, and clearing the second line.)
�Note that the Arduino and other systems with bootloaders may send "garbage"
characters to the display while the system is starting up or being reprogrammed. To
avoid this, you can use a software serial library to create a separate serial port from
the USB port, as in the following examples.
NOTE that these examples were written for Arduino 1.0 and later. If you are using
an older version of Arduino, you can download the older examples here:
serial_lcd_quickstart_Arduino02.zip.
You can copy and paste these sketches into your Arduino 1.0 (or later) editing
window, or download them here: serial_lcd_quickstart_Arduino10.zip.
// SparkFun Serial LCD example 1
// Clear the display and say "Hello World!"
// This sketch is for Arduino versions 1.0 and later
// If you're using an Arduino version older than 1.0, use
// the other example code available on the tutorial page.
// Use the softwareserial library to create a new "soft" serial
port
// for the display. This prevents display corruption when upload
ing code.
#include
// Attach the serial display's RX line to digital pin 2
SoftwareSerial mySerial(3,2); // pin 2 = TX, pin 3 = RX (unused)
Moving the cursor
A common LCD technique is to repeatedly display changing numbers such as RPM or
temperature in the same place on the display. You can easily do this by moving the
cursor before sending your data.
To move the cursor, send the special character 254 decimal (0xFE hex), followed by
the cursor position you'd like to set. Each cursor position is represented by a number,
see the table below to determine the number to send:
position 1 2 3 4 5 6 7 8 9 10 11 12 13 14 15 16
line 1
128 129 130 131 132 133 134 135 136 137 138 139 140 141 142 143
line 2
192 193 194 195 196 197 198 199 200 201 202 203 204 205 206 207
For example, if you want to move to the beginning of the second line, send the bytes
254 192 (decimal).
Here's a slightly more complex example showing how to display data at fixed points
on the display, plus the use of sprintf to convert numbers to strings (this right-justifies
the numbers with leading spaces, which keeps them from "jumping around" if the
number of digits changes):
�More information
Other commands are available to change the backlight level, turn the splash screen
on and off (and customize it to your own text), change the baud rate, etc. See the
LCD datasheet for information on all the available commands.
For a more extensive example sketch that shows oyu how to create a scrolling
marquee, create a timer, display sensor data and control the backlight, downlaod the
following examples:
• SerLCD Arduino example - Arduino 0023 and earlier
• SerLCD Arduino example - Arduino 1.0.2 and later
Alternatively, you can use the SerLCD libary found on the Arduino website. If you are
using Linux, you may want to try this library instead.
Tips and troubleshooting
If the display is powered up without the RX line connected to anything, the display
may fill with strange characters. This is because the display is receiving random noise
on the disconnected line. If you connect the RX line to a true TX port, this will not
happen.
If the display is unreadable or washed out, the contrast may need to be adjusted.
Send some text to the display (see the first example sketch above), then use a
miniature Phillips screwdriver to gently turn the contrast trimpot labeled VR1 on the
back of the display until the text is as clear as possible (please be gentle with the
trimpot). This display also has a backlight that can be adjusted for best readability,
see the LCD datasheet for information.
This display has a feature where if the display receives a CTRL-R character during its
half-second splash screen display, it will temporarily revert to 9600 baud until power is
cycled. This is to allow you to regain control of the display if you set it to an unknown
baud rate. Some systems like Arduino send bootloader information out the serial port
when the system starts up, which can fool the LCD into this recovery mode. If this is a
problem, there are a few solutions: you can use a different pin and the NewSoftSerial
library to create a TX port that doesn't get used during startup (as shown in the
example sketches above), or leave the display at the default 9600 baud rate, and
clear the display when your program starts.
Questions?
Enjoy your new display! If you have any problems, feel free to contact SparkFun
Technical Support at techsupport@sparkfun.com.
https://www.sparkfun.com/tutorials/246
11/16/2015
�