PIC32-PINGUINO-MX220 数据手册
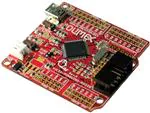
PIC32-PINGUINO-MX220 development board
USER’S MANUAL
Initial release, March 2012
Designed by OLIMEX Ltd, 2011
All boards produced by Olimex LTD are ROHS compliant
�OLIMEX© 2012
PIC32-PINGUINO-MX220 User's Manual
Disclaimer:
© 2012 Olimex Ltd. Olimex®, logo and combinations thereof, are registered trademarks of Olimex Ltd.
Other terms and product names may be trademarks of others.
The information in this document is provided in connection with Olimex products. No license, express
or implied or otherwise, to any intellectual property right is granted by this document or in connection
with the sale of Olimex products.
Neither the whole nor any part of the information contained in or the product described in this document may
be adapted or reproduced in any material from except with the prior written permission of the copyright
holder, unless it is clearly stated by Olimex that the product is licensed under the Open Source Hardware
(OSHW) Definition 1.0.
The product described in this document is subject to continuous development and improvements. All
particulars of the product and its use contained in this document are given by OLIMEX in good faith.
However all warranties implied or expressed including but not limited to implied warranties of
merchantability or fitness for purpose are excluded. This document is intended only to assist the reader in the
use of the product. OLIMEX Ltd. shall not be liable for any loss or damage arising from the use of any
information in this document or any error or omission in such information or any incorrect use of the
product.
Thank you for purchasing PIC32-PINGUINO-MX220 development board
assembled by OLIMEX LTD
Page 2 of 28
�OLIMEX© 2012
PIC32-PINGUINO-MX220 User's Manual
Table of Contents
CHAPTER 1.................................................................................................................5
OVERVIEW.................................................................................................................5
1. Introduction to the chapter.......................................................................................................5
1.1 Features.....................................................................................................................................5
1.2 Similar boards..........................................................................................................................5
1.3 Organization.............................................................................................................................6
Chapter 2......................................................................................................................8
Introduction to arduino/pinguino/maple...................................................................8
2. What is Arduino?.......................................................................................................................8
2.1 First steps with Pinguino IDE.................................................................................................9
CHAPTER 3 ..............................................................................................................10
SETTING UP THE PIC32-PINGUINO-MX220 BOARD.....................................10
3. Introduction to the chapter.....................................................................................................10
3.1 Electrostatic warning.............................................................................................................10
3.2 Requirements.........................................................................................................................10
3.3 Powering the board................................................................................................................10
3.4 Prebuilt software....................................................................................................................11
CHAPTER 4...............................................................................................................12
PIC32-PINGUINO-MX220 BOARD DESCRIPTION..........................................12
4. Introduction to the chapter.....................................................................................................12
4.1 Layout (top view)...................................................................................................................12
CHAPTER 5...............................................................................................................13
THE PIC32MX220F032D MICROCONTROLLER.............................................13
5. Introduction to the chapter.....................................................................................................13
5.1 The microcontroller...............................................................................................................13
CONTROL CIRCUITY............................................................................................16
6. Introduction to the chapter.....................................................................................................16
6.1 Reset........................................................................................................................................16
6.2 Clock.......................................................................................................................................16
CHAPTER 7...............................................................................................................17
HARDWARE.............................................................................................................17
7. Introduction to the chapter.....................................................................................................17
7.1 Battery connector...................................................................................................................17
7.2 ICSP pin holes........................................................................................................................17
7.3 UEXT......................................................................................................................................18
Page 3 of 28
�OLIMEX© 2012
PIC32-PINGUINO-MX220 User's Manual
7.4 Arduino shield pin holes........................................................................................................19
7.5 USB mini connector...............................................................................................................20
7.7 Jumper description................................................................................................................20
7.9 Additional hardware components........................................................................................21
CHAPTER 8...............................................................................................................22
MEMORY AND BLOCK DIAGRAM....................................................................22
8. Introduction to the chapter.....................................................................................................22
8.1 Memory organization............................................................................................................23
CHAPTER 9...............................................................................................................24
SCHEMATICS...........................................................................................................24
9. Introduction to the chapter.....................................................................................................24
9.1 Eagle schematic......................................................................................................................24
9.2 Physical dimensions...............................................................................................................26
CHAPTER 10.............................................................................................................27
REVISION HISTORY..............................................................................................27
10. Introduction to the chapter...................................................................................................27
10.1 Document revision...............................................................................................................27
10.2 Web page of your device.....................................................................................................28
Page 4 of 28
�OLIMEX© 2012
PIC32-PINGUINO-MX220 User's Manual
CHAPTER 1
OVERVIEW
1. Introduction to the chapter
Thank you for choosing the PIC32-PINGUINO-MX220 development board from Olimex! This
document provides a User’s Guide for the Olimex PIC32-PINGUINO-MX220 development board.
As an overview, this chapter gives the scope of this document and lists the board’s features. The
document’s organization is then detailed.
The PIC32-PINGUINO-MX220 development board enables code development of applications
running on the PIC32MX220F032D microcontroller, manufactured by Microchip technology.
1.1 Features
•
•
PIC32MX220F032D 32 bit, 40 Mhz microcontroller 32KB Flash 8KB RAM
Ultra Low Power design
•
•
PINGUINO IDE ready
Li-Po battery connector for handheld applications
•
•
Arduino/Pinguino/Maple shield pinout on the top
UEXT connector which allows many extensions modules like RF, ZIGBEE, GSM, GPS to
be connected
•
•
Two LEDs
One USER BUTTON
•
•
RESET button
Mini USB connector is used which is common and used in most cell phones, so you do not
have to buy other cables
•
All PIC ports available on 0.1" connectors matching ARDUINO platform and second row
with correct 0.1"step
ICSP signals provided on 0.1" step connector if you do not want to use Pinguino IDE and
want to program this board with PIC-KIT3.
•
1.2 Similar boards
PIC32-PINGUINO-MX220 is ARDUINO-UNO like board with PIC32MX220F032D. Generally
Page 5 of 28
�OLIMEX© 2012
PIC32-PINGUINO-MX220 User's Manual
this board outperform ARDUINO-UNO as hardware capabilities as you can see from the table
below while being considerably cheaper:
PIC32-PINGUINO-MX220
ARDUINO-UNO
CPU
32bit
32bit
CLOCK
40MHz
20MHz
FLASH
32KB
32KB
RAM
8KB
1KB
USB
YES
NO
LOW PWR
YES
NO
GPIO MAX
40MHz
5MHz
ADC
1.1MSPS
15KSPS
DMA
YES 4 Channel
NO
UEXT
YES
NO
PIC32-PINGUINO-MX220 is a powerful considering its low price but yet a starter board for the
PINGUINO family. If you are searching for powerful Pinguino board with a faster processor, more
memory, more peripherals, wider range of options be sure to check the PIC32-PINGUINO-OTG:
http://olimex.com/dev/pic32-pinguino-otg.html
1.3 Organization
Each section in this document covers a separate topic, organized as follow:
–
–
Chapter 1 is an overview of the board usage and features
Chapter 2 has a short introduction to Arduino platform and its derivatives Pinguino and
Maple
–
–
Chapter 3 provides a guide for quickly setting up the board
Chapter 4 contains the general board diagram and layout
–
Chapter 5 describes the component that is the heart of the board: the PIC32MX220F032D
microcontroller
Chapter 6 is an explanation of the control circuitry associated with the microcontroller to
reset. Also shows the clocks on the board
–
Page 6 of 28
�OLIMEX© 2012
PIC32-PINGUINO-MX220 User's Manual
–
–
Chapter 7 covers the connector pinout, peripherals and jumper description
Chapter 8 shows the processor diagram and memory map
–
–
Chapter 9 provides the schematics
Chapter 10 contains the revision history
Page 7 of 28
�OLIMEX© 2012
PIC32-PINGUINO-MX220 User's Manual
CHAPTER 2
INTRODUCTION TO ARDUINO/PINGUINO/MAPLE
2. What is Arduino?
Arduino is an open-source electronics prototyping platform, designed to make the process of using
electronics in multidisciplinary projects easily accessible. The hardware consists of a simple open
hardware design for the Arduino board with an Atmel AVR processor and on-board I/O support.
The software consists of a standard programming language and the boot loader that runs on the
board.
Arduino hardware is programmed using a Wiring-based language (syntax + libraries), similar to C+
+ with some simplifications and modifications, and a Processing-based Integrated Development
Environment (IDE).
The project began in Ivrea, Italy in 2005 aiming to make a device for controlling student-built
interaction design projects less expensively than other prototyping systems available at the time. As
of February 2010 more than 120,000 Arduino boards had been shipped. Founders Massimo Banzi
and David Cuartielles named the project after a local bar named Arduino. The name is an Italian
masculine first name, meaning "strong friend". The English pronunciation is "Hardwin", a
namesake of Arduino of Ivrea.
More information could be found at the creators web page http://arduino.cc/ and in the Arduino
Wiki http://en.wikipedia.org/wiki/Arduino
To make the story short - Arduino is easy for beginners who lack Electronics knowledge, but also
does not restrict professionals as they can program it in C++ or mix of Arduino/C++ language.
There are thousands of projects which makes it easy to startup as there is barely no field where
Arduino enthusiasts to have not been already.
Arduino has inspired two other major derivates - MAPLE and PINGUINO. Based on 8-bit AVR
technology the computational power of Arduino boards is modest, this is why a team from MIT
developed the MAPLE project which is based on ARM7 STM32F103RBT6 microcontroller. The
board have same friendly IDE as Arduino and offers the same capabilities as hardware and software
but runs the Arduino code much faster. The Maple project can be found at http://leaflabs.com
In parallel with Arduino another project was started called PINGUINO. This project chose its first
implementation to be with PIC microcontrollers, as AVRs were hard to find in some parts of the
world like South America so it is likely to see lot of PINGUINO developers are from that part of the
Page 8 of 28
�OLIMEX© 2012
PIC32-PINGUINO-MX220 User's Manual
world. PINGUINO project founders decided to go with Python instead Java for processing
language. For the moment PINGUINO is much more flexible than Arduino as it is not limited to
8bit microcontrollers. Currently the IDE, which has GCC in background, can support 8-bit PIC
microcontrollers, 32bit PIC32 (MIPS) microcontrollers and ARM7/CORTEXM3 microcontrollers
which makes PINGUINO very flexible because once you make your project you can migrate easily
through different hardware platforms and not being bound to a single microcontroller manufacturer.
The PINGUINO project can be found at: http://www.pinguino.cc.
2.1 First steps with Pinguino IDE
Download the latest Pinguino IDE distribution depending on your operation system and install it.
Connect your device in bootloader mode to the computer (for PIC32-PINGUINO-MX220 hold
BUT and press RST after connected). Start the IDE from it's shortcut. From Preferences choose
board (for PIC32-PINGUINO-MX220 that would be PIC32-Pinguino_220). From File->Open
navigate to the examples folder which is found in the Pingino IDE installation folder. Choose a
simple example to begin with like BlinkWithoutDelay.pde and open it. Click “Compile” (blue
arrow) and after it compiles click “Upload to Pinguino” (green arrow). Voila, you have uploaded
code to your Pinguino device.
Now start exploring the world of Pinguino! More info and help on the software can be found and
the official pinguino web site. You can leave your feedback on the project and report bugs at the
forum: http://forum.pinguino.cc/.
Page 9 of 28
�OLIMEX© 2012
PIC32-PINGUINO-MX220 User's Manual
CHAPTER 3
SETTING UP THE PIC32-PINGUINO-MX220 BOARD
3. Introduction to the chapter
This section helps you set up the PIC32-PINGUINO-MX220 development board for the first time.
Please consider first the electrostatic warning to avoid damaging the board, then discover the
hardware and software required to operate the board.
The procedure to power up the board is given, and a description of the default board behavior is
detailed.
3.1 Electrostatic warning
PIC32-PINGUINO-MX220 is shipped in a protective anti-static package. The board must not be
exposed to high electrostatic potentials. A grounding strap or similar protective device should be
worn when handling the board. Avoid touching the component pins or any other metallic element.
3.2 Requirements
In order to set up the PIC32-PINGUINO-MX220, the following items are required:
If using the free PINGUINO IDE the ONLY requirement is a miniUSB to USB-A cable to connect
to a computer.
If you want to upgrade the bootloader, or program the board without the PINGUINO-IDE there are
pinouts for ICSP programmer (note that there isn't a connector mounted). You can use our PICKIT3 programmer for custom programming without PINGUINO IDE.
3.3 Powering the board
The PIC32-PINGUINO-MX220 board is self-powered by the miniUSB if it is connected to a USB
hub of a computer.
To enter the bootloader mode hold the button BUT and then connect the miniUSB. Or after
plugging the miniUSB hold the button BUT and then press RST.
Page 10 of 28
�OLIMEX© 2012
PIC32-PINGUINO-MX220 User's Manual
On powering the board the AND starting bootloader mode LED1 and LED2 should start blinking
consecutively.
3.4 Prebuilt software
The board comes with prebuilt PINGUINO bootloader. To enter this mode hold BUT and press
RST then release BUT. Or connect the USB when BUT is pressed and then release BUT.
Page 11 of 28
�OLIMEX© 2012
PIC32-PINGUINO-MX220 User's Manual
CHAPTER 4
PIC32-PINGUINO-MX220 BOARD DESCRIPTION
4. Introduction to the chapter
Here you get acquainted with the main parts of the board. Note the names used on the board differ
from the names used to describe them. For the actual names check the PIC32-PINGUINO-MX220
board itself.
4.1 Layout (top view)
Page 12 of 28
�OLIMEX© 2012
PIC32-PINGUINO-MX220 User's Manual
CHAPTER 5
THE PIC32MX220F032D MICROCONTROLLER
5. Introduction to the chapter
In this chapter is located the information about the heart of PIC32-PINGUINO-MX220 – its
microcontroller. The information is a modified version of the datasheet provided by its
manufacturers.
5.1 The microcontroller
Operating Conditions
• 2.3V to 3.6V, -40ºC to +105ºC, DC to 40 MHz
Core: 40 MHz MIPS32® M4K®
• MIPS16e® mode for up to 40% smaller code size
• 1.56 DMIPS/MHz (Dhrystone 2.1) performance
• Code-efficient (C and Assembly) architecture
• Single-cycle (MAC) 32x16 and two-cycle 32x32 multiply
Clock Management
• 0.9% internal oscillator
• Programmable PLLs and oscillator clock sources
• Fail-Safe Clock Monitor (FSCM)
• Independent Watchdog Timer
• Fast wake-up and start-up
Power Management
• Low-power management modes (Sleep, Idle)
• Integrated Power-on Reset and Brown-out Reset
• 0.5 mA/MHz dynamic current (typical)
• 20 μA IPD current (typical)
Audio Interface Features
• Data communication: I2S, LJ, RJ, DSP modes
• Control interface: SPI and I2C™
• Master clock:
- Generation of fractional clock frequencies
- Can be synchronized with USB clock
- Can be tuned in run-time
Page 13 of 28
�OLIMEX© 2012
PIC32-PINGUINO-MX220 User's Manual
Advanced Analog Features
• ADC Module:
- 10-bit 1.1 Msps rate with one S&H
- 13 analog inputs
• Flexible and independent ADC trigger sources
• Charge Time Measurement Unit (CTMU):
- Supports mTouch™ capacitive touch sensing
- Provides high-resolution time measurement (1 ns)
- On-chip temperature measurement capability
• Comparators:
- Up to three Analog Comparator modules
- Programmable references with 32 voltage points
Timers/Output Compare/Input Capture
• Five General Purpose Timers:
- Five 16-bit and up to two 32-bit Timers/Counters
• Five Output Compare (OC) modules
• Five Input Capture (IC) modules
• Peripheral Pin Select (PPS) to allow function remap
• Real-Time Clock and Calendar (RTCC) module
Communication Interfaces
• USB 2.0-compliant Full-speed OTG controller
• Two UART modules (10 Mbps)
- Supports LIN 2.0 protocols and IrDA® support
• Two 4-wire SPI modules (20 Mbps)
• Two I2C modules (up to 1 Mbaud) with SMBus support
• Peripheral Pin Select (PPS) to allow function remap
• Parallel Master Port (PMP)
Direct Memory Access (DMA)
• Four channels of hardware DMA with automatic data size detection
• Two additional channels dedicated for USB
• Programmable Cyclic Redundancy Check (CRC)
Input/Output
• 15 mA source/sink on all I/O pins
• 5V-tolerant pins
• Selectable open drain, pull-ups, and pull-downs
• External interrupts on all I/O pins
Qualification and Class B Support
• AEC-Q100 REVG (Grade 2 -40ºC to +105ºC) planned
Page 14 of 28
�OLIMEX© 2012
PIC32-PINGUINO-MX220 User's Manual
• Class B Safety Library, IEC 60730
Debugger Development Support
• In-circuit and in-application programming
• 4-wire MIPS® Enhanced JTAG interface
• Unlimited program and six complex data breakpoints
• IEEE 1149.2-compatible (JTAG) boundary scan
1
For comprehensive information on the microcontroller visit the Microchip's web page for a
datasheet.
At the moment of writing the microcontroller datasheet can be found at the following link:
http://ww1.microchip.com/downloads/en/DeviceDoc/61168D.pdf
Page 15 of 28
�OLIMEX© 2012
PIC32-PINGUINO-MX220 User's Manual
CHAPTER 6
CONTROL CIRCUITY
6. Introduction to the chapter
Here you can find information about reset circuit, power circuit and quartz crystal locations.
6.1 Reset
PIC32-PINGUINO-MX220 reset circuit includes R8 (4.7 KΩ), PIC32MX220F032D pin 18
(#MCLR) and a RESET button. Note that it also can be found at the ICSP header pin 1.
6.2 Clock
8 MHz quarz crystal Q1 is found at pins 30 and 31 of the processor.
Page 16 of 28
�OLIMEX© 2012
PIC32-PINGUINO-MX220 User's Manual
CHAPTER 7
HARDWARE
7. Introduction to the chapter
In this chapter are presented the connectors that can be found on the board all together with their
pinout. Proto area is shown. Jumpers functions are described. Notes and info on specific peripherals
are presented. Notes regarding the interfaces are given.
7.1 Battery connector
Pin #
Signal Name
1
VBAT
2
GND
7.2 ICSP pin holes
The 6 pin ICSP header provides interface for custom programming/debugging outside of the
PINGUINO IDE. Note the pin holes doesn't have a connector mouted over – you have to mount
it/solder it yourself. The pinout can be found in the table below. It is important to check the jumper
configuration for proper use of the ICSP pin hole .
ICSP pin holes
Pin #
Signal Name
Pin #
Signal Name
1
RESET
4
PGED3
2
+3.3V
5
PGEC3
3
GND
6
Not connected
Page 17 of 28
�OLIMEX© 2012
PIC32-PINGUINO-MX220 User's Manual
7.3 UEXT
PIC32-PINGUINO-MX220 board has UEXT connector and can interface Olimex's UEXT modules.
For more information on our UEXT modules please visit:
http://www.olimex.com/dev/OTHER/UEXT.pdf
Pin #
Signal Name
1
+3.3V
2
GND
3
U1TX
4
U2RX
5
SCL1
6
SDA1
7
SDI1
8
SDO1
9
SCK1
10
CS
Page 18 of 28
�OLIMEX© 2012
PIC32-PINGUINO-MX220 User's Manual
7.4 Arduino shield pin holes
For your convenience the pads are named individually near each of them. Please take extra care
about the numbering but consider that there might be offset.
Also note that the board comes with no connectors soldered on the pin holes. Before being able to
connect with a shield you have to solder connecters yourself.
Pad Name
Signal
Pad Name
POWER CON1
Signal
DIGITAL CON2
RST
RESET
A0
AN6/RPC0/RC0
3V3
+3.3 V
A1
AN7/RPC1/RC1
5V
+5 V
A2
PGED1/AN2/C1IND/C2INB/C3
IND/RPB0/PMD0/RB0
GND
GROUND
A3
PGEC1/AN3/C1INC/C2INA/RP
B1/CTED12/PMD1/RB1
GND
GROUND
A4
AN4/C1INB/C2IND/RPB2/SDA
2/CTED13/PMD2/CNB2/RB2
VIN
V in
A5
AN5/C1INA/C2INC/RTCC/RPB
3/SCL2/PMWR/CNB3/RB3
DIGITAL CON5
DIGITAL CON4
AREF
A ref
D7
RPC7/PMA0/RC7
GND
GROUND
D6
RPC6/PMA1/RC6
D13
SCK2/LED1
D5
RPC5/PMA3/RC5
D12
SDI2
D4
RPC4/PMA4/RC4
D11
SDO2
D3
AN12/RPC3/RC3
D10
PGEC3
D2
AN8/RPC2/PMA2/RC2
D9
LED2
D1
U2TX
D8
BUT
D0
U2RX
Page 19 of 28
�OLIMEX© 2012
PIC32-PINGUINO-MX220 User's Manual
7.5 USB mini connector
Note that the USB is confiugred only as device.
Pin #
Signal Name
1
+5V
2
D-
3
D+
4
Not connected
5
GND
7.7 Jumper description
D10_E
If open disconnects D10 (on CON5 from the ARDUINO shield connector), so you can use ICSP
programming
Default state is closed.
AREF_E
When open provides AREF on the ICSP pin holes.
If closed AREF on CON5 pin D8
Default state is open.
Page 20 of 28
�OLIMEX© 2012
PIC32-PINGUINO-MX220 User's Manual
LED1_E
If closed excludes LED1.
Default state is open.
LED2_E
If closed excludes LED2.
Default state is open.
BUT_E
If closed excludes button BUT.
Default state is open.
7.9 Additional hardware components
The components below are mounted on the PIC32-PINGUINO-MX220 board but are not discussed
above. They are listed here for completeness:
General purpose button
2 LEDs
Page 21 of 28
�OLIMEX© 2012
PIC32-PINGUINO-MX220 User's Manual
CHAPTER 8
MEMORY AND BLOCK DIAGRAM
8. Introduction to the chapter
Below is located the block diagram of the processor and on the next page you can find a memory
map for this family of processors. It is strongly recommended to refer to the original datasheet
(DS61168D) released by Microchip for ones of higher quality.
Page 22 of 28
�OLIMEX© 2012
PIC32-PINGUINO-MX220 User's Manual
8.1 Memory organization
Page 23 of 28
�OLIMEX© 2012
PIC32-PINGUINO-MX220 User's Manual
CHAPTER 9
SCHEMATICS
9. Introduction to the chapter
In this chapter are located the schematics describing logically and physically PIC32-PINGUINOMX220.
9.1 Eagle schematic
PIC32-PINGUINO-MX220 schematic is visible for reference here. You can also find them on the
web page for PIC32-PINGUINO-MX220 at our site: http://www.olimex.com/dev/PIC32PINGUINO-MX220.html. They are located in HARDWARE section.
Note that PIC32-PINGUINO-MX220 schematic is released under Creative Commons AttributionShare Alike 3.0 United States License and the whole project is released under
The EAGLE schematic is situated on the next page for quicker reference.
Page 24 of 28
�OLIMEX© 2012
PIC32-PINGUINO-MX220 User's Manual
Page 25 of 28
�OLIMEX© 2012
PIC32-PINGUINO-MX220 User's Manual
9.2 Physical dimensions
Note that all dimensions are in inches.
Page 26 of 28
�OLIMEX© 2012
PIC32-PINGUINO-MX220 User's Manual
CHAPTER 10
REVISION HISTORY
10. Introduction to the chapter
In this chapter you will find the current and the previous version of the document you are reading.
Also the web-page for your device is listed. Be sure to check it after a purchase for the latest
available updates and examples.
10.1 Document revision
Revision
Changes
Modified
Pages
Initial
Initial Creation
All
A
Added “Open Hardware” exception; replaced
“headers” with “pin holes”; fixed various spelling
errors
2;
various;
various
Page 27 of 28
�OLIMEX© 2012
PIC32-PINGUINO-MX220 User's Manual
10.2 Web page of your device
The web page you can visit for more info on your device is http://www.olimex.com/dev/PIC32PINGUINO-MX220.html. There you can find more info and some examples.
ORDER CODES:
PIC32-PINGUINO-MX220 - completely assembled and tested
PIC-KIT3 + PIC-ICSP – PIC programmer + adapter for different types of ICSP connectors
SHIELD-LOL – Duino compatible shield with a matrix of LEDs
SHIELD-EKG-EMG – Duino compatible shield for electrocardiography
How to order?
You can order to us directly or by any of our distributors.
Check our webpage http://www.olimex.com/ for more info.
Page 28 of 28
�