Adafruit Power Relay FeatherWing
Created by lady ada
https://learn.adafruit.com/adafruit-power-relay-featherwing
Last updated on 2021-11-15 06:45:45 PM EST
©Adafruit Industries
Page 1 of 9
�Table of Contents
Overview
3
Pinouts
5
• Relay Control
• Relay Output
• Reset Button
6
7
8
Downloads
8
• Datasheets & Files
• Schematic
• Fabrication Print
8
8
9
©Adafruit Industries
Page 2 of 9
�Overview
A Feather board without ambition is a Feather board without FeatherWings! This is
the Power Relay FeatherWing. It gives you power to control, and control over power.
Put simply, you can now turn on and off lamps, fans, solenoids, and other small
appliances that run on up to 250VAC or DC power using any Feather board. Compar
ed to our smaller mini Relay FeatherWings (https://adafru.it/xDL), this one can handle
a beefy 1200 Watts!
Using our Feather Stacking Headers (http://adafru.it/2830) or Feather Female
Headers (http://adafru.it/2886) you can connect a FeatherWing on top of your Feather
board and let the board take flight. Check out our range of Feather boards here. (http
s://adafru.it/mf2)
©Adafruit Industries
Page 3 of 9
�This Wing has a non-latching type relay. You can switch up to 10A of resistive-load
current at 120VAC, 5A at 240VAC. With inductive loads, about half that. Check the
datasheet for the relay for the exact switching capacity, as it depends on type of load
and voltage type and magnitude. This relay is good for handling fairly large devices,
computers, TVs, small appliances and more.
However, note that when closing the relay, it will draw 100mA continuously from the
3.3V power rail
Each FeatherWing comes with a fully assembled and tested PCB, header you can use
to attach to your Feather. By soldering closed the jumper on the underside of the
Wing you can select which pin you want to use for the relay control. Some light
soldering is required.
©Adafruit Industries
Page 4 of 9
�Please note: If using with high voltages (> 24V) use care and common sense! High
voltages require experience, and are only for use by engineers who are comfortable
with guidelines and know how to use them safely!
Pinouts
©Adafruit Industries
Page 5 of 9
�Relay Control
Controlling the relay is really simple. The relay uses a single pin for control. When
floating or pulled low, the relay is 'open' or unset. When the pin is pulled high, the
relay switches closed/set. A red LED next to the pin will let you know that the signal is
high. You will need to solder closed a jumper on the bottom to match the pin you want
to use for control.
When the relay is closed it will draw approximately 100 milliamps (yep! its a big relay
and the voltage is only 3.3V) so keep that in mind when using a lot of accessories,
sensors and devices on the 3.3V power line.
©Adafruit Industries
Page 6 of 9
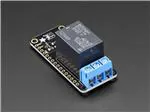
�Relay Output
The Wing has the power control output on the end, a 3-pin 5.08 mm terminal block.
The COM pin is what you should connect the signal you're planning to switch.
If the relay is unset, the NC pin (Normally Connected) is mechanically connected to C
OM. NO (Normally Open) is mechanically disconnected.
When the relay is set, NC becomes disconnected from COM and NO is connected to
COM
©Adafruit Industries
Page 7 of 9
�Reset Button
There is a Reset button on both Wings, this is connected to the RST pin and will short
it to ground. It is not connected to the relay at all, its handy for restarting your Feather
Downloads
Datasheets & Files
• EagleCAD PCB files on GitHub (https://adafru.it/pXB)
• Fritzing object in Adafruit Fritzing library (https://adafru.it/c7M)
• Datasheet for the Relay (https://adafru.it/pXC)
Schematic
©Adafruit Industries
Page 8 of 9
�Fabrication Print
Dims in inches
©Adafruit Industries
Page 9 of 9
�
很抱歉,暂时无法提供与“3191”相匹配的价格&库存,您可以联系我们找货
免费人工找货- 国内价格 香港价格
- 1+108.988151+14.10053
- 国内价格 香港价格
- 1+102.337921+13.24015