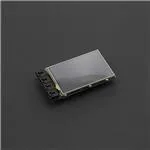
TELEMATICS 3.5" TFT Touch LCD Shield SKU: DFR0387
Contents
1 Introduction
2 Specification
3 Board Overview
4 Tutorial
4.1 Requirements
4.2 Sample Code 1
4.3 Sample Code 2
4.4 Sample Code 3
5 FAQ
Introduction
For beginners to Arduino it can be daunting and risky to wire LCD driver circuits - one wrong
connection and your component can be damaged. This LCD expansion board removes all the
complications and risks.
The TELEMATICS 3.5" TFT Touch LCD Shield is an Arduino compatible display designed by
DFRobot, with a resolution of 320x480, three serial ports and one IIC interface. It is perfectly
compatible with Arduino DUE, Mega1280/2560, and Bluno Mega1280/2560. There is an on-board
voltage switch which supports changing the output voltage between 3.3V and 5V to ensure that it
�won't damage your DUE. In addition, the LCD shield comes with a MicroSD card slot on the back
that can be used for data storage up to a maximum of 32GB. We also offer a variety of driver
packages to help you implement different features.
Note: Since the operating voltage of DUE and MEGA are different, the backlight
brightness will change if you replace your Arduino platform. Please adjust the D8 PWM
signal to control the brightness of the backlight
Specification
Screen Size: 3.5"
Resolution Ratio: 320x480
Power Supply: 5V
Output Voltage: 3.3/5V
Backlight Control Mode: D8 PWM signal
Supports MicroSD card (Up to 32GB)
Serial Ports: 3
IIC interface: 1
Compatible with Arduino Compatible DUE/Mega 1280/2560
Compatible with the Bluno Mega 1280/2560
Supports Touch Functionality
Dimensions: 100x57mm/3.93x2.24 inches
Weight: 70g
Board Overview
InterfaceDescription
Note:
LCD Driving Pins: D2, D3, D4, D5, D6, D8, D22~D41, D50~D53
IIC
Interface
IIC (SDA:
20; SCL:
21)
Serial1
Serial1
Serial2
Serial2
Serial3
Serial3
D52>DATA0
SD
D50->CMD
Driving
D52->CLK
Pins
D53>CD/DATA3
�Tutorial
Requirements
Hardware
Bluno Mega 2560 x 1
TELEMATICS 3.5" TFT Touch LCD Shield x 1
Software
Arduino IDE (Latest) Click to Download Arduino IDE from Arduino®
Download related Libraries. How to install libraries
https://www.arduino.cc/en/Guide/Libraries#.UxU8mdzF9H0
Sample Code 1
In this section, we'll explain how to initialize the LCD screen. You can use "setFontSize" and
"setColor" function to change the font and the color of the characters
1 /*
2 This code will demonstrate how to make the LCD display string with the
library
3 If you need to set the font size, you can call this function "setFontSi
ze()",and you can set the parameters:
4
FONT_SIZE_SMALL
5
FONT_SIZE_MEDIUM
6
FONT_SIZE_LARGE
7
FONT_SIZE_XLARGE
8
9 If you want to set the font color, you can call this function "setColor
()" with the parameters:
10
RGB16_RED-------->RED
11
RGB16_GREEN------>GREEN
12
RGB16_BLUE------->BLUE
13
RGB16_YELLOW----->YELLOW
14
RGB16_CYAN------->CYAN
15
RGB16_PINK------->PINK
16
RGB16_WHITE------>WHITE
17
18
19
20
Created 2016-4-8
�21
By Andy zhou
22
version:V1.0
23 */
24 #include
25 #include
26 #include
27
28 LCD_R61581 lcd;
29
30 void setup(){
31
lcd.begin();
32
lcd.setFontSize(FONT_SIZE_MEDIUM);
33
lcd.setColor(RGB16_RED);
34
lcd.println();
35
lcd.println();
36
lcd.println("DFRobot!!!");
37
lcd.println("TELEMATICS LCD SHIELD V1.0");
38
lcd.println();
39
lcd.setColor(RGB16_WHITE);
//set font size
//set strings color
40 }
41
42 void loop(){
43 }
Sample Code 2
In this section, we'll explain how to use the SD card with LCD screen.
1 /*
2 /*
3 This code is to teach you how to use SD library.
4
5
Created 2016-4-8
�6
By Andy zhou
7
version:V1.0
8 */
9 #include
10 #include
11 #include
12 #include
13 #include "datalogger.h"
14
15 #define STATE_SD_READY 0x1
16 #define STATE_OBD_READY 0x2
17 #define STATE_GPS_CONNECTED 0x4
18 #define STATE_GPS_READY 0x8
19 #define STATE_MEMS_READY 0x10
20 #define STATE_GUI_ON 0x20
21
22 LCD_R61581 lcd;
23 CDataLogger logger;
24
25 byte state = 0;
26
27 bool checkSD()
28 {
29
Sd2Card card;
30
SdVolume volume;
31
state &= ~STATE_SD_READY;
32
pinMode(SS, OUTPUT);
33
34
lcd.setFontSize(FONT_SIZE_MEDIUM);
35
if (card.init(SPI_HALF_SPEED, SD_CS_PIN)) {
36
const char* type;
37
switch(card.type()) {
38
case SD_CARD_TYPE_SD1:
39
type = "SD1";
�40
break;
41
case SD_CARD_TYPE_SD2:
42
type = "SD2";
43
break;
44
case SD_CARD_TYPE_SDHC:
45
type = "SDHC";
46
break;
47
default:
48
type = "SDx";
49
}
50
51
lcd.print(type);
52
lcd.write(' ');
53
if (!volume.init(card)) {
54
lcd.print("No FAT!");
55
return false;
56
}
57
58
uint32_t volumesize = volume.blocksPerCluster();
59
volumesize >>= 1; // 512 bytes per block
60
volumesize *= volume.clusterCount();
61
volumesize >>= 10;
62
63
lcd.print((int)volumesize);
64
lcd.print("MB");
65
} else {
66
lcd.println("No SD Card");
67
return false;
68
}
69
70
if (!SD.begin(SD_CS_PIN)) {
71
lcd.println("Bad SD");
72
return false;
73
}
�74
75
state |= STATE_SD_READY;
76
return true;
77 }
78
79 void setup(){
80
lcd.begin();
81
lcd.setFontSize(FONT_SIZE_MEDIUM);
82
lcd.setColor(RGB16_RED);
83
lcd.println();
84
lcd.println();
85
lcd.println("DFRobot!!!");
86
lcd.println("TELEMATICS LCD SHIELD V1.0");
87
lcd.println();
88
lcd.setColor(RGB16_WHITE);
89
if (checkSD()) {
//set font size
//set strings color
90
uint16_t index = logger.openFile();
91
lcd.println();
92
if (index > 0) {
93
lcd.print("File ID:");
94
lcd.println(index);
95
} else {
96
lcd.print("No File");
97
98
}
}
99 }
100
101 void loop(){
102 }
�
Sample Code 3
In this section, we'll explain how to use the touch function
1 #include
2 #include
3 #include
4 #include "touch.h"
5
6 LCD_R61581 lcd;
7
8 void setup(){
9
lcd.begin();
10
lcd.setFontSize(FONT_SIZE_MEDIUM);
11
lcd.setColor(RGB16_YELLOW);
12
lcd.println("DFRobot");
13
lcd.println("TELEMATICS LCD SHIELD V1.0");
14
lcd.println();
15
lcd.setColor(RGB16_WHITE);
16
17
touch.init();
18 }
19
20 void loop(){
21
lcd.setCursor(0, 8);
22
int x, y;
23
if ( touch.read(x, y) ){
24
lcd.print("X:");
25
lcd.print(x);
26
lcd.print(" Y:");
27
lcd.print(y);
28
lcd.print("
29
30
");
} else {
lcd.print("
");
//set font size
//set strings color
�31
}
32 }
FAQ
For any questions/advice/cool ideas to share, please visit DFRobot Forum.
Powered By DFRobot © 2008-2017
�
很抱歉,暂时无法提供与“DFR0387”相匹配的价格&库存,您可以联系我们找货
免费人工找货