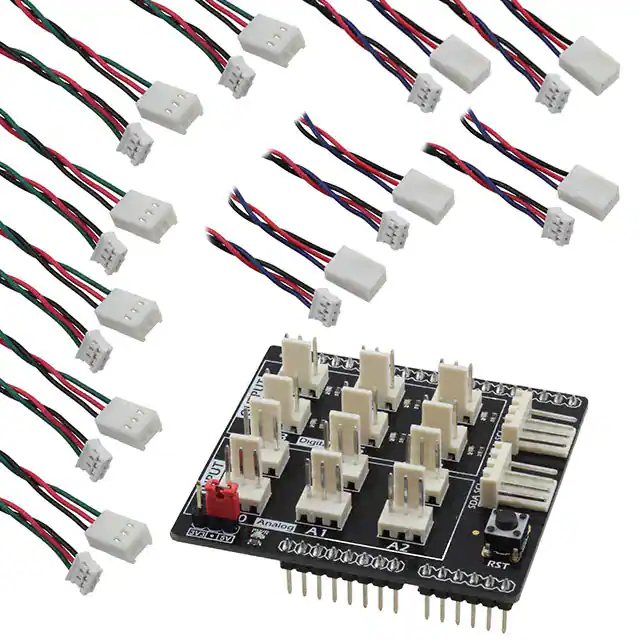
Cookie I/O Expansion Shield V2 SKU: DFR0375
Contents
1 Introduction
2 Features
3 Pin Definitions
4 Details
4.1 Digital & Analog
4.2 3.3V / 5V Power Switching
5 Cookie I/O Expansion Shield Applications
6 FAQ
7 More
Introduction
The Cookie I/O expansion shield is designed for beginners to electronics. The shield is directly
compatible with the Boson kit. We have implemented fail-safe systems to prevent bad connections
from destroying the board. The board is protected from reverse voltage input. And connector ports
�only accept connections the correct way around. These fail safes make the board ideal for beginners
and classroom settings - no need to worry about your students making the wrong connections!
Features
6 x PH2.0-3P interface digital ports: D3, D5, D6, D9, D10, D11
6 x PH2.0-3P Interface analog ports: A0 - A5
Two I2C ports, PH2.0-4P Interface
5V or 3.3V power supply (selected via power jumper cap)
Size: 58 * 52 mm / 2.28 * 2.04 inches
Pin Definitions
Details
Digital & Analog
�
"D": represents digital signal
"A": represents analog signal
One of the biggest benefits of the I/O expansion shield is increased power and GND pins, allowing
you to connect more sensors.
* Green: digital signal
* Blue: analog signal
* Red: VCC
* Black: GND
�
This is DFRobot's Gravity Interface. Digital and analog connections are easy to recognize and
support most of DFRobot's I/O expansion shields and modules. Search "Gravity" in the DFRobot
store to find compatible modules.
3.3V / 5V Power Switching
The shield is compatible with 3.3V and 5V logic. Select desired voltage by shorting either the 3.3 or
5v pins as pictured.
Cookie I/O Expansion Shield Applications
You will need:
Hardware
UNO Dashboard x1
DFR0375 Expansion Shield x1
Analog Sensors (Ambient Light Sensor) x1
Jumper Cables
Software
Arduino IDE V1.6.5 click to download Arduino IDE
Sample Code
1 int light=0;
2
3 void setup() {
4
// put your setup code here, to run once:
5
pinMode(3,OUTPUT);
�6
Serial.begin(9600);
7 }
8 void loop() {
9
// put your main code here, to run repeatedly:
10
light=analogRead(0);
11
Serial.println(light);
12
if(light>100)
13
digitalWrite(3,HIGH);
14
else
digitalWrite(3,LOW);
15
delay(100);
16 }
When there is low ambient light, the LED will turn ON.
FAQ
For any questions/advice/cool ideas to share, please visit DFRobot Forum.
Powered By DFRobot © 2008-2017
�
很抱歉,暂时无法提供与“DFR0375”相匹配的价格&库存,您可以联系我们找货
免费人工找货