DATASHEET
ISL8107
FN6605
Rev 1.00
October 29, 2008
Single-Phase Pulse-Width Modulation (PWM) Controller with Integrated High-Side
Gate Drivers
The ISL8107 is a single phase, non-synchronous buck
controller with an integrated high-side MOSFET driver. The
controller operates from 9V to 75V input voltage range. The
internal 1.192V reference voltage has a tolerance of ±1%
over the industrial temperature range.
Features
The ISL8107 employs voltage-mode control with
feedforward compensation to provide optimal transient
response and a constant loop gain over a wide input voltage
range. The switching frequency can be programmed from
100kHz to 600kHz by external resistor and capacitor. The
switching frequency can be synchronized to an external
clock signal through the SYNC pin.
• Programmable Switching Frequency 100kHz to 600kHz
The ISL8107 features programmable soft-start, hiccup mode
for short circuit protection, and over-temperature protection.
The overcurrent protection is implemented using MOSFET’s
rDS(ON) sensing. This approach simplifies the implementation
without deteriorating the converter efficiency.
Pinout
VFF
PVCC
BOOT
UGATE
PHASE
15
14
13
VCC
3
10 PGOOD
SYNC
4
9
7
8
COMP
11
FB
2
SGND
OCSET
RT/CT
12 EN/SS
6
• Simple Single-Loop Voltage Mode Control
• Voltage Feedforward Compensation
• Switching Frequency Synchronization
• Lossless, Programmable Overcurrent Protection
- Uses MOSFET’s rDS(ON)
- Hiccup Mode
• Integrated N-Channel MOSFET Gate Drivers
• Programmable Soft-Start
• Over-Temperature Protection
• Pb-Free (RoHS Compliant)
1
5
• +1.192V Internal Voltage Reference
- ±1% tolerance Over the Industrial Temperature Range
• QFN (5x5) Package
- QFN Compliant to JEDEC PUB95 MO-220 QFN - Quad
Flat No Leads - Product Outline
- QFN Near Chip Scale Package Footprint; Improves
PCB Efficiency, Thinner in Profile
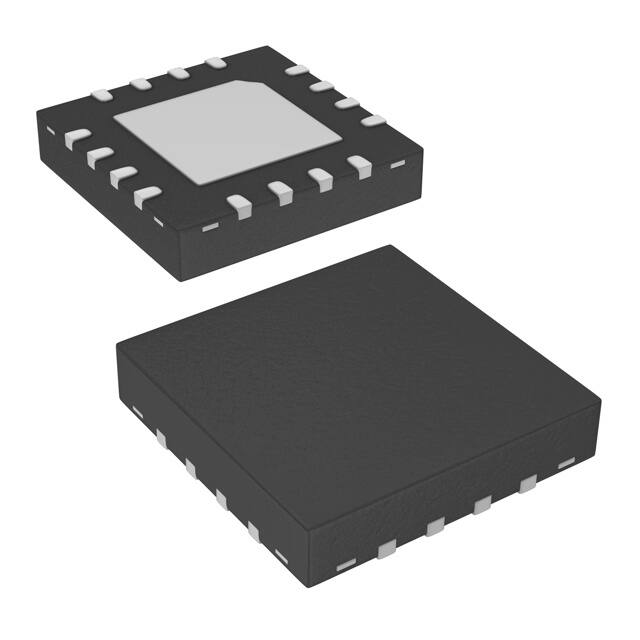
ISL8107
(16 LD 5X5 QFN)
TOP VIEW
16
• Operates from +9V to +75V Bias Supply Voltage
PGND
VBG
Applications
• Test and Measurement Instruments
• Routers and Switchers
• Point of Load Modules
• Distributed DC/DC Power Architecture
• Industrial Applications
• Telecom/Datacom Applications
Ordering Information
PART
NUMBER
(Note)
PART
MARKING
TEMP.
RANGE (°C)
ISL8107 IRZ
-40 to +85
16 Ld 5x5 QFN L16.5x5B
ISL8107IRZ-T* ISL8107 IRZ
-40 to +85
16 Ld 5x5 QFN L16.5x5B
Tape and Reel
ISL8107IRZ
PACKAGE
(Pb-Free)
PKG.
DWG. #
*Please refer to TB347 for details on reel specifications.
NOTE: These Intersil Pb-free plastic packaged products employ special
Pb-free material sets, molding compounds/die attach materials, and
100% matte tin plate plus anneal (e3 termination finish, which is RoHS
compliant and compatible with both SnPb and Pb-free soldering
operations). Intersil Pb-free products are MSL classified at Pb-free peak
reflow temperatures that meet or exceed the Pb-free requirements of
IPC/JEDEC J STD-020.
FN6605 Rev 1.00
October 29, 2008
Page 1 of 16
�ISL8107
FN6605 Rev 1.00
October 29, 2008
Block Diagram
VCC
INTERNAL
REGULATOR
INT. BIAS VOLTAGE
INTERNAL
REGULATOR
PVCC
POWER-ON
RESET (POR)
INT. BIAS VOLTAGE
OCFLT
+
+
OCSET
104µA
0.77V
EN/SS
SOFT-START
AND
FAULT LOGIC
BOOT
SGND
GATE
CONTROL
LOGIC
UGATE
PHASE
+
PWM
+
REFERENCE
VREF = 1.192V
VBG
+
PGOOD
+
GM
EA
OSCILLATOR
1.345V
PGND
OR
+
1.03V
Page 2 of 16
FB
COMP
RT/CT
SYNC
VFF
�ISL8107
Typical Application
VIN
9V TO 75V
RFilter
CHFIN
DBOOT
CF2
CBIN
CF1
PVCC
VFF
BOOT
VCC
OCSET
CF2
ROCSET
RT
RT/CT
UGATE
CBOOT
COCSET
Q1
LOUT
SYNC
ISL8107
CHFOUT
D1
PGND
C3
PGOOD
R3
R1
COMP
CBG
R2
C1
EN/SS
C4
CSS
CBOUT
FB
VBG
FN6605 Rev 1.00
October 29, 2008
VOUT
PHASE
CT
SGND
RO
C2
OPTIONAL
Page 3 of 16
�ISL8107
Typical Application
VIN
9V TO 75V
RT
CHFIN
DBOOT
CF2
CBIN
CF1
PVCC
VFF
BOOT
RT/CT
CT
VCC
< VFF
OCSET
UGATE
VCC
ROCSET
CBOOT
COCSET
Q1
LOUT
CF2
SYNC
ISL8107
CHFOUT
D1
PGND
C3
PGOOD
R3
R1
COMP
CBG
R2
C1
EN/SS
CSS
CBOUT
FB
VBG
FN6605 Rev 1.00
October 29, 2008
VOUT
PHASE
C4
SGND
RO
C2
OPTIONAL
Page 4 of 16
�ISL8107
Absolute Maximum Ratings
Thermal Information
Input Voltage (VCC,VFF) to GND . . . . . . . . . . . . . . . . . . . . . . .100V
BOOT to GND . . . . . . . . . . . . . . . . . . . . . . . . . . . . . . . . . . . . . .105V
ENSS pin . . . . . . . . . . . . . . . . . . . . . . . . . . . . . . . . . . . . . . . . . . . .6V
FB, COMP, SYNC pins . . . . . . . . . . . . . . . . . . . . . . . . . . . . . . . . .8V
Thermal Resistance (Typical)
JA (°C/W)
JC (°C/W)
QFN Package (Notes 1, 2) . . . . . . . .
33
3
Maximum Junction Temperature . . . . . . . . . . . . . . . . . . . . . +150°C
Maximum Storage Temperature Range . . . . . . . . . .-65°C to +150°C
Pb-free reflow profile . . . . . . . . . . . . . . . . . . . . . . . . . .see link below
http://www.intersil.com/pbfree/Pb-FreeReflow.asp
Operating Conditions
Temperature Range . . . . . . . . . . . . . . . . . . . . . . . . . .-40°C to +85°C
Supply Voltage Range . . . . . . . . . . . . . . . . . . . . . . . . . . 9.0V to 75V
CAUTION: Do not operate at or near the maximum ratings listed for extended periods of time. Exposure to such conditions may adversely impact product reliability and
result in failures not covered by warranty.
NOTES:
1. JA is measured in free air with the component mounted on a high effective thermal conductivity test board with “direct attach” features. See
Tech Brief TB379.
2. For JC, the “case temp” location is the center of the exposed metal pad on the package underside.
3. Limits should be considered typical and are not production tested.
Electrical Specifications
Recommended Operating Conditions, unless otherwise noted; Parameters with MIN and/or MAX limits are
100% tested at +25°C, unless otherwise specified. Temperature limits established by characterization and are
not production tested.
PARAMETER
SYMBOL
TEST CONDITIONS
MIN
TYP
MAX
UNITS
9.0
-
75
V
UGATE open
-
2
3
mA
VCC = 48V, ENSS = 0V
-
40
60
µA
VCC = 15V to 75V, Load = 3mA to 20mA
-
10
-
V
Maximum Output Current
20
-
-
mA
Short Current Protection
-
60
-
mA
VCC SUPPLY
Bias Voltage Range
Bias Supply Current
VCC Shutdown Current
IVCC
IVCC_SD
INTERNAL LINEAR REGULATOR (PVCC)
Output Voltage
PVCC
POWER-ON RESET
POR Threshold
VCC = VFF
6.8
7.8
8.5
V
POR Threshold Hysteresis
VCC = VFF
-
220
-
mV
OSCILLATOR
Total Variation on Set Frequency
RT = 20k, CT = 1200pF
Frequency Range
Set by RT and CT. RT range = 20k to 100k,
CT range = 470pF to 1200pF
100
-
600
kHz
SYNC Frequency Range
above RTCT natural frequency
100
-
600
kHz
-
0.11*VFF
-
VP-P
-
190
300
ns
-
1.192
-
V
-1.0
-
+1.0
%
-
2
-
µA
VENSS = 1.3V
22
33
43
µA
Voltage level where soft-start current
changes from low to high
0.5
0.77
1.0
V
Ramp Amplitude
VOSC
VCC varied from 9.0V to 75V
Min OFF Time
330
kHz
REFERENCE VOLTAGE
Feedback Voltage
VFB
Accuracy
ENABLE/SS
Soft-Start Current
Enable Threshold
FN6605 Rev 1.00
October 29, 2008
ISS
VEN
VENSS = 0V
Page 5 of 16
�ISL8107
Electrical Specifications
Recommended Operating Conditions, unless otherwise noted; Parameters with MIN and/or MAX limits are
100% tested at +25°C, unless otherwise specified. Temperature limits established by characterization and are
not production tested. (Continued)
PARAMETER
Maximum Disable Voltage
SYMBOL
TEST CONDITIONS
MIN
TYP
MAX
UNITS
-
-
0.5
V
4.2
5.7
7.2
mS
GBW
-
15
-
MHz
SR
-
6
-
V/µs
ICOMP
-
±300
-
µA
VDISEN
ERROR AMPLIFIER
Transconductance
Gain-Bandwidth Product (Note 3)
Slew Rate (Note 3)
COMP Pin Drive(Note 3)
POWER GOOD (OPEN DRAIN)
Power-Good Lower Threshold
VPG-
Percentage of Nominal VFB; ~ 3µs noise
filter
84
-
88
%
Power-Good Higher Threshold
VPG+
Percentage of Nominal VFB; ~ 3µs noise
filter
112
-
116
%
VPULLUP = 5.5V
-
-
1
µA
IPGOOD = 4mA
-
-
0.5
V
VBOOT - PHASE = 10V
-
1.5
-
A
-
0.25
-
-
1.5
-
A
PGOOD Leakage Current
IPGLKG
PGOOD Voltage Low
GATE DRIVER
Gate Drive Source Current (Note 3)
IG_SOURCE
Gate Drive Source Impedance
RG_SOURCE
Gate Drive Sink Current (Note 3)
IG_SINK
Gate Drive Sink Impedance
RG_SINK
-
0.24
-
Dynamic Current Limit OFF-time
tOCOFF
-
4
-
SS cycle
OCP (OCSET) Current Source
IOCSET
89
104
119
µA
Input HIGH Level (Asserted)
VSYNC_HIGH
3.0
-
-
V
Input LOW Level (Unasserted)
VSYNC_LOW
-
-
0.8
V
Input Current HIGH
ISYNCHIGH
-
-
1
µA
Input Current LOW
ISYNCLOW
-
-
1
µA
-
150
-
°C
-
40
-
°C
VBOOT - PHASE = 10V
OVERCURRENT PROTECTION
SYNCHRONIZATION
THERMAL SHUTDOWN
Thermal Shutdown Temperature
Thermal Shutdown Hysteresis
FN6605 Rev 1.00
October 29, 2008
Rising Threshold
Page 6 of 16
�ISL8107
Functional Pin Description
COMP (Pin 8)
VFF (Pin 1)
This pin is connected to the output of the transconductance
error amplifier and is used to compensate the feedback loop.
The voltage at this pin is used for input voltage feed forward
compensation and sets the internal oscillator ramp peak to
peak amplitude at 0.11*VFF. The oscillator ramp amplitude
varies from approximately 1V to 8.5V as VFF changes from
9V to 75V to maintain constant frequency and provide feed
forward compensation.
An external RC filter may be required at this pin in noisy
input environments.
OCSET (Pin 2)
VBG (Pin 9)
Band gap reference output. A 0.01µF capacitor to SGND is
required for decoupling this signal. This pin should not be
loaded.
PGOOD (Pin 10)
This pin provides a power good status. It is an open drain
output that is asserted when the voltage at FB pin is within
±14% of the reference voltage.
The current limit is set by placing a resistor, ROCSET and
capacitor, COCSET, between this pin and the drain of the
MOSFET. The maximum allowable ROCSET resistor is
50k. A 104µA current source develops a voltage across
ROCSET which is then compared with the voltage developed
across the MOSFET when on. An initial ~200ns blanking
period is used to eliminate the sampling error due to
switching noise before the current is measured.
PGND (Pin 11)
VCC (Pin 3)
PHASE (Pin 13)
VCC is power connection for the ISL8107. The pin should be
connected to a 9V to 75V bias supply and must be well
decoupled to signal ground (SGND) with a ceramic
capacitor.
Connect this pin to the source of MOSFET. This pin provides
the return path for the gate drive current. During normal
switching, this pin is also used for current limiting
measurements.
The voltage at this pin must always be equal to or less than
the voltage at VFF pin.
UGATE (Pin 14)
SYNC (Pin 4)
The switching frequency can be synchronized to an external
clock through this pin. When the sync function is not used,
this pin must be tied to ground. If the sync function is used,
the RT/CT natural frequency must be set to a frequency
lower than the sync input frequency. The termination of the
ramp is synchronized with the rising edge of the sync input
signal.
RT/CT (Pin 5)
A resistor to VFF and a capacitor to GND determines the
frequency of the sawtooth oscillator. The resistor should be
in the range of 20k to 100k, the capacitor range should be in
the range of 470pF to 1.2nF.
When the controller is disabled, the voltage at RT/CT pin
rises up to VFF. Hence, the voltage rating of the CT
capacitor must be sufficient to support the maximum VFF.
This pin provides the power ground to the IC. Tie this pin to
the ground plane through the lowest impedance connection.
EN/SS (Pin 12)
This pin provides enable/disable function and soft-start
timing function for the PWM output. The IC is disabled when
this pin is held below 0.5V.
This pin provides the drive for the MOSFET and should be
connected to its gate.
BOOT (Pin 15)
This pin provides the bootstrap bias for the gate driver. A
2.2 resistor may be placed in series with the bootstrap
diode to prevent over charging of the BOOT capacitor during
normal operation.
PVCC (Pin 16)
This pin is the output of the internal series linear regulator. A
minimum 1µF capacitor is required for decoupling PVCC to
PGND. For proper operation the PVCC capacitor must be
within 150 mils of the PVCC and the PGND pins and must
be connected to these pins with dedicated traces.
Exposed Thermal Pad
This pad is electrically isolated. Connect this pad to the
signal ground plane using at least five vias for a robust
thermal conduction path.
SGND (Pin 6)
Signal ground for the IC. All voltage levels are measured
with respect to this pin.
FB (Pin 7)
This is the feedback pin. The feedback ratio is set by an
external resistor divider connected to the output.
FN6605 Rev 1.00
October 29, 2008
Page 7 of 16
�ISL8107
11
12
10
10
9
8
VPVCC
PVCC (V)
Typical Performance Curves
8
VIN = 75V
4
6
2
1
10
VCC (V)
0
100
VIN = 9V
0
VFB VOLTAGE
VPVCC
VBIAS = 40V
VBIAS = 75V
9.5
7.0
80
1.193
10.0
7.5
60
IPVCC = 10mA
10.5
8.0
40
IPVCC (mA)
1.194
11.5
9.0
8.5
20
FIGURE 2. VI CHARACTERISTIC of PVCC
FIGURE 1. PVCC vs VCC (IPVCC = 20mA)
11.0
VIN = 48V
VIN = 12V
6
7
5
VIN = 24V
VBIAS = 12V
1.192
1.191
VBIAS = 9V
6.5
6.0
-40 -25 -15 -5
5
1.190
15 25 35 45 55 65 75 85
-40
-25
TEMPERATURE (°C)
50
75
85
100
FIGURE 4. VFB vs TEMPERATURE
190
192
188
190
186
188
FREQUENCY (kHz)
FREQUENCY (kHz)
25
TEMPERATURE (°C)
FIGURE 3. PVCC vs TEMPERATURE
184
182
180
178
176
174
VCC = VFF = 9V
VCC = VFF = 75V
186
184
182
180
VCC = VFF = 12V
VCC = VFF = 48V
178
176
172
170
0
0
10
20
30
40
50
60
70
VCC = VFF (V)
FIGURE 5. RT/CT FREQUENCY vs INPUT VOLTAGE
(RT = 40.2k, CT = 1000pF COG)
FN6605 Rev 1.00
October 29, 2008
80
174
-40 -25 -15 -5
5
15 25 35 45 55 65 75 85
TEMPERATURE (°C)
FIGURE 6. RT/CT FREQUENCY vs TEMPERATURE
(RT = 40.2k, CT = 1000pF COG)
Page 8 of 16
�ISL8107
Typical Performance Curves (Continued)
100
100
VIN = 12V
95
VIN = 24V
85
80
VIN = 36V
VIN = 48V
VIN = 60V
90
EFFICIENCY (%)
EFFICIENCY (%)
90
75
65
3
4
5
6
7
8
60
1
2
3
4
5
6
7
FIGURE 7. EFFICIENCY VS LOAD (OUTPUT VOLTAGE = 5V,
FSW = 200kHz (SEE APPLICATION NOTE FOR
MORE DETAILS)
FIGURE 8. EFFICIENCY VS LOAD (OUTPUT VOLTAGE = 12V,
FSW = 200kHz (SEE APPLICATION NOTE FOR
MORE DETAILS)
The delay from POR (T0) to the time the IC starts switching
(T2) can be approximated by using Equation 1:
Functional Description
Enable/Soft-Start
5
T delay switching = 3.712 10 C SS
VOUT
5V
ENSS
4V
(EQ. 1)
The output voltage soft-start time is determined by the rise
time of ENSS voltage from 1.4V to 2.6V (T3 -T2). The output
voltage ramp time can be calculated from:
1.2
T SS = ---------------------- C SS
–6
33 10
3V
2.6V
(EQ. 2)
The soft-start capacitor CSS is continuously charged up
linearly and clamped at 5V. Note that any leakage current on
ENSS node will extend the start-up period.
2V
1.4V
POR
8
OUTPUT CURRENT (A)
OUTPUT CURRENT (A)
1V
VIN = 60V
75
65
2
VIN = 48V
80
70
1
VIN = 36V
85
70
60
VIN = 18V
VIN = 24V
95
0.7V
R
RTCT
T/CT
T0
T1 T2
T3
FIGURE 9. TYPICAL SOFT-START DIAGRAM
Figure 9 illustrates the start-up scheme of the ISL8107. The
Power-On Reset (POR) function continually monitors the
bias voltage at VCC and VFF. When the voltage at VCC and
VFF exceed their rising POR thresholds (T0), the ISL8107
provides initially 2µA to charge the soft-start capacitor, CSS,
connected to the ENSS pin. If the voltage at this pin is
allowed to rise, it will ramp-up with at a slope determined by
the 2µA current and the value of the soft-start capacitor.
When the voltage at ENSS reaches 0.77V (Typ) at T1, the
oscillator circuit is active, causing the voltage at RT/CT pin to
drop from VIN and generate sawtooth waveform. At the
same time, the soft-start current is increased to 33µA; the
ENSS voltage then ramps up at a faster rate. The UGATE
starts switching when the ENSS voltage reaches 1.4V (Typ).
ENSS
ENSS
VOUT
PHASE
PHASE
FIGURE 10. TYPICAL SOFT-START WAVEFORM
Oscillator and Synchronization
The ISL8107 provides adjustable frequency from 100kHz to
600kHz by changing external resistor RT and capacitor CT.
The time constant of RT/CT determines the oscillator
FN6605 Rev 1.00
October 29, 2008
Page 9 of 16
�ISL8107
frequency, which can be calculated through Equation 3:.
1
F OSC = -----------------------------------------------------------------–9
0.1215R T C T + 140 10
(EQ. 3)
Note that when the controller is disabled, the voltage at
RT/CT pin rises up to the input voltage. Hence, the voltage
rating of the CT capacitor must be sufficient to support the
maximum input voltage.
The SYNC pin provides the ISL8107 to synchronize its
switching frequency to the fundamental frequency of the
input waveform. The rising edge of the input synchronization
signal is used to terminate the RT/CT ramp signal; therefore,
when frequency synchronization is used, the time constant
of RT/CT must be set longer than the period of the sync
signal. Tie the sync pin to ground when the sync feature is
not used.
Overcurrent Protection
The overcurrent protection function protects the converter
from overcurrent conditions by monitoring the current flowing
through the MOSFET. OCP is implemented via a resistor
(ROCSET) and a capacitor (COCSET) connecting the OCSET
pin and the drain of the MOSFET. An internal 104µA current
source develops a voltage across ROCSET which is then
compared with the voltage developed across the MOSFET
at turn on as measured at the PHASE pin. When the voltage
drop across the MOSFET exceeds the voltage drop across
the resistor, a OCP event occurs. COCSET is placed in
parallel with ROCSET to smooth the voltage across ROCSET
in the presence of switching noise on the input bus.
A 200ns blanking period is used to reduce the current
sampling error due to leading-edge switching noise.
The OCP trip point varies mainly due to MOSFET rDS(ON)
variations and layout noise concerns. To avoid overcurrent
tripping in the normal operating load range, find the ROCSET
resistor from the following equations with:
PHASE
1. The maximum rDS(ON) at the highest junction
temperature;
2. The minimum IOCSET from the specification table
SYNC
Determine the overcurrent trip point greater than the
maximum output continuous current at maximum inductor
ripple current.
RT/CT
Simple OCP Equation
I OC r
DS ON
R OCSET = -------------------------------------100A
FIGURE 11. SYNCHRONIZATION OPERATION
MINIMUM ON-TIME
Detailed OCP Equation
The ISL8107 requires the MOSFET to be turned on to a
minimum of 200ns (Typ). This minimum gate pulse width is
required to ensure proper samplings of the overcurrent
protection circuit.
I
I
+ ----- r
OC_SOU 2 DS ON
---------------------------------------------------------------------R OCSET =
I OCSET
For low duty cycle applications, the switching frequency
must be selected to satisfy the condition shown in
Equation 4:
V OUT
1
F OSC ------------------ --------------------- V IN t on – min
(EQ. 4)
(EQ. 6)
V IN - V OUT V OUT
I = --------------------------------- ---------------F SW L OUT
V IN
F SW = Regulator Switching Frequency
Where is converter efficiency.
MINIMUM OFF-TIME
At the termination of the oscillator’s ramp, there is a 190ns
time interval before the next ramp starts. This time interval
creates the minimum-off time of the PWM. This period
ensures that the boot capacitor is refreshed. Equation 5 can
be used to calculate the switching frequency to meet the
condition:
V OUT
1
F OSC 1 – ------------------ ----------------------- V IN t off – max
FN6605 Rev 1.00
October 29, 2008
(EQ. 5)
Page 10 of 16
�ISL8107
If overcurrent is detected, the output immediately shuts off, it
cycles the soft-start function in a hiccup mode (4 dummy softstart time-outs, then up to one real one) to provide fault
protection. If the shorted condition is not removed, this cycle
will continue indefinitely.
V
VOUT
OUT
Component Selection Guidelines
Output Capacitor Selection
An output capacitor is required to filter the output and supply
the load transient current. The filtering requirements are a
function of the switching frequency and the ripple current. The
load transient requirements are a function of the slew rate
(di/dt) and the magnitude of the transient load current. These
requirements are generally met with a mix of capacitors and
careful layout.
For applications that have transient load rates above 1A/ns,
high frequency capacitors initially supply the transient and slow
the current load rate seen by the bulk capacitors. The bulk filter
capacitor values are generally determined by the ESR
(effective series resistance) and voltage rating requirements
rather than actual capacitance requirements.
ENSS
ENSS
IL
IL
FIGURE 12. TYPICAL OVERCURRENT PROTECTION
VOUT
VOUT
ENSS
IL
IL
FIGURE 13. TYPICAL HICCUP RECOVER
High frequency decoupling capacitors should be placed as
close to the power pins of the load as physically possible. Be
careful not to add inductance in the circuit board wiring that
could cancel the usefulness of these low inductance
components. Consult with the manufacturer of the load on
specific decoupling requirements.
Use only specialized low-ESR capacitors intended for
switching-regulator applications for the bulk capacitors. The
bulk capacitor’s ESR will determine the output ripple voltage
and the initial voltage drop after a high slew-rate transient. An
aluminum electrolytic capacitor's ESR value is related to the
case size with lower ESR available in larger case sizes.
However, the equivalent series inductance (ESL) of these
capacitors increases with case size and can reduce the
usefulness of the capacitor to high slew-rate transient
loading. Unfortunately, ESL is not a specified parameter.
Work with your capacitor supplier and measure the
capacitor’s impedance with frequency to select a suitable
component. In most cases, multiple electrolytic capacitors of
small case size perform better than a single large case
capacitor.
Thermal Protection
Output Inductor Selection
If the ISL8107 IC junction temperature reaches a nominal
temperature of +150°C, the controller will be disabled. The
ISL8107 will not be re-enabled until the junction temperature
drops below +110°C.
The output inductor is selected to meet the output voltage
ripple requirements and minimize the converter’s response
time to the load transient. The inductor value determines the
converter’s ripple current and the ripple voltage is a function of
the ripple current. The ripple voltage and current are
approximated by Equation 7:
Power-Good
The PGOOD comparator monitors the voltage on the FB pin.
PGOOD is asserted (open drain) when the FB pin voltage is
within 14% of the reference voltage. The turn-on response of
the PGOOD circuit has a typical 3µs delay. The PGOOD is
deasserted under disable, overcurrent event, or
over-temperature event.
V IN - V OUT V OUT
I = -------------------------------- ---------------Fs x L
V IN
VOUT = I x ESR
(EQ. 7)
Increasing the value of inductance reduces the ripple current
and voltage. However, the large inductance values reduce the
converter’s response time to a load transient.
One of the parameters limiting the converter’s response to a
load transient is the time required to change the inductor current.
FN6605 Rev 1.00
October 29, 2008
Page 11 of 16
�ISL8107
The response time is the time required to slew the inductor
current from an initial current value to the transient current level.
During this interval the difference between the inductor current
and the transient current level must be supplied by the output
capacitor. Minimizing the response time can minimize the output
capacitance required.
L O I TRAN
t RISE = -------------------------------V IN – V OUT
L O I TRAN
t FALL = ------------------------------V OUT
The important parameters for the bulk input capacitor are the
voltage rating and the RMS current rating. For reliable
operation, select a bulk capacitor with voltage and current
ratings above the maximum input voltage and largest RMS
current required by the circuit. The capacitor voltage rating
should be at least 1.25x greater than the maximum input
voltage, a voltage rating of 1.5x greater is a conservative
guideline. The RMS current rating requirement for the input
capacitor of a buck regulator is approximately as shown in
Equation 9.
I IN RMS = K ICM I O
0.3
0.25IO
0.2
I = 0IO
0.0
Use a mix of input bypass capacitors to control the voltage
overshoot across the MOSFET and the diode. Use small
ceramic capacitors for high frequency decoupling and bulk
capacitors to supply the current needed each time the
MOSFET turns on. Place the small ceramic capacitors
physically close to the MOSFET and the diode, and between
the drain of the MOSFET and the anode of diode.
OR
0.4
(EQ. 8)
Input Capacitor Selection
I 2
2 D – D 2 + -------D
IO
12
0.5IO
0.1
where: ITRAN is the transient load current step, tRISE is the
response time to the application of load, and tFALL is the
response time to the removal of load.
I IN RMS =
0.5
KICM
The response time to a transient is different for the application
of load and the removal of load. Equation 8 gives the
approximate response time interval for application and removal
of a transient load:
0.6
VO
D = ---------VIN
(EQ. 9)
0
0.1
0.2
0.3
0.4 0.5 0.6
DUTY CYCLE (D)
0.7
0.8
0.9
1.0
FIGURE 14. INPUT-CAPACITOR CURRENT MULTIPLIER FOR
SINGLE-PHASE BUCK CONVERTER
For a through hole design, several electrolytic capacitors
(Panasonic HFQ series or Nichicon PL series or Sanyo MV-GX
or equivalent) may be needed. For surface mount designs,
solid tantalum capacitors can be used, but caution must be
exercised with regard to the capacitor surge current rating.
These capacitors must be capable of handling the surgecurrent at power-up. The TPS series available from AVX, and
the 593D series from Sprague are both surge current tested.
MOSFET Selection/Considerations
The ISL8107 requires a N-Channel power MOSFET. This
should be selected based upon rDS(ON), gate supply
requirements, and thermal management requirements.
The power dissipation includes two loss components;
conduction loss and switching loss.
2
1
P MOSFET = I O r DS ON D + --- I O V IN T SW F S
2
(EQ. 10)
where: D is the duty cycle = VO / VIN,
TSW is the switching interval, and
Fs is the switching frequency.
The gate-charge losses are dissipated by the ISL8107 and
don't heat the MOSFETs. However, large gate-charge
increases the switching interval, tSW which increases the
MOSFET switching losses. Ensure that the MOSFET is within
its maximum junction temperature at high ambient temperature
by calculating the temperature rise according to package
thermal-resistance specifications. A separate heatsink may be
necessary depending upon MOSFET power, package type,
ambient temperature and air flow.
Note that at 9V input voltage, the PVCC voltage can be as low
as 6V. Low gate-voltage threshold MOSFET must be used in
this condition.
FN6605 Rev 1.00
October 29, 2008
Page 12 of 16
�ISL8107
Rectifier Selection
Power Schottky diode is recommended for better converter
efficiency. The rectifier's rated reverse breakdown voltage must
be at least equal to the maximum input voltage, preferably with
a 20% derating factor. The power dissipation is shown in
Equation 11:
V OUT
P D W = I OUT V D 1 – ----------------
V IN
(EQ. 11)
where VD is the voltage of the Schottky diode = 0.5V to 0.7V
Application Guidelines
Feedback Compensation
Figure 15 highlights the voltage-mode control loop for a buck
converter with type-III compensator. The output voltage is
regulated to the reference voltage level. The error amplifier
output is compared with the oscillator ramp wave to provide a
pulse-width modulated wave with an amplitude of VIN at the
PHASE node. The PWM wave is smoothed by the output filter.
The output filter capacitor bank’s equivalent series resistance
is represented by the series resistor ESR.
VIN
DRIVER
OSC
PWM
COMPARATOR
-
VOSC
LO
LX
DRIVER
+
VOUT
CO
D
ESR
(PARASITIC)
ZFB
VE/A
-
ZIN
+
DETAILED COMPENSATION COMPONENTS
ZFB
C2
C1
C3
R2
R3
R1
COMP
ISL8107
VOUT
ZIN
FB
gm
+
R4
VREF
R
V OUT = V REF 1 + ------1-
R 4
FIGURE 15. VOLTAGE-MODE BUCK CONVERTER
COMPENSATION DESIGN AND OUTPUT
VOLTAGE SELECTION
The modulator transfer function is the small-signal transfer
function of VOUT /VCOMP. This function is dominated by a DC
gain and shaped by the output filter, with a double pole break
FN6605 Rev 1.00
October 29, 2008
For the purpose of this analysis, L and DCR represent the
output inductance and its DCR, while C and ESR represents
the total output capacitance and its equivalent series
resistance in Equation 12.
1
F LC = --------------------------2 L C
1
F CE = --------------------------------2 C ESR
(EQ. 12)
The compensation network consists of the transconductance
amplifier (internal to the ISL8107) and the external R1 to R4, C1
to C3 components. The goal of the compensation network is to
provide a closed loop transfer function with high 0dB crossing
frequency (F0; typically 0.1 to 0.3 of FSW) and adequate phase
margin (better than 45°). Phase margin is the difference
between the closed loop phase at F0dB and 180°. The equations
that follow relate the compensation network’s poles, zeros and
gain to the components (R1 , R2 , R3 , R4 , C1 , C2 , and C3) in
Figures 4 and 5. Use the following guidelines for locating the
poles and zeros of the compensation network:
1. Select a value for R2, (10k to 100k typically)
2. Calculate C1 such that FZ1 is placed at a fraction of the FLC,
at 0.1 to 0.75 of FLC. The higher the quality factor of the output
filter and/or the higher the ratio FCE/FLC, the lower the FZ1
frequency (to maximize phase boost at FLC).
1
C 1 = ------------------------------------2 F Z1 R 2
(EQ. 13)
3. Calculate C3 such that FBW is placed at desired frequency
(typically, 0.1x to 0.5x FSW). FSW represents the switching
frequency of the regulator.
REFERENCE
ERROR
AMP
frequency at FLC and a zero at FCE . The DC gain of the
modulator is simply the input voltage (VIN) divided by the peakto-peak oscillator voltage VOSC . The ISL8107 incorporates a
feed forward loop that accounts for changes in the input
voltage. This maintains a constant modulator gain.
2 F BW L C 0 V OSC
C 3 = -----------------------------------------------------------------------V IN R 2
(EQ. 14)
ISL8107 has feed forward compensation that adjusts the
amplitude of 0.11*VIN. Therefore, the Equation 14 can be
simplified as Equation 15:
0.22 F BW L C 0
C 3 = --------------------------------------------------------R2
(EQ. 15)
4. Calculate C2 such that the placement of FP2 is at a fraction
of the FSW. The lowering of the frequency helps reduce the
gain of the compensation network at high frequency, in turn
reducing the HF ripple component at the COMP pin and
minimizing resultant duty cycle jitter.
1
C 2 = ------------------------------------2 F P2 R 2
(EQ. 16)
5. Calculate R3 such that the placement of FP1 is at the FCE.
1
R 3 = -------------------------------------2 C 3 F CE
(EQ. 17)
Page 13 of 16
�ISL8107
6. Calculate R1 such that the placement of FZ2 is at the FLC.
(EQ. 18)
FZ1 FZ2
MODULATOR GAIN
COMPENSATION GAIN
LOOP GAIN
OPEN LOOP E/A GAIN
FP1
GAIN
1
R 1 = -------------------------------------- – R 3
2 C 3 F LC
FP2
7. Calculate R4 based on target output voltage.
V REF
R 4 = ------------------------------------- R 1
V OUT – V REF
(EQ. 19)
D MAX V IN
1 + s f ESR C
G vd f = ------------------------------- ----------------------------------------------------------------------------------------------------------2
V OSC
1 + s f ESR + DCR C + s f L C
1 + s f R2 C1
G COMP f = ----------------------------------------------------
s f R1 C1 + C2
1 + s f R1 + R3 C3
------------------------------------------------------------------------------------------------------------------C1 C2
------------------- 1 + s f R3 C3 1 + s f R2
C 1 + C 2
G LP f = G vd f G COMP f
(EQ. 20)
where s f = 2 f j
COMPENSATION BREAK FREQUENCY EQUATIONS
1
F Z1 = ------------------------------2 R 2 C 1
1
F P1 = ------------------------------2 R 3 C 3
1
F Z2 = ------------------------------------------------2 R 1 + R 3 C 3
1
F P2 = --------------------------------------------C1 C2
2 R 2 --------------------C1 + C2
(EQ. 21)
Figure 16 shows an asymptotic plot of the DC/DC converter’s
gain vs frequency. The actual Modulator Gain has a high gain
peak dependent on the quality factor (Q) of the output filter, which
is not shown. Using the previous guidelines should yield a
compensation gain similar to the curve plotted. The open loop
error amplifier gain bounds the compensation gain. Check the
compensation gain at FP2 against the capabilities of the error
amplifier. The loop gain, GLP, is constructed on the log-log graph
of Figure 16 by adding the modulator gain, Gvd (in dB), to the
feedback compensation gain, GCOMP (in dB). This is
equivalent to multiplying the modulator transfer function and
the compensation transfer function and then plotting the
resulting gain.
R2
20 log --------
R1
D
MAX V IN
20 log ---------------------------------V
OSC
0
GFB
GCL
LOG
It is recommended that a mathematical model be used to plot
the loop response. Check the loop gain against the error
amplifier’s open-loop gain. Verify phase margin results and
adjust as necessary. Equations 20 and 21 describe the
frequency response of the buck converter in continuous
conduction mode (Gvd), feedback compensation (Gcomp) and
loop response (GLP):
GMOD
LOG
FLC
FCE
F0
FREQUENCY
FIGURE 16. ASYMPTOTIC BODE PLOT OF CONVERTER GAIN
target crossover frequencies in the range of 10% to 30% of the
switching frequency (FSW).
Layout Considerations
As in any high frequency switching converter, layout is very
important. Switching current from one power device to another
can generate voltage transients across the impedances of the
interconnecting bond wires and circuit traces. These
interconnecting impedances should be minimized by using
wide, short printed circuit traces. The critical components
should be located as close together as possible using ground
plane construction or single point grounding.
A multi-layer printed circuit board is recommended. Figure 17
shows the critical components of the converter. Note that
capacitors CIN and COUT could each represent numerous
physical capacitors. Dedicate one solid layer, (usually a middle
layer of the PC board) for a ground plane and make all critical
component ground connections with vias to this layer. Dedicate
another solid layer as a power plane and break this plane into
smaller islands of common voltage levels. Keep the metal runs
from the PHASE terminals to the output inductor short. The
power plane should support the input power and output power
nodes. Use copper filled polygons on the top and bottom circuit
layers for the PHASE nodes. Use the remaining printed circuit
layers for small signal wiring.
A stable control loop has a gain crossing with close to a
-20dB/decade slope and a phase margin greater than 45°.
Include worst case component variations when determining
phase margin. The mathematical model presented makes a
number of approximations and is generally not accurate at
frequencies approaching or exceeding half the switching
frequency. When designing compensation networks, select
FN6605 Rev 1.00
October 29, 2008
Page 14 of 16
�ISL8107
Locate the ISL8107 within 2 to 3 inches of the MOSFET, Q1,
(1 inch or less for 500kHz or higher operation). The circuit
traces for the MOSFETs’ gate and source connections from
the ISL8107 must be sized to handle up to 2A peak current.
Minimize any leakage current paths on the ENSS pin and
locate the capacitor, CENSS close to the ENSS pin as the
internal current source is only 33µA. Provide local VCC
decoupling between VCC and GND pins. Locate the
capacitor, CBOOT as close as practical to the BOOT pin and
the phase node.
.
VCC
VCC
CBP_VCC
PVCC
CBP_PVCC
ISL8107
VIN
CIN
UGATE
Q1
BOOT
LOUT
PHASE
COUT
ENSS
GND
PGND
VOUT
LOAD
CIN
CENSS
KEY
TRACE SIZED FOR 2A PEAK CURRENT
SHORT TRACE, MINIMUM IMPEDANCE
ISLAND ON POWER PLANE LAYER
ISLAND ON CIRCUIT AND/OR POWER PLANE LAYER
VIA CONNECTION TO GROUND PLANE
FIGURE 17. PRINTED CIRCUIT BOARD POWER PLANES
AND ISLANDS
© Copyright Intersil Americas LLC 2007-2008. All Rights Reserved.
All trademarks and registered trademarks are the property of their respective owners.
For additional products, see www.intersil.com/en/products.html
Intersil products are manufactured, assembled and tested utilizing ISO9001 quality systems as noted
in the quality certifications found at www.intersil.com/en/support/qualandreliability.html
Intersil products are sold by description only. Intersil may modify the circuit design and/or specifications of products at any time without notice, provided that such
modification does not, in Intersil's sole judgment, affect the form, fit or function of the product. Accordingly, the reader is cautioned to verify that datasheets are
current before placing orders. Information furnished by Intersil is believed to be accurate and reliable. However, no responsibility is assumed by Intersil or its
subsidiaries for its use; nor for any infringements of patents or other rights of third parties which may result from its use. No license is granted by implication or
otherwise under any patent or patent rights of Intersil or its subsidiaries.
For information regarding Intersil Corporation and its products, see www.intersil.com
FN6605 Rev 1.00
October 29, 2008
Page 15 of 16
�ISL8107
Package Outline Drawing
L16.5x5B
16 LEAD QUAD FLAT NO-LEAD PLASTIC PACKAGE
Rev 2, 02/08
4X 2.4
5.00
12X 0.80
A
B
13
6
PIN 1
INDEX AREA
6
PIN #1 INDEX AREA
16
12
5.00
1
3 . 10 ± 0 . 15
9
(4X)
4
0.15
5
8
TOP VIEW
0.10 M C A B
+0.15
16X 0 . 60
-0.10
4 0.33 +0.07 / -0.05
BOTTOM VIEW
SEE DETAIL "X"
0.10 C
1.00 MAX
C
BASE PLANE
SEATING PLANE
0.08 C
( 4 . 6 TYP )
(
SIDE VIEW
3 . 10 )
( 12X 0 . 80 )
C
( 16X 0 .33 )
( 16 X 0 . 8 )
0 . 2 REF
5
0 . 00 MIN.
0 . 05 MAX.
TYPICAL RECOMMENDED LAND PATTERN
DETAIL "X"
NOTES:
1. Dimensions are in millimeters.
Dimensions in ( ) for Reference Only.
2. Dimensioning and tolerancing conform to AMSE Y14.5m-1994.
3. Unless otherwise specified, tolerance : Decimal ± 0.05
4. Dimension b applies to the metallized terminal and is measured
between 0.15mm and 0.30mm from the terminal tip.
5. Tiebar shown (if present) is a non-functional feature.
6. The configuration of the pin #1 identifier is optional, but must be
located within the zone indicated. The pin #1 identifier may be
either a mold or mark feature.
FN6605 Rev 1.00
October 29, 2008
Page 16 of 16
�


 工商网监
湘ICP备2023018690号
工商网监
湘ICP备2023018690号
