Page 1 of 6
SparkFun Blocks for Intel® Edison - ADC V20
Introduction
SparkFun’s ADC Block for the Intel Edison allows you to add four channels
of I2C controlled ADC input to your Edison stack. These four channels can
be used as single-ended inputs, or in pairs as differential inputs. A ground
reference is provided for each channel.
The maximum resolution of the converters is 12 bits, or 11 bits bipolar in
differential mode. Step sizes range from 125uV per count to 3mV per count.
ADC Block
Suggested Reading
If you are unfamiliar with Blocks, take a look at the General Guide to
Sparkfun Blocks for Intel Edison.
Other tutorials that may help you on your Edison adventure include:
• Programming the Edison - This tutorial assumes you are not using
the Arduino IDE, so you’ll want to familiarize yourself with C++
development on the Edison.
• Powering Your Project
• Connector Basics
• Analog-to-digital conversion
Board Overview
�Page 2 of 6
ADC Block Functional Diagram
• Signal Inputs - Four single inputs are available. The reference
voltage for each is produced internal to the ADC under software
control; do not exceed 3.3V input to these pins!
• Differential Channel Setting Table - Use two inputs to create a
differential pair. Useful for eliminating noise in some sensors or
measuring very small signals. This table shows the channel options
for the “getDiffResult(channel)” function.
• I2C Address Select - Apply solder to only one of the four jumpers to
select the address. Do not short two of these at once. Bad stuff will
happen.
• I2C Bus Select - Change both of these jumpers to select between
routing the I2C signals to bus 6 or bus 1. Bus 1 is the default (and
preferred) channel, as it has no other system devices on it. Bus 6 is
shared with some internal devices, but if you wish to use this block
with the Arduino IDE, you’ll want to change these jumpers so the
solder blobs connect the bottom pad with the center pad.
• 3.3V 150mA Supply - This supply provides an on-board reference for
the ADC, and can power small sensors (for example, potentiometers
or temperature sensors).
Using the ADC Block
To use the ADC Block simply attach an Intel Edison to the back of the
board or add it to your current stack. Blocks can be stacked without
hardware but it leaves the expansion connectors unprotected from
mechanical stress.
ADC Block Installed
We have a nice Hardware Pack available that gives enough hardware to
secure three blocks and an Edison.
�Page 3 of 6
Intel Edison Hardware Pack
NOTE: The ADC Block does not have console access or a voltage
regulator. It is recommended to use a console communication block in
conjunction with this block like ones found in the General Guide to Sparkfun
Blocks for Intel Edison.
C++ Code Examples
We’re assuming that you’re using the Eclipse IDE as detailed in our Beyond
Arduino tutorial. If you aren’t, you’ll need to go to that tutorial to get up to
speed.
Getting Started
Follow the instructions in the programming tutorial to create a new project
named “SparkFun_ADC_Edison_Block_Example”. Once you’ve created the
project, open the project files on disk (hint: you can find the path to the
project by choosing “Properites” from the project menu) and copy the three
source files found in the Edison ADC Block CPP library GitHub repository
into the “src” directory.
D O W N L O A D A ZI P FIL E O F T H E RE P O S I T O R Y
Hardware Connection
For this example, we’ve just got two 5k potentiometers connected between
3.3V and GND, with the wipers connected to channels 0 and 1.
V20 of the board adds a 3.3V reference supply (capable of sourcing up to
150mA, so it can power small sensors directly!).
Of course, you can connect any other analog voltage signal in place of the
potentiometers; we’re using them because they’re convenient to
demonstrate the concepts.
Code
Everything you need to know is in the comments.
�Page 4 of 6
/*************************************************************
***
Example file for SparkFun ADC Edison Block Support
1 Jun 2015 Mike Hord, SparkFun Electronics
Code developed in Intel's Eclipse IOTDK
This code requires the Intel mraa library to function; for mor
e
information see https://github.com/inteliotdevkit/mraa
This code is beerware; if you use it, please buy me (or any ot
her
SparkFun employee) a cold beverage next time you run into one
of
us at the local.
**************************************************************
**/
#include "mraa.hpp"
#include
#include
#include "SparkFunADS1015.h"
using namespace std;
// Declare a variable for our i2c object. You can create an
// arbitrary number of these, and pass them to however many
// slave devices you wish.
mraa::I2c* adc_i2c;
int main()
{
// The ADC is (by default) connected to I2C channel 1. Her
e, we create
// a device to pass to the ads1015 object constructor.
adc_i2c = new mraa::I2c(1);
// Now, pass that I2C object and the address of the ADC bl
ock in your
// system to the ads1015 object constructor. Note that th
ere are up to
// four different addresses available here, settable by j
umper on the
// board. You'll need to create an ads1015 object for eac
h one.
ads1015 adc(adc_i2c, 0x48);
// There are 6 settable ranges:
// _0_256V Range is 0.256V to 0.255875V, and step siz
e is 125uV.
// _0_512V Range is 0.512V to 0.51175V, and step size
is 250uV.
// _1_024V Range is 1.024V to 1.0235V, and step size i
s 500uV.
// _2_048V Range is 2.048V to 2.047V, and step size i
s 1mV.
// _4_096V Range is 4.096V to 4.094V, and step size i
s 2mV.
// _6_144V Range is 6.144V to 6.141V, and step size i
s 3mV.
// The default setting is _2_048V.
// NB!!! Just because FS reading is > 3.3V doesn't mean yo
�Page 5 of 6
u can take an
// input above 3.3V! Keep your input voltages below 3.3V
to avoid damage!
adc.setRange(_0_512V);
// getResult() returns a normalized floating point value r
epresenting the
// current voltage of the passed channel. User is respons
ible for
// logic to determine whether the value is at min or max.
cout
很抱歉,暂时无法提供与“DEV-13327”相匹配的价格&库存,您可以联系我们找货
免费人工找货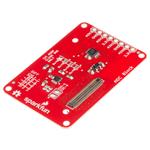


 工商网监
湘ICP备2023018690号
工商网监
湘ICP备2023018690号
