Audio Shield For DFRduino M0
SKU: DFR0420
DFRduino M0 Audio Expansion Shield selects the latest full-featured WM8978 of Wolfson as the
audio processor. It comes with HI-FI level digital signal processing kernel, supporting 3D surroundsound enhancement and 5 frequency bands balance which can improve the sound quality. With a
programmable notch filter, it also can filter noise caused by current noise, etc.
Attributing to the plentiful hardware resource on DFRduino M0, we finally can transplant this HI-FI
level codec chip to Arduino platform. Functions like dual channels playing, SD card storage, MONO
recording and dual channels 3W PA (power amplification) are available even without serial port MP3
module. It is efficient in serial port resources, flexible in control and convenient to use.
DFRduino M0 Audio Expansion Shield adopts standard IIS interface, equipped with on-board MIC
and 3.5mm audio jack, supporting external voice source input and output. It also has left and right
channels speakers, which you can connect 3W trumpets.
NOTE: DFRduino M0 Audio Expansion Shield uses IIS interface and it is only compatible
with DFRduino M0 and Bluno M0 microconyrollers, not support common Arduino
microcontrollers.
�Feature
WM8978 professional Hi-Fi codec chip
Standard IIS interface
Dual 3W amplifier
Support onboard MIC, DC3.5 MIC Input
Specification
Operating Voltage: 5V
Maximum Operating Current: 2A
Audio Format: wav file
DFRduino M0 shield package
Input Interface: 3.5mm MIC & On-board MIC
Output Interface: 3.5MIC headphone & XH2.54 Speaker pins
Dimension: 55mm * 53mm/2.16" * 2.08"
Weight 26g
Board Overview
Audio Shield For DFRduino M0 Pin Out
Num
Label
Description
1
Linein
3.5mm Microphone
2
Lineout
3.5mm headset
3
Micro-SD
Micro-SD
4
Speaker_L
Left Speaker
5
Speaker_R
Right Speaker
�Tutorial
In this section, we'll display 2 examples: Play WAV music & Record your voice.
Requirements
Hardware
DFRduino M0 Mainboard x1
Audio Shield for DFRduino M0 x1
3.5mm headphone or 3W Speaker
MicroSD card with FAT format (Currently, exFAT is not supported. Please use FAT16 or FAT32 for
formatting).
Software
Arduino IDE (Version requirements: V1.6+), Click to Download Arduino IDE from Arduino®
https://www.arduino.cc/en/Main/Software%7C
Sample Code 1 —— Play WAV File
#include
#include
#include
#include
// set up variables using the SD utility library functions:
Sd2Card card;
///< assign sd card chipselect pin
const int chipSelect = 30;
void setup()
{
// Open serial communications and wait for port to open:
Serial.begin(115200);
while (!Serial) {
; // wait for serial port to connect. Needed for Leonardo only
�}
while(1){
Serial.print("\nInitializing SD card...");
// we'll use the initialization code from the utility libraries
// since we're just testing if the card is working!
if (!card.init(SPI_HALF_SPEED, chipSelect)) {
Serial.println("initialization failed. Things to check:");
Serial.println("* is a card inserted?");
Serial.println("* is your wiring correct?");
Serial.println("* did you change the chipSelect pin to match your
shield or module?");
delay(2000);
continue;
} else {
Serial.println("Wiring is correct and a card is present.");
if (!SD.begin(chipSelect)) {
Serial.println("Card failed, or not present");
delay(2000);
continue;
}
break;
}
}
}
void loop()
{
int ret;
//assign music file and trigger transport dma
wav.play("test.wav");
do{
//We must continue to decode to provide data to the player
ret = wav.decode();
�//user code
}while(ret == WAV_DECODING);
while(1);
}
Operating Steps
1.
2.
3.
4.
Leave your wav file on the root of Micro-SD card. (Named with "test.wav") ,
Insert your SD card into the SD card slot. Note: SD storage format must be FAT
Plug in speakers or headphones
Upload the sample code, open the serial port monitor, and it will play themusic.
Sample Code 2 ——Record
#include
#include
#include
#include
// set up variables using the SD utility library functions:
Sd2Card card;
const int chipSelect = 30;
///< assign sd card chipselect pin
void setup()
{
// Open serial communications and wait for port to open:
Serial.begin(115200);
while (!Serial) {
; // wait for serial port to connect. Needed for Leonardo only
}
�while(1){
Serial.print("\nInitializing SD card...");
// we'll use the initialization code from the utility librarie
s
// since we're just testing if the card is working!
if (!card.init(SPI_HALF_SPEED, chipSelect)) {
Serial.println("initialization failed. Things to check:
");
Serial.println("* is a card inserted?");
Serial.println("* is your wiring correct?");
Serial.println("* did you change the chipSelect pin to
match your shield or module?");
delay(2000);
continue;
} else {
Serial.println("Wiring is correct and a card is present
.");
if (!SD.begin(chipSelect)) {
Serial.println("Card failed, or not present");
delay(2000);
continue;
}
break;
}
}
}
void loop()
{
int ret;
ret = wav.record("rec.wav");
unsigned int start = millis();
while(ret == WAV_ENCODING){
ret = wav.encode();
�if(millis() - start > 5000){
wav.stop();
ret = WAV_ENCODE_END;
}
};
while(1);
}
Expected Results
Record the voice for 5 seconds.
FAQ
For any questions, advice or cool ideas to share, please visit the DFRobot Forum.
https://www.dfrobot.com/wiki/index.php/Audio_Shield_For_DFRduino_M0_SKU:_DFR0420 12‐8‐17
�
很抱歉,暂时无法提供与“DFR0420”相匹配的价格&库存,您可以联系我们找货
免费人工找货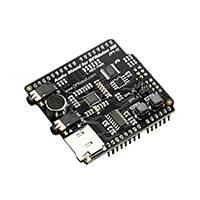


 工商网监
湘ICP备2023018690号
工商网监
湘ICP备2023018690号
