DEMO MANUAL DC1907A
isoSPI 2-Wire Serial Analyzer
Description
Demonstration circuit 1907A is an isoSPI™ analyzer board.
isoSPI is a bi-direction 2-wire serial interface with high
noise immunity and the ability to communicate over long
cables. Because isoSPI is a proprietary serial interface
with unique signaling, the DC1907 board is available to
help users develop systems using the isoSPI serial link.
The DC1907 can be connected across the two wires of
an isoSPI link to decode the isoSPI communication and
convert the signals to standard 4-wire SPI. The DC1907
is also capable of displaying the isoSPI link data on a PC
for analysis or troubleshooting.
Design files for this circuit board are available at
http://www.linear.com/demo
L, LT, LTC, LTM, Linear Technology and the Linear logo are registered trademarks and isoSPI
is a trademark of Linear Technology Corporation. All other trademarks are the property of their
respective owners.
Operation Description
The DC1907 implements an isoSPI receiver that can
connect across a 2-wire isoSPI data link. The DC1907
does not terminate the isoSPI lines and should represent
a minimal load to an operating isoSPI serial link. The
DC1907 decodes the isoSPI data using comparators to
check for minus 1 and plus 1 signals and an FPGA to
check pulse timing. After pulses have been decoded the
FPGA outputs the serial data in a standard SPI format
onto the logic analyzer header JP13 for analysis with an
oscilloscope or logic analyzer. The FPGA also sends the
detected isoSPI data to an onboard microcontroller(MCU)
that formats the data and transmits it to a PC. The MCU
connects to the PC over a USB link. Software is available
that can decode the data sent from the DC1907 to the PC.
The software is capable of displaying data and data logging. For LTC®6804 battery management applications the
software is capable of decoding unique device commands
and checking the command packet error codes(PEC) to
aid program development.
Performance Summary
Specifications are at TA = 25°C
SYMBOL
PARAMETER
CONDITIONS
VS
Supply Range
ISUPPLY
Supply Current
150
mA
VLOGIC
Logic Analyzer Voltage Output Level
3.3
V
MIN
TYP
4.5
MAX
5.5
UNITS
V
dc1907af
1
�DEMO MANUAL DC1907A
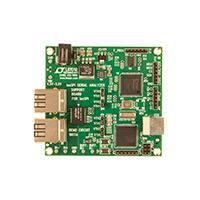
Board PHOTO
POWER
CONNECTIONS
EXT/USB
JUMPER
LOGIC
ANALYZER
HEADER
VTH JUMPERS
LED
INDICATORS
USB
isoSPI CONNECTIONS
RESET BUTTON
CONNECTION SUMMARY
Turrets
Logic Analyzer Header
• VIN: Power supply input, 4.5V to 5.5V up to 200mA
• MOSI: The decoded master out slave in signal
• GND: Power supply ground connection
• MISO: The decoded master in slave out signal
IN+:
Isolated IP turret. This turret connects to the IP
•
line of an isoSPI network
• IN–: Isolated IM turret. This turret connects to the IM
line of an isoSPI network
• CS: The decoded chip select
• SCK: The decoded clock signal
Connections
• Buff IN+: A buffered version of the isoSPI IP signal
• J1 Power Jack
• Buff IN–: A buffered version of the isoSPI IM signal
• RJ45 IN
• RJ45 OUT
• USB
dc1907af
2
�DEMO MANUAL DC1907A
Jumper Summary
JP1 VIN - EXT/USB
JP 2, 4, 6, 7 - VTH Jumpers
• Ext: Set to EXT to power the board from an external 5V
supply.
Note that all four of these jumpers must be connected the
same (i.e. connected to VTH1 or VTH2).
• USB(default): Set to USB to power the board from a
PC’s USB port (no external supply required).
• VTH1: Use this setting for an isoSPI link with Ibias
between 160µA and 1mA (default setting).
• VTH2: Use this setting for an isoSPI link with Ibias
between 100µA and 160µA.
LED Summary
ON: Indicates the state of the connection between the PC
and the DC1907 MCU. If the LED is blinking, the MCU
is waiting for the PC to connect. If the LED is solid this
means the MCU is connected to the PC.
TX: Indicates when data is being sent from the MCU to the
PC. The LED turns on when the MCU is communicating
with the PC.
ER: Indicates a full transmit buffer. If this LED is ON the
PC will most likely have lost some of the isoSPI transmitted data.
Button Summary
Reset: Can be used to reset the MCU. This button is useful
if the MCU appears to be non responsive and data is not
being received by the PC.
Boot: This button is used to program the MCU. Do not use.
Software Installation
• Unzip isoSPI_Software.zip
• Double click setup.exe and go through setup instructions
• Software will install into a Start Menu → Programs
folder called Linear Technology
dc1907af
3
�DEMO MANUAL DC1907A
Driver Installation
Windows XP
• From the Start Menu, open the Control Panel.
• Connect the DC1907 to a USB port and wait for new
hardware installer to open.
• In the Control Panel, navigate to System and Security.
Then, click on System and in the System window open
the Device Manager.
• Do not allow windows to search for the driver
automatically. Select the install from a list or specific
location option, then navigate to the folder where
the DC1907 software was installed. This will default
to either C:\Program Files\LTC\DC1907_Generic or
C:\Program Files\LTC\DC1907_LTC6804 depending
on which version of the software was installed. If both
versions are installed, the driver can be found in either
location.
• Windows should now find the DC1907.inf file and install
the drivers.
Windows 7/XP
• Connect the DC1907 to a USB port and Windows will
automatically begin it's driver installation process. It
will fail after a short time.
• Look under Ports (COM & LPT). There should be an
open port named DC1907_isoSPI_Analyzer (COMxx)
• Right click on the DC1907_isoSPI_Analyzer (COMxx)
port and choose the Update Driver Software option.
• Next, choose the Browse my computer for Driver
software option.
• Navigate to and select the DC1907's driver file, named
DC1907.inf, located in the folder that the DC1907
software was installed into. This will default to either
C:\Program Files(x86)\LTC\DC1907_Generic or
C:\Program Files(x86)\LTC\DC1907_LTC6804
depending on which version of the software was
installed.
• Windows will finish up the driver installation from there.
dc1907af
4
�DEMO MANUAL DC1907A
Hardware Connections
4-Wire SPI Decode Connection
2) Connect the DC1907 to a PC through a USB port.
Figure 1 shows how to connect the DC1907 to two
DC1941(LTC6820) isoSPI demo boards.
3) Connect both DC1941 J1 RJ45 connectors to the DC1907
with two CAT5 patch cables.
1) Set JP1 to USB if you want the DC1907 to be powered
from the computer USB port. Make sure threshold
jumpers are set to VTH1.
Figure 1. isoSPI Demo Board Setup
dc1907af
5
�DEMO MANUAL DC1907A
Hardware Connections
Figure 2 shows how to connect the DC1907 to any isoSPI
network.
2) Set JP1 to USB to have the board powered from the
computer’s USB port.
1) The DC1907 must be connected on the cable side of
the isoSPI network. Connect the IN+ turret to the isolated IP signal. Connect the IN– turret to the isolated
IM signal. The IN+ → IP and IN– →IM connect can be
made on test points, in the cable or even on the pads
of the transformer.
3) Connect the DC1907 to the PC through a USB port.
Figure 2. General isoSPI Connection Setup
dc1907af
6
�DEMO MANUAL DC1907A
LTC6804 Software Operation
The DC1907 isoSPI monitoring software is easy to use.
When you open the software you will see the window
shown in Figure 3.
The software will automatically try to connect to the attached DC1907. Once the board connects, the status box
will become green and indicate connected. The ON LED
on the DC1907 should be blinking while the software is
trying to connect. Once the software has connected, the
LED will turn solid. If the board does not connect, make
sure that the ON LED is blinking. If it is not blinking press
the reset button located on the DC1907 demo board. Once
the LED is blinking, manually select the comm. port in the
software and click the connect button. Generally, if there
is more than one port listed the DC1907 will most likely
be the highest numbered port. The connection status is
also indicated on the DC1907 board by the ON LED.
Once the software has connected (Figure 4) it will begin
to display data decoded by the DC1907. The software
displays LTC6804 data separated into IC data and command data. The IC data is made up of the master out slave
in (MOSI) row and the master in slave out (MISO) row.
Data is displayed in hex format. The LTC6804 command
data is decoded and the software will check to make sure
the transmitted command PEC matches a calculated PEC.
CONNECTION STATUS
Figure 3. isoSPI Analyzer Start Screen
Figure 4.
dc1907af
7
�DEMO MANUAL DC1907A
LTC6804 Software Operation
If desired, the decoded isoSPI hex data can be saved into a
.csv file by clicking the Start Datalog button. A dialog box
will open as is shown in Figure 5. A custom file name and
save location can be entered along with notes to append
to the data log. To start the datalog click the green Start
Datalog button.
When using the DC1907 with the LTC6804-2, the IC
version should be changed from LTC6804-1 (default) to
LTC6804-2. When the LTC6804-2 is selected, the display
will reformat as shown in Figure 6. In this mode the software will read the address of each command and display
it next to the data.
Additional Software Controls
• Pause/Resume: Pauses the screen from updating and
can be used to pause the programs datalog. The software will continue to decode the isoSPI traffic in the
background.
• Clear: Clears the screen buffer and message counter.
• Open Datalog: Opens the last completed datalog file in
Windows Notepad to be viewed.
• Close: Closes the program and disconnects the DC1907.
• Close Port: Disconnects the DC1907 and stops data
decode.
Figure 5. Datalog Dialog
IC VERSION
SELECTED
Figure 6. isoPSI Analyzer in LTC6804-2 Mode
dc1907af
8
�DEMO MANUAL DC1907A
Generic Software Operation
The Generic DC1907 isoSPI monitoring software can be
used to monitor any isoSPI traffic. When you open the
software you will see the window in Figure 7.
The software will automatically try to connect to the attached DC1907. Once the board connects the status box
will become green and indicate connected. The ON LED on
the DC1907 should be blinking while the software is trying
to connect. Once the software has connected the LED will
turn solid. If the board does not connect, first make sure
that the ON LED is blinking. If it is not blinking press the
reset button located on the DC1907 demo board. Once
the LED is blinking, manually select the com. port in the
software and click the connect button. Generally if there
is more than one port listed the DC1907 will most likely
be the highest numbered port. The connection status is
also indicated on the DC1907 board by the ON LED.
CONNECTION STATUS
Figure 7. Generic isoSPI Analyzer GUI
dc1907af
9
�DEMO MANUAL DC1907A
Generic Software Operation
Once the software has connected to the DC1907 it will begin
to display data seen by the DC1907 shown in Figure 8.
The software displays the master out slave in (MOSI)
data and the master in slave out (MISO) data on separate
lines and the data is displayed in hex format. By default
the software displays data divided into bytes; this can be
changed so that data is grouped into bytes, nibbles or 16
bit words. If desired, the decoded isoSPI hex data can be
saved into a .csv file by clicking the Start Datalog button.
A dialog will open, a custom file name and save location
can be entered along with notes to append to the data log.
To start the datalog, click the green Start Datalog button.
Additional Software Controls
• Pause/Resume: Pauses the screen from updating and
can be used to pause the programs datalog. The software will continue to decode the isoSPI traffic in the
background.
• Clear: Clears the screen buffer and message counter.
• Open Datalog: Opens the last completed datalog file in
Windows Notepad to be viewed.
• Close: Closes the program and disconnects the DC1907
• Close Port: Disconnects the DC1907 and stops data
decode.
Figure 8.
dc1907af
10
�DEMO MANUAL DC1907A
Parts List
ITEM QTY REFERENCE
PART DESCRIPTION
MANUFACTURER/PART NUMBER
Required Circuit Components
1
21
C1, C2, C3, C4, C5, C6, C7, C8,
C9, C10, C11, C12, C13, C14,
C15, C27, C28, C29, C30, C32,
C33
CAP, 0.01µF 10% 25V X7R, 0603
AVX, 06033C103KAT
2
1
C23
CAP, 22µF 20%, 16V X7R,1210
AVX,1210YC226KAT2A
3
1
C24
CAP, 2.2µF 10% 16V X5R, 0603
TAIYO YUDEN, EMK107BJ225KA-T
4
2
C25, C57
CAP, 1µF 10% 16V X5R, 0603
AVX, 0603YD105KAT2A
5
2
C26, C35
CAP, 100pF 10% 25V X5R, 0603
AVX, 06033C101KAT2A
6
1
C31
CAP, 10µF 20%, 16V X7R,1210
AVX, 1210YC106KAT2A
7
2
C39, C40
CAP, 4.7µF 20% 16V X5R, 1206
TAIYO YUDEN, EMK316BJ475KL-T
8
9
C41, C43, C44, C45, C46
C49, C53, C55, C56
CAP, 0.1µF 20% 10V X5R, 0603
TAIYO YUDEN, LMK107BJ104MV-F
9
1
C42
CAP, 0.47µF 20% 16V X5R, 0603
AVX, 0603YD474KAT2A
10
0
C47, C48
OPT, 0603
11
2
C50, C54
CAP, 100nF 20% 25V X7R, 0603
AVX, 06033C104MAT2A
12
2
C51, C52
CAP, 20pF 10% 25V COG, 0603
AVX, 06033A220KAT2A
13
1
D1
SMALL SIGNAL SCHOTTKY DIODE, SOD-323
ST, BAT46JFILM
14
6
E1, E2, E3, E4, E5, E6
TESTPOINT, TURRET, 0.060"
MILL-MAX, 2308-2-00-80-00-00-07-0
15
5
JP1, JP2, JP4, JP6, JP7
HEADER, 3PIN, 2MM
SAMTEC TMM-103-02-L-S
16
5
XJP1 TO XJP7
SHUNT, 0.079" CENTER
SAMTEC, 2SN-BK-G
17
4
JP5, JP9, JP12, JP13
HEADER, 6 PIN, 0.100"
SAMTEC TSW-106-02-L-S
18
1
JP8
HEADER, 2X3 PIN, 0.100"
SAMTEC TSW-103-02-L-D
19
1
J1
POWER JACK, KLDHCX-0202-AC
KYCON, KLDHCX-0202-AC
20
DELETE BANANA JACKS
21
1
J4
CONNECTOR, USB
TE CONNECTIVITY, 292304-2
22
2
J5, J6
CONNECTOR RJ45, CACE CODE 00779
TE CONNECTIVITY, 5406298-1-ND
23
3
LED1, LED2, LED3
RED1206 LED
PANASONIC/LN1251C
24
2
R1, R8
RESISTOR, 300Ω 1% 0603
VISHAY, CRCW0603300RFKEA
25
2
R2, R6
RESISTOR, 100Ω 1% 0603
VISHAY, CRCW0603100RFKEA
26
2
R3, R7
RESISTOR, 150Ω 1% 0603
VISHAY, CRCW0603150RFKEA
27
1
R4
RESISTOR, 75Ω 1% 0603
VISHAY, CRCW060375R0FKEA
28
0
R5, R21, R22, R23, R24, R25,
R35, R55
OPT, 0603
29
4
R9, R19, R26, R35
RESISTOR, 40.2kΩ 1% 0603
VISHAY, CRCW060340K2FKEA
30
5
R10, R20, R27, R32, R48
RESISTOR, 10kΩ 1% 0603
VISHAY, CRCW060310K0FKEA
31
2
R11, R13
RESISTOR, 4.7kΩ 1% 0603
VISHAY, CRCW06034K70FKEA
32
3
R12, R45, R49
RESISTOR, 330Ω 1% 0603
VISHAY, CRCW0603330RFKEA
33
3
R14, R16, R18
RESISTOR, 56Ω 1% 0603
VISHAY, CRCW060356R0FKEA
34
4
R15, R17, R28, R30
RESISTOR, 402Ω 1% 0603
VISHAY, CRCW0603402RFKEA
35
4
R29, R31, R33, R54
RESISTOR, 0Ω 1% 0603
VISHAY, CRCW06030000Z0EA
dc1907af
11
�DEMO MANUAL DC1907A
Parts List
ITEM QTY REFERENCE
PART DESCRIPTION
MANUFACTURER/PART NUMBER
36
0
R34, R36, R37, R38, R39, R40,
R41, R43
OPT
37
1
R42
RESISTOR, 33kΩ 1% 0603
VISHAY, CRCW060333K0FKEA
38
3
R44, R46, R47
RESISTOR, 470Ω 1% 0603
VISHAY, CRCW0603470RFKEA
39
2
R50, R51
RESISTOR, 22Ω 1% 0603
VISHAY, CRCW060322R0FKEA
40
3
R56, R57, R58
RESISTOR, 1kΩ 1% 0603
VISHAY, CRCW06031K00FKEA
41
2
SW1, SW2
SWITCH, PUSH BUTTON
PANASONIC/EVQPPDA25
42
1
T1
TRANSFORMER, HX1188NL
PULSE, HX1188NL
43
2
U1, U2
IC, LT1719CS8
LINEAR TECHNOLOGY, LT1719CS8
44
1
U3
IC, LT1118
LINEAR TECHNOLOGY, LT1118
45
1
U4
IC, LT3021
LINEAR TECHNOLOGY, LT3021
46
1
U5
IC, LT1085
LINEAR TECHNOLOGY, LT1085
47
1
U6
IC, XCF02SVOG20C
XILINX, XCF02SVOG20C
48
1
U7
IC, LT1819IMS8
LINEAR TECHNOLOGY, LT1819IMS8
49
1
U8
IC, XC3S50-5VQG100C
XILINX, XC3S50-5VQG100C
50
0
U10
20MHZ-OSC, OPT
51
0
U11
CRISTAL OSCILL, OPT
52
1
U12
CRISTAL, 100MHz 4-SMB DFN,LCC
CTS-FREQUENCY CONTROLS, CB3LV-3I-100M0000
53
1
U13
8-BIT MICROCONTROLLER, TQFP64
ATMEL, AT90USB646-AU, PACKAGE MD
54
1
U14
PRTR5V0U4D, SOT457-TSOP6
NXP SEMI, PRTR5V0U4D
55
2
U15, U16
BUFFER WITH OPEN-DRAIN OUTPUTS,
SOT363
NXP SEMI, 74LVC2G07GW
56
1
X1
QUARTZ CRYSTAL
ECS INC, ECS-160-20-4-DN
57
4
MH1 TO MH4
STAND-OFF, NYLON 0.5" TALL
KEYSTONE, 8833(SNAP ON)
dc1907af
12
�A
B
C
D
IN-
GND
BUFF.IN-
J6
RJ45
IN
J5
RJ45
OUT
IN+
BUFF.IN+
GND
5V
3
VCC
OUT
EG-2101
GND
OE
3
2
9
4
5
6
5
3.3V
R6 100
1
2
3
6
3.3V
6
5
C44
0.1uF
400
R30
R35
DNS
400
R28
R26
DNS
3.3V
2 +
3 -
3.3V
2 +
3 -
VOUT_N
4
1. ALL CAPACITORS AND RESISTORS ARE 0603.
U2
LT1719CS8
7
C45
0.1uF
SCK
CS
VOUT_P
C41
0.1uF
C35
100pF
U1
LT1719CS8
7
R7
150 R8 300
C25
1uF
C40
4.7uF
1206
1
C26
100pF
3.3V
4
2
3
1.2V
OUT
NOTES: UNLESS OTHERWISE SPECIFIED,
JP7
R32
3.3V
10K
R27
10K
JP6
R1
R3
150
JP4
3.3V 10K
R20
R10
10K
GND2
GND
300
OUT
SENSE
IN
/SHDN
IN
R43 130
GCLK4_P
GCLK4_N
400
R17
DNS
R19
400
R15
R9
DNS
3
C24
2.2uF
U4
LT3021
JP2
6
8
5
3.3V
U3
LT1118
4
R40 50 2.5V
R41 510
R39
100
R38 50
R37 130
2.5V
R34 510
-
+
C39
4.7uF
1206
C23
22uF
1210
R5 DNS
4
2
8
2
4
OUT
7
-
+
3
C46
0.1uF
IN
U5
LT1085
R2 100
EPF8119F
U7B
LT1816IMS8
7
16
15
14
11
10
T1
1
3
C31
10uF
1210
5V
D1
BAT46
U7A
LT1816IMS8
EXT
C48
0.1uF
IN-
IN+
1
/OUT
E7
E1
E6
11
12
11
12
E5
E4
E3
E2
R36
0
U11
1
1
USB
1
USB_5V
GND
1
J1
KLDHCX-0202X
2
2
3
3
2
4
6
8
8
4
GND
GND
2
4
1
VTH1
1
3
5
7
2
4
6
8
1
3
5
7
VTH2
2
8
4
1
8
1
2Y
GND
2A
3
2
1Y
VCC
2Y
1A
GND
2A
4
5
6 SDI_B
5V
5V
2
4
6
R56
1k
1
2
3
4
5
6
JP8
M_PROG
1
3
5
5V
5V
R58
1k
4 SCK_B
5
6 CS_B
U16
74LVC2G07
1Y
VCC
1A
SD1 1
3
2
5V
R57
1k
R42
33k
5V
IO_L01P_7/VRN7
IO_L01N_7/VRN7
GND
IO_L21P_7
IO_L21N_7
VCCO_7
VCCAUX
IO_L23P_7
IO_L23N_7
GND
IO_L40P_7
IO_L40N_7/VREF_7
IO_L40P_7/VREF_6
IO_L40N_6
IO_L40P_7
IO_L24N_6/VREF_6
IO
VCCINT
VCCO_6
GND
IO
IO_L01P_6/VRN_6
IO_L01N_6/VRP_6
M1
M0
FPGA_TDI
PROG-
RESET
SW1
5V
1
2
3
4
5
6
7
8
9
10
11
12
13
14
15
16
17
18
19
20
21
22
23
24
25
GPIO_M
JP9
RESET
R33 0
R31 0
R29 0
3.3V 1.2V
2.5V 3.3V
U15
74LVC2G07
R4
75
2.5V
C1 C3 C5 C7 C9 C11
C2 C4 C6 C8 C10
0.01uF
3.3V
3
GCLK4_N
GCLK4_P
3.3V 1.2V
C13 C15
C12 C14
0.01uF
2.5V
2.5V 3.3V
1.2V
C27 C29 C33
C28 C30 C32
0.01uF
100
99
98
97
96
95
94
93
92
91
90
89
88
87
86
85
84
83
82
81
80
79
78
77
76
U8
XC3250
TDI
PROG_B
HSWAP_EN
LO_L01N_0/VRP_0
IO_L01P_0/VRN_0
GND
VCCO_0
VCCINT
IO_L31N_0
IO_L31P_0/VREF_0
IO_L32N_0/GCLK7
IO_L32P_0/GCLKK6
IO_L32N_1/GCLK5
IO_L32P_1/GCLK4
IO_L31N_1/VREF_1
IO_L31P_1
VCCAUX
VCCO_1
GND
IO
IO_L01N_1/VRP_1
IO_L01P_1/VRN
TMS
TCK
TDO
M2
IO_L01P_5/CS_B
IO_L01N_5/RDWR_B
GND
IO_L28P_5/D7
VCCO_5
IO_L28N_5/D6
VCCAUX
IO_L31P_5/D5
IO_L31N_5/D4
IO_L32P_5/GCLK2
IO_L32N_5/GCLK3
IO_L32P_4/GCLK0
IO_L32N_4/GCLK1
IO_L31P_4/DOUT/BUSY
GND
IO_L31N_4/INIT_B
IO_L30P_4/D3
IO_L30P_4/D2
VCCINT
VCCO_4
IO_L27P_4/D1
IO_L27N_4/DIN/D0
IO_L01P_4/VRN_4
IO_L01N_4/VRP_4
SDI_B
3
R52
47k
330
R45
C51
20pF
USB_5V
SDO_B
SCK_B
C50
100nF
3.3V
2.5V
1
R53
47k
GPIO
CS_B
2
1
2
U13
5V
R54
0
DONE
CCLK
GPIO
AVCC
UVCC
DD+
UGND
UCAP
PD0/OC0B/INT0
PD1/AIN0/INT1
PD2/AIN1/INT2
PD3/TXD1/INT3
PD4/INT5
PD5/XCK1/PCINT12
PD6/INT6/#RTS
PD7/T0/INT7/#HWB/#CTS
2
THIS CIRCUIT IS PROPRIETARY TO LINEAR TECHNOLOGY AND
SUPPLIED FOR USE WITH LINEAR TECHNOLOGY PARTS.
4
OE
ON
GND
LED3
1
2
R46 470
R51 22
D+
D-
R47 470
SCALE = NONE
DATE:
N/A
SIZE
CCLK
DIN
1
2
3
4
5
6
7
8
9
10
3.3V
DO
NC
CLK
TDI
TMS
TCK
CFOE/RST
NC
CE-
C56
0.1uF
330
C54
100nF
USB
J4
CON-USB-5V
5V
DD+
GND
SW2
BOOT
R48
10K
FPGA_TDI
3.3V
GPI0_F
JP5
R18
56
C42
0.47uF
C43 0.1uF
1
SHEET 1
SUPPORT BOARD FOR LTC6804
DEMO CIRCUIT 1907A
Thursday, January 05, 2012
IC NO.
2
OF 1
REV.
ISOLATED TWO WIRE SPI SERIAL SNIFFER
1630 McCarthy Blvd.
Milpitas, CA 95035
Phone: (408)432-1900 www.linear.com
Fax: (408)434-0507
LTC Confidential-For Customer Use Only
1
2
3
4
USB_5V
TECHNOLOGY
C55
0.1uF
5V
R49
5V
MOSI_L
5
4
2
20
19
18
17
16
15
14
13
12
11
3.3V
6 MISO_L
PRTR5V0U4D
U14
DATE
CUYLER L. 01-05-12
APPROVED
1
SCK_L 3
CS
1
2
3
4
5
6
VCCJ
VCCO
VCC
TD0
NC
NC
NC
CEONC
GND
U6 XCF02S
R13
4.7K
R21 R22 R23 R24
DNS DNS DNS DNS
CUYLER L. TITLE: SCHEMATIC
AK
1
2
R44 470
R50 22
ER
LED2 BUSY
LED1
OUT
VCC
U12
100MHZ-OSC
GCK0 3
DONE
PROG-
1
REVISION HISTORY
DESCRIPTION
2ND PROTOTYPE
R12
330
2.5V
R11
4.7K
3.3V
2
REV
LOGIC
ANALYZER
JP13
OPT
OE
GND
R55
OPT
OUT
__
ECO
F_PROG
JP12
4
1
2
R25
OPT
1
2
3
4
5
6
56
56
VCC
APPROVALS
C57
1uF
32
31
30
29
28
27
6
7
8
9
10
11
12
13
5
6
3
U10
GCK1 3
4
3.3V
R16
R14
3.3V
C49
3.3V
0.1uF
C47
OPT
2.5V 3.3V
CS
SCK
SCK_L
MISO_L
MOSI_L
3.3V 1.2V
SDO
SDI
AT90USB162
C53
0.1uF
75
74
73
72
71
70
69
68
67
66
65
64
63
62
61
60
59
58
57
56
55
54
53
52
51
CUSTOMER NOTICE
PC2/PCINT11
PC4/PCINT10
PC5/PCINT9/OC1B
PC6/PCINT8/OC1A
PC7/INT4/ICP1/CLKO
PB0/SS/PCINT0
PB1/SCK/PCINT1
PB2/MOSI/PCINT2
PB3/MISO/PCINT3
PB4/T1/PCINT4
PB5/PCINT5
PB6/PCINT6
PB7/OC0A/OC1C/PCINT7
RESET
XTAL1
XTAL2
C52
20pF
3.3V 1.2V
IO_L01N_2/VRP_2
IO_L01P_2/VRN_2
GND
IO_L21N_2
IO_L21P_2
VCCO_2
VCCINT
IO_L24AN_2
IO_L24AP_2
GND
IO_L40N_2
IO_L40P_2/VREF_2
IO_L40N_3/VREF_3
IO_L40P_3
IO_L24N_3
IO_L24P_3
IO
VCCAUX
VCCO_3
GND
IO
IO_L01N_3/VRP_3
IO_L01P_3/VRN_3
CLK
DONE
FPGA_TDO
FPGA_TCK
FPGA_TMS
2
LINEAR TECHNOLOGY HAS MADE A BEST EFFORT TO DESIGN A
CIRCUIT THAT MEETS CUSTOMER-SUPPLIED SPECIFICATIONS;
HOWEVER, IT REMAINS THE CUSTOMER'S RESPONSIBILITY TO PCB DES.
VERIFY PROPER AND RELIABLE OPERATION IN THE ACTUAL
APP ENG.
APPLICATION. COMPONENT SUBSTITUTION AND PRINTED
CIRCUIT BOARD LAYOUT MAY SIGNIFICANTLY AFFECT CIRCUIT
PERFORMANCE OR RELIABILITY. CONTACT LINEAR
TECHNOLOGY APPLICATIONS ENGINEERING FOR ASSISTANCE.
5
26
25
23
22
14
15
16
17
18
19
20
21
24
X1
HC-49US
GCKL0
GCKL1
DIN
26
27
28
29
30
31
32
33
34
35
36
37
38
39
40
41
42
43
44
45
46
47
48
49
50
JP1
1
2
1
1
2
2
VTH2 VTH2
VTH2
4
VCC
3
3
VTH1 VTH1
2
2
1
1
3
3
VTH1
GND
4
5
6
1
8
4
5
6
Information furnished by Linear Technology Corporation is believed to be accurate and reliable.
However, no responsibility is assumed for its use. Linear Technology Corporation makes no representation that the interconnection of its circuits as described herein will not infringe on existing patent rights.
3
1
2
5
A
B
C
D
DEMO MANUAL DC1907A
Schematic Diagram
dc1907af
13
�DEMO MANUAL DC1907A
DEMONSTRATION BOARD IMPORTANT NOTICE
Linear Technology Corporation (LTC) provides the enclosed product(s) under the following AS IS conditions:
This demonstration board (DEMO BOARD) kit being sold or provided by Linear Technology is intended for use for ENGINEERING DEVELOPMENT
OR EVALUATION PURPOSES ONLY and is not provided by LTC for commercial use. As such, the DEMO BOARD herein may not be complete
in terms of required design-, marketing-, and/or manufacturing-related protective considerations, including but not limited to product safety
measures typically found in finished commercial goods. As a prototype, this product does not fall within the scope of the European Union
directive on electromagnetic compatibility and therefore may or may not meet the technical requirements of the directive, or other regulations.
If this evaluation kit does not meet the specifications recited in the DEMO BOARD manual the kit may be returned within 30 days from the date
of delivery for a full refund. THE FOREGOING WARRANTY IS THE EXCLUSIVE WARRANTY MADE BY THE SELLER TO BUYER AND IS IN LIEU
OF ALL OTHER WARRANTIES, EXPRESSED, IMPLIED, OR STATUTORY, INCLUDING ANY WARRANTY OF MERCHANTABILITY OR FITNESS
FOR ANY PARTICULAR PURPOSE. EXCEPT TO THE EXTENT OF THIS INDEMNITY, NEITHER PARTY SHALL BE LIABLE TO THE OTHER FOR
ANY INDIRECT, SPECIAL, INCIDENTAL, OR CONSEQUENTIAL DAMAGES.
The user assumes all responsibility and liability for proper and safe handling of the goods. Further, the user releases LTC from all claims
arising from the handling or use of the goods. Due to the open construction of the product, it is the user’s responsibility to take any and all
appropriate precautions with regard to electrostatic discharge. Also be aware that the products herein may not be regulatory compliant or
agency certified (FCC, UL, CE, etc.).
No License is granted under any patent right or other intellectual property whatsoever. LTC assumes no liability for applications assistance,
customer product design, software performance, or infringement of patents or any other intellectual property rights of any kind.
LTC currently services a variety of customers for products around the world, and therefore this transaction is not exclusive.
Please read the DEMO BOARD manual prior to handling the product. Persons handling this product must have electronics training and
observe good laboratory practice standards. Common sense is encouraged.
This notice contains important safety information about temperatures and voltages. For further safety concerns, please contact a LTC application engineer.
Mailing Address:
Linear Technology
1630 McCarthy Blvd.
Milpitas, CA 95035
Copyright © 2004, Linear Technology Corporation
dc1907af
14 Linear Technology Corporation
LT 0813 • PRINTED IN USA
1630 McCarthy Blvd., Milpitas, CA 95035-7417
(408) 432-1900
●
FAX: (408) 434-0507 ● www.linear.com
LINEAR TECHNOLOGY CORPORATION 2013
�