NCT210
Low Cost Microprocessor
System Temperature
Monitor Microcomputer
The NCT210 is a two-channel digital thermometer and
under/overtemperature alarm, intended for use in personal computers
and other systems requiring thermal monitoring and management. The
device can measure the temperature of a microprocessor using a
diode-connected PNP transistor, which can be provided on-chip with
the processor, or can be a low cost discrete NPN/PNP device, such as
the 2N3904/2N3906. A novel measurement technique cancels out the
absolute value of the transistor’s base emitter voltage so that no
calibration is required. The second measurement channel measures the
output of an on-chip temperature sensor to monitor the temperature of
the device and its environment.
The NCT210 communicates over a two-wire serial interface
compatible with SMBus standards. Under/overtemperature limits can
be programmed into the device over the serial bus, and an ALERT
output signals when the on-chip or remote temperature is out of range.
This output can be used as an interrupt or as an SMBus alert.
Features
•
•
•
•
•
•
•
•
•
•
•
•
•
•
Alternative to the ADM1021A
On-chip and Remote Temperature Sensing
No Calibration Necessary
1°C Accuracy for On-chip Sensor
3°C Accuracy for Remote Sensor
Programmable Over/Undertemperature Limits
Programmable Conversion rate
2-wire SMBus Serial Interface
Supports System Management Bus (SMBus) Alert
200ĂmA Max Operating Current
1ĂmA Standby Current
3.0ĂV to 5.5ĂV Supply
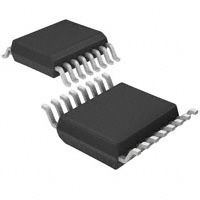
Small 16-lead QSOP Package
This Device is Pb-Free, Halogen Free and is RoHS Compliant
Applications
•
•
•
•
•
•
Desktop Computers
Notebook Computers
Smart Batteries
Industrial Controllers
Telecom Equipment
Instrumentation
© Semiconductor Components Industries, LLC, 2012
September, 2012 − Rev. 2
http://onsemi.com
QSOP−16
CASE 492
PIN ASSIGNMENT
NC
1
16
NC
VDD
2
15
STBY
D+
3
14
SCLK
D−
4
13
NC
NCT210
(Top View)
NC
5
12
SDATA
ADD1
6
11
ALERT
GND
7
10
ADD0
GND
8
9
NC
NC = No Connect
MARKING DIAGRAM
NCT210
#YYWW
NCT210
#
YYWW
= Specific Device Code
= Pb-Free Package
= Date Code
ORDERING INFORMATION
See detailed ordering and shipping information in the package
dimensions section on page 14 of this data sheet.
1
Publication Order Number:
NCT210/D
�NCT210
ADDRESS POINTER
REGISTER
ONE-SHOT
REGISTER
CONVERTION RATE
REGISTER
ON-CHIP
TEMPERATURE
SENSOR
D+
3
D−
4
LOCAL TEMPERATURE
VALUE REGISTER
A-TO-D
CONVERTER
ANALOG
MUX
BUSY
RUN/STANDBY
REMOTE TEMPERATURE
VALUE REGISTER
LOCAL TEMPERATURE
LOW LIMIT COMPARATOR
LOCAL TEMPERATURE
LOW LIMIT REGISTER
LOCAL TEMPERATURE
HIGH LIMIT COMPARATOR
LOCAL TEMPERATURE
HIGH LIMIT REGISTER
REMOTE TEMPERATURE
LOW LIMIT COMPARATOR
REMOTE TEMPERATURE
LOW LIMIT REGISTER
REMOTE TEMPERATURE
HIGH LIMIT COMPARATOR
REMOTE TEMPERATURE
HIGH LIMIT REGISTER
CONFIGURATION
REGISTER
EXTERNAL DIODE OPEN-CIRCUIT
INTERRUPT
MASKING
STATUS REGISTER
15 STBY
11 ALERT
NCT210
SMBus INTERFACE
1
2
5
7
8
9
13
16
12
14
10
6
NC
VDD
NC
GND
GND
NC
NC
NC
SDATA
SCLK
ADD0
ADD1
Figure 1. Functional Block Diagram
Table 1. PIN ASSIGNMENT
Pin No.
Mnemonic
Description
1
NC
No Connect
2
VDD
Positive Supply, 3.0 V to 5.5 V
3
D+
Positive Connection to Remote Temperature Sensor
4
D−
Negative Connection to Remote Temperature Sensor
5
NC
No Connect
6
ADD1
Three-state Logic Input, Higher Bit of Device Address
7
GND
Supply 0 V Connection
8
GND
Supply 0 V Connection
9
NC
10
ADD0
No Connect
Three-state Logic Input, Lower Bit of Device Address
11
ALERT
Open-drain Logic Output Used as Interrupt or SMBus ALERT
12
SDATA
Logic Input/Output, SMBus Serial Data. Open-drain Output
13
NC
14
SCLK
Logic Input, SMBus Serial Clock
15
STBY
Logic Input Selecting Normal Operation (High) or Standby Mode (Low)
16
NC
No Connect
No Connect
http://onsemi.com
2
NC = NO CONNECT
�NCT210
Table 2. ABSOLUTE MAXIMUM RATINGS
Parameter
Positive Supply Voltage (VDD) to GND
D+, ADD0, ADD1
Rating
Unit
−0.3 to +6.0
V
−0.3 to VDD +0.3
V
D− to GND
−0.3 to +0.6
SCLK, SDATA, ALERT, STBY
−0.3 to +6.0
V
±50
mA
Input Current
Input Current, D−
±1
mA
2,000
V
Continuous Power Dissipation
Up to 70°C
Derating Above 70°C
650
6.7
mW
mW/°C
Operating Temperature Range
−55 to +125
°C
150
°C
ESD Rating, All Pins (Human Body Model)
Maximum Junction Temperature (TJ MAX)
Storage Temperature Range
−65 to +150
°C
Lead Temperature, Soldering (10 sec)
300
°C
IR Reflow Peak Temperature
220
°C
Stresses exceeding Maximum Ratings may damage the device. Maximum Ratings are stress ratings only. Functional operation above the
Recommended Operating Conditions is not implied. Extended exposure to stresses above the Recommended Operating Conditions may affect
device reliability.
NOTE: This device is ESD sensitive. Use standard ESD precautions when handling.
Table 3. THERMAL CHARACTERISTICS
Package Type
16-lead QSOP Package
qJA
Unit
105
°C/W
Table 4. ELECTRICAL CHARACTERISTICS
(TA = TMIN to TMAX, VDD = 3.0 V to 3.6 V, unless otherwise noted) (Note 1)
Parameter
Test Conditions/Comments
Min
Typ
Max
Unit
1.0
−
−
°C
−3.0
±1.0
+3.0
°C
−3.0
−5.0
−
−
+3.0
+5.0
°C
3.0
−
3.6
V
2.5
2.7
2.95
V
−
25
−
mV
0.885
1.7
2.2
V
−
50
−
mV
Power Supply and ADC
Temperature Resolution
Guaranteed No Missed Codes
Temperature Error, Local Sensor
Temperature Error, Remote Sensor
TA = 60°C to 100°C
Supply Voltage Range (Note 2)
Undervoltage Lockout Threshold
VDD Input, Disables ADC, Rising Edge
Undervoltage Lockout Hysteresis
Power-on Reset Threshold
VDD, Falling Edge (Note 3)
POR Threshold Hysteresis
Standby Supply Current
VDD = 3.3 V, No SMBus Activity
SCLK at 10 kHz
−
−
1.0
4.0
5.0
−
mA
Average Operating Supply Current
0.25 Conversions/Sec Rate
−
130
200
mA
Auto-convert Mode, Averaged Over 4 Sec
2 Conversions/Sec Rate
−
225
370
mA
Conversion Time
From Stop Bit to Conversion Complete
(Both Channels) D+ Forced to D− + 0.65 V
65
115
170
ms
Remote Sensor Source Current
High Level (Note 3)
Low Level (Note 3)
120
7.0
205
12
300
16
mA
−
0.7
−
V
−
50
−
mA
D− Source Voltage
Address Pin Bias Current (ADD0, ADD1)
Momentary at Power-on Reset
http://onsemi.com
3
�NCT210
Table 4. ELECTRICAL CHARACTERISTICS (continued)
(TA = TMIN to TMAX, VDD = 3.0 V to 3.6 V, unless otherwise noted) (Note 1)
Parameter
Test Conditions/Comments
Min
Typ
Max
Unit
SMBus Interface (See Figure 2)
Logic Input High Voltage, VIH
STBY, SCLK, SDATA
VDD = 3.0 V to 5.5 V
2.2
−
−
V
Logic Input Low Voltage, VIL
STBY, SCLK, SDATA
VDD = 3.0 V to 5.5 V
−
−
0.8
V
SMBus Output Low Sink Current
SDATA Forced to 0.6 V
6.0
−
−
mA
ALERT Output Low Sink Current
ALERT Forced to 0.4 V
1.0
−
−
mA
−1.0
−
+1.0
mA
−
5.0
−
pF
Logic Input Current, IIH, IIL
SMBus Input Capacitance, SCLK, SDATA
SMBus Clock Frequency
−
−
100
kHz
SMBus Clock Low Time, tLOW
tLOW between 10% Points
4.7
−
−
ms
SMBus Clock High Time, tHIGH
tHIGH between 90% Points
4.0
−
−
ms
SMBus Start Condition Setup Time,
tSU:STA
4.7
−
−
ms
SMBus Repeat Start Condition
250
−
−
ns
Setup Time, tSU:STA
Between 90% and 90% Points
250
−
−
ns
SMBus Start Condition Hold Time, tHD:STA
Time from 10% of SDATA to 90% of SCLK
4.0
−
−
ms
SMBus Stop Condition Setup Time, tSU:STO
Time from 90% of SCLK to 10% of SDATA
4.0
−
−
ms
SMBus Data Valid to SCLK
Time for 10% or 90% of SDATA to 10% of SCLK
250
−
−
ns
Rising Edge Time, tSU:DAT
Time for 10% or 90% of SDATA to 10% of SCLK
250
−
−
ns
0
−
−
ms
Between Start/Stop Condition
4.7
−
−
ms
−
−
1
ms
−
−
1
ms
SMBus Data Hold Time, tBUF:DAT
SMBus Bus Free Time, tBUF
SCLK Falling Edge to SDATA
Valid Time, tVD:DAT
Master Clocking in Data
1. TMAX = 100°C, TMIN = 0°C
2. Operation at VDD = 5.0 V guaranteed by design; not production tested.
3. Guaranteed by design; not production tested.
t LOW
tF
t HD; STA
tR
SCLK
t HD; STA
t HD; DAT
t HIGH
t SU; STA
t SU; DAT
t SU; STO
SDATA
t BUF
STOP START
START
Figure 2. Serial Bus Timing
http://onsemi.com
4
STOP
�NCT210
TYPICAL PERFORMANCE CHARACTERISTICS
20
5
TEMPERATURE ERROR (°C)
TEMPERATURE ERROR (°C)
15
10
D+ To GND
5
0
−5
D+ To VDD
−10
−15
−20
−25
−30
1
10
4
250 mV p-p REMOTE
3
2
100 mV p-p REMOTE
1
0
100
100
1k
10k
LEAKAGE RESISTANCE (MW)
Figure 3. Temperature Error vs. PC Board Track
Resistance
7
6
5
4
3
50 mV p-p
2
1
0
25 mV p-p
1
10
100
1k
10k 100k
1M
10
8
6
4
2
0
−2
10M 100M
2
4
6
8
10 12 14 16 18 20 22 24
CAPACITANCE (nF)
Figure 5. Temperature Error vs. Common-mode
Noise Frequency
Figure 6. Temperature Error vs. Capacitance
between D+ and D−
4
70
TEMPERATURE ERROR (°C)
60
SUPPLY CURRENT (mA)
100M
12
FREQUENCY (Hz)
50
40
30
VDD = 3.3 V
20
10
0
10M
14
100 mV p-p
8
1M
Figure 4. Temperature Error vs. Power Supply
Noise Frequency
TEMPERATURE ERROR (°C)
TEMPERATURE ERROR (°C)
9
100k
FREQUENCY (Hz)
VDD = 5 V
1
5
10
25
50
3
10 mV p-p
2
1
0
100k
75 100 250 500 750 1000
SCLK FREQUENCY (kHz)
1M
10M
100M
1G
FREQUENCY (Hz)
Figure 7. Standby Supply Current vs. Clock
Frequency
Figure 8. Temperature Error vs. Differential-mode
Noise Frequency
http://onsemi.com
5
�NCT210
TYPICAL PERFORMANCE CHARACTERISTICS (Cont’d)
550
SUPPLY CURRENT (mA)
500
450
400
350
300
250
200
3.3 V
150
100
5V
50
0.0625 0.125
0.25
0.5
1
2
4
8
CONVERTION RATE (Hz)
Figure 9. Operating Supply Current vs. Conversion Rate
100
SUPPLY CURRENT (mA)
80
60
40
20
0
−20
0
0.5 1.0 1.5 2.0 2.5 3.0 3.5 4.0 4.5 5.0
SUPPLY VOLTAGE (V)
Figure 10. Standby Supply Current vs. Supply Voltage
125
REMOTE
TEPMERATURE
TEMPERATURE (°C)
100
INT TEPMERATURE
75
50
25
0
0
1
2
3
4
5
6
7
8
9
TIME (s)
Figure 11. Response to Thermal Shock
http://onsemi.com
6
10
�NCT210
Functional Description
Measurement Method
The NCT210 contains a two-channel A-to-D converter
with special input-signal conditioning to enable operation
with remote and on-chip diode temperature sensors. When
the NCT210 is operating normally, the A-to-D converter
operates in free-running mode. The analog input multiplexer
alternately selects either the on-chip temperature sensor to
measure its local temperature or the remote temperature
sensor. These signals are digitized by the ADC and the
results stored in the local and remote temperature value
registers as 8-bit, twos complement words.
The measurement results are compared with local and
remote, high and low temperature limits, stored in four
on-chip registers. Out-of-limit comparisons generate flags
that are stored in the status register, and one or more
out-of-limit results will cause the ALERT output to pull low.
The limit registers can be programmed and the device
controlled and configured via the serial System
Management Bus (SMBus). The contents of any register can
also be read back via the SMBus.
Control and configuration functions consist of:
• Switching the Device between Normal Operation and
Standby Mode
• Masking or Enabling the ALERT Output
• Selecting the Conversion Rate
A simple method of measuring temperature is to exploit
the negative temperature coefficient of a diode, or the
base-emitter voltage of a transistor, operated at constant
current. Unfortunately, this technique requires calibration to
null the effect of the absolute value of VBE, which varies
from device to device.
The technique used in the NCT210 is to measure the
change in VBE when the device is operated at two different
currents. This is given by:
DV BE + kTńq
N×I
IBIAS
VDD
D+
REMOTE
SENSING
TRANSISTOR
VOUT+
To ADC
C1*
D−
VOUT−
BIAS
DIODE
*CAPACITOR C1 IS OPTIONAL. IT IS ONLY
NECESSARY IN NOISY ENVIRONMENTS.
C1 = 2.2 nF TYP, 3 nF MAX
(eq. 1)
where:
k is Boltzmann’s constant.
q is the charge on the electron (1.6 × 10⁻¹⁹ Coulombs).
T is the absolute temperature in Kelvins.
N is the ratio of the two currents.
Figure 12 shows the input signal conditioning used to
measure the output of an external temperature sensor.
This figure shows the external sensor as a substrate
transistor provided for temperature monitoring on some
microprocessors, but it could be a discrete transistor. If a
discrete transistor is used, the collector will not be grounded
and should be linked to the base. To prevent ground noise
interfering with the measurement, the more negative
terminal of the sensor is not referenced to ground, but is
biased above ground by an internal diode at the D– input. If
the sensor is operating in a noisy environment, one can
optionally be added as a noise filter. Its value is typically
2,200 pF, but it should be no more than 3,000 pF. See the
Layout Considerations section for more information.
To measure DVBE, the sensor is switched between
operating currents of I and N × I. The resulting waveform is
passed through a 65 kHz low-pass filter to remove noise, and
then to a chopper-stabilized amplifier that performs the
functions of amplification and rectification of the waveform
to produce a dc voltage proportional to DVBE. This voltage
is measured by the ADC to give a temperature output in
8-bit, twos complement format. To reduce the effects of
noise further, digital filtering is performed by averaging the
results of 16 measurement cycles.
Signal conditioning and measurement of the internal
temperature sensor is performed in a similar manner.
On initial powerup, the remote and local temperature
values default to –128°C. Since the device normally powers
up converting, a measurement of local and remote
temperature is made, and these values are then stored before
a comparison with the stored limits is made. However, if the
part is powered up in standby mode (STBY pin pulled low),
no new values are written to the register before a comparison
is made. As a result, both RLOW and LLOW are tripped in
the status register, thus generating an ALERT output. This
can be cleared in one of two ways.
1. Change both the local and remote lower limits to
–128°C and read the status register (which in turn
clears the ALERT output).
2. Take the part out of standby and read the status
register (which in turn clears the ALERT output).
This works only if the measured values are within
the limit values.
I
1n (N)
LOW-PASS FILTER
fC = 65 kHz
Figure 12. Input Signal Conditioning
http://onsemi.com
7
�NCT210
Temperature Data Format
Address Pointer Register
One LSB of the ADC corresponds to 1°C so the ADC can
theoretically measure from −128°C to +127°C, although the
device does not measure temperatures below −65°C;
therefore, the actual range is −65°C to 127°C. The
temperature data format is shown in Table 5.
The results of the local and remote temperature
measurements are stored in the local and remote temperature
value registers and are compared with limits programmed
into the local and remote high and low limit registers.
The address pointer register does not have and does not
require an address, because it is the register to which the first
data byte of every write operation is written automatically.
This data byte is an address pointer that sets up one of the
other registers for the second byte of the write operation or
for a subsequent read operation.
Value Registers
The NCT210 has two registers to store the results of local
and remote temperature measurements. These registers are
written to by the ADC and can only be read over the SMBus.
Table 5. TEMPERATURE DATA FORMAT
Temperature (5C)
Digital Output
−65
1 011 1111
−55
1 100 1001
−25
1 110 0111
0
0 000 0000
1
0 000 0001
10
0 000 1010
25
0 001 1001
50
0 011 0010
75
0 100 1011
100
0 110 0100
125
0 111 1101
127
0 111 1111
Status Register
Bit 7 of the status register indicates when it is high that the
ADC is busy converting. Bit 5 to Bit 3 are flags that indicate
the results of the limit comparisons.
If the local and/or remote temperature measurement is
above the corresponding high temperature limit or below the
corresponding low temperature limit, then one or more of
these flags are set. Bit 2 is a flag that is set if the remote
temperature sensor is open-circuit. These five flags are
NOR’d together so that if any of them are high, the ALERT
interrupt latch is set and the ALERT output goes low. Reading
the status register clears the five flag bits, provided the error
conditions that caused the flags to be set have gone away.
While a limit comparator is tripped due to a value register
containing an out-of-limit measurement, or the sensor is
open-circuit, the corresponding flag bit cannot be reset. A flag
bit can only be reset if the corresponding value register
contains an in-limit measurement, or the sensor is good.
Registers
The NCT210 contains nine registers that are used to store
the results of remote and local temperature measurements,
and high and low temperature limits, and to configure and
control the device. A description of these registers follows,
and further details are given in Table 6 to Table 8. It should
be noted that the NCT210’s registers are dual port and have
different addresses for read and write operations.
Attempting to write to a read address, or to read from a write
address, produces an invalid result. Register addresses
above 0x0F are reserved for future use or used for factory
test purposes and should not be written to.
Table 6. STATUS REGISTER BIT ASSIGNMENTS
Bit
Name
7
BUSY
6
LHIGH*
1 when Local High Temp Limit Tripped
5
LLOW*
1 when Local Low Temp Limit Tripped
4
RHIGH*
1 when Remote High Temp Limit
Tripped
3
RLOW*
1 when Remote Low Temp Limit Tripped
2
OPEN*
1 when Remote Sensor Open-circuit
1 to 0
Function
1 when ADC Converting
Reserved
*These flags stay high until the status register is read or they are
reset by POR.
http://onsemi.com
8
�NCT210
Table 7. LIST OF NCT210 REGISTERS
Read Address (Hex)
Write Address (Hex)
Not Applicable
Not Applicable
Address Pointer
Name
Undefined
Power-On Default
00
Not Applicable
Local Temperature Value
1000 0000 (0x80) (−128°C)
01
Not Applicable
Remote Temperature Value
1000 0000 (0x80) (−128°C)
02
Not Applicable
Status
Undefined
03
09
Configuration
0000 0000 (0x00)
04
0A
Conversion Rate
0000 0010 (0x02)
05
0B
Local Temperature High Limit
0111 1111 (0x7F) (+127°C)
06
0C
Local Temperature Low Limit
1100 1001 (0xC9) (−55°C)
07
0D
Remote Temperature High Limit
0111 1111 (0x7F) (+127°C)
08
0E
Remote Temperature Low Limit
1100 1001 (0xC9) (−55°C)
Not Applicable
0F (Note 1)
One-shot
10
Not Applicable
Reserved
Reserved for Future Versions
12
12
Reserved
Reserved for Future Versions
13
13
Reserved
Reserved for Future Versions
14
14
Reserved
Reserved for Future Versions
15
16
Reserved
Reserved for Future Versions
17
18
Reserved
Reserved for Future Versions
19
Not Applicable
Reserved
Reserved for Future Versions
20
21
Reserved
Reserved for Future Versions
FE
Not Applicable
Manufacturer Device ID
0100 0001 (0x41)
FF
Not Applicable
Die revision Code
0011 xxxx (0x3x)
1. Writing to Address 0F causes the NCT210 to perform a single measurement. It is not a data register and data written to it is irrelevant.
The ALERT interrupt latch is not reset by reading the
status register, but is reset when the ALERT output is
serviced by the master reading the device address, provided
the error condition has gone away and the status register flag
bits have been reset.
Table 8. CONFIGURATION REGISTER BIT
ASSIGNMENTS
Name
Function
7
MASK1
0 = ALERT Enabled
1 = ALERT Masked
0
6
RUN/STOP
0 = Run
1 = Standby
0
Reserved
0
Configuration Register
Two bits of the configuration register are used. If Bit 6
is 0, which is the power-on default, the device is in operating
mode with the ADC converting. If Bit 6 is set to 1, the device
is in standby mode and the ADC does not convert. Standby
mode can also be selected by taking the STBY pin low. In
standby mode, the values stored in the remote and local
temperature registers remain at the values they were when
the part was placed in standby.
Bit 7 of the configuration register is used to mask the
ALERT output. If Bit 7 is 0, which is the power-on default,
the ALERT output is enabled. If Bit 7 is set to 1, the ALERT
output is disabled.
Power-On
Default
Bit
5 to 0
Conversion Rate Register
The lowest three bits of this register are used to program
the conversion rate by dividing the ADC clock by 1, 2, 4, 8,
16, 32, 64, or 128 to give conversion times from 125 ms
(Code 0x07) to 16 seconds (Code 0x00). This register can
be written to and read back over the SMBus. The higher five
bits of this register are unused and must be set to 0. Use of
slower conversion times greatly reduces the device power
consumption, as shown in Table 9.
http://onsemi.com
9
�NCT210
Table 9. CONVERSION RATE REGISTER CODE
Table 10. DEVICE ADDRESSES (Note 1)
Conversion/
Sec
Average Supply Current
mA Typ at VCC = 3.3 V
ADD0
ADD1
Device Address
Data
0
0
0011 000
0x00
0.0625
150
0
NC
0011 001
0x01
0.125
150
0
1
0011 010
0x02
0.25
150
NC
0
0101 001
0x03
0.5
150
NC
NC
0101 010
0x04
1
150
NC
1
0101 011
0x05
2
150
1
0
1001 100
0x06
4
160
1
NC
1001 101
0x07
8
180
1
1
1001 110
0x08 to 0xFF
Reserved
−
1. ADD0 and ADD1 are sampled at powerup only.
The serial bus protocol operates as follows:
1. The master initiates data transfer by establishing a
start condition, defined as a high-to-low transition
on the serial data line SDATA, while the serial
clock line SCLK remains high. This indicates that
an address/data stream will follow. All slave
peripherals connected to the serial bus respond to
the START condition and shift in the next eight
bits, consisting of a 7-bit address (MSB first) plus
an R/W bit, which determines the direction of the
data transfer, that is, whether data will be written
to or read from the slave device.
The peripheral whose address corresponds to the
transmitted address responds by pulling the data
line low during the low period before the ninth
clock pulse, known as the Acknowledge Bit. All
other devices on the bus now remain idle while the
selected device waits for data to be read from or
written to it. If the R/W bit is a 0, the master writes
to the slave device. If the R/W bit is a 1, the
master reads from the slave device.
2. Data is sent over the serial bus in sequences of
nine clock pulses, eight bits of data followed by an
Acknowledge Bit from the slave device.
Transitions on the data line must occur during the
low period of the clock signal and remain stable
during the high period, because a low-to-high
transition when the clock is high can be interpreted
as a stop signal. The number of data bytes that can
be transmitted over the serial bus in a single read
or write operation is limited only by what the
master and slave devices can handle.
3. When all data bytes have been read or written,
stop conditions are established. In write mode, the
master pulls the data line high during the 10th
clock pulse to assert a stop condition. In read
mode, the master device overrides the
acknowledge bit by pulling the data line high
during the low period before the ninth clock pulse.
This is known as No Acknowledge. The master
then takes the data line low during the low period
Limit Registers
The NCT210 has four limit registers to store local and
remote and high and low temperature limits. These registers
can be written to and read back over the SMBus. The high
limit registers perform a > comparison, while the low limit
registers perform a < comparison. For example, if the high
limit register is programmed as a limit of 80°C, measuring
81°C results in an alarm condition.
One-shot Register
The one-shot register is used to initiate a single conversion
and comparison cycle when the NCT210 is in standby mode,
after which the device returns to standby. This is not a data
register as such, and it is the write operation that causes the
one-shot conversion. The data written to this address is
irrelevant and is not stored.
Serial Bus Interface
Control of the NCT210 is carried out via the serial bus.
The NCT210 is connected to this bus as a slave device, under
the control of a master device. Note that the SMBus and SCL
pins are three-stated when the NCT210 is powered down and
will not pull down the SMBus.
Address Pins
In general, every SMBus device has a 7-bit device address
(except for some devices that have extended 10-bit
addresses). When the master device sends a device address
over the bus, the slave device with that address responds.
The NCT210 has two address pins, ADD0 and ADD1, to
allow selection of the device address so that several
NCT210’s can be used on the same bus, and/or to avoid
conflict with other devices. Although only two address pins
are provided, these are three-state and can be grounded, left
unconnected, or tied to VDD so that a total of nine different
addresses are possible, as shown in Table 10.
It should be noted that the state of the address pins is only
sampled at powerup, so changing them after powerup has no
effect.
http://onsemi.com
10
�NCT210
into that register or read from it. The first byte of a write
operation always contains a valid address that is stored in the
address pointer register. If data is to be written to the device,
the write operation contains a second data byte that is written
to the register selected by the address pointer register.
This is illustrated in Figure 13. The device address is sent
over the bus followed by R/W set to 0. This is followed by
two data bytes. The first data byte is the address of the
internal data register to be written to, which is stored in the
address pointer register. The second data byte is the data to
be written to the internal data register.
before the 10th clock pulse, then high during the
10th clock pulse to assert a stop condition.
Any number of bytes of data can be transferred over the
serial bus in one operation, but it is not possible to mix read
and write in one operation, because the type of operation is
determined at the beginning and cannot subsequently be
changed without starting a new operation.
For the NCT210, write operations contain either one or
two bytes, while read operations contain one byte.
To write data to one of the device data registers or read
data from it, the address pointer register must be set so that
the correct data register is addressed, data can then be written
1
9
9
1
SCLK
A6
SDATA
A5
START BY
MASTER
A4
A3
A2
A1
A0
R/W
D7
D5
D4
D3
D2
D1
D0
ACK. BY
NCT210
ACK. BY
NCT210
FRAME 1
SERIAL BUS ADDRESS BYTE
D6
FRAME 2
ADDRESS POINTER REGISTER BYTE
1
9
SCLK (CONTINUED)
SDATA (CONTINUED)
D7
D6
D5
D4
D3
D2
D1
FRAME 3
DATA BYTE
D0
ACK. BY STOP BY
NCT210 MASTER
Figure 13. Writing a Register Address to the Address Pointer Register, then Writing Data to the Selected Register
1
9
9
1
SCLK
SDATA
A6
START BY
MASTER
A5
A4
A3
A2
A1
A0
FRAME 1
SERIAL BUS ADDRESS BYTE
D7
R/W
ACK. BY
NCT210
D6
D5
D4
D3
D2
D1
D0
ACK. BY
NCT210
FRAME 2
ADDRESS POINTER REGISTER BYTE
STOP BY
MASTER
Figure 14. Writing to the Address Pointer Register Only
9
1
1
9
SCLK
SDATA
A6
START BY
MASTER
A5
A4
A3
A2
A1
A0 R/W
FRAME 1
SERIAL BUS ADDRESS BYTE
D7
D6
ACK. BY
NCT210
D5
D4
D3
D2
D1
D0
NO ACK. BY
MASTER
FRAME 2
DATA BYTE FROM NCT210
STOP BY
MASTER
Figure 15. Reading Data from a Previously Selected Register
before, but only the data byte containing the
register read address is sent, because data is not to
be written to the register. This is shown in
Figure 14.
A read operation is then performed consisting of
the serial bus address, R/W bit set to 1, followed
When reading data from a register there are two
possibilities:
1. If the NCT210’s address pointer register value is
unknown or not the desired value, it is first
necessary to set it to the correct value before data
can be read from the desired data register. This is
done by performing a write to the NCT210 as
http://onsemi.com
11
�NCT210
5. Once the NCT210 has responded to the alert
response address, it resets its ALERT output,
provided that the error condition that caused the
ALERT no longer exists. If the SMBALERT line
remains low, the master sends the ARA again, and
so on until all devices whose ALERT outputs were
low have responded.
by the data byte read from the data register. This is
shown in Figure 15.
2. If the address pointer register is known to be
already at the desired address, data can be read
from the corresponding data register without first
writing to the address pointer register, so Figure 14
can be omitted.
NOTES:Although it is possible to read a data byte from a data
register without first writing to the address pointer register,
if the address pointer register is already at the correct value,
it is not possible to write data to a register without writing to
the address pointer register; this is because the first data
byte of a write is always written to the address pointer
register.
Low Power Standby Modes
The NCT210 can be put into a low power standby mode
using hardware or software, that is, by taking the STBY
input low, or by setting Bit 6 of the configuration register.
When STBY is high or Bit 6 is low, the NCT210 operates
normally. When STBY is pulled low or Bit 6 is high, the
ADC is inhibited, so any conversion in progress is
terminated without writing the result to the corresponding
value register.
The SMBus is still enabled. Power consumption in the
standby mode is reduced to less than 10 mA if there is no
SMBus activity or 100 mA if there are clock and data signals
on the bus.
These two modes are similar but not identical. When
STBY is low, conversions are completely inhibited. When
Bit 6 is set but STBY is high, a one-shot conversion of both
channels can be initiated by writing 0xXX to the one-shot
register (Address 0x0F).
Remember that the NCT210 registers have different
addresses for read and write operations. The write address
of a register must be written to the address pointer if data is
to be written to that register, but it is not possible to read data
from that address. The read address of a register must be
written to the address pointer before data can be read from
that register.
ALERT Output
The ALERT output goes low whenever an out-of-limit
measurement is detected, or if the remote temperature sensor
is open-circuit. It is an open drain and requires a 10 kW
pullup to VDD. Several ALERT outputs can be wire-ANDed
together so the common line goes low if one or more of the
ALERT outputs goes low.
The ALERT output can be used as an interrupt signal to a
processor, or it can be used as an SMBALERT. Slave devices
on the SMBus cannot normally signal to the master that they
want to talk, but the SMBALERT function allows them to do
so.
One or more ALERT outputs are connected to a common
SMBALERT line connected to the master. When the
SMBALERT line is pulled low by one of the devices, the
following procedure occurs, as shown in Figure 16.
Sensor Fault Detection
The NCT210 has a fault detector at the D+ input that
detects if the external sensor diode is open-circuit. This is a
simple voltage comparator that trips if the voltage at D+
exceeds VCC – 1.0 V (typical). The output of this
comparator is checked when a conversion is initiated and
sets Bit 2 of the status register if a fault is detected.
In this respect, the NCT210 differs from and improves
upon competitive devices that output 0 if the external sensor
goes short-circuit. These devices can misinterpret a genuine
0°C measurement as a fault condition.
If the external diode channel is not being used and is
shorted out, the resulting ALERT can be cleared by writing
0x80 (−128°C) to the low limit register.
MASTER RECEIVES SMBALERT
START
ALERT RESPONSE
ADDRESS
MASTER SENDS
ARA AND READ
COMMAND
RD ACK
DEVICE
ADDRESS
NO
STOP
ACK
DEVICE SENDS
ITS ADDRESS
Factors Affecting Accuracy
Figure 16. Use of SMBALERT
Remote Sensing Diode
1. SMBALERT is pulled low.
2. Master initiates a read operation and sends the
alert response address (ARA = 0001 100). This is
a general call address that must not be used as a
specific device address.
3. The device whose ALERT output is low responds
to the alert response address and the master reads
its device address. The address of the device is now
known and it can be interrogated in the usual way.
4. If more than one device’s ALERT output is low,
the one with the lowest device address has priority,
in accordance with normal SMBus arbitration.
The NCT210 is designed to work with substrate
transistors built into processors, or with discrete transistors.
Substrate transistors are generally PNP types with the
collector connected to the substrate. Discrete types can be
either PNP or NPN, connected as a diode (base shorted to
collector). If an NPN transistor is used, the collector and
base are connected to D+ and the emitter to D−. If a PNP
transistor is used, the collector and base are connected to D−
and the emitter to D+.
The user has no choice in the case of substrate transistors,
but if a discrete transistor is used, the best accuracy is
http://onsemi.com
12
�NCT210
4. Try to minimize the number of copper/solder
joints, which can cause thermocouple effects.
Where copper/solder joints are used, ensure they
are in both the D+ and D− paths and at the same
temperature.
Thermocouple effects should not be a major
problem as 1°C corresponds to about 240 mV, and
thermocouple voltages are about 3 mV/°C of
temperature difference. Unless there are two
thermocouples with a big temperature differential
between them, thermocouple voltages should be
much less than 240 mV.
5. Place a 0.1 mF bypass capacitor close to the VDD
pin, and 2,200 pF input filter capacitors across D+,
D− close to the NCT210.
6. If the distance to the remote sensor is more than
eight inches, the use of twisted pair cable is
recommended. This works up to about 6 to 12 feet.
7. For very long distances (up to 100 feet), use
shielded twisted pair, such as Belden #8451
microphone cable. Connect the twisted pair to D+
and D− and the shield to GND close to the
NCT210. Leave the remote end of the shield
unconnected to avoid ground loops.
obtained by choosing devices according to the following
criteria:
1. Base-emitter voltage greater than 0.25 V at 6 mA,
at the highest operating temperature.
2. Base-emitter voltage less than 0.95 V at 100 mA, at
the lowest operating temperature.
3. Base resistance less than 100 W.
4. Small variation in hFE (such as 50 to 150), which
indicates tight control of VBE characteristics.
Transistors, such as 2N3904, 2N3906, or equivalents, in
SOT−23 package are suitable devices to use.
Thermal Inertia and Self-heating
Accuracy depends on the temperature of the
remote-sensing diode and/or the internal temperature sensor
being at the same temperature as that being measured, and a
number of factors can affect this. Ideally, the sensor should be
in good thermal contact with the part of the system being
measured, for example the processor. If it is not, the thermal
inertia caused by the mass of the sensor causes a lag in the
response of the sensor to a temperature change. For the
remote sensor, this should not be a problem, because it is
either a substrate transistor in the processor or a small package
device, such as SOT−23, placed in close proximity to it.
The on-chip sensor is, however, often remote from the
processor and only monitors the general ambient
temperature around the package. The thermal time constant
of the QSOP−16 package is approximately 10 seconds.
In practice, the package will have an electrical, and hence
a thermal, connection to the printed circuit board, so the
temperature rise due to self-heating is negligible.
GND
10 MIL
10 MIL
D+
10 MIL
10 MIL
D−
10 MIL
10 MIL
Layout Considerations
GND
Digital boards can be electrically noisy environments, and
because the NCT210 is measuring very small voltages from
the remote sensor, care must be taken to minimize noise
induced at the sensor inputs. The following precautions
should be taken:
1. Place the NCT210 as close as possible to the
remote sensing diode. Provided that the worst
noise sources, such as clock generators,
data/address buses, and CRTs, are avoided, this
distance can be four to eight inches.
2. Route the D+ and D− tracks close together, in
parallel, with grounded guard tracks on each side.
Provide a ground plane under the tracks, if
possible.
3. Use wide tracks to minimize inductance and
reduce noise pickup. 10 mil track minimum width
and spacing is recommended.
10 MIL
Figure 17. Arrangement of Signal Tracks
Because the measurement technique uses switched
current sources, excessive cable and/or filter capacitance
can affect the measurement. When using long cables, the
filter capacitor can be reduced or removed. Cable resistance
can also introduce errors. A series resistance of 1 W
introduces about 1°C error.
Application Circuits
Figure 18 shows a typical application circuit for the
NCT210, using a discrete sensor transistor connected via a
shielded, twisted pair cable. The pullups on SCLK, SDATA,
and ALERT are required only if they are not already
provided elsewhere in the system.
The SCLK and SDATA pins of the NCT210 can be
interfaced directly to the SMBus of an I/O chip. Figure 19
shows how the NCT210 might be integrated into a system
using this type of I/O controller.
http://onsemi.com
13
�MECHANICAL CASE OUTLINE
PACKAGE DIMENSIONS
QSOP16
CASE 492−01
ISSUE A
DATE 23 MAR 2011
2X
SCALE 2:1
NOTES:
1. DIMENSIONING AND TOLERANCING PER ASME
Y14.5M, 1994.
2. CONTROLLING DIMENSION: MILLIMETERS.
3. DIMENSION b DOES NOT INCLUDE DAMBAR
PROTRUSION.
4. DIMENSION D DOES NOT INCLUDE MOLD FLASH,
PROTRUSIONS, OR GATE BURRS. MOLD FLASH,
PROTRUSIONS, OR GATE BURRS SHALL NOT EX
CEED 0.005 PER SIDE. DIMENSION E1 DOES NOT
INCLUDE INTERLEAD FLASH OR PROTRUSION. IN
TERLEAD FLASH OR PROTRUSION SHALL NOT EX
CEED 0.005 PER SIDE. D AND E1 ARE DETERMINED
AT DATUM H.
5. DATUMS A AND B ARE DETERMINED AT DATUM H.
0.20 C D
D
16
L2
D
A
9
GAUGE
PLANE
SEATING
PLANE
E
E1
C
L
C
DETAIL A
2X
2X 10 TIPS
0.20 C D
1
8
16X
e
B
b
0.25
A2
0.10 C
0.10 C
A1
16X
C
0.25 C D
M
C A-B D
h x 45 _
A
SEATING
PLANE
M
1.12
9
XXXXXXX
XXXXXXX
YYWWG
6.40
1
8
0.635
PITCH
DOCUMENT NUMBER:
DESCRIPTION:
MILLIMETERS
MIN
MAX
1.35
1.75
0.10
0.25
1.24
---0.20
0.30
0.19
0.25
4.89 BSC
6.00 BSC
3.90 BSC
0.635 BSC
0.22
0.50
0.40
1.27
0.25 BSC
0_
8_
16X
0.42
16
DETAIL A
INCHES
MIN
MAX
0.053
0.069
0.004
0.010
0.049
---0.008
0.012
0.007
0.010
0.193 BSC
0.237 BSC
0.154 BSC
0.025 BSC
0.009
0.020
0.016
0.050
0.010 BSC
0_
8_
GENERIC
MARKING DIAGRAM*
SOLDERING FOOTPRINT
16X
H
DIM
A
A1
A2
b
c
D
E
E1
e
h
L
L2
M
XXXXX
YY
WW
G
= Specific Device Code
= Year
= Work Week
= Pb−Free Package
*This information is generic. Please refer
to device data sheet for actual part
marking. Pb−Free indicator, “G”, may
or not be present.
DIMENSIONS: MILLIMETERS
98AON04472D
QSOP16
Electronic versions are uncontrolled except when accessed directly from the Document Repository.
Printed versions are uncontrolled except when stamped “CONTROLLED COPY” in red.
PAGE 1 OF 1
ON Semiconductor and
are trademarks of Semiconductor Components Industries, LLC dba ON Semiconductor or its subsidiaries in the United States and/or other countries.
ON Semiconductor reserves the right to make changes without further notice to any products herein. ON Semiconductor makes no warranty, representation or guarantee regarding
the suitability of its products for any particular purpose, nor does ON Semiconductor assume any liability arising out of the application or use of any product or circuit, and specifically
disclaims any and all liability, including without limitation special, consequential or incidental damages. ON Semiconductor does not convey any license under its patent rights nor the
rights of others.
© Semiconductor Components Industries, LLC, 2019
www.onsemi.com
�onsemi,
, and other names, marks, and brands are registered and/or common law trademarks of Semiconductor Components Industries, LLC dba “onsemi” or its affiliates
and/or subsidiaries in the United States and/or other countries. onsemi owns the rights to a number of patents, trademarks, copyrights, trade secrets, and other intellectual property.
A listing of onsemi’s product/patent coverage may be accessed at www.onsemi.com/site/pdf/Patent−Marking.pdf. onsemi reserves the right to make changes at any time to any
products or information herein, without notice. The information herein is provided “as−is” and onsemi makes no warranty, representation or guarantee regarding the accuracy of the
information, product features, availability, functionality, or suitability of its products for any particular purpose, nor does onsemi assume any liability arising out of the application or use
of any product or circuit, and specifically disclaims any and all liability, including without limitation special, consequential or incidental damages. Buyer is responsible for its products
and applications using onsemi products, including compliance with all laws, regulations and safety requirements or standards, regardless of any support or applications information
provided by onsemi. “Typical” parameters which may be provided in onsemi data sheets and/or specifications can and do vary in different applications and actual performance may
vary over time. All operating parameters, including “Typicals” must be validated for each customer application by customer’s technical experts. onsemi does not convey any license
under any of its intellectual property rights nor the rights of others. onsemi products are not designed, intended, or authorized for use as a critical component in life support systems
or any FDA Class 3 medical devices or medical devices with a same or similar classification in a foreign jurisdiction or any devices intended for implantation in the human body. Should
Buyer purchase or use onsemi products for any such unintended or unauthorized application, Buyer shall indemnify and hold onsemi and its officers, employees, subsidiaries, affiliates,
and distributors harmless against all claims, costs, damages, and expenses, and reasonable attorney fees arising out of, directly or indirectly, any claim of personal injury or death
associated with such unintended or unauthorized use, even if such claim alleges that onsemi was negligent regarding the design or manufacture of the part. onsemi is an Equal
Opportunity/Affirmative Action Employer. This literature is subject to all applicable copyright laws and is not for resale in any manner.
PUBLICATION ORDERING INFORMATION
LITERATURE FULFILLMENT:
Email Requests to: orderlit@onsemi.com
onsemi Website: www.onsemi.com
◊
TECHNICAL SUPPORT
North American Technical Support:
Voice Mail: 1 800−282−9855 Toll Free USA/Canada
Phone: 011 421 33 790 2910
Europe, Middle East and Africa Technical Support:
Phone: 00421 33 790 2910
For additional information, please contact your local Sales Representative
�


 工商网监
湘ICP备2023018690号
工商网监
湘ICP备2023018690号
